
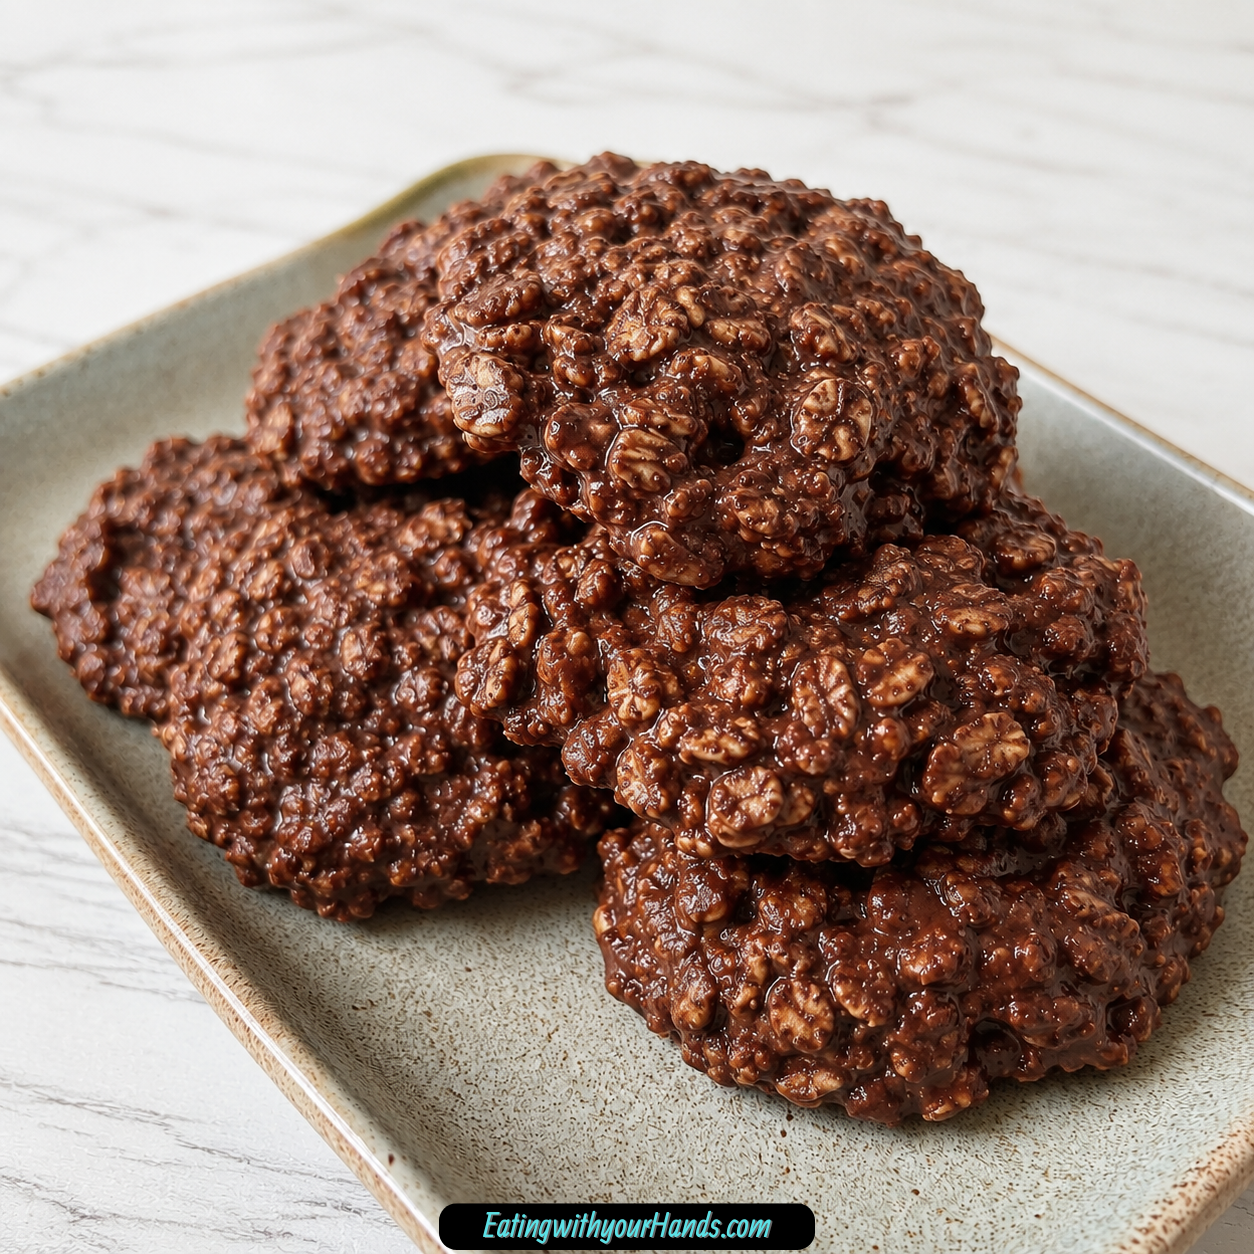
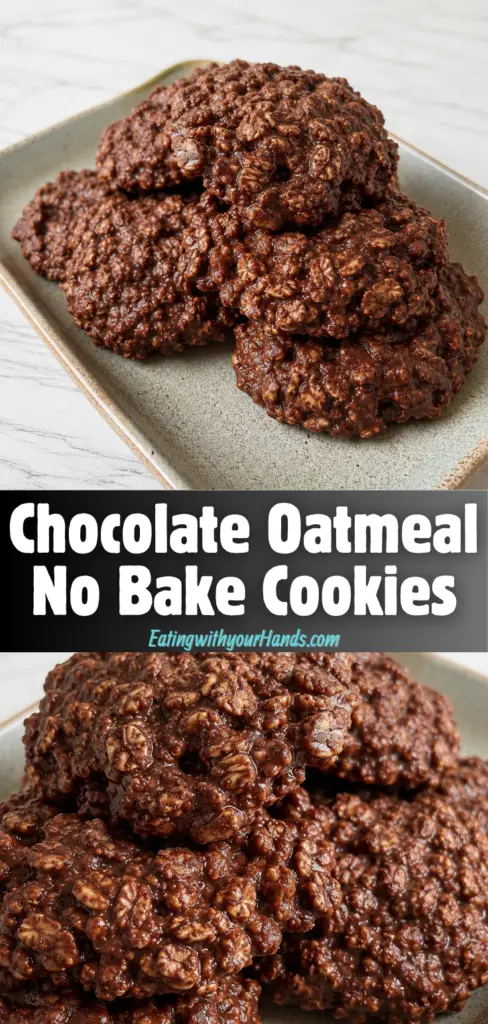
Chocolate Oatmeal No Bake Cookies are the kind of recipe that feels like pure kitchen nostalgia. They are rich, chewy, chocolatey, peanut buttery, and wonderfully simple because they come together without ever turning on the oven.
There is something special about a cookie recipe that can be made in one saucepan and dropped onto wax paper in little chocolate puddles. It feels almost too easy at first, but once the mixture sets into soft, chewy cookies, the magic makes complete sense.
These cookies are perfect for the days when you want something sweet quickly. They are also wonderful when the weather is too warm for baking, when you need a simple treat for kids to help with, or when the craving for chocolate shows up and you do not want to wait for dough to chill or trays to bake.
The flavor is classic and comforting. Butter, sugar, milk, cocoa powder, peanut butter, vanilla, and quick oats come together into a cookie that tastes rich and satisfying with very little effort.
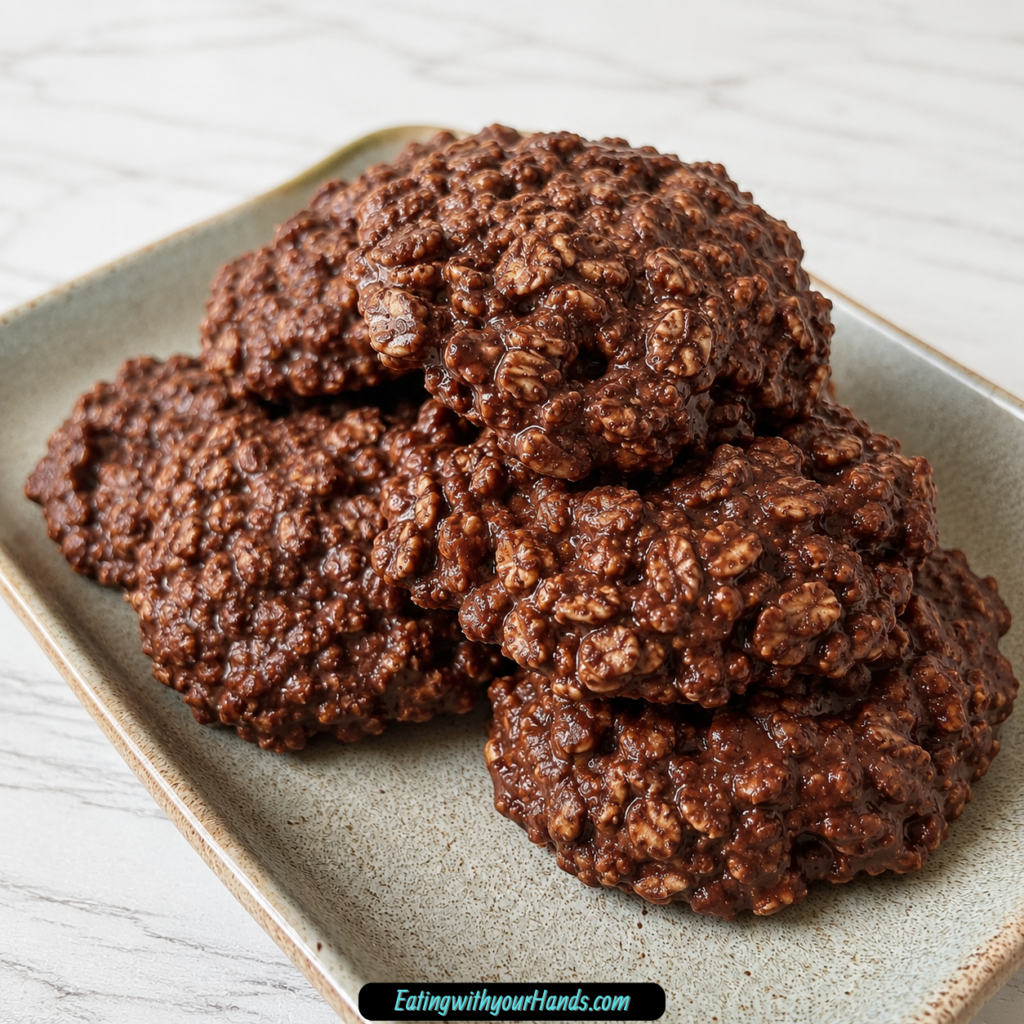
What makes these cookies so memorable is the texture. They are not crisp like oven-baked cookies, but soft, chewy, fudgy, and slightly rustic in the best way.
They are the kind of treat you can make from pantry staples and enjoy within the same hour. Once you learn the timing of the boil, this recipe becomes one of those dependable sweets you can pull together almost automatically.
Table of Contents
- Why You’ll Love Chocolate Oatmeal No Bake Cookies
- What Makes No Bake Cookies Work
- Recipe Details
- Ingredients for Chocolate Oatmeal No Bake Cookies
- Butter
- Granulated Sugar
- Milk
- Unsweetened Cocoa Powder
- Peanut Butter
- Vanilla Extract
- Quick Oats
- Before You Start
- Directions for Chocolate Oatmeal No Bake Cookies
- Step 1: Prepare the Setting Surface
- Step 2: Measure the Ingredients
- Step 3: Add Butter, Sugar, Milk, and Cocoa to the Saucepan
- Step 4: Stir as the Mixture Melts
- Step 5: Bring the Mixture to a Full Rolling Boil
- Step 6: Boil for Exactly 1 Minute
- Step 7: Remove the Pan From the Heat
- Step 8: Add Peanut Butter and Vanilla
- Step 9: Stir Until Silky Smooth
- Step 10: Add the Quick Oats
- Step 11: Check the Texture
- Step 12: Drop the Cookies Onto Wax Paper
- Step 13: Work Quickly
- Step 14: Let the Cookies Set
- Step 15: Chill If Your Kitchen Is Warm
- Step 16: Serve at Room Temperature
- Delicious Variations
- Serving Ideas
- Storage Tips
- Freezing Tips
- Helpful Notes for Perfect No Bake Cookies
- Troubleshooting Common Problems
- Frequently Asked Questions
- Final Thoughts
- Chocolate Oatmeal No Bake Cookies
Why You’ll Love Chocolate Oatmeal No Bake Cookies
These cookies are easy to love because they deliver big chocolate flavor without requiring baking. There is no preheating, no rotating pans, and no waiting for tray after tray to come out of the oven.
They are also incredibly fast. From saucepan to setting time, the active work is only a matter of minutes, which makes them perfect when you need a quick dessert.
Kids can help with this recipe, especially when it is time to drop spoonfuls onto wax paper. There is something fun and satisfying about watching the glossy mixture turn into real cookies right on the counter.
The ingredients are simple and familiar. Most of them are the kind of things people already keep around: butter, sugar, milk, cocoa powder, peanut butter, vanilla, and oats.
They are also easy to customize. You can swap the peanut butter, add coconut, stir in crunchy extras, or create a mocha version with instant coffee granules.
Most of all, they taste like comfort. Each bite has rich chocolate, creamy peanut butter, and chewy oats, giving you the feeling of a homemade dessert without a long process.
What Makes No Bake Cookies Work
No bake cookies rely on stovetop timing instead of oven heat. The butter, sugar, milk, and cocoa powder are boiled together until the mixture reaches the right consistency to set once the oats are added.
That one-minute boil is the most important part of the recipe. Boiling too briefly can leave the cookies too soft or sticky, while boiling too long can make them dry and crumbly.
The peanut butter helps bind everything together and adds richness. It melts into the hot chocolate mixture and helps create that smooth, fudgy texture.
The quick oats absorb the chocolate mixture as the cookies cool. This is why quick oats are preferred over old-fashioned oats, because they soak up the liquid better and create the classic chewy texture.
The cookies set at room temperature as they cool. They begin glossy and soft, then slowly firm into chewy, chocolate-oat cookies that hold their shape.
Recipe Details
- Recipe Name: Chocolate Oatmeal No Bake Cookies
- Recipe Style: No bake stovetop cookies
- Active Cooking Time: About 15 minutes
- Setting Time: At least 30 minutes
- Main Flavors: Chocolate, peanut butter, vanilla, and oats
- Best Oats to Use: Quick oats
- Best Setting Surface: Wax paper or silicone mats
- Room Temperature Storage: About 1 week in an airtight container
- Freezer Storage: Up to 3 months
- Best Served: At room temperature
Ingredients for Chocolate Oatmeal No Bake Cookies
This recipe uses simple ingredients, but the balance matters. Each one contributes to the flavor, texture, and setting process that make these cookies work.
Butter
You need 1/2 cup unsalted butter. Butter gives the cookies richness and helps the chocolate mixture become smooth and glossy.
Unsalted butter gives you the most control over flavor. If you use salted butter, skip adding extra salt later.
Granulated Sugar
You need 2 cups granulated sugar. The sugar sweetens the cookies and helps them set properly once the boiled mixture cools.
The amount may look like a lot, but this is part of the structure of traditional no bake cookies. You can reduce it to 1 3/4 cups, and the cookies should still set.
Milk
You need 1/2 cup milk. Milk helps create the liquid base that melts with the butter, sugar, and cocoa powder.
Whole milk makes the cookies creamier, but other types can work. Almond milk can also be used in a pinch.
Unsweetened Cocoa Powder
You need 1/4 cup unsweetened cocoa powder. This gives the cookies their deep chocolate flavor.
A darker cocoa powder can create a richer taste. Since this is the main chocolate ingredient, it has a big impact on the finished cookies.
Peanut Butter
You need 1/2 cup creamy peanut butter. Peanut butter adds flavor, richness, and helps bind the cookies.
Shelf-stable creamy peanut butter helps the cookies set more reliably. Natural, drippy peanut butter can work, but the texture may vary.
Crunchy peanut butter can also be used. It changes the texture and adds little bits of peanut crunch throughout the cookies.
Vanilla Extract
You need 1 teaspoon vanilla extract. Vanilla balances the sweetness and rounds out the chocolate and peanut butter flavors.
It may seem small, but it makes the cookies taste warmer and more complete. Add it after removing the pan from the heat so its flavor stays clear.
Quick Oats
You need 3 cups quick oats. Quick oats absorb the chocolate mixture well and create the classic chewy texture.
Old-fashioned oats do not absorb liquid quite the same way. In an emergency, you can pulse old-fashioned oats in a blender for a few seconds, but do not turn them into powder.
Before You Start
Before cooking, line your counter or a baking sheet with wax paper or silicone mats. The cookies need a prepared surface so you can drop them quickly once the mixture is ready.
Wax paper works especially well for this recipe. Parchment paper can sometimes stick, so wax paper or silicone mats are better choices.
Measure all ingredients before turning on the stove. Once the chocolate mixture reaches a full boil, the process moves quickly, and you will not want to pause to scoop peanut butter or measure oats.
Use a medium saucepan with enough room for bubbling. The mixture will rise and foam during the boil, so a pan that is too small can create a mess.
Have a timer ready. The one-minute boil is the key to cookies that set correctly.
Directions for Chocolate Oatmeal No Bake Cookies
Step 1: Prepare the Setting Surface
Lay wax paper or silicone mats on your counter or on baking sheets. Make sure you have enough space for all the cookies before you begin cooking.
This step matters because the mixture thickens as it cools. Once the oats are stirred in, you need to work quickly.
Step 2: Measure the Ingredients
Measure the butter, sugar, milk, cocoa powder, peanut butter, vanilla, and quick oats before starting. Keep everything close to the stove and ready to use.
No bake cookies depend on timing. Having the ingredients ready keeps the process smooth and prevents the chocolate mixture from overcooking.
Step 3: Add Butter, Sugar, Milk, and Cocoa to the Saucepan
Place the unsalted butter, granulated sugar, milk, and unsweetened cocoa powder into a medium saucepan. Set the pan over medium heat.
Use a wooden spoon or sturdy spatula to begin stirring. The butter will melt and the cocoa will blend into the milk and sugar.
Step 4: Stir as the Mixture Melts
Continue stirring as the mixture heats. Do not walk away from the stove, because chocolate mixtures can scorch quickly.
At first, the mixture may look grainy as the sugar dissolves. As it warms, it will become smoother and more uniform.
Step 5: Bring the Mixture to a Full Rolling Boil
Keep heating over medium heat until the mixture reaches a full rolling boil. You should see large bubbles breaking across the entire surface, not just a few bubbles around the edges.
This full boil is important because it activates the setting process. Starting the timer too early can leave the cookies too soft.
Step 6: Boil for Exactly 1 Minute
Once the mixture reaches a full rolling boil, start a timer for exactly 1 minute. Keep the mixture boiling and stir carefully during this time.
This timing is the heart of the recipe. Too little boiling can cause sticky cookies, while too much boiling can make them dry and crumbly.
Step 7: Remove the Pan From the Heat
As soon as the minute is finished, remove the saucepan from the heat. Do this right away so the mixture does not continue boiling too long.
Set the pan on a heat-safe surface. The mixture will still be very hot, so handle the pan carefully.
Step 8: Add Peanut Butter and Vanilla
Add the creamy peanut butter and vanilla extract to the hot chocolate mixture. Stir immediately until the peanut butter melts completely.
The mixture should become glossy, smooth, and thick. The peanut butter blends into the chocolate base and gives the cookies their classic flavor.
Step 9: Stir Until Silky Smooth
Keep stirring until no streaks of peanut butter remain. The chocolate mixture should look like a shiny, thick sauce.
This step creates the base that will coat the oats. A smooth base means the finished cookies will have a better texture and more even flavor.
Step 10: Add the Quick Oats
Pour the quick oats into the saucepan all at once. Begin folding and stirring them into the chocolate mixture.
Make sure every oat is coated. The mixture will become thick as the oats absorb the liquid.
Step 11: Check the Texture
The mixture should look thick, moist, and scoopable. It may seem slightly loose at first, but the oats will continue absorbing liquid as the cookies cool.
If it looks extremely runny, give it a few more stirs and a brief moment to thicken. If it seems too thick, add a very small splash of milk, about a teaspoon at a time.
Step 12: Drop the Cookies Onto Wax Paper
Use two spoons to drop spoonfuls of the mixture onto the wax paper or silicone mats. Each cookie can be about 1 tablespoon, though rustic shapes are completely fine.
You do not need to make them perfect. These cookies are meant to look homemade and simple.
Step 13: Work Quickly
Continue dropping the cookies while the mixture is still warm and flexible. As it cools, it will become firmer and harder to shape.
If the mixture thickens in the pan, scoop it as best as you can. The cookies will still taste good even if the final few are a little rough around the edges.
Step 14: Let the Cookies Set
Let the cookies sit at room temperature for at least 30 minutes. They are ready when they are no longer shiny and hold their shape when touched gently.
This resting time allows the oats to finish absorbing the chocolate mixture. It also gives the cookies their chewy texture.
Step 15: Chill If Your Kitchen Is Warm
If your kitchen is warm and the cookies are setting slowly, place them in the refrigerator for about 15 minutes. This helps them firm up faster.
Do not rely on the refrigerator to fix underboiled cookies completely, but it can help with a softer batch. Once set, they can be stored normally.
Step 16: Serve at Room Temperature
Serve the cookies once they are firm and chewy. They are best at room temperature because the texture is soft but not sticky.
The cookies will continue to firm slightly as they cool completely. That is when the chewiness becomes just right.
Delicious Variations
The classic chocolate peanut butter version is hard to beat, but this recipe is flexible. Small changes can make the cookies feel new without changing the basic method.
Almond Butter or Sunflower Seed Butter
Swap the peanut butter for almond butter if you want a nuttier flavor. Sunflower seed butter can also work as a school-safe option.
Use a creamy version for the smoothest texture. Different nut and seed butters may affect how firmly the cookies set.
Coconut Chocolate Oatmeal Cookies
Stir in 1/2 cup shredded coconut with the oats. Coconut adds texture and a slightly chewy sweetness.
For deeper flavor, toast the coconut first. Let it cool before stirring it into the mixture.
Honey Variation
Replace half the sugar with honey for a deeper flavor. The cookies may turn out slightly softer, but they will still taste rich and delicious.
This version changes the texture a little because honey behaves differently than granulated sugar. Let the cookies set fully before serving.
Crunchy Additions
Add chopped nuts, pretzel bits, or crushed potato chips for crunch. These additions make the cookies more textured and playful.
Fold them in with the oats so they are evenly coated. Keep the amount moderate so the cookies still hold together.
Mocha No Bake Cookies
Add 1 teaspoon instant coffee granules to the cocoa mixture. This gives the cookies a grown-up mocha flavor.
The coffee deepens the chocolate without taking over. It is a simple way to make the cookies feel a little richer.
Festive No Bake Cookies
Mix in holiday sprinkles after the oats, or try swapping the cocoa for cinnamon around Christmas. The cinnamon version gives the cookies a very different, cozy flavor.
Sprinkles work best when folded in gently. Too much stirring can make colors bleed into the warm mixture.
Serving Ideas
These cookies are best served at room temperature. That is when they are chewy, firm enough to hold, and soft enough to feel fudgy.
They are wonderful with a glass of cold milk. The chocolate and peanut butter flavors make that pairing feel classic.
You can also serve them with coffee for an afternoon treat. Their rich sweetness works nicely with a hot drink.
For dessert, crumble one over ice cream. The chewy chocolate oats turn a simple scoop into a quick sundae-style treat.
They are also great for lunchboxes, potlucks, casual gatherings, or quick after-school snacks. Because they do not need the oven, they are especially helpful when you need something sweet without much planning.
Storage Tips
Store the cookies in an airtight container at room temperature for about 1 week. Place wax paper between layers so they do not stick together.
Keep them away from heat or direct sunlight. Warm temperatures can make them softer than you want.
Make sure they are completely set before stacking. If they are still soft, give them more time on the wax paper first.
If your kitchen is very warm, you can store them in the refrigerator. Let them sit at room temperature briefly before serving for the best texture.
Freezing Tips
To freeze the cookies, place them in a single layer on a baking sheet until solid. Then transfer them to a freezer bag or airtight container.
They can be frozen for up to 3 months. Use wax paper between layers to help keep them separated.
Thaw the cookies at room temperature for about 10 minutes before eating. They are also tasty straight from the freezer if you like a firmer texture.
Freezing is a great option if you make a double batch. It gives you a quick chocolate treat ready whenever a craving hits.
Helpful Notes for Perfect No Bake Cookies
Watch the Boil Carefully
The most common issue with no bake cookies comes from the boiling time. Start the timer only when the mixture reaches a full rolling boil.
A few small bubbles are not enough. You want big bubbles across the surface before counting that exact minute.
Use Quick Oats
Quick oats are the best choice because they absorb the liquid properly. They create the soft, chewy texture that makes these cookies classic.
Old-fashioned oats can make the cookies looser or more textured. If they are all you have, pulse them briefly in a blender.
Do Not Overboil
Boiling too long can make the cookies dry and crumbly. Set a timer and remove the pan from heat as soon as the minute is finished.
If your cookies turn out crumbly, the mixture likely cooked too long. Next time, be strict with the timing and consider adding a little extra peanut butter.
Do Not Underboil
If the cookies stay sticky and never set, the mixture probably did not boil long enough. The sugar mixture needs that full minute at a rolling boil.
For a soft batch, chilling can help firm them up. Next time, wait for a true rolling boil before starting the timer.
Keep the Heat Moderate
Medium heat is best. If your stove runs hot, lower the heat slightly so the chocolate mixture does not scorch.
Burnt chocolate flavor can happen quickly. Stir constantly and do not leave the pan unattended.
Adjust the Texture Carefully
If the mixture seems too thick after adding oats, add milk only in tiny amounts. A teaspoon at a time is enough.
If it seems too runny, wait briefly and stir again. The oats often thicken the mixture as they absorb the liquid.
Troubleshooting Common Problems
My Cookies Are Too Sticky
Sticky cookies usually mean the chocolate mixture was not boiled long enough. The sugar needs enough heat to help the cookies set.
Place the cookies in the refrigerator to firm them up. They may not be perfect, but they should become easier to handle.
My Cookies Are Dry and Crumbly
Dry cookies usually mean the mixture boiled too long. Even an extra minute can make a big difference.
Next time, remove the pan from the heat exactly after 1 minute of full rolling boil. Adding an extra tablespoon of peanut butter can also help bind a dry batch.
My Cookies Did Not Set at All
The oats may not have absorbed the liquid properly, or the boil may have been too short. Quick oats are important for the classic texture.
If you used old-fashioned oats, the cookies may stay looser. Pulse old-fashioned oats briefly before using them in future batches.
My Cookies Taste Burnt
The heat may have been too high, or the mixture may have sat too long without stirring. Chocolate and sugar can scorch quickly.
Use medium heat and stir constantly. If your stove runs hot, go lower and give the mixture more patience.
Frequently Asked Questions
Can I Use Old-Fashioned Oats Instead of Quick Oats?
Yes, but the texture will be different. Quick oats absorb the chocolate mixture better and create the classic chewy texture.
If you only have old-fashioned oats, pulse them in a blender for a few seconds. Do not grind them into powder.
How Long Do Chocolate Oatmeal No Bake Cookies Last?
They last about a week in an airtight container at room temperature. Use wax paper between layers to keep them from sticking.
For longer storage, freeze them for up to 3 months. Thaw at room temperature before serving.
Why Did My Cookies Not Set?
The sugar mixture probably was not boiled long enough. The one-minute timer should begin only after the mixture reaches a full rolling boil.
You can place the cookies in the refrigerator to help firm them up. For the next batch, watch the boil closely.
Can I Make These Without Peanut Butter?
Yes, you can use almond butter, sunflower seed butter, or even Nutella. The flavor and setting time may change slightly.
Creamy options work best. Thicker spreads usually help the cookies hold together better.
Why Are My Cookies Dry and Crumbly?
The mixture likely boiled too long. Overboiling removes too much moisture and makes the cookies dry.
Next time, set a timer as soon as the mixture reaches a full rolling boil. Remove it from the heat after exactly 1 minute.
Can I Make These With Less Sugar?
Yes, you can reduce the sugar to 1 3/4 cups, and the cookies should still set. The texture may be slightly different, but they will still taste good.
Because sugar helps with structure, avoid reducing it too much. Large changes may affect how the cookies firm up.
Can I Freeze No Bake Cookies?
Yes, these cookies freeze well. Freeze them first in a single layer, then transfer them to a freezer bag.
They can be stored frozen for up to 3 months. Let them thaw for about 10 minutes at room temperature before eating.
Final Thoughts
Chocolate Oatmeal No Bake Cookies are one of those recipes that proves simple ingredients can still feel magical. With one saucepan, a short boil, and a few minutes of scooping, you get chewy chocolate peanut butter cookies without using the oven.
They are quick, comforting, and wonderfully dependable once you understand the timing. The full rolling boil, the exact one-minute cook, the creamy peanut butter, and the quick oats all work together to create the perfect no bake texture.
What makes them especially lovable is how casual they are. They do not need perfect shaping, fancy equipment, or a long cooling process, and even the rustic-looking ones taste delicious.
Serve them with milk, enjoy them with coffee, crumble them over ice cream, or stash a batch in the freezer for later. These chocolate oatmeal no bake cookies are sweet, chewy, nostalgic, and always ready when a quick homemade treat sounds exactly right.
Chocolate Oatmeal No Bake Cookies
These Chocolate Oatmeal No Bake Cookies are rich, chewy, and full of classic chocolate-peanut butter flavor. They come together on the stovetop with quick oats, cocoa powder, creamy peanut butter, and vanilla, so there is no oven required. This is a great recipe for a fast homemade dessert when you want something sweet without a long baking process. The cookies set as they cool, making them easy to prepare for snack trays, lunchbox treats, or casual family desserts.
Recipe Details
- Prep Time: 10 minutes
- Cook Time: 5 minutes
- Total Time: 15 minutes
- Course: Dessert
- Cuisine: American
- Servings: 24 cookies
Equipment
- Saucepan
- Mixing bowl
Ingredients
- 3 cups quick oats
- ½ cup creamy peanut butter
- 1 teaspoon vanilla extract
- ¼ cup unsweetened cocoa powder
- ½ cup milk
- 2 cups granulated sugar
- ½ cup unsalted butter
Instructions
Step 1: Make the Chocolate Mixture
In a saucepan, combine the unsalted butter, granulated sugar, milk, and unsweetened cocoa powder. Heat the mixture over medium heat, stirring as it warms, until it reaches a boil.
Step 2: Boil Briefly
Once the mixture begins boiling, let it boil for 1 minute. Remove the saucepan from the heat.
Step 3: Add Peanut Butter and Vanilla
Stir in the creamy peanut butter and vanilla extract until the mixture becomes smooth and fully combined.
Step 4: Mix in the Oats
Add the quick oats and stir until they are evenly coated with the chocolate peanut butter mixture.
Step 5: Shape the Cookies
Drop spoonfuls of the mixture onto wax paper or a silicone mat. Let the cookies cool at room temperature until they are set.
Notes
Store the cookies in an airtight container at room temperature for up to a week.
Serving Suggestions
- Cold milk
- Hot coffee
- Iced coffee
- Fresh berries
- Vanilla ice cream
- Lunchbox snacks
- Holiday cookie trays
Storage
How to Store
Keep the cookies in an airtight container at room temperature for up to a week, as noted in the original recipe.
How to Freeze
Freeze the set cookies in a freezer-safe container with parchment paper between layers. Thaw at room temperature before serving.
Best Texture Tip
Let the mixture boil for the full 1 minute before adding the peanut butter and oats so the cookies set properly as they cool.

Fernando is the creator and writer behind the food blog Eating with your Hands. Living and working in cities like Paris, Barcelona, and Berlin, and being married to a Canadian foodie, has given Fernando a passion and interest in food and inspired him to run EWYH.