Try searching or checking out the popular posts below.
You Might Like
- HIDDEN HEART POUND CAKE

- Do You Need to Cook Summer Sausage?

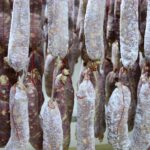
- Making Salami Without Starter Culture: Step-by-Step Guide
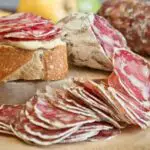
- Summer Sausage vs Salami: Understanding the Differences
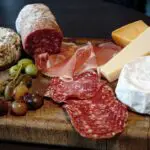
- Salami vs Pepperoni: Understanding the Difference
- Can You Eat Salami Raw? – The Unexpected Revelation

- What Tasty Food Would Be Disgusting If Eaten Over Rice?
- When Does McDonald’s Start Serving Lunch?
- Is the Grimace Shake in Ireland?

- Does Fresh Sausage Have Nitrates: Let’s Uncover the Truth
- Why Does My Sausage Smell Like Rotten Eggs? [Answered]

- How to Cook Blood Sausage? – What You Need to Know

- How to Fix Dry Sausage: Don’t Let Dry Sausage Ruin Your Meal!

- Why Is Pepperoni So Greasy? – Tips to Make It Less Greasy

- My Sausage Balls Are Too Dry – How to Fix?
- How to Hang Snack Sticks in a Smoker (Step-by-Step Guide)
- How to Cold Smoke Sausage: All You Need to Know

- Are Grimace Shakes Gluten Free? – Ingredient Analysis

- Does Grimace Shake Have Red 40?

- Where is Jimmy Dean Sausage Made? Unraveling the Mystery
- How to Eat Boudin Sausage: The Ultimate Guide for Cajun Food Lovers
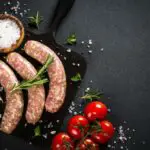
- The Best Types of Sausages for Smoking: A Comprehensive Guide

- How to Deal With Slimy Sausage Casing – The Ultimate Solution!

- Black Spots on Salami: Understanding Their Causes and Effects
- How to Cook Frozen Boudin Balls – A Quick and Easy Guide
- Learn How to Tie and Cut Sausage Links Like a Pro – Step-by-Step Guide

- What Can I Use as a Sausage Binder? (Explained!)

- How to Cut Sausage without It Falling Apart: A Complete Guide

- Can Dogs Eat Sausage Casing? – Which Sausages Can Your Dog Eat

- How to Tell if Chicken Sausage Is Cooked – A Comprehensive Guide

- Trail Bologna vs. Summer Sausage: Which One to Choose?
- How Long Do You Cook Deer Sausage? – Guide to Perfectly Cooked Venison

- Do Hickory Farms Gift Boxes Need to Be Refrigerated?

- Is Andouille Sausage Already Cooked? Answered by an Expert Chef!

- Chorizo vs Salami: What’s the Difference and Similarities?

- Pepperoni Vs Sausage: What Sets Them Apart?

- Encapsulated Citric Acid: The Secret to Perfect Sausage Making
- Complete Guide to Vegetarian Sausage Casings

- Best Wood for Smoking Sausage (Smoking Wood Choices): Everything You Need to Know!

- What Is Summer Sausage Made From