
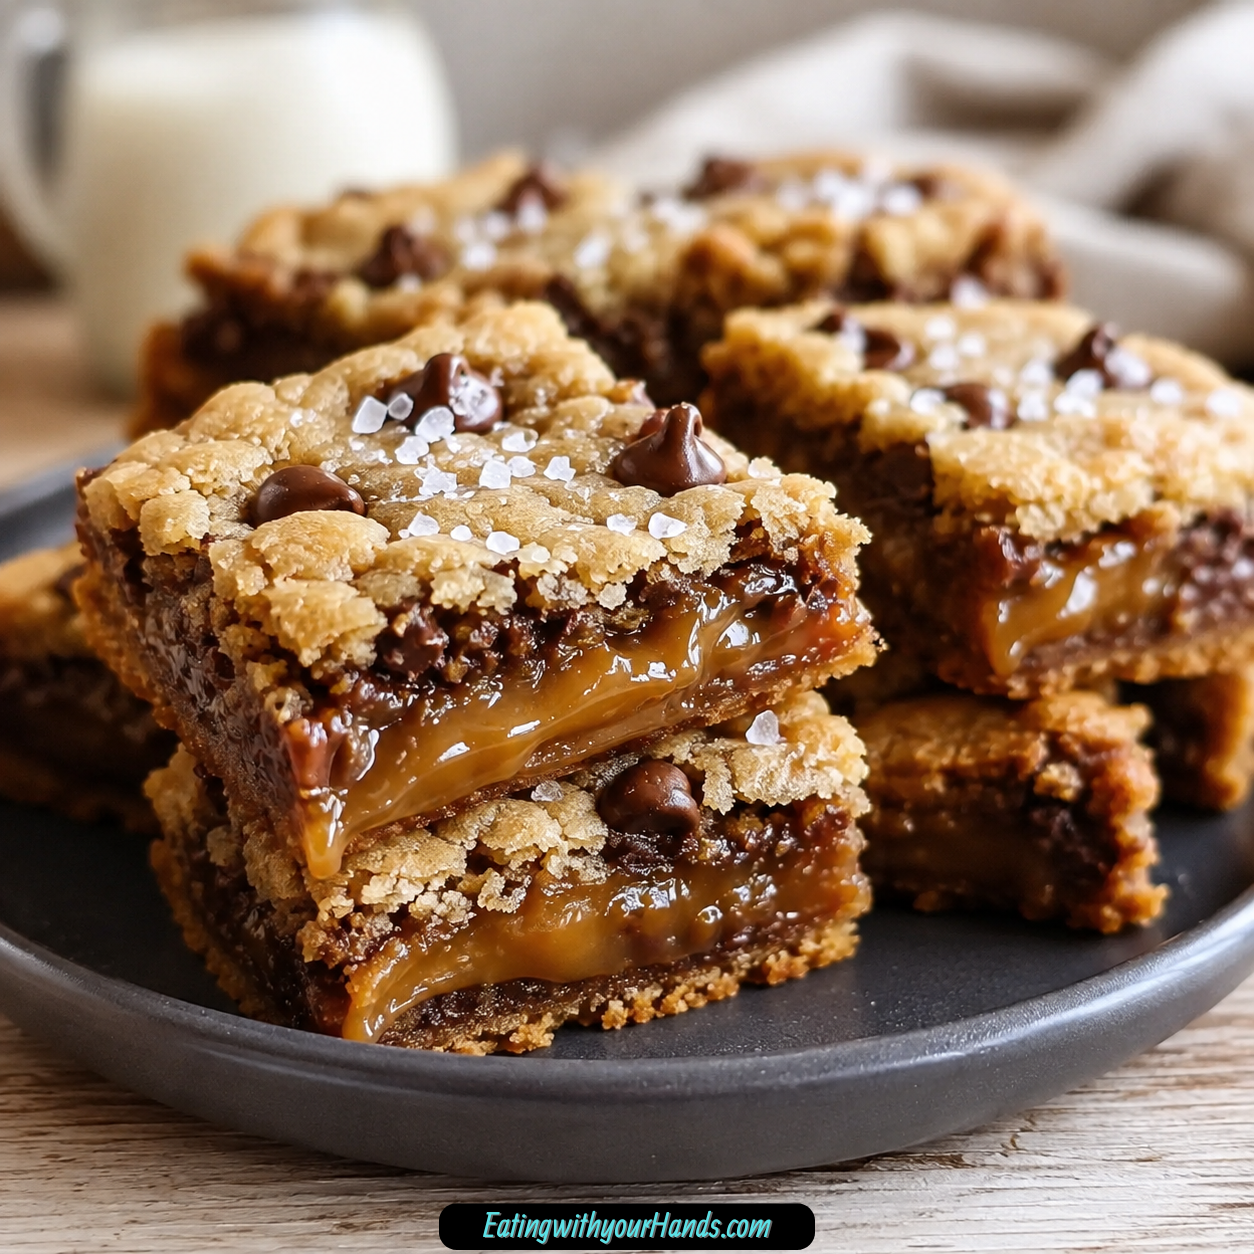
Salted Caramel Chocolate Chip Cookie Bars are the kind of dessert that makes people pause after the first bite. They look like simple cookie bars at first, but once you slice in and find the soft chocolate chip cookie layers, the gooey caramel center, and the sparkle of flaky sea salt, they become something much more memorable.
These bars bring together everything wonderful about a chocolate chip cookie and everything irresistible about salted caramel. The cookie layer is buttery, chewy, and rich from melted butter, brown sugar, vanilla, and plenty of semi-sweet chocolate chips.
Between those soft cookie layers sits a ribbon of caramel sauce. It bakes into the bars just enough to become warm, gooey, and slightly tucked into the dough, while still staying distinct enough to give every square a sweet caramel center.
The flaky sea salt is the detail that makes the whole dessert work. It cuts through the sweetness, wakes up the chocolate, and gives the caramel that perfect sweet-salty balance.
These bars are wonderful for bake sales, birthdays, holidays, potlucks, edible gifts, special occasions, or any night when a plain cookie does not feel quite indulgent enough. They are rich, easy to share, easy to slice once cooled, and impressive without needing a mixer or complicated technique.
Table of Contents
- Why You’ll Love These Salted Caramel Chocolate Chip Cookie Bars
- Recipe Details
- Ingredients
- Optional Variations and Add-Ins
- The Dessert Magic of Salted Caramel Cookie Bars
- Why Melted Butter Works So Well
- Why Thick Caramel Sauce Matters
- Directions
- Step 1: Preheat the Oven
- Step 2: Prepare the Baking Pan
- Step 3: Melt the Butter
- Step 4: Combine Butter and Sugars
- Step 5: Add the Eggs One at a Time
- Step 6: Add the Vanilla
- Step 7: Mix the Dry Ingredients
- Step 8: Combine Wet and Dry Ingredients
- Step 9: Fold in the Chocolate Chips
- Step 10: Divide the Dough
- Step 11: Press the First Layer Into the Pan
- Step 12: Add the Caramel Sauce
- Step 13: Add Sea Salt to the Caramel Layer
- Step 14: Add the Top Dough Layer
- Step 15: Smooth the Top Gently
- Step 16: Bake the Bars
- Step 17: Watch the Edges
- Step 18: Cool Completely in the Pan
- Step 19: Lift the Bars Out
- Step 20: Slice Into Bars
- Step 21: Finish With Extra Sea Salt
- Serving Suggestions
- Storage
- Refrigerator Storage
- Freezing
- Make-Ahead Tips
- Helpful Notes for Best Results
- Variations
- Troubleshooting
- Frequently Asked Questions
- Why These Bars Are Perfect for Sharing
- Why This Recipe Works So Well
- Final Thoughts
- Salted Caramel Chocolate Chip Cookie Bars
- Recipe Details
- Ingredients
- Instructions
- Step 1: Prepare the Oven and Pan
- Step 2: Cream the Butter and Sugars
- Step 3: Add the Eggs and Vanilla
- Step 4: Mix the Dry Ingredients
- Step 5: Make the Cookie Dough
- Step 6: Form the Cookie Base
- Step 7: Melt the Caramel
- Step 8: Add the Sea Salt Flakes
- Step 9: Layer the Caramel
- Step 10: Add the Remaining Dough
- Step 11: Bake the Bars
- Step 12: Cool and Slice
- Notes
- Serving Suggestions
- Storage
Why You’ll Love These Salted Caramel Chocolate Chip Cookie Bars
These bars have sweet and salty balance. Buttery cookie dough, rich caramel, chocolate chips, and flaky sea salt make every bite layered and satisfying.
They are easy to make. There is no mixer, no chilling, and no individual cookie scooping.
They bake in one pan. A 9×13-inch baking pan gives you a full batch that can be sliced into squares or rectangles.
They have a soft, chewy texture. Melted butter and brown sugar create a dense, moist cookie base.
They are great for sharing. The bars travel well, look beautiful once cut, and work for parties, bake sales, and gifts.
They are customizable. You can use dark chocolate, white chocolate, nuts, peanut butter, toffee bits, rolled oats, extra caramel, or melted chocolate on top.
Recipe Details
- Recipe name: Salted Caramel Chocolate Chip Cookie Bars
- Oven temperature: 350°F (175°C)
- Pan size: 9×13-inch baking pan
- Baking time: 30 to 35 minutes
- Main texture: Soft, chewy cookie bars with gooey caramel
- Butter style: Melted unsalted butter
- Caramel amount: 1 cup caramel sauce
- Chocolate amount: 1 ½ cups semi-sweet chocolate chips
- Storage at room temperature: Up to 4 days
- Refrigerator storage: Up to 1 week
- Freezer storage: Up to 3 months
- Best slicing tip: Cool completely before cutting
- Doneness cue: Golden top, set edges, and toothpick in cookie portion with a few moist crumbs
Ingredients
For the Cookie Bars
- 1 cup unsalted butter, melted
- 1 cup brown sugar, packed
- ½ cup granulated sugar
- 2 large eggs
- 2 teaspoons vanilla extract
- 2 ¼ cups all-purpose flour
- 1 teaspoon baking soda
- ½ teaspoon salt
- 1 ½ cups semi-sweet chocolate chips
For the Caramel Layer and Finish
- 1 cup caramel sauce
- Flaky sea salt
Optional Variations and Add-Ins
- Homemade caramel sauce
- Store-bought caramel sauce
- Dark chocolate chips
- White chocolate
- Darker caramel sauce
- Chopped pecans
- Chopped walnuts
- Small pinch of espresso powder
- Additional caramel for drizzling
- Melted chocolate for drizzling
- ¼ cup peanut butter
- Crushed toffee bits
- Rolled oats
- Vanilla ice cream for serving
- Extra flaky sea salt after baking
The Dessert Magic of Salted Caramel Cookie Bars
A great chocolate chip cookie is already hard to resist. It has golden edges, a soft middle, melted chocolate, and buttery sweetness.
These bars take that same comfort and build it into a thicker, richer dessert. Instead of baking separate cookies, the dough becomes a soft cookie bar base that holds a gooey caramel layer.
The caramel makes the bars feel decadent. It adds that sticky, buttery sweetness that turns a familiar dessert into something special.
The sea salt keeps the sweetness from becoming too much. Just a little salt over the caramel and a little more on top brings the flavors into focus.
The chocolate chips add classic cookie flavor. Semi-sweet chocolate is rich enough to stand up to the caramel without making the bars overly sweet.
The finished dessert feels like something from a bakery case, but the method is simple. Mix, layer, bake, cool, slice, and serve.
Why Melted Butter Works So Well
Melted butter is one of the reasons these bars are chewy and rich. It blends easily with brown sugar and granulated sugar, creating a glossy, thick base.
Unlike softened butter, melted butter does not require creaming. That means the dough comes together quickly with a whisk and spatula.
The melted butter also gives the bars a denser texture. This is exactly what you want for cookie bars that can hold a caramel layer.
Brown sugar adds moisture and caramel-like depth. Granulated sugar adds sweetness and classic cookie flavor.
Together, the sugars and butter create a base that bakes soft in the center and golden at the edges. The result is chewy instead of cakey.
This texture is important because the bars need structure. They must be soft enough to feel indulgent, but firm enough to slice cleanly after cooling.
Why Thick Caramel Sauce Matters
The caramel sauce should be thick enough to spread without running everywhere. If the caramel is too thin, it can sink into the dough instead of forming a clear layer.
A thick, buttery caramel gives the bars that gooey center. It holds its place between the cookie dough layers.
Homemade caramel can work beautifully if it has the right consistency. Store-bought caramel can also work well if it is not too runny.
If your caramel sauce seems thin, chill it briefly before layering. Cooler caramel is easier to spread and more likely to stay in place.
Leave a small border around the edges when adding the caramel. This helps prevent it from seeping out while the bars bake.
The caramel may bubble up in a few places, and that is a good thing. Those marbled spots make the bars look gooey and homemade.
Directions
Step 1: Preheat the Oven
Preheat your oven to 350°F (175°C). Let the oven fully heat before the pan goes in.
A steady oven temperature helps the bars bake evenly. Since these bars are thick and layered, even heat is important.
Place the oven rack in the center position. This helps the top brown while the center sets.
Step 2: Prepare the Baking Pan
Line a 9×13-inch baking pan with parchment paper. Leave an overhang on the sides.
The parchment overhang makes it easy to lift the cooled bars out of the pan. This is the key to clean slicing.
Press the parchment into the corners as best you can. A smooth lining helps the cookie dough spread evenly.
Step 3: Melt the Butter
Melt 1 cup unsalted butter. Let it cool slightly before mixing with the sugars.
The butter should be melted but not scorching hot. Slight cooling protects the eggs when they are added later.
Melted butter helps create a chewy, fudgy cookie texture. It is one of the main reasons these bars are rich.
Step 4: Combine Butter and Sugars
In a large mixing bowl, whisk together the melted butter, 1 cup packed brown sugar, and ½ cup granulated sugar. Mix until smooth and glossy.
The mixture should look thick and slightly caramel-colored. That glossy texture means the sugars and butter are blending well.
Make sure the brown sugar is packed when measured. It adds both sweetness and moisture.
Step 5: Add the Eggs One at a Time
Add 2 large eggs one at a time. Whisk after each egg until fully incorporated.
Adding the eggs gradually helps the dough stay smooth. It also gives the bars structure and richness.
The mixture should look silky after both eggs are added. Scrape the bowl if needed.
Step 6: Add the Vanilla
Stir in 2 teaspoons vanilla extract. Mix until evenly blended.
Vanilla makes the cookie base taste warmer and more complete. It supports the chocolate and caramel flavors.
Do not skip the vanilla. It helps the bars taste like classic homemade chocolate chip cookies.
Step 7: Mix the Dry Ingredients
In a separate bowl, whisk together 2 ¼ cups all-purpose flour, 1 teaspoon baking soda, and ½ teaspoon salt. Mix until evenly combined.
The baking soda helps the bars rise just enough while staying chewy. The salt balances the sweetness.
Whisking the dry ingredients separately helps prevent pockets of baking soda or salt in the dough.
Step 8: Combine Wet and Dry Ingredients
Gradually add the dry ingredients to the wet mixture. Stir gently with a spatula or spoon.
Mix only until the flour disappears. Do not overmix.
Overmixing can make the bars tough. A soft, chewy texture depends on gentle mixing.
Step 9: Fold in the Chocolate Chips
Add 1 ½ cups semi-sweet chocolate chips. Fold them into the dough until evenly distributed.
Use a spatula and slow folding motions. This keeps the dough from being overworked.
There should be chocolate throughout the dough. Every bar should have plenty of chips.
Step 10: Divide the Dough
Mentally divide the dough in half. Half will become the bottom layer, and half will go over the caramel.
The dough will be thick. That is exactly what you want for sturdy cookie bars.
If it feels sticky, use a spatula or lightly damp fingertips to press it into the pan. Work gently.
Step 11: Press the First Layer Into the Pan
Spread half of the cookie dough evenly into the prepared 9×13-inch pan. Press it into the corners.
Use a spatula or your fingertips to smooth the layer. Try to keep the thickness even.
This bottom layer needs to support the caramel. Make sure there are no large gaps.
Step 12: Add the Caramel Sauce
Drizzle 1 cup caramel sauce evenly over the dough. Use a thick caramel sauce that can spread without running too much.
Leave a small border around the edges. This helps keep the caramel from leaking out during baking.
Spread gently if needed. Do not press the caramel deep into the dough.
Step 13: Add Sea Salt to the Caramel Layer
Sprinkle a pinch of flaky sea salt over the caramel. This creates the signature salted caramel flavor.
The salt should be light and even. You want balance, not harsh saltiness.
Flaky sea salt works well because it gives little bursts of flavor. It also looks beautiful on top later.
Step 14: Add the Top Dough Layer
Drop spoonfuls of the remaining cookie dough over the caramel layer. Do not worry if some caramel peeks through.
The dough will spread and settle as it bakes. Visible caramel spots can bubble up and create a beautiful marbled effect.
Try to cover most of the surface without smearing the caramel too much. A patchy top is perfectly fine.
Step 15: Smooth the Top Gently
Use your fingertips or a spatula to lightly nudge the dough pieces together. Do not press hard.
The goal is to create a rustic top layer while still protecting the caramel underneath. Some gaps are welcome.
If the dough sticks to your fingers, lightly dampen them. This makes shaping easier.
Step 16: Bake the Bars
Bake at 350°F (175°C) for 30 to 35 minutes. The top should be golden brown, and the edges should look set.
A toothpick inserted into the cookie portion should come out with a few moist crumbs. Avoid testing directly through the caramel.
Do not overbake. The bars will continue to firm as they cool.
Step 17: Watch the Edges
The edges should be golden and set before removing the pan. The center should look baked but still soft.
If the center looks very wet, give the bars a little more time. Check again carefully.
Remember that caramel can make the center seem gooier. Look for the cookie dough to be set, not dry.
Step 18: Cool Completely in the Pan
Place the pan on a wire rack and let the bars cool completely. This step is crucial.
If you cut too soon, the caramel may ooze out, and the bars may fall apart. Cooling helps the caramel and cookie layers set.
This is the hardest part because the bars smell incredible. Patience gives you clean, bakery-style slices.
Step 19: Lift the Bars Out
Once fully cooled, use the parchment paper overhang to lift the bars from the pan. Place them on a cutting board.
Move slowly so the slab does not crack. The parchment makes this much easier.
Peel the parchment gently away from the sides. The bars are now ready to slice.
Step 20: Slice Into Bars
Use a sharp knife to cut the bars into squares or rectangles. Wipe the knife between cuts if the caramel sticks.
Clean cuts make the caramel layer more visible. Fully cooled bars slice best.
Choose smaller squares for rich party bites or larger rectangles for dessert servings. These bars are decadent, so a little goes a long way.
Step 21: Finish With Extra Sea Salt
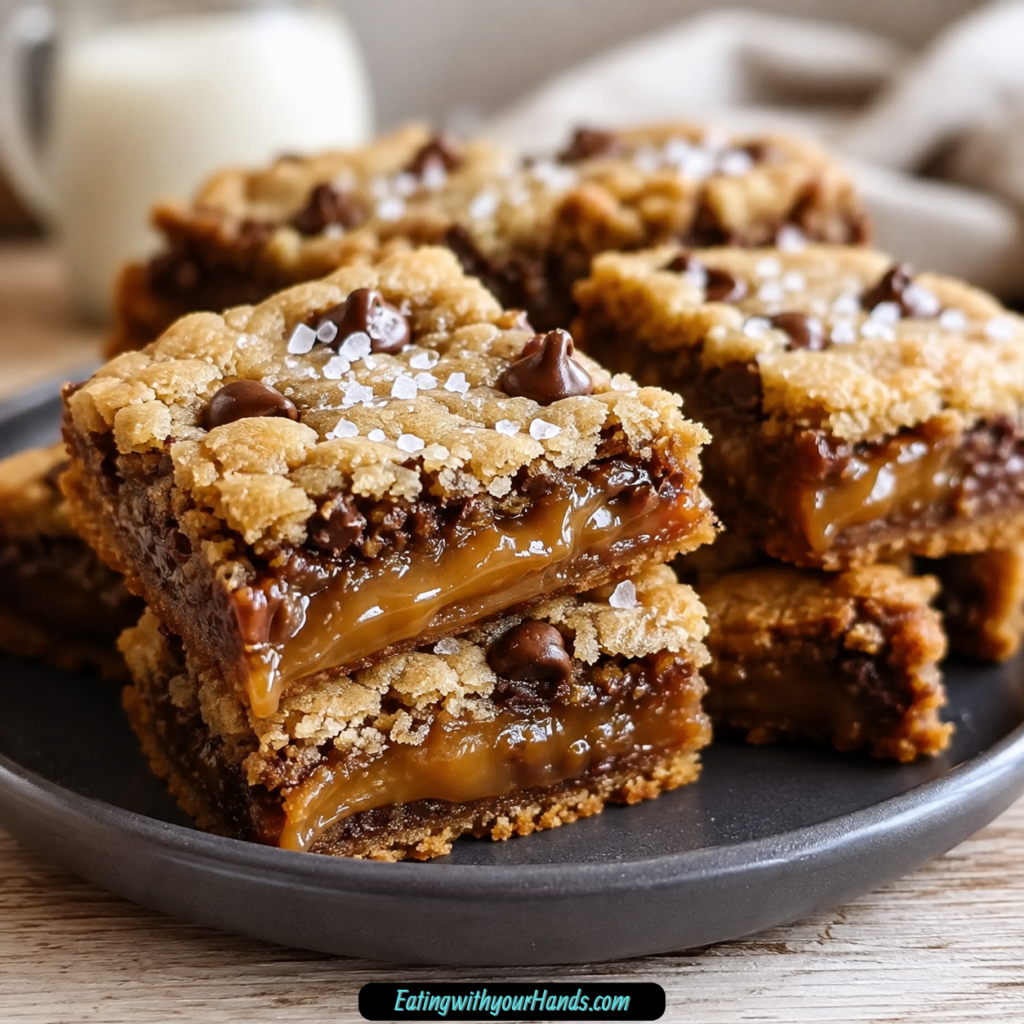
Sprinkle a few extra flakes of sea salt over the top before serving. This gives the bars a final pop of flavor.
Add the salt lightly. The goal is to brighten the caramel and chocolate, not overwhelm them.
This finishing touch also makes the bars look more polished. It signals the salted caramel flavor right away.
Serving Suggestions
Serve the bars at room temperature for clean slices. The caramel will be set enough to hold its shape.
For extra gooey caramel, warm a bar slightly before serving. A few seconds of heat softens the caramel and chocolate.
Vanilla ice cream turns these bars into a rich dessert. The cold ice cream balances the warm caramel and chewy cookie.
They also make a wonderful potluck dessert. Once cooled and sliced, they travel well.
For gifting, wrap individual bars after they are fully cooled. The caramel layer makes them feel extra special.
Storage
Store the bars in an airtight container at room temperature for up to 4 days. Keep them covered so the cookie layers stay soft.
Use parchment between layers if stacking. This helps prevent sticking.
The caramel may soften slightly depending on the temperature of the room. That is normal.
Keep them away from heat. Warm storage can make the caramel too loose.
Refrigerator Storage
For longer freshness, store the bars in the refrigerator for up to 1 week. Use an airtight container.
Refrigerated bars will be firmer. Let them sit at room temperature for a few minutes before serving if you want a softer texture.
You can also warm individual bars briefly. This brings back the gooey caramel feeling.
Refrigeration is useful if your kitchen is warm or if you want cleaner storage. The flavor remains rich and sweet.
Freezing
Wrap individual bars in plastic wrap and place them in a freezer-safe bag. Freeze for up to 3 months.
Individual wrapping makes it easy to thaw only what you need. It also protects the bars from freezer dryness.
Thaw overnight or warm in the microwave for a few seconds before serving. The caramel will soften again when warmed.
For the best texture, freeze only after the bars have cooled completely. Cooling first protects the layers.
Make-Ahead Tips
The dough can be prepared a day in advance. Refrigerate it, then assemble before baking.
If the dough firms up in the refrigerator, let it sit briefly before pressing into the pan. It should be workable.
The caramel can also be chilled briefly if it is thin. A thicker caramel layer is easier to manage.
Bake the bars when ready and cool completely before slicing. They are excellent for planning ahead.
Helpful Notes for Best Results
Use caramel sauce that is thick and buttery. Thin caramel may sink into the dough instead of staying layered.
If the caramel is too runny, chill it briefly before adding it to the bars. This helps it hold its shape.
Do not overmix the dough after adding flour. Overmixing can make the bars tough.
Do not overbake. The bars will continue to firm up as they cool, and overbaking can make them hard.
Let the bars cool completely before slicing. This is the best way to keep the caramel from oozing out.
For a bakery-worthy finish, drizzle additional caramel or melted chocolate on top before serving. Add the drizzle after the bars have cooled.
Variations
Dark Chocolate Caramel Bars
Use dark chocolate chips instead of semi-sweet chocolate chips. This gives the bars a richer, deeper chocolate flavor.
A darker caramel sauce can also be used. Together, they make the bars taste more intense.
This variation is excellent for anyone who likes desserts that are less sweet and more chocolate-forward. The sea salt becomes even more important.
White Chocolate Caramel Bars
Use white chocolate in place of semi-sweet chocolate. The bars become sweeter and creamier.
White chocolate pairs beautifully with caramel. It gives the bars a softer, dessert-shop flavor.
Keep the sea salt because it helps balance the sweetness. Without salt, this version may taste too sweet.
Peanut Butter Caramel Bars
Swirl ¼ cup peanut butter into the caramel before layering. This adds a sweet, nutty twist.
The peanut butter should be swirled gently so it does not completely disappear into the caramel. Little ribbons are ideal.
This version is rich and indulgent. It tastes like a cookie bar with caramel and peanut butter tucked inside.
Salted Toffee Bars
Add crushed toffee bits to the dough. This creates extra crunch and a deeper caramel-like flavor.
Toffee works well with chocolate chips and sea salt. It gives the bars a candy-like edge.
Do not add too much, or the bars may become overly sweet. A moderate amount gives texture without overwhelming the cookie dough.
Oatmeal Caramel Bars
Replace ½ cup of flour with rolled oats. This gives the bars a heartier, chewier texture.
The oats add a little rustic bite. They make the bars feel slightly more substantial.
Keep the rest of the recipe the same. The caramel and chocolate still remain the main flavors.
Nutty Caramel Cookie Bars
Add chopped pecans or walnuts to the dough. The nuts give crunch and pair naturally with caramel.
Pecans taste buttery and sweet. Walnuts add a slightly deeper flavor.
Fold them in with the chocolate chips. Keep the pieces small enough for clean slicing.
Espresso Chocolate Caramel Bars
Add a small pinch of espresso powder to the dough. It enhances the chocolate flavor.
The espresso should be subtle. It should not make the bars taste like coffee.
This variation adds depth and works especially well with dark chocolate chips. It makes the chocolate taste richer.
Bakery-Style Drizzled Bars
After the bars cool, drizzle additional caramel or melted chocolate over the top. This makes them look more polished.
Let the drizzle set slightly before slicing or serving. This keeps the presentation cleaner.
This variation is especially nice for parties, bake sales, or gifting. It adds visual appeal without changing the base recipe.
Troubleshooting
Why Did My Bars Turn Out Hard?
The bars may have been overbaked. Remove them when the edges are golden and the center is just set.
Overmixing the dough can also make the bars tough. Stir only until the flour disappears.
The bars firm up as they cool, so they should not bake until fully hard in the oven. Softness at the center is normal.
Why Did the Caramel Sink Into the Dough?
The caramel may have been too thin. Use a thick caramel sauce that can spread without running.
If needed, chill the caramel briefly before layering. This helps it stay distinct.
Also avoid pressing the top dough layer too hard. Heavy pressure can push caramel into the bottom layer.
Why Did the Caramel Leak Out the Edges?
The caramel may have been spread too close to the sides. Leave a small border around the edges.
The top dough layer also helps hold the caramel in place. Cover most of the caramel with spoonfuls of dough.
A little bubbling is normal. Large leaks can be reduced with a thicker caramel and a border.
Why Are My Bars Too Gooey to Slice?
They may still be warm. Cool completely before cutting.
Caramel needs time to set. If sliced too soon, it will ooze and make the bars messy.
For very clean slices, refrigerate briefly after cooling. Then cut with a sharp knife.
Why Are My Bars Dry?
They may have baked too long. Check around 30 minutes and avoid overbaking.
Too much flour can also dry the dough. Measure carefully.
The toothpick should show a few moist crumbs from the cookie portion. A completely dry toothpick may mean the bars are overdone.
Why Does My Dough Feel Sticky?
Cookie bar dough can be thick and slightly sticky because of melted butter and brown sugar. That is normal.
Use a spatula or lightly damp fingertips to press it into the pan. Do not add extra flour.
Adding too much flour can make the bars less chewy. Work with the dough gently.
Frequently Asked Questions
Can I Use Homemade Caramel Sauce?
Yes, homemade caramel sauce works well. It should be thick enough to layer without running.
If it is too thin, chill it briefly before using. A thicker caramel gives a better center.
Do I Need to Refrigerate the Bars?
Not necessarily. They keep well at room temperature for up to 4 days.
Refrigeration extends freshness up to 1 week. It also makes the bars firmer.
Can I Double the Recipe?
Yes, the recipe can be doubled. Use a large sheet pan for big batches.
This is helpful for parties, holidays, or bake sales. Watch the baking time and doneness carefully.
Why Did My Bars Turn Out Tough?
Overbaking or overmixing can make them tough. Remove them when the edges are golden and the center is just set.
Mix the dough gently after adding the flour. A chewy texture depends on not overworking it.
Can I Add More Salt?
Yes, sprinkle extra sea salt over the top right after baking if you love a stronger salty-sweet flavor. Add it lightly.
You can also add a final sprinkle after slicing. Taste balance is important.
Can I Use Dark Chocolate?
Yes, dark chocolate chips work beautifully. They create a richer bar and balance the caramel sweetness.
Dark chocolate is especially good with flaky sea salt. It makes the flavor deeper.
Can I Add Nuts?
Yes, chopped pecans or walnuts can be added. They bring crunch and complement the caramel.
Fold them in with the chocolate chips. Keep the pieces small for cleaner slices.
Can I Warm the Bars Before Serving?
Yes, warming the bars slightly makes the caramel extra gooey. Heat individual bars only briefly.
Serve warm with vanilla ice cream for a more indulgent dessert. The caramel and chocolate will soften beautifully.
Why These Bars Are Perfect for Sharing
Salted Caramel Chocolate Chip Cookie Bars are ideal for sharing because they bake in one pan and slice into neat portions after cooling. That makes them easier than individual cookies when feeding a crowd.
They also travel well. Once the caramel has set, the bars can be packed for parties, bake sales, birthdays, potlucks, or edible gifts.
The flavor feels special without being unfamiliar. Chocolate chip cookie dough, caramel, and sea salt are comforting, but together they feel impressive.
They look beautiful on a dessert tray. The golden top, chocolate chips, caramel peeking through, and salt flakes make them naturally eye-catching.
They are rich enough that smaller squares feel satisfying. This makes one pan stretch nicely for gatherings.
Why This Recipe Works So Well
This recipe works because the cookie dough is rich enough to hold the caramel layer. Melted butter and brown sugar create a chewy base that bakes soft but structured.
The flour and baking soda give the bars body and just enough lift. Salt balances the sweetness inside the dough.
Chocolate chips give the bars classic cookie flavor. Semi-sweet chocolate keeps the dessert from becoming overly sweet.
The caramel layer adds gooey richness. Leaving a border keeps it from leaking too much during baking.
Flaky sea salt sharpens the flavor and makes the caramel taste deeper. It turns a sweet cookie bar into a balanced dessert.
Final Thoughts
Salted Caramel Chocolate Chip Cookie Bars are chewy, buttery, gooey dessert bars layered with chocolate chips, caramel sauce, and flaky sea salt. With melted butter, brown sugar, granulated sugar, eggs, vanilla, flour, baking soda, salt, semi-sweet chocolate chips, caramel, and sea salt, they turn classic cookie ingredients into a true showstopper dessert.
The method is simple and rewarding. Mix the melted butter and sugars, whisk in eggs and vanilla, combine with the dry ingredients, fold in chocolate chips, press half the dough into a parchment-lined 9×13-inch pan, layer with caramel and sea salt, cover with the remaining dough, and bake at 350°F (175°C) for 30 to 35 minutes.
Let the bars cool completely in the pan before slicing. This step is essential because the caramel needs time to set, and clean slices depend on patience.
Serve them slightly warm with vanilla ice cream, pack them for a bake sale, gift them in small squares, store them at room temperature for up to 4 days, refrigerate them for up to 1 week, or freeze individual bars for up to 3 months. However you share them, these salted caramel chocolate chip cookie bars bring chewy cookie texture, molten caramel ribbons, rich chocolate, and the perfect touch of sea salt to every bite.
Salted Caramel Chocolate Chip Cookie Bars
These salted caramel chocolate chip cookie bars are soft, chewy, buttery, and filled with rich sweet-and-salty flavor. A thick chocolate chip cookie base gets layered with smooth caramel and finished with extra cookie dough on top for a bakery-style dessert bar. The gooey caramel center, melty semi-sweet chocolate chips, and sea salt flakes make these bars perfect for bake sales, potlucks, parties, or anytime you want an indulgent homemade treat.
Recipe Details
- Prep Time: 20 minutes
- Cook Time: 35 minutes
- Total Time: 55 minutes
- Servings: 16 bars
- Calories: 400 kcal
Ingredients
Caramel Mixture
- 11 oz soft caramels unwrapped
- 14 oz sweetened condensed milk
- ½ teaspoon sea salt flakes such as Maldon
Cookie Dough
- 2 cups semi-sweet chocolate chips
- 1 cup unsalted butter softened
- 1 cup granulated sugar
- 1 cup light brown sugar packed
- 2 large eggs
- 1 teaspoon vanilla extract
- 2½ cups all-purpose flour
- 1 teaspoon baking soda
- ½ teaspoon sea salt
Instructions
Step 1: Prepare the Oven and Pan
Preheat the oven to 350°F (175°C).
Grease a 9×13-inch baking pan and line it with parchment paper.
Step 2: Cream the Butter and Sugars
In a large bowl, cream together the softened unsalted butter, granulated sugar, and packed light brown sugar until the mixture is light and fluffy.
Step 3: Add the Eggs and Vanilla
Beat in the eggs one at a time, mixing well after each addition.
Stir in the vanilla extract until evenly combined.
Step 4: Mix the Dry Ingredients
In another bowl, whisk together the all-purpose flour, sea salt, and baking soda.
Step 5: Make the Cookie Dough
Gradually add the dry ingredients to the wet ingredients, mixing until combined.
Fold in the semi-sweet chocolate chips until evenly distributed.
Step 6: Form the Cookie Base
Press about two-thirds of the cookie dough evenly into the prepared 9×13-inch baking pan.
Step 7: Melt the Caramel
In a saucepan, combine the soft caramels and sweetened condensed milk.
Heat over low heat, stirring until the mixture is smooth and melted.
Step 8: Add the Sea Salt Flakes
Remove the caramel mixture from the heat.
Stir in the sea salt flakes until evenly mixed.
Step 9: Layer the Caramel
Pour the salted caramel mixture evenly over the cookie dough base.
Step 10: Add the Remaining Dough
Drop spoonfuls of the remaining cookie dough over the caramel layer.
Step 11: Bake the Bars
Bake for 30-35 minutes, or until the top is golden brown and the bars are set.
Step 12: Cool and Slice
Cool completely before slicing into 16 bars.
Notes
Chill the dough for 30 minutes if it is too soft to handle.
Use parchment with overhang for easy removal and cleaner cuts.
For extra indulgence, drizzle melted chocolate or caramel over the top.
Store the bars in an airtight container at room temperature for up to 4 days, or refrigerate for up to a week.
The bars can be frozen for up to 3 months. Thaw before serving.
Serving Suggestions
- Serve with cold milk for a classic cookie bar pairing.
- Add to bake sale trays or potluck dessert tables.
- Pair with hot coffee or cocoa.
- Serve slightly warmed with vanilla ice cream.
- Cut into smaller squares for holiday dessert platters.
Storage
How to Store
Keep the cooled bars in an airtight container at room temperature for up to 4 days.
How to Refrigerate
Refrigerate the bars in an airtight container for up to a week.
How to Freeze
Freeze the fully cooled bars in a freezer-safe airtight container for up to 3 months. Thaw before serving.
Best Texture Tip
Let the bars cool completely before slicing. The caramel needs time to set so the layers hold together and the cuts come out clean.

Fernando is the creator and writer behind the food blog Eating with your Hands. Living and working in cities like Paris, Barcelona, and Berlin, and being married to a Canadian foodie, has given Fernando a passion and interest in food and inspired him to run EWYH.