
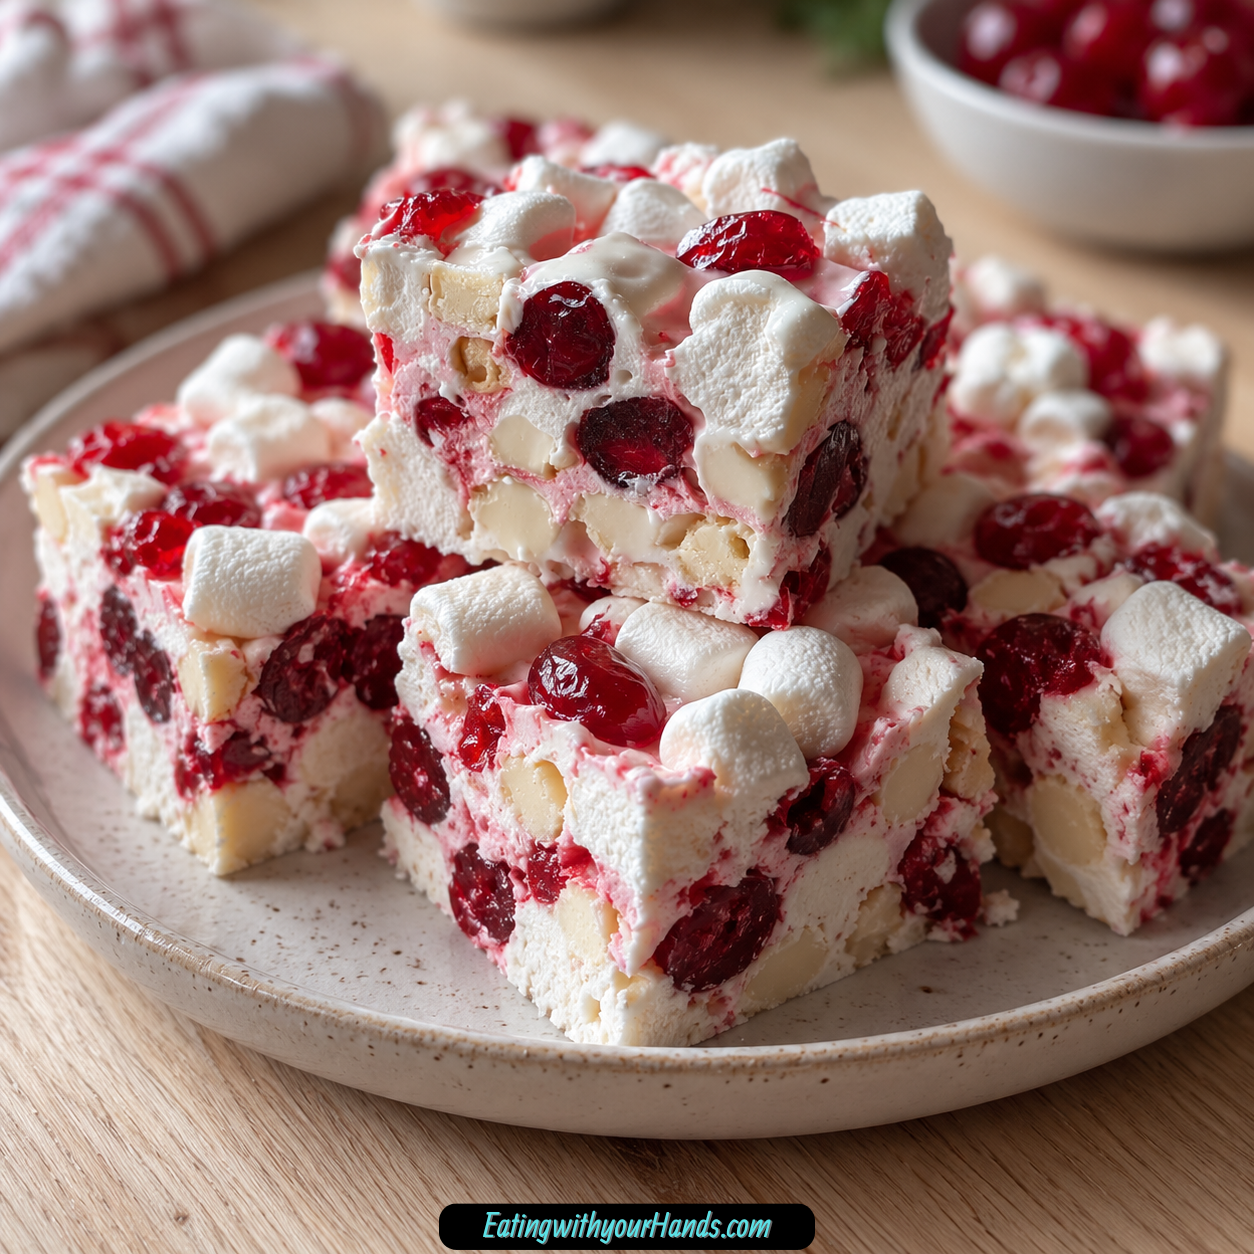
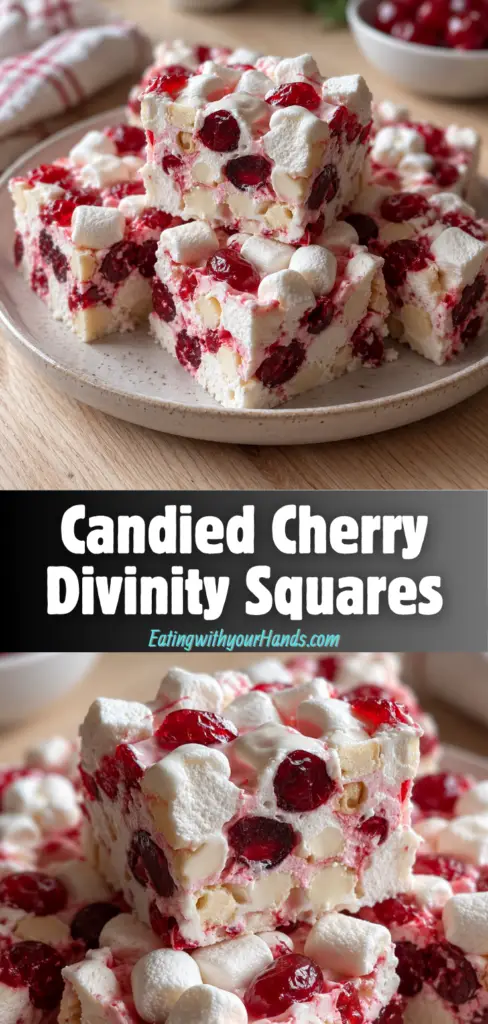
Candied Cherry Divinity Squares are the kind of holiday treat that feels bright, sweet, chewy, and full of old-fashioned charm. They have creamy melted white chocolate, soft mini marshmallows, rich butter, and colorful candied cherries folded together into little squares that look beautiful on any dessert platter.
This is the kind of recipe that makes a kitchen feel festive without demanding a long baking project. There is no oven, no complicated dough, and no delicate decorating, just a saucepan, a spatula, a pan, and a sweet mixture that sets into chewy little bites.
The magic starts when white chocolate chips and butter melt together over low heat. The mixture becomes smooth and glossy, and the aroma already feels like something made for a holiday tray.
Then the mini marshmallows are stirred in until they are coated in that creamy white chocolate mixture. They soften slightly, turning the base into something sweet, chewy, and wonderfully textured.
The candied cherries bring color and fruity sweetness. Their red jewel-like pieces make the squares feel cheerful, nostalgic, and perfect for the season.
Candied Cherry Divinity Squares are easy to make, easy to share, and easy to store. They are lovely for holiday gatherings, parties, cozy nights, freezer-friendly treat boxes, or anytime you want something sweet that feels homemade and special.
They are also flexible enough to make your own. You can keep them classic with white chocolate and cherries, or try dark chocolate, semi-sweet chocolate, sea salt, nuts, dried cranberries, almond extract, or shredded coconut for a different twist.
Table of Contents
- Why You’ll Love These Candied Cherry Divinity Squares
- Recipe Details
- Ingredients
- For the Divinity
- Candied Cherries
- Ingredient Notes
- Optional Swaps, Variations, Add-Ins, and Serving Ideas
- Dark Chocolate Cherry Squares
- Semi-Sweet Chocolate Squares
- Sweet-Salty Cherry Squares
- Pecan Cherry Divinity Squares
- Walnut Cherry Divinity Squares
- Cranberry Divinity Squares
- Almond Cherry Divinity Squares
- Coconut Cherry Divinity Squares
- Dairy-Free Cherry Squares
- Vanilla Ice Cream Serving
- Chocolate Sauce Drizzle
- Holiday Platter Squares
- Freezer-Friendly Treats
- Why This Recipe Works
- Directions
- Step 1: Gather the Ingredients and Equipment
- Step 2: Prepare the Candied Cherries
- Step 3: Add White Chocolate and Butter to the Saucepan
- Step 4: Melt Slowly and Stir Constantly
- Step 5: Remove the Saucepan from Heat
- Step 6: Stir in the Mini Marshmallows
- Step 7: Fold in the Candied Cherries
- Step 8: Add Optional Mix-Ins If Using
- Step 9: Transfer to the Pan
- Step 10: Spread Evenly
- Step 11: Add Optional Sea Salt
- Step 12: Cool Completely
- Step 13: Cut into Pieces
- Step 14: Serve the Squares
- Step 15: Store at Room Temperature
- Step 16: Refrigerate for Longer Freshness
- Step 17: Freeze for Later
- Serving Ideas
- Storage
- Freezing
- Make-Ahead
- Helpful Notes for Best Results
- Variations
- Dark Chocolate Cherry Divinity Squares
- Semi-Sweet Cherry Divinity Squares
- Sea Salt Cherry Squares
- Pecan Cherry Divinity Squares
- Walnut Cherry Divinity Squares
- Dried Cranberry Divinity Squares
- Almond Cherry Divinity Squares
- Coconut Cherry Divinity Squares
- Dairy-Free Cherry Divinity Squares
- Extra Fruity Cherry Squares
- Troubleshooting
- The White Chocolate Is Burning
- The Mixture Is Lumpy
- The Marshmallows Melted Too Much
- The Squares Are Too Soft to Cut
- The Squares Are Too Sticky
- The Cherries Are Not Evenly Distributed
- The Squares Taste Too Sweet
- The Squares Need More Crunch
- The Squares Need a Dairy-Free Version
- The Squares Need Longer Storage
- Frequently Asked Questions
- Why This Recipe Works So Well
- Final Thoughts
- Candied Cherry Divinity Squares
Why You’ll Love These Candied Cherry Divinity Squares
These squares are quick and easy to prepare. You can make them in about 25 minutes before allowing them to cool and set.
They use minimal ingredients. White chocolate chips, mini marshmallows, unsalted butter, and candied cherries create the main treat.
They are family-friendly. Kids can help mix, spread, or sneak little tastes once everything is safely cooled.
They are perfect for sharing. Cut them into bite-sized pieces for parties, holiday gatherings, dessert platters, or cozy nights in.
They are freezer-friendly. Extras can be stored for a sweet treat whenever you want one later.
They are chewy, sweet, and colorful. The combination of marshmallows and candied cherries gives every square a soft texture and bright pop of flavor.
Recipe Details
Candied Cherry Divinity Squares are a no-bake treat. They are made by melting white chocolate chips and butter, then stirring in marshmallows and candied cherries.
The prep time is about 25 minutes. After the mixture is spread into the pan, it must cool completely before cutting.
The recipe uses 24 oz white chocolate chips, which equals two 12 oz bags. Ghirardelli is mentioned as a favorite because of its smooth meltability.
The marshmallows are 20 oz mini marshmallows, or two 10 oz bags. Fresh marshmallows give the best texture.
The butter amount is 5 tablespoons unsalted butter. It adds richness and should not be skipped.
The candied cherries amount is 1.5 to 2 cups. They can be halved or chopped, and the amount can be adjusted depending on how fruity you want the squares.
The white chocolate chips and butter are melted in a saucepan over low heat. Stir gently and continuously until the mixture is completely melted and smooth, which usually takes about 5 to 7 minutes.
After the saucepan is removed from the heat, the mini marshmallows are stirred in until coated. Then the candied cherries are folded in until evenly distributed.
The mixture is poured into a greased square dish or lined baking pan. It should be spread evenly, then cooled completely before cutting.
The squares can be refrigerated to speed up the cooling process. Once set, they can be cut into bite-sized pieces for serving.
Ingredients
For the Divinity
- 24 oz white chocolate chips (2 bags of 12 oz each; I love using Ghirardelli for its smooth meltability)
- 20 oz mini marshmallows (2 bags of 10 oz each; check for freshness for the best texture)
- 5 tablespoon unsalted butter (this adds richness, so don’t skip it!)
Candied Cherries
- 1.5 to 2 cups candied cherries, halved or chopped (feel free to adjust based on how fruity you like it!)
Ingredient Notes
White chocolate chips create the creamy base of these squares. Using 24 oz gives the mixture enough sweetness and body to coat the marshmallows and cherries.
Ghirardelli is mentioned as a favorite because it melts smoothly. The goal is a white chocolate mixture that becomes glossy, creamy, and lump-free.
Mini marshmallows give the squares their chewy texture. Fresh marshmallows are best because they stay soft and pleasant in the finished treat.
Unsalted butter adds richness to the melted white chocolate. It also helps the mixture become smoother and more luxurious.
Candied cherries bring the bright fruity flavor and colorful holiday look. They can be halved or chopped depending on the texture you want.
The cherry amount can be adjusted from 1.5 to 2 cups. Use more if you want a fruitier square and less if you prefer more white chocolate and marshmallow in each bite.
Pre-chopped candied cherries can save time. This is helpful when you want to make the recipe faster.
A greased square dish or lined baking pan helps the mixture release more easily. The pan should be ready before the mixture is combined.
Optional Swaps, Variations, Add-Ins, and Serving Ideas
Dark Chocolate Cherry Squares
Switch out the white chocolate for dark chocolate. This gives the squares a richer flavor.
The flavor will become deeper and less sweet than the white chocolate version. The candied cherries will still add bright fruitiness.
Semi-Sweet Chocolate Squares
Use semi-sweet chocolate chips instead of white chocolate if you want to adjust the sweetness. This creates a slightly less sweet version.
The color and flavor will change. The treat will taste more chocolate-forward.
Sweet-Salty Cherry Squares
Add a sprinkle of sea salt on top. This gives the squares a sweet-salty twist.
The salt balances the sweetness of the chocolate, marshmallows, and cherries. Add it lightly so it does not overpower the treat.
Pecan Cherry Divinity Squares
Incorporate crushed pecans for added crunch. Pecans bring a nutty texture to the chewy squares.
This variation works well on holiday platters. Use it only when nut allergies are not a concern.
Walnut Cherry Divinity Squares
Use crushed walnuts instead of pecans. Walnuts add crunch and a different nutty flavor.
They make the squares more textured. This is a simple variation for nut lovers.
Cranberry Divinity Squares
Use dried cranberries instead of candied cherries for a tangy alternative. This changes both the flavor and color.
The squares will taste less like the classic candied cherry version. The cranberries bring a chewy, tart-sweet bite.
Almond Cherry Divinity Squares
Add a splash of almond extract for an extra layer of flavor. Almond flavor works well with cherry and white chocolate.
This variation makes the squares taste a little more bakery-style. Use it when you want a deeper flavor.
Coconut Cherry Divinity Squares
Add a handful of shredded coconut for a tropical twist. Coconut gives the squares more chew and texture.
The coconut works with the white chocolate and cherries. It creates a sweeter, more textured treat.
Dairy-Free Cherry Squares
For a dairy-free version, use dairy-free white chocolate and vegan butter. The flavor and texture may change depending on the products used.
Make sure all ingredients fit your needs. The no-bake method stays the same.
Vanilla Ice Cream Serving
Serve the squares alongside a scoop of vanilla ice cream for a fancy touch. This turns the small candy-like square into a fuller dessert.
The cold ice cream pairs well with the sweet chewy squares. It is a nice option for cozy nights or holiday dessert plates.
Chocolate Sauce Drizzle
Serve the squares with a drizzle of chocolate sauce. This adds a richer finish.
Chocolate sauce makes the dessert feel more dressed up. It is a simple way to turn bite-sized pieces into a plated treat.
Holiday Platter Squares
Cut the cooled squares into bite-sized pieces. Arrange them on a holiday platter with other candies and cookies.
Their bright candied cherries make the tray look festive. They are easy to share and easy to pick up.
Freezer-Friendly Treats
Freeze extra squares for later. Store them tightly in an airtight container or wrap them well.
They will last up to 3 months in the freezer. Thaw them in the refrigerator before enjoying again.
Why This Recipe Works
Candied Cherry Divinity Squares work because they balance creamy, chewy, fruity, and rich textures in one no-bake treat. The white chocolate and butter form the smooth coating that holds everything together.
The low heat matters because white chocolate can burn if rushed. Gentle, continuous stirring helps the mixture melt evenly.
Mini marshmallows soften as they are coated in the warm white chocolate mixture. They give the squares their chewy, sweet texture.
The candied cherries bring color and flavor. They make the squares look festive and give each bite a fruity pop.
Cooling is what sets the squares. Once the mixture cools completely, it can be cut into neat pieces.
The recipe is also easy to customize. Dark chocolate, semi-sweet chocolate, sea salt, pecans, walnuts, dried cranberries, almond extract, coconut, dairy-free ingredients, vanilla ice cream, and chocolate sauce all offer different ways to serve or adjust the treat.
Directions
Step 1: Gather the Ingredients and Equipment
Gather the white chocolate chips, mini marshmallows, unsalted butter, and candied cherries. You will also need a saucepan, a mixing bowl if desired, a spatula, and a greased square dish or lined baking pan.
Having everything ready matters because the mixture is easiest to work with while warm. Prepare the pan before you begin melting.
Step 2: Prepare the Candied Cherries
Measure 1.5 to 2 cups candied cherries. Halve or chop them depending on how you want the fruit distributed in the squares.
Pre-chopped candied cherries can save time. Use more cherries if you want a fruitier treat.
Step 3: Add White Chocolate and Butter to the Saucepan
Place 24 oz white chocolate chips and 5 tablespoons unsalted butter into a saucepan. Set the pan over low heat.
Low heat is important. It helps the chocolate melt smoothly without burning.
Step 4: Melt Slowly and Stir Constantly
Stir the white chocolate and butter gently and continuously. Keep stirring until the mixture is completely melted and smooth.
This usually takes about 5 to 7 minutes. The mixture should look creamy, glossy, and lump-free.
Step 5: Remove the Saucepan from Heat
Once the white chocolate mixture is smooth, remove the saucepan from the heat. Do not keep cooking it after it has melted.
Set the saucepan on a heat-safe surface. The mixture should still be warm enough to coat the marshmallows.
Step 6: Stir in the Mini Marshmallows
Add 20 oz mini marshmallows to the melted white chocolate mixture. Stir until the marshmallows are well coated.
The marshmallows will start to soften and become gooey. This is exactly what helps create the chewy texture.
Step 7: Fold in the Candied Cherries
Add the halved or chopped candied cherries. Fold them into the marshmallow mixture until evenly distributed.
The mixture should look colorful and thick. Make sure the cherries are spread throughout so every square gets some fruity flavor.
Step 8: Add Optional Mix-Ins If Using
If using crushed pecans, walnuts, shredded coconut, dried cranberries, or almond extract, add them according to the variation you want. Mix gently until incorporated.
If using sea salt as a topping, wait until the mixture is spread in the pan. That keeps the salt on the surface.
Step 9: Transfer to the Pan
Pour the mixture into the greased square dish or lined baking pan. Use a spatula to scrape the saucepan well.
Work while the mixture is still soft. It will become harder to spread as it cools.
Step 10: Spread Evenly
Use the spatula to spread the mixture into an even layer. Press lightly so the squares hold together, but do not pack the mixture too tightly.
An even layer makes cutting easier later. It also helps every piece have a good balance of marshmallows and cherries.
Step 11: Add Optional Sea Salt
If making the sweet-salty version, sprinkle a little sea salt over the top. Use a light hand.
The salt adds contrast to the sweet white chocolate and cherries. It should enhance, not dominate.
Step 12: Cool Completely
Allow the squares to cool completely before cutting. This gives the mixture time to set.
You can place the pan in the refrigerator to speed up the cooling process. This is helpful if you are impatient or preparing for a gathering.
Step 13: Cut into Pieces
Once fully set, cut the mixture into squares or bite-sized pieces. Use a sharp knife for cleaner edges.
Smaller pieces are easy to share. They work well on holiday platters and party trays.
Step 14: Serve the Squares
Serve the squares on their own, or pair them with vanilla ice cream or chocolate sauce for a fancier touch. They are sweet, chewy, and bright with candied cherry flavor.
These treats are perfect for parties, holidays, and cozy nights in. They are easy to pick up and share.
Step 15: Store at Room Temperature
Place leftover squares in an airtight container. Store them at room temperature for up to 1 week.
Keep the container sealed between servings. This helps preserve the texture.
Step 16: Refrigerate for Longer Freshness
If you want to keep the squares fresh for longer, store them in the refrigerator. Chilling can also make them firmer.
Let them sit briefly before serving if you prefer a softer bite. The texture may be firmer when cold.
Step 17: Freeze for Later
For longer storage, place the squares in the freezer. They will last for up to 3 months.
Store them in an airtight container or wrap them tightly in plastic wrap. Thaw them in the refrigerator before enjoying again.
Serving Ideas
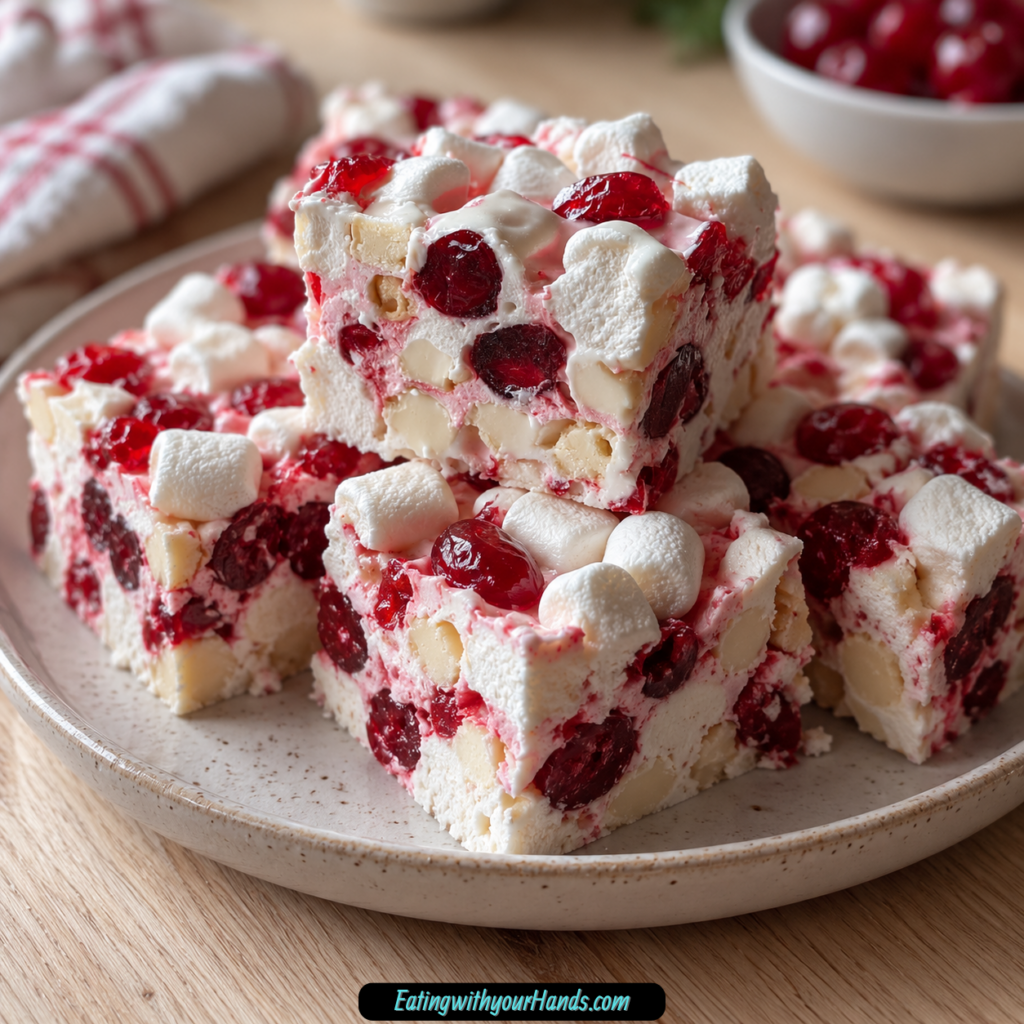
Candied Cherry Divinity Squares are best cut into bite-sized pieces for easy sharing. Their chewy texture and bright cherry color make them perfect for dessert trays.
Serve them on holiday platters with cookies, candies, and other small treats. The red candied cherries make the squares look festive without extra decoration.
They are also lovely for parties. Guests can pick up a small square without needing a plate or fork.
For a fancier dessert, serve the squares with a scoop of vanilla ice cream. The cold creamy ice cream pairs nicely with the sweet chewy texture.
A drizzle of chocolate sauce can also dress them up. It adds richness and makes the squares feel more like a plated dessert.
These squares are great for cozy nights in. A few small pieces can satisfy a sweet craving without a full baking project.
They are also useful for edible gifts. Once set, they can be packed in containers and shared with friends or family.
Storage
Store Candied Cherry Divinity Squares in an airtight container at room temperature. They will stay delicious for about 1 week.
Keep the container sealed well. This helps protect the chewy texture.
If stacking the squares, place parchment paper between layers if needed. This helps prevent sticking.
You can also store leftovers in the refrigerator to keep them fresh for longer. The squares may become firmer when chilled.
Freezing
Candied Cherry Divinity Squares can be frozen for up to 3 months. Store them in an airtight container or wrap them tightly in plastic wrap.
Thaw the squares in the refrigerator before enjoying again. This helps them return to a good texture gradually.
Freezing is helpful when you want to save extras for later. It also makes the recipe useful for holiday prep.
Make-Ahead
These squares are a wonderful make-ahead treat because they need time to cool and set. You can make them earlier in the day, chill them if needed, and cut them before serving.
For holiday gatherings, they can be prepared in advance and stored in an airtight container. This keeps dessert simple when the kitchen is busy.
They can also be frozen for longer storage. Thaw in the refrigerator before serving, then arrange them on a platter when ready.
Helpful Notes for Best Results
Melt the white chocolate and butter over low heat. This helps prevent burnt chocolate.
Stir gently and continuously while melting. The mixture should become completely smooth.
Use fresh mini marshmallows for the best texture. Fresh marshmallows soften and coat more evenly.
Do not skip the butter. It adds richness and helps the white chocolate mixture melt smoothly.
Use 1.5 to 2 cups candied cherries depending on how fruity you want the squares. Halved or chopped cherries both work.
Pre-chopped candied cherries can save time. This is helpful during busy holiday prep.
Let the squares cool completely before cutting. If you cut too soon, they may not hold their shape.
Refrigerate the pan if you want the squares to set faster. Store leftovers in the fridge if you want them to stay fresh longer.
Variations
Dark Chocolate Cherry Divinity Squares
Use dark chocolate instead of white chocolate. This creates a richer, deeper flavor.
The squares will be less sweet and more chocolate-forward. The candied cherries will still add brightness.
Semi-Sweet Cherry Divinity Squares
Use semi-sweet chocolate chips instead of white chocolate. This adjusts the sweetness and changes the flavor profile.
The finished squares will taste more like chocolate candy. They will not have the same creamy white chocolate look.
Sea Salt Cherry Squares
Sprinkle a little sea salt on top. This gives the squares a sweet-salty twist.
The salt balances the sweetness. Add it lightly after spreading the mixture in the pan.
Pecan Cherry Divinity Squares
Add crushed pecans for crunch. Pecans make the squares nuttier and more textured.
This variation is great for holiday trays. Use it only when nuts are safe for your guests.
Walnut Cherry Divinity Squares
Use crushed walnuts instead of pecans. Walnuts add a different nutty flavor.
They also give the squares more crunch. The texture becomes less soft and more layered.
Dried Cranberry Divinity Squares
Use dried cranberries instead of candied cherries. This creates a tangy alternative.
The flavor will be less candy-sweet and more tart. The color will still look festive.
Almond Cherry Divinity Squares
Add a splash of almond extract. This gives the squares an extra layer of flavor.
Almond works beautifully with cherry. It makes the treat feel a little more bakery-style.
Coconut Cherry Divinity Squares
Add a handful of shredded coconut. This gives the squares a tropical twist.
The coconut adds chewiness and texture. It pairs well with white chocolate and cherries.
Dairy-Free Cherry Divinity Squares
Use dairy-free white chocolate and vegan butter. This creates a dairy-free version.
The flavor and texture may change depending on the products used. Make sure all ingredients fit your needs.
Extra Fruity Cherry Squares
Use the higher end of the cherry range, closer to 2 cups. This makes the squares fruitier.
The pieces will have more candied cherry flavor in each bite. This is a good choice if cherries are your favorite part.
Troubleshooting
The White Chocolate Is Burning
The heat may be too high. Melt the white chocolate and butter over low heat only.
Stir gently and continuously. White chocolate needs patience for a smooth texture.
The Mixture Is Lumpy
Keep stirring until the white chocolate chips and butter are completely melted. The mixture should be smooth and glossy.
If the chocolate is not fully melted, give it more time over low heat. Do not raise the heat too much.
The Marshmallows Melted Too Much
Remove the saucepan from the heat before adding the marshmallows. Stir until they are coated and softened, not fully dissolved.
Fresh mini marshmallows help create the best texture. Work gently and do not overmix.
The Squares Are Too Soft to Cut
They may not have cooled completely. Let the pan sit longer before slicing.
You can refrigerate the squares to speed up the setting process. Cold squares are easier to cut neatly.
The Squares Are Too Sticky
Let the mixture set fully before cutting. If needed, chill it in the refrigerator.
Use a sharp knife for cleaner cuts. Wipe the knife between cuts if the mixture sticks.
The Cherries Are Not Evenly Distributed
Fold the cherries into the marshmallow mixture until they are spread throughout. Scrape the bottom and sides as you mix.
Chopping the cherries into smaller pieces can help distribute them more evenly. Halved cherries create bigger fruity bites.
The Squares Taste Too Sweet
Use semi-sweet chocolate chips instead of white chocolate if you prefer less sweetness. This will change the flavor profile.
A sprinkle of sea salt can also balance the sweetness. Use only a small amount.
The Squares Need More Crunch
Add crushed pecans or walnuts. These add texture and nutty flavor.
Use nuts only if safe for everyone eating them. The squares are still chewy and sweet without nuts.
The Squares Need a Dairy-Free Version
Use dairy-free white chocolate and vegan butter. This creates the listed dairy-free option.
The final texture may vary. Choose products that melt smoothly.
The Squares Need Longer Storage
Freeze them for up to 3 months. Store in an airtight container or wrap tightly in plastic wrap.
Thaw in the refrigerator before serving. This helps them soften gradually.
Frequently Asked Questions
Can I freeze Candied Cherry Divinity Squares?
Yes, Candied Cherry Divinity Squares can be frozen. Store them in an airtight container or wrap them tightly in plastic wrap.
They will stay fresh in the freezer for up to 3 months. Thaw them in the refrigerator overnight before enjoying again.
What can I use instead of white chocolate?
Dark chocolate or semi-sweet chocolate chips can be used instead of white chocolate. The flavor profile will change.
Dark chocolate gives a richer flavor, while semi-sweet chocolate makes the squares slightly less sweet. The color will also change.
How long do these squares last?
The squares stay delicious for about 1 week when stored in an airtight container at room temperature. Keep them sealed well.
If you want to extend their life, store them in the refrigerator or freezer. Frozen squares last up to 3 months.
Can I use dried cranberries instead of candied cherries?
Yes, dried cranberries can be used instead of candied cherries. They create a tangy alternative.
The flavor will be different from the candied cherry version. The squares will taste less candy-like and more tart.
Can I add nuts?
Yes, crushed pecans or walnuts can be added for crunch. They make the squares more textured.
Use nuts only when allergies are not a concern. The recipe is still sweet and chewy without them.
Can I add almond extract?
Yes, a splash of almond extract can be added. It gives the squares an extra layer of flavor.
Almond pairs especially well with cherry. It makes the treat taste more aromatic.
Can I make these dairy-free?
Yes, use dairy-free white chocolate and vegan butter. This creates a dairy-free version.
The flavor and texture may change depending on the products used. Use options that melt well.
How should I serve these squares?
Cut the cooled squares into bite-sized pieces for easy sharing. They are great on holiday platters, party trays, or cozy dessert plates.
You can also serve them with vanilla ice cream or chocolate sauce for a fancier touch. They are sweet enough to serve on their own too.
Why This Recipe Works So Well
Candied Cherry Divinity Squares work so well because they turn a few simple ingredients into a festive no-bake candy-style treat. The white chocolate and butter create a rich, creamy coating, while the marshmallows bring chewiness and softness.
The candied cherries add color, sweetness, and little pops of fruit flavor. They make the squares look bright and holiday-ready.
The low-heat melting method keeps the white chocolate smooth. Stirring continuously helps prevent burning and gives the mixture a glossy finish.
The marshmallows are added after the saucepan comes off the heat. This helps them soften and coat without disappearing completely.
The cherries are folded in last so they stay visible and evenly distributed. Using 1.5 to 2 cups lets you control how fruity the squares are.
Cooling is what turns the mixture into sliceable squares. Refrigeration can help speed up the process if needed.
The recipe is also easy to adjust. Dark chocolate, semi-sweet chocolate, sea salt, pecans, walnuts, dried cranberries, almond extract, shredded coconut, dairy-free white chocolate, vegan butter, vanilla ice cream, and chocolate sauce all give you ways to personalize it.
Most of all, these squares work because they feel festive without being difficult. They are chewy, sweet, bright, simple, freezer-friendly, and made for sharing.
Final Thoughts
Candied Cherry Divinity Squares are sweet no-bake treats made with white chocolate chips, mini marshmallows, unsalted butter, and candied cherries. The white chocolate and butter melt together over low heat, the marshmallows and cherries fold in, and the mixture cools into chewy little squares that are easy to slice and share.
Serve them as bite-sized pieces on holiday platters, party trays, or cozy dessert plates, or dress them up with vanilla ice cream or chocolate sauce. With their quick 25-minute prep, bright candied cherry flavor, creamy white chocolate base, freezer-friendly storage, and nostalgic homemade feel, these squares are a cheerful treat for gatherings, holidays, and sweet moments at home.
Candied Cherry Divinity Squares
Sweet, chewy, creamy, and colorful, these Candied Cherry Divinity Squares combine melted white chocolate chips, mini marshmallows, butter, and candied cherries. With a soft candy-like texture and bright cherry pieces throughout, they make an easy American dessert square for holidays, candy trays, or simple sweet treats.
Recipe Details
- Prep Time: 15 minutes
- Cook Time: 10 minutes
- Total Time: 25 minutes
- Course: Dessert
- Cuisine: American
- Servings: 12 squares
Equipment
- Mixing bowl
- Saucepan
Ingredients
Candied Cherries
- 1.5 to 2 cups candied cherries, halved or chopped
For the Divinity
- 24 oz white chocolate chips 2 bags (12 oz each)
- 20 oz mini marshmallows 2 bags (10 oz each)
- 5 tablespoon unsalted butter
Instructions
Step 1: Melt the White Chocolate and Butter
Melt the white chocolate chips and butter in a saucepan over low heat. Stir until the mixture is smooth.
Step 2: Add the Marshmallows and Candied Cherries
Remove from heat and stir in the mini marshmallows and candied cherries until well combined. Mix gently so the cherries and marshmallows are evenly distributed through the white chocolate mixture.
Notes
- Allow the squares to cool completely before cutting into pieces.
Serving Suggestions
Serve these Candied Cherry Divinity Squares after they have cooled completely and been cut into pieces. The white chocolate chips, mini marshmallows, butter, and candied cherries create a sweet, chewy dessert with a festive candy-style look.
These squares work well for holiday dessert trays, candy platters, potlucks, or simple homemade treats. Use candied cherries that are halved or chopped so the cherry pieces spread evenly through each serving.
Storage
How to Store
The recipe does not provide specific storage instructions or storage duration, so no exact storage time is added here.
Cooling Tip
Allow the squares to cool completely before cutting into pieces. This helps them firm up enough to slice more cleanly.
Melting Tip
Melt the white chocolate chips and butter over low heat. Stir until smooth so the base stays creamy before the marshmallows and candied cherries are added.
Mixing Tip
Remove the saucepan from the heat before stirring in the mini marshmallows and candied cherries. This preserves the original method and helps the mixture come together without adding extra cooking steps.
Cherry Tip
Use 1.5 to 2 cups candied cherries, halved or chopped. This keeps the cherry pieces visible and evenly mixed throughout the divinity squares.

Fernando is the creator and writer behind the food blog Eating with your Hands. Living and working in cities like Paris, Barcelona, and Berlin, and being married to a Canadian foodie, has given Fernando a passion and interest in food and inspired him to run EWYH.