
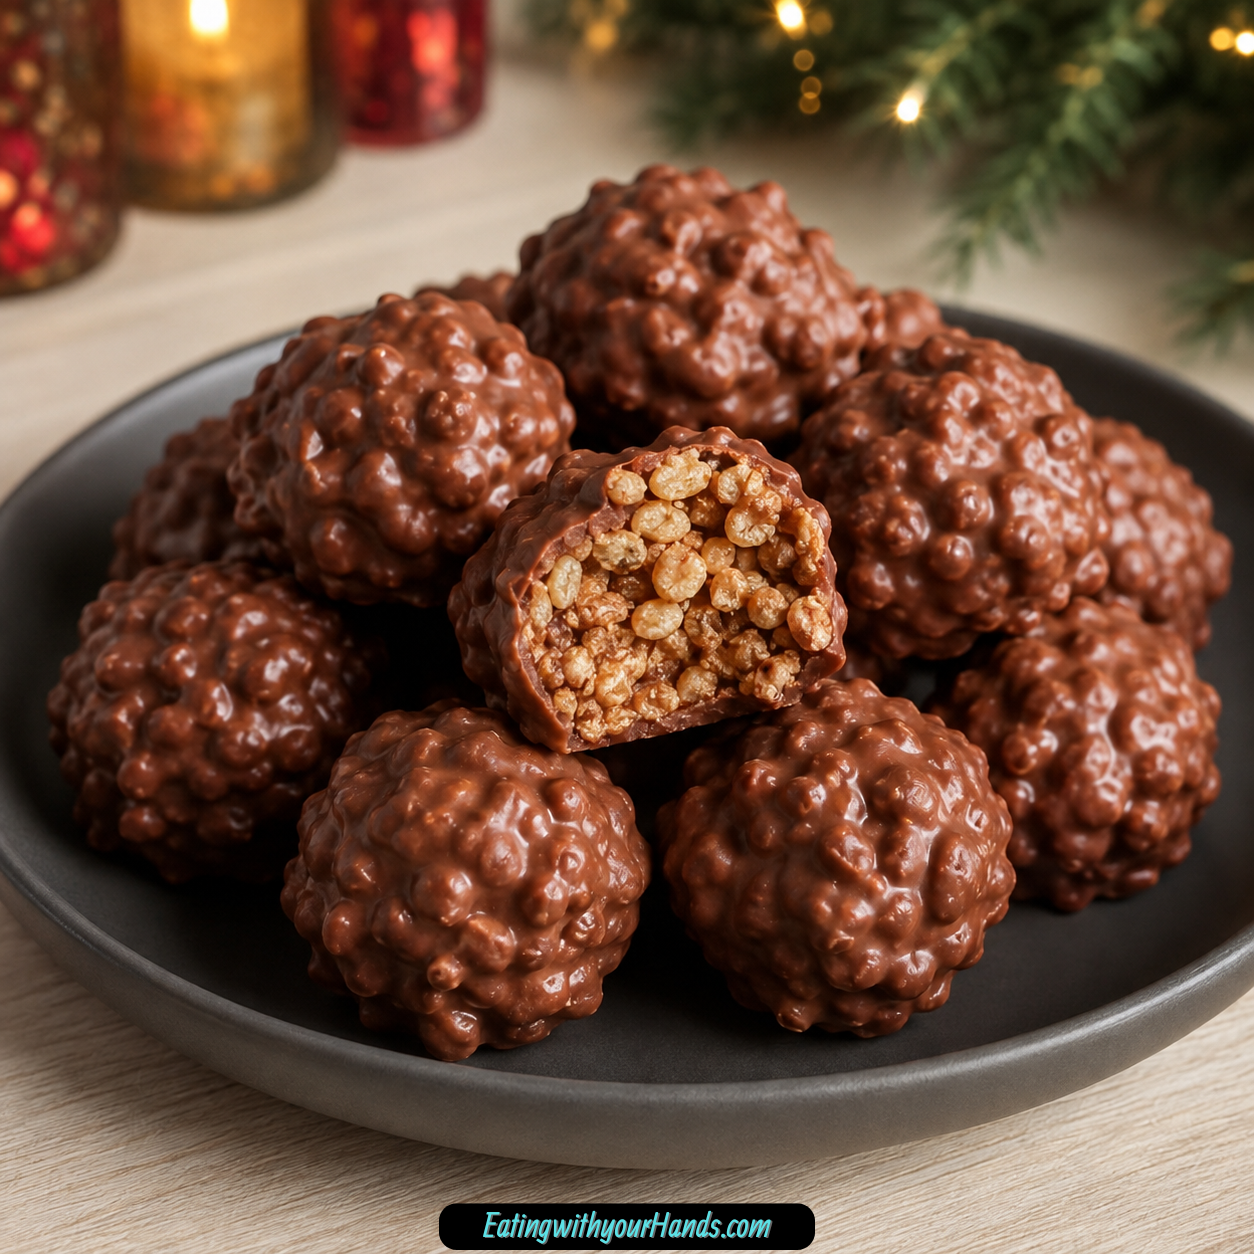
Christmas Chocolate Rice Krispie Balls are the kind of little holiday treat that make a kitchen feel instantly festive. They are sweet, crunchy, creamy, chocolate-covered, and just messy enough to remind you that some of the best holiday memories happen with sticky fingers and melted chocolate on the counter.
I always think of treats like this as the heart of a Christmas dessert tray. They are not complicated or fancy in a stiff way, but they feel special because they are made by hand, rolled one by one, and tucked into that glossy chocolate coating like tiny edible gifts.
These little bites bring together peanut butter, softened butter, vanilla, Rice Krispies cereal, shredded coconut, optional toasted pecans, and a smooth chocolate shell. Every bite has a mix of creamy filling, crispy cereal, chewy coconut, nutty crunch, and rich chocolate.
They are also wonderfully practical for the season. You can make them ahead, chill them, freeze them, decorate them, gift them, or set them beside cookies and candies when the house is full and everyone wants something sweet.
Table of Contents
- Why You’ll Love This Recipe
- Recipe Details
- Ingredients
- Optional Swaps, Variations, Add-Ins, and Serving Ideas
- Why These Christmas Treats Work
- Directions
- Step 1: Prepare a Parchment-Lined Baking Sheet
- Step 2: Combine the Peanut Butter, Butter, and Vanilla
- Step 3: Fold in the Rice Krispies, Coconut, and Pecans
- Step 4: Adjust the Filling Texture if Needed
- Step 5: Scoop Small Portions of Filling
- Step 6: Roll the Filling Into Balls
- Step 7: Freeze the Balls for About 20 Minutes
- Step 8: Combine the Chocolate Chips and Sweet Chocolate
- Step 9: Melt the Chocolate Slowly
- Step 10: Keep the Chocolate Smooth for Dipping
- Step 11: Dip Each Chilled Ball in Chocolate
- Step 12: Tap Off Excess Chocolate
- Step 13: Decorate Before the Chocolate Sets
- Step 14: Refrigerate Until Fully Set
- Step 15: Serve Chilled or at Room Temperature
- Serving Ideas
- Storage
- Reheating
- Freezing
- Make-Ahead
- Helpful Notes for Best Results
- Variations
- Troubleshooting
- Frequently Asked Questions
- Why This Recipe Works So Well
- Final Thoughts
- Christmas Chocolate Rice Krispie Balls
Why You’ll Love This Recipe
Christmas Chocolate Rice Krispie Balls are festive, fun, and easy to share. They look beautiful on a holiday platter and work just as well wrapped individually for homemade gifts.
They are no-bake, which is a gift all by itself during a busy holiday season. Instead of watching the oven, you simply mix the filling, roll the balls, chill them, dip them in chocolate, and let them set.
The texture is what makes them so memorable. The peanut butter mixture is creamy, the Rice Krispies cereal adds light crunch, the coconut gives chewiness, and the chocolate coating finishes everything with a smooth shell.
They are also kid-friendly. Little hands can help roll the filling into balls, sprinkle decorations on top, or proudly arrange them on a tray once the chocolate has set.
This recipe is easy to customize for the holidays. You can add red and green sprinkles, crushed peppermint, crushed candy canes, a pinch of sea salt, or try different chocolate options.
They store beautifully, which makes them perfect for holiday prep. Keep them in the refrigerator for up to 2 weeks or freeze them for up to 3 months.
Recipe Details
Christmas Chocolate Rice Krispie Balls are bite-sized no-bake treats made with a peanut butter cereal filling and a chocolate coating. The filling is rolled into about 1-inch balls before being chilled and dipped.
The filling uses ½ cup peanut butter, 3 tablespoon softened butter, 1 teaspoon vanilla extract, 1 cup Rice Krispies cereal, ½ cup chopped pecans, toasted and optional, and 1 cup shredded coconut. Smooth or crunchy peanut butter works well.
The coating uses 1 package chocolate chips and 1 square sweet chocolate. Milk, semi-sweet, or dark chocolate chips can be used depending on your preference.
The rolled balls chill in the freezer for about 20 minutes before dipping. After coating, they refrigerate for at least 1 hour, or until the chocolate is fully set.
They can be served chilled or at room temperature. For the best flavor and texture, let them sit at room temperature for 5–10 minutes before serving.
Store the finished treats in an airtight container in the refrigerator for up to 2 weeks. For freezing, layer them with wax paper between each layer and freeze for up to 3 months.
Ingredients
Filling
½ cup peanut butter, smooth or crunchy works well
3 tablespoon butter, softened
1 teaspoon vanilla extract
1 cup Rice Krispies cereal
½ cup chopped pecans, toasted (optional)
1 cup shredded coconut
Chocolate Coating
1 package chocolate chips, milk, semi-sweet, or dark, depending on your preference
1 square sweet chocolate
Ingredient Notes
Smooth peanut butter gives the filling a creamy texture. Crunchy peanut butter works too if you want extra little bits of texture throughout the centers.
Softened butter adds richness and helps the mixture hold together. It should be soft enough to blend into the peanut butter without leaving hard pieces.
Vanilla extract deepens the flavor and gives the filling a warmer taste. It is a small amount, but it helps the peanut butter and chocolate feel more rounded.
Rice Krispies cereal gives these holiday balls their light crisp texture. It keeps the filling from feeling too dense and adds that familiar crackly bite.
Toasted chopped pecans are optional, but they add nuttiness and texture. Toasting them gives added depth if you choose to include them.
Shredded coconut can be sweetened or unsweetened. It adds chewiness and flavor to the filling.
Use high-quality chocolate chips for the smoothest melting and best flavor. The sweet chocolate square helps stabilize the coating and adds shine.
Optional Swaps, Variations, Add-Ins, and Serving Ideas
Nut-Free Option
For a nut-free version, omit the pecans. You can also substitute sunflower seeds for crunch.
This keeps the filling textured while removing the pecans. The peanut butter is still part of the recipe unless you are making a separate allergy adjustment not listed here.
Coconut-Free Option
You can skip the coconut if needed. Replace it with more Rice Krispies or finely crushed graham crackers.
This changes the texture from chewy to crispier or more crumbly. It is helpful when coconut is not your favorite or not available.
Chocolate Variety
Try white chocolate, dark chocolate, or peppermint-flavored chips for a seasonal twist. Each option gives the outside coating a slightly different holiday personality.
Milk, semi-sweet, or dark chocolate chips can be used as the main coating depending on your preference. Choose the flavor that best fits your cookie tray.
Festive Decorations
Decorate the tops with red and green sprinkles or crushed peppermint. You can also sprinkle with crushed candy canes, festive sprinkles, or a pinch of sea salt before the chocolate sets.
These toppings make the balls look special with very little extra effort. They are especially pretty for holiday platters and edible gifts.
Size Options
Make mini versions for bite-sized party treats. You can also make larger ones when you want them to feel more like gift-worthy chocolate candies.
The standard size is about 1 inch in diameter. Keeping them close to that size makes them easy to dip, chill, serve, and share.
Why These Christmas Treats Work
Christmas Chocolate Rice Krispie Balls work because each ingredient brings a different kind of texture. The peanut butter and softened butter make the filling creamy, while Rice Krispies cereal keeps it light and crisp.
The coconut adds chewiness, which makes the inside more interesting. Optional toasted pecans bring a deeper nutty crunch that fits beautifully with chocolate and peanut butter.
The filling needs to be sticky but able to hold its shape when pressed together. That balance is what makes the balls easy to roll and sturdy enough to dip after chilling.
The freezer chill is important because it firms the balls before they meet the melted chocolate. A cold, firm center is much easier to coat without falling apart.
The chocolate shell ties everything together. Once it sets in the refrigerator, each piece becomes a little holiday candy with creamy filling inside and smooth chocolate outside.
Directions
Step 1: Prepare a Parchment-Lined Baking Sheet
Line a baking sheet with parchment paper before you start rolling the filling. This gives the Rice Krispie balls a clean place to rest before and after dipping.
A lined baking sheet also makes cleanup easier. The filling can be sticky, and the chocolate coating can drip as the dipped balls set.
Keep the baking sheet close to your mixing area. Once the filling is ready, you can roll the balls and place them directly on the lined surface.
Step 2: Combine the Peanut Butter, Butter, and Vanilla
In a large mixing bowl, combine ½ cup peanut butter, 3 tablespoon softened butter, and 1 teaspoon vanilla extract. Use a rubber spatula or wooden spoon to stir until the mixture is smooth and creamy.
This step creates the base that holds the filling together. The peanut butter brings flavor, the butter adds richness, and the vanilla gives a warm finish.
Take a little time to blend the softened butter fully into the peanut butter. You do not want streaks of butter hiding in the mixture.
Step 3: Fold in the Rice Krispies, Coconut, and Pecans
Gently fold in 1 cup Rice Krispies cereal, 1 cup shredded coconut, and ½ cup chopped toasted pecans if using. Stir until the mixture is fully combined.
Use a gentle hand so the cereal keeps its crisp texture. Hard stirring can crush the Rice Krispies and make the filling heavier.
The finished mixture should be sticky but able to hold its shape when pressed together. If it clings together when you squeeze a small amount, it is ready to roll.
Step 4: Adjust the Filling Texture if Needed
If the mixture feels too dry, add a little more peanut butter. This helps the filling bind together so the balls do not crumble.
If the mixture feels too wet, mix in more cereal or coconut until it is firm enough to roll. The goal is a filling that feels sticky, but not loose.
This small adjustment helps because peanut butter textures can vary. The mixture should be easy to shape into balls without spreading on the baking sheet.
Step 5: Scoop Small Portions of Filling
Scoop out small portions using a cookie scoop or your hands. Aim for balls about 1 inch in diameter.
Keeping the pieces close in size helps them chill evenly and look neat on a platter. It also makes dipping easier because each piece behaves about the same way in the chocolate.
If you want mini versions, scoop smaller portions. If you are making larger gift-style pieces, roll them slightly bigger.
Step 6: Roll the Filling Into Balls
Roll each portion between your hands until it forms a ball. Place each ball on the parchment-lined baking sheet.
If the mixture is too sticky, dampen your hands slightly. This makes rolling easier without changing the recipe.
Do not worry if every ball is not perfectly identical. Handmade holiday treats should look inviting, not machine-made.
Step 7: Freeze the Balls for About 20 Minutes
Place the tray in the freezer for about 20 minutes. This helps the balls firm up before dipping.
The chill time makes a big difference. A firm ball is less likely to fall apart, flatten, or lose crumbs in the melted chocolate.
Do not skip this step if you want a smoother dipping process. The chocolate coating will cling better when the centers are cold and sturdy.
Step 8: Combine the Chocolate Chips and Sweet Chocolate
Add 1 package chocolate chips and 1 square sweet chocolate to a microwave-safe bowl. Use milk, semi-sweet, or dark chocolate chips depending on your preference.
The chocolate chips provide the main coating. The sweet chocolate square helps stabilize the chocolate and adds shine.
Choose a bowl that gives you enough room to stir. Smooth chocolate is easier to work with when it has space to melt evenly.
Step 9: Melt the Chocolate Slowly
Microwave the chocolate in 30-second increments, stirring in between, until completely smooth. Stirring often helps the chocolate melt evenly.
Do not overheat the chocolate. Slow melting keeps the coating smooth and helps prevent scorching.
You can also use a double boiler to gently melt the chocolate. This is a good option when you want extra control over the heat.
Step 10: Keep the Chocolate Smooth for Dipping
If you need help keeping the chocolate fluid, add a teaspoon of coconut oil or shortening. This can make dipping easier.
Stir until the chocolate looks smooth and glossy. The coating should be thin enough to cover the balls evenly but still thick enough to set into a shell.
Work calmly at this stage. Chocolate dipping feels easier when the coating stays smooth and the chilled balls are ready nearby.
Step 11: Dip Each Chilled Ball in Chocolate
Remove the chilled balls from the freezer. Using a fork or dipping tool, lower each ball into the melted chocolate.
Turn the ball gently to coat it evenly. Make sure the chocolate covers the entire surface so the filling is sealed inside.
Lift the coated ball from the chocolate and let the excess drip back into the bowl. This keeps the coating from becoming too thick or pooling heavily on the tray.
Step 12: Tap Off Excess Chocolate
Tap gently to remove excess chocolate before placing each coated ball back on the parchment-lined baking sheet. This helps create a neater finish.
Do not tap too hard. The centers are firm, but you still want to keep the shape round and smooth.
A little chocolate pooling at the bottom is normal. It often creates a pretty homemade candy look once the chocolate sets.
Step 13: Decorate Before the Chocolate Sets
While the chocolate is still soft, add crushed candy canes, festive sprinkles, or a pinch of sea salt if desired. Red and green sprinkles or crushed peppermint also make the tops look festive.
Add decorations right away so they stick to the chocolate. Once the coating firms, toppings will not attach as easily.
This is a fun step for kids to help with. They can sprinkle the tops while you handle the warm melted chocolate.
Step 14: Refrigerate Until Fully Set
Place the coated balls in the refrigerator for at least 1 hour. Chill until the chocolate is fully set.
The refrigeration time gives the coating a firm shell. It also helps the filling stay compact and easy to handle.
Do not rush this step before serving or storing. Fully set chocolate keeps the treats cleaner, prettier, and easier to package.
Step 15: Serve Chilled or at Room Temperature
Serve the Christmas Chocolate Rice Krispie Balls chilled or at room temperature. Both ways are delicious.
For the best flavor and texture, let them sit at room temperature for 5–10 minutes before serving. This softens the filling slightly while keeping the chocolate shell pleasant.
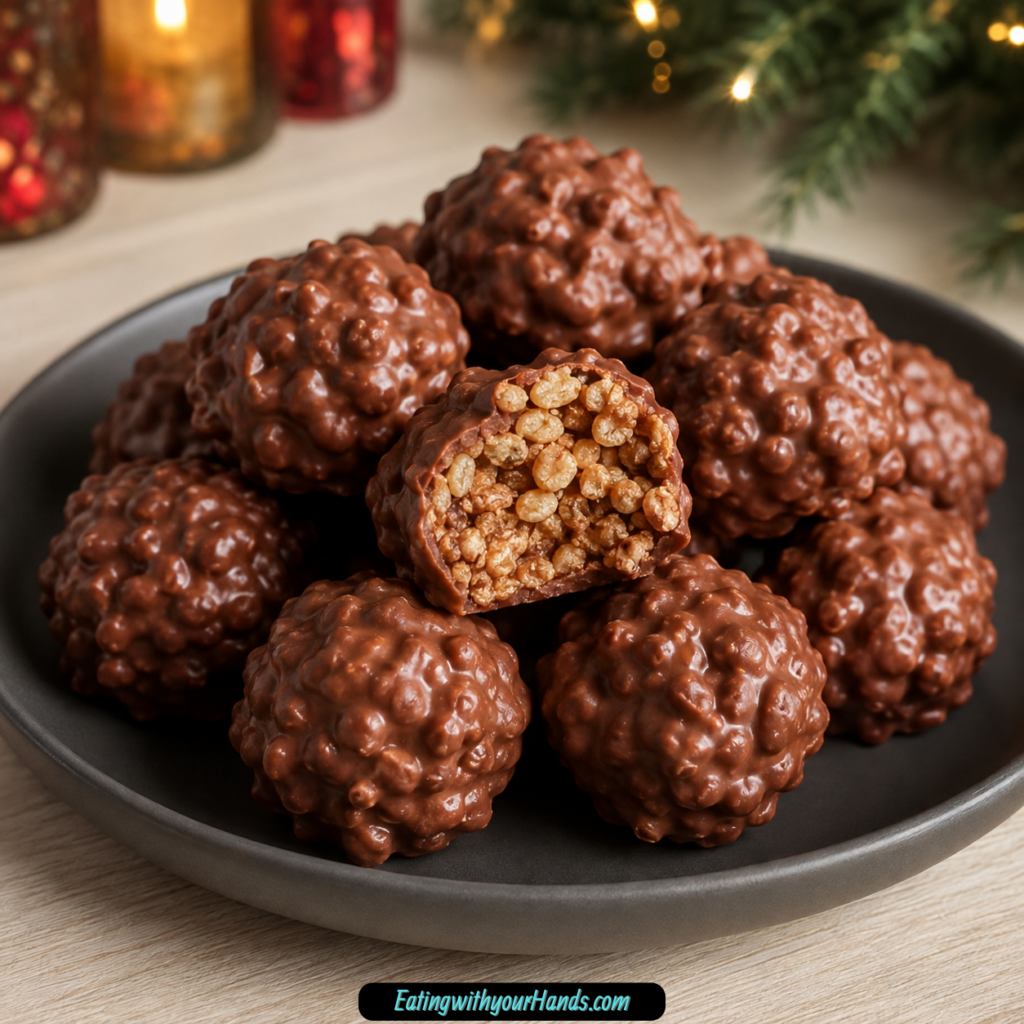
Arrange them on a holiday platter with other cookies and candies. They look festive, taste rich, and always feel like a special little bite.
Serving Ideas
Christmas Chocolate Rice Krispie Balls are perfect for holiday dessert boards. Place them alongside cookies, candies, and other homemade treats for a festive spread.
They also make wonderful edible gifts. Wrap them individually or tuck them into a treat box for family, friends, neighbors, or party hosts.
For serving at home, arrange them on a holiday platter and let them sit out for 5–10 minutes before everyone digs in. That short rest gives the best flavor and texture.
Mini versions are great for parties because people can grab a bite without needing a plate. Larger versions feel more generous when you are packaging them as gifts.
If you decorate them with sprinkles, crushed peppermint, crushed candy canes, or sea salt, group different finishes together on the platter. It makes the tray look cheerful and gives guests a little variety.
Storage
Store Christmas Chocolate Rice Krispie Balls in an airtight container in the refrigerator. They keep well for up to 2 weeks.
Make sure the chocolate is fully set before stacking or covering them. This keeps the coating smooth and prevents the decorations from smearing.
If layering the treats in a container, place wax paper between each layer. This helps keep them from sticking together.
These treats are great for holiday prep because they can be made ahead. A cold container of chocolate-covered bites in the fridge makes dessert trays and last-minute gifting much easier.
Reheating
Christmas Chocolate Rice Krispie Balls do not need reheating. They are no-bake candies meant to be served chilled or at room temperature.
For the best texture, let them sit at room temperature for 5–10 minutes before serving. This keeps the chocolate shell firm but allows the filling to taste creamier.
Avoid warming them because the chocolate coating can soften too much. A brief room-temperature rest is all they need.
Freezing
Freeze Christmas Chocolate Rice Krispie Balls in layers with wax paper between each layer. They keep well for up to 3 months.
Use an airtight freezer-safe container or sealed freezer storage. The wax paper helps protect the chocolate coating and keeps the balls from sticking together.
When ready to serve, move the treats from the freezer and let them thaw. They are a helpful make-ahead dessert for the busiest holiday weeks.
Make-Ahead
Yes, these treats are perfect for making ahead. They store beautifully in the refrigerator or freezer, which makes them ideal for holiday prep.
You can make the whole batch before a party, chill until set, and keep them refrigerated until serving. They are ready whenever you need to build a dessert tray.
For longer planning, freeze them for up to 3 months. This lets you prepare homemade sweets well before the rush of holiday baking and gifting.
Helpful Notes for Best Results
Use high-quality chocolate chips for the smoothest melting and best flavor. Since the coating is a major part of every bite, the chocolate matters.
Toast the pecans for added depth if you are using them. Toasted nuts bring more flavor and make the filling taste richer.
If using natural peanut butter, make sure it is well-stirred and thick in texture. Natural peanut butter can be too runny, which may make the filling harder to roll.
If the mixture is too sticky to handle, dampen your hands slightly while rolling. This helps shape the balls without adding more ingredients.
Freeze the balls for about 20 minutes before dipping. Chilled centers are easier to coat and less likely to fall apart in the chocolate.
Melt chocolate slowly and stir frequently. Smooth chocolate makes dipping easier and gives the finished treats a prettier shell.
Decorate immediately after dipping if you are using sprinkles, peppermint, candy canes, or sea salt. The toppings need soft chocolate to stick.
Variations
Nut-Free Christmas Rice Krispie Balls
Omit the pecans for a nut-free version. You can also use sunflower seeds for crunch.
This keeps the texture interesting while removing the pecans. The filling still has crispness from the Rice Krispies cereal.
Coconut-Free Rice Krispie Balls
Skip the coconut entirely if needed. Replace it with more Rice Krispies or finely crushed graham crackers.
This changes the chewiness of the filling. More cereal makes it crispier, while graham crackers make it a little more crumbly.
White Chocolate Rice Krispie Balls
Try white chocolate as the coating for a sweeter seasonal twist. It gives the balls a lighter holiday look.
Decorate with red and green sprinkles or crushed peppermint while the coating is still soft. The colors look beautiful against white chocolate.
Dark Chocolate Rice Krispie Balls
Use dark chocolate if you prefer a deeper chocolate flavor. It pairs well with the sweet filling and gives the treats a richer finish.
A pinch of sea salt on top is especially nice with dark chocolate. It adds a sweet-salty balance.
Peppermint Chocolate Rice Krispie Balls
Use peppermint-flavored chips for a seasonal twist. You can also decorate the tops with crushed peppermint or crushed candy canes.
This version feels especially festive. It is a great choice for Christmas cookie platters.
Mini Party Treats
Make smaller balls for bite-sized party treats. They are easy to serve and easy for guests to grab.
Mini versions also stretch the batch across a larger dessert spread. They look cute in candy cups or grouped on a platter.
Troubleshooting
Why Is My Filling Too Dry?
If the filling is too dry, add a little more peanut butter. The mixture should be sticky enough to hold together when pressed.
Dry filling can crumble when rolled. Adjust it before shaping the balls so dipping is easier later.
Why Is My Filling Too Wet?
If the filling is too wet, mix in more cereal or coconut until firm enough to roll. The mixture should not spread or collapse on the tray.
A firm filling makes cleaner balls. It also helps them stay intact during the chocolate dip.
Why Are the Balls Falling Apart in the Chocolate?
They may not be cold enough. Freeze the rolled balls for about 20 minutes before dipping.
The filling also needs to hold its shape before chilling. If it is too dry or too wet, adjust it before rolling.
Why Is My Chocolate Thick or Clumpy?
The chocolate may have been overheated. Melt it slowly in 30-second increments and stir frequently.
You can add a teaspoon of coconut oil or shortening to help keep it fluid. This makes coating easier.
Why Are My Toppings Not Sticking?
The chocolate may have set before the toppings were added. Add sprinkles, crushed peppermint, crushed candy canes, or sea salt while the coating is still soft.
Decorate each ball soon after dipping. This gives the toppings something to cling to.
Can I Fix Uneven Chocolate Coating?
Yes, uneven coating usually just needs a little patience. Dip the ball, turn it gently, then tap off the excess chocolate.
Using a fork or dipping tool helps control the coating. The finish does not need to be perfect to taste wonderful.
Frequently Asked Questions
Can I Make These Ahead of Time?
Yes, Christmas Chocolate Rice Krispie Balls store beautifully in the fridge or freezer. They are ideal for holiday prep.
Keep them in an airtight container in the refrigerator for up to 2 weeks. Freeze them for up to 3 months if you need longer storage.
Can I Use Natural Peanut Butter?
You can use natural peanut butter, but it may be too runny. If using it, make sure it is well-stirred and thick in texture.
The filling needs to hold its shape when pressed together. If the peanut butter is too loose, the balls may be harder to roll.
How Do I Keep the Chocolate Smooth When Dipping?
Melt chocolate slowly and stir frequently. Use 30-second microwave increments or a double boiler.
You can add a teaspoon of coconut oil or shortening to keep the chocolate fluid. This helps create a smoother coating.
What If My Mixture Is Too Dry or Too Wet?
If it is too dry, add a little more peanut butter. If it is too wet, mix in more cereal or coconut until firm enough to roll.
The mixture should be sticky but able to hold its shape. Adjust before rolling for the best result.
Can I Skip the Coconut?
Yes, you can omit the coconut entirely. Replace it with more Rice Krispies or finely crushed graham crackers.
Skipping coconut changes the texture. The treats will still be delicious and easy to roll when the filling is balanced.
What Chocolate Should I Use?
Use milk, semi-sweet, or dark chocolate chips depending on your preference. White chocolate, dark chocolate, or peppermint-flavored chips can also be used for variations.
High-quality chocolate chips melt more smoothly and taste better. The sweet chocolate square helps stabilize the coating and adds shine.
How Should I Serve Them?
Serve them chilled or at room temperature. Let them sit at room temperature for 5–10 minutes before serving for the best flavor and texture.
They are lovely on holiday platters. They also work beautifully as individually wrapped gifts.
Why This Recipe Works So Well
Christmas Chocolate Rice Krispie Balls work so well because they bring together the best parts of a holiday candy without needing to bake. The filling is creamy, crunchy, chewy, and nutty, while the chocolate coating makes every bite feel finished.
The peanut butter and softened butter create a rich base that binds everything together. Vanilla adds flavor depth, so the filling tastes warm and complete.
Rice Krispies cereal keeps the center light and crisp. Shredded coconut adds chewiness, and optional toasted pecans bring a deeper crunch.
The chocolate coating turns the filling into something gift-worthy. Once chilled until set, the balls become neat little treats that fit perfectly on a cookie platter.
This recipe also works because it can be made ahead. During the holidays, anything that can sit happily in the fridge or freezer feels like a small victory.
Most of all, these treats carry that homemade Christmas feeling. They are simple, sweet, a little messy to make, and full of the kind of joy people remember.
Final Thoughts
Christmas Chocolate Rice Krispie Balls are the kind of holiday recipe that earns a permanent place in the season. They are easy enough for kids to help with, pretty enough for a dessert tray, and rich enough to feel like a true Christmas treat.
I love how they bring together peanut butter, cereal, coconut, optional toasted pecans, and smooth chocolate in one bite-sized piece. They taste nostalgic and festive without asking for complicated baking.
Make them for family, wrap them for gifts, or keep a chilled container ready for the nights when the tree is glowing and everyone wants something sweet. These little chocolate-covered bites are simple, joyful, and exactly the kind of treat worth making year after year.
Christmas Chocolate Rice Krispie Balls

These Christmas Chocolate Rice Krispie Balls are sweet, crunchy, creamy, and perfect for holiday treat trays. The peanut butter filling is mixed with Rice Krispies cereal, shredded coconut, and optional toasted pecans, then dipped in smooth melted chocolate for an easy no-bake dessert that works beautifully for gifting, parties, or Christmas cookie boxes.
Recipe Details
- Prep Time: 15 minutes
- Cook Time: 10 minutes
- Total Time: 25 minutes
- Servings: 20 balls
- Calories: 180 kcal
Ingredients
Filling
- 3 tablespoon butter softened
- ½ cup peanut butter smooth or crunchy
- 1 teaspoon vanilla extract
- 1 cup shredded coconut
- ½ cup chopped pecans toasted (optional)
- 1 cup Rice Krispies cereal
Coating
- 1 square sweet chocolate
- 1 package about 12 oz chocolate chips (milk, semi-sweet, or dark)
Instructions
Step 1: Make the Peanut Butter Base
In a large bowl, mix the peanut butter, softened butter, and vanilla until creamy.
Step 2: Add the Crunchy Filling Ingredients
Stir in the Rice Krispies cereal, chopped pecans, and shredded coconut until everything is well combined.
Step 3: Shape the Balls
Roll the mixture into 1-inch balls and place them on a parchment-lined baking sheet.
Step 4: Freeze Until Firm
Freeze the balls for 20 minutes to help them firm up before dipping.
Step 5: Melt the Chocolate
Melt the chocolate chips and sweet chocolate in the microwave in 30-second intervals, stirring between each interval, or melt them using a double boiler.
Step 6: Dip the Rice Krispie Balls
Dip each ball into the melted chocolate, coating it evenly. Let the excess chocolate drip off before placing it back on the baking sheet.
Step 7: Chill Until Set
Place the dipped balls back on the baking sheet and chill for 1 hour, or until the chocolate is set.
Step 8: Serve
Serve chilled or at room temperature.
Notes
Use room temperature chocolate and stir in a teaspoon of coconut oil for a smoother dip.
Add sprinkles, crushed peppermint, or sea salt on top before the chocolate sets for extra flair.
Store in an airtight container in the fridge for up to 2 weeks, or freeze for up to 3 months.
Serving Suggestions
- Add them to Christmas cookie trays with fudge, sugar cookies, and holiday bars.
- Package them in small treat boxes or cellophane bags for edible gifts.
- Serve chilled for a firmer bite or at room temperature for a softer texture.
- Place them on a dessert board with other bite-sized holiday sweets.
- Pair with hot cocoa, coffee, or milk for a cozy Christmas treat.
Storage
How to Refrigerate
Store the chocolate Rice Krispie balls in an airtight container in the fridge for up to 2 weeks.
How to Freeze
Freeze the balls in an airtight container for up to 3 months.
How to Serve After Storing
Serve them chilled straight from the fridge, or let them sit briefly at room temperature if you prefer a softer bite.
Best Texture Tip
Make sure the balls are frozen for 20 minutes before dipping so they hold their shape better in the melted chocolate.

Fernando is the creator and writer behind the food blog Eating with your Hands. Living and working in cities like Paris, Barcelona, and Berlin, and being married to a Canadian foodie, has given Fernando a passion and interest in food and inspired him to run EWYH.