
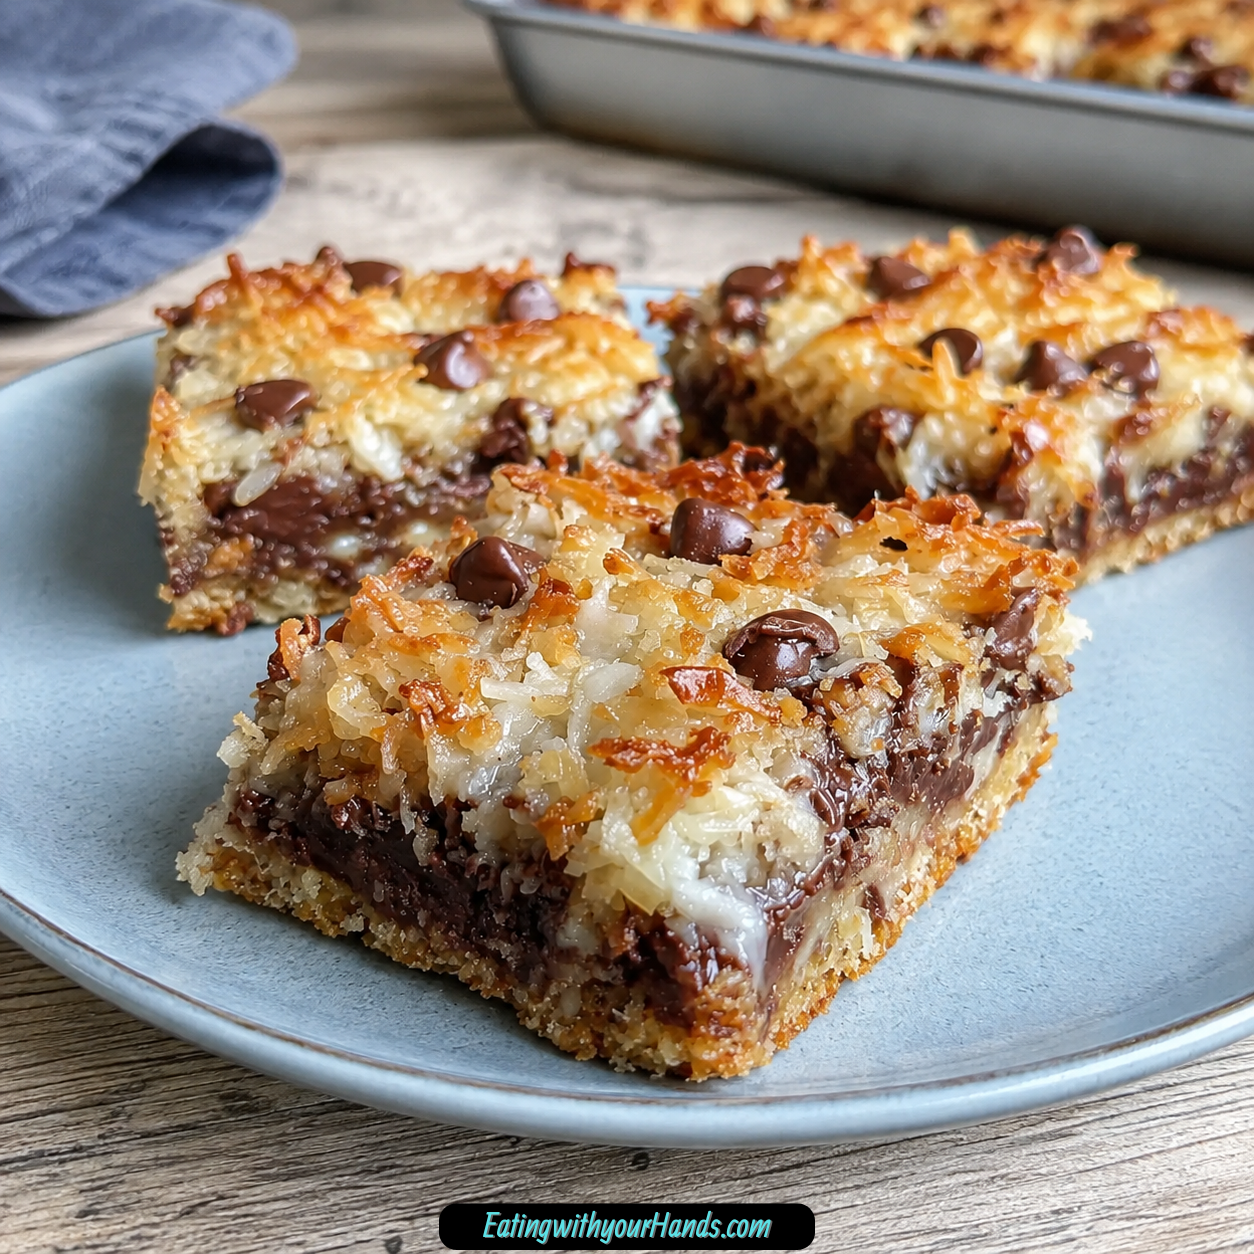
Millionaire Magic Bars are the kind of dessert that instantly takes me back to bake sale tables, paper napkins, and the impossible decision of choosing only one treat. There is something so comforting about a buttery graham cracker crust stacked with chocolate, coconut, nuts, and sweetened condensed milk until everything bakes into one gooey, golden pan.
These bars feel old-fashioned in the best way. They are rich, chewy, a little crisp around the edges, and packed with that layered sweetness that makes one small square feel like a full dessert.
I love recipes that look generous without making the day harder, and Millionaire Magic Bars do exactly that. You build the layers in one pan, let the oven turn everything golden and bubbly, then slice them once they have cooled completely.
They are perfect for potlucks, holiday cookie trays, bake sales, family get-togethers, or those days when you want something sweet enough to feel special but simple enough to make without pulling out a mixer. Every layer has its own little job, and together they make the kind of bar people reach for twice.
Table of Contents
- Why You’ll Love This Recipe
- Recipe Details
- Ingredients
- Optional Swaps, Variations, Add-Ins, and Serving Ideas
- Why These Millionaire Magic Bars Work
- Directions
- Step 1: Preheat the Oven to 350°F (175°C)
- Step 2: Prepare the 8×8-Inch Baking Pan
- Step 3: Mix the Graham Cracker Crumbs and Melted Butter
- Step 4: Press the Crust Into the Pan
- Step 5: Pre-Bake the Crust for 8–10 Minutes
- Step 6: Add the Sweetened Shredded Coconut
- Step 7: Add the Semi-Sweet Chocolate Chips
- Step 8: Add the Chopped Nuts
- Step 9: Pour the Sweetened Condensed Milk Over the Layers
- Step 10: Bake for 25–30 Minutes
- Step 11: Cool Completely on a Wire Rack
- Step 12: Lift Out and Slice Into Squares
- Serving Ideas
- Storage
- Reheating
- Freezing
- Make-Ahead
- Helpful Notes for Best Results
- Variations
- Troubleshooting
- Frequently Asked Questions
- Why This Recipe Works So Well
- Final Thoughts
- Millionaire Magic Bars
Why You’ll Love This Recipe
Millionaire Magic Bars taste like a candy bar tucked into cookie form. They have a buttery crumb crust, gooey chocolate, chewy coconut, crunchy nuts, and a sweet condensed milk layer that ties everything together.
They are wonderfully easy to make because the recipe uses simple ingredients and no mixer. Once the crust is pressed into the pan, the rest is mostly sprinkling, pouring, baking, and waiting.
These bars are made in one dish, which keeps cleanup manageable. A parchment-lined 8×8-inch baking pan also makes lifting and slicing much easier once the bars cool.
They are ideal for sharing because they are rich enough to cut into small squares. A little goes a long way, which makes them perfect for parties, gifts, and dessert platters.
The recipe is freezer-friendly, so you can make the bars ahead and save them for later. They keep at room temperature, in the refrigerator, or in the freezer depending on when you want to serve them.
They are also easy to customize. You can switch the chips, change the nuts, add a caramel drizzle, omit coconut, or try different crust options if you want a fresh version.
Recipe Details
Millionaire Magic Bars bake at 350°F (175°C). The recipe uses an 8×8-inch baking pan lined with parchment paper, with some overhang left for easy lifting later.
The crust is made with 1½ cups graham cracker crumbs and ½ cup melted butter. It is pressed firmly into the bottom of the prepared pan and pre-baked for 8–10 minutes, just until lightly golden and set.
After the crust is pre-baked, the layers are added. Sweetened shredded coconut goes over the warm crust, followed by semi-sweet chocolate chips and chopped nuts.
One can of sweetened condensed milk is poured slowly and evenly over the top. A spatula can be used gently if needed to help cover the layers evenly.
The bars bake again for 25–30 minutes. They are ready when the top is golden brown and bubbly.
The bars must cool completely in the pan on a wire rack before slicing. Once fully cooled, the parchment overhang makes it easy to lift them out and cut them into squares.
Ingredients
Graham Cracker Crust
1½ cups graham cracker crumbs
½ cup melted butter
Layers
1 cup sweetened shredded coconut
1 cup semi-sweet chocolate chips
1 cup chopped nuts, walnuts or pecans
1 can (14 oz) sweetened condensed milk
Ingredient Notes
Graham cracker crumbs create the buttery base of these bars. Once mixed with melted butter and pressed into the pan, they bake into a firm crust that holds all the rich layers.
Sweetened shredded coconut adds chewiness and toasty flavor. Toasted coconut can be used for extra depth of flavor and crunch.
Semi-sweet chocolate chips bring that classic gooey chocolate layer. High-quality chocolate chips give the bars the best flavor and melt.
Walnuts or pecans both work for the chopped nuts. They add crunch and help balance the sweetness of the chocolate, coconut, and condensed milk.
Sweetened condensed milk is what turns the layers into magic bars. It bakes down into a sticky, sweet layer that holds the bars together.
Using room temperature sweetened condensed milk makes pouring easier. It spreads more smoothly over the layers and helps cover the pan more evenly.
Optional Swaps, Variations, Add-Ins, and Serving Ideas
Chocolate Chip Swaps
You can switch up the chocolate chips depending on the flavor you want. White chocolate chips and butterscotch chips are both suggested options.
Crushed toffee bits can also be added for a sweeter crunch. This gives the bars more candy-like texture.
Nut-Free Version
For a nut-free version, omit the nuts. You can also substitute seeds like sunflower seeds or pumpkin seeds for a similar crunch.
This keeps the bars textured while removing walnuts or pecans. The crust, coconut, chocolate, and condensed milk still make the bars rich and satisfying.
Coconut Adjustment
If you do not like coconut, you can reduce it or omit it. Add more chocolate chips or crushed cookies instead.
This keeps the bars full and layered without relying on coconut. The texture will change, but the dessert will still be indulgent.
Crust Options
Graham crackers are classic, but other bases can work. Crushed digestive biscuits, shortbread cookies, or Oreos are all suggested options.
Each crust gives the bars a different personality. Shortbread leans buttery, Oreos make them more chocolatey, and digestive biscuits keep the base simple and crumbly.
Double Batch
For a larger batch, make the bars in a 9×13-inch pan and adjust the baking time slightly. This is helpful when baking for a crowd.
The same layered idea works beautifully in a bigger pan. Keep an eye on the top so it becomes golden brown and bubbly without overbaking.
Caramel Drizzle
A caramel drizzle can be added if you want to make the bars even more indulgent. It fits naturally with the chocolate, coconut, nuts, and buttery crust.
The bars are already rich, so a little extra sweetness goes a long way. This is a nice option for gifts or holiday trays.
Why These Millionaire Magic Bars Work
Millionaire Magic Bars work because the layers are simple, but each one brings a different texture. The graham cracker crust is buttery and firm, while the coconut is chewy, the chocolate is gooey, and the nuts are crunchy.
The pre-baked crust gives the bars a strong base. Baking it for 8–10 minutes before adding the toppings helps it set so it can hold the heavier layers.
The warm crust also gives the first layer a cozy start. When coconut, chocolate, nuts, and condensed milk go over it, the whole pan begins to feel like a true layered dessert.
Sweetened condensed milk is the ingredient that brings everything together. As it bakes, it becomes golden and bubbly, helping the toppings settle into one rich, sliceable bar.
Cooling is just as important as baking. These bars need to cool completely so the layers can firm up before cutting.
Directions
Step 1: Preheat the Oven to 350°F (175°C)
Set your oven to 350°F (175°C). This temperature is used for both the crust pre-bake and the final bake.
Let the oven fully preheat before putting the pan inside. A steady temperature helps the graham cracker crust set properly and later helps the topping become golden and bubbly.
This is also a good moment to clear your counter and gather the ingredients. Since the layers go into the pan quickly, having everything ready makes the process feel easy.
Step 2: Prepare the 8×8-Inch Baking Pan
Line an 8×8-inch baking pan with parchment paper. Leave some overhang on the sides so you can lift the cooled bars out later.
The parchment overhang is especially helpful because Millionaire Magic Bars are sticky once baked. Lifting the whole slab out makes cleaner cutting much easier.
Press the parchment into the corners of the pan as neatly as possible. A smooth lining helps the crust spread evenly across the bottom.
Step 3: Mix the Graham Cracker Crumbs and Melted Butter
In a medium bowl, combine 1½ cups graham cracker crumbs with ½ cup melted butter. Mix until the crumbs are well combined and evenly moistened.
The mixture should look crumbly but buttery. Every crumb should have some moisture so the crust presses together instead of falling apart.
Do not leave dry pockets in the bowl. Dry crumbs can make the crust weak and uneven once baked.
Step 4: Press the Crust Into the Pan
Transfer the graham cracker mixture into the parchment-lined 8×8-inch pan. Press it evenly into the bottom to form a firm crust.
Use your fingers, a spatula, or the bottom of a measuring cup to compact the crumbs. A firm press helps the crust hold the layers without crumbling.
Pay attention to the corners and edges. If the crust is thinner there, those pieces may break more easily when sliced.
Step 5: Pre-Bake the Crust for 8–10 Minutes
Bake the crust for 8–10 minutes. It should be lightly golden and set.
This short bake gives the crust structure before the rich toppings are added. It helps keep the bottom from turning too soft under the condensed milk.
Remove the pan from the oven when the crust is ready, but leave the oven on. The bars will return to the oven after the layers are added.
Step 6: Add the Sweetened Shredded Coconut
Sprinkle 1 cup sweetened shredded coconut evenly over the warm crust. Try to cover the whole surface rather than leaving bare patches.
The coconut adds chewiness and toasty flavor as the bars bake. If using toasted coconut for extra flavor and crunch, spread it the same way.
An even coconut layer helps each square taste balanced. Every bite should have some buttery crust, coconut, chocolate, and nuts.
Step 7: Add the Semi-Sweet Chocolate Chips
Sprinkle 1 cup semi-sweet chocolate chips over the coconut layer. Spread them evenly from edge to edge.
The chocolate chips melt as the bars bake, creating that gooey chocolate layer people love in magic bars. Semi-sweet chocolate also helps balance the sweetness of the condensed milk.
Try not to pile the chips in the center. Even coverage makes the finished bars easier to cut and more satisfying to eat.
Step 8: Add the Chopped Nuts
Sprinkle 1 cup chopped nuts over the chocolate chip layer. Use walnuts or pecans.
The nuts bring crunch and a toasted, earthy flavor. They help keep the bars from tasting only sweet.
Scatter them gently and evenly. This gives every square a little texture and makes the top look full before the condensed milk is added.
Step 9: Pour the Sweetened Condensed Milk Over the Layers
Slowly and evenly pour 1 can (14 oz) sweetened condensed milk over the top of the layers. Move across the pan as you pour so it reaches as much of the surface as possible.
Room temperature condensed milk pours more easily. If it is too cold, it may be thicker and harder to distribute.
Use a spatula gently if needed to help cover the layers evenly. Try not to disturb the coconut, chocolate, and nuts too much as you spread.
Step 10: Bake for 25–30 Minutes
Return the pan to the 350°F (175°C) oven. Bake for 25–30 minutes.
The bars are done when the top is golden brown and bubbly. The condensed milk should look set into the layers rather than pale and loose.
Watch the pan near the end of baking. You want rich golden color, but you do not want the edges to go too far before the center is ready.
Step 11: Cool Completely on a Wire Rack
Remove the pan from the oven and place it on a wire rack. Let the bars cool completely in the pan.
This step is essential because the bars are too soft and gooey to slice cleanly while warm. As they cool, the condensed milk layer firms and the chocolate settles.
Do not rush this part, even though the bars will smell wonderful. Clean squares depend on complete cooling.
Step 12: Lift Out and Slice Into Squares
Once fully cooled, use the parchment overhang to lift the bars out of the pan. Place them on a cutting board.
Use a sharp knife to slice into squares. Wipe the knife between cuts for cleaner edges.
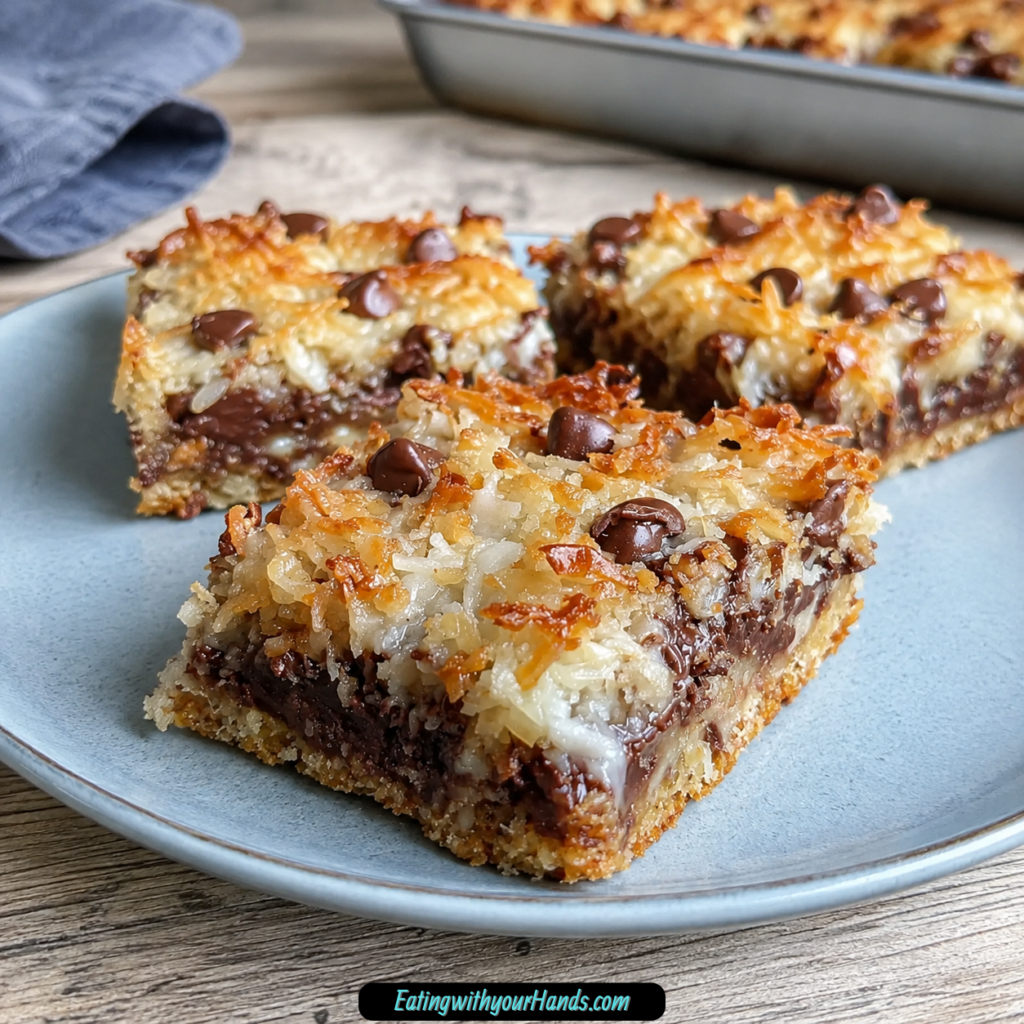
Cut small squares because these bars are rich. A little goes a long way, especially on dessert trays or at parties.
Serving Ideas
Serve Millionaire Magic Bars at room temperature or slightly chilled. Both textures work well, depending on whether you want a softer bite or a firmer bar.
They are perfect for potlucks, bake sales, family get-togethers, gifts, and holiday cookie trays. They look beautiful once sliced and stacked with other treats.
Because they are so rich, small squares are the best serving size. Guests can always come back for another piece if they want more.
For a pretty dessert tray, arrange them beside cookies and candies. Their layered look makes them feel like something special without extra decorating.
These bars also make a thoughtful homemade gift. Pack them in a container with parchment between layers so they stay neat.
Storage
Store Millionaire Magic Bars in an airtight container at room temperature for up to 5 days. Keep them covered so the crust and toppings stay fresh.
You can also refrigerate them for up to a week. Refrigeration makes the bars firmer and extends their shelf life.
If stacking the bars, place parchment between layers. This helps keep the tops from sticking to the bottoms of other pieces.
They taste even better the next day, which makes them useful for planning ahead. The layers settle, and the flavor becomes rich and cohesive.
Reheating
Millionaire Magic Bars do not need reheating. They are meant to be served at room temperature or slightly chilled.
If they have been refrigerated, you can let them sit briefly before serving if you prefer a softer texture. Chilled bars will be firmer and easier to handle.
Avoid warming them too much because the chocolate and condensed milk layer can soften. Their best texture comes after cooling completely.
Freezing
Freeze the bars in a single layer or with parchment between layers. They keep well for up to 2 months.
Use an airtight freezer-safe container so the bars stay protected. Parchment between layers helps prevent sticking.
Thaw at room temperature before serving. This brings back the best texture without needing to heat them.
Freezing makes these bars a strong make-ahead dessert. You can bake once and save some for future gatherings or sudden sweet cravings.
Make-Ahead
Millionaire Magic Bars are excellent for making ahead. They keep well and even taste better the next day.
Bake them, cool them completely, and store them in an airtight container. You can keep them at room temperature, refrigerate them, or freeze them depending on when you plan to serve.
For parties or bake sales, make them the day before and slice after they are fully cooled. This gives you cleaner squares and a calmer schedule.
Helpful Notes for Best Results
Use room temperature sweetened condensed milk for easier pouring. It spreads more smoothly and helps cover the layers evenly.
Toast the coconut beforehand if you want extra flavor and crunch. Toasted coconut gives the bars more depth.
Use high-quality chocolate chips when possible. The chocolate layer is a major flavor in every bite, so better chocolate makes the bars taste richer.
Let the bars cool completely before cutting. This is the most important tip for clean slices.
Use a sharp knife and wipe it between cuts. This keeps the edges neat and prevents the sticky filling from dragging.
Do not skip the parchment overhang. It makes lifting the bars out of the pan much easier.
If doubling the batch, make it in a 9×13-inch pan and adjust the baking time slightly. Watch for the same golden brown and bubbly top.
Variations
White Chocolate Magic Bars
Try white chocolate chips instead of semi-sweet chocolate chips. This makes the bars sweeter and gives them a creamier flavor.
White chocolate works nicely when you want a softer flavor profile. The coconut and crust still bring texture.
Butterscotch Magic Bars
Use butterscotch chips for a deeper, caramel-like sweetness. This variation fits beautifully with the buttery graham cracker crust.
The bars will taste richer and more candy-like. They are especially nice for fall or holiday trays.
Toffee Magic Bars
Add crushed toffee bits for extra crunch. This makes the bars even more indulgent.
The toffee adds a sweet, crisp bite. It works well with chocolate, coconut, and chopped nuts.
Nut-Free Magic Bars
Omit the nuts or substitute seeds like sunflower seeds or pumpkin seeds. This keeps some crunch without walnuts or pecans.
The bars will still be rich and layered. Coconut, chocolate, and condensed milk carry plenty of flavor.
Coconut-Free Magic Bars
Reduce or omit the coconut if you do not like it. Add more chocolate chips or crushed cookies instead.
This variation changes the chewiness but keeps the dessert full and sweet. Crushed cookies make the layers feel more bakery-style.
Different Crust Magic Bars
Use crushed digestive biscuits, shortbread cookies, or Oreos instead of graham crackers. Each base changes the flavor.
Digestive biscuits keep the crust simple, shortbread cookies make it more buttery, and Oreos add a chocolate base. Choose the one that fits the flavor you want.
Troubleshooting
Why Are My Bars Too Gooey to Cut?
They may not have cooled completely. Let the bars cool fully in the pan on a wire rack before slicing.
The condensed milk layer needs time to firm up. Cutting too soon can make the bars fall apart.
Why Is My Crust Crumbling?
The graham cracker crumbs may not have been mixed evenly with the melted butter. Make sure the crumbs are fully moistened before pressing them into the pan.
The crust also needs to be pressed firmly. A loose crust will not hold the toppings as well.
Why Did My Bars Stick to the Pan?
The pan may not have been lined with parchment paper. Use parchment with overhang for easy lifting.
These bars are sticky because of the condensed milk and melted chocolate. Parchment makes a big difference.
Why Are the Edges Too Dark?
The bars may have baked too long. Bake for 25–30 minutes, until the top is golden brown and bubbly.
Watch near the end of the baking time. The edges can darken before the center if the pan stays in too long.
Why Did the Layers Slide Around?
The condensed milk may have been spread too aggressively, or the bars may have been cut before cooling. Pour slowly and spread gently only if needed.
Cooling completely helps the layers settle. Once firm, the bars slice much more neatly.
Frequently Asked Questions
Can I Make These Ahead of Time?
Yes, Millionaire Magic Bars keep well and even taste better the next day. They are a great make-ahead dessert.
Store them in an airtight container after cooling completely. Keep them at room temperature, refrigerated, or frozen depending on when you need them.
What If I Do Not Like Coconut?
You can reduce or omit the coconut. Add more chocolate chips or crushed cookies instead.
This changes the texture but keeps the bars rich and layered. The recipe remains flexible.
Can I Use a Different Base Instead of Graham Crackers?
Yes, crushed digestive biscuits, shortbread cookies, or Oreos work great. Each one gives the crust a different flavor.
Use the same idea of combining crumbs with melted butter. The crust should still be pressed firmly into the pan.
Do I Need to Refrigerate Them?
Refrigeration is not necessary. The bars can be stored at room temperature for up to 5 days.
Refrigeration extends shelf life and makes them firmer. They can be refrigerated for up to a week.
How Do I Cut Them Cleanly?
Let the bars cool completely before cutting. Use a sharp knife and wipe between cuts.
The parchment overhang also helps because you can lift the bars from the pan before slicing. This gives you more control and cleaner squares.
Can I Freeze Millionaire Magic Bars?
Yes, freeze them in a single layer or with parchment between layers for up to 2 months. Thaw at room temperature before serving.
Freezing is helpful when making them ahead. It also lets you save extra bars for later.
Can I Double the Recipe?
Yes, make a double batch in a 9×13-inch pan and adjust the baking time slightly. Use the same visual cue: the top should be golden brown and bubbly.
This is a great option for parties, bake sales, or large family gatherings. The bars are rich, so a larger batch goes a long way.
Why This Recipe Works So Well
Millionaire Magic Bars work because they deliver big dessert flavor with very little effort. The recipe layers simple ingredients in one pan and lets the oven turn them into something rich, chewy, gooey, and crisp.
The graham cracker crust gives the bars a buttery foundation. Pre-baking it helps the base stay firm enough to hold the toppings.
The coconut adds chewiness, while the chocolate chips melt into soft pockets. Chopped walnuts or pecans bring the crunch that keeps the bars from feeling too heavy.
Sweetened condensed milk is the magic ingredient that binds the layers. It turns golden and bubbly in the oven, creating the sticky, candy-like texture these bars are known for.
The cooling time finishes the recipe. Once completely cool, the bars lift cleanly, slice neatly, and hold together beautifully.
They also work because they fit so many occasions. A pan of Millionaire Magic Bars can go to a potluck, a bake sale, a holiday tray, or a quiet kitchen counter when someone needs a sweet square after dinner.
Final Thoughts
Millionaire Magic Bars are the kind of dessert that feels like more than the sum of its layers. A simple graham cracker crust, chocolate chips, coconut, nuts, and sweetened condensed milk come together into something rich, nostalgic, and hard to resist.
I love that they are easy enough for a casual baking day but special enough to share. They look generous, taste indulgent, and always seem to disappear faster than expected.
Make them for a crowd, freeze a few for later, or cut small squares for a holiday tray. However you serve them, these bars bring the sweet comfort of an old favorite with the ease of a one-pan recipe.
Millionaire Magic Bars
Millionaire Magic Bars are rich, chewy, buttery dessert bars layered with graham cracker crust, sweet coconut, chocolate chips, chopped nuts, and creamy sweetened condensed milk. They are easy to make, wonderfully decadent, and perfect for holidays, bake sales, dessert trays, or anytime you want a low-effort treat that tastes extra special.
Recipe Details
- Prep Time: 10 minutes
- Cook Time: 35 minutes
- Servings: 16
- Calories: 350 kcal
Ingredients
- 1 can 14 oz sweetened condensed milk
- 1 cup semi-sweet chocolate chips
- 1 cup chopped nuts walnuts or pecans
- 1 cup sweetened shredded coconut
- ½ cup melted butter
- 1½ cups graham cracker crumbs
Instructions
Step 1: Prepare the Pan
Preheat oven to 350°F (175°C). Line an 8×8-inch baking pan with parchment paper, leaving overhang so the bars can be lifted out easily after cooling.
Step 2: Make the Graham Cracker Crust
Mix the graham cracker crumbs and melted butter until evenly combined. Press the mixture firmly into the prepared pan to create an even crust.
Step 3: Bake the Crust
Bake the crust for 8-10 minutes, until lightly golden.
Step 4: Add the Coconut Layer
Sprinkle the sweetened shredded coconut evenly over the warm crust.
Step 5: Layer the Chocolate and Nuts
Add the semi-sweet chocolate chips and chopped nuts over the coconut layer, spreading them evenly across the pan.
Step 6: Pour on the Condensed Milk
Pour the sweetened condensed milk evenly over the entire surface, making sure it covers the layered ingredients as much as possible.
Step 7: Bake Until Golden
Bake for 25-30 minutes, until the top is golden and bubbly.
Step 8: Cool and Slice
Cool the bars completely in the pan on a wire rack. Once fully cooled, lift them out using the parchment overhang and cut into squares.
Notes
Use room temperature condensed milk for easier pouring.
Toast the coconut before layering if you want extra flavor.
Swap the chocolate chips for white or butterscotch chips.
For a nut-free version, omit the nuts or use pumpkin or sunflower seeds.
These bars can be frozen for up to 2 months; thaw before serving.
Serving Suggestions
- Serve on holiday dessert trays with cookies, fudge, and brownies.
- Pack into treat boxes for bake sales or edible gifts.
- Pair with coffee, milk, or hot cocoa for a rich dessert break.
- Cut into small squares for parties since the bars are sweet and decadent.
- Serve slightly chilled for cleaner slices and a firmer chewy texture.
Storage
How to Store
Let the bars cool completely before storing. Place them in an airtight container to help keep the layers chewy and fresh.
How to Freeze
These bars can be frozen for up to 2 months. Store them in a freezer-safe container and thaw before serving.
Best Texture Tip
Cool the bars completely before cutting so the layers set properly and the squares hold their shape.

Fernando is the creator and writer behind the food blog Eating with your Hands. Living and working in cities like Paris, Barcelona, and Berlin, and being married to a Canadian foodie, has given Fernando a passion and interest in food and inspired him to run EWYH.