
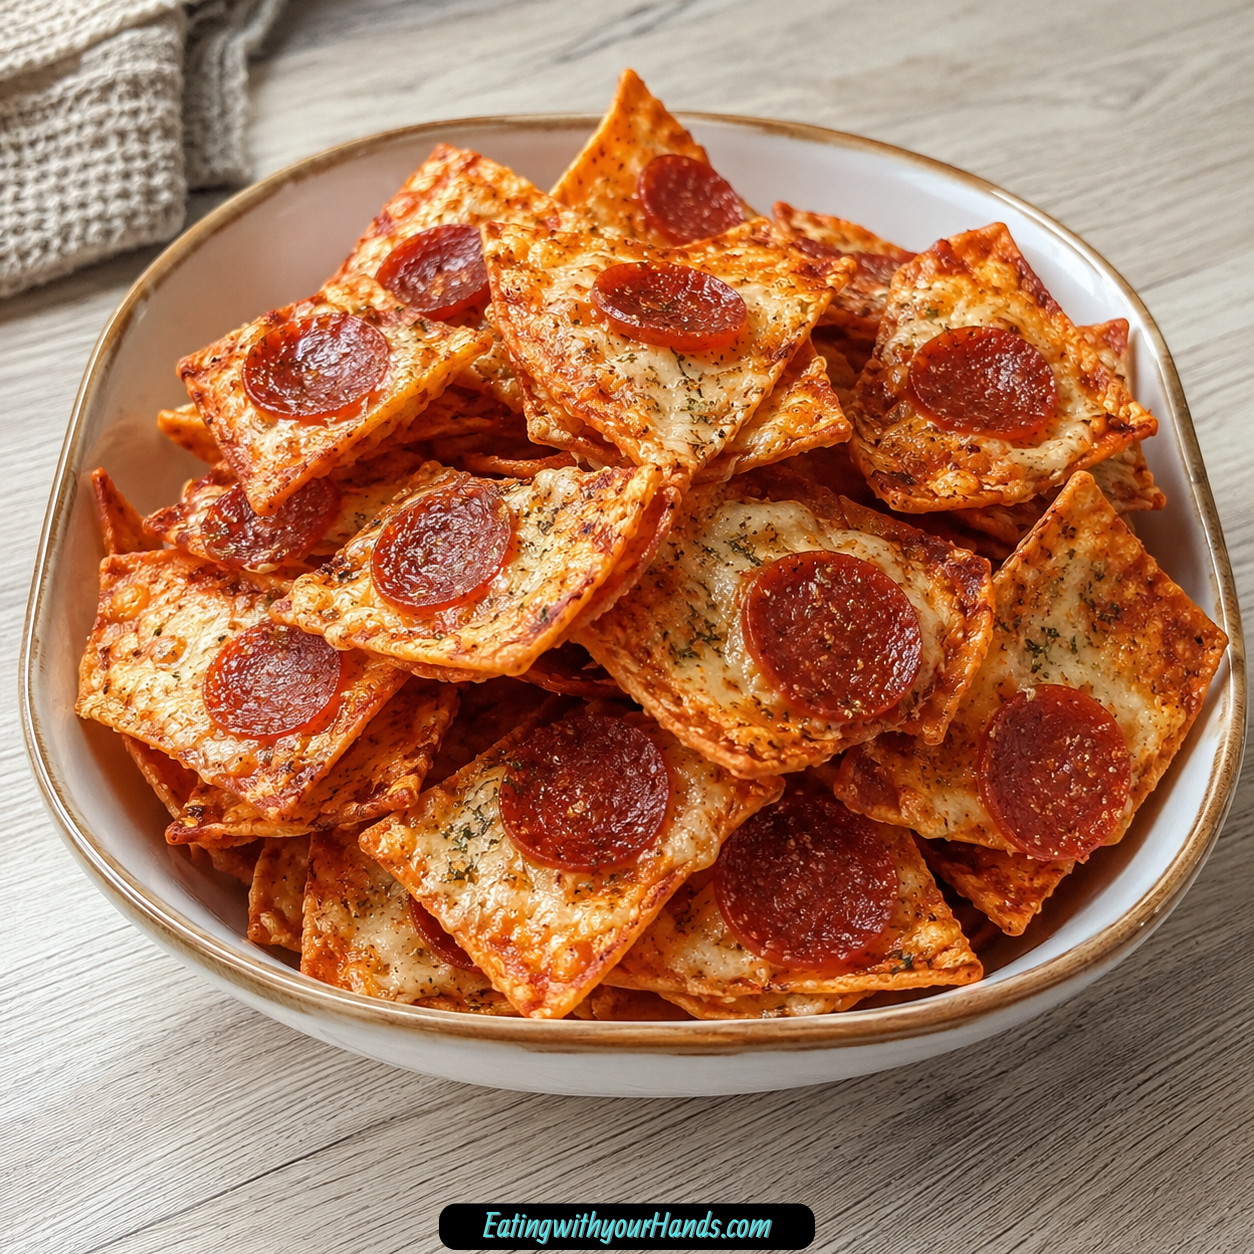

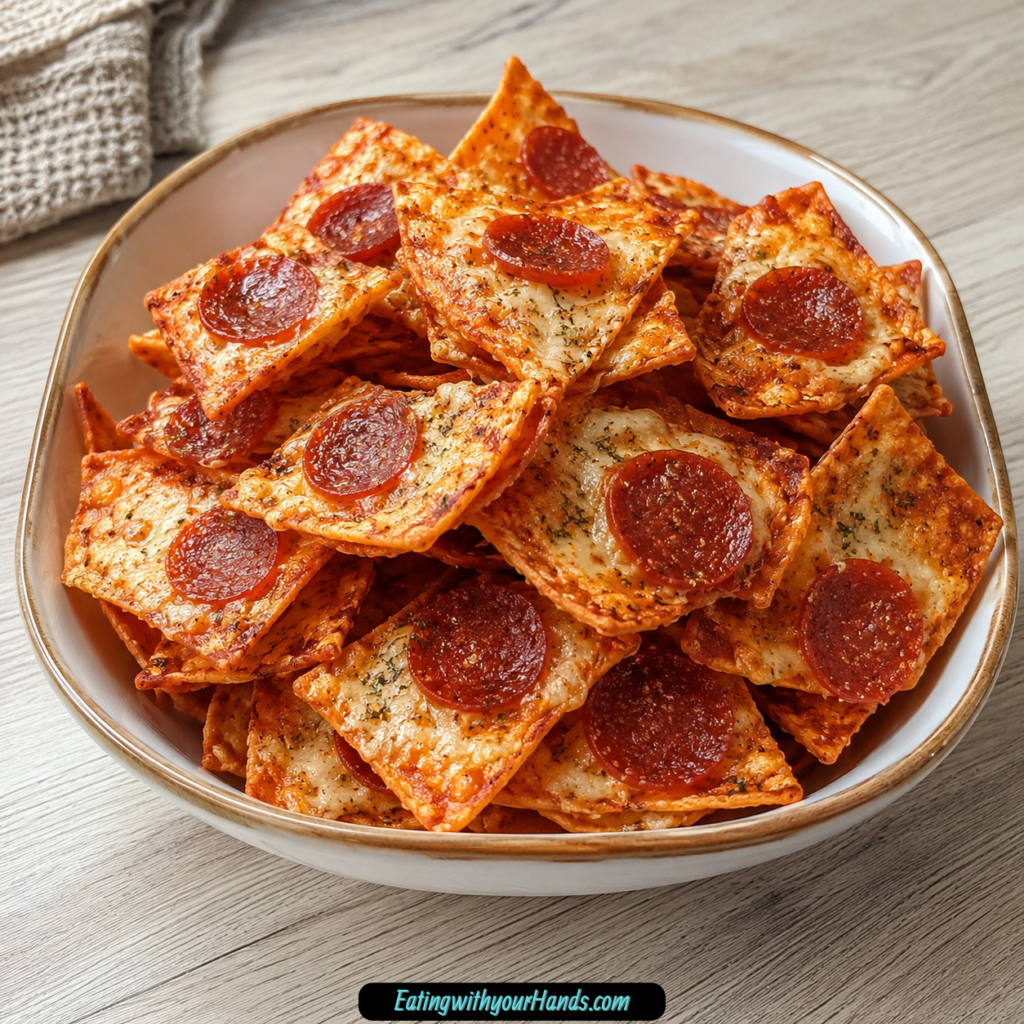
Pizza Chips are the kind of snack that makes complete sense the moment you take the first bite. They have the crispy crunch of a chip, the cheesy pull of pizza, and the familiar flavor of sauce, mozzarella, pepperoni, oregano, and garlic in a small, snackable triangle.
This recipe is perfect for those moments when you want pizza flavor but do not want to make dough, wait for delivery, or commit to a full meal. With flour tortillas as the base, these chips bake quickly and turn golden around the edges while the cheese melts into a bubbly topping.
What I love most about Pizza Chips is how casual and fun they feel. They are easy enough for an after-school snack, but flavorful enough to bring out for game night, movie night, potlucks, or a quick appetizer tray.
They also give you room to play. Keep them classic with pepperoni and mozzarella, make a veggie version, try barbecue chicken, add crushed red pepper, or turn them into cheesy garlic chips.
The key is keeping the toppings light. A thin layer of sauce, a modest sprinkle of cheese, and small pieces of topping help the tortillas crisp instead of turning soggy.
In less than 20 minutes, you can have a tray of crispy, cheesy, pizza-inspired chips ready to serve warm. They are simple, customizable, and almost too easy to keep making.
Table of Contents
- What Are Pizza Chips?
- Why You’ll Love Pizza Chips
- Recipe Details
- Ingredients You’ll Need
- A Closer Look at the Ingredients
- The Flavor Behind These Pizza Chips
- Directions
- Step 1: Gather the Ingredients and Tools
- Step 2: Preheat the Oven
- Step 3: Line the Baking Sheet
- Step 4: Lay Out the Tortillas
- Step 5: Spread the Pizza Sauce
- Step 6: Add the Mozzarella Cheese
- Step 7: Add the Pepperoni
- Step 8: Add Optional Toppings Carefully
- Step 9: Season the Tortillas
- Step 10: Slice Into Triangles
- Step 11: Arrange on the Baking Sheet
- Step 12: Spray with Olive Oil
- Step 13: Bake the Pizza Chips
- Step 14: Look for the Right Texture
- Step 15: Cool for a Few Minutes
- Step 16: Serve Warm
- Step 17: Air Fryer Option
- Helpful Tips for the Best Pizza Chips
- Common Mistakes
- Variations to Try
- Serving Suggestions
- Storage Tips
- Reheating Instructions
- Freezing Instructions
- Make-Ahead Notes
- Frequently Asked Questions
- Final Thoughts
- Pizza Chips
What Are Pizza Chips?
Pizza Chips are baked tortilla triangles topped with pizza sauce, mozzarella cheese, pepperoni, seasonings, and a light spray of olive oil. They are cut like small pizza slices, baked until crisp, and served as a snack, appetizer, or light lunch.
Instead of traditional pizza dough, this recipe uses flour tortillas. That shortcut gives the chips a thinner, crispier texture and keeps the recipe fast.
The flavor still tastes like pizza because the toppings are classic. Pizza sauce brings tangy tomato flavor, mozzarella adds cheesy meltiness, pepperoni gives savory richness, and oregano and garlic powder create that familiar pizza-shop aroma.
These chips are not meant to be heavy. They work best when the sauce and toppings are kept light so each piece can crisp around the edges.
Why You’ll Love Pizza Chips
They are quick and easy. There is no dough, no rising, and no long prep time.
They are crispy and cheesy. The tortillas bake into crunchy chips while the mozzarella melts on top.
They are easy to customize. Use pepperoni, vegetables, sausage, Parmesan, different sauces, or extra seasonings.
They are kid-friendly. The small pieces are fun to eat and easy to dip.
They are perfect for parties. Serve them for game nights, potlucks, gatherings, or movie marathons.
They give high reward for low effort. A few simple ingredients turn into a warm, shareable snack.
Recipe Details
- Recipe name: Pizza Chips
- Recipe style: Baked tortilla pizza snack
- Total time: About 20 minutes
- Oven temperature: 375°F (190°C)
- Bake time: 10-12 minutes
- Air fryer option: 375°F (190°C) for 5-7 minutes
- Chip shape: Tortillas sliced into triangles
- Chips per tortilla: About 6-8, depending on size
- Best texture: Crispy edges with melted, bubbly cheese
- Main base: Large flour tortillas
- Best sauce amount: Thin layer only
- Best topping rule: Keep toppings light to avoid soggy chips
- Storage: Airtight container or resealable bag at room temperature for up to 2 days
- Oven reheating: 350°F (175°C) for about 5 minutes
- Air fryer reheating: 2-3 minutes
- Freezing option: Freeze unbaked topped tortillas and bake from frozen
- Frozen bake adjustment: Add 2-3 minutes to cook time
Ingredients You’ll Need
For the Pizza Chips
- 4 large flour tortillas
- 1 cup shredded mozzarella cheese
- ½ cup pizza sauce
- ½ cup sliced pepperoni
- 1 teaspoon dried oregano
- ½ teaspoon garlic powder
- Olive oil spray
- Salt to taste
A Closer Look at the Ingredients
Large flour tortillas form the base of the chips. Medium or large tortillas work, but thinner tortillas crisp better and create a more chip-like texture.
Shredded mozzarella cheese gives the chips that classic pizza melt. It becomes bubbly in the oven and helps the toppings cling to the tortilla.
Pizza sauce adds tangy tomato flavor. Use a thin layer so the tortillas stay crisp and do not become soggy.
Sliced pepperoni gives the chips their classic pizza personality. It adds savory flavor and a little richness.
Dried oregano brings the familiar pizza flavor. A small sprinkle makes the chips taste more like something from a pizzeria.
Garlic powder adds savory depth. It blends into the sauce and cheese without adding moisture.
Olive oil spray helps the chips bake golden and crisp. A light coating is enough.
Salt enhances the other flavors. Use it lightly because pepperoni, cheese, and sauce already bring seasoning.
The Flavor Behind These Pizza Chips
Pizza Chips work because they keep the best parts of pizza and remove the waiting. The tortilla becomes crisp, the cheese melts, and the sauce and toppings deliver that familiar pizza flavor quickly.
The sauce should be present but not heavy. Too much sauce makes the chips soft, so a thin layer gives flavor while protecting the crunch.
Mozzarella adds the creamy, cheesy part of the bite. It also gives the chips a little stretch when warm.
Pepperoni brings the savory note people expect from classic pizza. Since the chips are small, a modest amount goes a long way.
The oregano and garlic powder finish the flavor. They make the chips taste seasoned and complete instead of simply cheesy tortillas.
Directions
Step 1: Gather the Ingredients and Tools
Start by gathering the flour tortillas, shredded mozzarella cheese, pizza sauce, sliced pepperoni, dried oregano, garlic powder, olive oil spray, and salt. You will also need a baking sheet, parchment paper, cutting board, spoon, sharp knife or pizza cutter, and spatula.
Because this recipe comes together quickly, it helps to have everything ready before you begin. Once the tortillas are sauced and topped, you can cut and bake them right away.
Make sure the toppings are not too large or too wet. Smaller, lighter toppings help the chips crisp better.
Step 2: Preheat the Oven
Preheat your oven to 375°F (190°C). This temperature gives the tortillas enough heat to crisp while melting the cheese.
Let the oven fully preheat before baking. If the oven is not hot enough, the tortillas may soften before they crisp.
While the oven heats, prepare the baking sheet and tortillas. This keeps the process efficient.
Step 3: Line the Baking Sheet
Line a baking sheet with parchment paper. This helps prevent sticking and makes cleanup easier.
Melted cheese can cling to bare pans. Parchment makes it much easier to lift the chips after baking.
Set the pan aside while you assemble the tortillas. You will arrange the triangles on it later.
Step 4: Lay Out the Tortillas
Place the 4 large flour tortillas on a clean, flat surface such as a cutting board or countertop. These tortillas will act as the pizza crusts.
If your tortillas are smaller, you may need more to make the same amount of chips. Larger tortillas will give more triangles.
Try to work on a surface with enough room to spread sauce and toppings evenly. This makes the assembly neater.
Step 5: Spread the Pizza Sauce
Spoon a thin layer of pizza sauce over each tortilla. Use the back of the spoon to spread it gently across the surface.
Do not use too much sauce. A light coating gives the chips pizza flavor without making the tortilla soggy.
Leave a small border around the edges if desired. This helps the edges crisp and brown nicely.
Step 6: Add the Mozzarella Cheese
Sprinkle shredded mozzarella evenly over each sauced tortilla. Use enough to cover the surface lightly without piling it on too heavily.
Too much cheese can weigh the chips down. The goal is melted, bubbly cheese that still allows the tortilla to crisp.
Spread the cheese all the way across the sauced area. Each chip should get a little mozzarella.
Step 7: Add the Pepperoni
Layer sliced pepperoni over the cheese. Keep the pieces evenly spaced so the topping is spread across the chips.
If the pepperoni slices are large, you can cut them into smaller pieces. Smaller pieces make the chips easier to eat.
Do not overload the tortillas. Too many toppings can make the chips heavy and chewy instead of crisp.
Step 8: Add Optional Toppings Carefully
If you want extra toppings, use a light hand. Diced bell peppers, black olives, onions, mushrooms, or crumbled sausage can all work.
The important rule is to avoid too much moisture and weight. Heavy toppings can stop the tortilla from crisping.
If using vegetables, keep them small. Small pieces bake more evenly and sit better on the chips.
Step 9: Season the Tortillas
Sprinkle dried oregano, garlic powder, and a pinch of salt evenly over the topped tortillas. These seasonings give the chips their classic pizza flavor.
Try to season each tortilla evenly. This helps every triangle taste complete after slicing.
Do not overdo the salt. The cheese and pepperoni already add savory flavor.
Step 10: Slice Into Triangles
Use a sharp knife or pizza cutter to slice each tortilla into triangles. Cut them like a pizza.
You will usually get 6-8 chips per tortilla, depending on the size. Larger tortillas may give bigger chips.
Try to make the pieces fairly even. Similar sizes bake more consistently.
Step 11: Arrange on the Baking Sheet
Place the tortilla triangles on the prepared baking sheet in a single layer. Avoid overlapping.
Overlapping traps steam and prevents crisping. Each chip needs space for the edges to brown.
If needed, bake in batches. A little extra space is better than crowded chips.
Step 12: Spray with Olive Oil
Lightly spray the tops of the triangles with olive oil spray. Use a gentle, even coating.
The oil helps the chips bake golden and crisp. Too much oil can make them greasy, so keep it light.
Focus on the exposed tortilla edges. Those areas will crisp the most.
Step 13: Bake the Pizza Chips
Place the baking sheet in the preheated oven and bake for 10-12 minutes. The cheese should be bubbly, and the edges should turn golden brown.
Start checking near the end of the baking time. Tortillas can go from crisp to overdone quickly.
The exact timing may vary depending on tortilla thickness and topping amount. Watch the edges closely.
Step 14: Look for the Right Texture
The chips are ready when the tortilla edges look golden and the cheese is melted and bubbly. The centers may still firm slightly after baking.
Do not wait until every part looks hard in the oven. The chips continue to crisp as they cool.
If you want them extra crisp, bake a little longer or reduce the sauce next time. You can also flip them halfway through baking for extra crunch.
Step 15: Cool for a Few Minutes
Remove the baking sheet from the oven and let the chips cool for a few minutes. This short rest helps them firm up.
They will be very hot right away, especially where the cheese and sauce sit. Cooling also improves the crunch.
Do not pile them into a bowl while they are steaming. Letting steam escape keeps them crisp.
Step 16: Serve Warm
Serve the Pizza Chips warm, straight from the tray or on a platter. They are best when the cheese is still slightly gooey.
Add dipping sauces on the side if desired. Extra pizza sauce, marinara, ranch, or garlic butter all work well.
Serve immediately for the best texture. These chips are at their crispiest shortly after baking.
Step 17: Air Fryer Option
For an air fryer version, cook the chips at 375°F (190°C) for 5-7 minutes. Arrange them in a single layer.
The air fryer can make them crisp faster. Work in batches if needed to avoid overlapping.
Watch carefully because air fryers vary. The chips are done when crisp and bubbly.
Helpful Tips for the Best Pizza Chips
Use thin tortillas for the crispiest texture. Thicker tortillas can work but may stay softer.
Do not over-sauce. A thin layer of pizza sauce prevents soggy chips.
Keep the toppings light. Too many toppings make the chips heavy and chewy.
Arrange chips in a single layer. Overlapping prevents crisping.
Check around the 9-minute mark. Tortillas can brown quickly near the end.
Serve immediately. They are best warm while the cheese is still slightly gooey.
Common Mistakes
Using Too Much Sauce
Too much sauce makes the tortilla wet. Wet tortillas do not crisp well.
Spread only a thin layer. You can always serve extra sauce on the side for dipping.
Overloading the Toppings
Heavy toppings weigh the chips down. They can also release moisture during baking.
Use small amounts and small pieces. This keeps the chips crisp and easy to eat.
Overlapping on the Baking Sheet
Chips need space to crisp. If they overlap, they steam instead of bake.
Use two baking sheets or bake in batches. A single layer gives the best result.
Walking Away at the End
Tortillas can brown quickly. The last few minutes matter.
Start checking at about 9 minutes. Remove them when the edges are golden and the cheese is bubbly.
Storing Before Fully Cool
Warm chips release steam. If stored too soon, they can soften.
Let them cool completely before placing them in a container. This helps preserve crunch.
Variations to Try
Veggie Pizza Chips
Top the tortillas with chopped bell peppers, onions, and olives. This makes a vegetarian-friendly version.
Keep the vegetables small and light. Too many vegetables can make the chips soft.
BBQ Chicken Chips
Use BBQ sauce instead of pizza sauce. Add shredded chicken and cheddar.
This gives the chips a sweet, smoky flavor. Bake the same way until crisp and bubbly.
Margherita Chips
Use fresh mozzarella, tomato slices, and basil leaves. This gives the chips a fresher, more gourmet flavor.
Keep the tomato slices thin. Too much moisture can affect crisping.
Hawaiian Chips
Add diced ham and pineapple for a sweet-savory combination. Use small pineapple pieces so they do not make the chips too wet.
This version is fun for anyone who likes pineapple on pizza. Keep the topping amount moderate.
Cheesy Garlic Chips
Skip the sauce and use garlic butter, mozzarella, and Parmesan. This creates a cheesy garlic snack.
This version is especially good for dipping. Serve with marinara or extra garlic butter.
Air Fryer Pizza Chips
Cook at 375°F (190°C) for 5-7 minutes in the air fryer. This makes a faster, crispier version.
Arrange the chips in a single layer. Cook in batches if needed.
Spicy Pizza Chips
Add crushed red pepper flakes or a dash of hot sauce. This gives the chips a little heat.
You can also use spicy pepperoni or add jalapeños lightly. Avoid adding too much moisture.
Serving Suggestions
Serve Pizza Chips with extra pizza sauce for dipping. This is the simplest and most classic option.
Marinara also works well. It gives a slightly deeper tomato flavor.
Ranch makes a creamy dip that kids and adults often enjoy. It balances the salty cheese and pepperoni.
Garlic butter adds richness. It is especially good with cheesy garlic chips.
Serve them on a party platter with mozzarella sticks, mini sliders, or bruschetta. They fit perfectly with finger foods.
Make them for movie night as a savory alternative to popcorn. A bowl of warm Pizza Chips with soda or sparkling water feels fun and casual.
Pack them for a kid-friendly lunch with a small cup of dipping sauce. Let them cool completely first if packing.
For a grown-up version, add crushed red pepper flakes, shaved Parmesan, or fresh basil before baking. These small touches make the chips feel more polished.
Storage Tips
Let the Pizza Chips cool completely before storing. This prevents trapped steam from making them soft.
Place them in an airtight container or resealable bag at room temperature. They will stay crispy for up to 2 days.
The texture is best the day they are made. The chips are crispiest when served warm from the oven.
If storing with toppings that release moisture, expect the chips to soften slightly. Reheating helps bring back crunch.
Do not refrigerate unless needed. Room temperature storage is better for texture.
Reheating Instructions
If the chips lose their crunch, reheat them in a 350°F (175°C) oven for about 5 minutes. This helps dry the edges and refresh the texture.
You can also use an air fryer for 2-3 minutes. This is a fast way to revive crispiness.
Avoid microwaving if you want crunch. The microwave can make the tortillas soft.
Let reheated chips cool for a minute before eating. The cheese can become hot quickly.
Serve reheated chips right away. They are best when freshly crisped.
Freezing Instructions
These chips are best enjoyed fresh, but you can freeze the unbaked topped tortillas for future snacks. Assemble the tortillas with sauce and toppings before freezing.
When ready to cook, bake directly from frozen. Add 2-3 minutes to the baking time.
Freezing works better before baking than after. Already-baked chips may lose more texture after thawing.
For easier handling, freeze the topped tortillas flat. Then cut and bake when ready, or cut before freezing if easier.
Keep toppings light before freezing. Heavy toppings may release more moisture during baking.
Make-Ahead Notes
You can prep the topped tortillas ahead of time. Cover them and refrigerate until you are ready to slice and bake.
Slice and bake right before serving for the best texture. This keeps the chips from becoming soft too early.
If making for a party, prepare the toppings and sauce station ahead. Then assemble quickly when guests are close to arriving.
You can also cut toppings ahead of time. Small topping pieces make final assembly faster.
For the crispiest results, avoid letting sauced tortillas sit too long before baking. Sauce softens tortillas over time.
Frequently Asked Questions
Can I Use Corn Tortillas Instead of Flour Tortillas?
Yes, corn tortillas work too. They create a crunchier chip with a slightly nutty flavor.
The texture will be different from flour tortillas. If you want a stronger chip crunch, corn tortillas are a good option.
Can I Make These Gluten-Free?
Yes, use gluten-free flour tortillas. Also make sure your toppings are gluten-free.
The same method works. Watch the baking time because different tortillas may crisp faster or slower.
Can I Use Pre-Shredded Cheese?
Yes, pre-shredded cheese can be used. It is convenient and works in this recipe.
However, shredding your own mozzarella melts more smoothly and gives a better texture. Use freshly shredded when possible.
How Can I Make Them Crispier?
Use thinner tortillas, reduce the sauce amount, and avoid too many toppings. These three changes help a lot.
You can also bake them a little longer or flip them halfway through baking. Watch carefully so they do not overbrown.
Can I Make Them Ahead of Time?
Yes, you can prep the topped tortillas ahead, cover them, and refrigerate. Slice and bake right before serving.
This gives the best texture. Fully baked chips are best fresh, but leftovers can be stored for up to 2 days.
Can I Reheat Pizza Chips?
Yes, reheat them in a 350°F (175°C) oven for about 5 minutes. You can also use an air fryer for 2-3 minutes.
This helps restore crispiness. Avoid microwaving if crunch matters.
Can I Add More Toppings?
Yes, but keep them light. Too many toppings make the chips heavy and less crisp.
Use small pieces of toppings like bell peppers, olives, onions, mushrooms, or sausage. Spread them evenly.
Can I Make These Spicy?
Yes, add crushed red pepper flakes or a dash of hot sauce. You can also use spicy toppings.
Start with a small amount. The chips are thin, so spice comes through quickly.
Final Thoughts
Pizza Chips are everything fun about pizza turned into a crispy, shareable snack. They are cheesy, savory, crunchy, customizable, and ready in about 20 minutes.
With flour tortillas, pizza sauce, mozzarella, pepperoni, oregano, garlic powder, olive oil spray, and salt, you can create a tray of golden chips that taste like pizza without making dough. The method is simple, but the flavor feels satisfying.
Keep them classic or try veggie, BBQ chicken, Margherita, Hawaiian, cheesy garlic, spicy, or air fryer versions. The recipe is flexible enough for kids, parties, movie nights, lunches, or quick cravings.
Serve them warm, keep the toppings light, and have dipping sauces ready. Once the first tray comes out crisp and bubbling, it is easy to see why making a double batch is a very good idea.
Pizza Chips

These Pizza Chips are crispy, cheesy, and packed with classic pizza flavor in a fun snackable form. Flour tortillas are layered with pizza sauce, mozzarella cheese, pepperoni or other toppings, and simple seasonings, then baked until golden around the edges. They are a quick option for movie nights, parties, game day snacks, after-school bites, or anytime you want pizza flavor without making dough. Serve them warm while the cheese is melted and the tortilla edges are crisp.
Recipe Details
- Prep Time: 10 minutes
- Cook Time: 12 minutes
- Total Time: 22 minutes
- Calories: 220 kcal
Ingredients
- Salt to taste
- Olive oil spray
- ½ teaspoon garlic powder
- 1 teaspoon dried oregano
- ½ cup sliced pepperoni or other toppings
- ½ cup pizza sauce
- 1 cup shredded mozzarella cheese
- 4 large flour tortillas
Instructions
Step 1: Prepare the Oven
Preheat the oven to 375°F (190°C).
Line a baking sheet with parchment paper and set it aside.
Step 2: Add the Pizza Sauce
Lay the flour tortillas flat on a clean surface.
Spread a thin, even layer of pizza sauce over each tortilla.
Step 3: Add the Cheese
Sprinkle shredded mozzarella cheese over the sauce.
Leave a small border around the edges so the chips crisp up better while baking.
Step 4: Add the Toppings
Top with sliced pepperoni or other toppings.
Keep the toppings light so the tortilla pieces stay crisp instead of turning soft.
Step 5: Season the Tortillas
Sprinkle the tortillas with dried oregano, garlic powder, and salt to taste.
This gives the chips a stronger pizza-style flavor.
Step 6: Cut Into Chips
Use a sharp knife or pizza cutter to cut each tortilla into triangles.
Try to keep the pieces similar in size so they bake evenly.
Step 7: Arrange and Spray
Place the tortilla triangles on the prepared baking sheet.
Lightly spray the pieces with olive oil spray.
Step 8: Bake
Bake for 10-12 minutes, or until the edges are golden and the cheese is melted.
Watch closely near the end so the chips crisp without burning.
Step 9: Cool and Serve
Let the pizza chips cool slightly before serving.
Enjoy warm for the best crispy texture and melted cheese.
Notes
Use a pizza cutter for clean, even slices.
Do not overload with toppings to keep the chips crisp.
Try different flavors like BBQ chicken, veggie, or Margherita.
Best served warm, but they can be reheated in the oven or air fryer.
Store in an airtight container for up to 2 days.
Serving Suggestions
These pizza chips pair well with:
- Extra pizza sauce
- Ranch dressing
- Garlic butter dip
- Marinara sauce
- Caesar salad
- Mozzarella sticks
- Fresh basil
- Game day snack boards
Storage
How to Store
Store leftover pizza chips in an airtight container for up to 2 days.
How to Reheat
Reheat in the oven or air fryer until warmed through and crisp again.
Best Texture Tip
Keep the sauce and toppings light. Too much moisture can make the chips softer instead of crispy.

Fernando is the creator and writer behind the food blog Eating with your Hands. Living and working in cities like Paris, Barcelona, and Berlin, and being married to a Canadian foodie, has given Fernando a passion and interest in food and inspired him to run EWYH.