
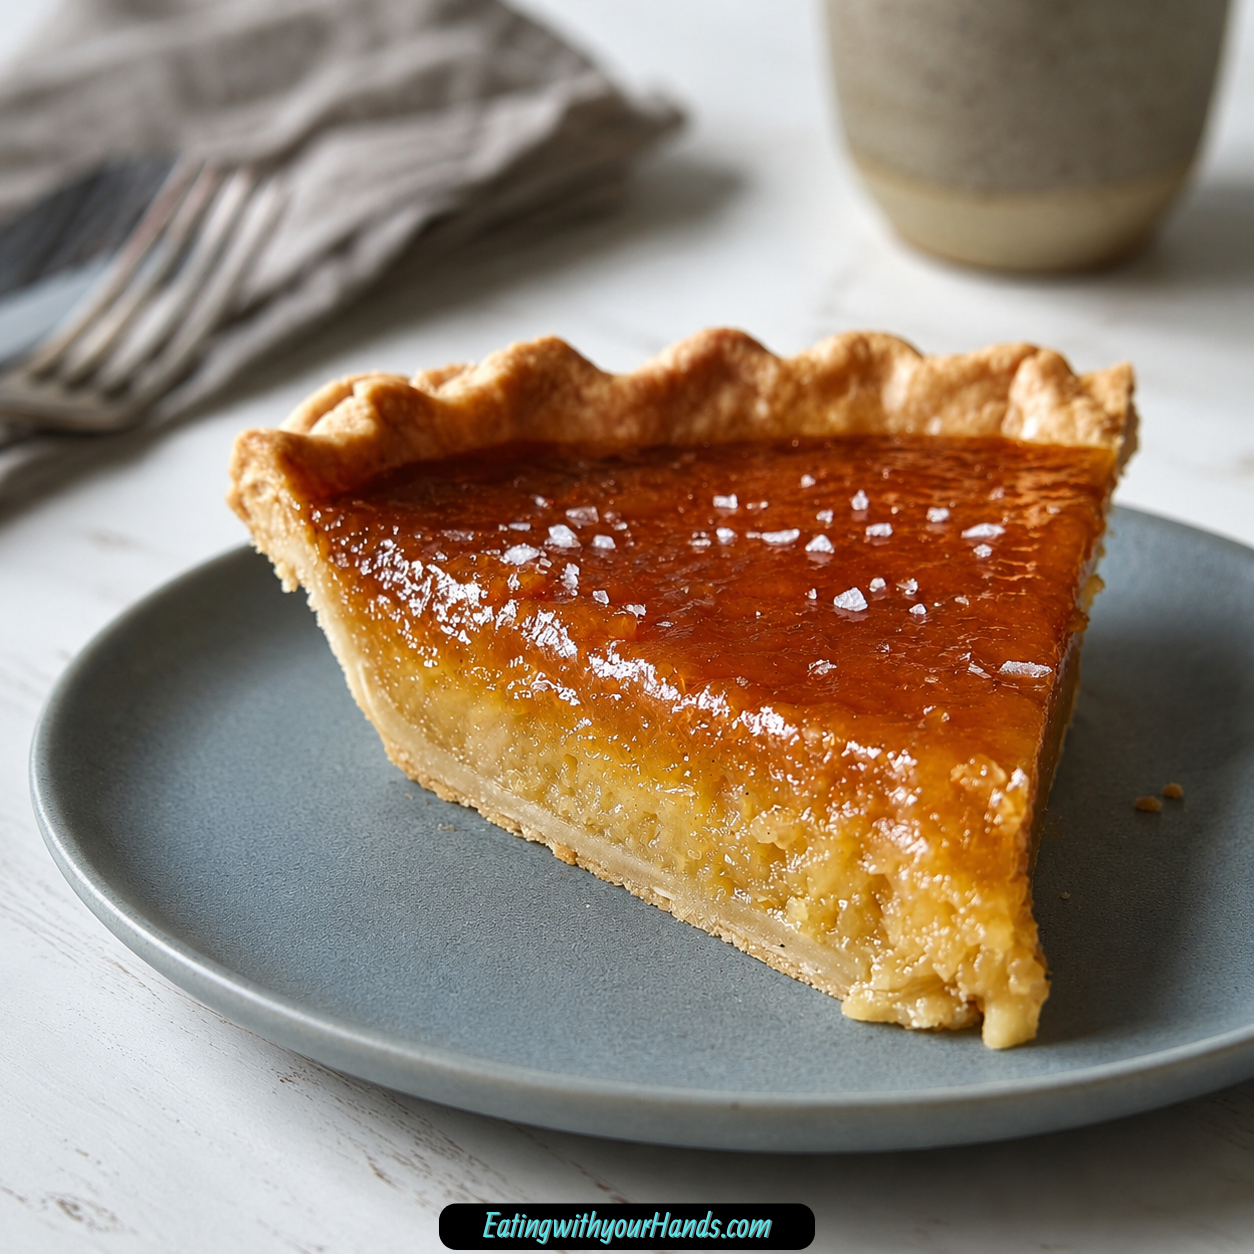
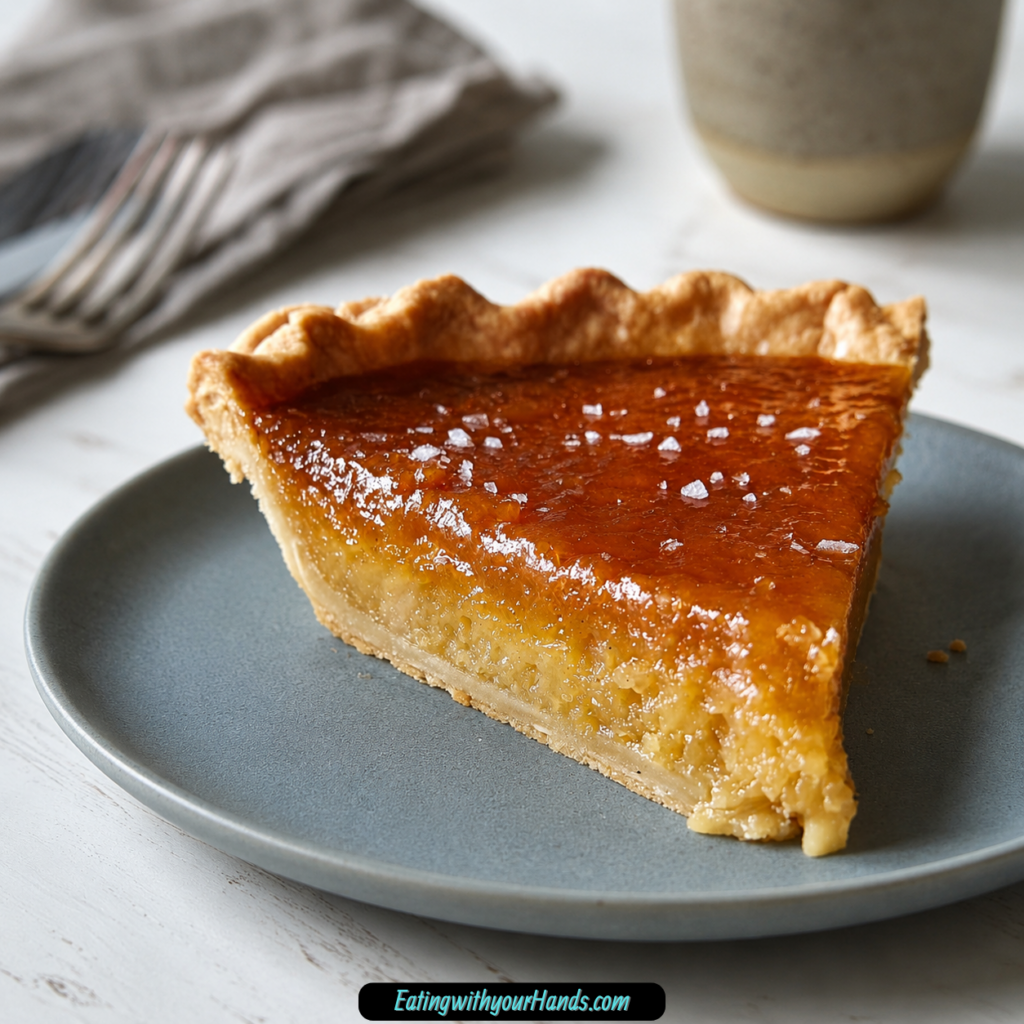
Salted Honey Pie is one of those desserts that feels quietly elegant, even though the process is wonderfully simple. It has a smooth, golden honey filling, a flaky blind-baked crust, and a finishing sprinkle of flaky sea salt that turns each bite into the perfect balance of sweet, salty, buttery, and rich.
This is the pie I think about when I want something that feels special without becoming complicated. It does not need layers, frosting, fruit filling, or a long decorating plan.
The filling comes together in a bowl with melted butter, sugar, cornmeal, salt, vinegar or lemon juice, vanilla, honey, eggs, and heavy cream. Once poured into a prepared crust and baked, it sets into a soft, custardy pie with a caramel-like sweetness.
The honey is the heart of the recipe. A flavorful honey like wildflower or clover gives the pie depth, warmth, and that golden floral sweetness that makes it taste far more memorable than the short ingredient list suggests.
Then comes the salt. The flaky sea salt on top is not just a decoration; it is the detail that makes the whole pie come alive.
A slice of Salted Honey Pie feels at home on a holiday table, at a summer picnic, after Sunday dinner, or on an ordinary weekday when dessert sounds like the right idea. It serves eight, comes together with simple ingredients, and tastes like something you would proudly share.
Table of Contents
- What Is Salted Honey Pie?
- Why You’ll Love Salted Honey Pie
- Recipe Details
- Ingredients You’ll Need
- A Closer Look at the Ingredients
- The Flavor Behind Salted Honey Pie
- Directions
- Step 1: Blind-Bake the Pie Crust
- Step 2: Preheat the Oven
- Step 3: Place the Crust on a Baking Sheet
- Step 4: Melt and Slightly Cool the Butter
- Step 5: Combine Butter, Sugar, Cornmeal, and Salt
- Step 6: Add Vinegar or Lemon Juice
- Step 7: Add the Vanilla Extract
- Step 8: Add the Honey
- Step 9: Add the Eggs One at a Time
- Step 10: Stir in the Heavy Cream
- Step 11: Check the Filling Texture
- Step 12: Pour the Filling Into the Crust
- Step 13: Bake on the Middle Rack
- Step 14: Watch the Crust Edges
- Step 15: Check for Doneness
- Step 16: Cool the Pie Completely
- Step 17: Finish With Flaky Sea Salt
- Step 18: Slice and Serve
- Helpful Tips for the Best Salted Honey Pie
- Common Mistakes
- Salted Honey Pie Variations
- Serving Suggestions
- Storage Tips
- Freezing Instructions
- Make-Ahead Notes
- Frequently Asked Questions
- Final Thoughts
- Salted Honey Pie
What Is Salted Honey Pie?
Salted Honey Pie is a custard-style pie made with honey, butter, sugar, eggs, cream, and cornmeal baked inside a blind-baked 9-inch pie crust. Once cooled, the pie is finished with flaky sea salt.
The filling has a smooth, slightly caramel-like flavor because honey is the main sweetener and flavor note. The cornmeal adds a subtle texture that keeps the filling from feeling too plain.
It is a sweet pie, but the salt and vinegar or lemon juice help keep it balanced. The final flavor is rich without being overly heavy.
The pie is baked until the filling is set and slightly puffed, with a center that wobbles just a little when gently shaken. After cooling completely, it slices cleanly and has a soft, custardy texture.
Why You’ll Love Salted Honey Pie
This pie has a beautiful sweet-salty balance. The honey filling is rich and smooth, while the flaky sea salt makes every bite brighter.
It is simple to make. You whisk, pour, bake, cool, and finish with salt.
It uses minimal ingredients. Most of what you need may already be in your pantry or refrigerator.
It feels impressive without being fussy. A golden honey pie with flaky salt looks elegant even when the method is easy.
It is versatile. Serve it warm, room temperature, chilled, with whipped cream, with vanilla ice cream, or completely plain.
It can be made ahead. Bake it the day before, cool it, store it overnight, and add the flaky salt right before serving.
Recipe Details
- Recipe name: Salted Honey Pie
- Recipe style: Sweet and salty custard-style pie
- Pie crust: 1 blind-baked 9-inch pie crust
- Oven temperature: 350°F (175°C)
- Bake time: About 45 minutes
- Serving size: 8 slices
- Filling texture: Smooth, custardy, golden, and slightly caramel-like
- Doneness cue: Edges are golden and center wobbles slightly when gently shaken
- Cooling requirement: Cool completely before slicing
- Finishing touch: Flaky sea salt
- Room temperature storage: Up to 2 days
- Refrigerator storage: 4-5 days
- Freezer storage: Individual slices for up to 2 months
- Make-ahead option: Bake the day before and add flaky salt just before serving
- Crust tip: Blind-bake to keep the bottom crisp
- Cornmeal substitute in a pinch: 2 tablespoons flour, whisked very well
Ingredients You’ll Need
For the Crust
- 1 9-inch pie crust, homemade or store-bought, blind-baked
For the Filling
- ½ cup unsalted butter, melted and slightly cooled
- ¾ cup granulated sugar
- ¼ cup cornmeal, fine grind
- ¼ teaspoon salt
- 1 tablespoon white vinegar or lemon juice
- 1 teaspoon vanilla extract
- ½ cup honey, preferably wildflower or clover
- 3 large eggs
- ½ cup heavy cream
For the Topping
- Flaky sea salt, to finish
A Closer Look at the Ingredients
The pie crust gives the filling its buttery base. You can use homemade crust or a good-quality store-bought crust, but it should be blind-baked before adding the filling.
Blind-baking helps keep the bottom crisp. Since the filling is loose before baking, an unbaked crust could become soggy.
Melted unsalted butter gives the filling richness and a smooth texture. Let it cool slightly before mixing so it does not heat the eggs too much later.
Granulated sugar sweetens the filling and helps create that classic custard-like pie texture. It works with the honey instead of overpowering it.
Fine-grind cornmeal adds a subtle texture. It gives the filling a little body and keeps it from feeling completely smooth in a one-note way.
Salt balances the sweetness inside the filling. Even before the flaky sea salt topping, the filling needs a little salt to taste complete.
White vinegar or lemon juice adds brightness. That bit of tang keeps the pie from tasting too sweet.
Vanilla extract gives warmth and softness. It rounds out the honey and butter flavors.
Honey is the star ingredient. Wildflower or clover honey gives the pie a deep, floral sweetness that makes the flavor shine.
Eggs help the filling set. Whisking them in one at a time helps keep the mixture smooth and custardy.
Heavy cream gives the filling a luxurious finish. It softens the sweetness and makes the texture richer.
Flaky sea salt finishes the pie. That final salty crunch is what makes Salted Honey Pie truly memorable.
The Flavor Behind Salted Honey Pie
The flavor of Salted Honey Pie is built around contrast. Honey brings sweetness, butter brings richness, vinegar or lemon juice adds brightness, and flaky salt creates a crisp salty finish.
The filling tastes almost caramel-like, but in a softer and more floral way. Honey gives it a different personality than plain sugar alone.
Cornmeal adds a gentle texture that makes the filling feel rustic and homemade. It is subtle, but it matters.
The heavy cream makes the filling smooth and rounded. It keeps the pie from tasting sharp or overly sugary.
The flaky sea salt on top is essential. Without it, the pie is sweet and pleasant, but with it, the flavor becomes balanced and addictive.
Directions
Step 1: Blind-Bake the Pie Crust
Start with 1 homemade or store-bought 9-inch pie crust that has been blind-baked. This step keeps the crust crisp and gives the filling a sturdy base.
Blind-baking matters because the honey filling is very runny before baking. A fully unbaked crust could turn soft on the bottom.
If your crust puffs during blind-baking, gently press it down with a spoon while it is still warm. This helps create an even space for the filling.
Step 2: Preheat the Oven
Preheat your oven to 350°F (175°C). Let it fully heat before the pie goes in.
A steady oven temperature helps the filling set evenly. Since this is a custard-style pie, even heat is important.
While the oven preheats, prepare the filling. The filling comes together quickly once the ingredients are measured.
Step 3: Place the Crust on a Baking Sheet
Set the blind-baked crust on a baking sheet. This makes the pie easier to move in and out of the oven.
It also helps catch any possible spills. The filling is liquid when poured, so the baking sheet gives you more control.
Keep the crust nearby while you mix the filling. You will pour the filling in once it is smooth.
Step 4: Melt and Slightly Cool the Butter
Melt ½ cup unsalted butter and let it cool for a few minutes. It should be warm but not hot.
This matters because hot butter can affect the eggs when they are added later. Slightly cooled butter blends more safely into the filling.
The butter gives the pie richness and helps create that silky texture. Do not skip the cooling step.
Step 5: Combine Butter, Sugar, Cornmeal, and Salt
In a mixing bowl, whisk together the melted and slightly cooled butter, ¾ cup granulated sugar, ¼ cup fine-grind cornmeal, and ¼ teaspoon salt. Whisk until everything is smooth and evenly combined.
The mixture should look glossy and lightly thickened. The cornmeal should be distributed evenly.
Take a moment to break up any lumps. A smooth start gives the filling a better texture.
Step 6: Add Vinegar or Lemon Juice
Add 1 tablespoon white vinegar or lemon juice. Whisk it into the butter and sugar mixture.
This small acidic ingredient brightens the pie and balances the honey. It keeps the sweetness from feeling too flat.
You can use whichever one you have available. Both options work in the recipe.
Step 7: Add the Vanilla Extract
Add 1 teaspoon vanilla extract. Whisk until the vanilla is fully blended.
Vanilla gives the pie a warm background note. It helps the honey taste deeper and softer.
Even though honey is the main flavor, vanilla supports it beautifully. The filling should begin smelling sweet and fragrant.
Step 8: Add the Honey
Pour in ½ cup honey, preferably wildflower or clover. Whisk until the mixture looks glossy and smooth.
Honey is the flavor that defines this pie, so choose one with good taste. A mild or flat honey will not stand out as much after baking.
The filling should look golden and fluid. This is exactly right.
Step 9: Add the Eggs One at a Time
Add the eggs one at a time, whisking well after each addition. Do not add all three eggs at once.
Adding them slowly helps the filling stay smooth. It also makes it easier to incorporate each egg fully.
After the third egg is mixed in, the filling should look cohesive and custardy. Scrape the bowl if needed.
Step 10: Stir in the Heavy Cream
Add ½ cup heavy cream and stir until fully combined. The filling should look smooth, golden, and pourable.
The cream makes the pie filling luxurious. It softens the sweetness and supports the custard texture.
Do not overwhisk aggressively at this stage. Mix until everything is combined.
Step 11: Check the Filling Texture
The filling will be runny before baking. This is normal and expected.
Do not add extra dry ingredients because it looks loose. The eggs and baking time will set the filling in the oven.
Look for a smooth, liquid-gold consistency. That is the right texture before pouring.
Step 12: Pour the Filling Into the Crust
Carefully pour the filling into the blind-baked 9-inch crust. Pour slowly so it does not splash or overflow.
The baking sheet underneath will make it easier to move the pie. This is especially helpful because the filling is liquid.
Fill the crust evenly. If needed, gently nudge the pan to settle the filling.
Step 13: Bake on the Middle Rack
Slide the pie into the oven on the middle rack. Bake at 350°F for about 45 minutes.
The middle rack helps the pie bake evenly from top to bottom. It also reduces the chance of overbrowning the top or bottom.
Try not to move the pie too much while it bakes. Custard-style fillings set best when left undisturbed.
Step 14: Watch the Crust Edges
If the crust edges begin browning too quickly, tent them with foil halfway through baking. This protects the crust while the filling finishes setting.
You do not need to cover the whole pie. A foil ring or loose foil around the edges is enough.
This simple step prevents overbrowned crust without interrupting the filling. The goal is golden, not burnt.
Step 15: Check for Doneness
The pie is done when the filling is set and slightly puffed. The edges should look golden, and the center should wobble just a tiny bit when gently shaken.
Do not wait until the center is completely firm in the oven. It will continue to set as the pie cools.
If the filling still looks very runny, bake for 5-10 more minutes. Some ovens run cooler, so use the visual cues as well as the time.
Step 16: Cool the Pie Completely
Remove the pie from the oven and place it on a wire rack. Let it cool completely before slicing.
This step is non-negotiable if you want clean slices. The filling needs time to set fully.
Cutting too early can create a gooey mess. It will still taste good, but the texture will not be as neat.
Step 17: Finish With Flaky Sea Salt
Once the pie is completely cool, sprinkle the top with flaky sea salt. Add enough to give each slice that sweet-salty finish.
The flaky salt adds texture as well as flavor. It gives a little crunch against the smooth honey filling.
Add the salt close to serving time if possible. This keeps the flakes crisp.
Step 18: Slice and Serve
Slice the pie into 8 servings. Use a sharp knife for clean cuts.
Serve the pie at room temperature for the best flavor. This lets the honey, butter, vanilla, and salt shine.
It is delicious on its own, but whipped cream or vanilla ice cream makes it even more special. Either pairing works beautifully with the honey filling.
Helpful Tips for the Best Salted Honey Pie
Use good-quality honey because it is the star of the filling. Wildflower or clover honey works beautifully.
Let the melted butter cool slightly before mixing. Hot butter can cause problems when eggs are added.
Whisk the eggs in one at a time. This keeps the filling smooth and custardy.
Do not skip the blind-baked crust. It helps prevent a soggy bottom.
Cool the pie completely before slicing. This gives the filling time to set.
Add flaky sea salt just before serving. That keeps the salty crunch fresh.
Common Mistakes
Using Honey With Very Little Flavor
A flat-tasting honey will not shine in this recipe. Since honey is the main flavor, it should taste good on its own.
Use wildflower or clover honey if possible. A more flavorful honey makes a better pie.
Pouring Hot Butter Into the Filling
Melted butter should be slightly cooled. If it is too hot, it can affect the eggs.
Let it rest for a few minutes before mixing. Warm is fine, but hot is not ideal.
Skipping the Blind Bake
The crust needs to be blind-baked before the filling goes in. This keeps the bottom crisp.
A raw crust under a wet filling can turn soft. Blind-baking gives the pie a better texture.
Cutting the Pie Too Soon
The filling needs to cool completely to set properly. Cutting early can make the pie runny.
Patience gives you clean slices. Let the pie rest until fully cooled.
Forgetting the Flaky Salt
The salt is what makes the pie special. It balances the honey sweetness and adds crunch.
Do not use too much, but do not skip it. A finishing sprinkle changes everything.
Salted Honey Pie Variations
Different Honey Flavors
Try buckwheat honey for a deeper, almost molasses-like flavor. It gives the pie a darker, richer personality.
Orange blossom honey adds a floral note. Avoid super mild honeys because they may fade during baking.
Warm Spice Version
Add ½ teaspoon cinnamon or a pinch of cardamom to the filling. This creates a cozier version of the pie.
The warm spice makes the kitchen smell amazing while the pie bakes. Keep the amount small so the honey remains the star.
Graham Cracker or Ginger Snap Crust
Swap the traditional pie crust for a graham cracker or ginger snap crust. Press the crumbs with butter into the pan.
With this style of crust, you can skip the blind bake. It gives the pie a different texture and flavor.
Bourbon or Rum Salted Honey Pie
Stir 1 tablespoon bourbon or rum into the filling. This gives the pie a grown-up flavor.
The honey still remains central, but the alcohol adds warmth. Let guests know if you use this option.
Nutty Salted Honey Pie
Sprinkle chopped toasted pecans or walnuts on top along with the flaky salt. This adds crunch and richness.
The nuts make the pie feel more textured. They also pair well with honey and salt.
Cornmeal Substitute
If you need to skip the cornmeal, use 2 tablespoons flour instead. Whisk very well so the filling stays smooth.
The texture will be slightly different. Cornmeal gives the pie its special subtle texture, so use it when you can.
Serving Suggestions
Serve Salted Honey Pie at room temperature. This is when the flavors shine best.
Add a dollop of barely sweetened whipped cream. It softens the richness and makes the slice feel elegant.
Serve with a scoop of vanilla ice cream if you want something more indulgent. The cold creaminess is lovely with the honey filling.
Enjoy it plain if you want the honey and salt to stand out. This pie does not need much decoration.
Serve it at picnics, holiday tables, dinner parties, or simple family meals. It fits both casual and special occasions.
Add the flaky salt right before serving if making the pie ahead. This keeps the salt crisp and pretty.
Storage Tips
Store leftover pie tightly covered with plastic wrap or in an airtight container. It can stay at room temperature for up to 2 days.
For longer storage, refrigerate it for 4-5 days. Let refrigerated slices sit out for about 15 minutes before serving.
The brief rest takes off the chill and helps the flavor come forward. Cold pie is fine, but room temperature tastes more balanced.
If storing after salting, the salt may soften slightly. For the best texture, add fresh flaky salt before serving leftovers.
Keep the pie covered so the filling does not dry out. A covered pie also holds flavor better.
Freezing Instructions
You can freeze individual slices for up to 2 months. Wrap each slice in plastic wrap, then foil.
Thaw slices overnight in the refrigerator. This helps protect the filling texture.
After thawing, bring slices to room temperature before serving or warm them slightly in the oven. Either method works.
Add flaky sea salt after thawing for the best crunch. The salt topping is best fresh.
Freezing slices is more convenient than freezing the whole pie. It lets you enjoy one piece at a time.
Make-Ahead Notes
Salted Honey Pie is a great make-ahead dessert. Bake it the day before, let it cool completely, and store it at room temperature overnight.
Wait to add the flaky sea salt until just before serving. This keeps the salt crisp and gives the best sweet-salty finish.
If you need to store it longer, refrigerate it instead. Bring it back toward room temperature before serving.
The pie is easy to transport once cooled. It holds together better than many cream-based desserts.
For clean slices at a gathering, cool it fully and use a sharp knife. Wipe the knife between cuts if needed.
Frequently Asked Questions
Can I Use Bottled Lemon Juice Instead of Fresh?
Yes, bottled lemon juice works in a pinch. Fresh lemon juice is great, but the pie will still work with bottled.
You can also use white vinegar. The purpose is to add a little brightness to balance the sweetness.
What If My Filling Is Still Runny After Baking?
Your oven may be running cool, or the pie may need more time. Put it back in the oven for 5-10 minutes until the center jiggles only slightly when nudged.
If the pie has already cooled and still seems loose, chill it. The refrigerator can help firm the filling.
Can I Make This Pie Ahead?
Yes, this pie can be made ahead. Bake it the day before, let it cool completely, and store it at room temperature overnight.
Add the flaky sea salt just before serving. This keeps the salt crunchy.
What Should I Do If My Crust Browns Too Fast?
Tent the edges with foil halfway through baking. This protects the crust while the filling finishes.
A little golden color is good. Too much browning can make the crust taste overdone.
Can I Skip the Cornmeal?
Technically yes, but the pie will lose its lovely subtle texture. Cornmeal helps give the filling body.
If you are in a bind, substitute with 2 tablespoons flour. Whisk extra well so the filling stays smooth.
Can I Use a Store-Bought Crust?
Yes, a good-quality store-bought crust works well. Just make sure it is blind-baked before adding the filling.
This shortcut keeps the recipe easy. The filling is still homemade and flavorful.
What Type of Honey Works Best?
Wildflower or clover honey works beautifully. Choose a honey with flavor because it is the main ingredient.
Buckwheat honey gives a deeper taste, while orange blossom honey adds a floral note. Very mild honey may not stand out.
Can I Serve This Pie Warm?
You can, but it slices best after cooling completely. If cut too warm, the filling may be messy.
For best presentation, cool fully first. Serve at room temperature, chilled, or slightly warmed after it has set.
Final Thoughts
Salted Honey Pie is the kind of dessert that proves simple ingredients can still feel deeply special. A blind-baked crust, a golden honey filling, and a sprinkle of flaky sea salt come together in a pie that tastes rich, balanced, and memorable.
It is sweet without being flat, salty without being overwhelming, and smooth without being boring. The cornmeal adds gentle texture, the cream makes the filling soft, and the honey gives every bite a warm, sunny flavor.
This pie works for holidays, picnics, dinner parties, or quiet nights when you want a dessert that feels comforting but a little different. It can be served plain, with whipped cream, with vanilla ice cream, or with a nutty topping.
Bake it until softly set, cool it completely, finish it with flaky sea salt, and slice it with pride. Once you taste that honey-rich filling against the salty crunch, it is easy to understand why this pie becomes a recipe worth keeping.
Salted Honey Pie

This Salted Honey Pie is smooth, sweet, and buttery with a delicate salty finish. The filling is made with melted butter, sugar, cornmeal, honey, eggs, heavy cream, vanilla, and a little vinegar or lemon juice to balance the sweetness. Once baked, the pie sets into a rich custard-like texture inside a flaky blind-baked crust. A final sprinkle of flaky sea salt makes each slice taste warm, sweet, and just slightly savory.
Recipe Details
- Prep Time: 15 minutes
- Cook Time: 45 minutes
- Total Time: 1 hour
- Course: Dessert, Pie
- Cuisine: American
- Servings: 8 slices
Equipment
- 9-inch pie dish
- Mixing bowl
- Whisk
Ingredients
For Topping
- Flaky sea salt (such as Maldon), to finish
For the Filling
- ½ cup heavy cream
- 3 large eggs
- ½ cup honey (preferably wildflower or clover)
- 1 teaspoon vanilla extract
- 1 tablespoon white vinegar or lemon juice
- ¼ teaspoon salt
- ¼ cup cornmeal (fine grind)
- ¾ cup granulated sugar
- ½ cup unsalted butter, melted and slightly cooled
For the Crust
- 1 9-inch pie crust homemade or store-bought (blind baked)
Instructions
Step 1: Prepare the Oven
Preheat your oven to 350°F (175°C).
Place the blind-baked 9-inch pie crust in a pie dish and set it aside.
Step 2: Start the Filling
In a mixing bowl, whisk together the melted unsalted butter, granulated sugar, cornmeal, and salt.
Whisk until the mixture looks smooth and evenly blended.
Step 3: Add the Honey Flavor
Add the white vinegar or lemon juice, vanilla extract, and honey.
Mix well until the filling base is glossy and combined.
Step 4: Add the Eggs
Whisk in the eggs one at a time.
Mix well after each addition so the filling stays smooth.
Step 5: Add the Cream
Stir in the heavy cream until fully combined.
The filling should look creamy and pourable.
Step 6: Fill the Pie Crust
Pour the honey filling into the blind-baked pie crust.
Spread it evenly if needed.
Step 7: Bake
Bake for 45 minutes, or until the filling is set and slightly puffed.
The center should be stable with only a gentle wobble.
Step 8: Cool Completely
Let the pie cool completely before slicing.
This helps the filling set properly and gives cleaner slices.
Step 9: Finish with Sea Salt
Sprinkle the top with flaky sea salt just before serving.
Serve and enjoy the sweet-salty honey flavor.
Notes
For best results, use high-quality honey and let the pie cool completely before slicing.
Serving Suggestions
This salted honey pie pairs well with:
- Whipped cream
- Vanilla ice cream
- Hot coffee
- Black tea
- Fresh berries
- Toasted pecans
- Crème fraîche
- Holiday dessert trays
Storage
How to Store
Store leftover pie covered in the refrigerator.
Best Texture Tip
Let the pie cool fully before slicing so the filling firms up and the sweet honey custard holds its shape.

Fernando is the creator and writer behind the food blog Eating with your Hands. Living and working in cities like Paris, Barcelona, and Berlin, and being married to a Canadian foodie, has given Fernando a passion and interest in food and inspired him to run EWYH.