
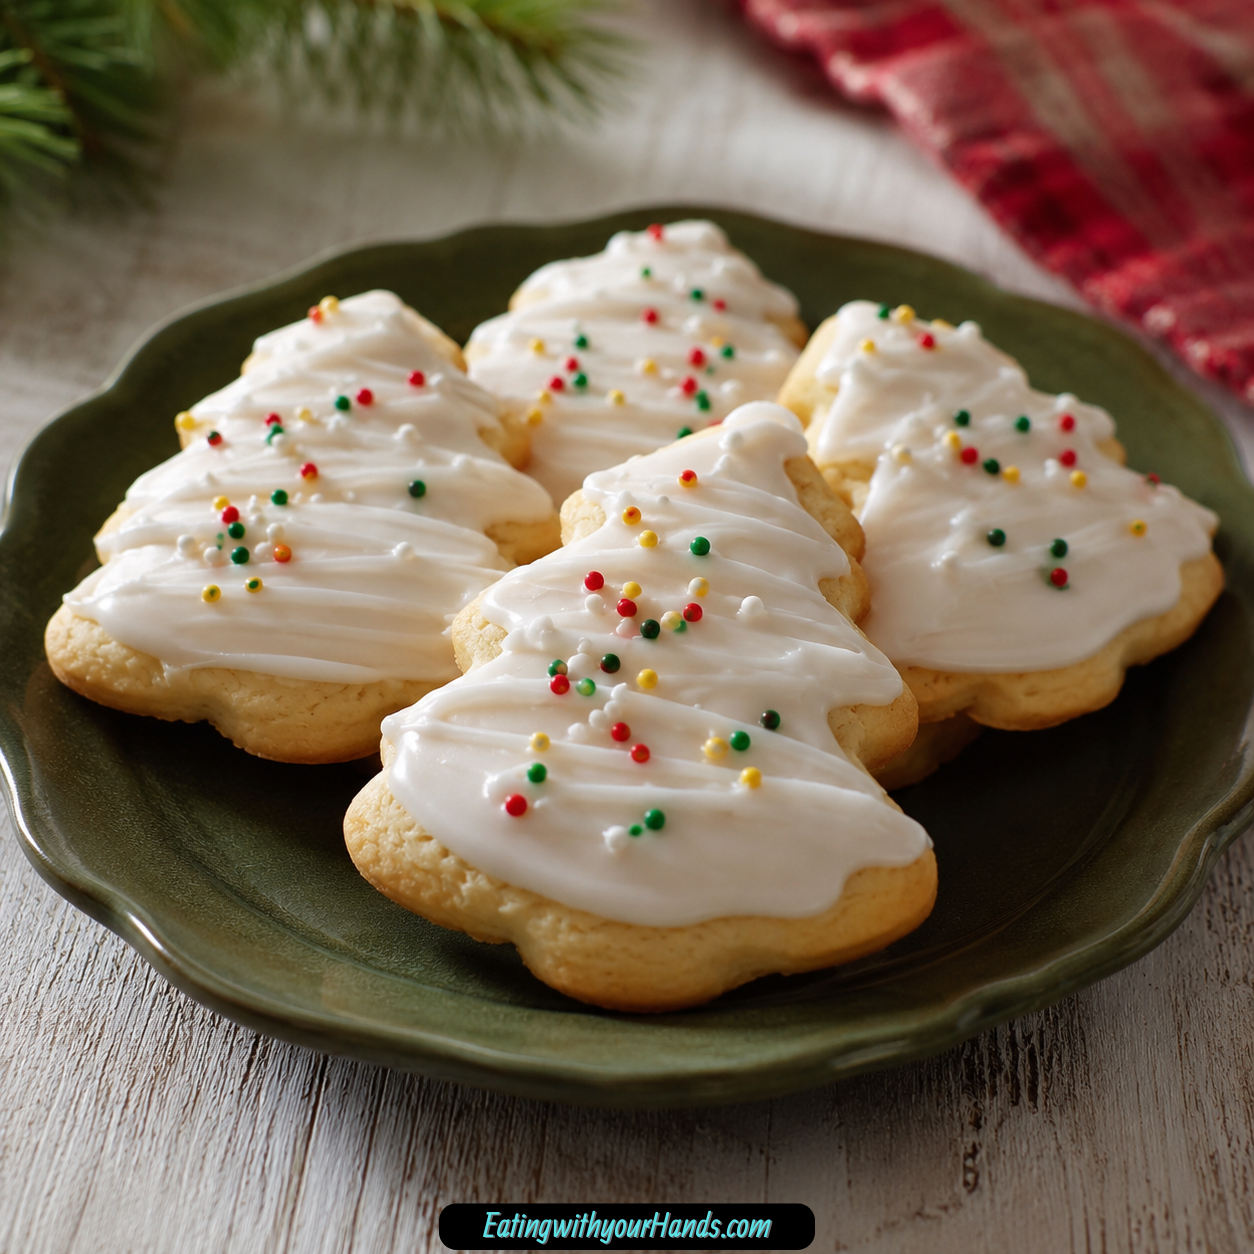

Soft Christmas Cookies are the kind of holiday treat that feels like more than a recipe. They carry the smell of butter, vanilla, almond, sugar, and warm baking sheets, and somehow that simple combination can make the whole house feel like Christmas has truly arrived.
These cookies are soft, tender, lightly sweet, and finished with a smooth vanilla icing that makes them perfect for decorating. They are simple enough for a cozy baking afternoon, but festive enough for cookie exchanges, Christmas Eve trays, gift boxes, and holiday dessert tables.
The cookie itself has that classic soft sugar cookie flavor, with vanilla extract giving warmth and almond extract adding the nostalgic holiday aroma people remember from old-fashioned Christmas cookies. The icing is made with powdered sugar, milk, and vanilla, so it stays simple, sweet, and easy to spread or drizzle.
What makes these cookies especially lovely is how flexible they are. You can drop the dough by rounded tablespoons for soft pillowy cookies, or chill the dough longer and roll it out for cut-out holiday shapes.
They are also wonderful for decorating with kids. A bowl of icing, a few sprinkles, crushed candy canes, colored sugar, or bright gel-colored icing can turn one batch of dough into an afternoon of sweet holiday memories.
Table of Contents
- Why You’ll Love Soft Christmas Cookies
- Recipe Details
- Ingredients
- Optional Decorations and Variations
- The Holiday Feeling Behind Soft Christmas Cookies
- Why These Cookies Stay Soft
- Why Vanilla and Almond Work So Well Together
- Directions
- Step 1: Preheat the Oven
- Step 2: Prepare the Baking Sheets
- Step 3: Measure the Flour Correctly
- Step 4: Mix the Dry Ingredients
- Step 5: Soften the Butter
- Step 6: Cream the Butter and Sugar
- Step 7: Add the Eggs One at a Time
- Step 8: Add the Vanilla and Almond Extracts
- Step 9: Begin Adding the Dry Ingredients
- Step 10: Add Some of the Milk
- Step 11: Finish With Dry Ingredients
- Step 12: Chill the Dough for Best Results
- Step 13: Shape the Cookies
- Step 14: Bake the Cookies
- Step 15: Cool on the Baking Sheet
- Step 16: Transfer to a Wire Rack
- Step 17: Make the Icing
- Step 18: Color the Icing if Desired
- Step 19: Ice the Cookies
- Step 20: Decorate the Cookies
- Step 21: Let the Icing Set
- Cut-Out Cookie Option
- Serving Tips
- Storage
- Refrigerator Storage
- Freezing
- Make-Ahead Tips
- Helpful Notes for Best Results
- Flavor Variations
- Decorating Ideas
- Troubleshooting
- Frequently Asked Questions
- Why These Cookies Are Perfect for Christmas
- Why This Recipe Works So Well
- Final Thoughts
- Soft Christmas Cookies
- Recipe Details
- Ingredients
- Instructions
- Step 1: Prepare the Oven and Baking Sheets
- Step 2: Mix the Dry Ingredients
- Step 3: Cream the Butter and Sugar
- Step 4: Add the Eggs and Extracts
- Step 5: Make the Cookie Dough
- Step 6: Portion the Cookies
- Step 7: Bake Until Soft and Lightly Golden
- Step 8: Cool the Cookies
- Step 9: Make the Vanilla Icing
- Step 10: Ice the Cookies
- Notes
- Serving Suggestions
- Storage
Why You’ll Love Soft Christmas Cookies
These cookies are soft and pillowy. They stay tender after baking, especially when stored properly.
The flavor is classic and festive. Vanilla and almond extract give the cookies a warm holiday taste without making them overpowering.
They are easy to make. The recipe uses simple ingredients, basic mixing, and no special equipment.
They are perfect for decorating. The smooth vanilla icing can be spread, drizzled, colored, or topped with sprinkles.
They are make-ahead friendly. The dough can chill before baking, and it can also be made up to 2 days ahead.
They are wonderful for gifting. Once the icing sets, the cookies can be packed into boxes, tins, or festive bags.
Recipe Details
- Recipe name: Soft Christmas Cookies
- Oven temperature: 350°F (175°C)
- Baking time: 10 to 12 minutes
- Cooling time on baking sheet: 5 minutes
- Optional dough chill for best results: 30 minutes
- Make-ahead dough storage: Up to 2 days in the refrigerator
- Cut-out cookie dough chill: At least 1 hour
- Cut-out dough thickness: About ¼ inch
- Room temperature storage: Up to 5 days
- Refrigerator storage: Up to 7 days
- Freezer storage: Freeze unfrosted cookies for up to 2 months
- Main flavor: Vanilla sugar cookie with almond extract
- Icing style: Powdered sugar, milk, and vanilla extract
Ingredients
For the Cookies
- 3 ¾ cups all-purpose flour
- 1 teaspoon baking powder
- ½ teaspoon salt
- 1 cup unsalted butter, softened
- 1 ½ cups granulated sugar
- 2 large eggs
- 2 teaspoons vanilla extract
- ½ teaspoon almond extract
- 4 tablespoons milk
For the Icing
- 2 cups powdered sugar
- 4 tablespoons milk
- 1 teaspoon vanilla extract
Optional Decorations and Variations
- Festive sprinkles
- Colored sugar
- Edible glitter
- Crushed candy canes
- Food coloring
- Gel food coloring
- Lemon extract
- Peppermint extract
- 1:1 gluten-free flour blend designed for baking
- Plant-based butter sticks
- Extra milk for thinner icing
- Less milk for thicker icing
- Hot cocoa for serving
- Spiced cider for serving
- Coffee for serving
- Slice of bread for keeping cookies soft in storage
The Holiday Feeling Behind Soft Christmas Cookies
Christmas cookies are special because they are tied to small traditions. They are the cookies cooling on the counter while music plays, the plate left out for Santa, the box wrapped for neighbors, and the treat children wait to decorate with too many sprinkles.
These Soft Christmas Cookies have that familiar holiday feeling. They are buttery, lightly sweet, and soft enough to melt into each bite.
The vanilla gives them a comforting sugar cookie flavor. The almond extract adds a gentle holiday note that makes the cookies smell like a Christmas kitchen.
The icing is simple, smooth, and sweet. It gives each cookie a festive finish without requiring complicated decorating skills.
You can keep them plain and elegant, or turn them bright and playful. Both versions belong on a holiday table.
This is the kind of recipe that invites everyone into the kitchen. It is about baking, decorating, tasting, sharing, and making the season feel a little warmer.
Why These Cookies Stay Soft
The softness comes from the balance of butter, sugar, eggs, milk, and careful baking. The dough is rich enough to stay tender, but structured enough to hold its shape.
The butter should be softened before mixing. Softened butter creams smoothly with the sugar and helps create a lighter texture.
The milk helps keep the dough tender. It also helps the dry ingredients blend into the wet mixture without becoming stiff.
The cookies are baked only until the edges are lightly golden and the centers remain soft. They may look slightly underbaked in the middle, but that is exactly what keeps them tender.
Cooling on the baking sheet for 5 minutes lets the cookies set without overbaking. They firm up gently as they rest.
Overbaking is the easiest way to lose softness. Pull them when the centers are still soft, and they will finish setting as they cool.
Why Vanilla and Almond Work So Well Together
Vanilla extract gives these cookies their classic sugar cookie warmth. It makes the dough taste round, sweet, and familiar.
Almond extract is stronger, so only ½ teaspoon is used. That small amount adds the signature holiday aroma without taking over the cookie.
Together, the two extracts make the cookies taste more festive than plain vanilla sugar cookies. The flavor feels nostalgic, buttery, and slightly bakery-like.
If almond is not your favorite, the recipe can be changed. Lemon extract or peppermint extract can be used for a holiday variation.
A little extract goes a long way. The goal is to flavor the cookie gently, not overpower the butter and sugar.
That balance is what makes these cookies easy to love. They taste simple, but not boring.
Directions
Step 1: Preheat the Oven
Preheat your oven to 350°F (175°C). Let the oven fully heat before baking.
A properly heated oven helps the cookies bake evenly. Since these cookies bake for only 10 to 12 minutes, the starting temperature matters.
Line your baking sheets with parchment paper. This prevents sticking and makes cleanup easier.
Step 2: Prepare the Baking Sheets
Place parchment paper on each baking sheet. Make sure the surface is flat and ready for dough.
Parchment helps the cookies release cleanly after baking. It also protects the bottoms from sticking.
Set the prepared baking sheets aside. You will use them after the dough is mixed and shaped.
Step 3: Measure the Flour Correctly
Measure 3 ¾ cups all-purpose flour using the spoon-and-level method. Spoon the flour into the measuring cup, then level it off.
Do not pack the flour into the cup. Too much flour can make the cookies dry.
Accurate flour measuring is one of the easiest ways to keep these cookies soft. A little care here makes a big difference.
Step 4: Mix the Dry Ingredients
In a medium bowl, whisk together the all-purpose flour, 1 teaspoon baking powder, and ½ teaspoon salt. Mix until evenly combined.
Baking powder gives the cookies a little lift without making them cakey. Salt balances the sweetness and makes the flavor better.
Set the dry mixture aside. It will be added gradually to the butter mixture later.
Step 5: Soften the Butter
Use 1 cup unsalted butter, softened. It should be soft enough to press with a finger but not melted.
Soft butter blends smoothly with sugar. Melted butter can change the texture and cause spreading.
If the butter is too cold, let it sit a little longer before mixing. Properly softened butter helps create a tender cookie.
Step 6: Cream the Butter and Sugar
In a large mixing bowl, beat the softened butter with 1 ½ cups granulated sugar. Mix for about 2 to 3 minutes.
The mixture should become light, fluffy, and creamy. This step helps give the cookies their soft texture.
Do not rush the creaming stage. It is one of the most important parts of the dough.
Step 7: Add the Eggs One at a Time
Add 2 large eggs, one at a time. Beat well after each egg is added.
Adding them one at a time helps the dough stay smooth. It also makes the mixture easier to combine evenly.
Scrape down the sides of the bowl if needed. This keeps all the butter and sugar incorporated.
Step 8: Add the Vanilla and Almond Extracts
Mix in 2 teaspoons vanilla extract and ½ teaspoon almond extract. Blend just until combined.
The vanilla gives the cookies their classic flavor. The almond extract adds that soft holiday aroma.
Use almond extract sparingly because it is strong. The amount here is enough to flavor the dough without overpowering it.
Step 9: Begin Adding the Dry Ingredients
Add part of the dry mixture to the wet mixture. Mix on low speed or stir gently.
This recipe adds the dry mixture gradually, alternating with milk. Starting and ending with dry ingredients helps the dough come together smoothly.
Do not dump everything in at once. Gradual mixing gives you better control over the dough texture.
Step 10: Add Some of the Milk
Add some of the 4 tablespoons milk. Mix until just blended.
The milk keeps the cookies soft and tender. It also helps the dough absorb the flour without becoming too stiff.
Continue alternating dry ingredients and milk. Mix gently each time.
Step 11: Finish With Dry Ingredients
Continue adding the dry mixture and milk in alternating additions, ending with the dry ingredients. Mix just until combined.
Stop as soon as the dough comes together. Overmixing can make the cookies less tender.
The dough should be soft and thick. It should be scoopable, not runny.
Step 12: Chill the Dough for Best Results
For best results, refrigerate the dough for 30 minutes before baking. Chilling helps prevent spreading.
This step keeps the cookies thick and soft. It also makes the dough easier to handle.
If you are making the dough ahead, wrap it tightly and refrigerate for up to 2 days. Let it soften slightly if needed before shaping.
Step 13: Shape the Cookies
Drop rounded tablespoons of dough onto the prepared baking sheets. Space the cookies about 2 inches apart.
Keeping the portions similar helps the cookies bake evenly. A cookie scoop can make this easier.
Do not flatten them too much. The cookies should bake into soft, rounded shapes.
Step 14: Bake the Cookies
Bake at 350°F (175°C) for 10 to 12 minutes. Watch for the edges to become lightly golden.
The centers should remain soft. They may look slightly underbaked, and that is correct.
Do not wait until the whole cookie looks firm. The cookies will continue setting as they cool.
Step 15: Cool on the Baking Sheet
Let the cookies rest on the baking sheet for 5 minutes. This helps them firm up without losing softness.
Freshly baked cookies are delicate. Moving them too soon can cause them to break.
The 5-minute rest lets the centers settle. After that, they are easier to transfer.
Step 16: Transfer to a Wire Rack
Move the cookies to a wire rack after the 5-minute rest. Let them cool completely before icing.
Do not ice warm cookies. Warm cookies can melt the icing and make it slide off.
Cooling fully gives the icing a better surface. It also helps the cookies hold their shape.
Step 17: Make the Icing
In a small bowl, whisk together 2 cups powdered sugar, 4 tablespoons milk, and 1 teaspoon vanilla extract. Mix until smooth.
The icing should be thick enough to spread or thin enough to drizzle, depending on your preference. Adjust with milk as needed.
Use less milk for thicker icing and more milk for thinner icing. Add milk gradually so you do not thin it too much.
Step 18: Color the Icing if Desired
For colored icing, divide the icing into small bowls. Add gel food coloring to each bowl.
Gel food coloring works better than liquid food coloring because it does not thin the icing as much. This helps the icing keep the right texture.
Stir until the color is even. Use holiday colors like red, green, white, or any shade you like.
Step 19: Ice the Cookies
Once the cookies are completely cool, spread or drizzle icing over the tops. Use a spoon, small spatula, or piping bag.
A thicker icing is good for spreading. A thinner icing is better for drizzling.
Work gently so the soft cookies do not break. Let the icing settle over the tops.
Step 20: Decorate the Cookies
Add festive sprinkles, colored sugar, edible glitter, or crushed candy canes while the icing is still wet. This helps decorations stick.
You can keep the cookies simple or decorate each one differently. This is a fun family activity.
If decorating with children, set up small bowls of toppings. A little cookie station makes the process easy and joyful.
Step 21: Let the Icing Set
Allow the icing to set before serving or storing. This keeps the cookies from sticking together.
The setting time depends on how thick the icing is. Thicker icing may take longer.
Once set, the cookies can be arranged on a platter or packed for gifting. Handle them gently to protect the soft texture.
Cut-Out Cookie Option
Step 1: Chill the Dough Longer
To make cut-out cookies, chill the dough for at least 1 hour. Firmer dough is easier to roll.
A longer chill helps the dough hold cookie-cutter shapes. Soft dough can spread or tear.
Wrap the dough tightly while it chills. This prevents it from drying out.
Step 2: Roll the Dough
Roll the chilled dough to about ¼ inch thickness. Use a lightly floured surface if needed.
Keep the thickness even so the cookies bake evenly. Too-thin cookies may become crisp, while very thick cookies may need more time.
Work in batches if the dough softens. Return it to the refrigerator when needed.
Step 3: Cut Festive Shapes
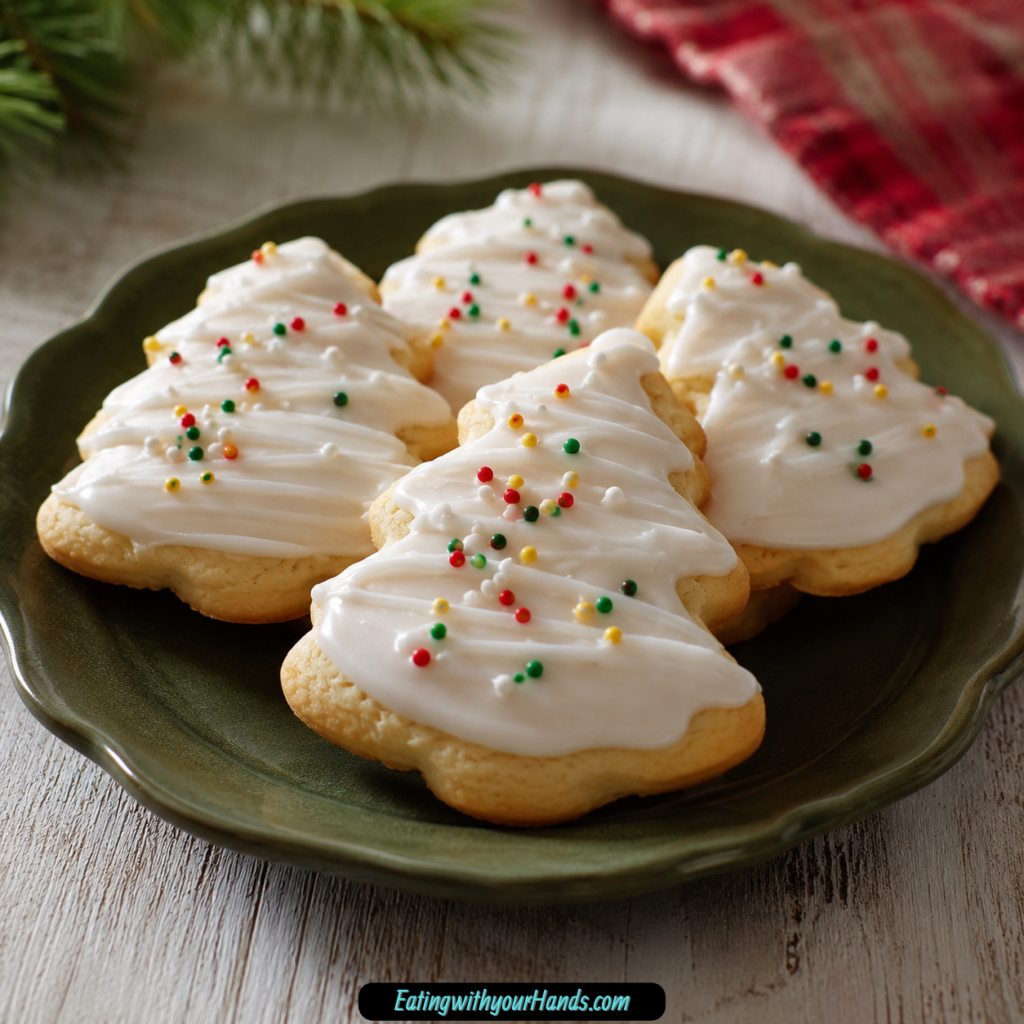
Use cookie cutters to cut Christmas shapes. Trees, stars, snowflakes, stockings, and rounds all work beautifully.
Transfer the shapes carefully to lined baking sheets. Space them slightly apart.
Bake until the edges are lightly golden and the centers stay soft. Cool completely before icing.
Serving Tips
Serve these cookies with hot cocoa for a classic holiday pairing. The soft cookie and sweet icing feel perfect with a warm drink.
They also go beautifully with spiced cider. The vanilla and almond flavors work well with cozy holiday spices.
Coffee is another simple choice. A soft iced cookie with a warm mug makes a lovely winter afternoon treat.
These cookies are perfect for dessert tables. Arrange them on a platter with different icing colors and sprinkles.
They also make sweet additions to gift boxes. Let the icing set completely before packing them.
Storage
Store the cookies in an airtight container at room temperature for up to 5 days. Make sure the icing is set before stacking.
Place parchment paper between layers if the cookies are decorated. This protects the icing and sprinkles.
To keep cookies extra soft, store them with a slice of bread in the container. The moisture from the bread helps the cookies stay tender.
Replace the bread slice if it becomes dry. Keep the container tightly sealed.
Refrigerator Storage
The cookies can be stored in the refrigerator for up to 7 days. Let them come to room temperature before serving.
Cold cookies can taste firmer. A little time at room temperature brings back softness.
Use an airtight container so they do not absorb refrigerator smells. Decorated cookies should be layered carefully.
Refrigeration is helpful if you need them to last a little longer. For the best soft texture, room temperature is ideal for shorter storage.
Freezing
Freeze unfrosted cookies for up to 2 months. Let them cool completely before wrapping.
Place the unfrosted cookies in a freezer-safe container or bag. Use parchment between layers.
Thaw the cookies before icing. Fresh icing after thawing gives the best look and texture.
This make-ahead method is perfect for holiday planning. You can bake the cookies early and decorate closer to serving.
Make-Ahead Tips
The dough can be made ahead and refrigerated for up to 2 days. Wrap it tightly in plastic so it does not dry out.
When ready to bake, let the dough sit just long enough to become scoopable if it is very firm. Do not let it become too warm.
Cookies can also be baked ahead and frozen unfrosted. This saves time during busy holiday weeks.
Decorate after thawing for the freshest finish. The icing will look cleaner and brighter.
Helpful Notes for Best Results
Chilling the dough for 30 minutes helps prevent spreading. It also keeps the cookies thick and soft.
Do not overmix after adding the flour. Gentle mixing keeps the cookies tender.
Spoon and level the flour. Too much flour can make cookies dry.
Pull the cookies from the oven when the centers are still soft. They will set as they cool.
Use gel food coloring for icing. Liquid dyes can thin the icing too much.
For a dairy-free version, use plant-based butter sticks that mimic real butter’s fat content. Sticks work better than soft tub spreads.
Flavor Variations
Lemon Christmas Cookies
Swap the almond extract for lemon extract. This gives the cookies a brighter flavor.
Lemon works well with vanilla icing. It makes the cookies feel fresh and light.
Use the same careful approach with extract. A little flavor goes a long way.
Peppermint Christmas Cookies
Swap the almond extract for peppermint extract. This creates a cool, festive flavor.
Peppermint pairs especially well with crushed candy canes on top. It gives the cookies a cheerful holiday twist.
Use peppermint gently so it does not overpower the cookie. The base should still taste buttery and sweet.
Colorful Iced Cookies
Add gel food coloring to the icing. Divide the icing into several bowls for multiple colors.
Red, green, white, and pale blue all work beautifully for Christmas cookies. Use whatever matches your holiday style.
Avoid liquid food dyes when possible. They can make the icing too thin.
Sprinkle-Topped Cookies
Add festive sprinkles while the icing is wet. This keeps them attached.
Use colored sugar, holiday shapes, edible glitter, or classic red and green sprinkles. Keep the decorations as simple or playful as you like.
Let the icing set before stacking. This keeps the decorations neat.
Crushed Candy Cane Cookies
Sprinkle crushed candy canes over the icing before it sets. This adds crunch and peppermint flavor.
This variation works especially well with peppermint extract. It turns the cookies into a bright Christmas treat.
Do not add too much if you want the cookies to stay soft. A light sprinkle is enough.
Gluten-Free Soft Christmas Cookies
Use a 1:1 gluten-free flour blend designed for baking. The dough may behave slightly differently, but the method stays the same.
Chill the dough if it feels soft or sticky. Gluten-free dough can benefit from extra rest.
Watch the baking time carefully. Pull the cookies when the edges are lightly golden and centers remain soft.
Dairy-Free Soft Christmas Cookies
Use plant-based butter sticks that mimic real butter’s fat content. This helps the cookies keep the right texture.
Avoid tub-style spreads when possible. They may contain more water and can change the dough.
Use the same mixing and chilling method. The cookies should still bake soft and festive.
Decorating Ideas
Family Cookie Station
Set up a small decorating station with icing bowls, sprinkles, colored sugar, crushed candies, and icing bags. This makes decorating feel easy and fun.
Let everyone decorate their own cookies. The cookies do not need to look perfect.
Holiday cookies are about the memory as much as the design. A little messy decoration can be part of the charm.
Gift Box Cookies
Let the icing set completely before packing cookies into boxes or tins. Use parchment between layers.
Choose cookies with firmer icing for gifting. This keeps them looking cleaner during transport.
Add a mix of plain iced cookies and sprinkle-topped cookies. The variety looks beautiful in a gift box.
Christmas Eve Platter
Arrange the cookies on a Christmas Eve platter with other holiday sweets. Their soft texture makes them a nice contrast to crisp cookies.
Use icing colors that match your holiday table. White, red, green, and gold-toned sprinkles all look festive.
Serve with cocoa, cider, or coffee. These cookies fit beautifully into a cozy evening.
Troubleshooting
Why Did My Cookies Turn Out Dry?
The cookies may have been overbaked. Pull them from the oven when the edges are lightly golden and the centers are still soft.
Too much flour can also make them dry. Spoon and level the flour instead of packing it.
Storing them properly helps, too. Use an airtight container and add a slice of bread to keep them soft.
Why Did My Cookies Spread Too Much?
The dough may have been too warm. Chill it for 30 minutes before baking.
Butter that is too soft or melted can also cause spreading. Use softened butter, not melted butter.
Make sure your baking powder is measured correctly. The dough needs proper structure.
Why Is My Dough Too Sticky?
The dough may need chilling. Refrigerate it for 30 minutes before scooping.
If rolling for cut-outs, chill for at least 1 hour. Firmer dough is easier to handle.
Avoid adding too much extra flour. Extra flour can make the cookies dry.
Why Is My Icing Too Thin?
Too much milk may have been added. Add more powdered sugar to thicken it.
For future batches, add milk gradually. It is easier to thin icing than to thicken it.
Thicker icing is better for spreading. Thinner icing works better for drizzling.
Why Is My Icing Too Thick?
Add a little more milk, a small amount at a time. Whisk until smooth.
Do not add too much at once. A small splash can change the texture quickly.
The ideal consistency depends on how you want to decorate. Spreading icing should be thicker than drizzle icing.
Why Did My Colored Icing Become Runny?
Liquid food coloring may have thinned the icing. Use gel food coloring instead.
Gel color is more concentrated. It creates bright colors without adding too much liquid.
If icing becomes too thin, add powdered sugar. Whisk until it returns to the texture you want.
Frequently Asked Questions
Can I Make the Dough Ahead of Time?
Yes, prepare the dough, wrap it tightly in plastic, and refrigerate it for up to 2 days. This is helpful during busy holiday weeks.
Let it soften slightly if it is too firm to scoop. Do not let it get warm.
Why Did My Cookies Turn Out Dry?
They may have baked too long, or too much flour may have been added. Spoon and level the flour carefully.
Pull the cookies from the oven when the centers are still soft. They will continue setting as they cool.
Can I Roll Out the Dough for Cut-Out Cookies?
Yes, chill the dough for at least 1 hour first. Roll it to about ¼ inch thickness.
Use cookie cutters to make festive shapes. Bake carefully and cool before icing.
Can I Use Butter Substitutes?
Yes, for a dairy-free version, use plant-based butter sticks that mimic real butter’s fat content. Avoid watery spreads.
The texture may vary slightly. Chilling the dough can help.
How Do I Make Colored Icing?
Divide the icing into bowls and mix in gel food coloring. Gel color keeps the icing from becoming too thin.
Avoid liquid food dyes if possible. They can change the icing consistency.
Can I Freeze These Cookies?
Yes, freeze unfrosted cookies for up to 2 months. Thaw and ice them fresh before serving.
This keeps the icing prettier. It is also easier for make-ahead holiday baking.
How Do I Keep the Cookies Extra Soft?
Store them in an airtight container with a slice of bread. The bread helps maintain moisture.
Do not leave the container open. Air will dry the cookies faster.
Can I Use Peppermint or Lemon Extract?
Yes, almond extract can be swapped for lemon or peppermint extract. Each gives the cookies a different festive flavor.
Use extracts carefully because they can be strong. Keep the flavor balanced.
Why These Cookies Are Perfect for Christmas
Soft Christmas Cookies are ideal for the holidays because they are simple, pretty, and nostalgic. They taste like butter, vanilla, almond, sugar, and sweet icing.
They are easy enough for casual baking but special enough for traditions. You can make them with children, decorate them for parties, or pack them as gifts.
The dough is flexible. Drop cookies are quick, while cut-outs give you festive shapes.
The icing is also adaptable. Make it white and simple, or color it for holiday designs.
Most importantly, they invite people to gather. A batch of soft cookies on the counter has a way of making the season feel warmer.
Why This Recipe Works So Well
This recipe works because the dough balances structure and softness. Flour gives the cookies body, while butter, eggs, sugar, and milk keep them tender.
Baking powder gives a gentle lift. Salt balances the sweetness.
Vanilla and almond extract create the classic holiday flavor. The almond is small but memorable.
Chilling the dough helps prevent spreading. It keeps the cookies thick and soft.
The cookies are baked just until the edges turn lightly golden. That timing keeps the centers soft and pillowy.
Final Thoughts
Soft Christmas Cookies are buttery, tender holiday sugar cookies finished with a smooth vanilla icing. With all-purpose flour, baking powder, salt, softened butter, sugar, eggs, vanilla extract, almond extract, milk, powdered sugar, and festive decorations, they are simple enough for family baking and special enough for Christmas celebrations.
The most important steps are easy to follow. Cream the butter and sugar until light and fluffy, add the eggs and extracts, alternate the dry ingredients with milk, chill the dough for best results, and bake at 350°F (175°C) for 10 to 12 minutes.
Let the cookies cool on the baking sheet for 5 minutes, then transfer them to a wire rack before icing. Once completely cool, spread or drizzle the vanilla icing and decorate with sprinkles, colored sugar, edible glitter, or crushed candy canes.
Serve them with hot cocoa, spiced cider, or coffee, store them at room temperature for up to 5 days, refrigerate for up to 7 days, or freeze unfrosted cookies for up to 2 months. Whether you bake them for a cookie exchange, Christmas Eve platter, gift box, or quiet winter afternoon, these soft Christmas cookies bring sweetness, warmth, and holiday joy to every bite.
Soft Christmas Cookies

These soft Christmas cookies are buttery, tender, and full of classic holiday flavor. Vanilla extract gives them a warm sweetness, while a hint of almond extract adds that nostalgic bakery-style taste people love in festive cookies. The cookies bake with lightly golden edges and soft centers, then get finished with a smooth vanilla icing that makes them perfect for decorating, gifting, or serving with a warm mug of cocoa.
Recipe Details
- Prep Time: 20 minutes
- Cook Time: 12 minutes
- Total Time: 32 minutes
- Cuisine: American
- Servings: 24 cookies
- Calories: 210 kcal
Ingredients
For the Icing
- 2 cups powdered sugar
- 4 tablespoons milk
- 1 teaspoon vanilla extract
For the Cookies
- 3 ¾ cups all-purpose flour
- 1 teaspoon baking powder
- ½ teaspoon salt
- 1 cup unsalted butter softened
- 1 ½ cups granulated sugar
- 2 large eggs
- 2 teaspoons vanilla extract
- ½ teaspoon almond extract
- 4 tablespoons milk
Instructions
Step 1: Prepare the Oven and Baking Sheets
Preheat the oven to 350°F (175°C). Line baking sheets with parchment paper.
Step 2: Mix the Dry Ingredients
In a medium bowl, whisk together the all-purpose flour, baking powder, and salt.
Set the bowl aside.
Step 3: Cream the Butter and Sugar
In a large bowl, beat the softened unsalted butter and granulated sugar until the mixture is light and fluffy.
Step 4: Add the Eggs and Extracts
Add the eggs one at a time, mixing well after each addition.
Stir in the vanilla extract and almond extract until evenly combined.
Step 5: Make the Cookie Dough
Gradually mix the dry ingredients into the butter mixture, alternating with the milk.
Begin and end with the dry ingredients, mixing until the dough comes together.
Step 6: Portion the Cookies
Drop rounded tablespoons of dough onto the prepared baking sheets, spacing them 2 inches apart.
Step 7: Bake Until Soft and Lightly Golden
Bake for 10-12 minutes, or until the edges are lightly golden and the centers are still soft.
Step 8: Cool the Cookies
Let the cookies cool on the baking sheet for 5 minutes.
Transfer them to a wire rack and allow them to cool completely before icing.
Step 9: Make the Vanilla Icing
Whisk the powdered sugar, milk, and vanilla extract together until smooth.
Step 10: Ice the Cookies
Once the cookies are cool, spread or drizzle the icing over the tops.
Allow the icing to set before serving.
Notes
Chill the dough for 30 minutes to help prevent spreading.
For softer cookies, avoid overbaking. Remove them from the oven when the centers are still slightly pale.
Add food coloring or sprinkles to the icing for a festive touch.
Store the cookies in an airtight container for up to 5 days, or freeze unfrosted cookies for up to 2 months.
Serving Suggestions
- Serve with hot cocoa or warm milk.
- Add to Christmas cookie trays.
- Decorate with festive sprinkles for holiday parties.
- Package in cookie tins for homemade gifts.
- Pair with coffee, tea, or eggnog.
Storage
How to Store
Store the fully cooled and iced cookies in an airtight container for up to 5 days.
How to Freeze
Freeze unfrosted cookies in a freezer-safe airtight container for up to 2 months. Thaw completely before icing.
Best Texture Tip
Chill the dough for 30 minutes before baking and remove the cookies while the centers are still slightly pale. This helps keep them soft and pillowy after cooling.

Fernando is the creator and writer behind the food blog Eating with your Hands. Living and working in cities like Paris, Barcelona, and Berlin, and being married to a Canadian foodie, has given Fernando a passion and interest in food and inspired him to run EWYH.