
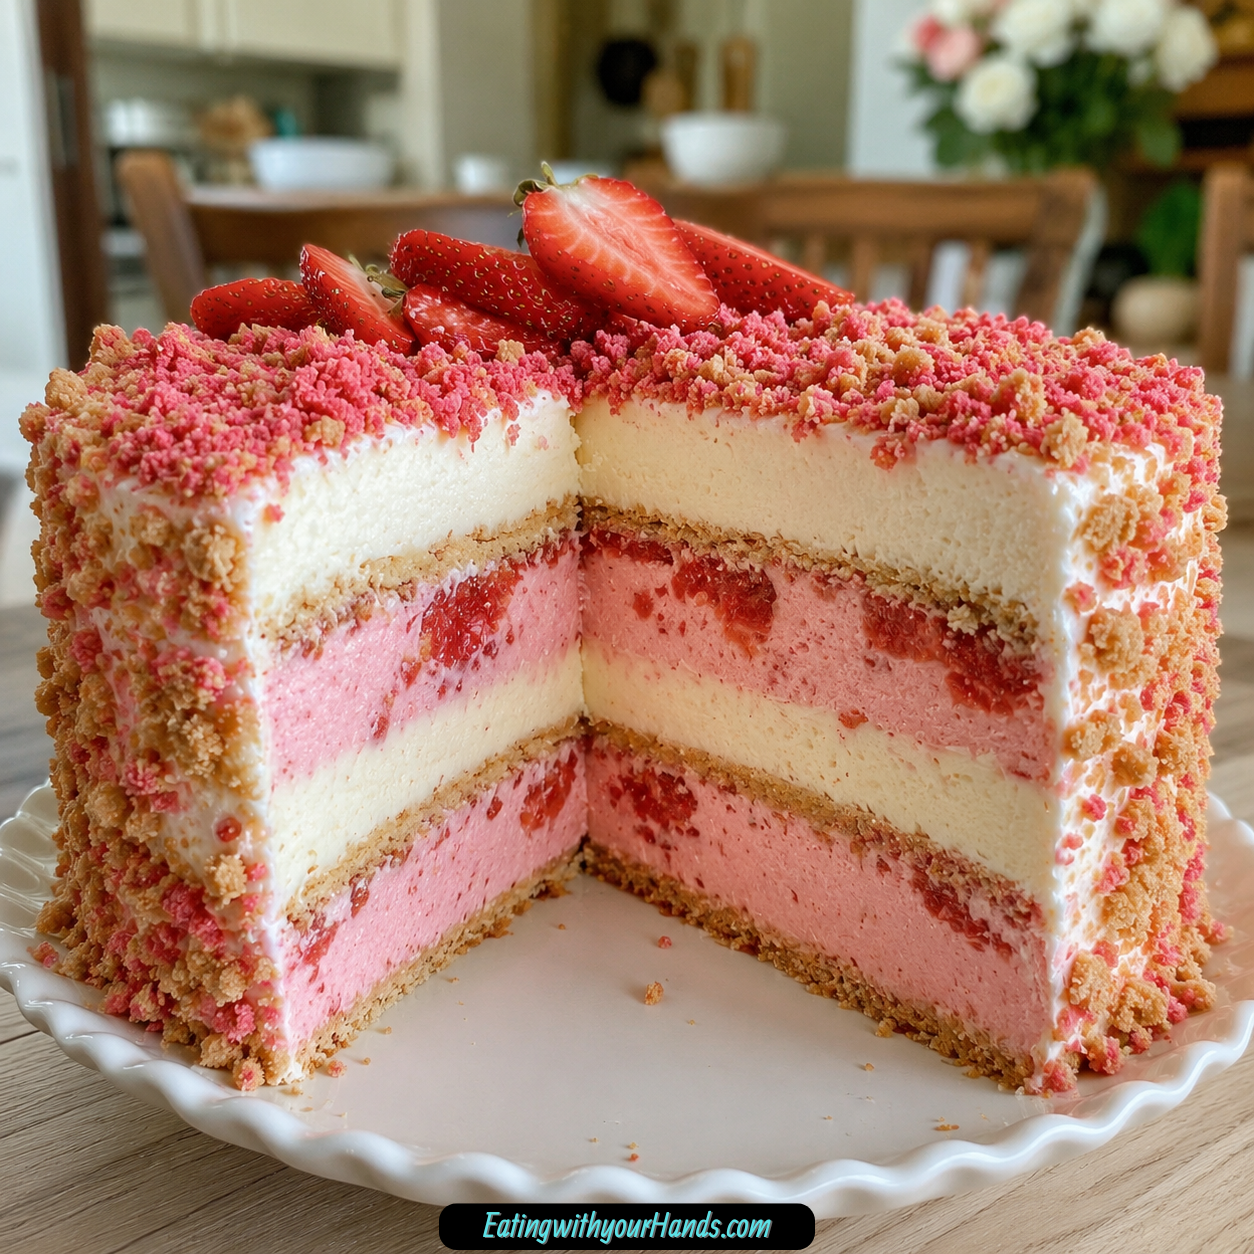
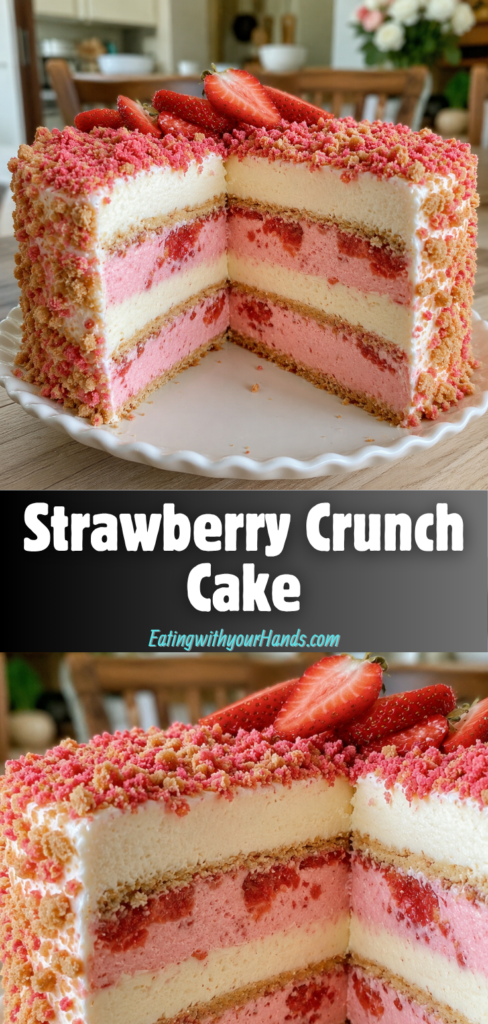
Strawberry Crunch Cake is the kind of dessert that feels like summer showed up wearing its prettiest dress. It has fluffy strawberry cake, a creamy cheesecake layer, sweet frosting, and a colorful cookie crumb topping that gives every slice a little crunch.
I love cakes that look festive before anyone even cuts into them. This one has that bright strawberry personality, the kind that makes it perfect for birthdays, summer gatherings, family celebrations, or a quiet afternoon when dessert should feel a little special.
The cake starts with Strawberry Supreme cake mix, strawberry gelatin, eggs, melted butter, and whole milk. That combination gives the layers a soft, sweet strawberry flavor and a fluffy texture.
Then comes the cheesecake layer, made with cream cheese, sugar, cornstarch, heavy cream, vanilla, and eggs. It bakes between the strawberry cake layers, adding a rich, creamy contrast to the fruity sweetness.
The final touch is the cookie crumb layer. Crushed vanilla sandwich cookies, strawberry gelatin, melted butter, and optional red food color gel create that signature strawberry crunch finish that makes the cake feel fun, nostalgic, and show-stopping.
Table of Contents
- Why You’ll Love This Strawberry Crunch Cake
- Recipe Details
- Ingredients
- Optional Swaps, Variations, Add-Ins, and Serving Ideas
- Why This Strawberry Crunch Cake Works
- Directions
- Step 1: Preheat the Oven
- Step 2: Prepare the Baking Pan
- Step 3: Crush the Vanilla Sandwich Cookies
- Step 4: Add Strawberry Gelatin to the Crumbs
- Step 5: Add Melted Butter and Food Color Gel
- Step 6: Set the Crumb Layer Aside
- Step 7: Start the Strawberry Cake Batter
- Step 8: Add Eggs, Butter, and Milk to the Cake Batter
- Step 9: Beat the Cake Batter
- Step 10: Prepare the Cheesecake Dry Base
- Step 11: Add the Softened Cream Cheese
- Step 12: Add Heavy Cream and Vanilla
- Step 13: Add the Cheesecake Eggs One at a Time
- Step 14: Make the Frosting Base
- Step 15: Add Heavy Cream and Vanilla to the Frosting
- Step 16: Add Powdered Sugar Gradually
- Step 17: Pour the First Cake Layer
- Step 18: Add the Cheesecake Layer
- Step 19: Add the Remaining Cake Batter
- Step 20: Add the Cookie Crumb Layer
- Step 21: Bake the Cake
- Step 22: Cool in the Pan
- Step 23: Transfer to a Wire Rack
- Step 24: Refrigerate Before Serving
- Step 25: Frost and Serve
- Serving Ideas
- Storage
- Reheating
- Freezing
- Make-Ahead
- Helpful Notes for Best Results
- Variations
- Troubleshooting
- Frequently Asked Questions
- Why This Recipe Works So Well
- Final Thoughts
- Strawberry Crunch Cake
- Recipe Details
- Equipment
- Ingredients
- Instructions
- Step 1: Prepare the Oven and Baking Pan
- Step 2: Make the Cookie Crumb Layer
- Step 3: Mix the Strawberry Cake Batter
- Step 4: Prepare the Cheesecake Layer
- Step 5: Make the Cream Cheese Frosting
- Step 6: Build the Cake Layers
- Step 7: Frost the Cake
- Step 8: Finish with the Crunch Layer
- Step 9: Chill Before Serving
- Notes
- Serving Suggestions
- Storage
Why You’ll Love This Strawberry Crunch Cake
This cake has a quick prep time of just 30 minutes. Even though it looks impressive, the process is approachable.
It uses simple ingredients. Cake mix, gelatin, cookies, cream cheese, butter, milk, eggs, sugar, cornstarch, heavy cream, vanilla, and powdered sugar come together into a layered dessert.
It is family-friendly. Kids and adults both love the strawberry flavor, creamy cheesecake center, and crunchy topping.
It is freezer-friendly. You can make it ahead and freeze slices for unexpected guests or future dessert cravings.
It has layers of flavor and texture. Soft cake, creamy cheesecake, fluffy frosting, and crumbly cookie topping all work together.
It is visually stunning. The strawberry color and crunchy topping make it a beautiful dessert for any occasion.
Recipe Details
This cake bakes at 350°F (175°C). A 9×13-inch baking pan should be lightly greased with butter or cooking spray before layering.
The cookie crumb layer uses 36 pieces vanilla sandwich cookies, 3 ounces strawberry gelatin mix, 4 tablespoons melted unsalted butter, and 5 to 6 drops red food color gel if desired. The mixture should resemble wet sand.
The strawberry cake layers use 16.5 ounces Strawberry Supreme cake mix, 3 large room-temperature eggs, ½ cup melted unsalted butter, 1 cup whole milk, and 3 ounces strawberry gelatin mix. The batter is mixed until smooth and well combined, about 2–3 minutes.
The cheesecake layer uses ¾ cup granulated sugar, ¼ cup cornstarch, 16 ounces softened cream cheese, ¼ cup heavy cream, 2 teaspoons pure vanilla extract, and 3 large room-temperature eggs. The eggs are added one at a time and mixed well after each addition.
The frosting uses 8 ounces softened cream cheese, ½ cup heavy cream, ½ cup softened unsalted butter, 1 teaspoon vanilla extract, and 2 cups powdered sugar. It is whipped until fluffy and smooth.
The cake bakes for 45–50 minutes. It is done when the cake is set and a toothpick inserted into the center comes out clean.
After baking, the cake cools in the pan for about 10 minutes before being transferred to a wire rack to cool completely. For the best flavor and texture, refrigerate the cake for a few hours or overnight before serving.
Ingredients
Cookie Crumb Layer
36 pieces vanilla sandwich cookies, coarsely crushed
3 oz strawberry gelatin mix
4 tablespoons unsalted butter, melted
5 to 6 drops red food color gel, optional
Strawberry Cake Layers
16.5 oz Strawberry Supreme cake mix
3 oz strawberry gelatin mix
3 large eggs, room temperature
½ cup unsalted butter, melted
1 cup whole milk
Cheesecake Layer
16 oz cream cheese, softened
¾ cup granulated sugar
¼ cup cornstarch
¼ cup heavy cream
2 teaspoons pure vanilla extract
3 large eggs, room temperature
Frosting
8 oz cream cheese, softened
½ cup unsalted butter, softened
½ cup heavy cream
1 teaspoon vanilla extract
2 cups powdered sugar
Ingredient Notes
Vanilla sandwich cookies create the crunchy crumb topping. They should be coarsely crushed so the texture stays noticeable.
Strawberry gelatin mix adds both flavor and color. It is used in the crumb layer and also in the strawberry cake batter.
Melted unsalted butter helps bind the cookie crumb layer. Unsalted butter keeps the sweetness balanced.
Red food color gel is optional. It gives the crumb layer a more vibrant look.
Strawberry Supreme cake mix creates the foundation of the cake layers. Use your favorite brand.
Room-temperature eggs help the cake batter and cheesecake layer mix more smoothly. They are used in both layers.
Whole milk gives the strawberry cake batter a rich and fluffy texture. It helps the cake feel soft and tender.
Cream cheese should be softened for both the cheesecake layer and the frosting. Soft cream cheese mixes more smoothly and helps prevent lumps.
Cornstarch helps the cheesecake layer set. It supports that creamy texture in the middle of the cake.
Heavy cream adds richness to the cheesecake layer and makes the frosting lighter and fluffier. If you are out of heavy cream, whole milk can be used, but the texture will be less rich.
Powdered sugar sweetens the frosting and helps it become smooth. Add it gradually for easier mixing.
Optional Swaps, Variations, Add-Ins, and Serving Ideas
Raspberry Crunch Cake
Use raspberry gelatin instead of strawberry gelatin. This gives the cake a different berry flavor.
The color and flavor will change. Choose this variation if you want a fun twist while keeping the same layered structure.
Peach Crunch Cake
Use peach gelatin for a fruitier, softer twist. The overall flavor becomes different from the strawberry version.
This variation is nice when you want a summer-style dessert that feels less berry-forward. The crumb layer can still stay crunchy.
Lemon Crunch Cake
Use lemon gelatin for a brighter flavor. This changes the cake into a citrus-style variation.
The tangy flavor will influence the whole dessert. Use this option if you enjoy a sharper fruit note.
Gluten-Free Strawberry Crunch Cake
Substitute gluten-free cake mix to make the cake gluten-free. Make sure the other ingredients fit your needs as well.
The texture may vary depending on the cake mix. Follow the same layering and baking cues.
Greek Yogurt Frosting Direction
Use Greek yogurt instead of cream cheese in the frosting for a lighter version. The flavor and texture will be different.
This option creates a tangier finish. It is useful when you want the frosting to feel less rich.
Fresh Strawberry Layer
Add fresh strawberries between the cake and cheesecake layer for extra flavor. Fresh strawberries can also be served on the side.
This adds more berry freshness. It also makes the presentation feel brighter.
Chocolate Sandwich Cookie Crunch
Use chocolate sandwich cookies in the crumb layer. This creates a chocolate lover’s version.
The crumb layer becomes darker and richer. It pairs well with the strawberry flavor.
Mascarpone Substitute
Mascarpone cheese can be used as a cream cheese substitute. It creates a richer texture.
The flavor will vary slightly. Use it when you want a more luxurious creamy layer.
Sugar Alternative Option
The granulated sugar can be swapped for a sugar alternative if desired. The result may vary depending on the substitute.
Keep in mind that sweetness and texture may change. Choose an option that fits your needs.
Why This Strawberry Crunch Cake Works
This cake works because every layer has a purpose. The strawberry cake brings softness and fruit flavor, the cheesecake layer brings richness, the frosting adds creaminess, and the crumb topping gives crunch.
The strawberry gelatin strengthens the strawberry flavor. It also helps create a more colorful, cheerful cake.
The cake mix keeps the process approachable. It gives the dessert structure while leaving room for the cheesecake and crumb layers to shine.
The cheesecake layer makes the cake feel more indulgent. It adds creaminess between the strawberry layers.
The frosting gives the cake a smooth, sweet finish. Cream cheese, butter, heavy cream, vanilla, and powdered sugar make it fluffy and rich.
The crumb topping is what makes the cake memorable. It gives a playful crunch that contrasts beautifully with the soft cake and creamy layers.
Directions
Step 1: Preheat the Oven
Preheat your oven to 350°F (175°C). This gives the cake the proper baking temperature from the start.
Let the oven fully preheat before the cake goes in. A steady temperature helps the layers bake evenly.
While the oven heats, prepare the baking pan and gather all ingredients. This cake has several layers, so having everything ready makes the process easier.
Step 2: Prepare the Baking Pan
Grab a 9×13-inch baking pan. Lightly grease it with butter or cooking spray.
Make sure the bottom and sides are coated. This helps the cake release more easily after baking and cooling.
Set the pan aside while you prepare the crumb, cake batter, cheesecake layer, and frosting. The pan will be used during assembly.
Step 3: Crush the Vanilla Sandwich Cookies
Place 36 pieces vanilla sandwich cookies in a zip-top bag. Use a rolling pin to crush them coarsely.
The crumbs should not be completely powdery. A coarser texture gives the topping its signature crunch.
Pour the crushed cookies into a mixing bowl. This will become the cookie crumb layer.
Step 4: Add Strawberry Gelatin to the Crumbs
Add 3 ounces strawberry gelatin mix to the crushed cookies. Stir to combine.
The gelatin adds strawberry flavor and color. It helps the crumb topping feel bright and fun.
Make sure the gelatin is spread through the cookie crumbs. This creates a more even flavor.
Step 5: Add Melted Butter and Food Color Gel
Pour 4 tablespoons melted unsalted butter over the cookie crumb mixture. Add 5 to 6 drops red food color gel if using.
The butter helps the crumbs hold together. The optional food color gel gives the crumb layer a stronger red look.
Mix until all the crumbs are coated. The mixture should resemble wet sand.
Step 6: Set the Crumb Layer Aside
Once the crumb mixture is evenly coated, set it aside. It will be sprinkled over the assembled cake before baking.
Do not press it into the pan yet. It belongs on top after the cake and cheesecake layers are arranged.
Keeping it ready nearby makes final assembly smoother. The crumb layer is the last part added before baking.
Step 7: Start the Strawberry Cake Batter
In a large mixing bowl, add the 16.5-ounce Strawberry Supreme cake mix. Use your favorite brand.
Add 3 ounces strawberry gelatin mix. This gives the cake another layer of strawberry flavor.
Stir the dry cake mix and gelatin together briefly. This helps the gelatin spread through the batter more evenly once liquids are added.
Step 8: Add Eggs, Butter, and Milk to the Cake Batter
Add 3 large room-temperature eggs, ½ cup melted unsalted butter, and 1 cup whole milk. These ingredients make the cake batter rich and smooth.
The eggs mix best when they are at room temperature. The melted butter adds moisture and flavor.
Whole milk helps create a fluffy texture. It also gives the batter a richer feel.
Step 9: Beat the Cake Batter
Use an electric mixer to beat the cake batter until smooth and well combined. This should take about 2–3 minutes.
The batter may look a little runny. That is normal for this cake.
Scrape the sides of the bowl if needed. You want the cake mix, gelatin, eggs, butter, and milk fully blended.
Step 10: Prepare the Cheesecake Dry Base
In a separate bowl, whisk together ¾ cup granulated sugar and ¼ cup cornstarch. This helps the cornstarch distribute evenly.
Cornstarch helps the cheesecake layer set. Mixing it with sugar first helps prevent uneven pockets.
Once the sugar and cornstarch are combined, the cream cheese can be added. This step supports a smoother cheesecake layer.
Step 11: Add the Softened Cream Cheese
Add 16 ounces softened cream cheese to the sugar and cornstarch mixture. The cream cheese must be soft enough to mix smoothly.
Softened cream cheese helps prevent lumps. A smooth cheesecake layer makes the cake taste more luscious.
Beat or mix until the cream cheese begins to blend with the sugar and cornstarch. Scrape the bowl if needed.
Step 12: Add Heavy Cream and Vanilla
Pour in ¼ cup heavy cream and 2 teaspoons pure vanilla extract. Mix until the cheesecake base becomes creamier.
The heavy cream adds richness. The vanilla makes the cheesecake layer taste warmer and more complete.
Continue mixing until the mixture looks smooth. This layer should be creamy before the eggs are added.
Step 13: Add the Cheesecake Eggs One at a Time
Add 3 large room-temperature eggs one at a time. Mix well after each addition.
Adding the eggs one at a time helps the cheesecake layer stay smooth. It also makes mixing easier.
Do not rush this step. The mixture should look creamy and fully combined before assembly.
Step 14: Make the Frosting Base
In another mixing bowl, add 8 ounces softened cream cheese and ½ cup softened unsalted butter. Both should be at room temperature for easy blending.
Mix until the cream cheese and butter are smooth. This creates the base of the frosting.
A stand mixer can make this step easier, especially if the cream cheese or butter needs more mixing. A smooth base gives the frosting a better texture.
Step 15: Add Heavy Cream and Vanilla to the Frosting
Pour in ½ cup heavy cream and 1 teaspoon vanilla extract. Mix on low at first.
The heavy cream helps make the frosting light and fluffy. Vanilla adds flavor.
Blend until the liquid is incorporated. Scrape down the bowl so everything mixes evenly.
Step 16: Add Powdered Sugar Gradually
Gradually add 2 cups powdered sugar while mixing on low speed. This keeps the powdered sugar from scattering.
Once combined, increase the speed and whip until fluffy and smooth. The frosting should look creamy and spreadable.
Set the frosting aside until the cake is baked and cooled. It should not be spread onto a hot cake.
Step 17: Pour the First Cake Layer
Pour half of the strawberry cake batter into the prepared 9×13-inch baking pan. Smooth it evenly.
This first layer creates the base for the cheesecake. Spread it carefully so the cheesecake layer has a stable surface.
Use a spatula to nudge batter into the corners. Try to keep the layer as even as possible.
Step 18: Add the Cheesecake Layer
Carefully spoon the cheesecake mixture over the cake batter. Spread it gently so it covers the entire layer.
Use light pressure. You do not want to mix the cheesecake completely into the cake batter.
The cheesecake layer should sit evenly across the first cake layer. This creates the creamy center of the dessert.
Step 19: Add the Remaining Cake Batter
Top the cheesecake layer with the remaining strawberry cake batter. Spread it evenly over the cheesecake.
Work gently so the layers stay distinct. A spatula helps smooth the batter without disturbing the cheesecake too much.
Cover as much of the cheesecake as possible. The top cake layer helps hold the dessert together.
Step 20: Add the Cookie Crumb Layer
Sprinkle the cookie crumb mixture over the top of the cake. Spread it evenly.
Press it down lightly to help it adhere during baking. Do not pack it down too firmly.
The crumb topping should cover the surface. This creates the strawberry crunch finish.
Step 21: Bake the Cake
Place the pan in the preheated oven. Bake for 45–50 minutes.
The cake is done when it is set and a toothpick inserted into the center comes out clean. Check carefully near the end of the baking time.
The top should look finished and the crumb layer should be set. Avoid overbaking so the cake stays tender.
Step 22: Cool in the Pan
Remove the cake from the oven and let it cool in the pan for about 10 minutes. This helps it settle.
The layers will be hot and delicate right after baking. A short rest makes the cake easier to handle.
Do not frost or slice it yet. It needs more cooling time first.
Step 23: Transfer to a Wire Rack
After the brief pan cooling time, transfer the cake to a wire rack to cool completely. Let it cool fully before frosting.
A fully cooled cake holds frosting better. Warm cake can make frosting melt and slide.
Be patient with this step. The layers will slice more neatly after they cool.
Step 24: Refrigerate Before Serving
For the best flavor and texture, refrigerate the cake for a few hours or overnight before serving. This helps the cheesecake layer settle.
Chilling also makes the cake easier to slice. The creamy layers firm up beautifully.
The wait is worth it. The chilled cake tastes refreshing, rich, and balanced.
Step 25: Frost and Serve
Spread the prepared frosting over the cooled cake as desired. The frosting should be fluffy, creamy, and smooth.
Slice into generous pieces. Serve chilled for the best flavor and texture.
Add fresh strawberries on the side if desired. A scoop of vanilla ice cream or a dollop of whipped cream can make each slice extra indulgent.
Serving Ideas
Serve Strawberry Crunch Cake chilled. The cake has the best flavor and texture after refrigeration.
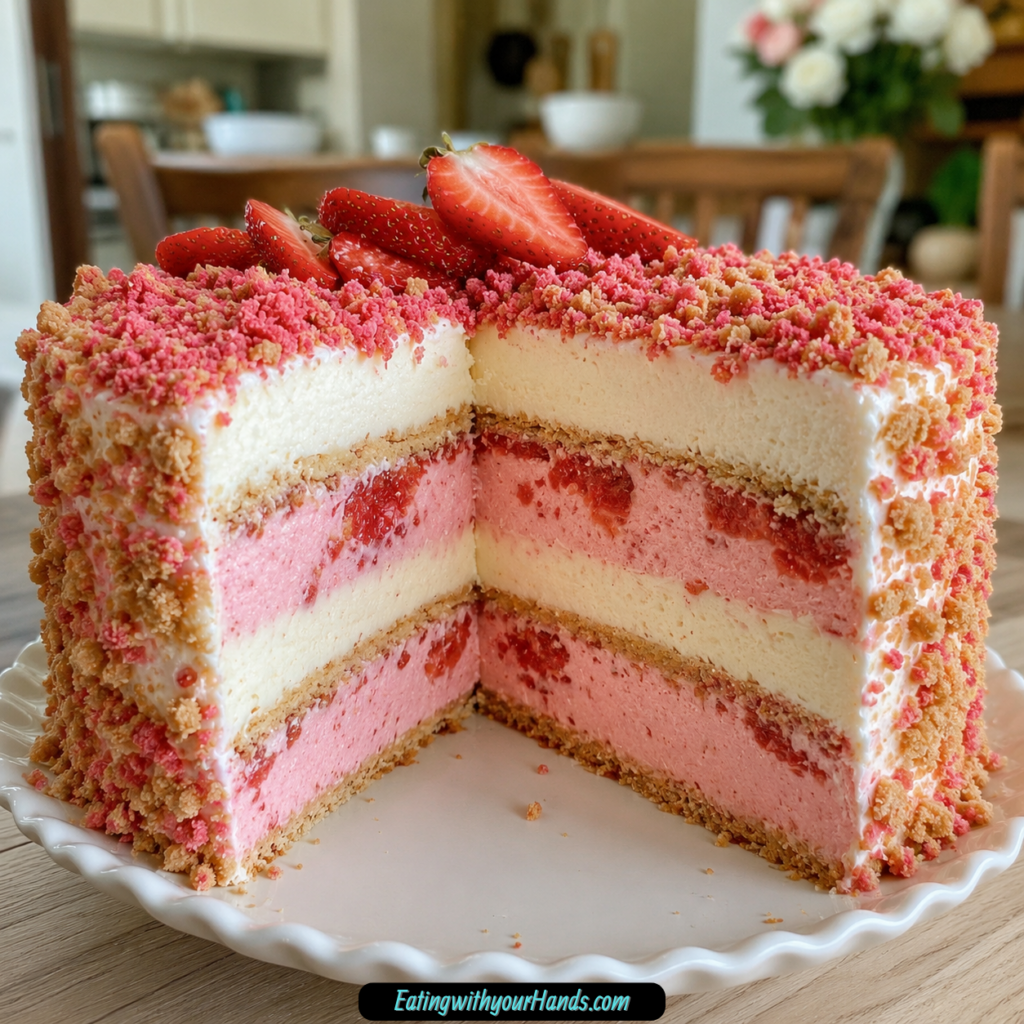
Cut the cake into generous slices. The layers should show soft strawberry cake, creamy cheesecake, and the crunchy topping.
Pair each slice with vanilla ice cream for a more indulgent dessert. The cold ice cream works beautifully with the chilled cake.
A dollop of whipped cream is another lovely option. It makes the dessert feel lighter on the plate.
Fresh strawberries on the side elevate the presentation. They also reinforce the strawberry flavor.
This cake works for birthdays, summer barbecues, gatherings, cozy afternoons, and special celebrations. It is bright enough for warm weather and rich enough for a dessert table.
Storage
Store leftover cake in an airtight container in the refrigerator. It will keep for up to 5 days.
Keep the cake covered to maintain freshness. The cheesecake and frosting layers should stay chilled.
If you slice the cake before storing, place the pieces carefully so the crumb topping stays intact. Use a container with enough room.
Serve leftovers chilled. The texture is best when the cake remains cold.
Reheating
This cake does not need reheating. It is best served chilled.
Because it has cheesecake and frosting layers, keep it refrigerated until serving. Chilling helps the layers stay firm.
If frozen, thaw it in the refrigerator before serving. Do not heat it.
Enjoy the cake cold for the best texture. The cheesecake layer and frosting taste best that way.
Freezing
You can freeze Strawberry Crunch Cake. Wrap slices tightly in plastic wrap and aluminum foil.
Freeze for up to 3 months. Proper wrapping helps prevent freezer burn.
Thaw in the refrigerator before serving. Overnight thawing works well.
For best results, freeze individual slices if you want easy portions. That way, you can thaw only what you need.
Make-Ahead
This cake is excellent for making ahead. It actually benefits from chilling for a few hours or overnight before serving.
Bake the cake, let it cool, refrigerate it, and serve chilled. This gives the cheesecake layer time to settle.
You can also freeze slices for up to 3 months. Wrap them tightly in plastic wrap and aluminum foil.
Make-ahead desserts are helpful for parties and guests. This cake lets you prepare something beautiful before the day gets busy.
Helpful Notes for Best Results
Use softened cream cheese for both the cheesecake layer and frosting. Cold cream cheese can create lumps.
Use room-temperature eggs for easier mixing. They blend more smoothly into the cake batter and cheesecake layer.
Grease the pan lightly with butter or cooking spray. This helps with serving and cleanup.
Do not skip the refrigeration time if you want the best texture. A few hours or overnight makes the layers firmer and more flavorful.
If you are out of heavy cream, whole milk can be used, but the texture will be less rich. Heavy cream gives the cheesecake and frosting a more indulgent feel.
For a nut-free version, make sure all ingredients are free from cross-contamination. Check labels carefully.
A stand mixer can make mixing easier, especially for the cheesecake layer. Smooth mixing helps prevent lumps.
Fresh strawberries can be added between the cake and cheesecake for extra flavor. They can also be served on the side.
Variations
Raspberry Crunch Cake
Use raspberry gelatin instead of strawberry gelatin. This gives the cake a berry twist.
The overall flavor changes but stays fruity and fun. It is a good option for a different summer dessert.
Peach Crunch Cake
Use peach gelatin for a soft, sweet fruit flavor. This creates a warmer fruit profile.
Peach gives the cake a different color and taste. It is a nice variation for fruit lovers.
Lemon Crunch Cake
Use lemon gelatin for a bright citrus version. The flavor becomes tangier and fresher.
This variation changes the mood of the dessert. It is especially nice when you want something lively.
Gluten-Free Strawberry Crunch Cake
Use gluten-free cake mix. Check the other ingredients as needed.
The texture may vary depending on the mix. Bake until the cake is set and the toothpick comes out clean.
Greek Yogurt Frosting Cake
Use Greek yogurt instead of cream cheese in the frosting for a lighter version. The texture and flavor will change.
It will be tangier and less rich. Use this option when you want a lighter finish.
Fresh Strawberry Cheesecake Layer
Add fresh strawberries between the cake and cheesecake layer. This brings extra fruit flavor.
The strawberries make the cake feel even more summery. They also add freshness to the rich layers.
Chocolate Strawberry Crunch Cake
Use chocolate sandwich cookies in the crumb layer. This creates a chocolate lover’s delight.
Chocolate sandwich cookies add a deeper flavor to the topping. They pair well with strawberry cake.
Mascarpone Strawberry Cake
Use mascarpone cheese as a substitute for cream cheese. It gives a richer texture.
The flavor will vary slightly. This option makes the creamy layers feel more luxurious.
Sugar Alternative Cake
Swap the granulated sugar for a sugar alternative if desired. Results may vary based on the alternative used.
The sweetness and texture can change. Follow the same mixing and baking cues.
Troubleshooting
Why Is My Cheesecake Layer Lumpy?
The cream cheese may not have been softened enough. Room-temperature cream cheese mixes more smoothly.
A stand mixer can help create a smoother cheesecake layer. Scrape the bowl as needed.
Why Is My Cake Not Set in the Center?
It may need more baking time. Bake until the cake is set and a toothpick inserted into the center comes out clean.
Check near the end of the 45–50 minute range. Ovens can vary.
Why Did My Frosting Melt?
The cake may have been too warm when frosted. Let the cake cool completely before adding frosting.
Refrigerating the cake before serving also helps. The chilled layers hold better.
Why Is My Crumb Layer Too Loose?
The crumbs may not have been coated well enough with butter. Mix until the texture resembles wet sand.
Press the crumb layer down lightly before baking. This helps it adhere.
Why Does My Cake Slice Messily?
The cake may not have chilled long enough. Refrigerate for a few hours or overnight before serving.
Chilling helps the cheesecake layer firm. It also makes cleaner slices.
Frequently Asked Questions
Can I Freeze Strawberry Crunch Cake?
Yes, you can freeze Strawberry Crunch Cake. Wrap it tightly in plastic wrap and then in aluminum foil to prevent freezer burn.
It can be frozen for up to 3 months. Thaw it in the refrigerator overnight before serving.
What Can I Substitute for Cream Cheese?
Greek yogurt can be used for a lighter option. Mascarpone cheese can be used for a richer texture.
The flavor will vary slightly with either substitute. Both can work depending on your preference.
How Long Can I Store the Cake?
Store the cake in an airtight container in the refrigerator for up to 5 days. Keep it covered to maintain freshness.
Serve it chilled. The texture is best when the cake stays refrigerated.
Can I Use a Different Fruit Flavor?
Yes, different fruit flavors can be used. Raspberry, peach, or lemon gelatin can switch up the taste.
The fruit flavor will influence the overall cake. Choose the flavor you enjoy most.
Can I Use Chocolate Sandwich Cookies?
Yes, chocolate sandwich cookies can be used in the crumb layer. This creates a chocolate-strawberry version.
It gives the topping a richer flavor. It is a great option for chocolate lovers.
Do I Have to Refrigerate the Cake?
For the best flavor and texture, yes. Refrigerate the cake for a few hours or overnight before serving.
The cheesecake layer firms as it chills. This makes slicing easier.
Can I Add Fresh Strawberries?
Yes, fresh strawberries can be added between the cake and cheesecake layer. They can also be served on the side.
They add freshness and make the presentation brighter. Use them when you want extra fruit flavor.
Why This Recipe Works So Well
Strawberry Crunch Cake works because it combines several dessert textures in one slice. The cake is fluffy, the cheesecake layer is creamy, the frosting is smooth, and the crumb topping is crunchy.
The Strawberry Supreme cake mix and strawberry gelatin create a bright strawberry base. The gelatin adds another blast of strawberry flavor and color.
The melted butter and whole milk help the cake layers taste rich and soft. The eggs support the structure.
The cheesecake layer makes the cake feel special. Cream cheese, sugar, cornstarch, heavy cream, vanilla, and eggs create a smooth center that balances the strawberry cake.
The frosting adds another creamy layer. Cream cheese, butter, heavy cream, vanilla, and powdered sugar whip into a dreamy finish.
The cookie crumb topping brings the fun. It gives every bite the strawberry crunch texture that makes this dessert memorable.
Final Thoughts
Strawberry Crunch Cake is a joyful, layered dessert that feels made for celebrations. It is sweet, creamy, colorful, crunchy, and filled with the kind of strawberry flavor that makes people smile before the first bite is gone.
I love how it looks impressive but still uses approachable ingredients. Cake mix, strawberry gelatin, cookies, cream cheese, butter, milk, eggs, heavy cream, and powdered sugar turn into a dessert that feels bakery-worthy without becoming stressful.
Serve it chilled for birthdays, summer gatherings, family parties, barbecues, or a simple afternoon treat that deserves something special. However you share it, this cake brings strawberry sweetness, creamy cheesecake comfort, and a crunchy finish to every slice.
Strawberry Crunch Cake
This Strawberry Crunch Cake is sweet, creamy, fruity, and layered with strawberry cake, a smooth cheesecake layer, rich cream cheese frosting, and a colorful crunchy cookie crumb topping. It is a fun dessert for birthdays, spring gatherings, parties, or any occasion that needs a bright strawberry cake with creamy texture and a bakery-style finish.
Recipe Details
- Prep Time: 30 minutes
- Cook Time: 45 minutes
- Total Time: 1 hour 15 minutes
- Course: Dessert
- Cuisine: American
- Servings: 12 people
- Calories: 400 kcal
Equipment
- Mixing bowl
- baking pan
Ingredients
For The Cookie Crumb Layer
- 5 to 6 drops red food color gel
- 4 tablespoons unsalted butter, melted
- 3 oz strawberry gelatin mix
- 36 pieces vanilla sandwich cookies, coarsely crushed
For The Strawberry Cake Layers
- 1 cup whole milk
- ½ cup unsalted butter, melted (1 stick)
- 3 large eggs, room temperature
- 3 oz strawberry gelatin mix
- 16.5 oz Strawberry Supreme cake mix
For The Cheesecake Layer
- 3 large eggs, room temperature
- 2 teaspoons pure vanilla extract
- ¼ cup heavy cream
- 16 oz cream cheese, softened
- ¼ cup cornstarch
- ¾ cup granulated sugar
For The Frosting
- 2 cups powdered sugar
- 1 teaspoon vanilla extract
- ½ cup unsalted butter, softened (1 stick)
- ½ cup heavy cream
- 8 oz cream cheese, softened
Instructions
Step 1: Prepare the Oven and Baking Pan
Preheat the oven according to the temperature from your original recipe source, since the provided recipe does not include a specific baking temperature. Prepare the baking pan.
Step 2: Make the Cookie Crumb Layer
In a mixing bowl, mix the coarsely crushed vanilla sandwich cookies, strawberry gelatin mix, melted unsalted butter, and red food color gel until the crumb mixture is evenly coated and colorful.
Step 3: Mix the Strawberry Cake Batter
In another mixing bowl, combine the Strawberry Supreme cake mix, room temperature eggs, melted unsalted butter, whole milk, and strawberry gelatin mix until the strawberry cake batter is combined.
Step 4: Prepare the Cheesecake Layer
Mix the granulated sugar, cornstarch, softened cream cheese, heavy cream, pure vanilla extract, and room temperature eggs until the cheesecake layer is smooth and evenly blended.
Step 5: Make the Cream Cheese Frosting
In a mixing bowl, combine the softened cream cheese, heavy cream, softened unsalted butter, vanilla extract, and powdered sugar until the frosting is creamy and smooth.
Step 6: Build the Cake Layers
Layer the strawberry cake, cheesecake, and cookie crumb layer as directed by the recipe method, keeping the cake and cheesecake elements even so the finished dessert has distinct layers.
Step 7: Frost the Cake
Spread the cream cheese frosting over the cake, covering it evenly.
Step 8: Finish with the Crunch Layer
Add the strawberry cookie crumb layer to the frosted cake for a crunchy strawberry topping.
Step 9: Chill Before Serving
Refrigerate the cake before serving for better texture.
Notes
Refrigerate the cake before serving for better texture.
Serving Suggestions
- Serve chilled for the cleanest slices and best cheesecake texture.
- Add to birthday parties, spring dessert tables, or family gatherings.
- Pair with coffee, iced tea, or cold milk.
- Slice into 12 servings for a rich layered dessert.
- Serve after refrigerating so the frosting, cheesecake, and crumb topping hold together better.
Storage
How to Refrigerate
Store the cake covered in the refrigerator until ready to serve.
Best Texture Tip
Refrigerate the cake before serving so the cheesecake layer, frosting, and crumb topping have time to set.
Serving Tip
Slice the cake while chilled for neater pieces and more defined layers.

Fernando is the creator and writer behind the food blog Eating with your Hands. Living and working in cities like Paris, Barcelona, and Berlin, and being married to a Canadian foodie, has given Fernando a passion and interest in food and inspired him to run EWYH.