
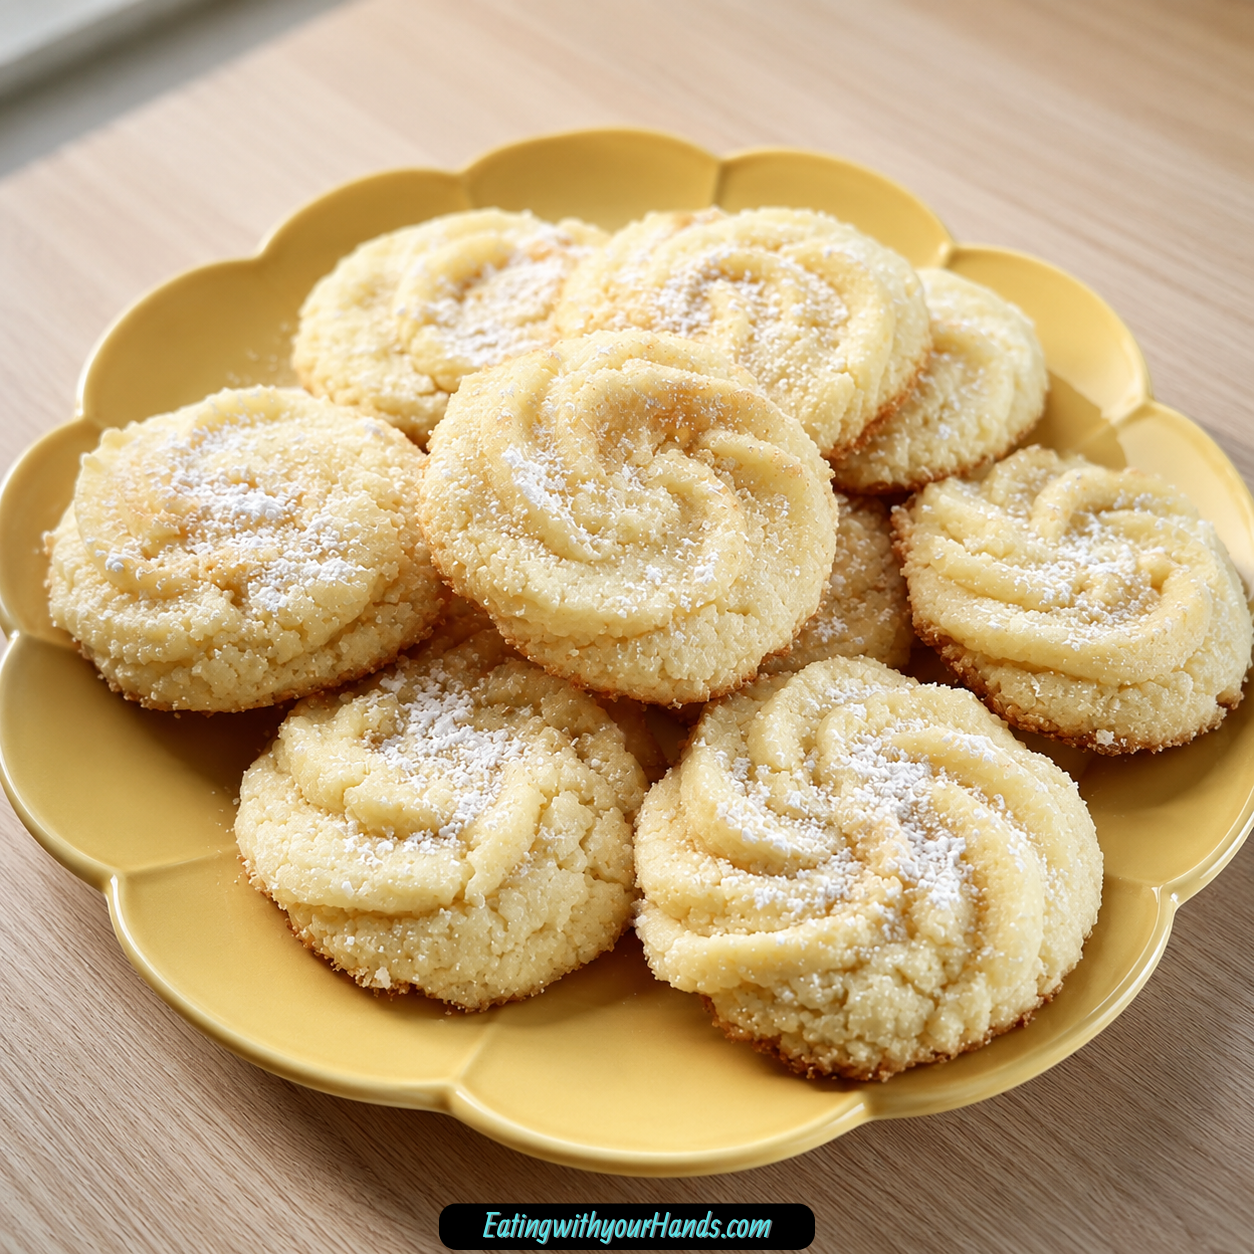
There is a quiet kind of happiness that comes from baking something simple and watching it turn out beautifully. These 3-ingredient butter cookies are exactly that kind of recipe, made with nothing more than butter, powdered sugar, and all-purpose flour.
They do not need a long list of extras to feel special. Their charm comes from their soft, buttery texture, their gentle sweetness, and the way they seem to melt the moment you bite into them.
This is the type of cookie that feels like it could have come from a handwritten family recipe card. It is practical, warm, and dependable, yet still lovely enough to place on a holiday cookie tray or tuck into a decorative tin for gifting.
The original story behind these cookies begins with a simple recipe found inside a great-aunt’s handwritten cookbook. Tucked among more elaborate holiday bakes, this minimalist cookie stood out because it asked for so little and still delivered something tender, rich, and memorable.
That is what makes these cookies so appealing. They prove that a recipe does not have to be complicated to feel homemade, comforting, and worth keeping.
Table of Contents
- Why This 3-Ingredient Butter Cookie Recipe Belongs in Your Kitchen
- The Beauty of Baking With Only Three Ingredients
- Recipe Details
- Ingredients
- Optional Add-Ins and Finishing Ideas
- Understanding the Ingredients
- Directions
- Step 1: Preheat the Oven to 350°F
- Step 2: Line the Baking Sheet
- Step 3: Prepare the Butter
- Step 4: Add the Powdered Sugar
- Step 5: Cream the Butter and Sugar
- Step 6: Scrape Down the Bowl
- Step 7: Measure the Flour Correctly
- Step 8: Add the Flour Gradually
- Step 9: Mix Until the Dough Forms
- Step 10: Check Whether the Dough Needs Chilling
- Step 11: Scoop the Dough
- Step 12: Roll Into 1-Inch Balls
- Step 13: Arrange on the Baking Sheet
- Step 14: Flatten Each Cookie Gently
- Step 15: Add Optional Designs or Color
- Step 16: Bake the Cookies
- Step 17: Cool on the Baking Sheet
- Step 18: Transfer to a Wire Rack
- Serving Suggestions
- Storage
- Freezing
- Make-Ahead Tips
- Gifting Tip
- Helpful Notes
- Troubleshooting
- Flavor and Decoration Ideas
- Frequently Asked Questions
- Why These Cookies Are Great for Beginners
- Why These Cookies Are Perfect for Holidays
- Final Thoughts
- 3-Ingredient Butter Cookies
Why This 3-Ingredient Butter Cookie Recipe Belongs in Your Kitchen
These cookies are made for the days when you want to bake but do not want to make the kitchen feel overwhelming. With only three pantry staples, the process stays calm from start to finish.
There are no special tools required beyond a mixing bowl, a hand mixer or stand mixer, and a baking sheet. There is no usual chilling step either, which means the dough can go from bowl to oven quickly.
The texture is one of the biggest reasons this recipe works so well. The cookies are soft, buttery, and tender, with a shortbread-like quality that feels delicate without being difficult.
Powdered sugar is part of what gives them that fine, smooth texture. It blends into the butter beautifully and helps create a cookie that feels light and soft instead of grainy.
They are also easy to customize. You can keep them plain, dust them with powdered sugar, dip one half in melted chocolate, press them with a fork, add sprinkles, or use a cookie press for decorative shapes.
That flexibility makes them useful for many occasions. They can be a quick sweet snack, a beginner baking project, a holiday cookie, a school lunch treat, or a thoughtful edible gift.
The Beauty of Baking With Only Three Ingredients
Some recipes earn their place in a kitchen because they are efficient. Others stay because they carry a feeling, and these cookies manage to do both.
Butter, powdered sugar, and flour are everyday ingredients, but together they create something that feels classic. The dough is simple, but the finished cookies have that soft, rich flavor people associate with traditional homemade baking.
There is also comfort in knowing exactly what is going into the bowl. No long shopping list, no complicated flavor combination, and no stressful steps.
The process is direct: cream the butter and sugar, mix in the flour, shape the dough, flatten the cookies, and bake. Each step is easy to follow, which makes the recipe especially friendly for beginners.
At the same time, experienced bakers can appreciate how dependable the formula is. It is the kind of base recipe that can be made plain or dressed up without losing its identity.
That is the strength of a minimalist cookie. It gives you room to enjoy the basics and just enough flexibility to make it your own.
Recipe Details
- Recipe name: 3-Ingredient Butter Cookies
- Main ingredients: Butter, powdered sugar, and all-purpose flour
- Oven temperature: 350°F (175°C)
- Baking time: 12 to 15 minutes
- Creaming time: 2 to 3 minutes
- Cookie shape: Tablespoon-sized portions rolled into 1-inch balls and gently flattened
- Spacing: 1 to 2 inches apart on the baking sheet
- Cooling time on baking sheet: 5 minutes
- Total time: Ready in under 30 minutes from start to finish
- Dough chilling: Not usually needed
- Room temperature storage: Up to 1 week
- Freezer storage: Up to 2 months
- Make-ahead option: Dough can be made 1 to 2 days in advance and stored in the fridge
Ingredients
- 1 cup butter, softened and slightly melted
- 1 cup powdered sugar
- 2 cups all-purpose flour
Optional Add-Ins and Finishing Ideas
- Lemon zest
- Almond extract
- Vanilla bean
- Powdered sugar for dusting after baking
- Melted chocolate for dipping
- Holiday sprinkles
- Colored sugar
Understanding the Ingredients
Because there are only three ingredients in the base recipe, every ingredient matters. The flavor, texture, and structure all depend on using each one correctly.
Butter
The recipe uses 1 cup butter, softened and slightly melted. Butter is the main flavor of these cookies, so it gives the finished batch its rich, classic taste.
Unsalted butter is recommended for best results. It allows the buttery flavor to come through clearly and keeps the cookie base simple and balanced.
The butter should be soft enough to cream easily with the powdered sugar. It should not be fully melted, because butter that is too warm can make the dough overly soft.
If the butter becomes too melted and the dough feels sticky, the recipe notes that the dough can be chilled for 15 to 20 minutes before baking. This helps the cookies hold their shape better in the oven.
Powdered Sugar
The recipe uses 1 cup powdered sugar. This ingredient gives the cookies their fine, melt-in-your-mouth texture.
Powdered sugar blends smoothly with butter, which helps create a soft dough and a tender finished cookie. It also sweetens the cookies gently without making the texture coarse.
Because powdered sugar is light, it can puff up when mixing begins. Start the mixer slowly so the sugar stays in the bowl.
All-Purpose Flour
The recipe uses 2 cups all-purpose flour. Flour gives the cookies structure and helps turn the butter-sugar mixture into a dough that can be shaped.
For accurate measuring, the recipe notes that the flour should be spooned and leveled. Scooping directly from the flour container can pack in too much flour and may make the cookies dry.
When the flour is first added, the dough may look crumbly. Continue mixing on low speed until it comes together and the flour is fully incorporated.
Directions
Step 1: Preheat the Oven to 350°F
Set your oven to 350°F (175°C). Let the oven fully preheat before you place the cookies inside.
A steady oven temperature helps the cookies bake evenly. Since the cookies only bake for 12 to 15 minutes, the oven needs to be ready from the beginning.
While the oven heats, gather your ingredients and prepare your baking sheet. This keeps the process organized and prevents the dough from sitting too long once it is shaped.
Step 2: Line the Baking Sheet
Line a baking sheet with parchment paper or a silicone baking mat. This helps prevent sticking and makes cleanup easier after baking.
The lining also protects the tender cookies when it is time to move them. Butter cookies can be delicate when they first come out of the oven, so a smooth surface helps.
Set the lined baking sheet near your mixing area. Once the dough is ready, you can shape the cookies and place them directly on the prepared sheet.
Step 3: Prepare the Butter
Place 1 cup of softened and slightly melted butter into a large mixing bowl. Check the texture before moving forward.
The butter should be easy to beat, but it should not look completely liquid. Soft butter mixes smoothly, while fully melted butter can make the dough too loose.
If the butter is too warm, let it cool slightly before adding the sugar. This small detail helps preserve the classic butter cookie texture.
Step 4: Add the Powdered Sugar
Add 1 cup of powdered sugar to the bowl with the butter. Add it carefully because powdered sugar is fine and can scatter easily.
If you are using a mixer, begin on low speed. This helps the butter and powdered sugar come together without creating a cloud of sugar.
At this stage, the mixture may look soft and pale as the sugar begins to blend into the butter. Keep mixing until it becomes smoother.
Step 5: Cream the Butter and Sugar
Use a hand mixer or stand mixer to beat the softened butter and powdered sugar together. Continue beating until the mixture is light, fluffy, and smooth.
This should take about 2 to 3 minutes. The mixture should look creamy and evenly combined, with no dry pockets of sugar.
This step is important because it creates the foundation for the cookie texture. A well-creamed butter and sugar mixture helps the cookies bake up tender and soft.
Step 6: Scrape Down the Bowl
Pause the mixer and scrape the sides of the bowl. Butter and powdered sugar can cling to the edges, especially in the early stages of mixing.
Scraping helps everything blend evenly. In a three-ingredient recipe, even mixing is especially important because there are so few components.
After scraping, mix briefly again. The mixture should look smooth before the flour is added.
Step 7: Measure the Flour Correctly
Measure 2 cups of all-purpose flour using the spoon-and-level method. Spoon the flour into the measuring cup, then level off the top.
This helps avoid using too much flour. Extra flour can make the cookies dry instead of soft and tender.
Do not pack the flour firmly into the cup. The goal is an accurate measurement that supports the delicate texture of the cookies.
Step 8: Add the Flour Gradually
Gradually add the flour to the butter and powdered sugar mixture. Mix on low speed as you add it.
Adding the flour slowly makes it easier for the dough to come together. It also reduces the chance of flour spilling out of the bowl.
The dough may look crumbly at first. This is normal, so continue mixing gently until the texture changes.
Step 9: Mix Until the Dough Forms
Keep mixing on low speed until the flour is fully incorporated. The crumbly mixture should begin to come together into a soft dough.
Stop once there are no dry flour patches left. The dough does not need to be beaten for a long time after it forms.
Overmixing is not necessary for these cookies. Once the dough holds together, it is ready to shape.
Step 10: Check Whether the Dough Needs Chilling
Most of the time, this dough does not need to be chilled. That is one reason the recipe is so quick and convenient.
However, if the butter was too warm or the dough feels sticky, chill it briefly. The recipe recommends chilling for 15 to 20 minutes if needed.
This short chill helps firm the dough and can reduce spreading. It is not a required step unless the dough feels too soft to handle.
Step 11: Scoop the Dough
Scoop out tablespoon-sized portions of dough. Try to make the portions similar in size so the cookies bake evenly.
A tablespoon or small cookie scoop can help. Even sizing gives the batch a more consistent appearance and texture.
Place the scooped portions near your prepared baking sheet. This makes rolling and arranging the cookies faster.
Step 12: Roll Into 1-Inch Balls
Roll each tablespoon-sized portion into a 1-inch ball. Use gentle pressure so the dough stays soft and smooth.
The balls do not need to be perfect, but they should be close in size. This helps them flatten and bake consistently.
If the dough becomes warm in your hands, continue working gently. If it becomes too sticky, return it to the refrigerator for a short chill.
Step 13: Arrange on the Baking Sheet
Place the dough balls on the lined baking sheet. Leave 1 to 2 inches of space between each cookie.
The cookies need a little room to bake evenly. They may spread slightly, and spacing helps prevent them from touching.
Arrange them in rows if possible. This makes the baking sheet easier to monitor while the cookies are in the oven.
Step 14: Flatten Each Cookie Gently
Using the palm of your hand or the bottom of a glass, gently press each dough ball to flatten it slightly. This helps the cookies bake evenly and creates the classic butter cookie shape.
Do not press them too thin. A slight flattening is enough to shape the cookie while keeping a soft center.
If the edges crack a little, smooth them gently with your fingers. A simple handmade look is perfectly fine.
Step 15: Add Optional Designs or Color
For a classic pattern, press the tops with a fork to create a crosshatch design. This adds a simple decorative touch.
You can also use a cookie press if you want more decorative shapes. This is optional, but it can make the cookies feel more festive.
For color, add holiday sprinkles or colored sugar before baking. This makes the cookies especially fun for holidays or baking with little helpers.
Step 16: Bake the Cookies
Place the baking sheet in the preheated oven. Bake the cookies at 350°F (175°C) for 12 to 15 minutes.
The cookies are ready when the edges are just lightly golden. Do not wait for the entire cookie to become deeply browned.
Avoid overbaking because the goal is a soft, tender texture. The cookies will continue to firm slightly as they cool.
Step 17: Cool on the Baking Sheet
Remove the baking sheet from the oven and let the cookies cool on the sheet for 5 minutes. This short rest helps them set.
Fresh butter cookies can be fragile right after baking. Letting them sit briefly makes them easier to move without breaking.
Do not skip this cooling step. It helps the cookies finish firming while still staying tender.
Step 18: Transfer to a Wire Rack
After 5 minutes, transfer the cookies to a wire rack. Let them cool completely before storing or decorating further.
Cooling on a rack allows air to circulate around the cookies. This prevents the bottoms from becoming too soft.
Once fully cooled, the cookies are ready to serve plain, dust with powdered sugar, dip in chocolate, or pack for gifting.
Serving Suggestions
These cookies are wonderful served with coffee, tea, or milk. Their buttery flavor and soft texture pair naturally with simple drinks.
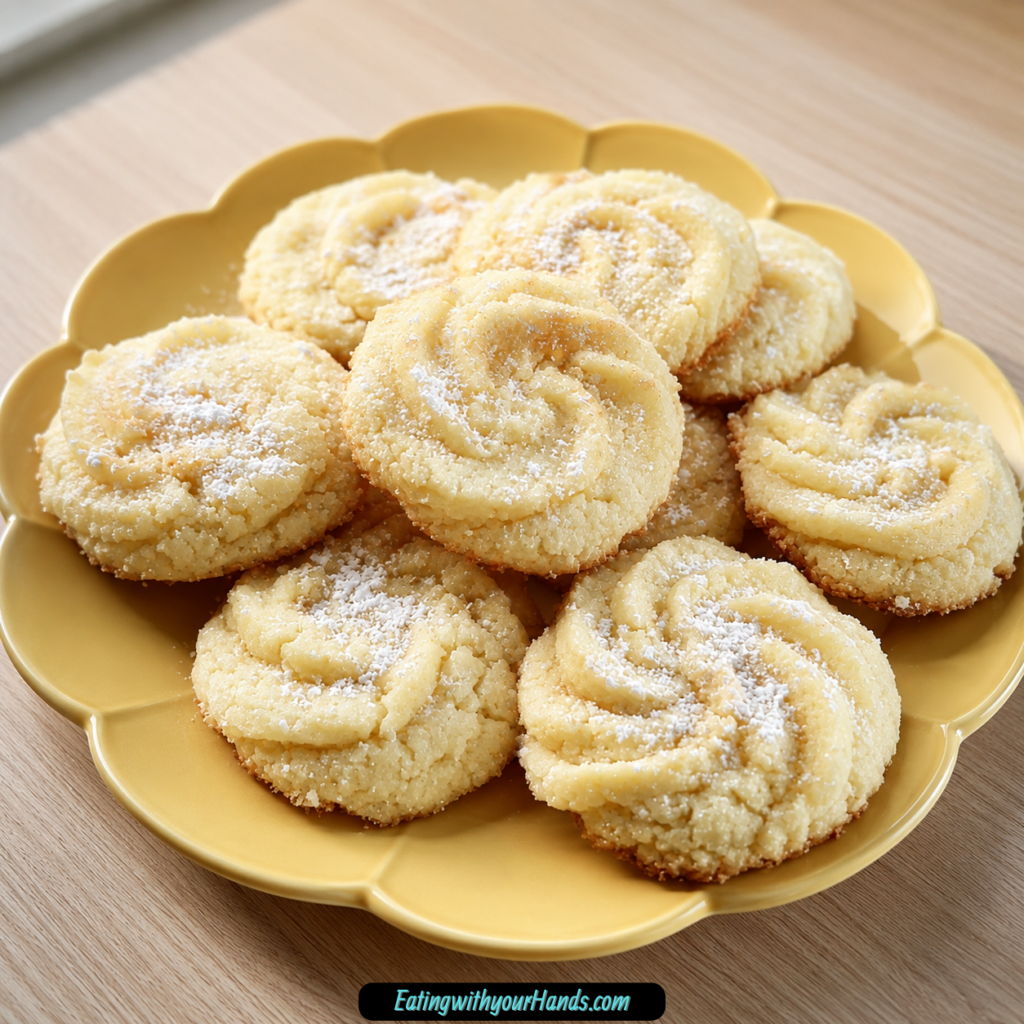
For a delicate finish, dust the cooled cookies with powdered sugar after baking. This gives them a snow-like look that works beautifully for holidays.
For a fancier variation, dip one half of each cooled cookie in melted chocolate. This adds a polished appearance while keeping the original cookie base intact.
They also make an easy addition to cookie trays. Because their flavor is simple and buttery, they balance nicely beside richer or more decorated desserts.
For everyday serving, enjoy them plain. The base cookie is rich, tender, and satisfying enough without any extra topping.
Storage
Store the cooled cookies in an airtight container at room temperature. They will keep for up to 1 week.
Make sure the cookies are completely cool before storing them. If they are still warm, moisture can collect inside the container and affect the texture.
If you have decorated them with powdered sugar or chocolate, stack them carefully. Parchment paper between layers can help protect the finish.
Freezing
Baked cookies can be frozen for up to 2 months. Place them in a freezer-safe container after they have cooled completely.
Thaw the cookies at room temperature before serving. This helps the texture return gently without making the cookies too soft.
Freezing is useful for holiday prep or larger batches. You can bake ahead and save some for later without needing to make a fresh batch every time.
Make-Ahead Tips
The dough can be made 1 to 2 days in advance and stored in the fridge. This is helpful when you want to prepare ahead but bake closer to serving time.
Before shaping refrigerated dough, check the texture. If it is too firm, let it sit briefly until it is easier to scoop and roll.
If the dough becomes too warm after sitting out, chill it again for a short time. The goal is dough that is soft enough to shape but firm enough to hold its structure.
Gifting Tip
These cookies make a charming edible gift. Their simple flavor, tender texture, and classic appearance make them easy to share.
Pack them in decorative tins or boxes lined with parchment paper. The parchment gives the package a thoughtful, homemade look.
For gifting, you can keep the cookies plain, dust them with powdered sugar, or decorate them with sprinkles. Chocolate-dipped cookies also look especially pretty in a gift box.
Helpful Notes
Butter consistency is one of the most important details in this recipe. The butter should be soft, not fully melted.
If the dough feels sticky because the butter was too warm, chill it for 15 to 20 minutes before baking. This helps the cookies hold their shape.
Flour measurement also matters. Too much flour can make the cookies dry, so spoon and level instead of scooping.
The dough may look crumbly when the flour is first added. Keep mixing on low speed until it comes together.
Add-ins like lemon zest, almond extract, or vanilla bean can be stirred in for flavor variations. These additions can change the personality of the cookie without changing the simple base.
For decoration, use a fork pattern, a cookie press, sprinkles, or colored sugar. These options make the recipe flexible for holidays and special occasions.
Troubleshooting
Why Did My Cookies Spread Too Much?
The butter may have been too melted. When butter is too warm, the dough can become soft and spread more in the oven.
Chill the dough briefly before baking if it feels sticky. A 15 to 20 minute chill can help the cookies keep their shape.
Why Are My Cookies Dry?
The most likely reason is too much flour. Spoon and level the flour instead of scooping directly from the container.
Overbaking can also make the cookies dry. Remove them when the edges are just lightly golden.
Why Is My Dough Crumbly?
The dough may look crumbly at first when the flour is added. Continue mixing on low speed until the dough comes together.
Do not add extra ingredients too quickly. The butter and powdered sugar mixture needs a little time to absorb the flour.
Why Are My Cookies Too Soft or Greasy?
Margarine or overly melted butter can affect the texture. The recipe recommends real butter for the classic flavor and structure.
If the dough seems greasy or too soft, chill it before baking. This can help firm the butter back up.
Flavor and Decoration Ideas
Powdered Sugar Finish
Dust the cookies with powdered sugar after baking. This gives them a soft, snowy look and adds a delicate sweetness.
This finish is especially pretty for winter gatherings or holiday cookie trays. Make sure the cookies are cool before dusting.
Chocolate-Dipped Cookies
Dip one half of each cooled cookie in melted chocolate for a more elegant variation. Let the chocolate set before serving or storing.
This option works well for gifting. It makes the cookies look more decorative while keeping the recipe simple.
Lemon Zest Variation
Stir lemon zest into the dough for a brighter flavor. The buttery base pairs well with the fresh citrus note.
This variation is a nice choice when you want the cookies to feel a little lighter. It still keeps the texture tender and classic.
Almond Extract Variation
Add almond extract for a fragrant variation. This gives the cookies a more bakery-style flavor.
Use it as an optional flavor accent. The base recipe remains butter-forward, but the almond note makes it feel slightly more dressed up.
Vanilla Bean Variation
Vanilla bean can be stirred into the dough for a warm, classic flavor. It adds depth while keeping the cookies simple.
This option is especially nice when you want a subtle upgrade. The cookies stay minimal but feel a little more special.
Sprinkle or Colored Sugar Finish
Add holiday sprinkles or colored sugar before baking. This gives the cookies a festive appearance.
This is a great option when baking with kids. The decorating step is simple and fun without making the recipe more difficult.
Frequently Asked Questions
Can I Use Margarine Instead of Butter?
It is best to use real butter for the classic flavor and texture. Margarine may make the cookies too soft or greasy.
Because butter is the main flavor in this recipe, replacing it can change the final result. Real butter gives the cookies their rich, traditional taste.
Do I Need to Chill the Dough?
Not usually. This recipe is designed to be quick and does not normally require chilling.
If the butter was too warm or the dough feels sticky, a quick chill can help. Chill the dough for 15 to 20 minutes before baking if needed.
Can I Make These Gluten-Free?
Yes, you can use a 1:1 gluten-free flour blend with xanthan gum for similar results. Follow the same method as the original recipe.
The texture may vary slightly depending on the blend used. The provided recommendation is to choose a blend with xanthan gum.
Why Are My Cookies Spreading Too Much?
The butter may have been too melted. Warm butter can make the dough too loose.
Chill the dough briefly before baking. This helps firm the dough and reduce spreading.
Can I Double This Recipe?
Absolutely. This recipe scales well and is useful for large batches during the holidays.
When doubling, keep the same ingredient ratios. Bake in batches if needed so the cookies have enough room on the baking sheet.
Can I Make the Dough Ahead?
Yes, the dough can be made 1 to 2 days in advance and stored in the fridge. This is helpful for planning ahead.
Let the dough soften slightly if it becomes too firm to scoop. If it gets too warm, chill it again briefly before baking.
How Long Do the Cookies Last?
At room temperature, the cookies can be stored in an airtight container for up to 1 week. Baked cookies can also be frozen for up to 2 months.
Thaw frozen cookies at room temperature before serving. This helps preserve their texture.
What Is the Best Way to Serve Them?
Serve them plain with coffee, tea, or milk for a simple treat. You can also dust them with powdered sugar or dip them in melted chocolate.
For gifting, pack them in decorative tins or boxes lined with parchment paper. This gives them a charming homemade presentation.
Why These Cookies Are Great for Beginners
This recipe is a comfortable starting point for anyone new to baking. The short ingredient list makes the process less intimidating.
The method is also easy to understand. You cream butter and powdered sugar, add flour, shape the dough, flatten the cookies, bake, and cool.
Each step teaches a basic baking skill without adding unnecessary pressure. You learn how butter texture affects dough, how flour measurement matters, and how cookies continue to firm as they cool.
The cookies also bake quickly. In under 30 minutes, you can have a finished batch ready to serve.
That quick success makes the recipe encouraging. It is simple enough for beginners but satisfying enough for experienced bakers to keep making.
Why These Cookies Are Perfect for Holidays
Holiday baking often involves long recipes, detailed decorating, and several batches of different desserts. These cookies bring simplicity into that busy season.
They are quick, reliable, and easy to customize. You can make them plain for a classic tray or decorate them with sprinkles, colored sugar, powdered sugar, or chocolate.
Because the dough can be made ahead, they also fit well into a holiday baking schedule. Prepare the dough 1 to 2 days in advance, then bake when ready.
The cookies also freeze well after baking. That makes them practical for large batches or early preparation.
Their simple buttery flavor pairs nicely with many other holiday treats. They are not too rich or too complicated, which makes them a dependable addition to any cookie spread.
Final Thoughts
These 3-ingredient butter cookies are a reminder that simple recipes can still feel special. With butter, powdered sugar, and all-purpose flour, you can create a soft, tender cookie with a rich buttery flavor and a delicate melt-in-your-mouth texture.
They are easy enough for beginner bakers, quick enough for busy days, and flexible enough for holidays, gifts, school lunches, afternoon tea, or a quiet sweet craving. The base recipe is beautiful on its own, but it can also be dressed up with powdered sugar, melted chocolate, sprinkles, colored sugar, lemon zest, almond extract, or vanilla bean.
The most important details are simple. Use real butter, keep it soft but not fully melted, spoon and level the flour, avoid overbaking, and let the cookies cool before moving or storing them.
Once you make them, it is easy to understand why a three-ingredient cookie can still feel timeless. They are humble, buttery, tender, and full of the kind of homemade comfort that never really goes out of style.
3-Ingredient Butter Cookies
These simple butter cookies are rich, tender, and delicately crumbly, with a classic buttery flavor in every bite. Made with only butter, powdered sugar, and flour, they come together quickly with minimal preparation. They are an easy choice for holiday cookie trays, afternoon tea, homemade gifts, or whenever you want a straightforward sweet treat.
Recipe Details
- Prep Time: 10 minutes
- Cook Time: 15 minutes
- Total Time: 25 minutes
- Servings: 24 cookies
- Calories: 150 kcal
Ingredients
- 2 cups all-purpose flour
- 1 cup powdered sugar
- 1 cup butter softened and slightly melted
Instructions
Step 1: Prepare the Oven
Preheat the oven to 350°F (175°C). Line a baking sheet with parchment paper.
Step 2: Cream the Butter and Sugar
Place the butter and powdered sugar in a large bowl. Cream them together until the mixture is smooth and fluffy.
Step 3: Form the Dough
Gradually add the all-purpose flour, mixing until a soft dough forms.
Step 4: Shape the Cookies
Roll the dough into 1-inch balls and arrange them on the prepared baking sheet.
Gently flatten each dough ball with your palm or the bottom of a glass.
Step 5: Bake the Cookies
Bake for 12-15 minutes, or until the edges are just beginning to turn golden.
Step 6: Cool Completely
Let the cookies cool on the baking sheet for 5 minutes. Transfer them to a wire rack and allow them to cool completely.
Notes
Use cold butter when you want a more crumbly, shortbread-like texture.
For a classic finish, dust the cooled cookies with extra powdered sugar.
Store the cookies in an airtight container for up to a week, or freeze them for longer storage.
Vanilla, lemon, or almond extract may be added for different flavor variations.
Serving Suggestions
- Serve with hot coffee or tea.
- Arrange on a holiday cookie tray.
- Package in a decorative tin for homemade gifts.
- Pair with cold milk for a simple snack.
- Add to an afternoon tea spread with fresh fruit.
Storage
How to Store
Keep the completely cooled cookies in an airtight container for up to a week.
How to Freeze
Place the cooled cookies in a freezer-safe airtight container for longer storage.
Best Texture Tip
Allow the cookies to cool completely before storing them so their soft, delicate crumb remains intact.

Fernando is the creator and writer behind the food blog Eating with your Hands. Living and working in cities like Paris, Barcelona, and Berlin, and being married to a Canadian foodie, has given Fernando a passion and interest in food and inspired him to run EWYH.