
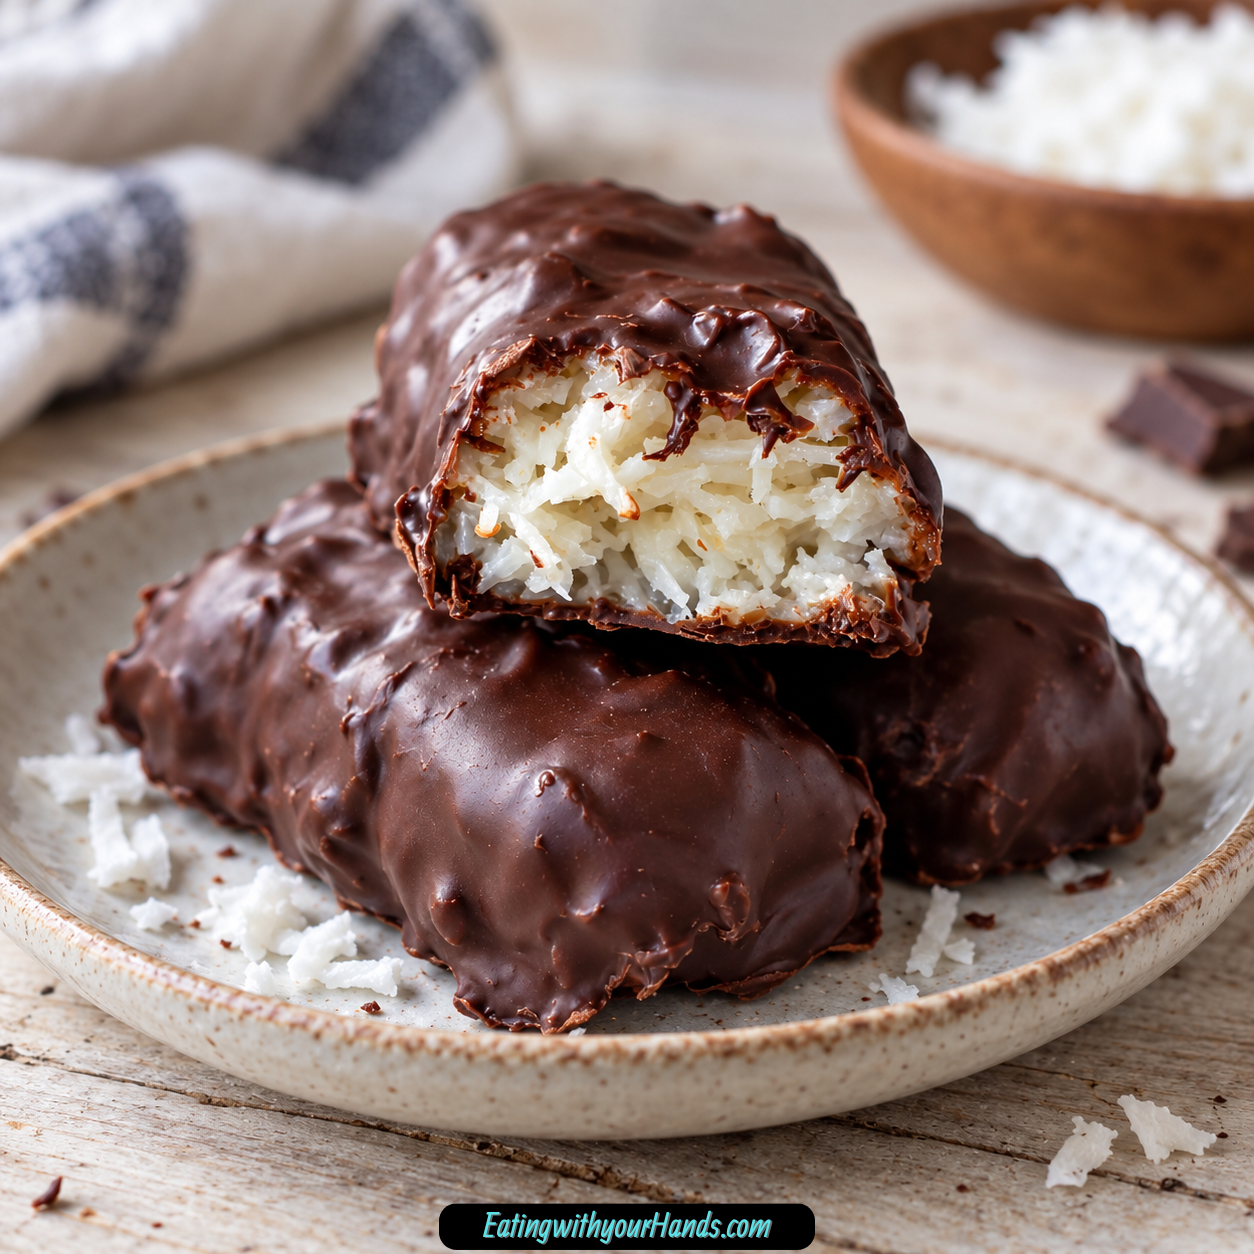
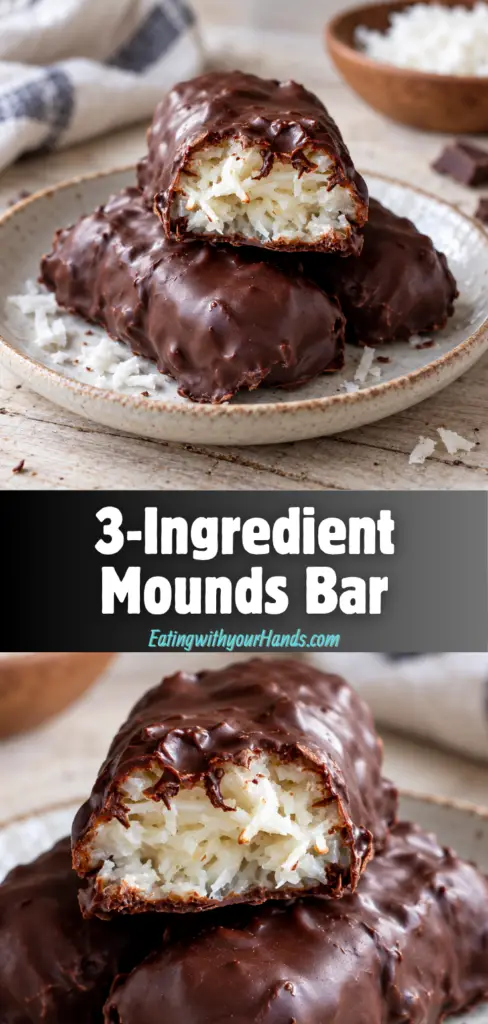
3-Ingredient Mounds Bar is the kind of no-bake dessert that feels almost impossible in the best way. With only unsweetened shredded coconut, sweetened condensed milk, and dark or semi-sweet chocolate, you can make rich, chewy coconut bars wrapped in a smooth chocolate shell.
This is the kind of treat that proves a dessert does not need a long ingredient list to feel special. Sometimes the most memorable sweets come from the simplest combination: coconut, chocolate, and a little patience while the centers firm up.
There is something deeply satisfying about making a candy-bar-style dessert at home. The coconut filling comes together in one bowl, the bars are shaped by hand, chilled until sturdy, and then dipped into melted chocolate until every piece looks glossy and irresistible.
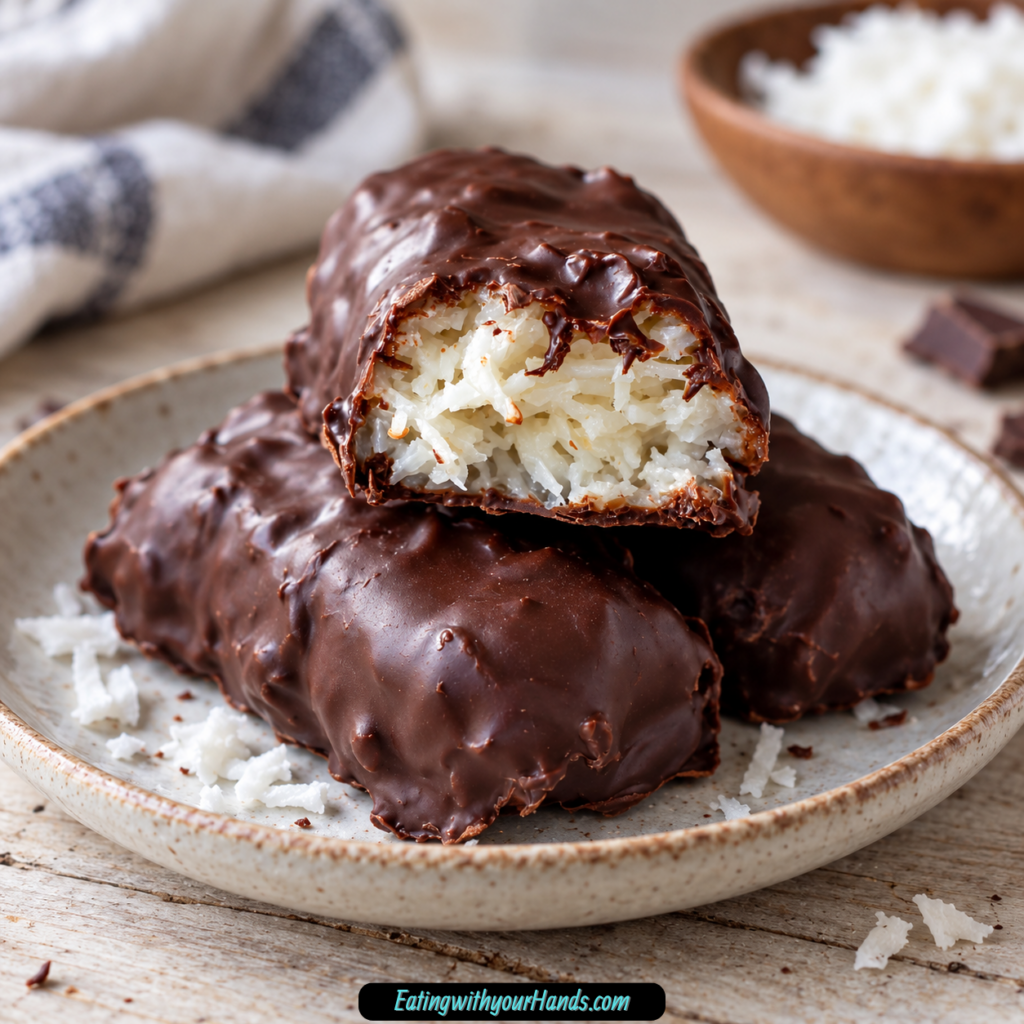
The texture is what makes these bars so enjoyable. The coconut center is chewy and sweet, while the chocolate coating gives each bite a rich snap or soft shell depending on how chilled the bars are when served.
These bars are also wonderfully practical. There is no oven, no flour, no eggs, and no complicated baking schedule to manage.
They are ready in about 20 minutes, with a short freezer step that helps the coconut hold its shape. That makes them perfect for last-minute sweet cravings, holiday dessert trays, homemade gift boxes, or a simple treat tucked away in the refrigerator.
Dark chocolate gives the most classic Mounds-style flavor. Semi-sweet chocolate works too if you want the bars a little sweeter.
The bars can be served chilled for a firmer bite or at room temperature for a slightly softer coconut center. Either way, they taste rich, homemade, and surprisingly elegant for such an easy recipe.
3-Ingredient Mounds Bar is simple, naturally gluten-free, freezer-friendly, giftable, and full of chewy coconut-chocolate comfort. It is the kind of no-bake dessert that feels like a small kitchen miracle every time.
Table of Contents
- Why You’ll Love This 3-Ingredient Mounds Bar
- Recipe Details
- Ingredients
- For the Coconut Bars
- Ingredient Notes
- Optional Swaps, Variations, Add-Ins, and Serving Ideas
- Dark Chocolate Mounds Bars
- Semi-Sweet Chocolate Mounds Bars
- Sweetened Coconut Version
- Dairy-Free Style Bars
- Coconut Balls
- Polished Gift Bars
- Chilled Mounds Bars
- Room-Temperature Mounds Bars
- Holiday Dessert Tray
- Homemade Gift Boxes
- Freezer Treats
- Why This Recipe Works
- Directions
- Step 1: Line the Cookie Sheet
- Step 2: Measure the Coconut
- Step 3: Add the Sweetened Condensed Milk
- Step 4: Mix the Coconut Filling
- Step 5: Wet Your Hands
- Step 6: Shape the Bars
- Step 7: Clean Up the Shape
- Step 8: Freeze the Coconut Bars
- Step 9: Start the Chocolate
- Step 10: Melt the First Portion
- Step 11: Add the Remaining Chocolate
- Step 12: Cool the Chocolate Slightly
- Step 13: Dip the Coconut Bars
- Step 14: Set the Dipped Bars on Parchment
- Step 15: Let the Chocolate Set
- Step 16: Serve the Bars
- Step 17: Store Leftovers
- Step 18: Freeze for Longer Storage
- Serving Ideas
- Storage
- Freezing
- Make-Ahead
- Helpful Notes for Best Results
- Variations
- Troubleshooting
- Frequently Asked Questions
- Why This Recipe Works So Well
- Final Thoughts
- 3-Ingredient Mounds Bar
Why You’ll Love This 3-Ingredient Mounds Bar
This recipe uses only three simple ingredients. Unsweetened shredded coconut, sweetened condensed milk, and chocolate are all you need.
No baking is required. The bars are mixed, shaped, chilled, dipped, and set without turning on the oven.
The flavor is rich and classic. Dark chocolate and a chewy coconut center create that familiar candy bar-style bite.
The recipe is naturally gluten-free. There is no flour, no crust, and no baked base.
These bars are perfect for gifting or holiday trays. They look beautiful once the chocolate has set.
They are ready in about 20 minutes. The freezer step helps them firm quickly before dipping.
Recipe Details
3-Ingredient Mounds Bar is a no-bake dessert. It does not require flour, eggs, or oven time.
The recipe uses 3 cups unsweetened shredded coconut. This gives the bars their classic chewy texture.
The coconut is bound with 1 can, 14 ounces, sweetened condensed milk. It sweetens the filling and holds the coconut together.
The coating uses 15 ounces dark or semi-sweet chocolate. Dark chocolate gives a classic Mounds-style flavor, while semi-sweet chocolate adds a little extra sweetness.
The coconut mixture is shaped into 12 small logs or bars. Lightly wet hands help prevent sticking while shaping.
The bars are placed on a parchment paper-lined cookie sheet. Parchment helps prevent sticking and makes cleanup easier.
The shaped coconut bars are frozen for about 20 minutes. This step is important because it helps the bars hold their shape during dipping.
The chocolate is melted using a two-step method. About 10 ounces of chocolate are melted first, then the remaining 5 ounces are stirred in until smooth and glossy.
The chilled bars are dipped in the melted chocolate using two forks. Excess chocolate should be allowed to drip off before the bars are set back on the parchment-lined sheet.
Because the bars are cold, the chocolate begins setting almost immediately. Let the bars sit at room temperature or refrigerate briefly until fully set.
Ingredients
For the Coconut Bars
- 3 cups unsweetened shredded coconut – Provides that classic chewy texture
- 14-ounce can sweetened condensed milk – Sweetens and binds the coconut
- 15 ounces dark or semi-sweet chocolate – Creates a smooth, rich coating
Ingredient Notes
Unsweetened shredded coconut is the main texture in these bars. It gives the centers that chewy, classic coconut bite.
Sweetened shredded coconut can be used, but the bars will be much sweeter. Unsweetened coconut gives the best balance.
Sweetened condensed milk binds the coconut together. It also sweetens the filling and helps the bars hold their shape once chilled.
Dark chocolate gives a classic Mounds-style flavor. It balances the sweetness of the coconut filling.
Semi-sweet chocolate can also be used. It creates a slightly sweeter coating.
The chocolate should be melted slowly. Overheating or moisture can cause chocolate to seize.
The two-step melting method helps keep the chocolate smooth and glossy without full tempering. It is simple and works beautifully for these bars.
Parchment paper helps prevent sticking. It is useful when shaping, chilling, dipping, and setting the bars.
Optional Swaps, Variations, Add-Ins, and Serving Ideas
Dark Chocolate Mounds Bars
Use dark chocolate for the most classic Mounds-style flavor. The deeper chocolate taste balances the sweet coconut filling.
This version tastes rich without becoming overly sweet. It is a wonderful choice for people who love dark chocolate with coconut.
Semi-Sweet Chocolate Mounds Bars
Use semi-sweet chocolate if you want a sweeter chocolate coating. It still works beautifully with the chewy coconut center.
This version may taste a little more dessert-like and mellow. It is a good option for family trays and gift boxes.
Sweetened Coconut Version
Sweetened shredded coconut can be used, but the bars will be much sweeter. Unsweetened coconut gives better balance.
Choose this option only if you prefer a very sweet coconut center. The chocolate choice can also affect the final sweetness.
Dairy-Free Style Bars
You can try coconut condensed milk alternatives for a dairy-free style version. The texture may vary.
Because sweetened condensed milk is what binds the filling, changing it can change how the bars shape and set. Chill carefully before dipping.
Coconut Balls
Shape the mixture into balls instead of bars. Bite-sized coconut balls work beautifully with the same method.
This shape is great for dessert trays. It also makes the treats easy to portion and serve.
Polished Gift Bars
Trim or reshape the bars slightly after freezing for a cleaner look. This helps create neater edges before dipping.
This step is optional. It is useful when making the bars for homemade gift boxes or holiday platters.
Chilled Mounds Bars
Serve the bars chilled for a firmer bite. The chocolate coating holds its shape well, and the coconut center feels denser.
This is a great serving style for clean presentation. It also makes the bars easy to handle.
Room-Temperature Mounds Bars
Serve the bars at room temperature for a slightly softer coconut center. This gives the filling a more tender chew.
The chocolate may soften depending on the room. Serve once the coating is fully set.
Holiday Dessert Tray
Add the bars to dessert trays or cookie platters. Their chocolate coating and coconut center make them feel special.
They stand out beautifully beside cookies and other sweets. Keep them chilled until serving if you want a firmer bite.
Homemade Gift Boxes
Pack these bars into homemade gift boxes once the chocolate has fully set. Place parchment paper between layers if stacking.
They are simple but thoughtful. Their candy-bar flavor makes them easy to share.
Freezer Treats
Freeze the bars for later and thaw in the refrigerator before serving. This makes them convenient for future sweet cravings.
They freeze very well. Store them carefully so the chocolate coating stays protected.
Why This Recipe Works
3-Ingredient Mounds Bar works because each ingredient has a clear purpose. Coconut provides texture, sweetened condensed milk binds and sweetens, and chocolate creates the rich outer shell.
Unsweetened shredded coconut gives the best balance. It keeps the filling chewy without making the bars overly sweet.
Sweetened condensed milk turns loose coconut into a shapeable mixture. It helps the filling hold together after chilling.
Freezing the shaped bars before dipping is important. Cold, firm bars are much easier to coat in chocolate.
The two-step chocolate melting method helps create a smooth, glossy coating. Melting most of the chocolate first, then stirring in the remaining chocolate, keeps the process simple.
Using two forks makes dipping easier. The forks help lift, turn, coat, and drain each bar.
Parchment paper keeps the bars from sticking as they chill and set. It also makes cleanup easy.
The recipe is also flexible in shape and serving. Bars, logs, or balls all work with the same coconut filling and chocolate coating.
Directions
Step 1: Line the Cookie Sheet
Line a cookie sheet with parchment paper. This gives the coconut bars a nonstick surface for shaping, chilling, dipping, and setting.
Set the prepared sheet near your work area. Once the coconut filling is mixed, you will be ready to shape the bars right away.
Step 2: Measure the Coconut
Add 3 cups unsweetened shredded coconut to a medium mixing bowl. Make sure the bowl is large enough for stirring.
Unsweetened coconut gives the best balance. It keeps the bars chewy and coconut-forward without making them too sweet.
Step 3: Add the Sweetened Condensed Milk
Pour in 1 can, 14 ounces, sweetened condensed milk. Add it directly over the shredded coconut.
The sweetened condensed milk is what sweetens and binds the filling. It turns the coconut into a mixture that can be shaped.
Step 4: Mix the Coconut Filling
Stir the coconut and sweetened condensed milk until fully mixed. The coconut should be evenly coated.
Take a moment to scrape the sides and bottom of the bowl. Every bit of coconut should look moistened and sticky.
Step 5: Wet Your Hands
Lightly wet your hands before shaping. This helps prevent the coconut mixture from sticking too much.
You do not need your hands dripping wet. A slight dampness is enough to make shaping easier.
Step 6: Shape the Bars
Scoop portions of the coconut mixture and shape them into 12 small logs or bars. Try to keep the pieces similar in size.
Place each shaped bar on the parchment paper-lined cookie sheet. Leave a little space between them so they chill evenly.
Step 7: Clean Up the Shape
If needed, gently press and smooth the sides of each bar. This helps them look more polished after dipping.
You can also trim or reshape the bars slightly after freezing. This is useful if you want cleaner edges.
Step 8: Freeze the Coconut Bars
Transfer the tray to the freezer. Chill the shaped coconut bars for about 20 minutes.
This step is important. Firm bars hold their shape much better when dipped into melted chocolate.
Step 9: Start the Chocolate
Place about 10 ounces of the dark or semi-sweet chocolate in a microwave-safe bowl. Reserve the remaining 5 ounces for later.
Using this two-step method helps the chocolate become smooth and glossy. It also avoids needing full tempering.
Step 10: Melt the First Portion
Microwave the 10 ounces of chocolate on high for 30 seconds. Stir well.
Continue microwaving in 15-second intervals. Stir well between each interval until the chocolate is mostly melted.
Step 11: Add the Remaining Chocolate
Add the remaining 5 ounces of chocolate to the mostly melted chocolate. Stir until completely smooth and glossy.
The heat from the melted chocolate helps melt the added chocolate. Keep stirring until no pieces remain.
Step 12: Cool the Chocolate Slightly
Let the melted chocolate cool slightly before dipping. This helps avoid melting or softening the chilled coconut bars too quickly.
The chocolate should still be smooth and easy to coat with. Do not let it harden before dipping.
Step 13: Dip the Coconut Bars
Use two forks to dip each chilled coconut bar into the melted chocolate. Turn each bar carefully so it is coated completely.
Let excess chocolate drip off before setting the bar down. This keeps the coating neat.
Step 14: Set the Dipped Bars on Parchment
Place each dipped bar back onto the parchment-lined cookie sheet. The cold bars will help the chocolate begin setting almost immediately.
Continue dipping until all 12 bars are coated. Work steadily so the chocolate stays smooth.
Step 15: Let the Chocolate Set
Let the bars sit at room temperature until fully set. You can also refrigerate them briefly to help the chocolate firm.
The bars are ready once the chocolate coating is no longer wet. Make sure the coating is fully set before stacking or storing.
Step 16: Serve the Bars
Serve the bars chilled for a firmer bite or at room temperature for a slightly softer coconut center. Both serving styles work well.
These bars are perfect for dessert trays, cookie platters, holiday treats, or homemade gift boxes. They are rich, chewy, and chocolatey.
Step 17: Store Leftovers
Store the bars in an airtight container in the refrigerator for up to 1 week. If stacking, place parchment paper between layers.
The parchment prevents sticking and protects the chocolate coating. Keep the container sealed for freshness.
Step 18: Freeze for Longer Storage
These bars freeze very well. Place them in a freezer-safe container and thaw them in the refrigerator before serving.
Freezing makes them perfect for planning ahead. They are easy to pull out whenever you want a sweet coconut-chocolate treat.
Serving Ideas
3-Ingredient Mounds Bars are best enjoyed once the chocolate has fully set. The coating should be firm enough to hold, slice, or serve neatly.
Serve them chilled if you want a firmer bite. The coconut center becomes denser and the chocolate coating stays clean.
Serve them at room temperature if you prefer a slightly softer coconut center. This makes the bars feel a little more tender and candy-like.
Add them to dessert trays for holidays or gatherings. Their dark chocolate shell and coconut filling make them look elegant with very little effort.
They also fit beautifully on cookie platters. The no-bake bars bring a different texture beside baked cookies.
These bars are wonderful for homemade gift boxes. Layer them with parchment paper so they do not stick.
Because they are rich, small portions work well. The 12-bar shape makes them easy to share.
They are also perfect for keeping in the refrigerator for a quick sweet treat. A chilled bar feels satisfying when you want something chocolatey and chewy.
Storage
Store 3-Ingredient Mounds Bars in an airtight container in the refrigerator. They will keep for up to 1 week.
Let the chocolate set fully before storing. This protects the coating and keeps the bars neat.
If stacking the bars, place parchment paper between layers. This prevents the chocolate from sticking and keeps the shape cleaner.
Keep the container sealed between servings. This helps preserve the texture of the coconut center.
Freezing
These bars freeze very well. Place them in a freezer-safe container after the chocolate has fully set.
Use parchment paper between layers if stacking. This prevents sticking and protects the chocolate shell.
Thaw the bars in the refrigerator before serving. This helps them soften gradually.
Frozen bars are convenient for holidays, gifts, and last-minute desserts. You can make a batch ahead and keep them ready for later.
Make-Ahead
3-Ingredient Mounds Bars are a great make-ahead dessert because they do not require baking. You can mix, shape, chill, dip, and store them ahead of time.
For short-term storage, keep the finished bars in the refrigerator for up to 1 week. This keeps the chocolate firm and the coconut center fresh.
For longer planning, freeze the bars and thaw them in the refrigerator before serving. They freeze well and are easy to portion.
If making them for gifts, wait until the chocolate is fully set before packing. Use parchment between layers for the neatest presentation.
Helpful Notes for Best Results
Slightly damp hands make shaping the coconut mixture much easier. Wet hands help prevent sticking.
Do not skip the freezer step before dipping. Freezing prevents the coconut bars from falling apart in the chocolate.
Dark chocolate gives the most classic Mounds-style flavor. Semi-sweet chocolate adds a little extra sweetness.
Let the melted chocolate cool slightly before dipping. This helps avoid melting the chilled coconut bars.
Trim or reshape bars slightly after freezing if you want cleaner edges. This is helpful for polished dessert trays or gift boxes.
Melt chocolate slowly and stir often. Overheating can cause the chocolate to seize.
Keep moisture away from the chocolate. Moisture can also cause seizing.
Use parchment paper for both chilling and setting. It makes the process cleaner and easier.
Variations
Dark Chocolate Mounds Bars
Use dark chocolate for the coating. This gives the bars a classic Mounds-style flavor.
The slightly deeper chocolate balances the sweet coconut center. It is the best option if you like a richer finish.
Semi-Sweet Chocolate Mounds Bars
Use semi-sweet chocolate for a sweeter coating. This makes the bars taste a little softer and more familiar.
Semi-sweet chocolate still coats the coconut well. It is a great choice for dessert trays.
Sweetened Coconut Bars
Use sweetened shredded coconut if you prefer, but the bars will be much sweeter. Unsweetened coconut gives the best balance.
This variation is best for people who love extra-sweet coconut treats. Pairing it with dark chocolate can help balance the sweetness.
Coconut Condensed Milk Alternative Bars
Try coconut condensed milk alternatives if you need a dairy-free-style option. The texture may vary.
Because the condensed milk binds the coconut, the bars may shape or set differently. Chill well before dipping.
Coconut Ball Bites
Shape the mixture into balls instead of bars. Bite-sized coconut balls work beautifully with the same method.
They are easy to serve on platters. They also look lovely in gift boxes.
Extra Glossy Chocolate Bars
Use the two-step melting method carefully. Melt about 10 ounces first, then stir in the remaining 5 ounces until smooth and glossy.
This keeps the chocolate coating smooth without full tempering. Stir patiently for the best texture.
Polished Edge Bars
After freezing, trim or reshape the bars slightly before dipping. This gives the finished bars a cleaner look.
This step is optional. It is helpful when making the bars for gifts.
Firmer Chilled Bars
Serve the bars straight from the refrigerator for a firmer bite. The coconut center stays chewy and structured.
This serving style is best for clean presentation. It also helps the chocolate hold its shape.
Softer Room-Temperature Bars
Let the bars sit briefly at room temperature before serving. This creates a softer coconut center.
The chocolate may soften depending on the temperature. Serve once the coating is set.
Troubleshooting
The Coconut Mixture Is Too Sticky
Lightly wet your hands before shaping. Slightly damp hands make the mixture easier to handle.
Do not add extra ingredients. The mixture is meant to be sticky enough to hold together.
The Bars Fall Apart While Dipping
The bars may not be cold enough. Freeze them for about 20 minutes before dipping.
This step helps them hold their shape in the melted chocolate. Do not skip it.
The Bars Look Messy
Trim or reshape the bars slightly after freezing. This gives them cleaner edges before dipping.
Use two forks to dip and lift each bar. Let excess chocolate drip off before setting it down.
The Chocolate Is Too Thick
Make sure the chocolate is fully melted and smooth. Stir patiently after adding the remaining chocolate.
Let it stay warm enough to coat the bars. If it begins setting too much, work carefully and avoid overheating.
The Chocolate Seized
Chocolate can seize from overheating or moisture. Melt it slowly and stir often.
Keep water away from the bowl and utensils. Even a little moisture can affect melted chocolate.
The Chocolate Melted the Coconut Bars
The melted chocolate may have been too hot. Let it cool slightly before dipping.
The bars should also be frozen before dipping. Cold bars are easier to coat.
The Chocolate Coating Is Too Thick
Let excess chocolate drip off after dipping. Use two forks to lift and drain each bar.
A slightly thick coating is fine, but draining helps the bars look neater. Set them on parchment once coated.
The Bars Are Too Sweet
Use unsweetened shredded coconut for the best balance. Sweetened shredded coconut will make the bars much sweeter.
Dark chocolate can also help balance the sweetness. Semi-sweet chocolate will taste sweeter.
The Bars Stick Together in Storage
Place parchment paper between layers if stacking. This prevents the chocolate from sticking.
Make sure the chocolate is fully set before storing. Keep the bars in an airtight container.
The Bars Need to Be Dairy-Free
Try coconut condensed milk alternatives. The texture may vary.
Because the condensed milk is important for binding, chill the bars well. Expect a slightly different result.
Frequently Asked Questions
Can I use sweetened shredded coconut instead of unsweetened?
Yes, you can use sweetened shredded coconut. The bars will be much sweeter.
Unsweetened coconut gives the best balance. It keeps the coconut center chewy without making the dessert overly sweet.
Do I need to temper the chocolate?
No, full tempering is not required. The two-step melting method helps keep the chocolate smooth and glossy.
Melt about 10 ounces first, then stir in the remaining 5 ounces. This method keeps the process simple.
Can I make these dairy-free?
You can try coconut condensed milk alternatives. The texture may vary.
Sweetened condensed milk is what binds the coconut, so changing it can affect the final bars. Chill the shaped pieces well before dipping.
Why did my chocolate seize?
Chocolate can seize from overheating or moisture. Melt it slowly and stir often.
Keep water away from the chocolate. Use dry bowls, dry utensils, and short heating intervals.
Can I shape them into balls instead of bars?
Absolutely, bite-sized coconut balls work beautifully with the same method. Shape the coconut mixture into balls, freeze them, and dip them in chocolate.
This is a great option for party trays or gift boxes. The method stays the same.
How long do these bars last?
Store the bars in an airtight container in the refrigerator for up to 1 week. Use parchment paper between layers if stacking.
They also freeze very well. Thaw them in the refrigerator before serving.
Should I serve them cold or at room temperature?
Serve them chilled for a firmer bite. Serve them at room temperature for a slightly softer coconut center.
Both are delicious. Choose based on the texture you prefer.
What chocolate should I use?
Dark chocolate gives the classic Mounds-style flavor. Semi-sweet chocolate adds a little extra sweetness.
Both create a smooth, rich coating. Use whichever flavor you enjoy most.
Why This Recipe Works So Well
3-Ingredient Mounds Bar works so well because the recipe is simple but perfectly balanced. Coconut, sweetened condensed milk, and chocolate each do exactly what the dessert needs.
The coconut creates the chewy center. Using unsweetened shredded coconut helps keep the sweetness under control.
The sweetened condensed milk binds the coconut into a shapeable filling. It also adds enough sweetness that no extra sugar is needed.
The freezer step makes the bars sturdy. Without chilling, the coconut filling can be harder to dip neatly.
The chocolate coating turns the coconut filling into a candy-bar-style dessert. Dark chocolate keeps the flavor classic, while semi-sweet chocolate makes it a little sweeter.
The two-step melting method keeps the chocolate smooth and glossy. It gives a nice finish without requiring full tempering.
Using two forks makes dipping easier. It helps coat the bars completely and lets extra chocolate drip away.
The parchment-lined tray keeps everything neat. It prevents sticking and makes cleanup simple.
The recipe also works because it can be shaped in different ways. Logs, bars, and balls all use the same filling and coating.
Most of all, this dessert works because it is easy and dependable. With only three ingredients and no oven, it creates a rich, chewy, chocolate-covered treat that feels much more impressive than the effort required.
Final Thoughts
3-Ingredient Mounds Bar is a simple no-bake dessert made with unsweetened shredded coconut, sweetened condensed milk, and dark or semi-sweet chocolate. The coconut and condensed milk are mixed together, shaped into 12 small logs or bars, frozen for about 20 minutes, dipped in melted chocolate, and set until the coating is firm.
Serve the bars chilled for a firmer bite or at room temperature for a softer coconut center. With their chewy coconut filling, smooth chocolate shell, naturally gluten-free ingredient list, refrigerator storage, freezer-friendly convenience, and giftable candy-bar flavor, these homemade Mounds-style bars are a sweet little recipe worth keeping close.
3-Ingredient Mounds Bar
Sweet, chewy, chocolate-coated, and wonderfully simple, this 3-Ingredient Mounds Bar recipe turns shredded coconut, sweetened condensed milk, and dark or semi-sweet chocolate into easy no-bake coconut bars. Shaped into small logs, chilled until firm, and dipped in glossy melted chocolate, these homemade candy-style bars are perfect for coconut lovers.
Recipe Details
- Prep Time: 15 minutes
- Cook Time: 5 minutes
- Total Time: 20 minutes
- Servings: 12 bars
- Calories: 250 kcal
Ingredients
For the Coconut Bars
- 3 cups unsweetened shredded coconut
- 14 oz sweetened condensed milk
- 15 oz dark chocolate or semi-sweet chocolate
Instructions
Step 1: Mix the Coconut Filling
In a bowl, mix shredded coconut and sweetened condensed milk until well combined. Stir until the coconut is evenly coated and the mixture holds together.
Step 2: Shape the Bars
With lightly wet hands, shape mixture into 12 small logs and place on a parchment-lined baking sheet. Use slightly damp hands when shaping to prevent sticking.
Step 3: Freeze Until Firm
Freeze for 20 minutes until firm. This helps the coconut bars hold their shape before dipping.
Step 4: Melt the First Portion of Chocolate
Melt 10 oz of chocolate in the microwave in 30-second then 15-second intervals, stirring until smooth. Stir between intervals so the chocolate melts evenly.
Step 5: Finish the Chocolate Coating
Add remaining 5 oz chocolate and stir until fully melted and glossy. Allow melted chocolate to cool slightly before dipping to avoid melting the coconut bars.
Step 6: Dip the Coconut Bars
Dip chilled coconut bars into melted chocolate, coating completely. Let the excess chocolate settle before returning each bar to the parchment-lined sheet.
Step 7: Let the Chocolate Set
Return to parchment-lined sheet and allow chocolate to set before serving.
Notes
- Use slightly damp hands when shaping to prevent sticking.
- Allow melted chocolate to cool slightly before dipping to avoid melting the coconut bars.
- Store in the refrigerator up to 7 days or freeze for longer storage.
Serving Suggestions
Serve these 3-Ingredient Mounds Bars after the chocolate coating has fully set. The coconut and sweetened condensed milk filling gives each bar a chewy center, while the dark or semi-sweet chocolate coating adds a rich candy-bar finish.
These bars work well for dessert trays, homemade candy boxes, no-bake treats, or simple make-ahead sweets. Slice or serve them as 12 small logs once the coating is firm.
Storage
How to Store
Store the bars in the refrigerator up to 7 days. Keep them chilled so the coconut filling and chocolate coating stay firm.
Freezer Tip
Freeze for longer storage, exactly as noted. The recipe does not provide a specific freezer duration or thawing method, so no extra details are added here.
Best Texture Tip
Freeze the shaped coconut bars for 20 minutes until firm before dipping. This helps the bars hold together when they are coated in melted chocolate.
Chocolate Tip
Melt 10 oz of chocolate first, then add the remaining 5 oz and stir until fully melted and glossy. Let the melted chocolate cool slightly before dipping so it does not soften the coconut bars.
Shaping Tip
Use lightly wet hands when forming the coconut mixture into 12 small logs. This helps prevent sticking and keeps the bars easier to shape.

Fernando is the creator and writer behind the food blog Eating with your Hands. Living and working in cities like Paris, Barcelona, and Berlin, and being married to a Canadian foodie, has given Fernando a passion and interest in food and inspired him to run EWYH.