
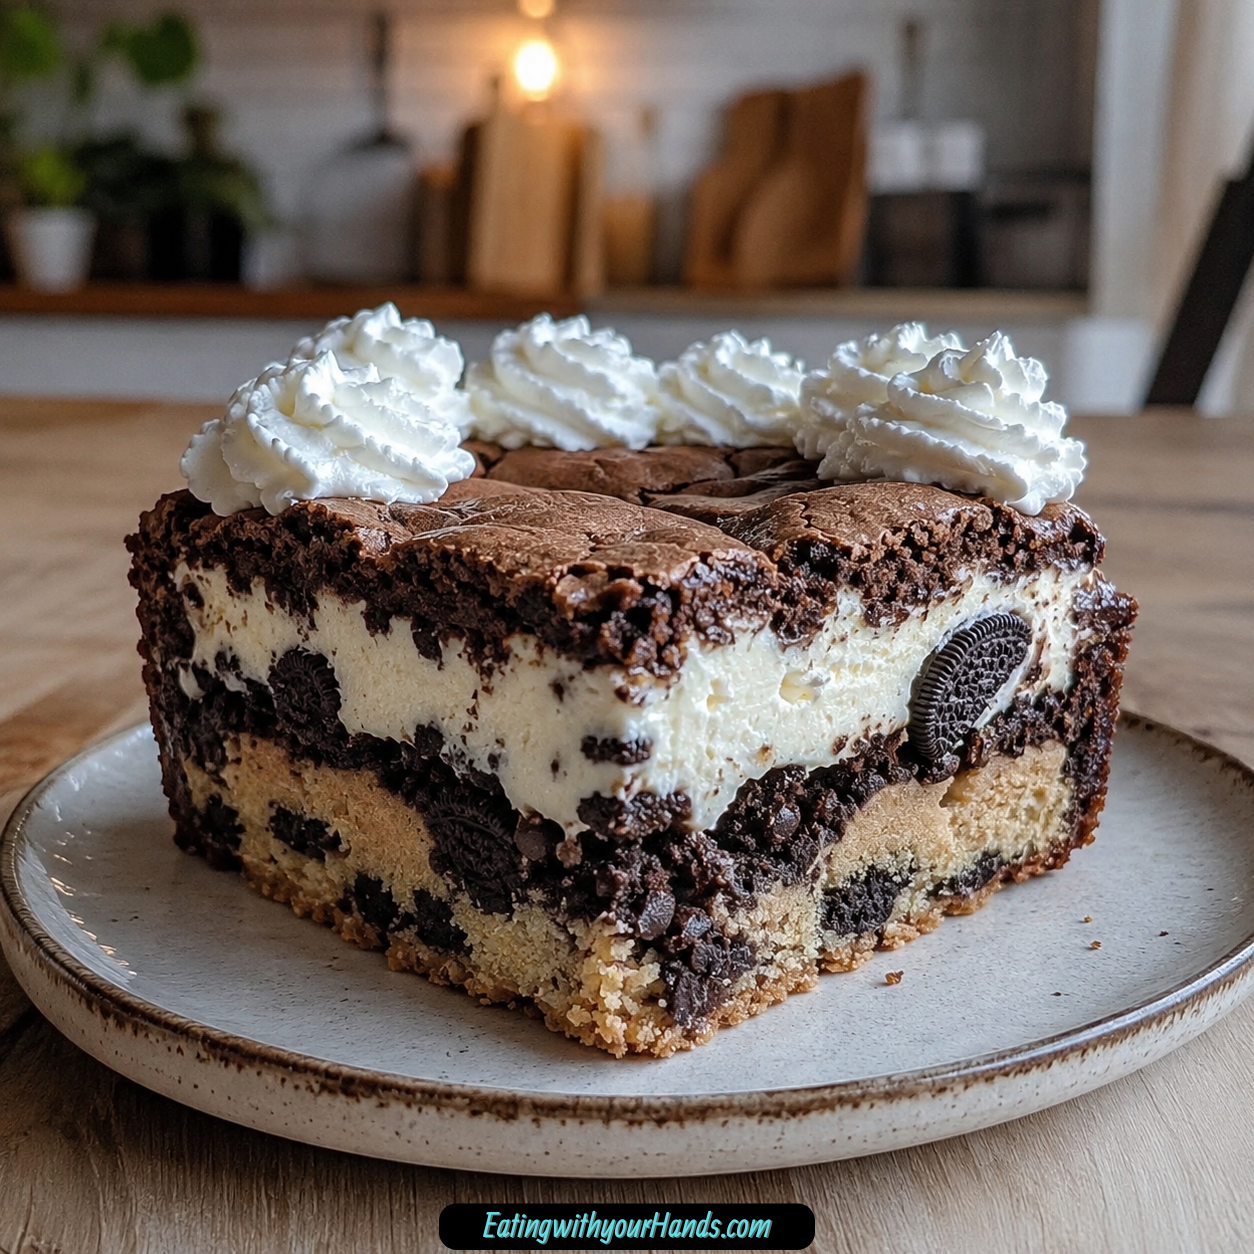
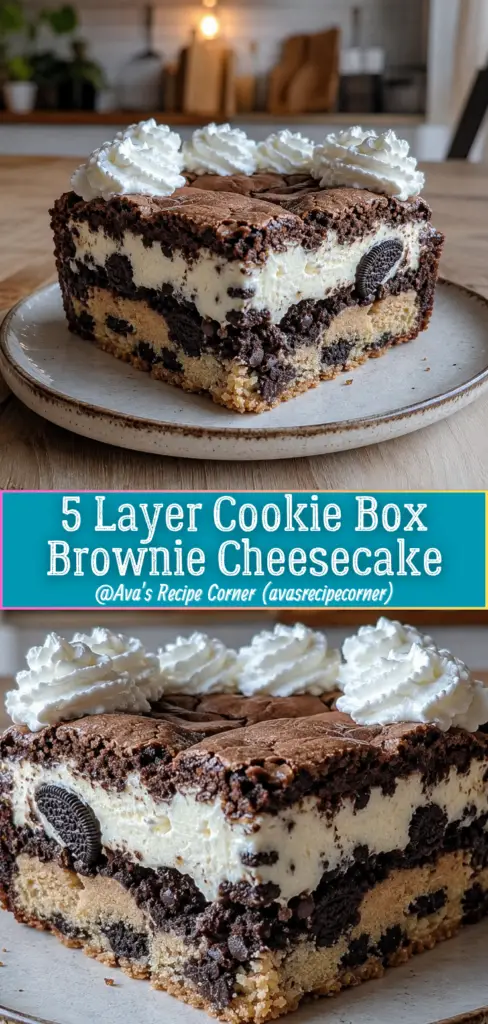
5 Layer Cookie Box Brownie Cheesecake is the kind of dessert that makes people stop mid-conversation and ask what exactly is in that pan. It is dramatic, rich, over-the-top, and built for anyone who believes a dessert should be a full experience, not just a small sweet ending.
I love desserts that feel playful and unapologetic. This one takes the comfort of chocolate chip cookie dough, the creaminess of cheesecake, the crunch of double-stuffed chocolate sandwich cookies, and the fudgy richness of brownies, then stacks them into one unforgettable bar.
This is not a quiet dessert. It is the kind you make for birthdays, holidays, potlucks, parties, or any moment when you want the dessert table to have a true showstopper.
The best part is that it looks much more complicated than it really is. With store-bought shortcuts like cookie dough, brownie mix, and sandwich cookies, you get a bakery-style layered dessert without needing advanced baking skills.
Table of Contents
- Why You’ll Love This Recipe
- Recipe Details
- Ingredients
- Optional Swaps, Variations, Add-Ins, and Serving Ideas
- Why This 5 Layer Cookie Box Brownie Cheesecake Works
- Directions
- Step 1: Preheat the Oven to 325°F (163°C)
- Step 2: Grease and Line the Baking Pan
- Step 3: Press in the Cookie Dough Base
- Step 4: Beat the Cream Cheese Until Smooth
- Step 5: Add Sugar, Vanilla, and Egg
- Step 6: Spread the Cheesecake Layer
- Step 7: Arrange the Sandwich Cookies
- Step 8: Prepare the Brownie Batter
- Step 9: Pour the Brownie Batter Over the Cookies
- Step 10: Bake for 50–60 Minutes
- Step 11: Cool Completely in the Pan
- Step 12: Refrigerate for at Least 4 Hours
- Step 13: Lift the Dessert From the Pan
- Step 14: Slice Into Squares or Rectangles
- Step 15: Serve Chilled With Whipped Cream if Desired
- Serving Ideas
- Storage
- Reheating
- Freezing
- Make-Ahead
- Helpful Notes for Best Results
- Variations
- Troubleshooting
- Frequently Asked Questions
- Why This Recipe Works So Well
- Final Thoughts
- 5 Layer Cookie Box Brownie Cheesecake
Why You’ll Love This Recipe
This 5 Layer Cookie Box Brownie Cheesecake is unbelievably decadent. It brings together dessert favorites in one slice: cookie dough, cheesecake, sandwich cookies, brownie, and an optional whipped cream topping.
It is easy but impressive. The recipe uses simple store-bought components, yet the finished bars look rich, layered, and party-ready.
This dessert is a guaranteed crowd-pleaser. It is perfect for potlucks, birthday tables, holiday dessert spreads, gifting, and any gathering where people love a bold sweet treat.
It is make-ahead friendly because it is best served chilled. The bars need at least 4 hours in the refrigerator, and overnight chilling gives the best structure and flavor.
Every bite has a different texture. The cookie base is chewy, the cheesecake is creamy, the sandwich cookies bring crunch, and the brownie layer is thick and fudgy.
It is also freezer-friendly. You can slice and store portions for future cravings, which is helpful because this dessert is rich enough to enjoy a little at a time.
Recipe Details
This layered brownie cheesecake dessert bakes at 325°F (163°C). The recipe uses a 9×13-inch baking pan that should be greased and lined with parchment paper, leaving an overhang on the sides.
The first layer is 16 oz chocolate chip cookie dough at room temperature. It can be homemade dough or your favorite store-bought brand.
The cheesecake layer is made with 24 oz softened cream cheese, ½ cup sugar, 1 teaspoon vanilla extract, and 1 large egg. The mixture should be beaten until smooth, creamy, and lump-free.
The cookie layer uses 40 double-stuffed chocolate sandwich cookies. Oreo-style cookies work best for structure and taste.
The brownie layer uses 36 oz brownie mix, which is 2 boxes. The batter should be prepared according to package instructions, usually requiring eggs, oil, and water.
The dessert bakes for 50–60 minutes. It is done when a toothpick inserted near the center comes out with just a few moist crumbs but no wet batter.
After baking, it must cool completely in the pan on a wire rack. Then it should chill for at least 4 hours or overnight before slicing.
Ingredients
Cookie Base
16 oz chocolate chip cookie dough, room temperature
Cheesecake Layer
24 oz cream cheese, softened
½ cup sugar
1 teaspoon vanilla extract
1 large egg
Cookie and Brownie Layers
40 double-stuffed chocolate sandwich cookies
36 oz brownie mix, 2 boxes
Optional Topping
Whipped cream, optional, for serving
Ingredient Notes
Chocolate chip cookie dough creates the chewy bottom layer. Room temperature dough is easier to press evenly into the pan.
The cream cheese should be softened for the smoothest cheesecake layer. Full-fat cream cheese gives the creamiest texture.
Sugar sweetens the cheesecake without overpowering the other layers. Vanilla extract adds a warm, aromatic touch.
One large egg binds the cheesecake layer and helps it bake into a creamy middle. Beat it in until the mixture is smooth.
Double-stuffed chocolate sandwich cookies create the surprise crunch between the cheesecake and brownie layers. Oreo-style cookies work especially well for structure and flavor.
Brownie mix forms the thick, fudgy top layer. Prepare it according to the package instructions before pouring it over the cookies and cheesecake.
Whipped cream is optional for serving. It adds a light contrast to the very rich layers.
Optional Swaps, Variations, Add-Ins, and Serving Ideas
Homemade Dough and Brownie Option
You can use homemade cookie dough and homemade brownie batter if you prefer. Just make sure the brownie recipe makes enough for a 9×13-inch pan, around 36 oz total.
This option keeps the same layered dessert structure. The key is having enough cookie dough for the base and enough brownie batter to cover the top.
Cookie Layer Swaps
Peanut butter cookies or mint Oreos can be used for a custom version. Each one changes the flavor while keeping the layered concept.
Peanut butter cookies make the bars richer and nuttier. Mint Oreos add a cool chocolate-mint surprise.
Brownie Add-Ins
Chopped nuts can be added to the brownie layer. This gives the top layer more texture and crunch.
Since the dessert already has several layers, keep additions simple. The chopped nuts should support the brownie layer without making it too heavy.
Serving Extras
Serve chilled for clean slices and firmer texture. For a gooier bite, warm individual slices slightly in the microwave for 10–15 seconds.
A scoop of vanilla ice cream makes the dessert even more indulgent. Chocolate sauce can also be added if you want a richer finish.
Smaller Batch Option
You can halve the recipe and make it in an 8×8-inch pan. Adjust the bake time to about 40–45 minutes.
This is helpful when you want the same dessert but do not need a full 9×13-inch pan. Watch for the same doneness cue: moist crumbs but no wet batter.
Why This 5 Layer Cookie Box Brownie Cheesecake Works
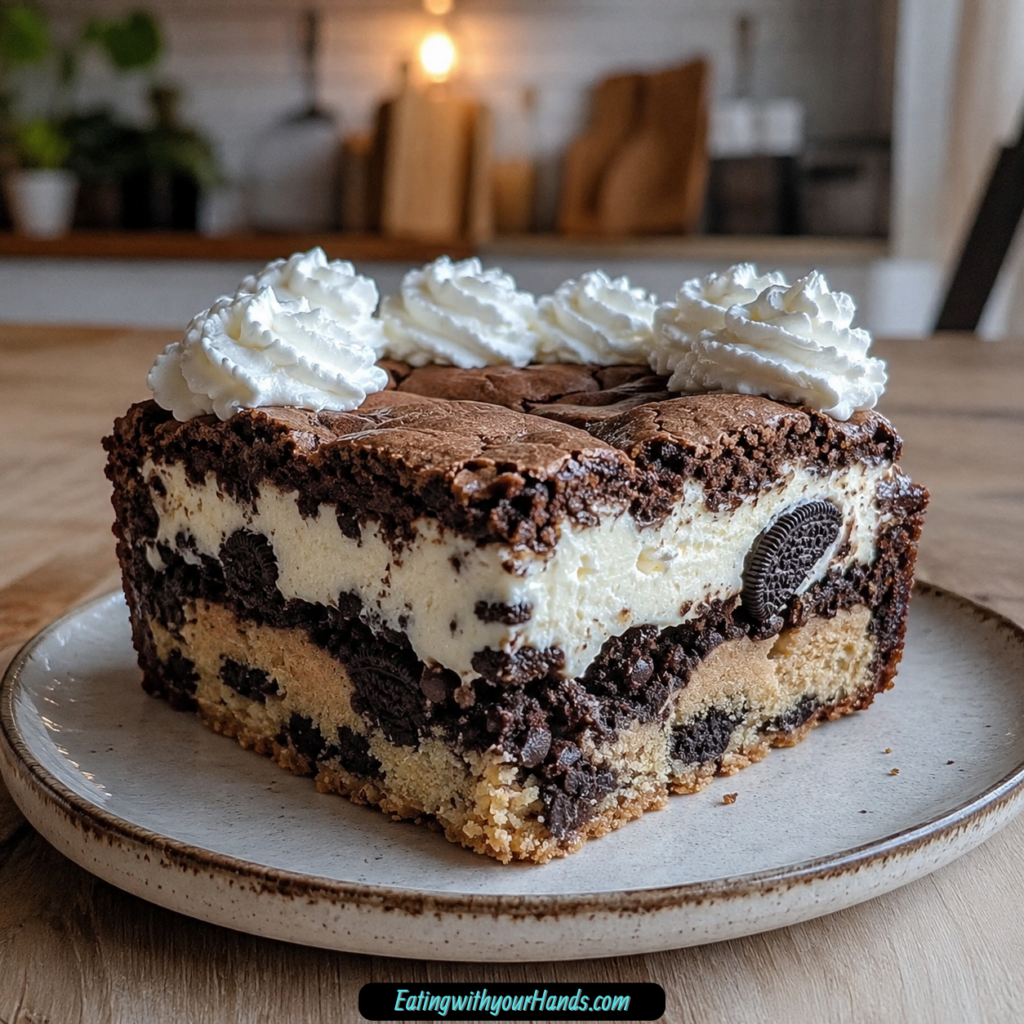
This dessert works because every layer has a clear purpose. The cookie dough gives a chewy base, the cheesecake adds creaminess, the sandwich cookies bring crunch, and the brownie layer finishes everything with fudgy richness.
The cookie dough base is sturdy enough to support the dessert. It also gives every slice a familiar chocolate chip cookie flavor.
The cheesecake layer softens the intensity of the brownie and cookie layers. It adds a creamy center that makes the dessert feel more complete.
The double-stuffed sandwich cookies create a surprise layer. They give structure, sweetness, and a little crunch between the cheesecake and brownie.
The brownie batter bakes into the top and seals the layers underneath. It creates the dramatic thick finish that makes each slice look impressive.
Chilling is essential because the layers need time to set. Without enough chill time, the bars will be harder to slice cleanly.
Directions
Step 1: Preheat the Oven to 325°F (163°C)
Preheat your oven to 325°F (163°C). This lower baking temperature helps the thick layered dessert bake through without overbrowning too quickly.
Because the pan holds cookie dough, cheesecake, sandwich cookies, and brownie batter, it needs steady heat. A fully preheated oven gives the layers the best chance to bake evenly.
Let the oven come to temperature while you prepare the pan. This dessert is easier when every step is ready before layering begins.
Step 2: Grease and Line the Baking Pan
Grease a 9×13-inch baking pan. Then line it with parchment paper, leaving an overhang on the sides.
The parchment overhang is important because it lets you lift the chilled dessert out of the pan later. That makes slicing much easier and cleaner.
Press the parchment into the pan as smoothly as possible. A well-prepared pan helps protect the layers and prevents sticking.
Step 3: Press in the Cookie Dough Base
Press 16 oz room temperature chocolate chip cookie dough evenly into the bottom of the prepared pan. Make sure the dough covers the entire base with no gaps.
Use your fingers or a spatula to spread it into the corners. An even cookie dough layer helps every bar have the same chewy foundation.
Do not leave thick mounds or thin spots. The base should look level before the cheesecake layer is added.
Step 4: Beat the Cream Cheese Until Smooth
Place 24 oz softened cream cheese in a large bowl. Beat until it is smooth and creamy.
Softened cream cheese is especially important here. If it is too cold, the cheesecake layer can turn lumpy.
Take the time to beat it well before adding the sugar, vanilla, and egg. A smooth base creates a better cheesecake layer.
Step 5: Add Sugar, Vanilla, and Egg
Add ½ cup sugar, 1 teaspoon vanilla extract, and 1 large egg to the cream cheese. Beat until the mixture is creamy and lump-free.
The sugar sweetens the cheesecake, the vanilla adds flavor, and the egg helps bind the layer. Everything should be fully incorporated.
Scrape the bowl if needed. The cheesecake mixture should look smooth before it goes over the cookie dough.
Step 6: Spread the Cheesecake Layer
Pour the cheesecake mixture over the cookie dough base. Smooth it evenly with a spatula.
Spread gently so you do not pull up the cookie dough underneath. Move from the center toward the edges until the base is covered.
This creamy layer becomes the soft middle of the dessert. Try to keep it even so every slice has cheesecake throughout.
Step 7: Arrange the Sandwich Cookies
Arrange 40 double-stuffed chocolate sandwich cookies in a single layer over the cheesecake. Place them carefully so they cover the surface.
Press the cookies gently into the cream cheese layer to anchor them in place. Do not press too hard; they should sit in the cheesecake, not disappear into it.
This layer adds structure and crunch. It also makes the finished bars more fun to bite into.
Step 8: Prepare the Brownie Batter
Prepare 36 oz brownie mix, or 2 boxes, according to the package instructions. This usually requires eggs, oil, and water.
Mix the brownie batter until it is ready to pour. Follow the box directions so the texture comes out as intended.
The brownie layer is the top of the dessert, so it should be smooth enough to spread over the sandwich cookies. Once mixed, move directly to layering.
Step 9: Pour the Brownie Batter Over the Cookies
Pour the prepared brownie batter evenly over the sandwich cookie and cheesecake layers. Use a spatula to gently smooth the surface.
Try to cover every cookie. The brownie batter should form a full top layer from edge to edge.
Be gentle while spreading. You do not want to shift the sandwich cookies or disturb the cheesecake layer underneath.
Step 10: Bake for 50–60 Minutes
Place the pan in the preheated oven and bake for 50–60 minutes. The dessert is ready when a toothpick inserted near the center comes out with just a few moist crumbs.
There should be no wet batter on the toothpick. Moist crumbs are fine because the brownie layer is meant to stay fudgy.
Check near the end of the baking time. The top should look set, and the center should not look loose.
Step 11: Cool Completely in the Pan
Let the dessert cool completely in the pan on a wire rack. Do not rush this step.
The layers are very soft when hot. Cooling helps the brownie, cheesecake, cookies, and cookie base settle into place.
A wire rack allows the pan to cool more evenly. This makes the next chilling step more effective.
Step 12: Refrigerate for at Least 4 Hours
After the dessert has cooled completely, refrigerate it for at least 4 hours. Overnight chilling gives the best structure and flavor.
Chilling helps the cheesecake firm up and makes the bars easier to slice. It also lets the layers settle into a cleaner, more defined dessert.
Do not skip the chill time. Without it, the bars may taste delicious but slice messily.
Step 13: Lift the Dessert From the Pan
Use the parchment overhang to lift the chilled dessert from the pan. Move it to a cutting board or flat surface.
Lift slowly and evenly so the dessert stays intact. The layered bars are heavy, so support them as needed.
This is where the parchment really helps. It lets you remove the whole slab without digging into the pan.
Step 14: Slice Into Squares or Rectangles
Cut the dessert into squares or rectangles with a sharp knife. Wipe the knife between cuts for clean edges.
For the cleanest slices, use a sharp knife dipped in hot water and wiped dry between cuts. This helps the knife glide through the brownie, cheesecake, cookies, and cookie base.
Cut smaller pieces if serving a crowd. This dessert is rich, so a modest square is usually plenty.
Step 15: Serve Chilled With Whipped Cream if Desired
Serve the bars chilled for cleaner slices and a firmer texture. Add a swirl of whipped cream if desired.
The whipped cream brings a lighter contrast to the dense layers. It is optional but lovely for serving.
For a gooier bite, warm individual slices slightly in the microwave for 10–15 seconds. Add vanilla ice cream or chocolate sauce if you want even more decadence.
Serving Ideas
Serve 5 Layer Cookie Box Brownie Cheesecake chilled for the cleanest slices. The layers hold together better when cold, making the bars easier to cut and serve.
For a softer, gooier bite, warm individual slices slightly in the microwave for 10–15 seconds. This makes the brownie and cookie layers feel richer.
Add a swirl of whipped cream for a lighter finish. A scoop of vanilla ice cream also works beautifully with the fudgy brownie top.
Chocolate sauce can be drizzled over the slices for extra indulgence. This is a good choice when serving the dessert for birthdays or parties.
These bars are perfect for potlucks, holiday tables, gifting, parties, and dessert trays. Cut them into smaller portions when serving a crowd because each piece is very rich.
Storage
Store the bars covered in the refrigerator for up to 5 days. For the best texture, keep the dessert chilled and only remove what you need.
Because of the cheesecake layer, refrigeration is important. The bars also slice better when cold.
Use an airtight container or cover the pan well. This keeps the dessert from drying out and protects the layers.
If stacking slices, place parchment between layers. This helps prevent sticking and keeps the edges cleaner.
Reheating
These bars do not need reheating, but individual slices can be warmed slightly for a gooier bite. Microwave a slice for 10–15 seconds.
Warm only the portion you plan to eat. The dessert is best stored chilled, especially because of the cheesecake layer.
If adding whipped cream or ice cream, add it after warming. This keeps the toppings fresh and cold against the warm slice.
Freezing
Freeze slices in an airtight container with parchment between layers. This keeps the pieces from sticking together.
Thaw the slices in the refrigerator overnight before serving. Chilled thawing helps preserve the texture of the cheesecake and brownie layers.
Freezing is a great option for future cravings. Since the dessert is rich, having individual slices stored away makes it easy to enjoy later.
Keep the slices well covered. This protects the cookie base, cheesecake layer, sandwich cookies, and brownie top.
Make-Ahead
This dessert is ideal for make-ahead prep. Bake it a day ahead, chill it overnight, and slice it before serving.
Overnight chilling gives the best structure and flavor. The layers firm up, making the bars easier to cut cleanly.
You can keep the whole dessert covered in the refrigerator until you are ready to serve. Lift it from the pan with the parchment overhang and cut when chilled.
This is especially helpful for parties. The work is done ahead, and the dessert is ready when the table needs something dramatic.
Helpful Notes for Best Results
Use room temperature cookie dough so it presses evenly into the pan. Cold dough can be harder to spread into the corners.
Softened cream cheese is especially important for the cheesecake layer. It helps the filling mix smoothly without lumps.
Do not skip the chill time. Chilling overnight allows the flavors to meld and the layers to firm up.
Use quality mixes if possible. The better the brownie mix and cookie dough, the better the final result.
Stick to a 9×13-inch pan for even baking. A smaller pan can overflow.
Use a sharp knife for slicing. For the cleanest slices, dip the knife in hot water and wipe it dry between cuts.
Variations
Homemade Cookie and Brownie Version
Use homemade cookie dough and homemade brownie batter if you prefer. Make sure the brownie recipe makes enough for a 9×13-inch pan, around 36 oz total.
This keeps the same dramatic layered structure. The baking and chilling steps remain the same.
Peanut Butter Cookie Version
Use peanut butter cookies as a customization. This adds a nutty flavor to the layered dessert.
Peanut butter works well with brownie and cheesecake flavors. It makes the bars taste even richer.
Mint Oreo Version
Use mint Oreos for the sandwich cookie layer. This adds a cool mint flavor between the cheesecake and brownie.
This variation is especially fun for holiday trays. It changes the flavor while keeping the same layered look.
Nutty Brownie Layer
Add chopped nuts to the brownie layer. This gives the top more texture.
The nuts add crunch to the fudgy brownie portion. Keep the layer even so the bars slice well.
Extra Decadent Serving Version
Serve the chilled bars with vanilla ice cream and chocolate sauce. This turns each piece into a plated dessert.
This version is perfect for birthdays or celebrations. It makes the already rich bars feel even more indulgent.
Half Batch Version
Halve the recipe and make it in an 8×8-inch pan. Adjust the bake time to about 40–45 minutes.
This is useful when you want fewer bars. Check for moist crumbs and no wet batter near the center.
Troubleshooting
Why Is My Cheesecake Layer Lumpy?
The cream cheese may not have been softened enough. Beat the cream cheese until smooth before adding the sugar, vanilla, and egg.
Room temperature ingredients help the cheesecake layer mix more smoothly. Scrape the bowl so no thick bits remain.
Why Are My Layers Messy?
The dessert may not have chilled long enough. Refrigerate for at least 4 hours, or overnight for the best structure.
Clean slicing also helps. Use a sharp knife, wipe it between cuts, or dip it in hot water and wipe dry for cleaner edges.
Why Is There Wet Batter in the Center?
The dessert may need more baking time. Bake until a toothpick inserted near the center comes out with a few moist crumbs but no wet batter.
Because the dessert is thick and layered, the center needs time to bake through. Check near the end of the 50–60 minute window.
Why Did My Pan Overflow?
The pan may have been too small. Stick to a 9×13-inch pan for even baking and enough space.
A smaller pan can overflow because the dessert has multiple thick layers. Use the correct size for the full recipe.
Why Is the Dessert Hard to Lift Out?
The parchment may not have had enough overhang. Leave parchment hanging over the sides so you can lift the bars after chilling.
Let the dessert cool and chill completely before lifting. A warm or soft slab can break more easily.
Frequently Asked Questions
Can I Use Homemade Cookie Dough and Brownie Mix?
Yes, you can use homemade cookie dough and homemade brownie batter. Just make sure the brownie recipe makes enough for a 9×13-inch pan, around 36 oz total.
The same layering method applies. Press the cookie dough first, add the cheesecake layer, arrange the cookies, and finish with brownie batter.
Do I Have to Chill It Overnight?
You can chill it for just 4 hours, but overnight chilling gives the best structure and flavor. The layers firm up better with more time.
If you want clean slices, overnight chilling is the safest choice. The cheesecake layer especially benefits from the longer chill.
What Is the Best Way to Cut Clean Slices?
Use a sharp knife dipped in hot water and wiped dry between cuts. Wiping the knife keeps the layers from smearing.
The bars should also be well chilled before cutting. Cold bars slice much more cleanly than warm ones.
Can I Make This in Advance?
Yes, this dessert is ideal for make-ahead prep. Bake it a day ahead, chill overnight, and slice before serving.
Store it covered in the refrigerator until needed. Keep it chilled for the best texture.
Can I Halve the Recipe?
Yes, you can halve the recipe and make it in an 8×8-inch pan. Adjust the bake time to about 40–45 minutes.
Use the same doneness cue. A toothpick inserted near the center should come out with a few moist crumbs but no wet batter.
Can I Freeze the Slices?
Yes, freeze slices in an airtight container with parchment between layers. Thaw in the fridge overnight before serving.
This is a great way to save leftovers. It also makes future dessert cravings easy to satisfy.
Should These Bars Be Served Cold?
Yes, they are best served chilled for clean slices and a firmer texture. You can warm individual slices for 10–15 seconds if you want a gooier bite.
Chilled bars hold their layers best. Warmed slices taste softer and more indulgent.
Why This Recipe Works So Well
5 Layer Cookie Box Brownie Cheesecake works because it uses familiar dessert flavors in a dramatic layered form. Each layer brings something different, so every bite feels rich and exciting.
The cookie dough base gives the dessert chew and sweetness. It creates a sturdy bottom layer that supports the cheesecake.
The cheesecake layer adds creaminess and balances the heavy chocolate layers. It makes the bars taste more complete and less one-note.
The double-stuffed sandwich cookies bring structure, crunch, and a playful surprise. They also make the cut slices look impressive.
The brownie layer adds fudgy richness on top. It bakes into a thick crown that makes the dessert feel bold and celebration-worthy.
The chill time brings everything together. Once cold, the layers firm enough to cut cleanly and serve beautifully.
Final Thoughts
5 Layer Cookie Box Brownie Cheesecake is the kind of dessert you make when subtle is not the goal. It is rich, stacked, dramatic, and filled with the flavors people love: cookie dough, cheesecake, chocolate sandwich cookies, brownie, and whipped cream if you want to finish it with a soft touch.
I love that it feels like a bakery case dessert but uses easy shortcuts that make it possible in a home kitchen. The store-bought cookie dough, brownie mix, and sandwich cookies do the heavy lifting, while the cheesecake layer makes the whole pan feel extra special.
Bake it for a birthday, holiday table, potluck, party, or any day that calls for a dessert with real wow factor. Chill it well, cut it cleanly, and enjoy every chewy, creamy, crunchy, fudgy bite.
5 Layer Cookie Box Brownie Cheesecake
This 5 Layer Cookie Box Brownie Cheesecake is a rich, over-the-top dessert with layers of chocolate chip cookie dough, creamy cheesecake, double-stuffed chocolate sandwich cookies, and fudgy brownie batter. It is sweet, decadent, and perfect for birthdays, holidays, special occasions, or any time you want a dramatic dessert that slices into impressive layered bars.
Recipe Details
- Prep Time: 20 minutes
- Cook Time: 1 hour
- Chilling Time: 4 hours
- Total Time: 5 hours 20 minutes
- Servings: 12
- Calories: 450 kcal
Ingredients
- 40 double-stuffed chocolate sandwich cookies
- 36 oz brownie mix 2 boxes, batter prepared according to package instructions
- 16 oz chocolate chip cookie dough room temperature
- 24 oz cream cheese softened
- ½ cup sugar
- 1 large egg
- 1 teaspoon vanilla extract
- Whipped cream for serving (optional)
Instructions
Step 1: Prepare the Pan
Preheat oven to 325°F (163°C). Line a 9×13 inch pan with parchment paper, leaving overhang so the dessert can be lifted out after chilling.
Step 2: Add the Cookie Dough Layer
Press the chocolate chip cookie dough evenly into the bottom of the prepared pan.
Step 3: Make the Cheesecake Layer
Beat the softened cream cheese, sugar, vanilla, and egg until smooth.
Step 4: Spread the Cheesecake Mixture
Spread the cheesecake mixture evenly over the cookie dough layer.
Step 5: Add the Cookie Layer
Arrange the double-stuffed chocolate sandwich cookies in a single layer over the cheesecake.
Step 6: Add the Brownie Batter
Pour the prepared brownie batter over the top and spread it evenly to cover the cookie layer.
Step 7: Bake the Dessert
Bake for 50-60 minutes, until a toothpick inserted comes out with a few moist crumbs.
Step 8: Cool and Chill
Cool the dessert in the pan, then chill in the fridge for at least 4 hours or overnight.
Step 9: Slice and Serve
Lift the dessert out of the pan using the parchment overhang. Slice into 12 servings and serve topped with whipped cream if desired.
Notes
Use room temperature cream cheese for a smooth cheesecake layer.
Let the dessert chill overnight for clean slices and the best texture.
Add-ins like chopped nuts or caramel drizzle can be added to the brownie layer.
Use a sharp knife wiped clean between cuts for neat portions.
Freezes well in slices; wrap tightly and thaw overnight in the fridge.
Serving Suggestions
- Serve chilled for clean layers and a firm cheesecake texture.
- Add whipped cream on top for a creamy finish.
- Slice into small squares for parties because this dessert is very rich.
- Serve with cold milk, hot coffee, or hot cocoa.
- Add to birthday dessert tables, holiday trays, or special occasion spreads.
Storage
How to Refrigerate
Keep the sliced or unsliced dessert covered in the fridge. Chilling for at least 4 hours or overnight helps the layers set properly.
How to Freeze
This dessert freezes well in slices. Wrap the slices tightly before freezing.
How to Thaw
Thaw frozen slices overnight in the fridge before serving.
Best Texture Tip
For the cleanest slices, chill the dessert overnight and wipe a sharp knife clean between cuts.

Fernando is the creator and writer behind the food blog Eating with your Hands. Living and working in cities like Paris, Barcelona, and Berlin, and being married to a Canadian foodie, has given Fernando a passion and interest in food and inspired him to run EWYH.