
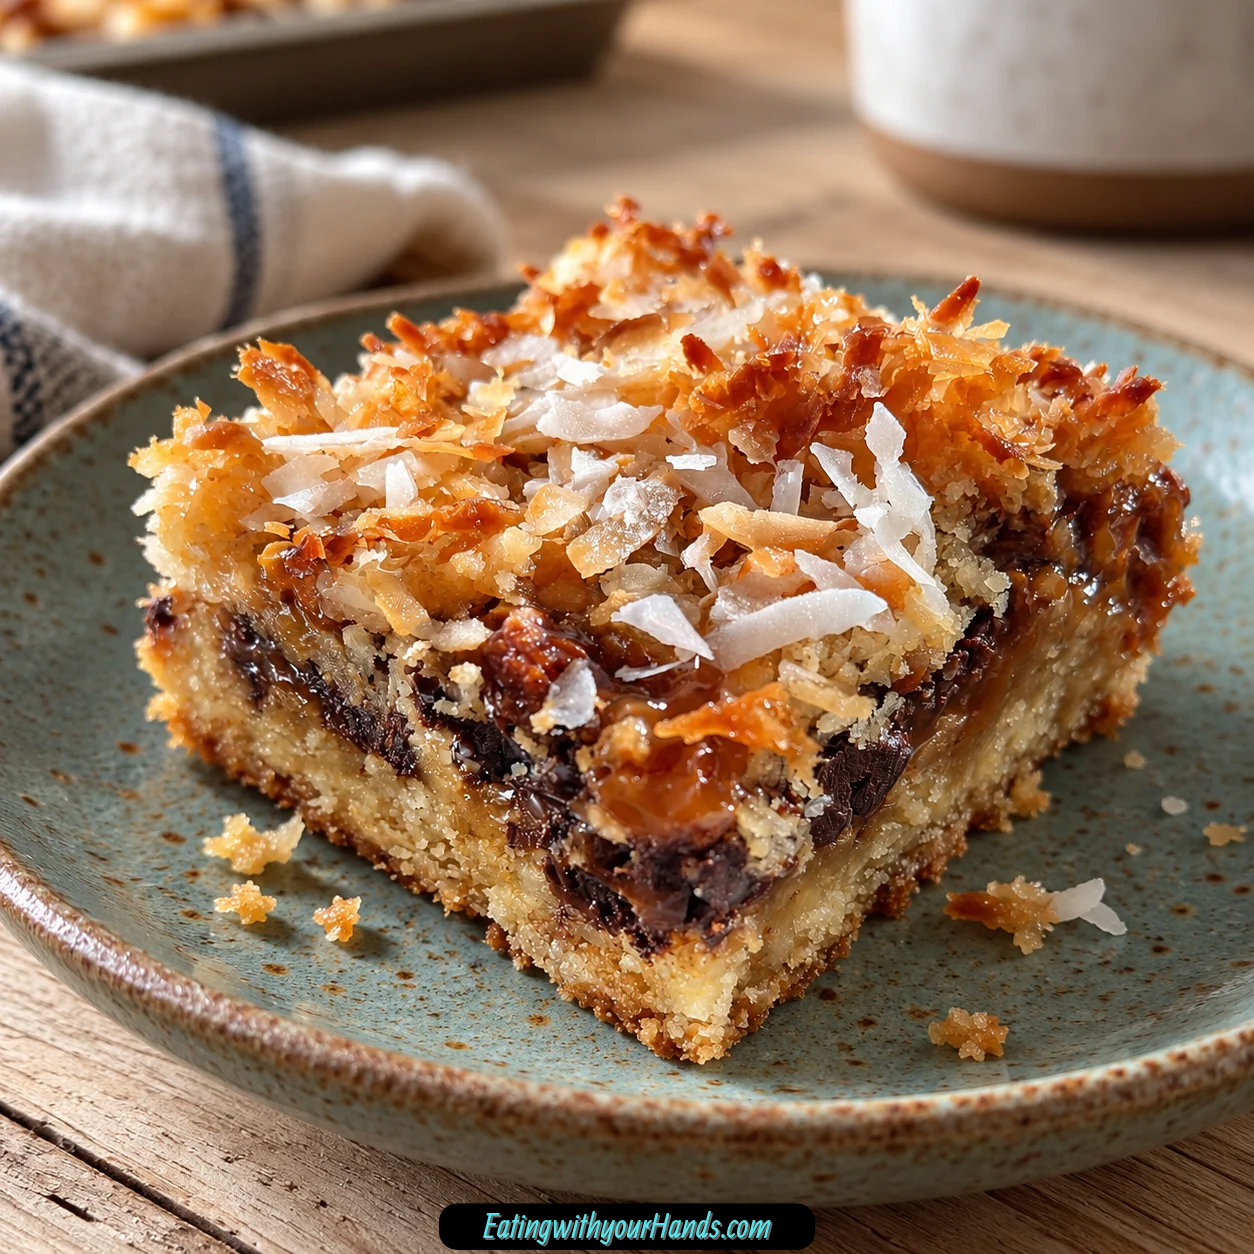

I still remember the first time I tasted 7-Layer Bars at one of my aunt’s potlucks, because one bite was enough to make the entire dessert table feel suddenly less interesting. There was buttery graham cracker crust underneath, chocolate melting into every corner, toasted coconut on top, and sweetened condensed milk pulling all of those textures together into one wonderfully gooey square.
Back then, we called them Magic Cookie Bars, and that name still feels completely right to me. There is something almost unfair about how little effort they require compared with how rich, layered, and irresistible they taste once they come out of the oven.
They eventually became one of my signature bakes for school bake sales and family gatherings. Whenever I needed a dessert that could feed a crowd without demanding complicated techniques or hours of decorating, this was the pan I knew I could rely on.
The appeal is easy to understand once you see how the layers work together. A crisp graham cracker base supports semi-sweet chocolate, white chocolate, butterscotch chips, pecans, sweetened condensed milk, and coconut, creating a dessert that feels chewy, crunchy, creamy, and buttery all at once.
Over the years, I kept adjusting the balance until every layer felt like it belonged. Too much of one thing can overwhelm the rest, but when the chocolate, nuts, coconut, and condensed milk are distributed evenly, every square has that same satisfying mix of textures.
That balance is exactly why these bars disappear so quickly. People rarely stop at one because each bite seems to offer a slightly different combination of crisp crust, melted chips, toasted coconut, and gooey sweetness.
Another reason I love them is how forgiving they are. There is no mixer, no delicate batter, no frosting to spread, and no complicated timing beyond getting the crust packed firmly and letting the finished bars cool completely before cutting.
They also become even better after sitting for a while. The layers settle together, the flavors deepen, and the bars become easier to slice cleanly once the sweetened condensed milk has had time to firm around everything else.
Table of Contents
- Why You’ll Love These 7-Layer Bars
- Ingredients for 7-Layer Bars
- Why the Graham Cracker Crust Matters
- The Three-Chip Layer
- Why Sweetened Condensed Milk Is the Magic Layer
- Equipment You’ll Need
- How to Make 7-Layer Bars
- Tips for Perfect 7-Layer Bars
- Why Cooling Is So Important
- Toasting the Pecans and Coconut
- Ingredient Substitutions and Variations
- Serving 7-Layer Bars
- Why They Are Perfect for Potlucks
- Storage
- How to Freeze 7-Layer Bars
- Frequently Asked Questions
- Nutritional Information
- The Dessert That Never Stays on the Table Long
- 7-Layer Bars Recipe
Why You’ll Love These 7-Layer Bars
These bars are almost impossible to overcomplicate. You build them layer by layer in one pan, bake until golden around the edges, and let them cool before cutting.
They are also wonderfully adaptable. Pecans can become almonds or walnuts, butterscotch chips can be replaced with peanut butter chips, and coconut can give way to extra nuts or crushed pretzels.
The texture is one of their biggest strengths. The graham cracker crust stays firm underneath while the center becomes rich and gooey and the coconut on top gets gently toasted.
They are ideal for potlucks, bake sales, parties, and family gatherings. The 9×13-inch pan format gives you plenty to share without requiring individual assembly.
Children tend to love them because every bite feels packed with familiar sweet flavors. Adults tend to love them for exactly the same reason, even if everyone pretends they only came back for “one more small piece.”
They also store beautifully. Once cooled and cut, the bars can stay in an airtight container for up to a week and can also be frozen individually for later.
Ingredients for 7-Layer Bars
The ingredient list is short, but each component has a distinct job in the finished dessert. The graham crackers create structure, the butter binds the base, the chips bring different kinds of sweetness, the pecans add crunch, and sweetened condensed milk ties everything together.
- 1 ½ cups graham cracker crumbs, about 10 full sheets
- 10 tablespoons salted butter, melted
- 1 cup semi-sweet chocolate chips
- ½ cup white chocolate chips
- ½ cup butterscotch chips
- ½ cup chopped pecans
- 1 (14 oz) can sweetened condensed milk
- 1 cup sweetened shredded coconut
Crush the graham crackers finely but not into completely powdery crumbs. You want them small enough to compact well while still keeping a little texture.
The butter should be fully melted before mixing with the crumbs. Salted butter adds enough savory contrast to keep the crust from tasting flat against all the sweeter toppings.
Why the Graham Cracker Crust Matters
The crust is the foundation of the entire pan. If it is pressed too loosely, the bars can crumble when you try to lift or cut them.
Mix the graham crumbs and melted butter until the texture looks like wet sand. When squeezed in your hand, the mixture should hold together rather than falling apart immediately.
Pressing firmly makes a big difference. The bottom of a measuring cup works especially well because it gives you a flat surface for compacting the crumbs evenly across the pan.
Take the crust slightly up the sides if you like a little edge around the filling. The most important part is making sure the center and corners are equally packed so every bar has a strong base.
The Three-Chip Layer
Using semi-sweet, white chocolate, and butterscotch chips gives the bars more depth than relying on just one kind of sweetness. Each chip melts differently and creates a slightly different flavor pocket.
Semi-sweet chocolate brings the deepest chocolate flavor. It keeps the bars from feeling overwhelmingly sugary by adding a darker note underneath the white chocolate and butterscotch.
White chocolate gives a softer, creamier sweetness. Butterscotch adds that warm caramel-like flavor that makes these bars taste especially nostalgic.
Spread all three evenly rather than letting one section become overloaded. Good distribution means every square gets a little of each flavor.
Why Sweetened Condensed Milk Is the Magic Layer
Sweetened condensed milk is what binds the loose toppings into one cohesive bar. As it bakes, it moves between the chips, nuts, coconut, and crust and turns those separate ingredients into one rich layer.
Use a 14-ounce can and make sure you do not accidentally grab evaporated milk. The two products are completely different and do not behave the same way in this dessert.
Pour the condensed milk slowly rather than dumping it into one spot. A zigzag pattern helps it spread across more of the surface before it begins sinking downward.
Leave a small border near the edge of the pan. About ½ inch gives the condensed milk room to spread during baking without bubbling over as easily.
Equipment You’ll Need
This recipe keeps the equipment simple. You need a 9×13-inch baking dish, parchment paper, a medium mixing bowl, and measuring cups.
Either a glass or metal baking dish works. The parchment paper is especially useful because an overhang gives you handles for lifting the cooled slab out of the pan.
A flat-bottomed measuring cup is handy for pressing the crust. It creates much more even pressure than using fingertips alone.
No mixer is required. The entire recipe can be assembled by hand from start to finish.
How to Make 7-Layer Bars
The method is best thought of as a simple sequence: prepare the pan, build the crust, scatter the chips and nuts, add condensed milk and coconut, then bake and cool completely. The bars are easy, but clean slicing depends heavily on firm crust packing and enough cooling time.
Step 1: Preheat the Oven and Prepare the Pan
Preheat the oven to 350°F (175°C) before beginning the layers. Line a 9×13-inch baking dish with parchment paper, leaving enough overhang on the long sides to act as handles later.
Press the parchment into the corners so it sits as flat as possible. A good lining makes removal easier and protects the crumb base from sticking firmly to the pan.
Make sure the butter is melted and the remaining ingredients are measured before you begin. Once the crust is pressed, the rest of the layering moves quickly.
Step 2: Build the Graham Cracker Crust
Place 1 ½ cups graham cracker crumbs in a medium mixing bowl and pour in the 10 tablespoons melted salted butter. Stir until the crumbs are evenly moistened and resemble wet sand.
Transfer the mixture into the prepared pan and spread it across the bottom. Use the base of a measuring cup to press firmly and evenly, working all the way into the corners and slightly up the sides.
Do not leave the crust loose or fluffy. Compacting it well is what helps the bars stay intact when they are lifted and sliced after cooling.
Step 3: Add the Chocolate and Butterscotch Layers
Scatter the 1 cup semi-sweet chocolate chips evenly over the crust. Follow with ½ cup white chocolate chips and ½ cup butterscotch chips.
Try to spread the chips across the entire pan rather than creating large piles in one place. Uneven distribution can make some bars overwhelmingly rich while others miss entire flavors.
Do not worry about creating perfect rows. A slightly random spread gives every square a natural mix of melted chips.
Step 4: Add the Pecans
Sprinkle ½ cup chopped pecans across the chip layer. Distribute them into open spaces so the crunch is spread throughout the pan.
Give the pan a very gentle shake if needed to help the smaller pieces settle. The goal is not to compress the layers but simply to prevent large clusters from forming.
If you decide to toast the pecans first, let them cool before adding them. Toasting is optional, but it creates a deeper nutty flavor.
Step 5: Drizzle the Sweetened Condensed Milk
Slowly pour the 14-ounce can of sweetened condensed milk over the layered chips and pecans. Use a back-and-forth zigzag motion, then return to any dry-looking areas that still need coverage.
Try to stop about ½ inch away from the outer edge of the pan. The condensed milk will spread as it heats, so that small border helps reduce the chance of bubbling over.
Let the milk seep naturally through the toppings. There is no need to stir because the beauty of the bars comes from preserving distinct layers while still letting them melt together.
Step 6: Add the Coconut
Sprinkle 1 cup sweetened shredded coconut evenly across the top. Keep the layer light and fluffy rather than compressing it into a solid blanket.
Use clean fingers to press the coconut down very gently. This helps some of the shreds make contact with the condensed milk while still leaving enough exposed surface to toast.
Make sure the corners receive some coconut too. Even distribution helps every cut bar look and taste complete.
Step 7: Bake Until Golden
Place the pan in the preheated 350°F oven and bake for about 25 minutes. Watch for golden edges and lightly toasted coconut across the top.
The condensed milk may bubble gently around the layers as the bars bake. That is normal as long as it stays contained within the pan.
Remove the pan once the edges look golden and the topping has developed color. The bars will still feel soft while hot, so do not judge doneness by trying to cut into them immediately.
Step 8: Cool Completely Before Cutting
Let the bars cool completely at room temperature before slicing. About 2 hours gives the layers time to firm enough for cleaner cuts.
If you want to speed up the process, transfer the pan to the refrigerator once it is no longer dangerously hot. Chilling makes the condensed milk and chocolate layers much easier to slice.
Use the parchment overhang to lift the cooled slab from the pan. Cut into squares only after the layers feel firm enough to hold their shape.

Tips for Perfect 7-Layer Bars
Use parchment paper with a generous overhang. Those simple handles make it much easier to remove the bars without destroying the corners.
Do not cut while warm. The melted chocolate and condensed milk need time to firm or the layers can squash and smear under the knife.
Press the crust firmly from the beginning. A weak crust makes even perfectly baked toppings difficult to handle.
Toasting the pecans and coconut separately for about 5 extra minutes can deepen their flavor. This is optional, but it gives the finished bars a more pronounced nutty and toasted character.
Let the finished bars sit until completely cool. They actually improve as the flavors settle together.
Why Cooling Is So Important
The bars are extremely soft when they first leave the oven. Condensed milk, melted chips, and hot butter are still fluid enough that cutting immediately can create a gooey mess.
Cooling allows those layers to firm without becoming hard. The result is a bar that stays rich and soft but can still hold a clean square shape.
About 2 hours at room temperature is usually enough. Refrigeration can shorten the wait if patience is running low.
For the neatest pieces, lift the cooled slab out first and cut it on a flat surface. That gives you more control than slicing inside the baking dish.
Toasting the Pecans and Coconut
Toasting is optional, but it can make the nut and coconut flavors more noticeable. A few extra minutes before assembly adds another layer of depth.
Toast the pecans separately if you want them especially fragrant. Let them cool before layering so they do not start melting the chocolate chips prematurely.
The coconut can also be toasted lightly. Keep a close eye on it because fine shreds can change color quickly.
Even without pre-toasting, the top coconut still browns in the oven. The extra step is simply for a stronger toasted flavor.
Ingredient Substitutions and Variations
One of the best things about these bars is how easy they are to customize. The graham cracker crust and condensed milk provide enough structure that several topping swaps still work beautifully.
Swap the Pecans
Toasted almonds or walnuts can replace the pecans. Each one brings a slightly different crunch and flavor while keeping the same general role.
Salted peanuts are another option when you want stronger salty-sweet contrast. Their bolder flavor makes the bars feel a little less traditional but still very satisfying.
Use the same ½ cup quantity for a direct nut swap. Keep the pieces chopped so they distribute evenly.
Use Peanut Butter Chips
Peanut butter chips can replace the butterscotch chips. They make the bars taste richer and bring a more pronounced nutty sweetness.
Keep the amount at ½ cup. Scatter them across the pan just as you would the butterscotch.
This variation pairs especially well with semi-sweet chocolate. The contrast between chocolate and peanut butter makes the bars feel even more indulgent.
Try Dark Chocolate Chips
Dark chocolate chips can replace some or all of the semi-sweet chocolate chips. They give the bars a deeper, less sugary chocolate character.
Use them when you want stronger contrast against the condensed milk and white chocolate. The overall texture remains the same.
This swap can make the bars feel a little more grown-up without changing the method. Layer and bake exactly as usual.
Skip the Coconut
If coconut is not your favorite, leave it out. The bars still hold together because the condensed milk and remaining toppings provide plenty of structure.
Replace it with extra nuts or crushed pretzels if you still want a textured top. Either option changes the personality of the bars without affecting the basic baking method.
Keep the replacement spread evenly. You still want balanced coverage from corner to corner.
Make Them Nut-Free
Crushed pretzels can replace the pecans. They give the bars crunch and introduce a salty element that works very well with chocolate and condensed milk.
Sunflower seeds are another option for nut allergies. They add texture without changing the method.
You can also simply increase the amount of chocolate chips. Extra chocolate is never likely to disappoint anyone at a bake sale.
Gluten-Free Variation
Use gluten-free graham crackers in place of standard graham crackers. Crush them into the same 1 ½ cups of crumbs and combine with the melted butter as usual.
The remaining layers can stay exactly the same. Press the gluten-free crust firmly so it has enough structure.
This is one of the simplest adaptations because the crust is the only component that needs replacing. The rest of the recipe remains familiar.
Serving 7-Layer Bars
These bars are best served at room temperature. The chocolate becomes softer and the condensed milk layer stays pleasantly gooey without becoming messy.
Lift the full slab from the pan using the parchment handles before slicing. This gives you a flat surface and makes it easier to create even squares.
A sharp knife works best for cutting through the chilled or cooled layers. Wipe the blade between cuts if the chocolate and condensed milk begin sticking.
Serve them as part of a dessert tray, bake sale table, or potluck spread. Their rich flavor means even a modest square feels satisfying.
Why They Are Perfect for Potlucks
A 9×13-inch pan is easy to transport and gives you plenty of pieces to share. There is also no frosting or fragile topping that needs to stay perfectly decorated in transit.
The bars hold together once cooled and can be stacked in a container. Layer parchment between them to keep the surfaces from sticking.
They also taste good after sitting for a while. That makes them especially convenient when dessert needs to be prepared before guests arrive.
Most importantly, they appeal to a wide range of people. Chocolate, coconut, nuts, caramel-like butterscotch, and graham crackers are familiar flavors that rarely sit untouched for long.
Storage
Store completely cooled bars in an airtight container. They keep well for up to 1 week.
If stacking multiple layers, place parchment paper between them. This prevents the gooey tops from sticking together and pulling apart when the bars are separated.
Room temperature gives the bars the softest, meltiest texture. Keep the container sealed well so the crust does not dry out.
They can also be chilled if you prefer a firmer bar. Bring them back toward room temperature before serving if you want the chocolate softer.
How to Freeze 7-Layer Bars
Wrap individual bars tightly in plastic wrap. Place the wrapped pieces together inside a freezer bag for longer storage.
Freezing individually means you can remove one or two pieces whenever a craving hits. There is no need to thaw the entire batch.
Let frozen bars thaw at room temperature for about 1 hour. Once thawed, the texture returns close to the fresh version.
Keep the wrapping on while they begin thawing to protect the surface. Unwrap once the bars are soft enough to serve.
Frequently Asked Questions
Can I Use Unsweetened Coconut?
Yes. The sweetened condensed milk already provides plenty of sweetness, so unsweetened coconut works well.
Toast it lightly first if you want stronger flavor. The slightly less sweet coconut can create a pleasant contrast with the richer layers underneath.
Can I Freeze the Bars?
Yes. Wrap each cooled bar tightly in plastic wrap and place the pieces inside a freezer bag.
Thaw at room temperature for about 1 hour. Once thawed, the bars are ready to serve.
Can I Make Them Without Nuts?
Yes. Crushed pretzels or sunflower seeds can replace the pecans.
You can also omit the nut layer and add more chocolate chips instead. The condensed milk keeps the remaining layers together.
Why Did My Sweetened Condensed Milk Bubble Over?
It may have been poured too close to the edge of the pan. Leave about a ½-inch border when drizzling it over the toppings.
The condensed milk spreads as it bakes. Giving it room reduces the chance that it will bubble over the side.
Can I Use Another Kind of Chocolate Chip?
Yes. Dark chocolate chips or peanut butter chips are both good options.
Use them as substitutions for the existing chip layers rather than changing the basic method. Keep the toppings evenly scattered for the best distribution.
Do I Have to Toast the Nuts and Coconut?
No. Toasting is completely optional.
It adds more depth and nuttiness, but the bars are still delicious when everything goes into the pan without that extra step.
Nutritional Information
Each bar contains approximately 220 calories. It also provides about 12g fat and 25g carbohydrates.
These values are estimates and can change depending on the specific brands and portion size. Different chocolate chips, nuts, coconut, graham crackers, or substitutions will alter the final numbers.
Larger squares will naturally contain more than smaller ones. The same is true for versions with extra chocolate, peanuts, pretzels, or other additions.
Treat the nutrition as a general guide rather than an exact calculation. The exact values depend on how the pan is cut and which ingredients are used.
The Dessert That Never Stays on the Table Long
I think part of the reason these bars have stayed with me for so many years is that they carry the memory of crowded tables and people reaching across one another for dessert. That first potluck bite turned into school bake sales, family gatherings, and more pans than I could ever count accurately.
They also remind me that some of the best desserts do not need complicated technique. There is something deeply satisfying about watching such ordinary ingredients become a dessert that people immediately ask you to make again.
The crust starts the whole thing with a buttery crunch. Then the chocolate melts, the butterscotch softens, the pecans add texture, and the coconut browns while condensed milk settles into every gap.
By the time the bars cool, those separate layers have become almost impossible to think about individually. Every square tastes like one rich, chewy, crunchy bite with just enough variation to keep you reaching back for another.
I still love bringing them to gatherings because I know exactly what will happen. Someone will ask what is in them, someone else will take a second piece before finishing the first, and eventually the pan will look mysteriously empty.
That is the charm of 7-Layer Bars for me. They are uncomplicated, nostalgic, endlessly adaptable, and just messy enough in flavor to feel genuinely fun.
Some batches stay completely classic. Others get dark chocolate, peanut butter chips, pretzels, walnuts, or whatever sounds good that day.
But I always come back to the version that first made me love them. A crisp graham cracker crust, three kinds of chips, pecans, sweetened condensed milk, and coconut are still more than enough to create that unmistakable Magic Cookie Bar experience.
And once that pan has cooled and the first clean square comes free, I am reminded all over again why these bars became my signature bake. They are easy to make, difficult to resist, and almost guaranteed to disappear faster than anyone planned.
7-Layer Bars Recipe

Rich, chewy, crunchy, and packed with sweet layers, these Irresistible 7-Layer Bars combine a buttery graham cracker crust with three kinds of chips, pecans, sweetened condensed milk, and shredded coconut. Also known as Magic Cookie Bars, they are an easy American dessert with plenty of texture in every bite.
Recipe Details
- Prep Time: 15 minutes
- Cook Time: 25 minutes
- Total Time: 40 minutes
- Course: Dessert
- Cuisine: American
- Servings: 24 bars
- Calories: 220 kcal
Ingredients
For the Graham Cracker Crust
- 10 tablespoons salted butter melted
- 1 ½ cups graham cracker crumbs store-bought or make your own by pulsing 10 graham crackers in a food processor
For the Layers
- 1 cup sweetened shredded coconut
- 1 14-ounce can sweetened condensed milk
- ½ cup chopped pecans
- ½ cup butterscotch chips
- ½ cup white chocolate chips
- 1 cup semi-sweet chocolate chips
Instructions
Step 1: Preheat the Oven
Preheat your oven to 350°F (175°C).
Prepare a 9×13-inch baking dish before assembling the layers.
Step 2: Make the Graham Cracker Crust
Combine the graham cracker crumbs and melted salted butter.
Mix until the crumbs are evenly coated with butter.
Step 3: Press the Crust into the Pan
Transfer the graham cracker mixture to the 9×13-inch baking dish.
Press it firmly and evenly across the bottom to form the base of the bars.
Step 4: Add the Chocolate and Pecan Layers
Sprinkle the semi-sweet chocolate chips, white chocolate chips, butterscotch chips, and chopped pecans evenly over the crust.
Distribute each ingredient across the surface so every bar gets a mix of the different layers.
Step 5: Pour Over the Sweetened Condensed Milk
Slowly pour the sweetened condensed milk over the layered chips and pecans.
Cover the surface as evenly as possible so the condensed milk reaches the different sections of the pan.
Step 6: Add the Coconut
Sprinkle the sweetened shredded coconut evenly over the top.
Keep the coconut distributed across the entire pan for a consistent finish.
Step 7: Bake
Bake for 25 minutes, or until the edges are golden brown.
Remove the pan from the oven once the bars have developed that golden edge.
Step 8: Cool Completely
Let the bars cool completely in the baking dish.
Cooling fully helps the layers set and makes the bars easier to cut cleanly.
Step 9: Slice and Serve
Cut the cooled dessert into 24 bars.
Serve once the layers are fully set.
Notes
- Use parchment paper for easy removal.
- Store in an airtight container for up to one week.
- Substitute nuts or chocolate types as desired.
Serving Suggestions
Serve Irresistible 7-Layer Bars after they have cooled completely so the graham cracker crust and layered filling hold together neatly. The combination of semi-sweet chocolate, white chocolate, butterscotch, pecans, coconut, and sweetened condensed milk creates a rich dessert with plenty of contrasting textures.
This recipe makes 24 bars, making it convenient for dessert trays, parties, gatherings, or sharing. Letting the bars cool fully before slicing helps create cleaner portions and keeps the layers intact.
For easy removal from the pan, line the baking dish with parchment paper before assembling. You can also swap the nuts or chocolate varieties according to preference.
Storage
Store the finished bars in an airtight container for up to one week.
Graham Cracker Tip
Use 1 ½ cups graham cracker crumbs.
You can use store-bought crumbs or make your own by pulsing 10 graham crackers in a food processor.
Butter Tip
Use 10 tablespoons melted salted butter and mix it thoroughly with the graham cracker crumbs before pressing the crust into the baking dish.
Chocolate Tip
Use 1 cup semi-sweet chocolate chips and ½ cup white chocolate chips.
Sprinkle both evenly over the crust before adding the remaining layers.
Butterscotch Tip
Add ½ cup butterscotch chips with the chocolate layers for a sweet, rich finish.
Pecan Tip
Use ½ cup chopped pecans and distribute them evenly over the crust.
Substitute the nuts if desired.
Condensed Milk Tip
Pour one 14-ounce can sweetened condensed milk evenly over the layered chips and pecans.
Coconut Tip
Finish the top with 1 cup sweetened shredded coconut before baking.
Baking Tip
Bake at 350°F (175°C) for 25 minutes, or until the edges are golden brown.
Cooling Tip
Cool completely before cutting into 24 bars.

Fernando is the creator and writer behind the food blog Eating with your Hands. Living and working in cities like Paris, Barcelona, and Berlin, and being married to a Canadian foodie, has given Fernando a passion and interest in food and inspired him to run EWYH.