
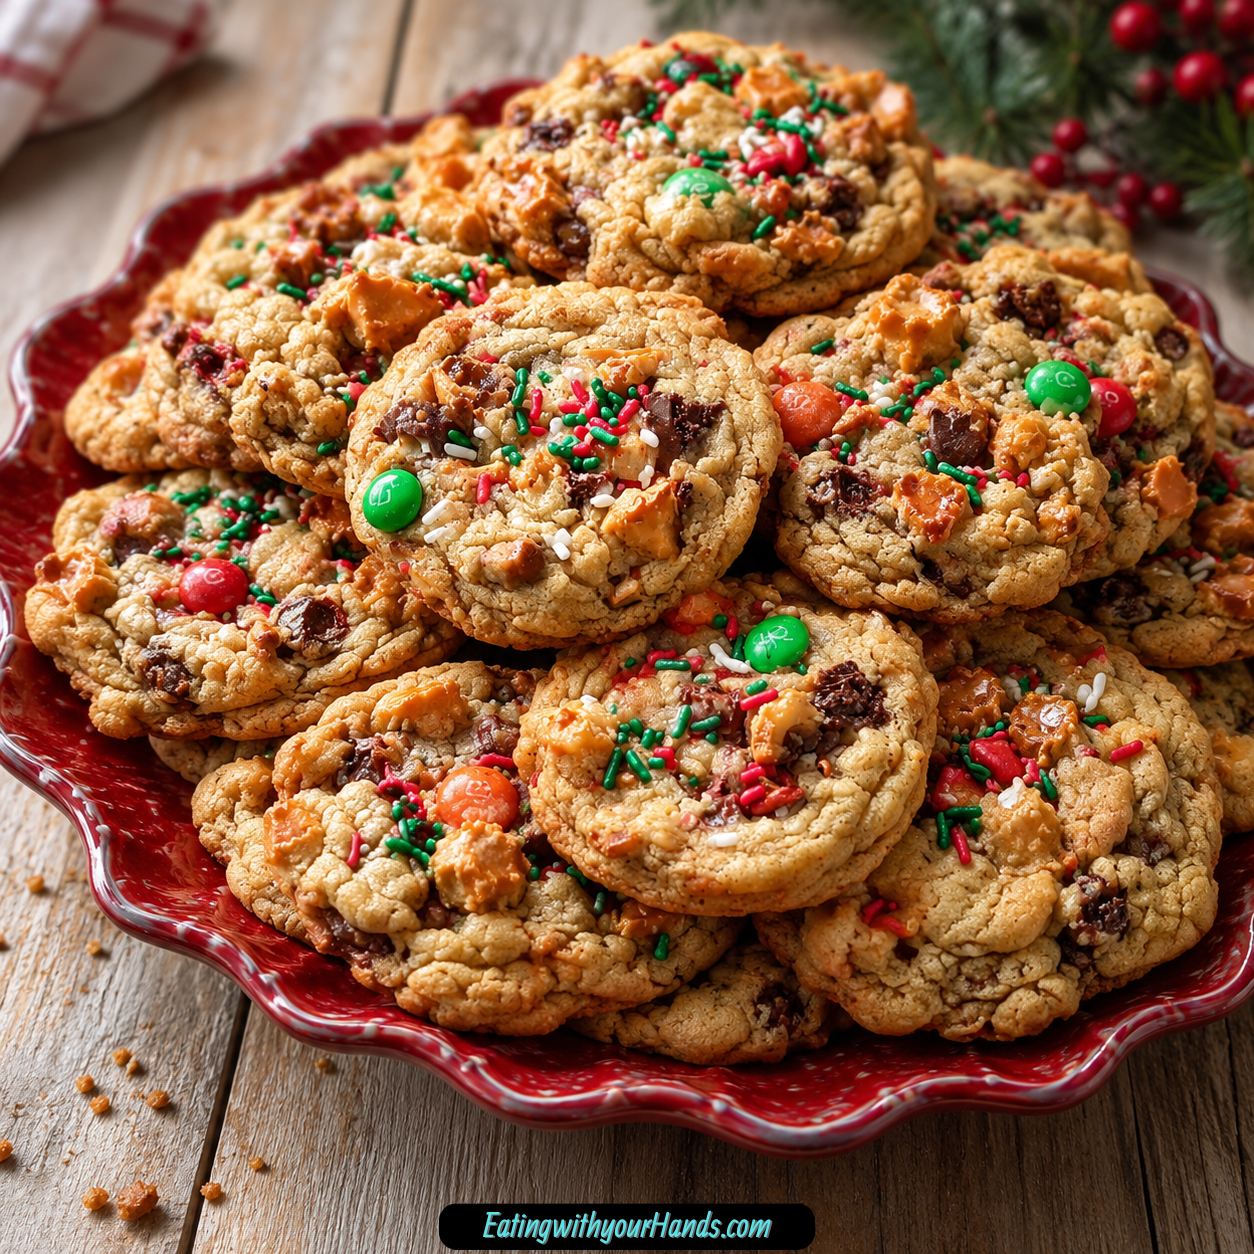

Amazing Christmas Kitchen Sink Cookies are the kind of holiday cookie that feels like a cheerful little mess in the very best way. They are buttery, chewy, crunchy, salty, sweet, colorful, and packed with all the bits and pieces that make December baking feel fun.
These are the cookies to make when the pantry has half a bag of pretzels, a few handfuls of holiday M&Ms, extra sprinkles, some caramels, a little chocolate, and a salty snack or two that deserves a second life. Instead of letting those odds and ends sit around, you fold them into one big cookie dough and turn them into something festive.
Every bite is a surprise. One bite might have dark chocolate and caramel, while the next has a salty pretzel piece, a crisp potato chip edge, a peanut crunch, and a pop of holiday color.
That is exactly the charm of kitchen sink cookies. They are not meant to be quiet, tidy, plain, or predictable.
The dough itself is a classic buttery cookie base made with softened butter, brown sugar, granulated sugar, vanilla, eggs, flour, baking soda, baking powder, and salt. It is soft enough to hold all the mix-ins but sturdy enough to bake into thick, chewy cookies.
The mix-ins bring the personality. Mini pretzels, lightly crushed potato chips, chewy caramels, dark chocolate chunks, salted peanuts, holiday M&Ms, and sprinkles all work together to create that sweet-and-salty holiday flavor.
These cookies are perfect for cookie swaps, Santa’s plate, holiday tins, neighbor gifts, classroom parties, family movie nights, or anytime you want a cookie that feels more exciting than the usual batch. They are also incredibly flexible, which makes them practical for busy holiday kitchens.
If you are missing one mix-in, you can swap in another. Popcorn, toasted coconut, sunflower seeds, almonds, pecans, white chocolate, peppermint M&Ms, crushed candy canes, or even leftover Halloween candy can all fit the spirit of the recipe.
Amazing Christmas Kitchen Sink Cookies are festive, forgiving, and full of little surprises. They taste like the happy chaos of the holidays baked into a golden-edged cookie.
Table of Contents
- Why You’ll Love These Christmas Kitchen Sink Cookies
- Recipe Details
- Ingredients
- Ingredient Notes
- Optional Swaps, Variations, Add-Ins, and Serving Ideas
- Classic Christmas Kitchen Sink Cookies
- Pretzel-Free Kitchen Sink Cookies
- BBQ Chip Cookie Twist
- White Chocolate Christmas Cookies
- Dark Chocolate Sweet-Salty Cookies
- Nut-Free Kitchen Sink Cookies
- Almond Kitchen Sink Cookies
- Toasted Pecan Kitchen Sink Cookies
- Candied Bacon Sweet-Salty Cookies
- Gluten-Free Christmas Kitchen Sink Cookies
- Dairy-Free Direction
- Peppermint Holiday Cookies
- Leftover Candy Cookies
- Santa’s Plate Cookies
- Cookie Tin Gift Cookies
- Why This Recipe Works
- Directions
- Step 1: Preheat the Oven
- Step 2: Prepare the Baking Sheet
- Step 3: Cream the Butter and Sugars
- Step 4: Add Vanilla and Eggs
- Step 5: Whisk the Dry Ingredients
- Step 6: Combine Wet and Dry Mixtures
- Step 7: Prepare the Mix-Ins
- Step 8: Fold in the Mix-Ins
- Step 9: Rest the Dough
- Step 10: Chill if Needed
- Step 11: Scoop the Cookies
- Step 12: Shape and Add Extra Pieces if Desired
- Step 13: Bake the Cookies
- Step 14: Cool on the Baking Sheet
- Step 15: Transfer to a Wire Rack
- Step 16: Repeat With Remaining Dough
- Step 17: Store the Cookies
- Step 18: Freeze for Later
- Serving Ideas
- Storage
- Freezing
- Make-Ahead
- Helpful Notes for Best Results
- Variations
- Classic Christmas Kitchen Sink Cookies
- Popcorn Kitchen Sink Cookies
- BBQ Potato Chip Cookies
- Candied Bacon Cookies
- Salted Almond Kitchen Sink Cookies
- Toasted Pecan Kitchen Sink Cookies
- White Chocolate Sea Salt Cookies
- Gluten-Free Kitchen Sink Cookies
- Nut-Free Christmas Cookies
- Dairy-Free Direction
- Peppermint M&M Cookies
- Crushed Candy Cane Cookies
- Leftover Candy Cookies
- Troubleshooting
- Frequently Asked Questions
- Why This Recipe Works So Well
- Final Thoughts
- Christmas Kitchen Sink Cookies
Why You’ll Love These Christmas Kitchen Sink Cookies
These cookies have everything going on. They are chewy, crunchy, buttery, salty, sweet, chocolatey, caramel-filled, and colorful.
They are perfect for using pantry extras. Half-bags of pretzels, chips, candy, nuts, and sprinkles all become part of the fun.
They feel festive without complicated decorating. Holiday M&Ms and sprinkles bring color right into the dough.
They are great for gifting. Stack them in tins with parchment between layers or tie a few together with ribbon.
They are easy to customize. Swap the mix-ins based on allergies, preferences, or whatever is already in the pantry.
They freeze well. You can freeze baked cookies or freeze dough balls for fresh holiday cookies later.
Recipe Details
This recipe bakes at 350°F (175°C). Line a baking sheet with parchment paper or use a silicone baking mat.
The cookie dough starts with 1 cup unsalted butter, softened to room temperature. Soft butter creams more easily with the sugars.
The sugars are ¾ cup light brown sugar and ¾ cup granulated sugar. Brown sugar adds chew and caramel-like flavor, while granulated sugar helps with sweetness and structure.
The dough also uses 2 teaspoons vanilla extract and 2 large eggs. Room-temperature eggs blend more smoothly, but cold eggs can be used.
The dry ingredients are 2 ½ cups all-purpose flour, ½ teaspoon baking soda, 1 teaspoon baking powder, and ½ teaspoon salt. Whisking them separately helps them mix evenly.
The mix-ins are ½ cup mini pretzels, ½ cup lightly crushed potato chips, ½ cup quartered chewy caramels, ¾ cup dark chocolate chunks, ½ cup chopped salted peanuts, ½ cup holiday M&Ms, and ¼ cup holiday sprinkles.
The dough rests for 5 minutes before scooping. This gives the flour a little time to hydrate.
The cookies are scooped in heaping tablespoons and placed about 2 inches apart. They bake for 10 to 12 minutes.
They are ready when the edges are golden and the centers still look slightly soft. Let them cool on the baking sheet for 5 minutes before moving to a wire rack.
Ingredients
For the Cookie Dough
- 1 cup unsalted butter, softened to room temperature
- ¾ cup light brown sugar
- ¾ cup granulated sugar
- 2 teaspoons vanilla extract
- 2 large eggs
- 2 ½ cups all-purpose flour
- ½ teaspoon baking soda
- 1 teaspoon baking powder
- ½ teaspoon salt
For the Holiday Mix-Ins
- ½ cup mini pretzels
- ½ cup potato chips, lightly crushed
- ½ cup chewy caramels, quartered
- ¾ cup dark chocolate chunks
- ½ cup chopped salted peanuts
- ½ cup holiday M&Ms
- ¼ cup holiday sprinkles
Optional Swaps, Add-Ins, and Variations
- BBQ potato chips
- Chocolate chips
- Popcorn
- Candied bacon
- Salted almonds
- Toasted pecans
- White chocolate chunks
- Flaky sea salt
- 1:1 gluten-free flour blend
- Sunflower seeds
- Toasted coconut
- Vegan butter
- Dairy-free chocolate chips
- Peppermint M&Ms
- Crushed candy canes
- Leftover Halloween candy
- Slice of bread for storage
Ingredient Notes
Softened unsalted butter gives the cookies their rich base. It should be soft enough to cream but not melted.
Light brown sugar adds chew and a gentle caramel flavor. It helps the cookies stay soft.
Granulated sugar balances the brown sugar. It gives sweetness and helps the cookies bake with golden edges.
Vanilla extract makes the dough taste warm and complete. It also helps tie together the sweet and salty mix-ins.
Eggs bind the dough and help the cookies bake up thick and chewy. Adding them one at a time helps them blend evenly.
All-purpose flour gives the cookies structure. Spoon and level it instead of scooping so the dough does not become too dry.
Baking soda and baking powder work together for lift and texture. They help the cookies puff and spread just enough.
Salt balances the sweetness. It is especially important because these cookies are loaded with candy and chocolate.
Mini pretzels add salty crunch. Their shape and texture make the cookies more interesting.
Potato chips bring delicate crispness. Plain chips work well, while BBQ chips create a fun twist.
Chewy caramels melt into gooey pockets. Quartering them helps distribute caramel through the dough.
Dark chocolate chunks add rich chocolate flavor. Chips can be used instead if that is what you have.
Salted peanuts bring nutty crunch. Any nut you love can be used, or they can be replaced for nut-free versions.
Holiday M&Ms add color and chocolate. They make the cookies instantly festive.
Sprinkles bring extra holiday cheer. They are simple, colorful, and fun.
Optional Swaps, Variations, Add-Ins, and Serving Ideas
Classic Christmas Kitchen Sink Cookies
Make the cookies with the full mix of pretzels, potato chips, caramels, dark chocolate chunks, salted peanuts, holiday M&Ms, and sprinkles. This gives the full sweet-salty holiday version.
Bake until the edges are golden and the centers still look soft. The cookies will finish setting as they cool.
Pretzel-Free Kitchen Sink Cookies
If you are out of pretzels, use crushed buttery popcorn. Popcorn adds a light, crisp texture.
Add it gently so it does not crush too much. The cookie will still have a salty snack element.
BBQ Chip Cookie Twist
Use BBQ potato chips instead of plain potato chips. This adds a smoky-sweet flavor.
Use lightly crushed pieces. Too much crushing can make them disappear into the dough.
White Chocolate Christmas Cookies
Use white chocolate chunks instead of dark chocolate chunks. Add a small sprinkle of flaky sea salt for balance.
White chocolate makes the cookies sweeter and creamier. It pairs well with pretzels and cranial holiday candy colors.
Dark Chocolate Sweet-Salty Cookies
Keep the dark chocolate chunks for a richer flavor. Dark chocolate keeps the cookies from tasting overly sweet.
This version feels a little more grown-up. It works well with caramels and salted peanuts.
Nut-Free Kitchen Sink Cookies
Leave out the peanuts. Use sunflower seeds, toasted coconut, or extra pretzels instead.
This keeps the crunch without using nuts. Always choose ingredients that fit your needs.
Almond Kitchen Sink Cookies
Swap the peanuts for salted almonds. They give the cookies a firmer crunch.
This version tastes slightly more polished. It is great for gifting.
Toasted Pecan Kitchen Sink Cookies
Use toasted pecans instead of peanuts. The flavor becomes buttery and warm.
Let the pecans cool before adding them to the dough. Warm nuts can soften the butter too much.
Candied Bacon Sweet-Salty Cookies
Add chopped candied bacon for a bold sweet-salty twist. This creates a more indulgent version.
Use a modest amount so it does not overpower the cookie. The flavor is strong.
Gluten-Free Christmas Kitchen Sink Cookies
Use a 1:1 gluten-free flour blend in place of the all-purpose flour. The texture may vary slightly by blend.
The mix-ins should also be checked as needed. Bake until the edges are golden and the centers are soft.
Dairy-Free Direction
Use vegan butter in the dough. Choose dairy-free chocolate chips and watch the caramels, since some brands contain dairy.
The texture may vary slightly. Chill the dough if it feels too soft.
Peppermint Holiday Cookies
Use peppermint M&Ms or crushed candy canes. These add a festive minty flavor.
Avoid adding too much candy cane because it can melt and spread. A little goes a long way.
Leftover Candy Cookies
Use leftover Halloween candy pieces. Chop larger candies into bite-sized bits.
Avoid gummy candies because they melt strangely and do not work well. Chocolate-based candies are better.
Santa’s Plate Cookies
Serve these cookies on Christmas Eve with milk. Their colorful mix-ins make them feel perfect for Santa’s plate.
Let the cookies cool completely before stacking. This keeps the caramel pieces from sticking.
Cookie Tin Gift Cookies
Stack the cooled cookies in tins with parchment between layers. Add a small label so the mix-ins feel intentional and fun.
These are great for neighbor gifts. They look cheerful without needing icing or decorating.
Why This Recipe Works
This recipe works because the dough is sturdy enough to hold a generous amount of mix-ins. The butter, sugars, eggs, flour, leaveners, and salt create a thick cookie base.
Brown sugar gives chew, while granulated sugar supports the edges. Together, they make a cookie that is soft inside and golden outside.
The salty mix-ins balance the sweet ones. Pretzels, potato chips, and salted peanuts keep the chocolate, caramel, M&Ms, and sprinkles from feeling too sugary.
The caramels melt into little pockets. They make the cookies feel gooey and special.
The chocolate chunks add richness. Dark chocolate works especially well because it offsets the candy sweetness.
Resting the dough for 5 minutes helps the flour hydrate. That short pause improves the cookie texture.
Slightly underbaking is important. The cookies should look soft in the center when they come out, then firm as they cool.
The recipe is also flexible. Kitchen sink cookies are meant to welcome swaps, so the dough can handle plenty of pantry creativity.
Directions
Step 1: Preheat the Oven
Preheat the oven to 350°F (175°C). Give it time to fully heat before baking the cookies.
A properly heated oven helps the cookies spread and bake evenly. This matters because the dough is loaded with mix-ins.
Step 2: Prepare the Baking Sheet
Line a baking sheet with parchment paper or a silicone baking mat. This prevents sticking and helps with cleanup.
Set the pan aside while you make the dough. Use a cool baking sheet for each batch.
Step 3: Cream the Butter and Sugars
In a large mixing bowl, beat 1 cup softened unsalted butter with ¾ cup light brown sugar and ¾ cup granulated sugar. Mix until light and fluffy, about 2 minutes with a hand mixer.
The mixture should look creamy and lighter in color. Do not rush this step because it helps create a chewy cookie texture.
Step 4: Add Vanilla and Eggs
Add 2 teaspoons vanilla extract. Then add 2 large eggs, one at a time, mixing well after each egg.
Scrape down the sides of the bowl as needed. This keeps the dough evenly mixed.
Step 5: Whisk the Dry Ingredients
In a separate bowl, whisk together 2 ½ cups all-purpose flour, ½ teaspoon baking soda, 1 teaspoon baking powder, and ½ teaspoon salt. Whisk until evenly combined.
Mixing the dry ingredients separately helps the leaveners spread through the dough. It also helps prevent overmixing later.
Step 6: Combine Wet and Dry Mixtures
Gradually add the dry ingredients to the butter mixture. Mix just until no flour streaks remain.
The dough will be thick, and that is correct. Do not overmix once the flour disappears.
Step 7: Prepare the Mix-Ins
Lightly crush the potato chips and keep the pretzels in small, chunky pieces. Quarter the chewy caramels.
Keep the mix-ins large enough to notice in the cookies. If everything is crushed too finely, the texture gets lost.
Step 8: Fold in the Mix-Ins
Add the mini pretzels, potato chips, quartered caramels, dark chocolate chunks, salted peanuts, holiday M&Ms, and sprinkles to the dough. Fold gently with a spatula.
Do not beat the mix-ins with a mixer. Gentle folding helps keep the crunchy pieces from breaking too much.
Step 9: Rest the Dough
Let the dough rest for 5 minutes. This gives the flour time to hydrate.
The short rest helps the cookies bake up tender. It also gives you a moment to clear the counter.
Step 10: Chill if Needed
If the dough feels sticky or too soft, chill it for 15 minutes before scooping. This helps prevent spreading.
Chilling is especially helpful if your kitchen is warm. It also helps loaded dough hold shape.
Step 11: Scoop the Cookies
Scoop heaping tablespoons of dough onto the prepared baking sheet. Space the cookies about 2 inches apart.
These cookies spread as they bake. Give them enough room.
Step 12: Shape and Add Extra Pieces if Desired
If you want bakery-style cookies, press a few extra M&Ms, chocolate chunks, or pretzel pieces onto the tops before baking. This makes the mix-ins more visible.
Do not flatten the dough too much. The cookies should still bake thick and chewy.
Step 13: Bake the Cookies
Bake for 10 to 12 minutes. The edges should look golden, while the centers should still look slightly soft.
Slightly underbaked centers are better than overbaked cookies. They will firm up as they cool.
Step 14: Cool on the Baking Sheet
Let the cookies cool on the baking sheet for 5 minutes. The caramel pieces will be very hot.
This rest also helps the cookies set. Moving them too soon can cause them to break.
Step 15: Transfer to a Wire Rack
Move the cookies to a wire rack to cool completely. Use a spatula and lift gently.
Let them cool before stacking or storing. Warm caramel can stick to other cookies.
Step 16: Repeat With Remaining Dough
Continue baking the remaining dough on cool baking sheets. If the pan is hot, let it cool before adding more dough.
Warm pans can cause the cookies to spread too much. Cool pans give better shape.
Step 17: Store the Cookies
Once completely cool, place the cookies in an airtight container. Use parchment between layers if stacking.
Store at room temperature for up to 5 days. Refrigerate if your house is warm or humid.
Step 18: Freeze for Later
Freeze baked cookies in a freezer bag with parchment between layers for up to 3 months. Thaw at room temperature for about 1 hour before serving.
You can also freeze dough balls on a tray, then transfer to a bag. Bake from frozen and add 1 to 2 minutes to the bake time.
Serving Ideas
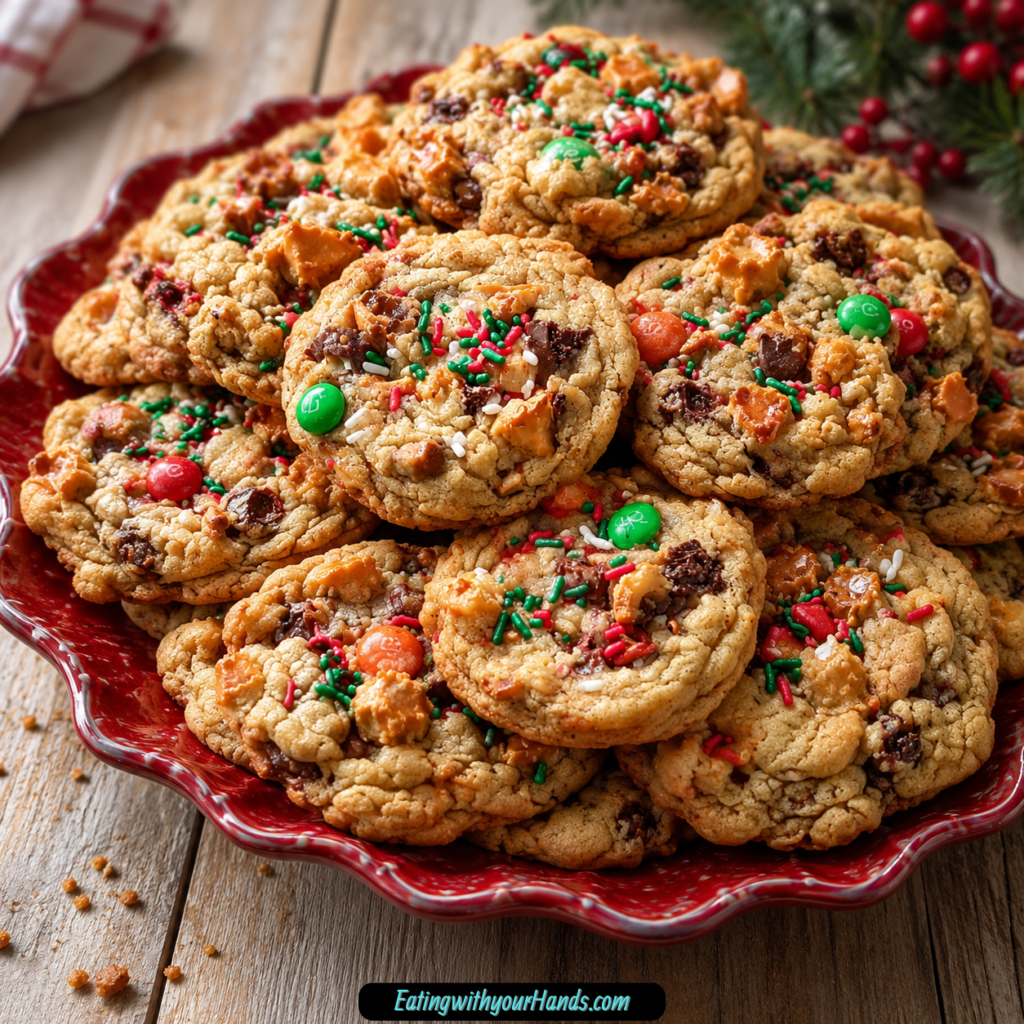
Serve Amazing Christmas Kitchen Sink Cookies slightly warm after the caramel has cooled enough to be safe. The chocolate will be soft, and the centers will taste extra gooey.
For cookie swaps, let them cool completely before packing. Their colorful mix-ins make them stand out on a holiday dessert table.
Place them in a tin with parchment paper between layers for gifting. The parchment keeps caramel and chocolate from sticking.
Tie a few cookies in a clear bag with ribbon for neighbor gifts. They look festive without needing frosting.
Serve them with milk on Christmas Eve. The sweet-and-salty flavor makes them perfect for Santa’s plate.
Add them to holiday dessert boards with fudge, candies, or other cookies. They bring color, crunch, and texture.
Serve with coffee after dinner. The dark chocolate, caramel, and salty mix-ins make them satisfying.
Enjoy one straight from the cooling rack once it is safe to eat. That is when the chocolate and caramel are at their softest.
Storage
Store the cooled cookies in an airtight container at room temperature for up to 5 days. Make sure they are fully cool before closing the container.
Place parchment paper between layers if stacking. This prevents caramel or chocolate from sticking.
If your home is warm or humid, store the cookies in the refrigerator. This keeps the caramel from becoming too sticky.
A slice of bread can be added to the container to help absorb extra moisture. Replace it as needed.
Keep the container sealed tightly. Air can dry out the cookies.
Do not stack warm cookies. The caramel pieces can stick and pull apart the cookies.
For the best texture, enjoy within the first few days. They stay good longer, but the crunchy bits are best early.
Freezing
These cookies freeze well after baking. Place cooled cookies in a freezer bag with parchment between layers.
Freeze for up to 3 months. Thaw at room temperature for about 1 hour before serving.
You can also freeze the dough balls. Scoop them onto a tray and freeze until firm.
Transfer frozen dough balls to a freezer bag. This lets you bake only what you need later.
Bake frozen dough balls straight from the freezer. Add 1 to 2 minutes to the bake time.
Freezing dough is perfect for holiday planning. It gives you fresh-baked cookies with less last-minute work.
If the cookies include caramel, let them cool fully after baking from frozen. Hot caramel can be very sticky.
Make-Ahead
Christmas Kitchen Sink Cookies are excellent for make-ahead holiday baking. You can make the dough, scoop it, and freeze the dough balls.
Bake straight from frozen whenever you need fresh cookies. Add 1 to 2 minutes to the baking time.
You can also bake the cookies ahead and freeze them. Thaw at room temperature for about 1 hour before serving.
For gifting, bake and cool completely before packing. Use parchment between layers to protect the mix-ins.
If making the dough a few hours early, chill it until ready to bake. Chilled dough can help control spreading.
If the dough feels too firm after chilling, let it sit briefly before scooping. It should be scoopable but not warm.
Prepare mix-ins ahead by chopping caramels, crushing chips, and measuring candy. This makes baking day faster.
Helpful Notes for Best Results
Do not overbake these cookies. Pull them when the edges are golden and the centers still look soft.
Let them cool on the baking sheet for 5 minutes. The centers set, and the caramel cools slightly.
If the dough is sticky, chill it for 15 minutes before scooping. This helps prevent spreading.
Use cool baking sheets. Warm pans can melt the butter too quickly and cause flat cookies.
If you do not have brown sugar, you can use all white sugar. The cookies will be less chewy.
Do not crush the mix-ins too finely. Bigger pieces create better texture.
If caramels leak everywhere, chop them slightly bigger next time. Larger pieces stay more contained.
Avoid gummy candies. They can melt strangely and do not bake well in cookies.
Variations
Classic Christmas Kitchen Sink Cookies
Use the full mix of pretzels, potato chips, caramels, dark chocolate chunks, salted peanuts, holiday M&Ms, and sprinkles. This gives the classic loaded holiday cookie.
Bake until golden at the edges and soft in the centers. Cool before storing.
Popcorn Kitchen Sink Cookies
Swap the pretzels for crushed buttery popcorn. This gives a lighter crunch.
Fold gently so the popcorn does not disappear. This version feels playful and salty.
BBQ Potato Chip Cookies
Use BBQ chips instead of plain potato chips. The flavor becomes smoky, sweet, and salty.
Use lightly crushed pieces. Too much chip dust can disappear into the dough.
Candied Bacon Cookies
Add chopped candied bacon for a bold sweet-and-salty twist. This variation tastes rich and unexpected.
Use a small amount so the bacon does not overpower the cookie. The caramel and chocolate still need room to shine.
Salted Almond Kitchen Sink Cookies
Use salted almonds instead of peanuts. They add firm crunch and a more polished flavor.
Chop them before folding into the dough. This helps them distribute evenly.
Toasted Pecan Kitchen Sink Cookies
Swap peanuts for toasted pecans. The cookies become buttery and warm-tasting.
Cool the pecans before adding them. Warm nuts can soften the dough.
White Chocolate Sea Salt Cookies
Use white chocolate chunks and add a sprinkle of flaky sea salt. This creates a sweet, creamy, salty cookie.
Add the salt right before baking or after drizzling. Use a light hand.
Gluten-Free Kitchen Sink Cookies
Use a 1:1 gluten-free flour blend. King Arthur’s blend is one option mentioned for good results.
Check mix-ins carefully if needed. Baking time may vary slightly.
Nut-Free Christmas Cookies
Skip the peanuts. Add sunflower seeds, toasted coconut, or extra pretzels instead.
This keeps texture in the dough. Choose ingredients based on your needs.
Dairy-Free Direction
Use vegan butter in the dough. Choose dairy-free chocolate chips and check caramels carefully because some contain dairy.
The texture may vary. Chill the dough if it feels too soft.
Peppermint M&M Cookies
Use peppermint M&Ms for a minty holiday version. They add festive color and flavor.
This variation works well with dark chocolate. Keep the other mix-ins balanced.
Crushed Candy Cane Cookies
Add crushed candy canes for a peppermint crunch. Use a modest amount.
Candy canes can melt, so avoid adding too much. They are best as a holiday accent.
Leftover Candy Cookies
Use leftover Halloween candy in place of some holiday candy. Chop larger pieces before folding them in.
Avoid gummy bears and candies that melt oddly. Chocolate-based candies work best.
Troubleshooting
The Cookies Spread Too Much
The butter may have been too soft, or the baking sheet may have been warm. Chill the dough for 15 minutes before baking.
Always use cool pans. Warm pans make the dough spread before it sets.
The Cookies Are Too Puffy
The dough may have been chilled too long or scooped very tall. Let it sit briefly before baking.
The cookies will settle slightly as they cool. Do not press them too much unless needed.
The Cookies Are Dry
They may have been overbaked. Remove them when the edges are golden and centers still look soft.
They continue setting on the baking sheet. That 5-minute rest is part of the bake.
The Cookies Are Too Crunchy
They likely baked too long. Shorten the bake time next batch.
Soft centers are important. Underbaking slightly is better than overbaking for this recipe.
The Caramels Leaked
The caramel pieces may have been too small. Chop them slightly bigger next time.
If caramel spreads on the sheet, let it cool before removing the cookies. Hot caramel is sticky.
The Cookies Stuck to the Pan
Use parchment paper or a silicone mat. Caramel can stick to bare pans.
Let cookies cool for 5 minutes before moving. They release more easily once set.
The Dough Is Too Sticky
Chill it for 15 minutes. This makes scooping easier.
Sticky dough is common with lots of mix-ins. Do not add too much extra flour.
The Mix-Ins Broke Too Much
They may have been mixed too aggressively. Fold them in with a spatula.
Avoid using a mixer after adding chips, pretzels, and candy. Gentle folding keeps texture.
The Cookies Taste Too Sweet
Use more salty mix-ins next time, such as pretzels, salted peanuts, or potato chips. Dark chocolate also helps balance sweetness.
A light sprinkle of flaky sea salt can help. Add it to the tops before baking or after drizzling.
The Cookies Look Messy
That is normal. Kitchen sink cookies are meant to look loaded and rustic.
Press a few colorful candies or pretzel pieces on top before baking for a prettier look. This makes the chaos look intentional.
Frequently Asked Questions
Can I leave out the nuts for allergies?
Yes, leave out the peanuts. Use sunflower seeds, toasted coconut, or extra pretzels instead.
The dough is flexible. Keep the total amount of mix-ins similar.
The butter may have been too soft, or the baking sheet may have been warm. Chill the dough for 15 minutes and use cool pans.
Overly warm dough spreads faster. Chilling helps the cookies hold shape.
Can I use different chips or candies?
Yes, peppermint M&Ms, crushed candy canes, or leftover Halloween candy can work. Chocolate-based candies are the safest choice.
Avoid gummy bears because they melt strangely. Choose candies that bake well.
Why are my caramels leaking everywhere?
The caramel pieces may have been cut too small. Next time, chop them slightly bigger.
Larger pieces stay more contained but still become gooey. Let cookies cool before moving them.
Can I make these ahead for Santa?
Yes, baked cookies freeze beautifully for up to 3 months. Thaw at room temperature before serving.
You can also freeze dough balls. Bake straight from frozen and add 1 to 2 minutes.
Can I use all white sugar?
Yes, you can use all white sugar if you do not have brown sugar. The cookies will be less chewy.
Brown sugar gives the best texture. Use it when possible.
Can I use gluten-free flour?
Yes, use a 1:1 gluten-free flour blend. The texture may vary slightly.
Check your mix-ins as needed. Bake until edges are golden and centers are soft.
They stay soft and chewy for up to 5 days at room temperature in an airtight container. Use parchment between layers.
If your house is warm or humid, refrigerate them. This helps keep caramel from getting sticky.
Why This Recipe Works So Well
Amazing Christmas Kitchen Sink Cookies work because the dough is rich enough to support a generous amount of mix-ins. Butter, brown sugar, granulated sugar, eggs, vanilla, flour, baking soda, baking powder, and salt create a reliable chewy base.
The mix-ins create balance. Sweet chocolate, caramel, M&Ms, and sprinkles meet salty pretzels, potato chips, and peanuts.
That sweet-salty contrast keeps every bite interesting. It also keeps the cookies from tasting one-dimensional.
The different textures matter. Pretzels and chips crunch, caramels melt, chocolate softens, peanuts add bite, and sprinkles bring color.
The 5-minute dough rest helps the flour hydrate. It gives the cookies a better texture without requiring a long chill.
The short bake time keeps the centers soft. Taking the cookies out while the middle still looks slightly tender is the key.
The recipe also works because it is forgiving. Kitchen sink cookies are designed for swaps, leftovers, and playful combinations.
Most of all, these cookies work because they capture holiday baking in one messy, joyful bite. They are colorful, crunchy, chewy, sweet, salty, and full of surprise.
Final Thoughts
Amazing Christmas Kitchen Sink Cookies are made with a buttery cookie dough loaded with mini pretzels, potato chips, chewy caramels, dark chocolate chunks, salted peanuts, holiday M&Ms, and festive sprinkles. The dough is mixed, rested briefly, scooped into heaping tablespoons, baked until golden at the edges, and cooled into thick, chewy, sweet-and-salty holiday cookies.
Serve them for cookie swaps, Santa’s plate, holiday gifts, dessert trays, or pantry-cleanout baking days when a little chaos sounds delicious. With their flexible mix-ins, 5-day room-temperature storage, freezer-friendly dough, and colorful Christmas personality, these cookies turn leftover pantry bits into a holiday tradition worth repeating.
Christmas Kitchen Sink Cookies

Sweet, salty, colorful, and packed with holiday crunch, these Christmas Kitchen Sink Cookies are loaded with dark chocolate chunks, pretzels, potato chips, chewy caramels, salted peanuts, holiday M&Ms, and festive sprinkles. The soft cookie dough bakes around all those mix-ins for a fun Christmas cookie with golden edges and plenty of texture in every bite.
Recipe Details
- Prep Time: 15 minutes
- Cook Time: 10 minutes
- Total Time: 25 minutes
- Course: Cookies, Dessert
- Cuisine: American
- Servings: 24 cookies
Equipment
- Mixing bowl
- Baking sheet
Ingredients
Mix-ins
- ¼ cup holiday sprinkles
- ½ cup holiday M&Ms
- ½ cup chopped salted peanuts
- ¾ cup dark chocolate chunks
- ½ cup chewy caramels quartered
- ½ cup potato chips lightly crushed
- ½ cup mini pretzels
Cookie Dough
- ½ teaspoon salt
- 1 teaspoon baking powder
- ½ teaspoon baking soda
- 2 ½ cups all-purpose flour
- 2 large eggs
- 2 teaspoons vanilla extract
- ¾ cup granulated sugar
- ¾ cup light brown sugar
- 1 cup unsalted butter softened to room temperature
Instructions
Step 1: Prepare the Oven and Baking Sheet
Preheat your oven to 350°F (175°C). Line a baking sheet with parchment paper so the cookie dough has a prepared surface for baking.
Keep the baking sheet nearby while you mix the dough. These cookies are packed with mix-ins, so having the pan ready makes the final steps easier.
Step 2: Cream the Butter and Sugars
In a mixing bowl, cream together the unsalted butter, light brown sugar, and granulated sugar until light and fluffy. The mixture should look smooth, soft, and evenly blended.
Using butter softened to room temperature helps the sugars mix in more easily. This creates the sweet base for the cookie dough.
Step 3: Add the Vanilla and Eggs
Add the vanilla extract and eggs, mixing well after each addition. Blend until the wet mixture is creamy and fully combined.
Mixing after each addition helps the dough come together smoothly. Once the eggs and vanilla are incorporated, the dry ingredients can be added.
Step 4: Combine the Dry Ingredients
In a separate bowl, whisk together the all-purpose flour, baking soda, baking powder, and salt. Stir until the leavening and salt are evenly distributed through the flour.
This helps the cookie dough bake evenly. Keep the dry mixture ready before adding it to the butter mixture.
Step 5: Finish the Cookie Dough
Gradually add the dry ingredients to the wet ingredients. Mix until just combined.
Stop mixing once the flour mixture disappears into the dough. Overmixing is not needed, especially before adding all the crunchy and sweet mix-ins.
Step 6: Fold in the Christmas Mix-ins
Fold in the mini pretzels, lightly crushed potato chips, quartered chewy caramels, dark chocolate chunks, chopped salted peanuts, holiday M&Ms, and holiday sprinkles. Stir gently until everything is spread throughout the dough.
The mix-ins give these cookies their sweet-and-salty kitchen sink style. Fold carefully so the pretzels, chips, candies, and chocolate stay nicely distributed.
Step 7: Portion the Cookies
Drop rounded tablespoons of dough onto the prepared baking sheet. Space them 2 inches apart.
Keeping the portions similar in size helps the 24 cookies bake evenly. The spacing gives the cookies room to spread while baking.
Step 8: Bake Until Lightly Golden
Bake for 10-12 minutes, or until the edges are lightly golden. Watch the edges near the end of the baking time for the best doneness cue.
The centers should still look soft enough to stay chewy after cooling. Remove the cookies once the edges have set and taken on a light golden color.
Step 9: Cool Before Moving
Let the cookies cool on the baking sheet for 5 minutes. Then transfer them to a wire rack.
The short rest helps the cookies firm up before being moved. Let them finish cooling on the wire rack before storing or serving.
Notes
- Store the cookies in an airtight container at room temperature for up to 5 days.
Serving Suggestions
Serve Christmas Kitchen Sink Cookies once they have cooled enough to hold their shape. The dark chocolate chunks, salty pretzels, lightly crushed potato chips, chewy caramels, salted peanuts, holiday M&Ms, and sprinkles make them colorful, crunchy, chewy, and sweet all at once.
These cookies are a fun choice for holiday cookie trays, Christmas dessert boxes, party platters, or casual family snacking. Since the recipe makes 24 cookies, they are easy to portion for sharing.
For the best texture, let the cookies rest on the baking sheet for 5 minutes before transferring them. This helps the soft centers set while keeping the edges lightly golden.
Storage
How to Store
Store the cookies in an airtight container at room temperature for up to 5 days. Keep the container sealed so the cookies stay fresh.
Butter Tip
Use 1 cup unsalted butter softened to room temperature. Softened butter blends smoothly with the brown sugar and granulated sugar.
Mix-in Tip
Fold in the pretzels, potato chips, caramels, chocolate chunks, peanuts, M&Ms, and sprinkles gently. This keeps the mix-ins evenly spread without crushing everything too much.
Caramel Tip
Use ½ cup chewy caramels quartered. Cutting them into smaller pieces helps them distribute throughout the cookie dough.
Baking Tip
Bake at 350°F (175°C) for 10-12 minutes. The cookies are ready when the edges are lightly golden.
Cooling Tip
Let the cookies cool on the baking sheet for 5 minutes before transferring to a wire rack. This helps them set before they finish cooling.

Fernando is the creator and writer behind the food blog Eating with your Hands. Living and working in cities like Paris, Barcelona, and Berlin, and being married to a Canadian foodie, has given Fernando a passion and interest in food and inspired him to run EWYH.