
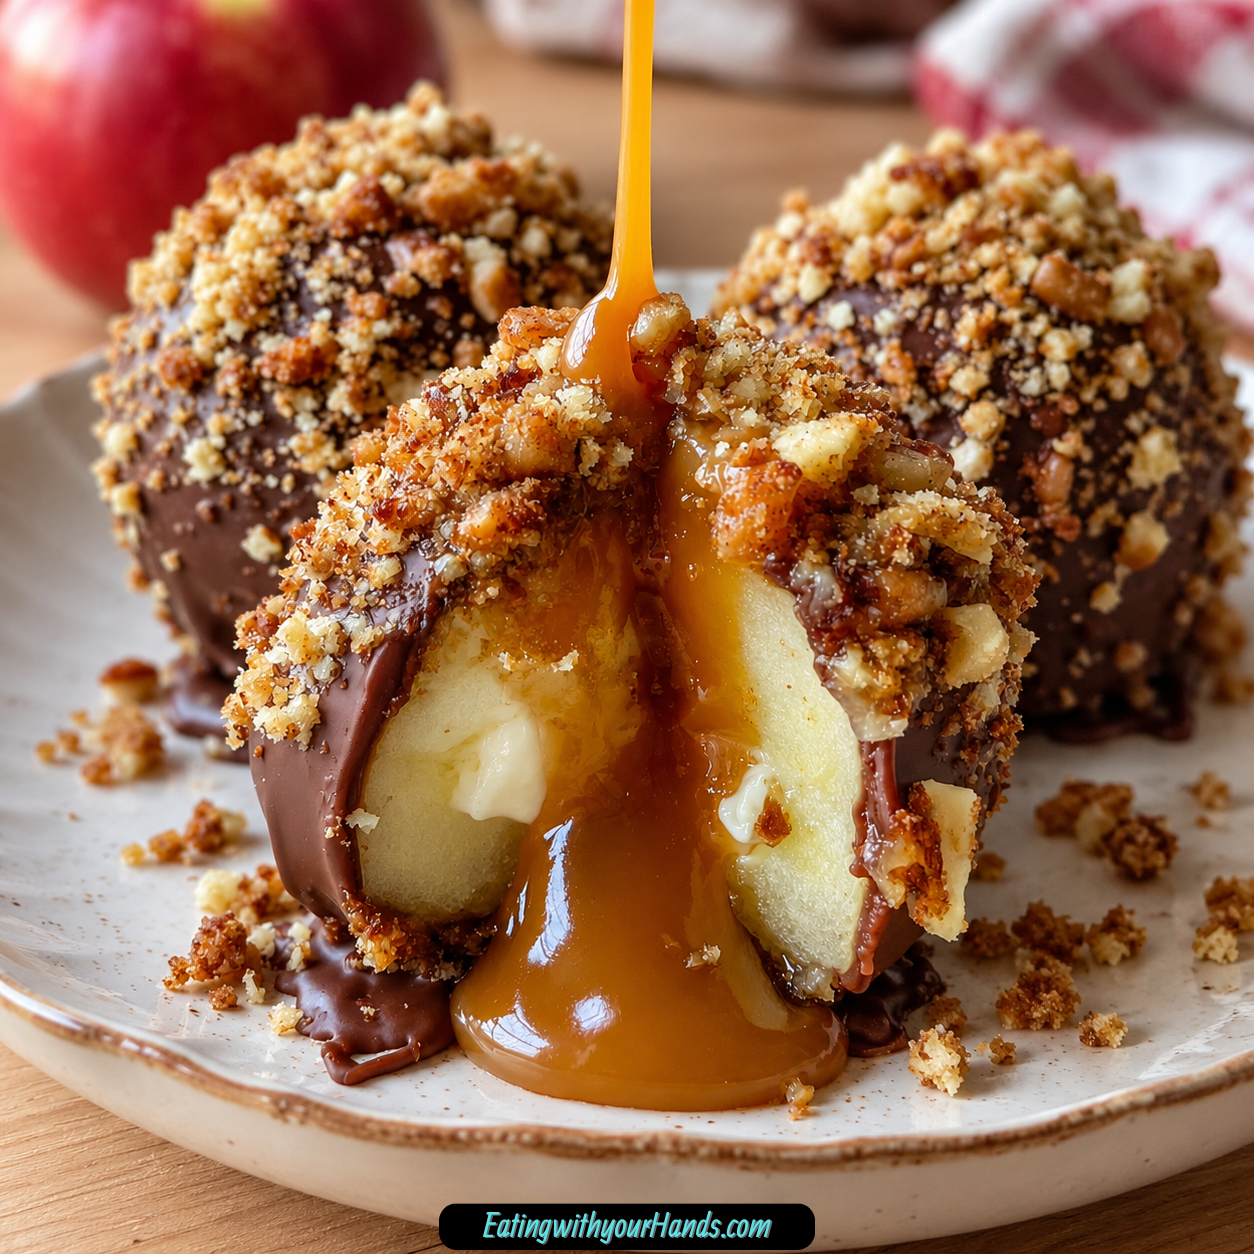
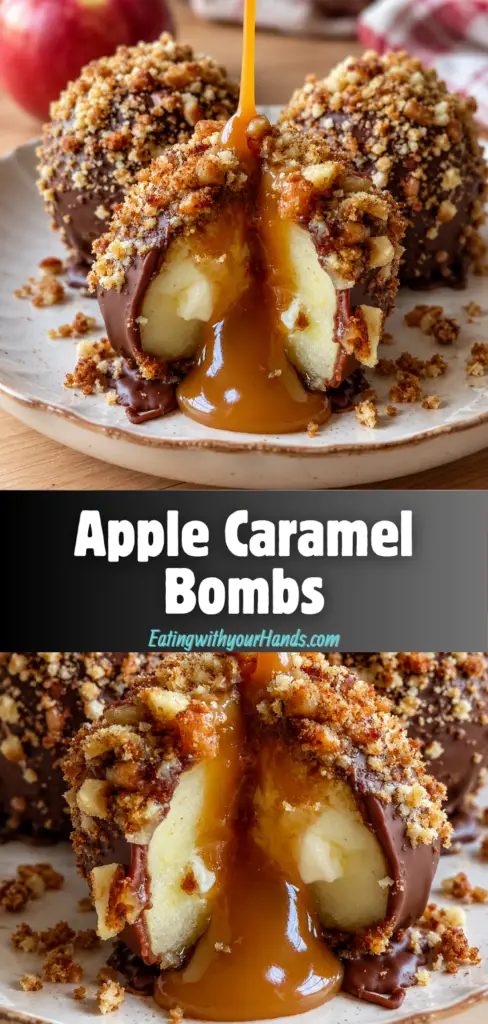
Apple Caramel Bombs are the kind of dessert that makes people stop mid-bite and smile. They bring together crisp apples, warm homemade caramel, smooth chocolate, and crunchy toppings in one dramatic little treat that feels playful, rich, and completely irresistible.
These are not ordinary caramel apples. Instead of simply coating the outside, each apple is cored to create a pocket, filled with caramel, dipped in chocolate, and finished with toppings like nuts, crushed cookies, toffee bits, sprinkles, sea salt, or extra caramel drizzle.
The result is a dessert with layers of texture. You get the snap of the apple, the creamy pull of caramel, the smooth shell of chocolate, and the crunch of whatever toppings you choose.
What makes them especially fun is how customizable they are. You can make them elegant with dark chocolate and sea salt, playful with sprinkles, cozy with spiced caramel, or over-the-top with Nutella, crushed cookies, and a caramel drizzle.
They look fancy, but the process is friendly. Make the caramel, fill the apples, melt the chocolate, dip, decorate, and let everything set.
These Apple Caramel Bombs are perfect for fall fairs at home, Halloween treats, cozy movie nights, party trays, edible gifts, birthdays, or any day when a plain apple needs a little dessert drama. They are also a great project when you want something hands-on and fun without needing special equipment.
The most important thing is to start with firm apples. Soft apples can turn mushy, but Honeycrisp or Granny Smith apples give you that crisp, juicy bite that holds up beautifully against caramel and chocolate.
No two Apple Caramel Bombs need to look exactly the same, and honestly, that is part of the charm. Some will have more nuts, some will have extra chocolate, some will drip a little caramel, and every single one will taste like a celebration.
Table of Contents
- Why You’ll Love These Apple Caramel Bombs
- Recipe Details
- Ingredients
- Ingredient Notes
- Optional Swaps, Variations, Add-Ins, and Serving Ideas
- Classic Apple Caramel Bombs
- Salted Caramel Apple Bombs
- Milk Chocolate Apple Bombs
- Dark Chocolate Apple Bombs
- White Chocolate Apple Bombs
- Vegan Apple Caramel Bombs
- Spiced Caramel Apple Bombs
- Nutella Core Apple Bombs
- Cookie Monster Apple Bombs
- Boozy Apple Caramel Bombs
- Toffee Crunch Apple Bombs
- Sprinkle Party Apple Bombs
- Extra Caramel Drizzle Apple Bombs
- Chopped Nut Apple Bombs
- Wedge-Style Party Serving
- Why This Recipe Works
- Directions
- Step 1: Prepare the Apples
- Step 2: Chill Soft Apples if Needed
- Step 3: Core the Apples
- Step 4: Protect the Cut Apple if Waiting
- Step 5: Melt the Sugar
- Step 6: Cook the Caramel to Golden
- Step 7: Add the Butter
- Step 8: Add the Cream Slowly
- Step 9: Add Optional Flavorings
- Step 10: Cool the Caramel
- Step 11: Fill the Apples
- Step 12: Melt the Chocolate
- Step 13: Smooth the Chocolate if Needed
- Step 14: Dip the Apples
- Step 15: Add the Toppings
- Step 16: Let the Bombs Set
- Step 17: Serve Whole or Sliced
- Step 18: Store Leftovers
- Serving Ideas
- Storage
- Freezing
- Make-Ahead
- Helpful Notes for Best Results
- Variations
- Classic Apple Caramel Bombs
- Salted Caramel Apple Bombs
- White Chocolate Strawberry Bombs
- White Chocolate Matcha Bombs
- Vegan Apple Caramel Bombs
- Pumpkin Spice Caramel Bombs
- Nutella Core Bombs
- Oreo Cookie Bombs
- Graham Cracker Bombs
- Gingersnap Apple Bombs
- Bourbon Caramel Bombs
- Spiced Rum Caramel Bombs
- Toffee Crunch Bombs
- Sprinkle Celebration Bombs
- Troubleshooting
- Frequently Asked Questions
- Why This Recipe Works So Well
- Final Thoughts
- Apple Caramel Bombs
Why You’ll Love These Apple Caramel Bombs
These Apple Caramel Bombs are fun to make. If you can melt caramel, dip apples in chocolate, and add toppings, you can make them.
They have an amazing texture contrast. Crisp apple, gooey caramel, smooth chocolate, and crunchy toppings all come together in every bite.
They are easy to customize. Use dark chocolate, milk chocolate, white chocolate, nuts, crushed cookies, toffee bits, sea salt, sprinkles, or extra caramel drizzle.
They look impressive without complicated steps. They are dramatic enough for parties but simple enough for a cozy night in.
They make great edible gifts. Wrap them in cute boxes or bags for a sweet homemade present.
They work year-round. Use spooky sprinkles for Halloween, red and green sprinkles for Christmas, pastels for Easter, or classic nuts and sea salt anytime.
Recipe Details
This recipe uses 4 large firm apples. Honeycrisp or Granny Smith apples are great options because they stay crisp.
The caramel begins with 1 cup granulated sugar. This is the backbone of the caramel, so do not substitute it.
The caramel also uses 6 tablespoons unsalted butter, cubed. Let the butter sit out for about 5 minutes after cubing so it is not fridge-cold.
The cream is ½ cup heavy cream at room temperature. If needed, warm it in the microwave for 10 seconds so it is not cold.
Optional caramel flavorings include ½ teaspoon sea salt and ½ teaspoon vanilla extract. Salt creates a salted caramel flavor, while vanilla adds extra depth.
The apples are coated with 8 oz dark or milk chocolate. Chocolate bars or chips both work.
Toppings can include chopped nuts, crushed cookies, toffee bits, mini chocolate chips, extra caramel drizzle, sea salt flakes, or sprinkles. Pecans, walnuts, and almonds are all good nut options.
The sugar melts into caramel in about 5 to 7 minutes. The caramel then cools for about 10 minutes so it thickens slightly before filling the apples.
After dipping, the chocolate sets in about 20 minutes at room temperature. If you are in a hurry, 10 minutes in the refrigerator helps it firm faster.
Ingredients
For the Caramel
- 1 cup granulated sugar
- 6 tablespoons unsalted butter, cubed
- ½ cup heavy cream, at room temperature
- ½ teaspoon sea salt, optional
- ½ teaspoon vanilla extract, optional
For Assembly
- 4 large firm apples
- 8 oz dark or milk chocolate
- Chopped nuts
Optional Toppings and Add-Ins
- Pecans
- Walnuts
- Almonds
- Crushed cookies
- Toffee bits
- Mini chocolate chips
- Extra caramel drizzle
- Sea salt flakes
- Sprinkles
- White chocolate
- Crushed freeze-dried strawberries
- Matcha powder
- Coconut cream
- Vegan butter
- Dairy-free chocolate
- Cinnamon
- ½ teaspoon pumpkin pie spice
- Nutella
- Oreos
- Graham crackers
- Gingersnaps
- 1 tablespoon bourbon
- 1 tablespoon spiced rum
- Coconut oil
- Vegetable shortening
- Lemon juice
- Store-bought soft caramels
- Splash of cream
- Hot water
Ingredient Notes
Granulated sugar is used to make the caramel. It melts down into a deep golden sauce and should not be swapped.
Unsalted butter makes the caramel rich and glossy. Cube it before adding so it melts quickly and evenly.
Heavy cream smooths the caramel and makes it pourable. It should be at room temperature so it blends into the hot sugar more easily.
Sea salt is optional but delicious. It turns the caramel into a salted caramel filling and balances the sweetness.
Vanilla extract is also optional. It gives the caramel a warmer flavor.
Firm apples are essential. Honeycrisp and Granny Smith apples work well because they have crunch and structure.
Dark chocolate gives a more balanced flavor against the sweet caramel. Milk chocolate creates a sweeter, creamier shell.
Chopped nuts add crunch. Pecans, walnuts, and almonds all work, especially if toasted briefly for extra flavor.
Crushed cookies make the outside fun and dessert-like. Oreos, graham crackers, shortbread, or gingersnaps can all be used.
Toffee bits add buttery crunch. They pair beautifully with caramel and chocolate.
Mini chocolate chips are for anyone who believes more chocolate is always welcome. They stick best when added before the chocolate shell sets.
Sprinkles make the bombs festive. Use colors for birthdays, holidays, Halloween, Christmas, Easter, or any celebration.
Optional Swaps, Variations, Add-Ins, and Serving Ideas
Classic Apple Caramel Bombs
Make the bombs with firm apples, homemade caramel, dark or milk chocolate, and chopped nuts. This gives the classic crisp apple, gooey caramel, chocolate shell, and crunchy topping combination.
Let the chocolate set fully before serving. Slice into wedges for easier sharing.
Salted Caramel Apple Bombs
Add ½ teaspoon sea salt to the caramel. Finish the chocolate shell with sea salt flakes.
This version is sweet, salty, rich, and balanced. It is especially good with dark chocolate.
Milk Chocolate Apple Bombs
Use milk chocolate for the coating. This makes the bombs sweeter and creamier.
Milk chocolate pairs nicely with chopped nuts and sprinkles. It is a kid-friendly option.
Dark Chocolate Apple Bombs
Use dark chocolate for a less sweet coating. It balances the caramel well.
This version tastes a little more grown-up. Sea salt flakes are especially good here.
White Chocolate Apple Bombs
Swap dark or milk chocolate for white chocolate. Roll or sprinkle with crushed freeze-dried strawberries or matcha powder.
This version looks elegant and colorful. It feels like something from a dessert boutique.
Vegan Apple Caramel Bombs
Use coconut cream instead of heavy cream, vegan butter, and dairy-free chocolate. Add a pinch of cinnamon to the caramel if you want to soften the coconut flavor.
The texture and taste will be slightly different. The method stays similar.
Spiced Caramel Apple Bombs
Stir ½ teaspoon pumpkin pie spice into the caramel. This gives the filling a warm fall flavor.
Dust with cinnamon sugar after dipping if desired. This makes the bombs taste extra cozy.
Nutella Core Apple Bombs
Spoon 1 teaspoon Nutella into each apple center before adding the caramel. Then fill with caramel and continue as usual.
This creates an extra chocolate-hazelnut surprise. It is rich and fun.
Cookie Monster Apple Bombs
Crush cookies and press them onto the chocolate coating. Oreos, graham crackers, and gingersnaps are all great choices.
This version is kid-approved and party-friendly. Press gently so the crumbs stick.
Boozy Apple Caramel Bombs
Add 1 tablespoon bourbon or spiced rum to the caramel after removing it from the heat. This creates an adults-only variation.
Stir well so the flavor blends smoothly. Pair with dark chocolate for a stronger flavor.
Toffee Crunch Apple Bombs
Roll the dipped apples in toffee bits. The buttery crunch works beautifully with caramel.
Add the toffee before the chocolate sets. Otherwise, it will not stick well.
Sprinkle Party Apple Bombs
Use colorful sprinkles on the chocolate coating. Match the colors to birthdays, holidays, or party themes.
This is one of the easiest ways to make the bombs festive. Kids especially love this version.
Extra Caramel Drizzle Apple Bombs
After the chocolate sets, drizzle extra caramel over the top. This gives the bombs a dramatic bakery-style look.
Use a light drizzle so they are not too sticky. Serve soon after decorating.
Chopped Nut Apple Bombs
Roll the chocolate-coated apples in chopped pecans, walnuts, or almonds. Toast the nuts for 5 minutes in a dry pan if you have time.
The nuts add crunch and balance the sweetness. They also make the bombs look classic.
Wedge-Style Party Serving
Slice the finished bombs into thick wedges for serving. This shows off the caramel center and makes them easier to share.
Use a sharp knife. Serve soon after slicing for the crispest apple texture.
Why This Recipe Works
This recipe works because it layers different textures around a firm apple. The apple stays crisp, the caramel stays soft, and the chocolate creates a shell.
The caramel filling goes inside the apple instead of only on the outside. That makes every slice dramatic and gooey.
The chocolate coating helps hold the toppings. It also gives each bomb a rich outer layer.
Firm apples are important because they keep the dessert from becoming mushy. Soft apples cannot support the caramel and chocolate as well.
Letting the caramel cool slightly matters. If it is too hot and thin, it can leak too much from the apples.
Dry apples are easier to coat. Wet apple skins make it harder for chocolate to cling.
Letting the chocolate set before serving creates cleaner bites. Room temperature setting takes about 20 minutes, while the refrigerator takes about 10.
The recipe is flexible because the apple, caramel, and chocolate base works with many toppings. You can make it playful, elegant, salty, sweet, or holiday-themed.
Directions
Step 1: Prepare the Apples
Wash and dry 4 large firm apples thoroughly. The apples must be dry so the chocolate can stick properly.
Honeycrisp or Granny Smith apples are great choices. Avoid soft apples because they can become mushy.
Step 2: Chill Soft Apples if Needed
If your apples feel a little soft, place them in the refrigerator for about 1 hour before coring. Cold apples are firmer and easier to handle.
This helps the finished bombs stay crisp. Granny Smith apples are especially sturdy if you need a firmer option.
Step 3: Core the Apples
Use an apple corer or small knife to remove the core from each apple. Create about a 1-inch-wide hole.
Do not cut all the way through the apple. You want a well that holds the caramel.
Step 4: Protect the Cut Apple if Waiting
If you are not filling the apples right away, rub the cut parts with lemon juice. This helps prevent browning.
Use only a light amount. Too much moisture can make dipping harder later.
Step 5: Melt the Sugar
Place 1 cup granulated sugar in a medium, light-colored saucepan over medium heat. Let it begin melting without stirring right away.
Once the edges start to liquefy, gently swirl or stir with a wooden spoon. Watch closely as the sugar changes color.
Step 6: Cook the Caramel to Golden
Continue heating until the sugar becomes a deep golden color, about 5 to 7 minutes. Aim for an amber shade.
Too pale gives weak flavor, while too dark can taste bitter. Remove from heat control if it darkens too quickly.
Step 7: Add the Butter
Add 6 tablespoons cubed unsalted butter to the melted sugar. The mixture will bubble strongly.
Stir constantly until the butter melts completely. If it looks separated at first, keep stirring until it comes together.
Step 8: Add the Cream Slowly
Remove the pan from the heat. Pour in ½ cup room-temperature heavy cream in a thin stream while stirring constantly.
The mixture may hiss and foam, which is normal. Keep stirring until the caramel becomes smooth and velvety.
Step 9: Add Optional Flavorings
Stir in ½ teaspoon sea salt and ½ teaspoon vanilla extract if using. Mix until fully blended.
These add flavor and balance. The caramel should look glossy and smooth.
Step 10: Cool the Caramel
Let the caramel cool for about 10 minutes. It should thicken slightly but still be spoonable.
If it is too thin, let it cool longer, up to 20 minutes. If it becomes too thick, warm it briefly for 5 seconds in the microwave.
Step 11: Fill the Apples
Spoon the slightly cooled caramel into each apple cavity. Fill just below the rim.
Leave a tiny gap because the caramel can settle and shift. If caramel leaks onto the apple sides, wipe it away before dipping.
Step 12: Melt the Chocolate
Chop 8 oz dark or milk chocolate if using bars. Melt in a microwave-safe bowl in 30-second bursts, stirring between each.
You can also use a double boiler. The chocolate should be warm and smooth, not scorching.
Step 13: Smooth the Chocolate if Needed
If the chocolate becomes too thick, reheat it for 5 to 10 seconds. Stir until smooth again.
If needed, add a teaspoon of coconut oil or vegetable shortening. Keep water away from the chocolate.
Step 14: Dip the Apples
Hold each apple by the stem or insert a popsicle stick or decorative skewer into the top. Swirl the apple in the melted chocolate.
Let the excess chocolate drip off. Work quickly so the apple does not warm too much and loosen the caramel.
Step 15: Add the Toppings
Immediately roll or sprinkle the dipped apple with chopped nuts, crushed cookies, toffee bits, mini chocolate chips, sea salt flakes, or sprinkles. Press gently so toppings stick.
If the chocolate sets too fast, drizzle a little melted chocolate on top to help hold the toppings. Decorate before the shell hardens.
Step 16: Let the Bombs Set
Place the coated apples on parchment paper. Let the chocolate harden for about 20 minutes at room temperature.
If you are in a hurry, chill for about 10 minutes in the refrigerator. Do not let them get too cold for too long because the caramel can become very firm.
Step 17: Serve Whole or Sliced
Serve the Apple Caramel Bombs whole with sticks or skewers for easy handling. You can also slice them into thick wedges.
Slicing reveals the caramel center. Serve soon after slicing for the best crunch.
Step 18: Store Leftovers
Store finished bombs in an airtight container in the refrigerator for up to 3 days. The apples are crispest on the first day.
Do not freeze them. Apples become mushy after thawing.
Serving Ideas
Serve Apple Caramel Bombs after the chocolate has fully set. They are easiest to handle when the shell is firm.
For parties, insert popsicle sticks or decorative skewers before dipping. This turns them into dessert lollipops.
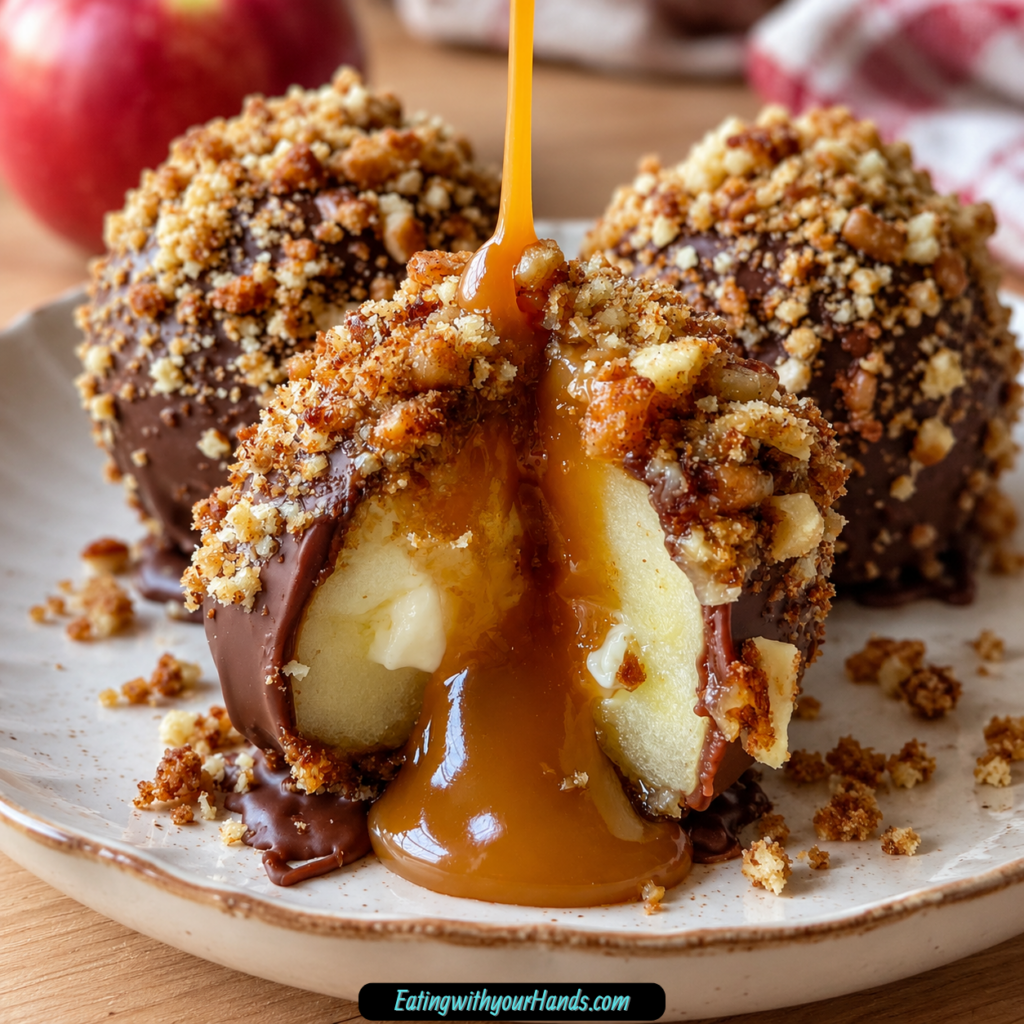
Slice them into thick wedges for sharing. The cross-section shows the apple, caramel center, chocolate shell, and toppings.
Serve with extra chocolate drizzle for drama. Add it right before presenting.
For a fall dessert table, use dark chocolate, nuts, and sea salt flakes. This gives them a classic caramel apple feeling.
For a kid-friendly platter, use milk chocolate, sprinkles, and crushed cookies. The colors make them fun and playful.
For a holiday version, match the sprinkles to the season. Use red and green for Christmas, spooky colors for Halloween, or pastels for Easter.
If your kitchen is warm, chill the bombs for 5 minutes before serving. This helps prevent melty chocolate hands.
Storage
Store Apple Caramel Bombs in an airtight container in the refrigerator. They keep for up to 3 days.
The apples stay crispest on the first day. The texture softens a little as they sit.
Keep them chilled until about 30 minutes before serving if making ahead. This helps the chocolate stay firm without serving them too cold.
Do not store uncovered. The apples can dry out and absorb refrigerator odors.
If the caramel leaks slightly, treat it as extra drizzle. Wipe the container if needed.
Chocolate may lose some shine after refrigeration. The flavor will still be delicious.
Do not microwave the finished bombs. The chocolate and caramel can melt unevenly.
Slice only when ready to serve. Cut apples soften faster once exposed.
Freezing
Freezing is not recommended for Apple Caramel Bombs. The apples become mushy after thawing.
These treats are best enjoyed fresh. The crisp apple texture is an important part of the dessert.
If planning ahead, assemble them the morning of your event. Keep them chilled until about 30 minutes before serving.
Avoid freezing leftovers. The caramel and chocolate may survive, but the apple texture will suffer.
Make smaller batches more often if needed. The recipe is more enjoyable fresh.
If you need to save time, prepare toppings and meltable ingredients ahead. Keep the apples whole until assembling.
Make-Ahead
Apple Caramel Bombs can be made the morning of a party. The apples stay crispest within about 8 hours.
Keep them chilled until 30 minutes before serving. This helps the chocolate stay set while allowing the caramel to soften slightly.
You can prepare toppings ahead of time. Chop nuts, crush cookies, portion sprinkles, and set out sea salt before starting.
The caramel can be made and cooled before filling. If it thickens too much, warm it for 5 seconds to loosen.
Do not core the apples too early unless using lemon juice on the cut surfaces. Cut apple can brown if left exposed.
For the best presentation, decorate after dipping while the chocolate is still soft. Toppings stick best at that moment.
If gifting, package them once the chocolate has fully set. Keep them refrigerated until delivery.
Helpful Notes for Best Results
Use firm apples. Honeycrisp and Granny Smith apples hold up well.
Dry the apples completely before dipping. Wet apples make the chocolate slip.
Do not cut all the way through the apples when coring. The caramel needs a sealed bottom.
Let caramel cool before filling. Thin hot caramel can leak too much.
Use room-temperature cream in the caramel. Cold cream can make the caramel seize.
Keep water away from melted chocolate. Even a small amount can make chocolate seize.
If chocolate thickens, add a teaspoon of coconut oil or vegetable shortening. This can make dipping smoother.
Do not freeze the finished bombs. Fresh is best for texture.
Variations
Classic Apple Caramel Bombs
Use firm apples, homemade caramel, dark or milk chocolate, and chopped nuts. This gives the full crisp, gooey, chocolate-coated experience.
Let the chocolate set before serving. Slice into wedges if sharing.
Salted Caramel Apple Bombs
Add ½ teaspoon sea salt to the caramel. Finish with sea salt flakes on the chocolate shell.
This variation balances sweetness beautifully. It works especially well with dark chocolate.
White Chocolate Strawberry Bombs
Use white chocolate instead of dark or milk chocolate. Roll in crushed freeze-dried strawberries.
This creates a pretty, dessert-shop-style finish. The strawberry adds color and tang.
White Chocolate Matcha Bombs
Use white chocolate and dust or roll with matcha powder. The flavor becomes earthy and sweet.
Use a light amount of matcha. It can be strong.
Vegan Apple Caramel Bombs
Use coconut cream instead of heavy cream, vegan butter, and dairy-free chocolate. Add a pinch of cinnamon if desired.
The cinnamon helps soften any coconut-forward flavor. The texture may differ from classic caramel.
Pumpkin Spice Caramel Bombs
Stir ½ teaspoon pumpkin pie spice into the caramel. The flavor becomes warm and autumnal.
Dust with cinnamon sugar after dipping if desired. This version feels perfect for fall.
Nutella Core Bombs
Add 1 teaspoon Nutella to the apple center before spooning in caramel. Then dip and decorate as usual.
This adds a chocolate-hazelnut surprise. It is rich and playful.
Oreo Cookie Bombs
Press crushed Oreos onto the chocolate coating. Add them while the chocolate is still soft.
This version is kid-friendly and dramatic. The dark crumbs look great against milk or white chocolate.
Graham Cracker Bombs
Use crushed graham crackers as the topping. They add a simple, sweet crunch.
This variation tastes cozy and classic. It pairs well with milk chocolate.
Gingersnap Apple Bombs
Use crushed gingersnaps on the chocolate coating. The spice works nicely with caramel and apples.
This is a great holiday-style topping. Press gently so the crumbs stick.
Bourbon Caramel Bombs
Add 1 tablespoon bourbon to the caramel after removing it from the heat. This is an adults-only variation.
Stir well and let the caramel cool before filling. Pair with dark chocolate and nuts.
Spiced Rum Caramel Bombs
Add 1 tablespoon spiced rum to the caramel after removing it from the heat. It gives the filling a warm flavor.
Use this for an adult dessert platter. Let the caramel thicken before filling the apples.
Toffee Crunch Bombs
Roll the dipped apples in toffee bits. The buttery crunch adds texture.
This topping works with both dark and milk chocolate. Add it before the chocolate sets.
Sprinkle Celebration Bombs
Use sprinkles for birthdays, holidays, or casual fun. Match colors to the occasion.
This is the easiest way to customize the look. Kids love this version.
Troubleshooting
The Caramel Is Too Thin
Let it cool longer before filling the apples. It can cool for up to 20 minutes.
Caramel thickens as it cools. Do not rush the filling step.
The Caramel Is Too Thick
Warm it for 5 seconds in the microwave. Stir and check the texture.
It should be spoonable but not runny. Repeat briefly if needed.
The Caramel Split
Whisk in 1 tablespoon hot water. It may come back together.
If it stays imperfect, use it anyway. It will still taste good.
The Caramel Turned Grainy
Sugar crystals may have formed. Avoid stirring too early when melting the sugar.
Use room-temperature cream. If grainy caramel happens, strain it through a sieve.
The Caramel Tastes Bitter
The sugar cooked too dark. Remove it when it reaches deep golden amber.
Aim for a warm autumn-sunset color. Dark brown caramel can taste burnt.
The Chocolate Seized
Water may have touched the chocolate. Use dry bowls, dry spoons, and dry hands.
Stir in a little coconut oil if it thickens. Avoid steam from nearby pots.
The Chocolate Is Too Thick for Dipping
Warm it for 5 to 10 seconds and stir. Add coconut oil or vegetable shortening if needed.
Do not overheat it. Warm and smooth is the goal.
The Chocolate Will Not Stick to the Apples
The apples may be wet. Wash and dry them thoroughly before dipping.
If caramel leaked onto the sides, wipe the apple clean before coating. Chocolate sticks best to dry surfaces.
The Caramel Keeps Leaking
Let the caramel cool longer before filling, at least 15 minutes if needed. Also fill just below the rim.
If it leaks anyway, drizzle the caramel over the finished bombs as decoration. It can look intentional.
The Apples Became Mushy
The apples may have been too soft to start. Use firm apples such as Honeycrisp or Granny Smith.
Do not freeze the finished bombs. Thawed apples become mushy.
Frequently Asked Questions
Can I use store-bought caramel instead?
Yes, you can melt soft caramels with a splash of cream for a shortcut sauce. Homemade caramel has deeper flavor, but store-bought works when you need a faster option.
Let the melted caramel cool slightly before filling. It should be thick enough not to run straight out.
How do I prevent chocolate from seizing?
Keep all water away from the chocolate. Use dry bowls, dry spoons, and dry hands.
If the chocolate thickens, stir in a small amount of coconut oil. Also keep steam away from the chocolate bowl.
Why did my caramel turn grainy?
Sugar crystals may have formed while the caramel was cooking. Do not stir the sugar until it is mostly melted.
Room-temperature cream also helps. If the caramel turns grainy, strain it through a sieve.
Can I make these ahead for a party?
Yes, assemble them the morning of the event. Apples stay crispest within 8 hours.
Keep them chilled until 30 minutes before serving. This helps the chocolate stay firm while the caramel softens slightly.
What should I do if my caramel will not stop leaking?
Let the caramel cool longer before filling the apples, at least 15 minutes if needed. Fill just below the rim.
If leaking still happens, use it as a drizzle over the finished bombs. It can look decorative.
Can I freeze Apple Caramel Bombs?
No, freezing is not recommended. The apples become mushy when thawed.
Store them in the refrigerator instead. They keep for up to 3 days.
What kind of apples work best?
Firm apples work best. Honeycrisp and Granny Smith are good choices.
Avoid soft apples because they can turn mushy. Cold apples are easier to handle.
Can I make a vegan version?
Yes, use coconut cream instead of heavy cream, vegan butter, and dairy-free chocolate. Add a pinch of cinnamon to the caramel if desired.
The flavor and texture will change slightly. The method still works.
Why This Recipe Works So Well
Apple Caramel Bombs work so well because they turn a familiar caramel apple idea into something more exciting. The caramel is tucked inside the apple, while the chocolate and toppings cover the outside.
The apple gives crunch and freshness. That crisp bite balances the rich caramel and chocolate.
The caramel adds softness and sweetness. Sea salt and vanilla can make it taste deeper.
The chocolate shell adds structure. It helps hold toppings and makes the dessert feel finished.
The toppings bring personality. Nuts add crunch, cookies add sweetness, sprinkles add color, and sea salt adds balance.
The recipe is also flexible. You can make it fancy, playful, seasonal, vegan-style, boozy, spicy, chocolatey, or nutty.
The no-bake method keeps it approachable. The only cooking is the caramel, and the rest is assembly.
Most of all, this dessert works because it is fun. It is messy in the best way, dramatic when sliced, and always more impressive than the effort suggests.
Final Thoughts
Apple Caramel Bombs are made with firm apples, homemade caramel, dark or milk chocolate, and your favorite toppings. The apples are cored without cutting all the way through, filled with slightly cooled caramel, dipped in melted chocolate, decorated, and left to set until the shell is firm.
Serve them whole with sticks, slice them into thick wedges, or wrap them as edible gifts. With their crisp apple center, gooey caramel filling, chocolate coating, endless topping options, 3-day refrigerator storage, and no-freeze fresh texture, these Apple Caramel Bombs are a fun dessert that turns simple ingredients into something unforgettable.
Apple Caramel Bombs
Sweet, crisp, rich, and covered with chocolate, these Apple Caramel Bombs turn firm apples into a fun dessert filled with homemade caramel and finished with nuts or festive toppings. Honeycrisp or Granny Smith apples give each bomb a fresh bite, while the caramel, chocolate, and optional toppings make them feel extra special.
Recipe Details
- Prep Time: 20 minutes
- Cook Time: 10 minutes
- Total Time: 30 minutes
- Course: Dessert
- Cuisine: American
- Servings: 4 bombs
Equipment
- Saucepan
- Wooden spoon
- Parchment paper
Ingredients
Optional Toppings
- sprinkles
- sea salt flakes
- caramel drizzle
- mini chocolate chips
- toffee bits
- crushed cookies
For Assembly
- chopped nuts pecans, walnuts, or almonds
- 8 oz dark or milk chocolate bars or chips
- 4 large firm apples Honeycrisp or Granny Smith recommended
For the Caramel
- ½ teaspoon vanilla extract optional
- ½ teaspoon sea salt optional, for salted caramel
- ½ cup heavy cream at room temperature
- 6 tablespoons unsalted butter cubed
- 1 cup granulated sugar
Instructions
Step 1: Start the Caramel
Make the caramel by melting the granulated sugar in a saucepan over medium heat until golden. Stir carefully with a wooden spoon as the sugar melts.
Watch the color closely as it changes. The sugar should turn golden before the butter is added.
Step 2: Add the Butter and Cream
Add the cubed unsalted butter to the melted sugar and stir until melted. Slowly pour in the heavy cream at room temperature while continuing to stir.
Add the cream gradually so the caramel comes together smoothly. Keep stirring until the mixture looks combined and rich.
Step 3: Finish the Caramel
Remove the saucepan from the heat. Mix in the sea salt and vanilla extract if using.
Let the caramel cool slightly before adding it to the apples. The caramel should still be soft enough to fill the centers.
Step 4: Prepare the Apples
Core the firm apples, keeping them ready for filling. Use Honeycrisp or Granny Smith apples as recommended.
Fill the centers of the apples with the caramel. Work carefully so the caramel stays inside each apple.
Step 5: Coat with Chocolate
Melt the dark or milk chocolate bars or chips. Dip each filled apple into the melted chocolate until coated.
Let excess chocolate drip off before adding toppings. The chocolate coating helps seal in the caramel and creates the rich outer layer.
Step 6: Add Nuts and Toppings
Roll each chocolate-coated apple in chopped nuts, using pecans, walnuts, or almonds. Add any optional toppings you like, such as crushed cookies, toffee bits, mini chocolate chips, caramel drizzle, sea salt flakes, or sprinkles.
Choose the toppings that fit the flavor you want. Keep the toppings ready before the chocolate sets so they stick well.
Step 7: Let Set Before Serving
Place the coated apples on parchment paper. Let them set before serving.
Serve once the chocolate coating has firmed. If not serving immediately, store them in the refrigerator.
Notes
- Use firm apples to prevent them from becoming too soft.
- Store in the refrigerator if not serving immediately.
Serving Suggestions
Serve Apple Caramel Bombs once the chocolate has set and the caramel-filled apples are ready to slice or enjoy. The crisp apples, rich caramel, melted chocolate, and crunchy toppings create a sweet dessert with layers of texture.
Use Honeycrisp or Granny Smith apples for the firm texture recommended in the recipe. Dark or milk chocolate can be used, depending on whether you want a deeper chocolate flavor or a sweeter finish.
For topping variety, roll the apples in chopped pecans, walnuts, or almonds, then add optional toppings like crushed cookies, toffee bits, mini chocolate chips, caramel drizzle, sea salt flakes, or sprinkles. These toppings make the apples more colorful and customizable for serving.
Storage
How to Store
Store the Apple Caramel Bombs in the refrigerator if not serving immediately. The recipe does not provide a specific storage duration, so no exact storage time is added here.
Apple Tip
Use 4 large firm apples, with Honeycrisp or Granny Smith recommended. Firm apples help prevent the dessert from becoming too soft.
Caramel Tip
Let the caramel cool slightly before filling the apples. It should be warm enough to pour but not so hot that it makes the apples soften too much.
Chocolate Tip
Use 8 oz dark or milk chocolate bars or chips. Dip each caramel-filled apple into the melted chocolate before adding toppings.
Topping Tip
Add chopped nuts or optional toppings while the chocolate is still soft. This helps the nuts, sprinkles, sea salt flakes, toffee bits, crushed cookies, mini chocolate chips, or caramel drizzle stay in place.
Setting Tip
Place the coated apples on parchment paper and let them set before serving. Refrigerate them if they will not be served right away.

Fernando is the creator and writer behind the food blog Eating with your Hands. Living and working in cities like Paris, Barcelona, and Berlin, and being married to a Canadian foodie, has given Fernando a passion and interest in food and inspired him to run EWYH.