
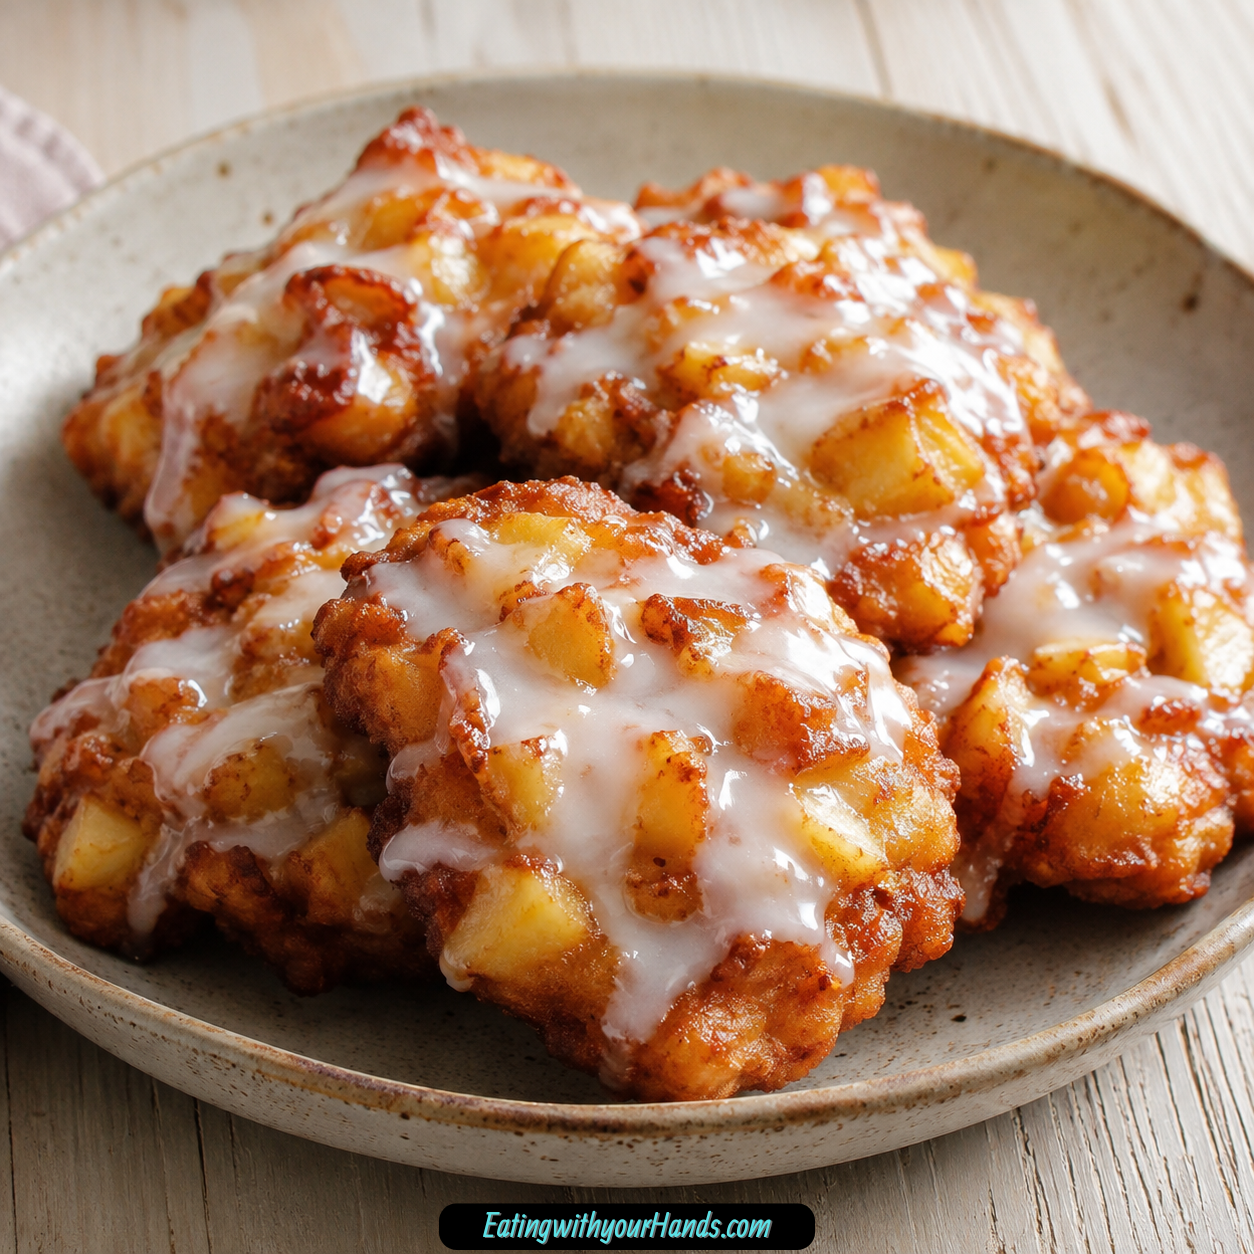
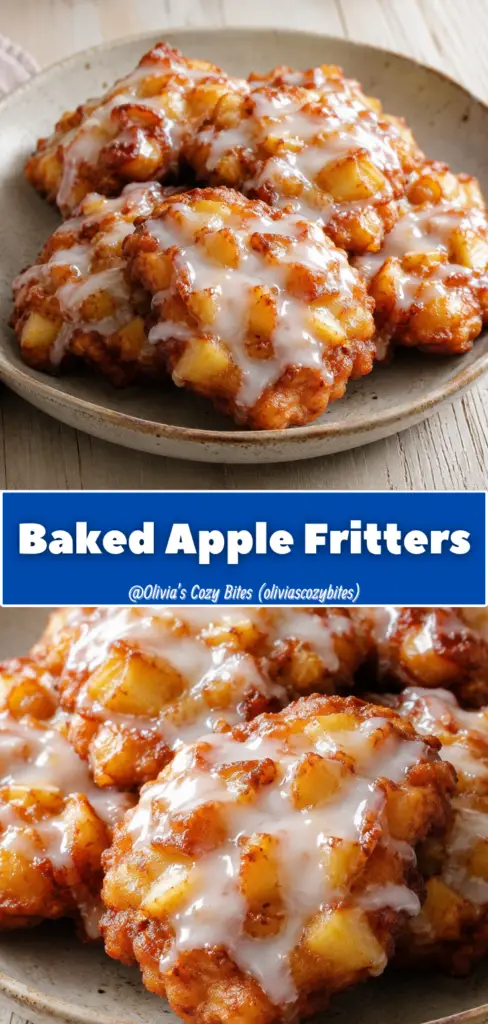
Baked Apple Fritters are the kind of cozy homemade treat that can make an ordinary morning feel like fall. They have tender pieces of apple, warm cinnamon, a little nutmeg, a soft baked texture, and a sweet vanilla glaze that drips over the tops just enough to make each bite feel special.
These fritters bring all the comforting flavor of apple fritters without the deep-frying. There is no pot of hot oil, no splatter, and no heavy cleanup, just a simple batter dropped onto a parchment-lined baking sheet and baked until golden.
The batter comes together with all-purpose flour, granulated sugar, baking powder, salt, cinnamon, nutmeg, milk, eggs, vanilla, melted butter, chopped apples, and light brown sugar. Once baked, the fritters are finished with a glaze made from powdered sugar, milk, and vanilla extract.
They are perfect for breakfast, brunch, dessert, or a sweet afternoon pick-me-up with coffee or tea. They also freeze well when left unglazed, which makes them a lovely make-ahead treat for busy mornings.
What makes them so easy to love is the balance of texture and flavor. The outside turns lightly golden, the inside stays soft, the apples bring little juicy bites, and the glaze adds a sweet finish without making the whole thing complicated.
Table of Contents
- Why You’ll Love Baked Apple Fritters
- Recipe Details
- Ingredients
- Optional Swaps and Add-Ins
- The Comfort of Baked Apple Fritters
- Why Baking Works So Well
- Choosing Apples for Baked Apple Fritters
- Directions
- Step 1: Preheat the Oven
- Step 2: Line the Baking Sheet
- Step 3: Prepare the Apples
- Step 4: Measure the Flour Carefully
- Step 5: Mix the Dry Ingredients
- Step 6: Melt the Butter
- Step 7: Mix the Wet Ingredients
- Step 8: Combine Wet and Dry Ingredients
- Step 9: Add the Apples and Brown Sugar
- Step 10: Check the Batter Texture
- Step 11: Scoop the Batter
- Step 12: Shape Lightly if Needed
- Step 13: Bake the Fritters
- Step 14: Make the Glaze
- Step 15: Cool the Fritters Slightly
- Step 16: Drizzle the Glaze
- Step 17: Serve Warm
- Serving Ideas
- Storage
- Freezing
- Make-Ahead Tips
- Helpful Notes for Best Results
- Variations
- Troubleshooting
- Frequently Asked Questions
- Why These Fritters Are Perfect for Fall
- Why This Recipe Works So Well
- Final Thoughts
- Baked Apple Fritters
Why You’ll Love Baked Apple Fritters
These fritters are baked instead of fried. That makes them lighter and much easier to prepare at home.
They are quick and approachable. From mixing the batter to baking and glazing, the recipe is ready in just over 30 minutes.
They are full of fall flavor. Apples, cinnamon, nutmeg, brown sugar, and vanilla create a warm, cozy taste.
They are family-friendly. Kids and adults both love the sweet apple and cinnamon combination.
They are easy to make ahead. Unglazed fritters can be frozen, reheated, and glazed before serving.
They are flexible. You can use plant-based milk, vegan butter, gluten-free flour, chopped nuts, allspice, or cardamom.
Recipe Details
- Recipe name: Baked Apple Fritters
- Oven temperature: 375°F (190°C)
- Baking time: 15 to 18 minutes
- Baking surface: Parchment-lined baking sheet
- Main texture: Soft baked fritters with tender apples
- Apple amount: 2 cups peeled and chopped apples
- Recommended apples: Granny Smith or Honeycrisp
- Glaze style: Powdered sugar, milk, and vanilla extract
- Refrigerator storage: Up to 3 days
- Freezer storage: Unglazed fritters for up to 2 months
- Best serving style: Warm with glaze slightly set
- Doneness cue: Golden brown and toothpick comes out clean
Ingredients
For the Apple Fritters
- 2 cups all-purpose flour
- ¼ cup granulated sugar
- 2 teaspoons baking powder
- ½ teaspoon salt
- 1 teaspoon ground cinnamon
- ¼ teaspoon ground nutmeg
- ½ cup whole milk
- 2 large eggs
- 1 teaspoon vanilla extract
- 3 tablespoons unsalted butter, melted
- 2 cups peeled and chopped apples
- ¼ cup light brown sugar, packed
For the Glaze
- 1 cup powdered sugar
- 2 to 3 tablespoons milk
- ½ teaspoon vanilla extract
Optional Swaps and Add-Ins
- Plant-based milk
- Vegan butter
- Granny Smith apples
- Honeycrisp apples
- Chopped walnuts
- Chopped pecans
- 1:1 gluten-free flour blend
- Pinch of allspice
- Pinch of cardamom
- Coffee for serving
- Tea for serving
- Vanilla ice cream for serving
The Comfort of Baked Apple Fritters
Apple fritters have a way of feeling nostalgic before you even take the first bite. The smell of apples and cinnamon baking together can make a kitchen feel warmer, calmer, and a little more like home.
This baked version keeps that same cozy feeling but makes the process much easier. Instead of frying batter in oil, you scoop the apple-filled mixture onto a baking sheet and let the oven do the work.
The apples become tender as the fritters bake. Their natural sweetness blends with brown sugar, cinnamon, and vanilla.
The cinnamon is essential because it gives the fritters that warm apple-spice flavor. Nutmeg adds a little depth and makes the spice blend feel rounder.
The glaze is simple but important. It gives each fritter a sweet finish and makes them feel like a true bakery-style treat.
The result is soft, spiced, apple-filled, and easy to make. These fritters are casual enough for a weekday breakfast but special enough for a weekend brunch.
Why Baking Works So Well
Baking makes these fritters simpler and cleaner than a fried version. There is no need to heat oil or worry about splatter.
The baking powder helps the fritters rise and stay fluffy. It gives the batter enough lift to bake into soft mounds.
The parchment paper keeps the fritters from sticking. It also makes cleanup easier after the glaze and apple juices settle.
Because the fritters are baked, the texture is softer and lighter. They will not be exactly like deep-fried fritters, but they still have plenty of comfort and flavor.
The oven gives them a golden exterior while keeping the inside tender. A toothpick should come out clean when they are done.
The glaze adds the final classic touch. Drizzling it over warm fritters makes them feel sweet, cozy, and finished.
Choosing Apples for Baked Apple Fritters
Granny Smith and Honeycrisp apples work especially well for this recipe. They hold up during baking and bring a nice balance of flavor.
Granny Smith apples are tart. Their sharpness balances the sweet batter and vanilla glaze.
Honeycrisp apples are crisp, juicy, and sweet-tart. They give the fritters a fresh apple bite.
The apples should be peeled and chopped. Peeling creates a smoother texture, while chopping helps the fruit distribute evenly through the batter.
If you prefer a more rustic fritter, the peels can be left on. The texture will be a little different, but it can still be delicious.
Try to chop the apples into small, even pieces. This helps them soften properly during the short baking time.
Directions
Step 1: Preheat the Oven
Preheat your oven to 375°F (190°C). Let the oven fully heat before baking.
A hot, steady oven helps the fritters rise and bake evenly. Since the baking time is only 15 to 18 minutes, the starting temperature matters.
Place an oven rack in the center position. This helps the fritters brown gently without overcooking the bottoms.
Step 2: Line the Baking Sheet
Line a baking sheet with parchment paper. This prevents sticking and makes cleanup easier.
Baked fritter batter is soft, and the apples release a little moisture as they bake. Parchment helps the fritters lift cleanly from the pan.
Set the prepared baking sheet aside. You will need it once the batter is mixed.
Step 3: Prepare the Apples
Peel and chop enough apples to measure 2 cups. Use small, even pieces.
Granny Smith or Honeycrisp apples are recommended because they hold their shape and balance the sweetness. Both work beautifully in baked fritters.
If you prefer a rustic texture, you can leave the peels on. Peeling is recommended for a smoother bite.
Step 4: Measure the Flour Carefully
Measure 2 cups all-purpose flour using the spoon-and-level method. Spoon the flour into the measuring cup and level it off.
Avoid packing the flour. Too much flour can make the fritters dense.
Careful measuring helps keep the fritters light. This is especially important for baked versions.
Step 5: Mix the Dry Ingredients
In a large bowl, whisk together 2 cups all-purpose flour, ¼ cup granulated sugar, 2 teaspoons baking powder, ½ teaspoon salt, 1 teaspoon ground cinnamon, and ¼ teaspoon ground nutmeg.
Whisk until everything is evenly combined. This spreads the baking powder and spices throughout the batter.
Nutmeg is optional but adds depth. Cinnamon gives the main warm apple-fritter flavor.
Step 6: Melt the Butter
Melt 3 tablespoons unsalted butter. Let it cool slightly before mixing it with the wet ingredients.
Very hot butter can affect the eggs if added directly. Slightly cooled melted butter blends more smoothly.
The butter adds richness to the batter. It gives the baked fritters a softer, more flavorful crumb.
Step 7: Mix the Wet Ingredients
In a separate bowl, whisk together ½ cup whole milk, 2 large eggs, 1 teaspoon vanilla extract, and the slightly cooled melted butter.
Whisk until smooth. The eggs should be fully blended into the milk mixture.
Vanilla gives the fritters a sweet, warm background flavor. It also helps the glaze and batter taste connected.
Step 8: Combine Wet and Dry Ingredients
Pour the wet ingredients into the bowl with the dry ingredients. Stir gently.
Mix only until the batter comes together. Do not overmix.
Overmixing can make the fritters dense instead of light. A few small lumps are fine.
Step 9: Add the Apples and Brown Sugar
Fold in the 2 cups peeled and chopped apples and ¼ cup packed light brown sugar. Stir gently until evenly distributed.
The brown sugar adds a deeper sweetness and helps the apples taste slightly caramelized as they bake. It also enhances the cinnamon flavor.
Make sure the apple pieces are spread throughout the batter. Every fritter should have apples in it.
Step 10: Check the Batter Texture
The batter should be thick enough to scoop. It should hold its shape when dropped onto the baking sheet.
If it looks slightly rustic or uneven, that is normal. Fritters are meant to look homemade.
Do not thin the batter with extra liquid. A thick batter helps the fritters bake into soft mounds.
Step 11: Scoop the Batter
Use a spoon or cookie scoop to drop portions of batter onto the prepared baking sheet. Leave about 2 inches between each fritter.
Spacing gives them room to spread slightly and bake evenly. It also helps air circulate around each one.
Try to keep the portions similar in size. This helps them finish baking at the same time.
Step 12: Shape Lightly if Needed
If any batter mound looks very uneven, gently nudge it into shape with the spoon. Do not flatten it too much.
The fritters should remain thick and slightly rustic. Their uneven shape is part of their charm.
Make sure apple pieces are not all piled on one side. Even distribution helps with baking.
Step 13: Bake the Fritters
Bake at 375°F (190°C) for 15 to 18 minutes. The fritters should turn golden brown.
The centers should be set, and a toothpick inserted into one fritter should come out clean. This means the batter is baked through.
Start watching near 15 minutes. Smaller fritters may finish sooner, while larger ones may need the full time.
Step 14: Make the Glaze
While the fritters bake, whisk together 1 cup powdered sugar, 2 tablespoons milk, and ½ teaspoon vanilla extract. Mix until smooth.
If the glaze is too thick, add the third tablespoon of milk gradually. Stop when it reaches a pourable consistency.
The glaze should drizzle easily but not run like water. Adjust slowly for the best texture.
Step 15: Cool the Fritters Slightly
Remove the fritters from the oven and let them cool slightly on the baking sheet. They should be warm but easier to handle.
Cooling briefly helps the fritters set. It also keeps the glaze from melting too much.
Do not let them cool completely if you want the glaze to settle softly over the tops. Warm fritters make the glaze feel cozy.
Step 16: Drizzle the Glaze
Drizzle the vanilla glaze over the slightly cooled fritters. Use a spoon and move it back and forth over each fritter.
The glaze can be light or generous, depending on your preference. Let it run naturally over the ridges.
Allow the glaze to set slightly before serving. This gives the fritters a sweet finished look.
Step 17: Serve Warm
Serve the fritters warm for the best texture and flavor. The apples will be tender, and the glaze will be lightly set.
They are delicious with coffee or tea. They can also be served with vanilla ice cream for dessert.
Enjoy them the day they are baked if possible. Fresh baked apple fritters taste especially comforting.
Serving Ideas
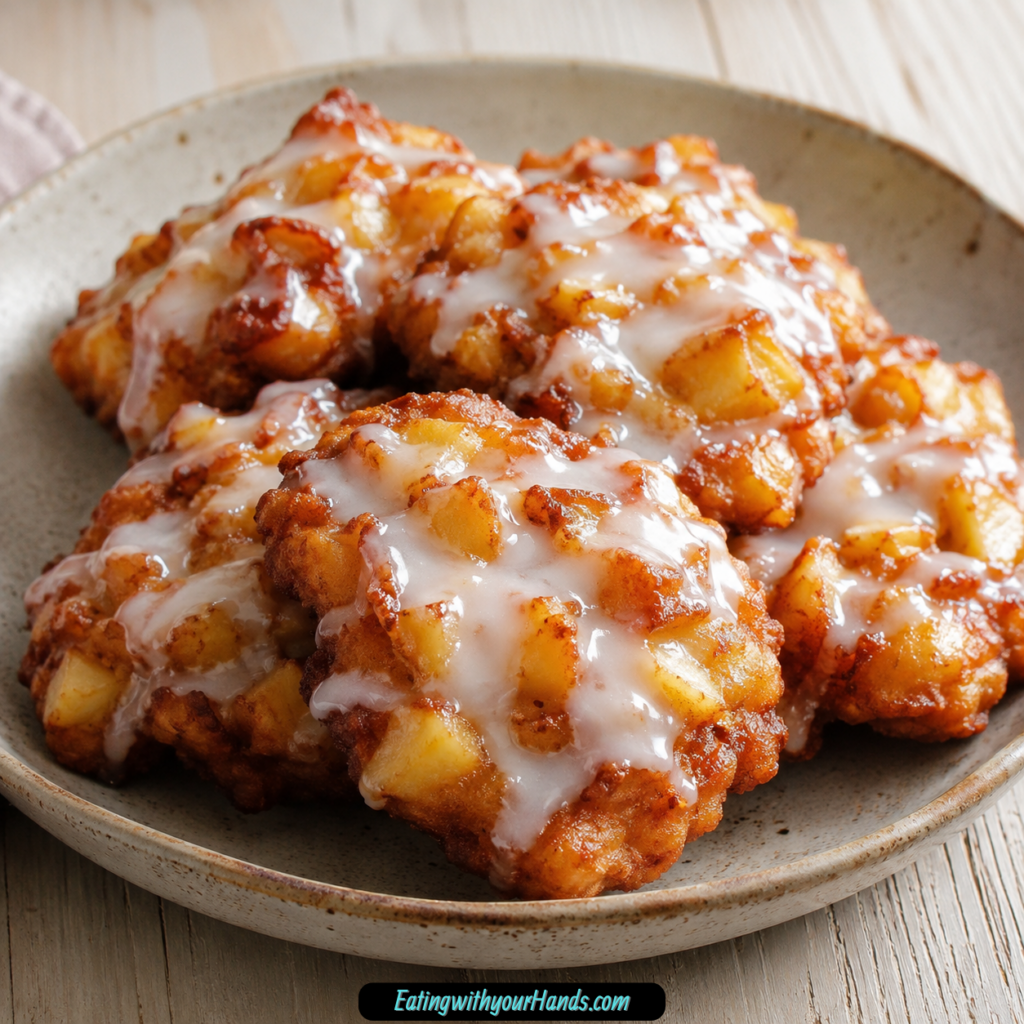
Baked Apple Fritters are best served warm. The glaze should be slightly set, and the apple pieces should still taste soft and fragrant.
Serve them with hot coffee for breakfast. The cinnamon and apple flavor pairs beautifully with a warm cup.
Tea is another lovely pairing. It makes the fritters feel like a cozy afternoon treat.
For dessert, serve them with a scoop of vanilla ice cream. The warm fritter and cold ice cream make a simple but delicious combination.
They also work well for brunch. Arrange them on a platter after the glaze sets slightly.
Storage
Store leftover fritters in an airtight container in the refrigerator for up to 3 days. Let them cool before storing.
Because the fritters contain apples and glaze, refrigeration helps keep them fresh. The texture may soften as they sit.
Reheat them in the microwave or oven before serving. Warm fritters taste better than cold ones.
If you plan to store them, keep in mind that the glaze may soak in a little. They will still taste sweet and delicious.
Freezing
Freeze unglazed fritters for the best result. Place them in an airtight container and freeze for up to 2 months.
Thaw and reheat before glazing. This keeps the glaze fresh and smooth.
Freezing glazed fritters is not ideal because the glaze can change texture. Unglazed storage gives a better final finish.
Once reheated, drizzle with fresh glaze and serve. This makes them taste closer to freshly baked.
Make-Ahead Tips
You can bake the fritters ahead of time and store them in the refrigerator or freezer. Glaze them closer to serving.
If serving for brunch, bake them earlier and warm them before adding glaze. This keeps the tops pretty.
For freezer prep, keep the fritters unglazed. Thaw and reheat when ready.
The glaze takes only a few minutes to make. Fresh glaze is worth the small extra step.
Helpful Notes for Best Results
Use tart apples like Granny Smith if you want better balance. They hold their shape and keep the fritters from tasting too sweet.
Honeycrisp apples are also a great choice. They bring juicy, sweet-tart flavor.
Do not overmix the batter. Stir only until the ingredients come together.
Measure flour carefully. Too much flour can make the fritters dense.
Peeling apples is recommended for a smoother texture. Leaving the peels on creates a more rustic fritter.
Adjust the glaze with milk as needed. Add liquid gradually so the glaze does not become too thin.
Variations
Dairy-Free Baked Apple Fritters
Use plant-based milk instead of whole milk. Use vegan butter instead of unsalted butter.
The texture may be slightly different, but the fritters should still be soft and flavorful. Keep the same amounts.
Use the same glaze method with plant-based milk if desired. Add the liquid gradually.
Gluten-Free Baked Apple Fritters
Use a 1:1 gluten-free flour blend in place of all-purpose flour. Choose a blend made for baking.
The fritters may be slightly more delicate. Let them cool briefly before moving them.
Bake as directed and use the toothpick test. The centers should be fully set.
Nutty Apple Fritters
Stir in chopped walnuts or pecans for extra crunch. The nuts add texture and a warm flavor.
Use a moderate amount so the apples remain the main feature. They should support the fritters, not take over.
This variation is especially good for brunch. The nuts make the fritters feel heartier.
Allspice Apple Fritters
Add a pinch of allspice to the dry ingredients. This creates a deeper spice flavor.
Allspice pairs well with apples and cinnamon. It makes the fritters taste warmer.
Use only a pinch. Too much can overpower the apple flavor.
Cardamom Apple Fritters
Add a pinch of cardamom for a fragrant twist. It gives the fritters a slightly floral warmth.
Cardamom is strong, so use it lightly. A small amount is enough.
This variation feels a little more special. It works beautifully with the vanilla glaze.
Honeycrisp Apple Fritters
Use Honeycrisp apples for a sweeter, juicy fritter. They hold up well during baking.
Honeycrisp gives a bright apple flavor. It works nicely with cinnamon and brown sugar.
Chop the apples evenly so they bake at the same rate. The texture should stay tender.
Granny Smith Apple Fritters
Use Granny Smith apples for a more tart fritter. Their sharp flavor balances the glaze.
This is a great choice if you do not want the fritters to taste overly sweet. The apple flavor stays clear.
Granny Smith also holds its shape well. That makes it a dependable baking apple.
Rustic Peel-On Fritters
Leave the peels on if you prefer a more rustic texture. This changes the bite slightly.
The fritters will have more visible apple pieces. Some people enjoy that homemade look.
For the smoothest texture, peel the apples. Both choices can work.
Troubleshooting
Why Are My Fritters Dense?
Dense fritters are often caused by overmixing or too much flour. Stir only until the batter is just combined.
Measure flour with the spoon-and-level method. Packing flour into the cup can make the batter heavy.
Baking powder also needs to be fresh. Old baking powder may not lift the fritters well.
Why Are My Fritters Too Wet Inside?
They may need a little more baking time. Use the toothpick test to check the center.
The toothpick should come out clean. Wet batter means the fritters need more time.
Large apple pieces can also add too much moisture. Chop apples into small, even pieces.
Why Did My Fritters Spread Too Much?
The batter may have been too loose or overmixed. Keep the batter thick and scoopable.
Do not add extra milk beyond the recipe. The glaze can be adjusted separately, but the batter should stay thick.
Use parchment paper so the fritters bake evenly and release cleanly. Proper spacing also helps.
Why Is My Glaze Too Thick?
Add a little more milk, a small amount at a time. Whisk until smooth.
The recipe uses 2 to 3 tablespoons milk for this reason. Start with 2 tablespoons and adjust.
A pourable glaze should drizzle easily from a spoon. It should not be stiff.
Why Is My Glaze Too Thin?
Too much milk may have been added. Add more powdered sugar to thicken it.
Whisk until smooth before adding more. Powdered sugar absorbs liquid gradually.
For best control, add milk slowly next time. A little liquid changes glaze quickly.
Why Did My Apples Turn Mushy?
The apple pieces may have been too small, or the apple variety may have been too soft. Use Granny Smith or Honeycrisp.
Cut apples into small but sturdy pieces. They should be tender after baking, not dissolved.
Peeling gives a smoother texture. Leaving the peel can help apple pieces feel more rustic.
Frequently Asked Questions
Can I Freeze Baked Apple Fritters?
Yes, freeze them unglazed in an airtight container for up to 2 months. Reheat and glaze before serving.
This keeps the glaze fresh and smooth. It also gives the best texture after thawing.
What Kind of Apples Work Best?
Granny Smith and Honeycrisp apples are great choices. They hold up during baking and add sweet-tart flavor.
Granny Smith brings tartness, while Honeycrisp brings juicy sweetness. Both work well with cinnamon.
Can I Make Them Ahead of Time?
Yes, bake and store them in the refrigerator or freezer. Reheat and glaze when ready to serve.
For the freshest finish, keep them unglazed until serving. The glaze only takes a few minutes to make.
Do I Have to Peel the Apples?
Peeling is recommended for a smoother texture. The fritters will feel softer and more even.
You can leave the peels on if you prefer a more rustic fritter. The texture will be slightly different.
Why Are My Fritters Dense?
The batter may have been overmixed, or too much flour may have been used. Mix gently and measure carefully.
Stir only until the ingredients come together. A few small lumps are fine.
Can I Make These Dairy-Free?
Yes, use plant-based milk and vegan butter. The recipe will still work with those swaps.
The flavor and texture may vary slightly. Keep the same measurements and bake as directed.
Can I Make These Gluten-Free?
Yes, use a 1:1 gluten-free flour blend. Choose one designed for baking.
The fritters may be a little more delicate. Let them cool slightly before glazing or moving.
Can I Add Nuts?
Yes, chopped walnuts or pecans can be stirred into the batter. They add crunch and flavor.
Keep the amount reasonable so the fritters stay apple-forward. The apples should still be the main feature.
Why These Fritters Are Perfect for Fall
Baked Apple Fritters are perfect for fall because they bring together apples, cinnamon, nutmeg, brown sugar, and vanilla. Those flavors feel warm, familiar, and seasonal.
They are also easier than fried fritters. You get a cozy apple treat without deep-frying.
They work for breakfast, brunch, dessert, or a snack. That makes them useful for both quiet mornings and shared gatherings.
Because they freeze well unglazed, they can be made ahead. A warm glazed fritter can be ready later with very little work.
The recipe also feels welcoming. It is simple enough for everyday baking but special enough to share.
Why This Recipe Works So Well
This recipe works because the batter balances structure, lift, moisture, and apple flavor. Flour gives the fritters body, while baking powder helps them rise.
Milk, eggs, melted butter, and vanilla create a soft, flavorful batter. Sugar and brown sugar add sweetness.
Cinnamon and nutmeg bring warmth. Salt keeps the sweetness balanced.
The chopped apples add tender texture and fresh flavor. Folding them in gently keeps the batter light.
Baking at 375°F (190°C) gives the fritters enough heat to turn golden while staying soft inside. The vanilla glaze finishes them with sweetness and shine.
Final Thoughts
Baked Apple Fritters are soft, spiced, apple-filled treats made without the mess of frying. With flour, sugar, baking powder, salt, cinnamon, nutmeg, milk, eggs, vanilla, melted butter, apples, brown sugar, powdered sugar, and glaze, they bring all the cozy flavor of fall into a simple baked recipe.
The method is easy to follow. Whisk the dry ingredients, whisk the wet ingredients, combine gently, fold in apples and brown sugar, scoop onto a parchment-lined baking sheet, and bake at 375°F (190°C) for 15 to 18 minutes.
While the fritters bake, whisk the powdered sugar, milk, and vanilla into a smooth glaze. Let the fritters cool slightly, drizzle the glaze over the top, and enjoy them warm.
Serve them with coffee, tea, or vanilla ice cream, store leftovers in the refrigerator for up to 3 days, or freeze unglazed fritters for up to 2 months. Whether you make them for breakfast, brunch, dessert, or a quiet afternoon treat, these baked apple fritters bring tender apples, cinnamon warmth, sweet glaze, and homemade comfort to every bite.
Baked Apple Fritters

These baked apple fritters are soft, lightly sweet, and filled with warm cinnamon-spiced apple flavor. Chopped Granny Smith or Honeycrisp apples give each bite a cozy sweet-tart balance, while nutmeg, brown sugar, and vanilla make the fritters taste comforting and bakery-style. Because they are baked instead of fried, these fritters are a lighter and easier option for fall mornings, weekend brunch, or anytime you want a warm apple treat without the extra mess.
Recipe Details
- Prep Time: 15 minutes
- Cook Time: 18 minutes
- Total Time: 33 minutes
- Servings: 8
- Calories: 280 kcal
Ingredients
For the Glaze
- 1 cup powdered sugar
- 2 -3 tablespoons milk
- ½ teaspoon vanilla extract
For the Fritters
- 2 cups peeled and chopped apples Granny Smith or Honeycrisp
- ¼ cup light brown sugar packed
- ½ cup whole milk
- 2 large eggs
- 1 teaspoon vanilla extract
- 3 tablespoons unsalted butter melted
- 2 cups all-purpose flour
- ¼ cup granulated sugar
- 2 teaspoons baking powder
- ½ teaspoon salt
- 1 teaspoon ground cinnamon
- ¼ teaspoon ground nutmeg
Instructions
Step 1: Prepare the Oven and Baking Sheet
Preheat the oven to 375°F (190°C). Line a baking sheet with parchment paper.
Step 2: Mix the Dry Ingredients
In a large bowl, whisk together the all-purpose flour, granulated sugar, baking powder, salt, ground cinnamon, and ground nutmeg until evenly combined.
Step 3: Whisk the Wet Ingredients
In another bowl, whisk the whole milk, eggs, vanilla extract, and melted unsalted butter until smooth.
Step 4: Make the Batter
Pour the wet ingredients into the dry ingredients.
Stir just until combined, being careful not to overmix.
Step 5: Add the Apples and Brown Sugar
Gently fold in the peeled and chopped apples and packed light brown sugar until they are evenly distributed through the batter.
Step 6: Portion the Fritters
Drop spoonfuls of batter onto the prepared baking sheet, spacing them 2 inches apart.
Step 7: Bake Until Golden
Bake for 15-18 minutes, or until the fritters are golden and a toothpick inserted into the center comes out clean.
Step 8: Make the Glaze
In a bowl, whisk the powdered sugar, milk, and vanilla extract until smooth.
Step 9: Glaze and Serve
Drizzle the glaze over the slightly cooled fritters.
Serve warm.
Notes
Tart apples work well for a balanced sweet-tart flavor.
Avoid overmixing the batter so the fritters stay light and fluffy.
For extra crunch, chopped pecans or walnuts may be mixed into the batter.
Serving Suggestions
- Serve warm with hot coffee or tea.
- Pair with apple cider for a cozy fall treat.
- Add to a brunch spread with eggs and fresh fruit.
- Serve with a light dusting of powdered sugar.
- Enjoy as an afternoon snack with a glass of milk.
Storage
How to Store
Let the fritters cool completely, then store them in an airtight container.
How to Reheat
Warm the fritters gently before serving so they soften and taste freshly baked again.
How to Freeze
Place cooled fritters in a freezer-safe airtight container. Thaw before reheating and glazing or serving.
Best Texture Tip
Drizzle the glaze over the fritters while they are slightly cooled but still a little warm. This helps the glaze settle nicely without making the fritters too soft.

Fernando is the creator and writer behind the food blog Eating with your Hands. Living and working in cities like Paris, Barcelona, and Berlin, and being married to a Canadian foodie, has given Fernando a passion and interest in food and inspired him to run EWYH.