
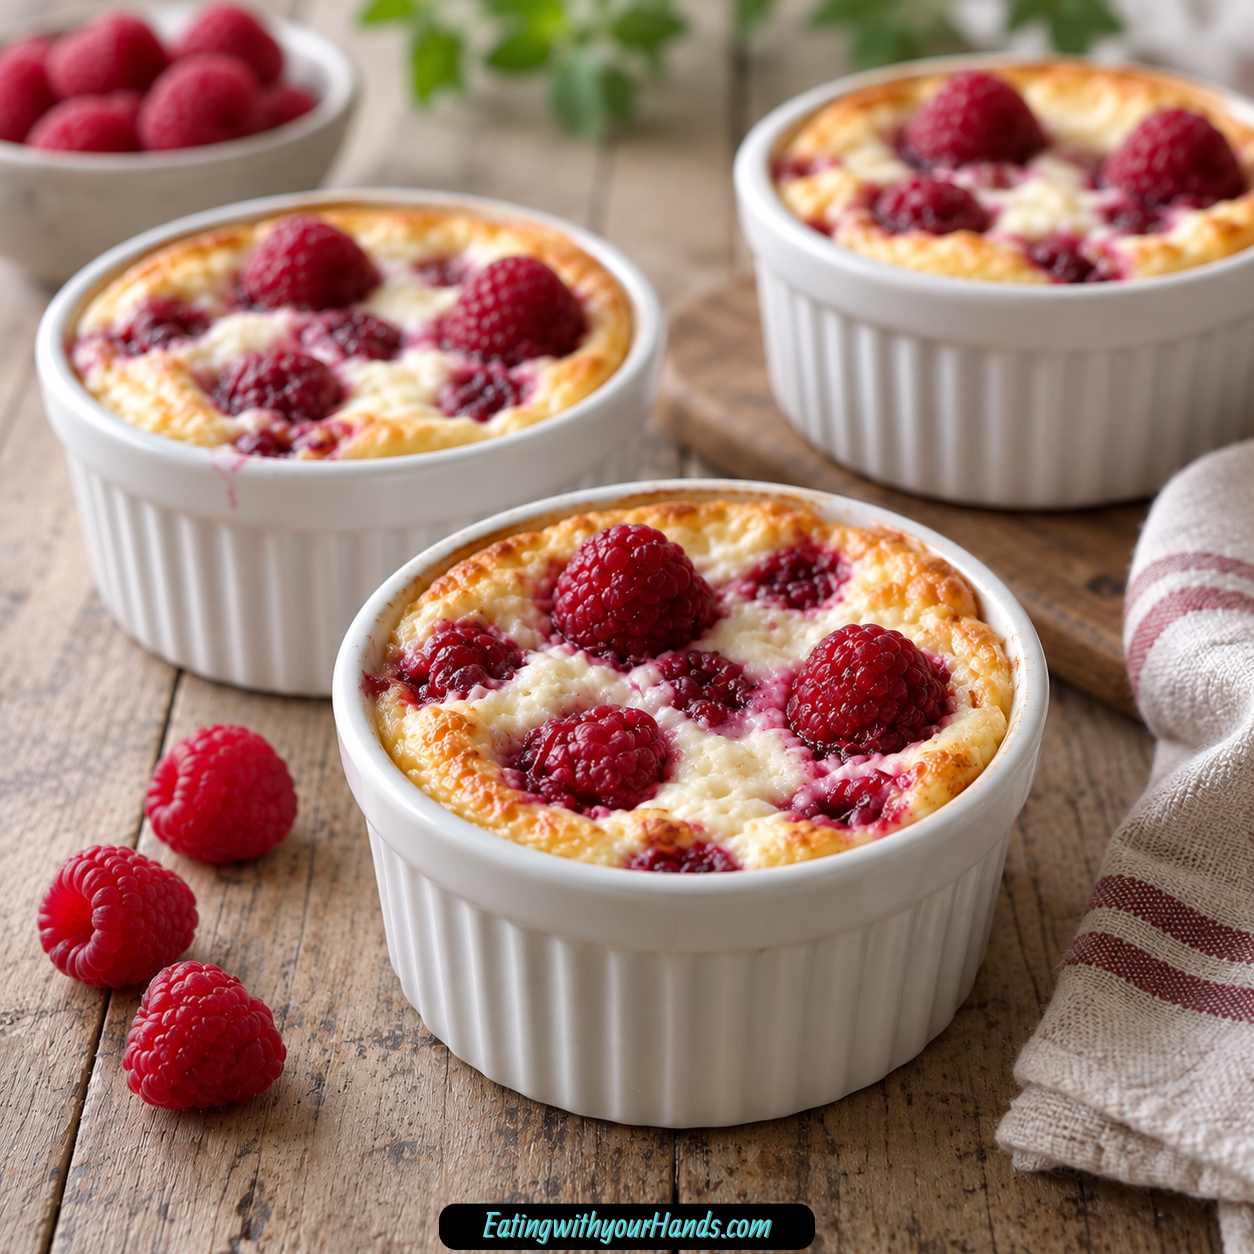
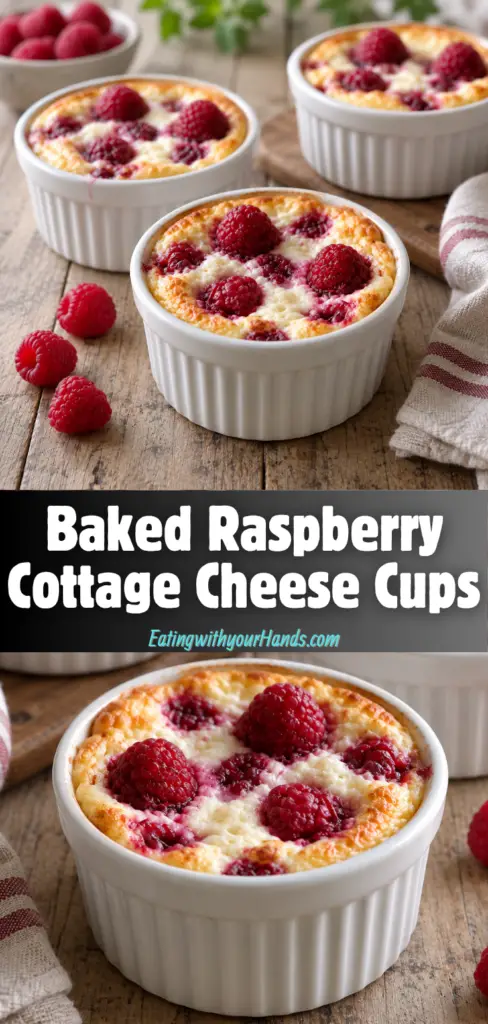
Baked Raspberry Cottage Cheese Cups are the kind of quiet little recipe that feels comforting, simple, and surprisingly special. They are creamy, lightly sweet, protein-packed, and dotted with raspberries that turn soft and tangy as they bake.
This is the kind of breakfast that feels gentle in the best way. It does not ask for a long list of ingredients or a complicated morning routine, but it still gives you something warm, nourishing, and satisfying.
The batter comes together in a blender, which makes the texture smooth and custard-like. Cottage cheese, eggs, maple syrup or honey, vanilla, oat flour or almond flour, and a pinch of salt blend into a creamy base that sets beautifully in the oven.
Then the raspberries are pressed into the top of each ramekin. As the cups bake, the fruit softens into bright little bursts that balance the mild sweetness and creamy center.
These cups are lovely warm, especially when you want something cozy from the oven. They are also wonderful chilled, when the texture becomes more cheesecake-like.
That flexibility makes them perfect for busy mornings, brunch, meal prep, or a wholesome dessert. You can bake them once and enjoy them from the refrigerator for several days.
They are lightly sweet rather than heavy. Maple syrup or honey adds just enough sweetness, while the raspberries bring freshness and tang.
Baked Raspberry Cottage Cheese Cups are high in protein thanks to cottage cheese and eggs, and they can be made gluten-free with almond flour. They are simple, soft, bright, and comforting in a way that makes them easy to return to again and again.
Table of Contents
- Why You’ll Love These Baked Raspberry Cottage Cheese Cups
- Recipe Details
- Ingredients
- For the Cottage Cheese Cups
- Ingredient Notes
- Optional Swaps, Variations, Add-Ins, and Serving Ideas
- Full-Fat Cottage Cheese Cups
- 2% Cottage Cheese Cups
- Maple Raspberry Cottage Cheese Cups
- Honey Raspberry Cottage Cheese Cups
- Extra Sweet Raspberry Cups
- Oat Flour Cottage Cheese Cups
- Almond Flour Cottage Cheese Cups
- Fresh Raspberry Cups
- Frozen Raspberry Cups
- Blueberry Cottage Cheese Cups
- Chopped Strawberry Cottage Cheese Cups
- Raspberry Jam Swirl Cups
- Dairy-Free Style Cups
- Greek Yogurt Serving
- Maple Drizzle Serving
- Powdered Sugar Finish
- Tea Pairing
- Coffee Pairing
- Why This Recipe Works
- Directions
- Step 1: Preheat the Oven
- Step 2: Prepare the Ramekins
- Step 3: Place the Ramekins on a Baking Tray
- Step 4: Add the Batter Ingredients to the Blender
- Step 5: Blend Until Smooth
- Step 6: Check the Texture
- Step 7: Fill the Ramekins
- Step 8: Add the Raspberries
- Step 9: Bake the Cups
- Step 10: Check for Doneness
- Step 11: Cool Before Serving
- Step 12: Serve Warm
- Step 13: Chill for a Cheesecake-Like Texture
- Step 14: Store Leftovers
- Step 15: Reheat Gently
- Step 16: Avoid Freezing
- Serving Ideas
- Storage
- Freezing
- Make-Ahead
- Helpful Notes for Best Results
- Variations
- Maple Raspberry Cottage Cheese Cups
- Honey Raspberry Cottage Cheese Cups
- Almond Flour Raspberry Cups
- Oat Flour Raspberry Cups
- Fresh Raspberry Cottage Cheese Cups
- Frozen Raspberry Cottage Cheese Cups
- Blueberry Cottage Cheese Cups
- Chopped Strawberry Cottage Cheese Cups
- Raspberry Jam Swirl Cups
- Dairy-Free Style Cottage Cheese Cups
- Muffin Tin Cottage Cheese Cups
- Troubleshooting
- Frequently Asked Questions
- Why This Recipe Works So Well
- Final Thoughts
- Baked Raspberry Cottage Cheese Cups
Why You’ll Love These Baked Raspberry Cottage Cheese Cups
These cups are high in protein and satisfying. Cottage cheese and eggs give them a nourishing base that works well for breakfast.
They are naturally sweetened with maple syrup or honey. The sweetness is gentle and can be adjusted slightly to taste.
They are quick and easy to make. The batter comes together in a blender with just a few ingredients.
They are perfect for meal prep. Make them once, store them in the refrigerator, and enjoy them during the week.
They are gluten-free adaptable with almond flour. Oat flour gives a mild flavor, while almond flour makes them a gluten-free option.
They are delicious warm or chilled. Warm cups feel soft and comforting, while chilled cups have a cheesecake-like texture.
Recipe Details
Baked Raspberry Cottage Cheese Cups bake at 350°F (175°C). The baking time is 25 to 28 minutes.
The recipe uses 4 ramekins. Each ramekin should be lightly greased with cooking spray or oil.
The ramekins are placed on a baking tray before baking. This makes them easier to move in and out of the oven.
The batter is made in a blender. Cottage cheese, eggs, maple syrup or honey, vanilla extract, oat flour or almond flour, and salt are blended until completely smooth and creamy.
The batter may look thin after blending. That is okay because it will set as it bakes.
Each ramekin should be filled about ¾ full. This leaves room for slight rising in the oven.
Raspberries are gently pressed into the top of each ramekin. They should be spread out so every bite has a little fruit.
Fresh or frozen raspberries can be used. Frozen raspberries do not need to be thawed first, though they will be softer after baking.
The cups are ready when the tops are lightly golden and the centers are just set. A slight jiggle in the center is okay because the cups firm up as they cool.
After baking, the cups cool for 5 to 10 minutes before serving. They can be enjoyed warm or refrigerated for a chilled, cheesecake-like texture.
Ingredients
For the Cottage Cheese Cups
- 1 cup cottage cheese (full-fat or 2%) – full-fat gives the creamiest texture, but both work beautifully
- 2 eggs – helps the cups set and adds extra protein
- 2 tablespoon maple syrup or honey – adjust slightly to taste if you prefer sweeter
- 1 teaspoon vanilla extract – adds warmth and depth of flavor
- 2 tablespoon oat flour or almond flour – oat flour for mild flavor, almond flour for gluten-free option
- 1 pinch salt – just enough to balance the sweetness
- 0.75 cup raspberries (fresh or frozen) – fresh for brighter flavor, frozen for convenience
Ingredient Notes
Cottage cheese is the heart of these baked cups. It gives them protein, moisture, and a creamy base.
Full-fat cottage cheese gives the creamiest texture. 2% cottage cheese also works beautifully.
Eggs help the cups set as they bake. They also add extra protein.
Maple syrup or honey provides gentle sweetness. You can adjust slightly to taste if you prefer the cups sweeter.
Vanilla extract adds warmth and depth of flavor. It helps the simple batter taste more rounded.
Oat flour gives the cups a mild flavor. Almond flour can be used for a gluten-free option.
The pinch of salt is small but important. It balances the sweetness and makes the flavor feel complete.
Raspberries add bright, tangy fruit flavor. Fresh raspberries give a brighter flavor, while frozen raspberries offer convenience.
Frozen raspberries do not need to be thawed before baking. They will be softer after baking but still delicious.
Optional Swaps, Variations, Add-Ins, and Serving Ideas
Full-Fat Cottage Cheese Cups
Use full-fat cottage cheese for the creamiest texture. This version tastes especially smooth and comforting.
The full-fat option makes the cups feel richer. It works beautifully for breakfast, brunch, or dessert.
2% Cottage Cheese Cups
Use 2% cottage cheese if that is what you have. It still blends into a smooth batter and sets nicely.
This version is slightly lighter. The cups remain creamy and satisfying.
Maple Raspberry Cottage Cheese Cups
Use maple syrup as the sweetener. It gives the cups a gentle sweetness.
Maple syrup works well with vanilla and raspberries. It makes the cups feel breakfast-friendly.
Honey Raspberry Cottage Cheese Cups
Use honey instead of maple syrup. Honey gives a different kind of natural sweetness.
The amount can be adjusted slightly to taste. Add more only if you prefer sweeter cups.
Extra Sweet Raspberry Cups
Add an additional teaspoon of maple syrup or honey if you want extra sweetness. This is helpful if your raspberries are very tart.
Keep the adjustment small. The cups are meant to stay lightly sweet.
Oat Flour Cottage Cheese Cups
Use oat flour for a mild flavor. It blends easily into the batter.
This option keeps the cups soft and gentle. It is a good choice for everyday breakfast.
Almond Flour Cottage Cheese Cups
Use almond flour for a gluten-free option. It gives the cups a slightly different texture.
Almond flour works well with cottage cheese and eggs. It keeps the recipe adaptable.
Fresh Raspberry Cups
Use fresh raspberries for brighter flavor. They hold their shape nicely on top of the batter.
Fresh raspberries make the cups look pretty and colorful. Press them gently into the top before baking.
Frozen Raspberry Cups
Use frozen raspberries for convenience. There is no need to thaw them first.
The raspberries will be softer after baking. They still bring tangy fruit flavor.
Blueberry Cottage Cheese Cups
Try blueberries instead of raspberries. This creates a different fruit variation.
The method stays the same. Press the berries into the top of each ramekin before baking.
Chopped Strawberry Cottage Cheese Cups
Use chopped strawberries as a variation. They bring a sweeter fruit flavor.
Chop them small so they sit well in the cups. Spread them evenly over each ramekin.
Raspberry Jam Swirl Cups
Add a swirl of raspberry jam on top. This gives the cups a stronger raspberry flavor.
Swirl gently so the batter still sets properly. This variation feels more dessert-like.
Dairy-Free Style Cups
Substitute the cottage cheese with a thick dairy-free yogurt if needed. The texture may vary.
Because cottage cheese is a main ingredient, the cups may set differently. Use this option with that texture change in mind.
Greek Yogurt Serving
Serve the baked cups with a dollop of Greek yogurt. This makes them feel brunch-worthy and more filling.
The cool yogurt contrasts with the warm or chilled cups. It is a simple serving idea.
Maple Drizzle Serving
Serve warm cups with a drizzle of extra maple syrup. This adds sweetness and makes the top glossy.
Use just enough to finish the cup. It is especially nice for breakfast or brunch.
Powdered Sugar Finish
Dust the tops lightly with powdered sugar. This gives the cups a pretty presentation.
Powdered sugar works well when serving them as a wholesome dessert. Add it right before serving.
Tea Pairing
Serve these cups with tea. The light sweetness and raspberry flavor make a calm pairing.
This is lovely for an afternoon treat. Warm or chilled cups both work.
Coffee Pairing
Pair the cups with coffee. Coffee balances the creamy sweetness.
This makes the cups feel right for a quiet morning. It also works for brunch.
Why This Recipe Works
Baked Raspberry Cottage Cheese Cups work because the blender turns simple ingredients into a smooth, creamy batter. Cottage cheese becomes mild and custard-like once blended.
The eggs help the cups set. They give structure while adding protein.
Maple syrup or honey sweetens the batter naturally. The sweetness stays gentle rather than heavy.
Vanilla adds warmth. Salt balances the flavor.
Oat flour or almond flour helps the cups hold together. Oat flour gives mild flavor, while almond flour offers a gluten-free option.
Raspberries bring brightness. Their tangy flavor keeps the creamy cups from tasting too rich.
The cups bake until lightly golden and just set. The slight jiggle in the center is normal and settles as they cool.
They also work because they can be served two ways. Warm cups feel soft and comforting, while chilled cups feel more like a light cheesecake.
Directions
Step 1: Preheat the Oven
Preheat your oven to 350°F (175°C). Let the oven heat fully before baking the cups.
This temperature helps the cottage cheese batter bake gently. The cups should set without becoming dry.
Step 2: Prepare the Ramekins
Lightly grease 4 ramekins with cooking spray or oil. Make sure the inside surfaces are coated.
Greasing helps the baked cups release more easily if you want to spoon or lift them out. It also helps prevent sticking around the edges.
Step 3: Place the Ramekins on a Baking Tray
Set the greased ramekins on a baking tray. This makes it easier and safer to transfer them to and from the oven.
The tray also keeps the ramekins steady. It is a simple step that makes baking more organized.
Step 4: Add the Batter Ingredients to the Blender
Add 1 cup cottage cheese, 2 eggs, 2 tablespoon maple syrup or honey, 1 teaspoon vanilla extract, 2 tablespoon oat flour or almond flour, and 1 pinch salt to a blender. Add everything except the raspberries.
Full-fat cottage cheese gives the creamiest result, while 2% cottage cheese also works beautifully. Oat flour gives mild flavor, and almond flour can be used for a gluten-free option.
Step 5: Blend Until Smooth
Blend the mixture until completely smooth and creamy. The curds should disappear into the batter.
Do not worry if the batter looks thin. It will set as it bakes.
Step 6: Check the Texture
Pause and make sure the batter looks smooth. A fully blended batter gives the cups a custard-like finish.
Blending thoroughly is key. It helps the finished cups taste mild and creamy instead of textured like cottage cheese.
Step 7: Fill the Ramekins
Pour the blended batter evenly into the prepared ramekins. Fill each one about ¾ full.
This leaves room for slight rising as the cups bake. Try to divide the batter as evenly as possible.
Step 8: Add the Raspberries
Gently press 0.75 cup raspberries into the top of each ramekin, dividing them evenly. Spread them out so every bite gets a little burst of fruit.
Fresh raspberries give brighter flavor. Frozen raspberries can be used straight from the freezer and will soften more after baking.
Step 9: Bake the Cups
Transfer the baking tray with the ramekins to the oven. Bake for 25 to 28 minutes.
The tops should become lightly golden. The centers should be just set.
Step 10: Check for Doneness
Gently check the centers. A slight jiggle in the middle is okay.
The cups will firm up as they cool. Avoid overbaking if you want them creamy.
Step 11: Cool Before Serving
Let the cups cool for 5 to 10 minutes before serving. This gives the centers time to settle.
They can be enjoyed warm after this short cooling time. The texture will be soft and comforting.
Step 12: Serve Warm
Serve warm with a drizzle of extra maple syrup if desired. A dollop of Greek yogurt also makes a lovely topping.
A dusting of powdered sugar can make the cups look brunch-worthy. They are also delicious with tea or coffee.
Step 13: Chill for a Cheesecake-Like Texture
Refrigerate the cups if you prefer a chilled texture. Once cold, they become more cheesecake-like.
This makes them wonderful for meal prep. They taste great straight from the fridge the next day.
Step 14: Store Leftovers
Place the cooled cups in an airtight container in the refrigerator. Store for up to 4 days.
Because these cups contain cottage cheese and eggs, refrigeration is the right storage method. Keep them covered for freshness.
Step 15: Reheat Gently
To reheat, microwave gently for 15 to 20 seconds. This warms the cups without making them too hot.
They can also be enjoyed cold. Choose the texture you prefer.
Step 16: Avoid Freezing
These cups are not ideal for freezing. The texture can change once thawed.
For best results, store them in the refrigerator and enjoy within 4 days. This keeps the creamy texture at its best.
Serving Ideas
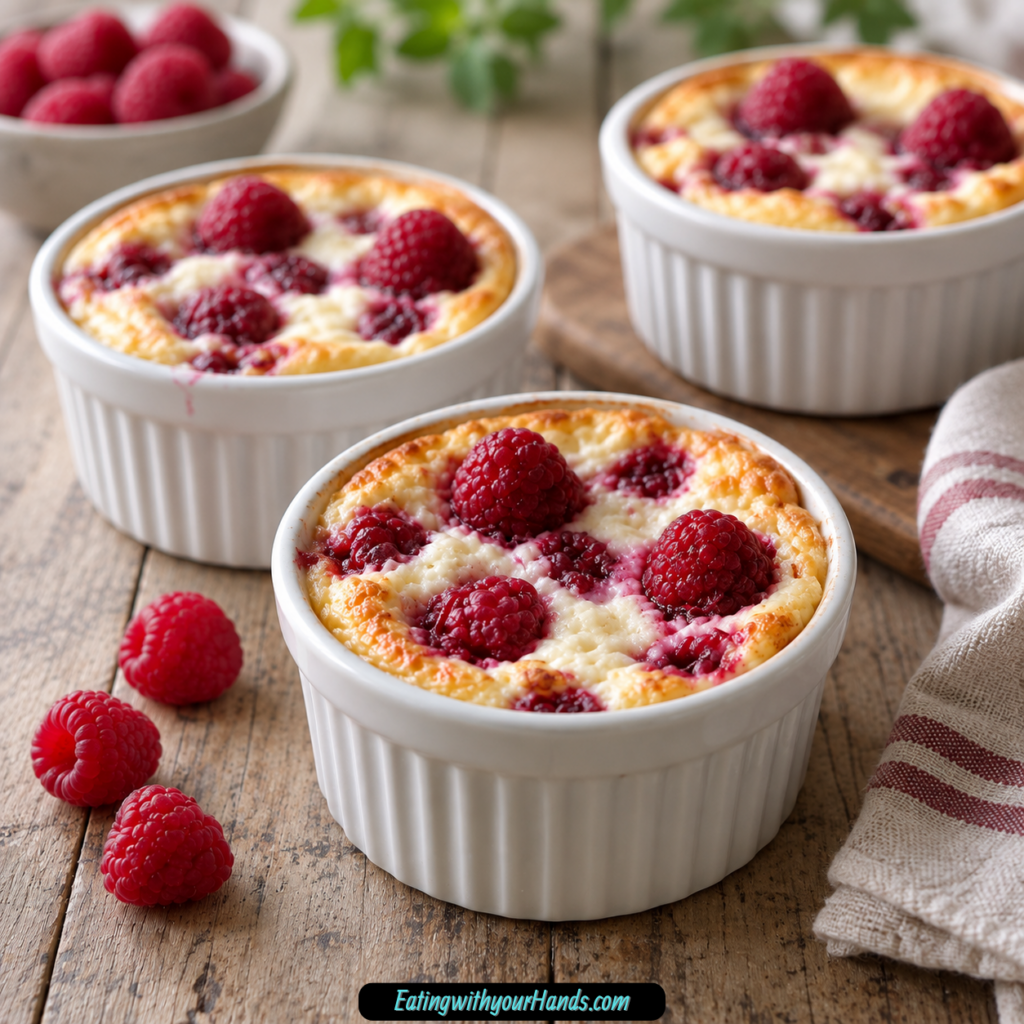
Baked Raspberry Cottage Cheese Cups are wonderfully versatile. They work for breakfast, brunch, a snack, or a wholesome dessert.
Serve them warm when you want something soft and comforting. The raspberries taste especially cozy when they are warm from the oven.
Add a drizzle of extra maple syrup for a sweeter brunch presentation. Honey can also fit the same gentle sweetness.
A dollop of Greek yogurt makes the cups more filling. It also adds a cool, creamy contrast.
A light dusting of powdered sugar makes them feel pretty enough for a brunch table. This is a simple way to dress them up.
These cups are lovely with tea. The raspberry flavor and creamy texture feel calm and gentle.
Coffee is another good pairing. It balances the light sweetness and makes the cups feel like a quiet morning treat.
Serve them chilled if you want a cheesecake-like texture. The cold version is especially nice as a light dessert.
Storage
Store Baked Raspberry Cottage Cheese Cups in an airtight container in the refrigerator. They will keep for up to 4 days.
Let the cups cool before storing. This helps protect the texture.
Because of the cottage cheese and eggs, the refrigerator is the best place for them. Keep them covered so they stay fresh.
You can enjoy them straight from the fridge. They also reheat gently if you prefer them warm.
To reheat, microwave for 15 to 20 seconds. Heat just enough to warm them lightly.
Freezing
These cups are not ideal for freezing. The texture can change once thawed.
For the best texture, store them in the refrigerator instead. Enjoy them within 4 days.
If you are making them for meal prep, the refrigerator is the better choice. They are easy to grab chilled or warm gently.
The chilled texture is one of the best parts. It becomes creamy and cheesecake-like without needing freezing.
Make-Ahead
Baked Raspberry Cottage Cheese Cups are excellent for meal prep. Bake them once and enjoy them through the week.
Store them in an airtight container in the refrigerator for up to 4 days. They are easy to serve warm or chilled.
If you like a breakfast that is ready to grab, chill the baked cups after they cool. The texture becomes more cheesecake-like.
You can also reheat a cup gently in the microwave for 15 to 20 seconds. This makes it feel freshly warmed without another baking session.
They are not ideal for freezing. Plan to refrigerate and enjoy them within the storage window.
Helpful Notes for Best Results
For extra sweetness, add an additional teaspoon of maple syrup or honey. This is helpful if you prefer a sweeter breakfast cup.
Blend thoroughly for the smoothest texture. This removes the cottage cheese curds and creates a custard-like finish.
Do not worry if the batter looks thin after blending. It will set as it bakes.
Fill the ramekins about ¾ full. This allows room for slight rising.
A slight jiggle in the center is okay when the cups come out of the oven. They firm up as they cool.
Fresh raspberries give brighter flavor. Frozen raspberries are convenient and do not need to be thawed.
These cups are not ideal for freezing because the texture can change after thawing. Refrigeration is best.
If using a muffin tin, grease it well and reduce the baking time slightly. Check for doneness around 20 to 22 minutes.
Variations
Maple Raspberry Cottage Cheese Cups
Use maple syrup as the sweetener. It gives the cups gentle sweetness.
This version feels warm and breakfast-friendly. Add a small extra teaspoon if you prefer sweeter cups.
Honey Raspberry Cottage Cheese Cups
Use honey instead of maple syrup. Honey gives the cups a different sweet note.
Adjust slightly to taste if desired. The cups should still stay lightly sweet.
Almond Flour Raspberry Cups
Use almond flour for a gluten-free option. It helps the cups set while keeping them adaptable.
The texture may be slightly different from oat flour. The flavor still pairs well with raspberries.
Oat Flour Raspberry Cups
Use oat flour for mild flavor. It creates a simple, gentle base.
This option works beautifully for everyday meal prep. Blend it with the rest of the batter until smooth.
Fresh Raspberry Cottage Cheese Cups
Use fresh raspberries for brighter flavor. Press them gently into the top of each ramekin.
Fresh berries give the cups a beautiful look. They are especially nice for brunch.
Frozen Raspberry Cottage Cheese Cups
Use frozen raspberries straight from the freezer. There is no need to thaw them first.
They will be softer after baking. The flavor is still tangy and delicious.
Blueberry Cottage Cheese Cups
Try blueberries instead of raspberries. This creates another fruit-forward breakfast cup.
Use the same method. Press the berries into the top before baking.
Chopped Strawberry Cottage Cheese Cups
Use chopped strawberries as a variation. This gives the cups a sweeter fruit flavor.
Chop the strawberries small so they fit well in the ramekins. Spread them evenly across the tops.
Raspberry Jam Swirl Cups
Add a swirl of raspberry jam on top. This gives the cups a stronger berry flavor and a pretty finish.
Swirl gently before baking. Do not mix it all the way through.
Dairy-Free Style Cottage Cheese Cups
Substitute cottage cheese with a thick dairy-free yogurt if needed. The texture may vary.
This changes the base of the recipe. Use it only if a dairy-free option is important to you.
Muffin Tin Cottage Cheese Cups
Bake the batter in a muffin tin instead of ramekins. Grease the muffin tin well.
Reduce the baking time slightly. Check for doneness around 20 to 22 minutes.
Troubleshooting
The Cups Taste Like Cottage Cheese
Blend the batter thoroughly until completely smooth. Blending removes the curds and creates a mild flavor.
The finished cups should taste more like a smooth cheesecake-style bake. Vanilla and raspberries help round out the flavor.
The Batter Looks Too Thin
The batter may look thin after blending. This is normal.
It will set as it bakes. The eggs and flour help give the cups structure.
The Centers Are Still Jiggly
A slight jiggle in the center is okay. The cups firm up as they cool.
If the centers look too loose, bake a little longer within the 25 to 28 minute window. The tops should be lightly golden and just set.
The Cups Are Too Dry
They may have baked too long. Bake only until the tops are lightly golden and the centers are just set.
A slight jiggle is better than an overbaked texture. The cups continue to firm as they cool.
The Cups Stuck to the Ramekins
Grease the ramekins lightly with cooking spray or oil before adding the batter. This helps prevent sticking.
Let the cups cool for 5 to 10 minutes before serving. The short rest helps them settle.
The Raspberries Sank
Press the raspberries gently into the top rather than stirring them fully through the batter. Spread them out evenly.
Even if they sink slightly, the cups will still taste delicious. Every bite should still get fruit.
The Cups Are Not Sweet Enough
Add an additional teaspoon of maple syrup or honey next time. The recipe is lightly sweet by design.
Powdered sugar or an extra drizzle of maple syrup can also be added when serving. This makes the cups sweeter without changing the baked base.
The Cups Are Too Tart
Frozen or fresh raspberries can be tangy. Add a small extra teaspoon of maple syrup or honey if you prefer more sweetness.
Serving with Greek yogurt and a drizzle of syrup can also balance the tartness. This makes the cups more brunch-like.
The Texture Changed After Storage
These cups are soft and creamy, and the texture becomes more cheesecake-like when chilled. That is normal.
Reheat gently for 15 to 20 seconds if you want them warm again. Do not freeze if you want the best texture.
The Muffin Tin Version Overbaked
Muffin tin portions bake faster. Check for doneness around 20 to 22 minutes.
The centers should be just set. Reduce baking slightly compared with ramekins.
Frequently Asked Questions
Can I use frozen raspberries?
Yes, frozen raspberries can be used. There is no need to thaw them first.
Frozen raspberries will be softer after baking but still delicious. Press them into the tops just like fresh berries.
Do these taste like cottage cheese?
Not at all. Blending removes the curds and leaves a smooth, mild flavor similar to cheesecake.
Blend the batter until completely smooth and creamy. This creates the best texture.
Can I make these ahead of time?
Yes, these cups are perfect for meal prep. They taste great chilled the next day.
Store them in an airtight container in the refrigerator for up to 4 days. Enjoy chilled or reheat gently.
Can I bake this in a muffin tin instead?
Yes, you can bake the batter in a muffin tin. Grease the tin well first.
Reduce the baking time slightly and check for doneness around 20 to 22 minutes. The centers should be just set.
Are these good for breakfast?
Yes, these cups are high in protein, lightly sweet, and very filling. Cottage cheese and eggs give them a satisfying base.
They are also easy to make ahead. Enjoy warm or chilled depending on your mood.
Can I make them sweeter?
Yes, add an additional teaspoon of maple syrup or honey. This gives a little extra sweetness.
You can also serve with a drizzle of maple syrup or a dusting of powdered sugar. Both make the cups feel more like a treat.
Can I make them dairy-free?
You can substitute cottage cheese with a thick dairy-free yogurt. The texture may vary.
Because cottage cheese helps create the creamy base, the result may be different. Choose this option if dairy-free is needed.
Can I freeze these cups?
These cups are not ideal for freezing. The texture can change once thawed.
For best results, store them in the refrigerator for up to 4 days. Enjoy them chilled or reheat gently.
Why This Recipe Works So Well
Baked Raspberry Cottage Cheese Cups work so well because they turn a handful of simple ingredients into something creamy, warm, and satisfying. Cottage cheese, eggs, sweetener, flour, vanilla, salt, and raspberries all have a clear role.
The cottage cheese gives the cups moisture, protein, and creaminess. When blended, it becomes smooth and mild.
The eggs help the cups set. They also add more protein, making the cups filling enough for breakfast.
Maple syrup or honey sweetens the batter gently. The recipe stays lightly sweet instead of heavy.
Vanilla adds warmth and depth. Salt balances the sweetness and makes the flavor clearer.
Oat flour or almond flour gives the batter enough structure. Oat flour keeps the flavor mild, while almond flour makes the cups gluten-free adaptable.
Raspberries add tangy fruit brightness. They keep the creamy base lively and fresh.
Baking in ramekins creates individual portions. Each cup bakes into its own soft, creamy serving.
The slight jiggle in the center is important. It means the cups are set but still creamy, and they will firm up as they cool.
The recipe also works because it is flexible. Fresh or frozen raspberries, blueberries, chopped strawberries, raspberry jam, maple syrup, honey, almond flour, oat flour, Greek yogurt, powdered sugar, and a muffin tin version all fit the idea.
Most of all, these cups work because they feel both nourishing and comforting. They are simple enough for a weekday and pretty enough for brunch.
Final Thoughts
Baked Raspberry Cottage Cheese Cups are creamy, protein-rich individual cups made with cottage cheese, eggs, maple syrup or honey, vanilla extract, oat flour or almond flour, salt, and raspberries. The batter is blended until smooth, poured into greased ramekins, topped with raspberries, baked at 350°F for 25 to 28 minutes, and cooled for 5 to 10 minutes before serving.
Enjoy them warm for a soft, cozy breakfast or chilled for a cheesecake-like texture. With their simple blender method, light sweetness, raspberry brightness, refrigerator meal-prep storage, gluten-free almond flour option, and flexible serving ideas, these little cups are a comforting recipe worth keeping in your breakfast and brunch routine.
Baked Raspberry Cottage Cheese Cups
Creamy, lightly sweet, and dotted with raspberries, these Baked Raspberry Cottage Cheese Cups make a simple protein-rich option for breakfast, brunch, or a healthier dessert. The batter blends until smooth, bakes gently in ramekins, and can be enjoyed warm or chilled depending on the moment.
Recipe Details
- Prep Time: 10 minutes
- Cook Time: 28 minutes
- Total Time: 38 minutes
- Servings: 4
- Calories: 150 kcal
Ingredients
For the Raspberry Cottage Cheese Cups
- 0.75 cup raspberries fresh or frozen
- 1 pinch salt
- 2 tablespoon oat flour or almond flour
- 1 teaspoon vanilla extract
- 2 tablespoon maple syrup or honey
- 2 eggs
- 1 cup cottage cheese full-fat or 2%
Instructions
Step 1: Warm the Oven and Prepare the Ramekins
Set the oven to 350°F (175°C). Lightly grease 4 ramekins, then arrange them on a baking tray so they are ready to fill.
Step 2: Blend the Cottage Cheese Batter
Add the cottage cheese, eggs, maple syrup or honey, vanilla extract, flour, and salt to a blender. Blend until the mixture becomes smooth and even.
Step 3: Fill the Cups
Divide the batter evenly among the prepared ramekins. Try to keep the portions balanced so each cup bakes at the same pace.
Step 4: Add the Raspberries
Gently press the raspberries into the top of each ramekin. Keep the berries near the surface so they bake into the creamy tops.
Step 5: Bake Until Just Set
Bake for 25-28 minutes, until the cups are lightly golden and just set in the center. The centers should no longer look loose, but they should still stay soft and creamy.
Step 6: Cool and Serve
Let the cups cool for 5-10 minutes before serving. Enjoy warm or chilled.
Notes
- Fresh raspberries give the cups a brighter, tangier flavor, while frozen raspberries work well for convenience.
- Almond flour can be used instead of oat flour for a gluten-free option with a slightly nutty taste.
- These cups store well in the refrigerator for up to 4 days.
- Enjoy them warm or chilled; freezing is not recommended because the texture can change.
Serving Suggestions
Serve these Baked Raspberry Cottage Cheese Cups after they have cooled for 5-10 minutes. They can be eaten warm when you want something soft and cozy, or chilled when you prefer a cooler, creamier texture.
They fit naturally into breakfast, brunch, or a healthy dessert moment. The raspberries bring a tangy fruit contrast to the lightly sweet cottage cheese base, while the vanilla, maple syrup or honey, and flour help create a smooth baked cup.
Storage
How to Store
Store the cups in the refrigerator for up to 4 days. Keep them covered so they stay fresh and ready for breakfast, brunch, or dessert.
Freezing Tip
Freezing is not recommended due to texture changes. For the best result, keep the baked cups refrigerated and enjoy them warm or chilled.
Raspberry Tip
Use fresh raspberries for a brighter, tangy flavor or frozen raspberries for convenience. Press them gently into the top of each ramekin before baking.
Flour Tip
Use oat flour or almond flour as listed. Almond flour can be substituted for a gluten-free option with a slightly nutty taste.
Serving Temperature Tip
These cups are best enjoyed warm or chilled. Let them cool for 5-10 minutes after baking before serving.

Fernando is the creator and writer behind the food blog Eating with your Hands. Living and working in cities like Paris, Barcelona, and Berlin, and being married to a Canadian foodie, has given Fernando a passion and interest in food and inspired him to run EWYH.