
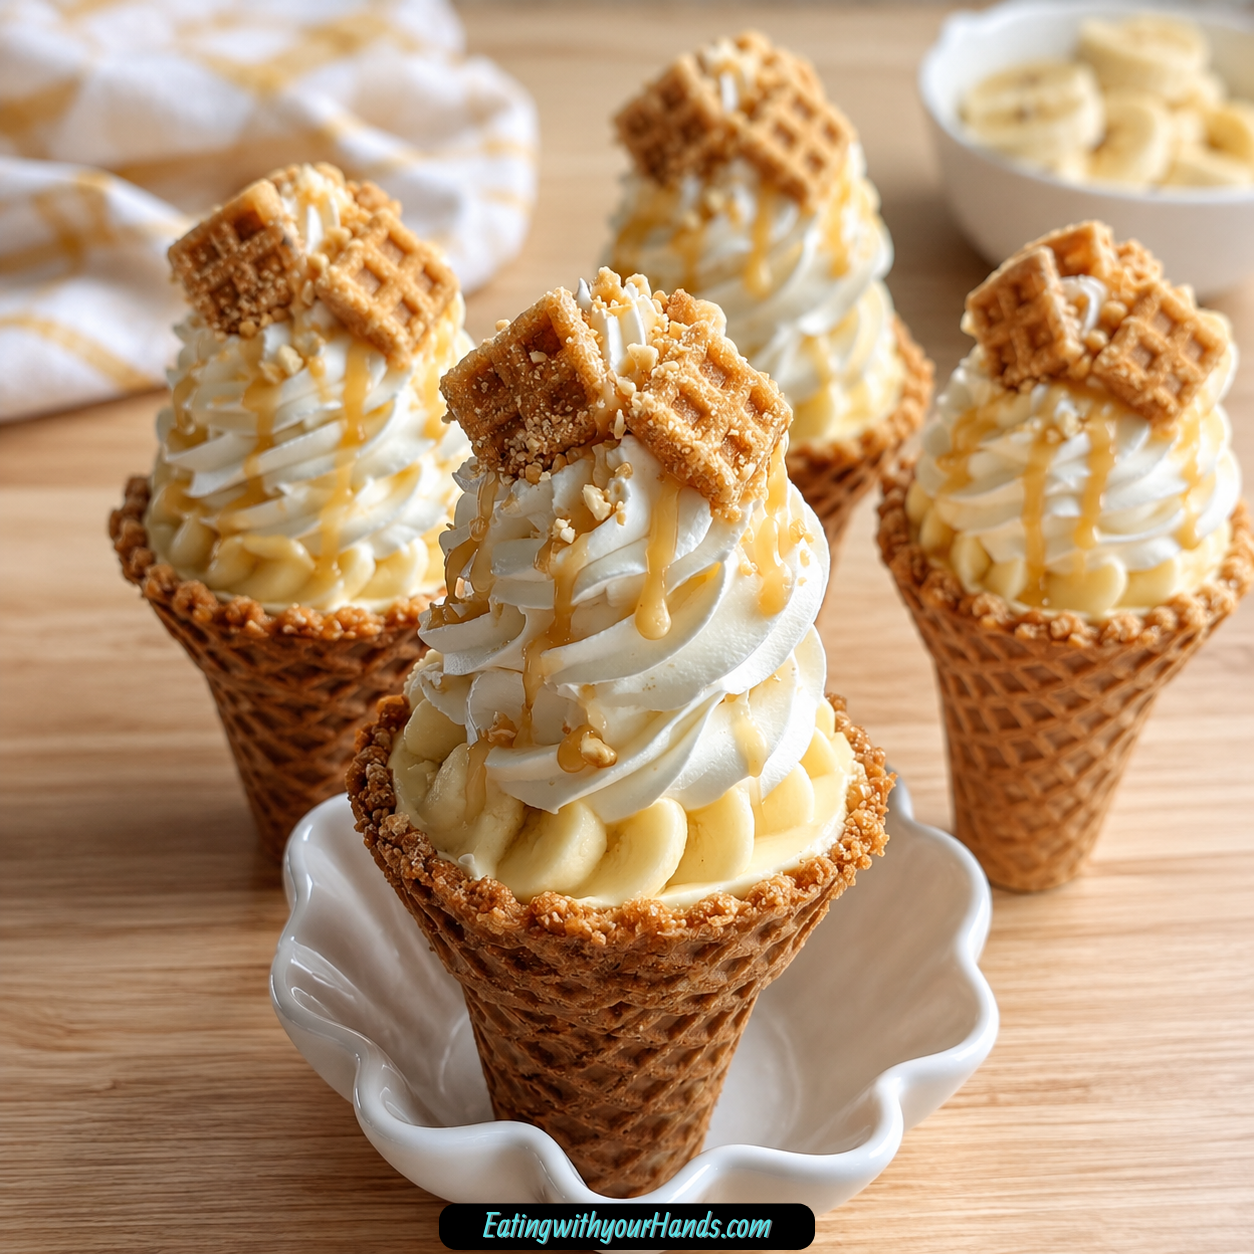
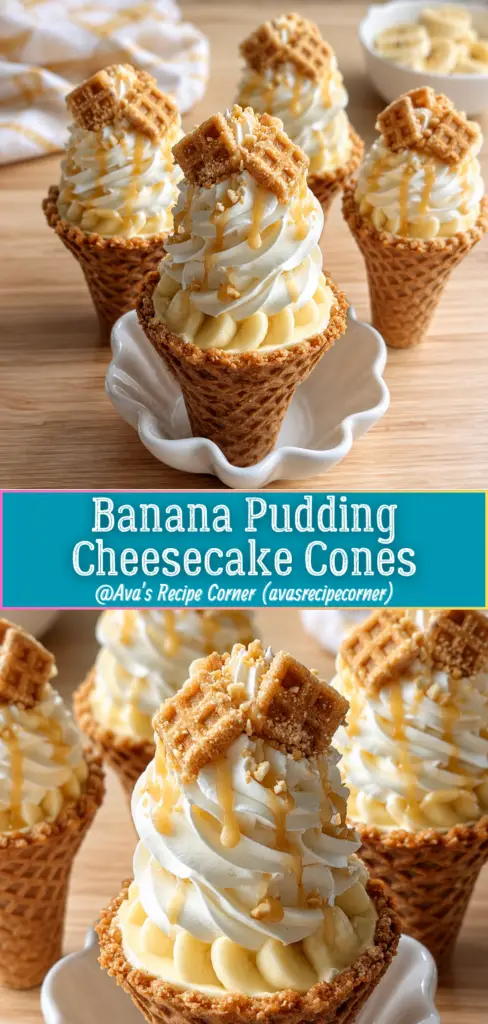
Banana Pudding Cheesecake Cones are the kind of no-bake dessert that feels playful, creamy, nostalgic, and a little bit magical. They combine fluffy cheesecake filling, instant banana pudding, sliced bananas, crushed vanilla wafers, whipped cream, optional caramel drizzle, and crunchy waffle cones into a sweet handheld treat.
I love desserts that feel like they belong at a picnic table, a summer gathering, or a family night when everyone wants something fun. These cones take the familiar comfort of banana pudding and turn it into something you can hold in your hand.
The filling is soft and creamy, with softened cream cheese, powdered sugar, vanilla, and whipped heavy cream folded together until light. The banana pudding layer is quick and easy, made with instant banana pudding mix and cold milk until thick and smooth.
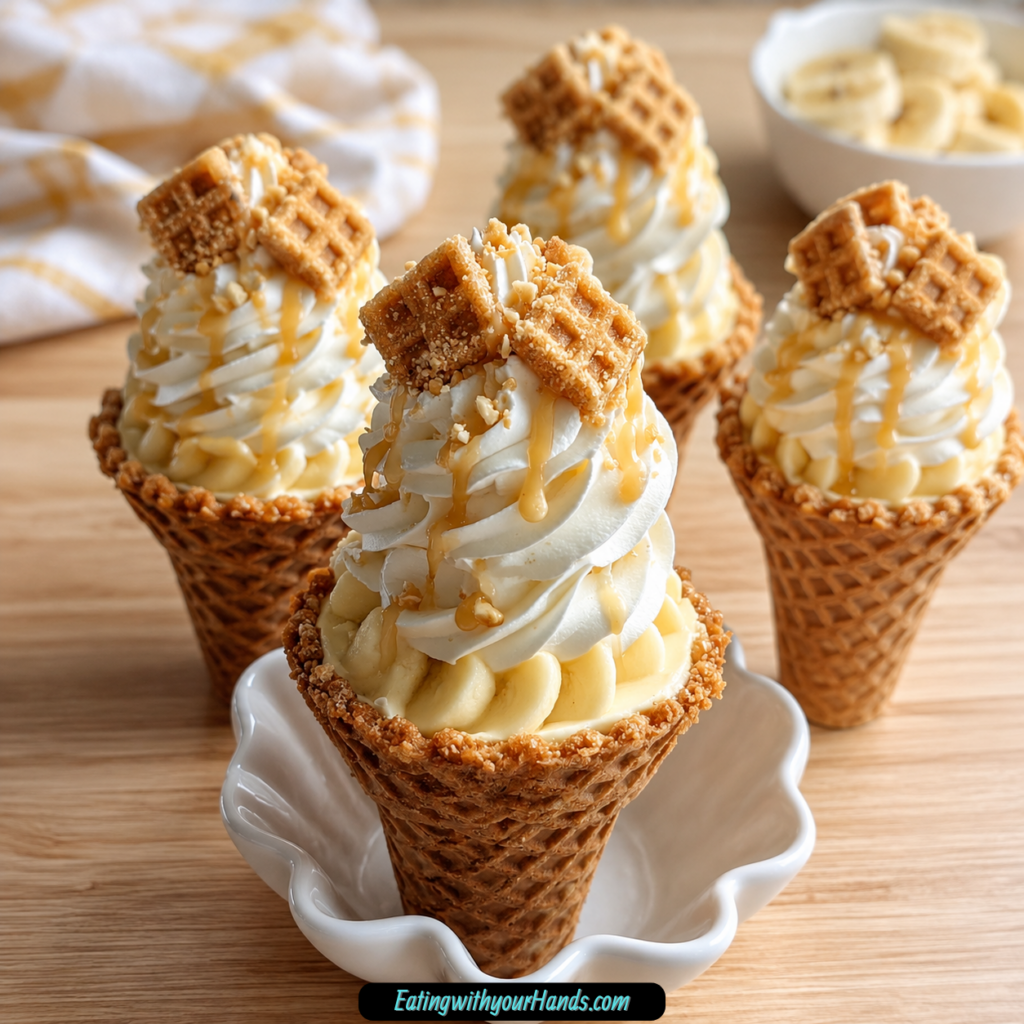
Then everything gets layered into waffle cones. The cheesecake filling goes in first, followed by banana pudding, banana slices, crushed vanilla wafers, whipped cream, and a drizzle of caramel if you want that extra sweet finish.
These cones are perfect for warm-weather celebrations because there is no oven involved. They are also wonderful for kids, parties, casual desserts, cozy nights, or any moment when banana pudding sounds good but you want it in a new, cheerful form.
Table of Contents
- Why You’ll Love These Banana Pudding Cheesecake Cones
- Recipe Details
- Ingredients
- Optional Swaps, Variations, Add-Ins, and Serving Ideas
- Why These Banana Pudding Cheesecake Cones Work
- Directions
- Step 1: Skip the Oven
- Step 2: Gather the Ingredients
- Step 3: Prepare the Mixing Bowl
- Step 4: Beat the Cream Cheese
- Step 5: Add the Powdered Sugar
- Step 6: Add the Vanilla Extract
- Step 7: Fold in the Whipped Heavy Cream
- Step 8: Check the Cheesecake Filling
- Step 9: Prepare a Separate Bowl
- Step 10: Add the Banana Pudding Mix
- Step 11: Add the Cold Milk
- Step 12: Whisk Until Thickened
- Step 13: Slice the Banana
- Step 14: Prepare the Cones
- Step 15: Add the Cheesecake Filling
- Step 16: Add the Banana Pudding
- Step 17: Add Banana Slices
- Step 18: Add Crushed Vanilla Wafers
- Step 19: Add Whipped Cream and Caramel
- Step 20: Chill or Serve
- Serving Ideas
- Storage
- Reheating
- Freezing
- Make-Ahead
- Helpful Notes for Best Results
- Variations
- Chocolate Banana Pudding Cones
- Strawberry Banana Cheesecake Cones
- Raspberry Banana Cheesecake Cones
- Gluten-Free Banana Pudding Cones
- Coconut Banana Cheesecake Cones
- Low-Fat Banana Cheesecake Cones
- Dairy-Free Banana Cheesecake Cones
- Chocolate Chip Banana Cheesecake Cones
- Mascarpone Banana Cones
- Greek Yogurt Banana Cones
- Sugar Cone Banana Pudding Cones
- Troubleshooting
- Frequently Asked Questions
- Why This Recipe Works So Well
- Final Thoughts
- Banana Pudding Cheesecake Cones
Why You’ll Love These Banana Pudding Cheesecake Cones
These cones are quick and easy to prepare. They are perfect for last-minute gatherings when you want something sweet without baking.
They require no oven. You only mix, whisk, layer, and assemble.
They are family-friendly and fun to eat. Dessert feels extra special when it comes in a crunchy waffle cone.
They use minimal ingredients. Cream cheese, powdered sugar, vanilla, heavy cream, banana pudding mix, milk, bananas, cones, vanilla wafers, whipped cream, and optional caramel create the whole dessert.
They can be made in advance with a little planning. The cheesecake filling and banana pudding can be stored separately until you are ready to assemble.
They are versatile. You can customize them with chocolate pudding, berries, coconut cream, gluten-free ingredients, mini chocolate chips, extra wafers, or different toppings.
Recipe Details
These Banana Pudding Cheesecake Cones are no-bake. There is no oven needed, which makes them especially nice for warm days.
The cheesecake filling uses 8 ounces softened cream cheese, ½ cup sifted powdered sugar, ½ teaspoon vanilla extract, and ½ cup whipped heavy cream. The whipped cream should be fluffy before being folded into the cream cheese mixture.
The banana pudding layer uses 1 box, or 3.4 ounces, instant banana pudding mix and 1 ½ cups cold milk. The mixture is whisked until thickened, which usually takes about 2 minutes.
The assembly uses 6 waffle cones. Sugar cones can be used if you like a sweeter crunch.
The crunchy banana pudding topping comes from ½ cup crushed vanilla wafers. Extra vanilla wafers and banana slices can also be used for garnish.
The cones are finished with whipped cream and optional caramel drizzle. Homemade or store-bought whipped cream can be used.
These cones are best served chilled. Leftover assembled cones can be stored tightly covered in the refrigerator for up to 2 days, but the cones may soften over time.
For the best crunch, keep the cheesecake filling and banana pudding separate until you are ready to assemble. Assembled cones should not be frozen because the waffle cones can become soggy after thawing.
Ingredients
Cheesecake Filling
8 oz cream cheese, softened
½ cup powdered sugar, sifted
½ teaspoon vanilla extract
½ cup heavy cream, whipped
Banana Pudding Layer
1 box, 3.4 oz, instant banana pudding mix
1 ½ cups cold milk
1 banana, sliced
Cone Assembly
6 waffle cones
½ cup crushed vanilla wafers
Whipped cream, for topping
Caramel drizzle, optional
Extra vanilla wafers and banana slices, for garnish
Ingredient Notes
Cream cheese gives the filling its cheesecake flavor. Full-fat cream cheese gives the best creaminess.
Powdered sugar sweetens the cheesecake filling. Sifting it helps create a smoother texture.
Vanilla extract gives the filling warm flavor. Pure vanilla gives the best taste.
Heavy cream should be whipped before being folded into the cream cheese mixture. It makes the filling light and fluffy.
Instant banana pudding mix creates the banana pudding layer quickly. No cooking is required.
Cold milk helps the pudding thicken properly. Whole milk works best, but almond milk can be used for a dairy-free option.
The banana should be ripe for maximum sweetness. Sliced banana adds fresh fruit flavor to the cones.
Waffle cones hold the filling and give the dessert crunch. Sugar cones can be used if you prefer a sweeter crunch.
Crushed vanilla wafers add the classic banana pudding texture. They make the cones taste even more like banana pudding.
Whipped cream makes the top soft and pretty. Caramel drizzle is optional, but it adds a rich sweet finish.
Optional Swaps, Variations, Add-Ins, and Serving Ideas
Chocolate Banana Cheesecake Cones
Swap the banana pudding mix for chocolate pudding for a chocolate twist. This creates a richer dessert while keeping the same layered cone idea.
Chocolate pudding pairs well with banana slices and cheesecake filling. The result feels more like a chocolate banana cream dessert.
Berry Banana Cheesecake Cones
Add a layer of fresh strawberries or raspberries for a fruity flair. The berries bring color and freshness.
This variation makes the cones feel extra bright. It is perfect for warm-weather dessert tables.
Gluten-Free Banana Pudding Cones
Use gluten-free vanilla wafers for a gluten-free option. Gluten-free waffle cones can also be used.
This helps the dessert fit gluten-free needs. Make sure each ingredient fits the dietary requirement.
Coconut Cream Banana Cones
Try coconut cream instead of heavy cream for a tropical vibe. Coconut cream gives the filling a different flavor.
This variation pairs beautifully with banana. It makes the cones feel even more summery.
Lighter Banana Cheesecake Cones
Use low-fat cream cheese and whipped topping for a lighter version. The texture and flavor will change slightly.
This option keeps the dessert creamy while making it feel lighter. It is still sweet, cool, and fun.
Dairy-Free Banana Pudding Cones
Use a non-dairy cream cheese alternative for a dairy-free option. Non-dairy cream cheese substitutes made from almonds or cashews can work.
Almond milk can be used in the pudding as mentioned. The flavor and texture may vary depending on the products used.
Mini Chocolate Chip Cheesecake Cones
Add mini chocolate chips to the cheesecake filling for a sweet surprise. They give the creamy filling little bites of chocolate.
This is a fun variation for kids and chocolate lovers. It turns the banana pudding cone into a more playful dessert.
Mascarpone Banana Cones
Use mascarpone cheese for a rich twist. It changes the flavor and gives the filling a different creamy quality.
This option makes the dessert feel a little more indulgent. The banana pudding and vanilla wafers still keep it familiar.
Greek Yogurt Banana Cones
Use Greek yogurt for a lighter alternative to cream cheese. Keep in mind that it will change the flavor slightly.
This variation gives the filling a tangier taste. It is a good option when you want something lighter.
Ice Cream Banana Pudding Cones
Serve the cones with a scoop of vanilla ice cream. This makes the dessert extra indulgent.
The cold ice cream pairs well with the creamy filling and crunchy cone. It is especially nice for warm days.
Why These Banana Pudding Cheesecake Cones Work
These cones work because they combine creamy, crunchy, sweet, and fruity layers. Every bite has soft cheesecake filling, banana pudding, fresh banana, cookie crumbs, whipped cream, and a crisp cone.
The cheesecake filling brings richness. Cream cheese, powdered sugar, vanilla, and whipped heavy cream create a light but creamy layer.
The instant banana pudding makes the dessert easy. It thickens quickly with cold milk and brings classic banana pudding flavor.
The waffle cone turns the dessert into something fun and handheld. It adds crunch and makes the cones feel like a summer treat.
The crushed vanilla wafers are important because they bring the classic banana pudding crunch. They also make the dessert taste more complete.
The toppings make each cone feel special. Whipped cream, caramel drizzle, extra banana slices, and extra vanilla wafers add color, sweetness, and texture.
Directions
Step 1: Skip the Oven
There is no oven needed for this dessert. Banana Pudding Cheesecake Cones are completely no-bake.
That makes them perfect for warm days, quick desserts, and last-minute gatherings. You only need to mix, whisk, and assemble.
Set the oven aside and gather your ingredients. The whole dessert comes together through layering.
Step 2: Gather the Ingredients
Place the cream cheese, powdered sugar, vanilla extract, whipped heavy cream, banana pudding mix, cold milk, banana, waffle cones, crushed vanilla wafers, whipped cream, caramel drizzle, and garnishes on your work surface.
Having everything ready makes assembly easier. This dessert is simple, but it helps to stay organized.
Make sure the cream cheese is softened before starting. Soft cream cheese mixes into a smoother filling.
Step 3: Prepare the Mixing Bowl
Use a mixing bowl for the cheesecake filling. The bowl should be large enough for beating the cream cheese and folding in whipped cream.
A roomy bowl gives you space to mix without making a mess. The filling should become smooth and fluffy.
Set a spatula nearby for folding. Folding gently helps keep the filling light.
Step 4: Beat the Cream Cheese
Add 8 ounces softened cream cheese to the mixing bowl. Beat it until it is smooth.
The cream cheese should be creamy and free of lumps. No one wants a lumpy cheesecake filling.
Take a little extra time here if needed. Smooth cream cheese makes the final filling much better.
Step 5: Add the Powdered Sugar
Add ½ cup sifted powdered sugar to the cream cheese. Mix until well combined.
Sifting the powdered sugar helps prevent lumps. It gives the filling a smoother texture.
Continue mixing until you no longer see sugar granules. The filling should look sweet, soft, and creamy.
Step 6: Add the Vanilla Extract
Add ½ teaspoon vanilla extract. Mix it into the cream cheese and powdered sugar.
The vanilla gives the filling a warm dessert flavor. Pure vanilla gives the best taste.
Once mixed, the cheesecake base should smell sweet and fragrant. It is ready for the whipped cream.
Step 7: Fold in the Whipped Heavy Cream
Add ½ cup whipped heavy cream to the cheesecake mixture. Fold it in gently.
Do not rush this step. You want to keep as much of the whipped cream’s lightness as possible.
Use slow, gentle motions. The goal is a light and fluffy filling that feels creamy but not heavy.
Step 8: Check the Cheesecake Filling
Look at the texture of the filling. It should be smooth, fluffy, and spoonable.
If you see streaks of whipped cream, fold a little more. If it looks overmixed, stop before it becomes too dense.
Set the cheesecake filling aside while you prepare the banana pudding. Keep it cool if needed.
Step 9: Prepare a Separate Bowl
Take out a separate bowl for the banana pudding layer. This keeps the pudding mixture smooth and separate from the cheesecake filling.
The pudding needs room for whisking. Use a bowl deep enough to prevent splashing.
Set your whisk nearby. The pudding thickens quickly once the milk is added.
Step 10: Add the Banana Pudding Mix
Pour 1 box, or 3.4 ounces, instant banana pudding mix into the bowl. No cooking is needed.
The instant pudding mix gives the cones their banana pudding flavor. It also makes the dessert fast.
Spread the mix evenly in the bowl so it is ready for the milk. Cold milk is added next.
Step 11: Add the Cold Milk
Pour in 1 ½ cups cold milk. Whole milk works best, but almond milk can be used for a dairy-free option.
Cold milk helps the pudding thicken. Make sure it is cold before whisking.
Once the milk is added, begin whisking right away. This helps prevent dry pockets of pudding mix.
Step 12: Whisk Until Thickened
Whisk the pudding mix and cold milk until the pudding thickens. This usually takes about 2 minutes.
The pudding should become smooth and creamy. It should hold its shape lightly on the whisk.
Take a moment to notice the banana color and aroma. This layer is what gives the cones their classic banana pudding flavor.
Step 13: Slice the Banana
Slice 1 ripe banana. Ripe bananas give the best sweetness.
Keep the slices ready for assembly and garnish. Banana slices will be layered into the cones and can also be used on top.
Do not slice too far ahead if you want the banana to look fresh. Assemble close to serving time for the best appearance.
Step 14: Prepare the Cones
Set out 6 waffle cones. Make sure they are upright and ready to fill.
Waffle cones give the dessert crunch. Sugar cones can be used if you want a sweeter crunch.
If preparing ahead, wait to fill the cones until close to serving time. This helps maintain the crunch.
Step 15: Add the Cheesecake Filling
Fill each cone with a generous layer of cheesecake filling. Leave room for the banana pudding layer.
Use a spoon to place the filling inside the cone. Work carefully so the cone does not crack.
The cheesecake layer should be creamy and fluffy. It forms the rich base of each cone.
Step 16: Add the Banana Pudding
Spoon the banana pudding over the cheesecake filling. Add enough to create a clear second layer.
This is where the dessert starts to feel like banana pudding and cheesecake together. The creamy layers should sit one over the other.
Do not overfill the cones too early. Leave space for banana slices, vanilla wafers, whipped cream, and garnish.
Step 17: Add Banana Slices
Place banana slices over the pudding layer. Use ripe banana slices for the best sweetness.
The banana slices add fresh fruit flavor. They also make each cone feel more like classic banana pudding.
You can add extra banana slices on top later as garnish. Keep the presentation fun and generous.
Step 18: Add Crushed Vanilla Wafers
Sprinkle crushed vanilla wafers over the banana layer. Use some of the ½ cup crushed vanilla wafers for that classic crunch.
Be a little generous if you love texture. More crunch makes the cones even more satisfying.
The vanilla wafers bring the familiar banana pudding feeling. They also contrast with the creamy filling.
Step 19: Add Whipped Cream and Caramel
Finish each cone with a swirl of whipped cream. Homemade or store-bought whipped cream can be used.
Drizzle caramel over the top if desired. The caramel is optional, but it adds a rich sweet finish.
Add extra vanilla wafers and banana slices for garnish. This makes the cones look finished and inviting.
Step 20: Chill or Serve
Serve the cones chilled for the best flavor and texture. They can be enjoyed as soon as they are assembled.
If you need to store them briefly, keep them tightly covered in the refrigerator. Assembled cones are best enjoyed within 2 days.
For the best crunch, assemble as close to serving time as possible. The waffle cone may soften the longer it sits with the filling.
Serving Ideas
Serve Banana Pudding Cheesecake Cones chilled. The filling should be creamy, cool, and soft against the crunchy cone.
Add a sprinkle of crushed vanilla wafers on top for extra crunch. This gives each cone the classic banana pudding finish.
Pair the cones with fresh fruit for a colorful dessert spread. Strawberries, raspberries, or banana slices can make the presentation brighter.
A scoop of vanilla ice cream makes the dessert more indulgent. This is a lovely option for warm-weather celebrations.
Serve them at picnics, summer parties, family nights, or cozy evenings at home. They feel playful enough for kids and special enough for guests.
Arrange the cones upright if possible. They look beautiful when the whipped cream, banana slices, wafers, and caramel are visible on top.
Storage
Store any leftover assembled cones in the refrigerator. Keep them tightly covered.
They are best enjoyed within 2 days. After that, the cones may begin to soften.
For the best texture, store the cheesecake filling and banana pudding separately until you are ready to assemble. This helps maintain the cone’s crunch.
Keep the banana slices and toppings ready separately if making ahead. Assemble fresh for the cleanest texture.
Reheating
These cones do not need reheating. They are a chilled no-bake dessert.
Serve them cold from the refrigerator or freshly assembled. The creamy filling tastes best chilled.
Do not warm the cones. Heat would soften the whipped cream, pudding, and cheesecake filling.
If the components have been refrigerated separately, simply assemble and serve. No heat is needed at any point.
Freezing
Freezing the assembled cones is not recommended. The waffle cones can lose their crunch and become soggy after thawing.
You can freeze the filling components separately if needed. Keep them separate from the cones.
For the best final result, thaw any frozen filling components and assemble the cones fresh. This helps protect the texture.
The crunchy cone is one of the best parts of the dessert. Keeping assembly fresh is the best way to preserve that contrast.
Make-Ahead
These cones can be made ahead with smart storage. Prepare the cheesecake filling and banana pudding separately.
Keep both components refrigerated until you are ready to assemble. This helps the cones stay crisp.
You can also crush the vanilla wafers ahead of time and keep them ready. Slice the banana close to serving for the freshest look.
When it is time to serve, fill the cones, add the pudding, banana slices, crumbs, whipped cream, caramel, and garnish. This gives you the best texture with less last-minute work.
Helpful Notes for Best Results
Make sure the cream cheese is softened before beating. This helps prevent lumps in the cheesecake filling.
Sift the powdered sugar for a smoother texture. It blends more easily into the cream cheese.
Whip the heavy cream until nice and fluffy before folding it in. Gently folding keeps the cheesecake filling light.
Use cold milk for the instant pudding. Cold milk helps it thicken properly.
Do not freeze assembled cones. The waffle cone can become soggy after thawing.
Store fillings separately if making ahead. This helps maintain the cone’s crunch.
For a dairy-free option, use non-dairy cream cheese and almond milk. The flavor and texture may change.
Mini chocolate chips can be added to the cheesecake filling for a sweet surprise. Use gluten-free waffle cones and gluten-free vanilla wafers if you need a gluten-free version.
Variations
Chocolate Banana Pudding Cones
Use chocolate pudding mix instead of banana pudding mix. This gives the cones a chocolate twist.
The banana slices still bring fruit flavor. The chocolate pudding makes the dessert richer.
Strawberry Banana Cheesecake Cones
Add a layer of fresh strawberries. This gives the cones a fruity flair.
Strawberries add color and freshness. They work well with cheesecake filling and banana pudding.
Raspberry Banana Cheesecake Cones
Add fresh raspberries for another berry option. They bring a bright flavor.
The raspberries contrast with the sweet banana and creamy filling. This makes the cones feel more colorful.
Gluten-Free Banana Pudding Cones
Use gluten-free vanilla wafers and gluten-free waffle cones. This creates a gluten-free option.
Make sure the other ingredients fit your needs. Assemble fresh for the best crunch.
Coconut Banana Cheesecake Cones
Use coconut cream instead of heavy cream. This gives the dessert a tropical vibe.
Coconut cream pairs nicely with banana. The filling will have a different flavor and texture.
Low-Fat Banana Cheesecake Cones
Use low-fat cream cheese and whipped topping. This makes a lighter version.
The texture may be softer or different. The dessert still keeps the banana pudding cone idea.
Dairy-Free Banana Cheesecake Cones
Use a non-dairy cream cheese alternative. Almond or cashew-based options can work.
Use almond milk in the pudding layer. The final flavor will depend on the products used.
Chocolate Chip Banana Cheesecake Cones
Add mini chocolate chips to the cheesecake filling. This gives the cones a sweet surprise.
The chocolate adds texture and extra sweetness. Kids especially may love this variation.
Mascarpone Banana Cones
Use mascarpone cheese for a rich twist. It gives the filling a different creamy flavor.
This variation feels extra indulgent. It still works with banana pudding and vanilla wafers.
Greek Yogurt Banana Cones
Use Greek yogurt for a lighter alternative. The flavor will change slightly.
Greek yogurt adds tang. It gives the dessert a lighter feel than cream cheese.
Sugar Cone Banana Pudding Cones
Use sugar cones instead of waffle cones. This gives a sweeter crunch.
The shape and size may differ. Fill carefully so the cones do not break.
Troubleshooting
Why Is My Cheesecake Filling Lumpy?
The cream cheese may not have been softened enough. Beat it until smooth before adding the powdered sugar and vanilla.
Sifted powdered sugar also helps. Lumps are easier to prevent than fix later.
Why Is My Cheesecake Filling Too Dense?
The whipped heavy cream may have been folded in too aggressively. Fold gently to keep the mixture light.
Do not beat heavily after adding the whipped cream. The goal is fluffy cheesecake filling.
Why Is My Pudding Too Thin?
The milk may not have been cold enough, or the pudding may not have been whisked long enough. Whisk for about 2 minutes until thickened.
Give the pudding a little time if needed. It should become creamy and spoonable.
Why Are My Cones Soggy?
The cones may have been assembled too far ahead. Filled cones soften as they sit in the refrigerator.
For the best crunch, store the cheesecake filling and banana pudding separately. Assemble close to serving time.
Why Did the Bananas Look Soft?
Bananas can soften after being sliced and stored. Slice them close to serving time for the freshest look.
Use ripe bananas for sweetness, but avoid overly soft slices for garnish. Fresh slices make the cones prettier.
Frequently Asked Questions
Can I Freeze Banana Pudding Cheesecake Cones?
Freezing assembled cones is not recommended. The waffle cone can lose its crunch and become soggy after thawing.
You can freeze the filling components separately if needed. Assemble the cones fresh when ready to enjoy.
What Can I Substitute for Cream Cheese?
For a dairy-free option, use non-dairy cream cheese made from almonds or cashews. Mascarpone cheese can be used for a rich twist.
Greek yogurt can be used for a lighter alternative. Keep in mind that it will change the flavor slightly.
How Long Do These Cones Last in the Fridge?
Stored in the refrigerator, the assembled cones are best enjoyed within 2 days. After that, the cones may start to soften.
For the best crunch, assemble them as close to serving time as possible. Keep the fillings separate if preparing ahead.
Can I Make These Gluten-Free?
Yes, use gluten-free waffle cones and gluten-free vanilla wafers. Make sure the pudding mix and other ingredients fit your needs.
Assemble fresh for the best texture. Gluten-free cones should still be kept from softening too long.
Can I Use Sugar Cones Instead of Waffle Cones?
Yes, sugar cones can be used if you like a sweeter crunch. They may change the size and shape of the dessert.
Fill them carefully. The layers should still include cheesecake filling, banana pudding, banana slices, wafers, whipped cream, and garnish.
Can I Add Chocolate?
Yes, mini chocolate chips can be added to the cheesecake filling. Chocolate pudding mix can also be used instead of banana pudding mix.
These options give the dessert a different flavor. They still keep the no-bake cone format.
Should I Assemble These Ahead of Time?
You can assemble them ahead, but they are best when assembled close to serving time. Filled cones can soften in the refrigerator.
For make-ahead convenience, prepare the cheesecake filling and banana pudding separately. Assemble fresh when ready.
Why This Recipe Works So Well
Banana Pudding Cheesecake Cones work because they combine familiar banana pudding flavors with a creamy cheesecake-style filling. The result is nostalgic but fun.
The cream cheese gives the filling richness. Powdered sugar and vanilla make it sweet and smooth.
Whipped heavy cream lightens the filling. It keeps the cheesecake layer from feeling too heavy.
Instant banana pudding makes the banana layer quick and easy. Cold milk helps it thicken into a smooth spoonable pudding.
The waffle cone adds crunch. It turns a bowl-style dessert into something handheld and playful.
The crushed vanilla wafers, banana slices, whipped cream, caramel drizzle, and extra garnish make the cones feel complete. Each part adds flavor, texture, or a pretty finish.
Final Thoughts
Banana Pudding Cheesecake Cones are creamy, crunchy, sweet, and full of sunny banana flavor. They take everything people love about banana pudding and cheesecake, then tuck it into a waffle cone for a fun no-bake dessert.
I love how cheerful this recipe feels from start to finish. The cream cheese filling turns fluffy, the banana pudding thickens in minutes, the wafers add crunch, and each cone becomes a little layered celebration.
Serve these cones chilled with whipped cream, caramel drizzle, banana slices, vanilla wafers, fresh fruit, or even a scoop of vanilla ice cream. Whether you make them for summer gatherings, family nights, or a simple sweet treat, they bring creamy banana joy in every bite.
Banana Pudding Cheesecake Cones

These Banana Pudding Cheesecake Cones are creamy, crunchy, sweet, and packed with banana pudding flavor in a fun handheld dessert. With softened cream cheese, whipped heavy cream, instant banana pudding, sliced banana, crushed vanilla wafers, waffle cones, whipped cream, and optional caramel drizzle, they are perfect for parties, summer treats, dessert bars, or easy make-ahead sweets.
Recipe Details
- Prep Time: 20 minutes
- Total Time: 20 minutes
- Course: Dessert
- Cuisine: American
- Servings: 6 cones
Equipment
- Mixing bowl
- Whisk
Ingredients
For the Cheesecake Filling
- ½ cup heavy cream, whipped
- ½ teaspoon vanilla extract
- ½ cup powdered sugar
- 8 oz cream cheese, softened
For the Banana Pudding Layer
- 1 banana, sliced
- 1 ½ cups cold milk
- 1 box (3.4 oz) instant banana pudding mix
For Assembly
- Caramel drizzle (optional)
- Whipped cream (for topping)
- Extra vanilla wafers and banana slices for garnish
- ½ cup crushed vanilla wafers
- 6 units waffle cones
Instructions
Step 1: Beat the Cream Cheese
In a mixing bowl, beat the softened cream cheese until smooth.
Step 2: Sweeten the Cheesecake Filling
Add the powdered sugar and vanilla extract to the cream cheese, then mix until well combined.
Step 3: Fold in the Whipped Cream
Fold in the whipped heavy cream until fully incorporated and the cheesecake filling is smooth and creamy.
Step 4: Make the Banana Pudding
In another bowl, whisk together the instant banana pudding mix and cold milk until thickened.
Step 5: Start Filling the Waffle Cones
To assemble, fill each waffle cone with a layer of cheesecake filling.
Step 6: Add the Banana Pudding Layer
Add a layer of banana pudding over the cheesecake filling in each cone.
Step 7: Add Banana and Vanilla Wafers
Top the banana pudding layer with sliced bananas and crushed vanilla wafers.
Step 8: Finish the Cones
Finish each cone with whipped cream, a drizzle of caramel if using, and additional banana slices and vanilla wafers for garnish.
Notes
These cones can be prepared in advance and stored in the refrigerator until serving.
Serving Suggestions
- Serve chilled as a fun handheld dessert.
- Add to a party dessert table with cookies, bars, or fruit cups.
- Serve at summer gatherings, birthdays, or casual family nights.
- Add the caramel drizzle right before serving for a pretty finish.
- Garnish with extra vanilla wafers and banana slices to make each cone look special.
Storage
How to Store
These cones can be prepared in advance and stored in the refrigerator until serving.
Best Texture Tip
For the crunchiest waffle cones, assemble close to serving time when possible so the filling does not soften the cones too much.
Make-Ahead Tip
The cheesecake filling and banana pudding layer can be prepared ahead, then spooned into the waffle cones before serving for the best texture.

Fernando is the creator and writer behind the food blog Eating with your Hands. Living and working in cities like Paris, Barcelona, and Berlin, and being married to a Canadian foodie, has given Fernando a passion and interest in food and inspired him to run EWYH.