
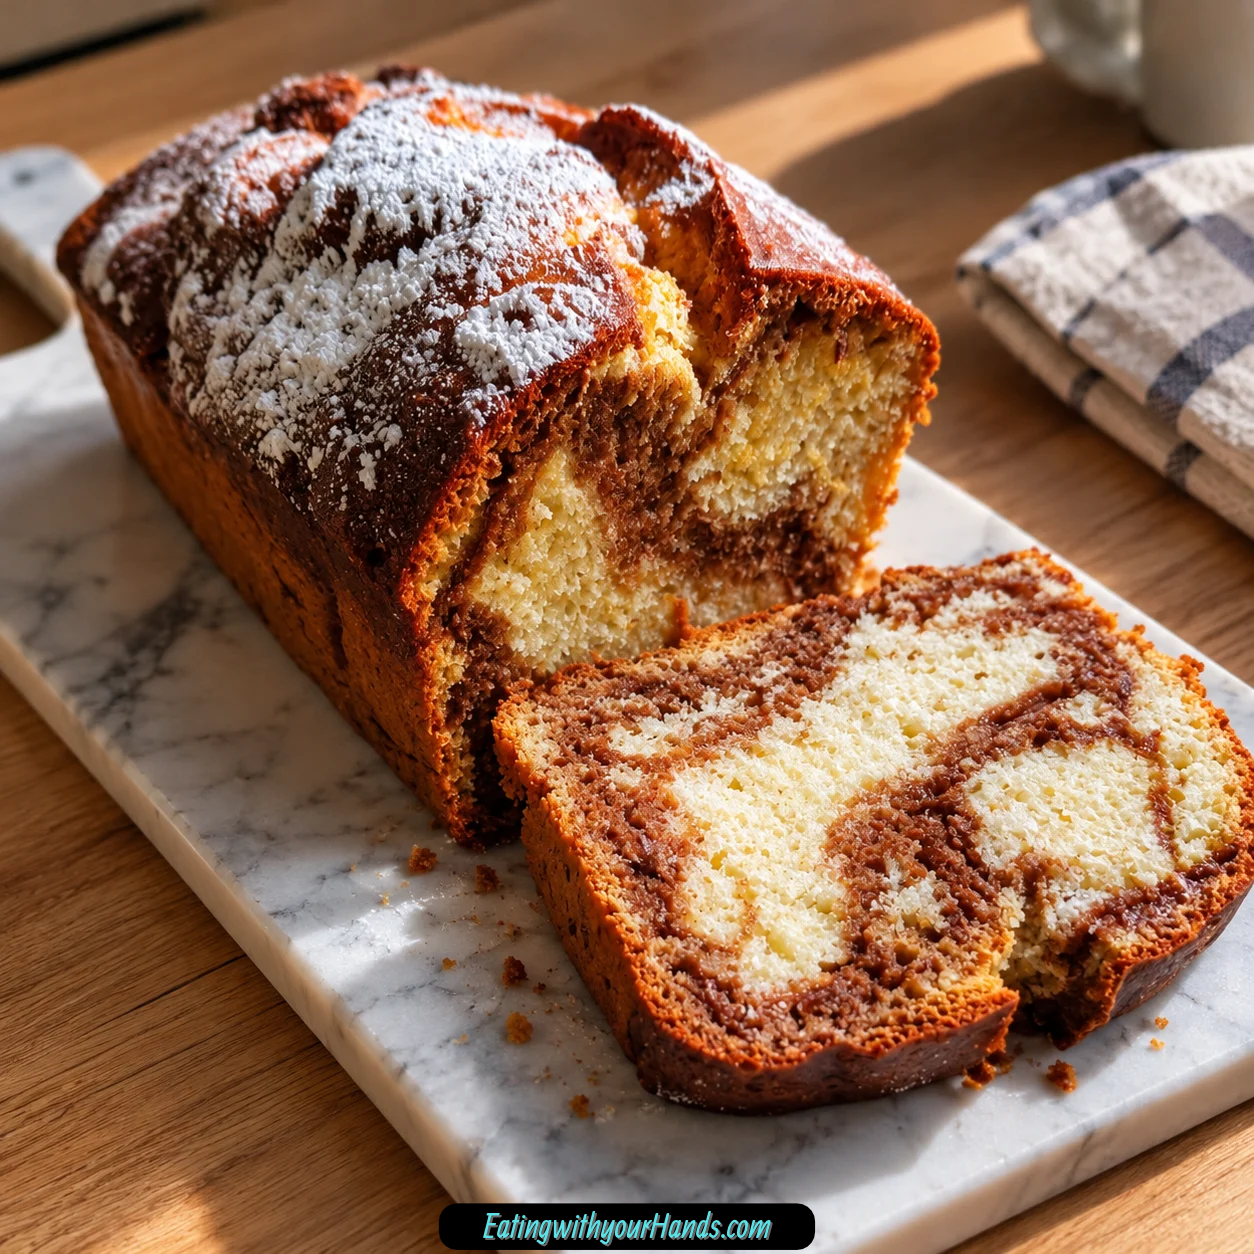
There is something about the smell of Brown Sugar Bread in the oven that makes the whole kitchen feel warmer before you even take the first bite. That deep caramel-like aroma has a way of filling the room with the kind of comfort that feels both simple and nostalgic.
This is one of those loaves I come back to when I want something homemade without turning baking into an all-day project. It uses familiar pantry staples, comes together without kneading, and still gives you a loaf that feels special enough to slice thick and share with someone you love.
I still remember sneaking warm pieces when I was younger, impatient enough to ignore the fact that the loaf had barely cooled. The crust had just enough crispness around the edges, while the middle stayed soft, tender, and almost cloudlike.
That contrast is still one of my favorite things about this bread. The outside develops a gentle golden crust while the inside stays moist and dense enough to feel satisfying without becoming heavy.
Brown sugar is what gives the loaf its signature personality. It brings a deeper sweetness than plain white sugar, with a warm molasses note that makes every slice taste cozy rather than simply sugary.
The recipe is also wonderfully forgiving for a home baker. There is one main bowl, no yeast to wait on, no kneading, and no complicated shaping once the batter is mixed.
That makes it perfect for ordinary days. You can bake it for breakfast, cut a slice for an afternoon snack, or reach for another piece late at night when something sweet and soft sounds especially good.
A thick smear of salted butter makes it feel even more comforting. If you want to take it a little further, honey or cinnamon sugar turns a plain slice into something that feels almost dessert-like.
Table of Contents
- Why You’ll Love This Brown Sugar Bread
- Ingredients for Brown Sugar Bread
- Why Packed Brown Sugar Matters
- Why Flour Measurement Matters
- Milk and Oil Keep the Loaf Tender
- How to Make Brown Sugar Bread
- The Importance of Gentle Mixing
- How to Know When Brown Sugar Bread Is Done
- Why Cooling Matters
- Tips for Perfect Brown Sugar Bread
- Ingredient Substitutions and Notes
- Adding Nuts or Raisins
- Serving Brown Sugar Bread
- Brown Sugar Bread for Breakfast
- Brown Sugar Bread as a Snack
- How to Store Brown Sugar Bread
- How to Freeze Brown Sugar Bread
- Reheating Brown Sugar Bread
- Frequently Asked Questions
- Brown Sugar Bread Nutritional Information
- The Loaf I Keep Coming Back To
- Irresistible Brown Sugar Bread Recipe
Why You’ll Love This Brown Sugar Bread
The first reason is how easy it is to make. Even beginner bakers can mix the batter with basic tools and move it into the oven without worrying about proofing, kneading, or complicated timing.
The second reason is the flavor. Packed brown sugar gives the bread a deep, toasted sweetness that feels richer and warmer than the flavor of an ordinary quick loaf.
Texture matters just as much. The vegetable oil and milk help create a tender crumb, while the baking powder gives the loaf enough lift to keep it from becoming too compact.
It is also extremely versatile once baked. A slice works at breakfast, with coffee, as an afternoon snack, or as a late-night treat when you want something homemade and comforting.
The loaf also stores well. You can keep it at room temperature for several days or freeze individual slices so there is always a piece ready when the craving comes back.
And perhaps best of all, the recipe does not ask for anything fancy. Flour, brown sugar, eggs, milk, oil, baking powder, and salt are enough to create something that feels much more special than the ingredient list suggests.
Ingredients for Brown Sugar Bread
The ingredient list is short and straightforward, but accurate measuring matters because the loaf depends on the right balance of flour, sugar, liquid, and leavening. Set everything out before you begin so the mixing process stays quick and smooth.
- 2 cups light brown sugar, packed
- 4 cups all-purpose flour
- 2 tablespoons baking powder
- 1 teaspoon salt
- 2 large eggs, room temperature
- 2 cups milk
- ⅔ cup vegetable oil
Light brown sugar is the main flavor builder in the standard version. Pack it firmly into the measuring cup so the full amount makes it into the batter.
The flour should be spooned into the measuring cup and leveled rather than scooped directly from the bag. Packing too much flour into the cup can make the finished bread dry.
The baking powder gives the loaf lift, so make sure it is still fresh. Old baking powder can leave the bread flatter and denser than intended.
Room-temperature eggs blend more easily with the milk and oil. Letting them sit out for about 30 minutes before mixing is enough.
Whole milk creates the richest, most tender result, but other kinds of milk also work. Vegetable oil keeps the crumb moist, and canola oil is another acceptable option.
Why Packed Brown Sugar Matters
Brown sugar is not just there for sweetness. Its deeper flavor is what gives this loaf the caramel-like character that makes the bread feel so distinctive.
Packing the sugar ensures you are actually using the full measured amount. Loose brown sugar can leave the loaf less sweet and change the balance of the batter.
Light brown sugar creates the standard version. Dark brown sugar can also be used, but it brings a stronger molasses flavor and needs to be reduced to 1¾ cups so the loaf does not become too heavy.
If the sugar has hardened into a solid block, there is an easy fix. Microwave it with a damp paper towel for 20 seconds to soften it enough for measuring and mixing.
Why Flour Measurement Matters
The recipe uses 4 cups all-purpose flour, which is a substantial amount. That makes accurate measurement especially important because even a little extra flour repeated across several cups can change the texture.
Spoon the flour into the measuring cup and level off the top. Do not pack it down or scoop directly from the bag.
The goal is a loaf that feels tender and dense without becoming dry. Careful flour measurement helps preserve that balance.
You can replace half of the all-purpose flour with whole wheat flour if you want a nuttier variation. Expect that version to be slightly denser than the standard loaf.
Milk and Oil Keep the Loaf Tender
The recipe uses 2 cups milk and ⅔ cup vegetable oil. Together, they give the batter enough moisture to create a soft crumb without the need for butter.
Whole milk gives the richest texture. Buttermilk can also be used when you want a little extra tang.
Thinned yogurt is another possible milk substitute in a pinch. No exact thinning ratio is provided, so adjust only enough to create a pourable consistency similar to milk.
Vegetable oil is the standard fat in the recipe. Canola oil works as an alternative without changing the overall method.
How to Make Brown Sugar Bread
This recipe is best approached as a simple quick-bread process: prepare the pan, combine the dry ingredients, add the wet ingredients, mix gently, bake, and cool. The detailed steps below keep the method clear without breaking the process into unnecessary micro-steps.
Step 1: Preheat the Oven and Prepare the Pan
Preheat the oven to 350°F (175°C) before you begin mixing the batter. Grease a 9×5-inch loaf pan thoroughly with butter or baking spray so the bread releases cleanly after baking.
Make sure the corners and sides are coated well. A properly prepared pan makes it much easier to remove the loaf without tearing the crust.
Give the oven enough time to reach the full temperature before the batter goes inside. Starting in a properly heated oven gives the bread a better chance to rise evenly from the beginning.
Step 2: Combine the Dry Ingredients
In a large mixing bowl, add 4 cups all-purpose flour, 2 cups packed light brown sugar, 2 tablespoons baking powder, and 1 teaspoon salt. Whisk the mixture thoroughly so the baking powder and salt are evenly distributed through the flour and sugar.
Use your fingers to break apart any stubborn brown sugar clumps. The goal is a dry mixture that looks even rather than streaked with large pockets of sugar.
Do not rush this stage because evenly distributed leavening is important in a loaf this large. Once everything looks uniform, the bowl is ready for the wet ingredients.
Step 3: Add the Eggs, Milk, and Oil
Make a well in the center of the dry mixture. Add 2 room-temperature eggs, 2 cups milk, and ⅔ cup vegetable oil directly into that space.
Use a wooden spoon or sturdy spatula to begin mixing from the center outward. Gradually pull the dry ingredients into the wet mixture rather than stirring everything aggressively from the start.
Continue only until the batter comes together. A few small lumps are completely acceptable and are preferable to overmixing.
Step 4: Stop Mixing as Soon as the Batter Comes Together
Watch the batter closely as you stir. Once the last visible streaks of flour disappear, stop mixing.
Overworking the batter can produce a tougher, denser loaf. The goal is a thick but pourable batter that looks mostly smooth without needing to be perfectly uniform.
If a few small lumps remain, leave them alone. They will not ruin the finished bread and are a better outcome than mixing until the batter becomes overworked.
Step 5: Fill the Loaf Pan
Pour the batter into the prepared 9×5-inch loaf pan. Use a spatula to spread it toward the corners and smooth the surface gently.
Do not press the batter down. A light leveling motion is enough because the top will settle naturally as the bread bakes.
Once the batter is in the pan, move directly to baking. There is no resting or proofing period required.
Step 6: Bake Until Golden and Set
Place the loaf pan in the preheated 350°F oven and bake for 50–60 minutes. Begin checking around the 50-minute mark because oven temperatures can vary.
Insert a toothpick into the center of the loaf. The bread is ready when the toothpick comes out clean or with only a few moist crumbs attached.
If wet batter clings to the toothpick, continue baking and check again. An oven thermometer can be especially helpful if your oven tends to run hotter or cooler than the displayed temperature.
Step 7: Cool in the Pan Before Removing
Remove the loaf from the oven and let it rest in the pan for 10 minutes. This short cooling period gives the bread enough time to firm up so it is less likely to crumble when moved.
After 10 minutes, carefully transfer the loaf to a wire rack. Handle it gently because the center will still be very warm and soft.
Let the loaf continue cooling on the rack. Air circulation around the sides and bottom helps the bread set more evenly.
Step 8: Wait Before Slicing
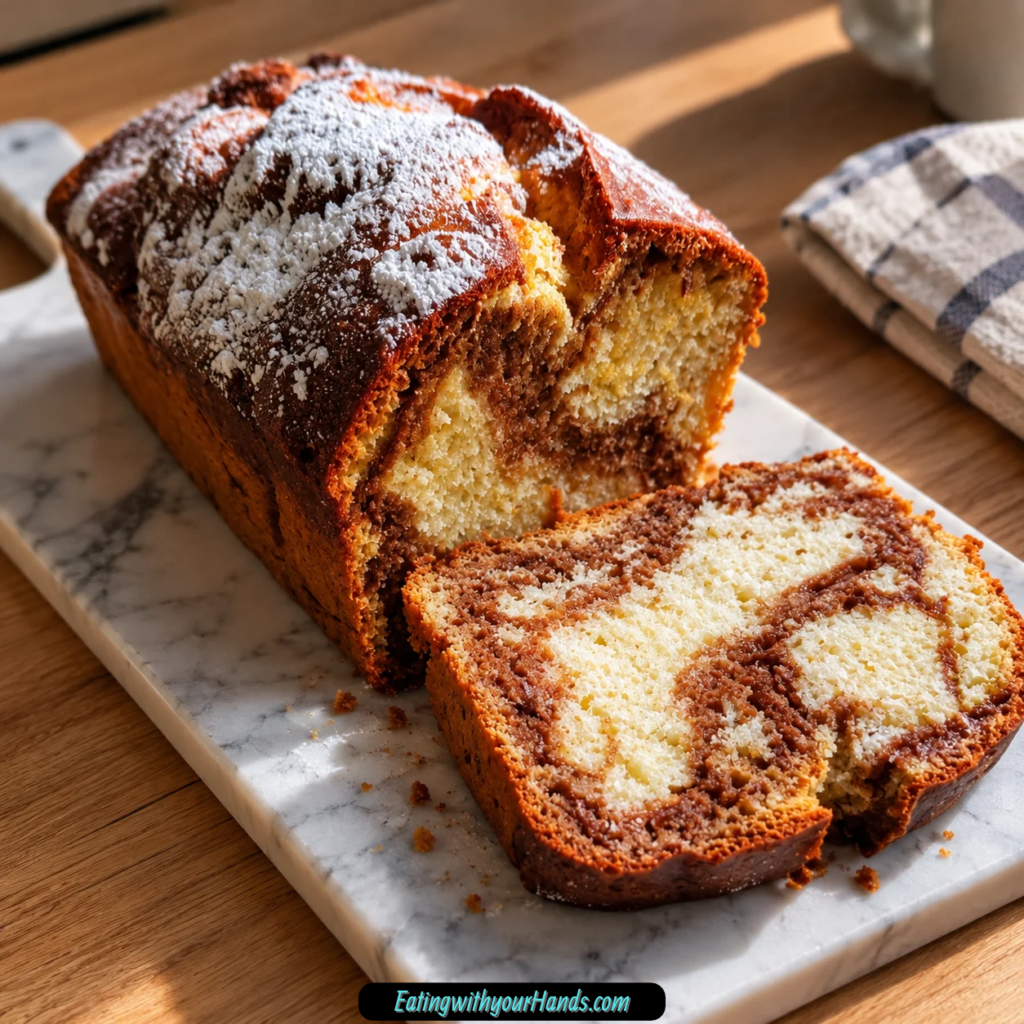
Let the bread cool for at least 20 minutes before cutting into it. Hot quick bread tears easily because the crumb is still setting and the internal steam has not had enough time to settle.
For the cleanest slices and the most stable crumb, allow it to cool completely. The waiting time may be difficult when the kitchen smells like brown sugar, but the texture is better when the loaf has had time to rest.
Use a sharp knife and cut slices as thick or thin as you prefer. The loaf is especially satisfying in thick slices that hold up well to butter or honey.
The Importance of Gentle Mixing
One of the easiest mistakes with quick breads is overmixing. Once flour comes into contact with the wet ingredients, too much stirring can make the final texture tougher and denser.
Stir only until the dry ingredients are barely incorporated. When the last streak of flour disappears, the batter is ready for the pan.
A few small lumps are not a problem. Chasing perfect smoothness often does more harm than good.
How to Know When Brown Sugar Bread Is Done
The loaf should look golden on top when it is fully baked. Color gives you the first visual clue, but the center test is more reliable.
Insert a toothpick into the middle around the 50-minute mark. A clean toothpick or one carrying a few moist crumbs means the bread is ready.
Wet batter means it needs more time. Continue baking within the 50–60 minute range while checking carefully.
Oven variation matters here. If your oven runs hot or cold, an oven thermometer can help you understand why one loaf needs a little more or less time than another.
Why Cooling Matters
The first 10-minute rest happens in the loaf pan. This gives the bread enough structure to come out without falling apart.
After that, move it to a wire rack so air can circulate around the loaf. That helps the crumb finish setting while the crust stays pleasant rather than becoming overly damp.
Wait at least 20 minutes before slicing. Hot bread may smell irresistible, but cutting too early can tear the crumb and make the slices less neat.
Cooling completely gives the most stable texture. That is especially useful when you want clean slices for serving or freezing.
Tips for Perfect Brown Sugar Bread
Gentle mixing is the biggest rule. Stir just until the ingredients come together, because overworked batter can produce bread that feels heavier than intended.
An oven thermometer is also useful. If your oven regularly runs hotter or colder than the setting, knowing the true temperature makes the 50–60 minute baking window much easier to manage.
The cooling period should not be skipped either. Steam needs time to settle inside the loaf before slicing.
Accurate measuring also matters. Spoon and level the flour, firmly pack the brown sugar, and use fresh baking powder so the loaf gets the intended texture.
Ingredient Substitutions and Notes
The recipe is simple enough to allow several substitutions without changing its basic identity. Each swap changes the flavor or texture slightly, so it is useful to know what to expect.
Whole Wheat Flour
Replace half of the all-purpose flour with whole wheat flour. The finished loaf will be slightly denser and will have a more noticeable nutty flavor.
Keep the other ingredients the same. This substitution changes the character of the bread without turning it into a completely different recipe.
Buttermilk
Buttermilk can replace the regular milk. It brings a tangier flavor and a slightly different richness.
Use it in the same role as the standard milk. The rest of the mixing method stays unchanged.
Thinned Yogurt
Thinned yogurt can also work when milk is unavailable. Adjust the yogurt only enough to create a consistency that can blend smoothly into the batter.
No exact amount of water or thinning liquid is specified. Use this as a practical substitute rather than a precisely reformulated version.
Dark Brown Sugar
Dark brown sugar can replace light brown sugar if you want a stronger molasses flavor. Use 1¾ cups rather than the full 2 cups so the loaf does not become too heavy.
This version will taste deeper and more intense. The texture may also feel slightly richer because of the stronger brown sugar character.
Canola Oil
Canola oil can replace vegetable oil. Use the same ⅔ cup amount.
The substitution does not change the method. It simply gives you another neutral oil option when vegetable oil is not available.
Adding Nuts or Raisins
Fold in ½ cup chopped walnuts for extra texture. The walnuts add a crunchy contrast against the otherwise soft crumb.
You can also add ½ cup plump raisins. Fold them into the batter just before pouring it into the loaf pan.
Do not overload the batter with more add-ins than necessary. Too much extra weight can interfere with the rise of the loaf.
Serving Brown Sugar Bread
A warm slice with salted butter is one of the simplest and best ways to serve this bread. The butter melts into the soft crumb and gives the sweet loaf a little savory contrast.
For something sweeter, drizzle honey over the top. The honey works especially well when the bread is still slightly warm.
Cinnamon sugar is another easy finish. A light sprinkle makes the caramel notes in the brown sugar feel even more pronounced.
The bread also works beautifully as morning toast. The dense yet tender texture holds up well enough for a simple breakfast slice.
Brown Sugar Bread for Breakfast
This loaf is naturally suited to slow mornings. A thick slice with butter feels satisfying without requiring anything complicated.
You can also toast it lightly and add honey. The extra warmth makes the brown sugar aroma come forward again.
Because the bread is sweet but not overwhelmingly sweet, it works well early in the day. It feels indulgent without crossing fully into dessert territory.
Brown Sugar Bread as a Snack
An afternoon slice is one of my favorite ways to eat it. The loaf is substantial enough to feel satisfying but simple enough that you do not need a plate full of toppings.
A little butter is usually enough. If the bread is fresh, I often prefer letting the brown sugar flavor speak for itself.
It also works for late-night cravings. A small slice with honey turns into the kind of quiet comfort food that feels especially good at the end of a long day.
How to Store Brown Sugar Bread
Keep leftover bread in an airtight container at room temperature for up to 3 days. Seal it well so the crumb stays soft rather than drying out around the edges.
If you have already sliced the loaf, keep the pieces packed closely together. Limiting exposure to air helps preserve the tender texture.
The bread remains easy to serve straight from the container. A short reheat can also bring back some of the just-baked softness.
How to Freeze Brown Sugar Bread
The loaf freezes well when sliced first. Wrap individual slices in foil and place them in a freezer bag.
Freezing by the slice makes it easy to remove only what you need. There is no need to thaw the entire loaf when you are craving one piece.
Thaw at room temperature. Once softened, the bread is ready to eat as-is or warm briefly before serving.
Reheating Brown Sugar Bread
A quick 10-second microwave warm-up can restore some of the soft, fresh-baked feel. This works especially well for a slice that has been stored or thawed.
Do not overheat it. The goal is gentle warmth, not enough heat to dry the crumb.
After warming, add butter if you like. The slightly heated surface lets the butter melt into the bread almost immediately.
Frequently Asked Questions
Can I Use Dark Brown Sugar Instead of Light Brown Sugar?
Yes, but use 1¾ cups instead of 2 cups. Dark brown sugar has a deeper molasses flavor and can make the loaf feel heavier if used in the full original quantity.
Expect a richer, darker flavor. The result will still be recognizably Brown Sugar Bread, just with a stronger molasses character.
Why Did My Bread Turn Out Dry?
Overmixing is one possible cause. Stir only until the last visible flour disappears, because excessive mixing can make the loaf tougher.
Overbaking is another possibility. Next time, begin checking earlier and consider setting the timer about 5 minutes sooner than before.
Can I Add Nuts?
Yes. Fold in ½ cup chopped walnuts.
Add them just before transferring the batter to the loaf pan. The walnuts add a nutty crunch without changing the basic bread method.
Can I Add Raisins?
Yes. Add ½ cup plump raisins.
Fold them through the batter before pouring it into the pan. Keep the amount moderate so the loaf can still rise properly.
Can I Use Whole Wheat Flour?
Yes. Replace half of the all-purpose flour with whole wheat flour.
The finished loaf will be slightly denser and nuttier. Keep the remaining half as all-purpose flour.
Can I Use Buttermilk?
Yes. Buttermilk works well in place of regular milk.
Expect a tangier flavor. The rest of the method remains the same.
Can I Use Canola Oil?
Yes. Canola oil can replace vegetable oil.
Use the same ⅔ cup quantity. No other changes are needed.
How Long Does Brown Sugar Bread Keep?
Store it in an airtight container at room temperature for up to 3 days. For longer storage, freeze individual slices.
Wrapped slices can be thawed at room temperature whenever you want one. A brief microwave warm-up helps restore a softer texture.
Brown Sugar Bread Nutritional Information
The nutritional information is intended to be considered per slice, based on 12 slices per loaf. Exact calorie, fat, carbohydrate, protein, sugar, fiber, and sodium values are not provided.
Actual values will vary depending on the brands and ingredients used. Substitutions such as whole wheat flour, dark brown sugar, buttermilk, walnuts, raisins, or different milk can also change the final numbers.
The Loaf I Keep Coming Back To
I think the reason this bread has stayed in my regular baking rotation is that it asks for so little and gives back so much. A few ordinary pantry ingredients become a loaf that fills the house with warmth before anyone even sees what is in the oven.
That smell always brings me back to the memory of taking slices too early. The center would still be soft and steaming, the edges slightly crisp, and patience was never my strongest skill when Brown Sugar Bread was involved.
Even now, waiting for it to cool can feel like the hardest part of the recipe. The loaf comes out golden, the brown sugar aroma fills the room, and suddenly 20 minutes feels much longer than it should.
But the texture is worth waiting for. Once the crumb has had time to settle, every slice holds together beautifully while still staying tender and moist.
I also love how little decoration this bread needs. Butter, honey, or cinnamon sugar are enough, and sometimes even those feel unnecessary when the loaf is fresh.
There is a quiet kind of comfort in recipes like this. They do not need a holiday, a celebration, or a special reason to exist.
You can bake this loaf because friends are coming over, but you can just as easily bake it on a random weekday because the kitchen feels too quiet. It belongs just as naturally beside morning coffee as it does wrapped up for an afternoon snack.
That versatility is part of why I make it so often. It never feels like too much work, yet the result always feels more special than the effort suggests.
And every time I cut into another loaf, I remember why it became a favorite in the first place. Brown Sugar Bread is simple, warm, sweet without being overwhelming, and comforting in exactly the way homemade baking should be.
Irresistible Brown Sugar Bread Recipe
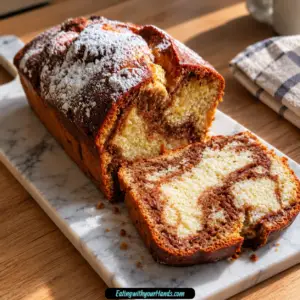
Soft, sweet, and wonderfully simple, this Irresistible Brown Sugar Bread gets its rich flavor from plenty of packed light brown sugar and a tender batter made with milk, eggs, and vegetable oil. It is an easy American-style loaf that comes together with basic pantry ingredients and bakes into a comforting homemade treat.
Recipe Details
- Prep Time: 10 minutes
- Cook Time: 1 hour
- Total Time: 1 hour 10 minutes
- Course: Bread
- Cuisine: American
- Servings: 1 loaf
- Calories: 250 kcal
Ingredients
For the Brown Sugar Bread
- ⅔ cup vegetable oil
- 2 cups milk
- 2 large eggs
- 1 teaspoon salt
- 2 tablespoons baking powder
- 4 cups all-purpose flour
- 2 cups light brown sugar packed
Instructions
Step 1: Preheat the Oven
Preheat the oven to 350°F (175°C).
Grease a loaf pan and set it aside while you prepare the batter.
Step 2: Combine the Dry Ingredients
In a bowl, mix the packed light brown sugar, all-purpose flour, baking powder, and salt.
Stir until the dry ingredients are evenly combined.
Step 3: Add the Wet Ingredients
Add the eggs, milk, and vegetable oil directly to the dry mixture.
Stir until everything is combined and a uniform batter forms.
Step 4: Fill the Loaf Pan
Pour the batter into the greased loaf pan.
Spread it evenly so the loaf can bake consistently.
Step 5: Bake
Bake for 50–60 minutes, or until a toothpick inserted into the bread comes out clean.
The recipe metadata lists a 1-hour cook time, while the baking instructions give a 50–60 minute range.
Step 6: Cool Before Slicing
Remove the loaf from the oven and let it cool before slicing.
Allowing it to cool helps the bread settle and makes it easier to cut cleanly.
Notes
- Store in an airtight container.
- Best served warm.
Serving Suggestions
Serve Irresistible Brown Sugar Bread warm for the best experience. The light brown sugar gives the loaf a deep sweetness, while the milk, eggs, and vegetable oil help create a soft and simple texture.
This recipe makes 1 loaf, making it a convenient option for breakfast, snacks, or an easy homemade sweet bread.
Let the loaf cool enough to slice cleanly, then serve while still slightly warm as noted.
Storage
How to Store
Store the bread in an airtight container.
The recipe does not provide a specific storage duration, so no exact number of days is added here.
Brown Sugar Tip
Use 2 cups packed light brown sugar.
Mix it with the flour, baking powder, and salt before adding the wet ingredients.
Flour Tip
Use 4 cups all-purpose flour.
Combine it evenly with the other dry ingredients before adding the eggs, milk, and oil.
Milk Tip
Use 2 cups milk and stir it into the dry ingredients with the eggs and vegetable oil.
Oil Tip
Use ⅔ cup vegetable oil in the batter.
Baking Tip
Bake at 350°F (175°C) for 50–60 minutes, or until a toothpick comes out clean.
Cooling Tip
Cool the loaf before slicing.
Serve warm for the best flavor and texture.

Fernando is the creator and writer behind the food blog Eating with your Hands. Living and working in cities like Paris, Barcelona, and Berlin, and being married to a Canadian foodie, has given Fernando a passion and interest in food and inspired him to run EWYH.