
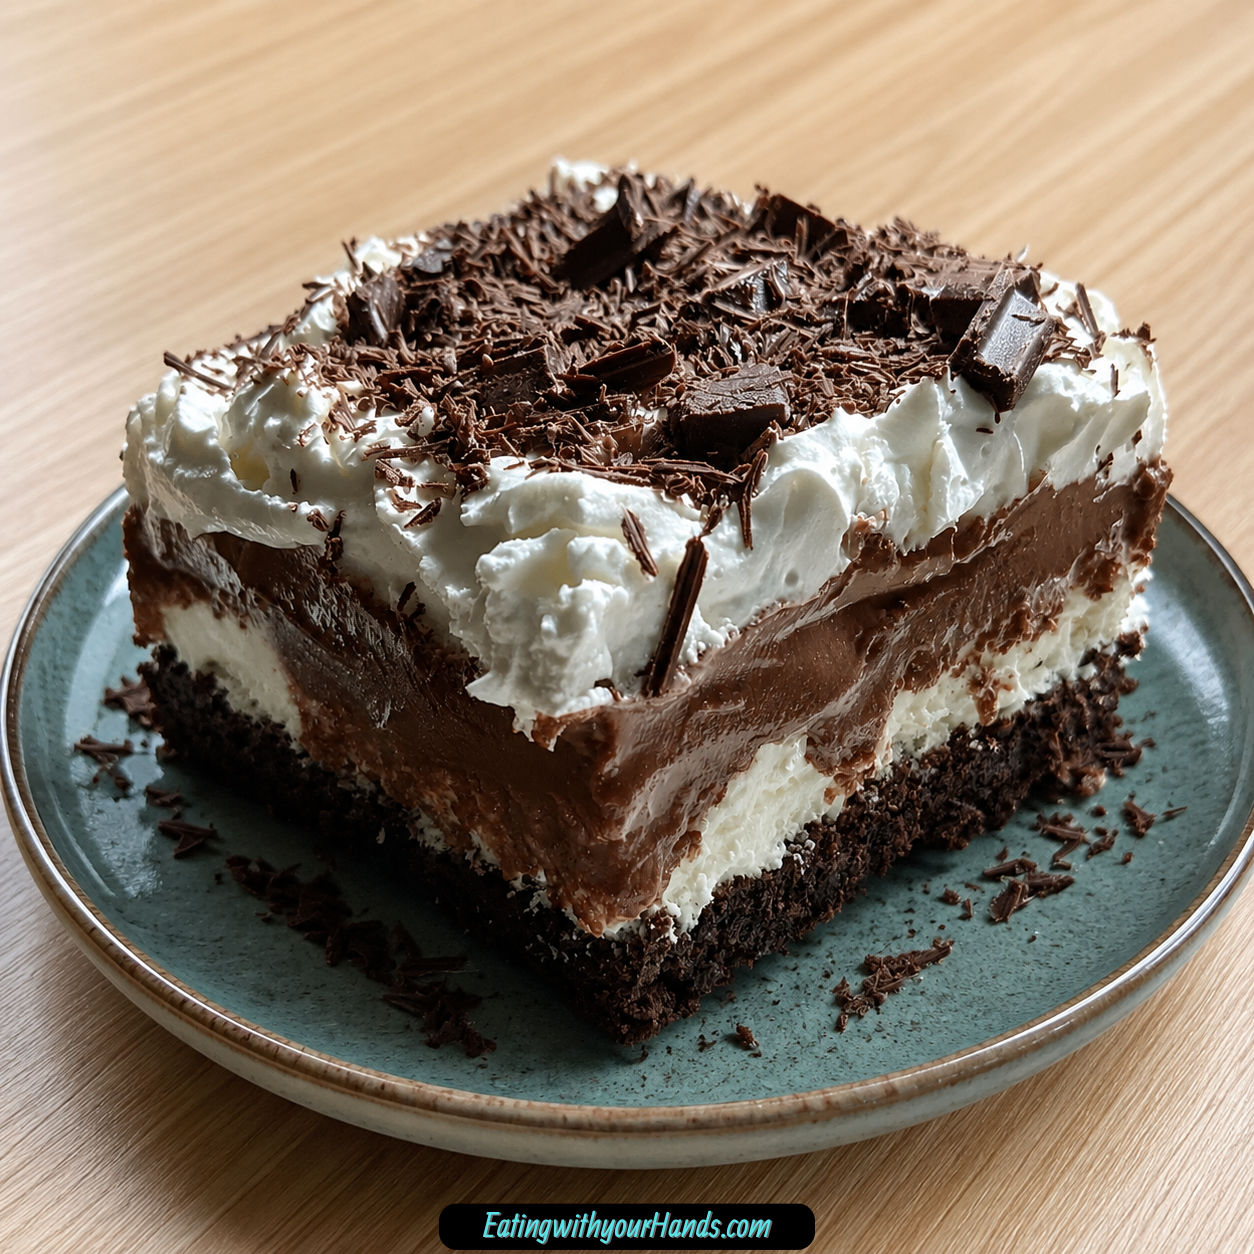
Brownie Refrigerator Cake is the kind of dessert that feels rich, cool, creamy, and deeply comforting all at once. It starts with a chocolate brownie layer, then builds into a chilled, layered dessert with cream cheese filling, chocolate-vanilla pudding, whipped topping, and a final touch of grated chocolate or chocolate syrup.
There is something wonderfully old-fashioned about a refrigerator cake. It does not need to be served warm from the oven to feel special, because its charm comes from the layers settling together in the fridge until every bite tastes cold, creamy, and indulgent.
This dessert has the feeling of a family gathering built right into it. Brownies bring the chocolate, the cream cheese layer brings softness, the pudding layer brings smooth richness, and the whipped topping makes the whole cake feel lighter than it looks.
It is also a practical dessert for real life. You can make it ahead, cover it, chill it for a few hours, and bring it out when everyone is ready for something sweet.
Brownie Refrigerator Cake works beautifully for summer picnics, cozy winter gatherings, potlucks, weeknight treats, or family celebrations. It is the type of dessert that looks impressive in a serving dish but is still easy enough to assemble without stress.
The best part is how flexible it can be. You can keep it classic with chocolate pudding and vanilla pudding, or create variations with mint extract, butterscotch pudding, fresh berries, gluten-free brownie mix, mascarpone, Greek yogurt, dairy-free alternatives, crushed nuts, chocolate chips, vanilla extract, and different chocolate toppings.
Table of Contents
- Why You’ll Love This Brownie Refrigerator Cake
- Recipe Details
- Ingredients
- Ingredient Notes
- Optional Swaps, Variations, Add-Ins, and Serving Ideas
- Mint Brownie Refrigerator Cake
- Butterscotch Brownie Refrigerator Cake
- Gluten-Free Brownie Refrigerator Cake
- Mascarpone Brownie Refrigerator Cake
- Greek Yogurt Cream Layer
- Berry Brownie Refrigerator Cake
- Dairy-Free Brownie Refrigerator Cake
- Vanilla Pudding Boost
- Chocolate Brand Variation
- Crunchy Brownie Refrigerator Cake
- Vanilla Ice Cream Serving
- Whipped Cream Serving
- Extra Chocolate Finish
- Why This Recipe Works
- Directions
- Step 1: Preheat the Oven
- Step 2: Prepare the Brownie Mix
- Step 3: Mix the Brownie Batter
- Step 4: Grease the Baking Pan
- Step 5: Pour in the Brownie Batter
- Step 6: Bake the Brownie Layer
- Step 7: Cool the Brownies Completely
- Step 8: Soften the Cream Cheese
- Step 9: Beat the Cream Cheese
- Step 10: Add the Powdered Sugar
- Step 11: Fold in Whipped Topping
- Step 12: Set Aside the Cream Cheese Layer
- Step 13: Combine the Pudding Mixes
- Step 14: Add the Milk
- Step 15: Whisk the Pudding
- Step 16: Fold in the Whipped Topping
- Step 17: Decide How to Use the Brownies
- Step 18: Begin the First Brownie Layer
- Step 19: Add Half the Cream Cheese Mixture
- Step 20: Add Half the Pudding Mixture
- Step 21: Add the Remaining Brownies
- Step 22: Add the Remaining Cream Cheese Mixture
- Step 23: Add the Remaining Pudding Mixture
- Step 24: Add the Final Whipped Topping
- Step 25: Add Chocolate Topping
- Step 26: Cover the Dish
- Step 27: Refrigerate Before Serving
- Step 28: Slice and Serve
- Serving Ideas
- Storage
- Freezing
- Thawing
- Make-Ahead
- Helpful Notes for Best Results
- Variations
- Mint Brownie Refrigerator Cake
- Butterscotch Brownie Refrigerator Cake
- Gluten-Free Brownie Refrigerator Cake
- Mascarpone Brownie Refrigerator Cake
- Greek Yogurt Brownie Refrigerator Cake
- Berry Brownie Refrigerator Cake
- Dairy-Free Brownie Refrigerator Cake
- Vanilla Pudding Flavor Boost
- Chocolate Brand Variation
- Crunchy Brownie Refrigerator Cake
- Extra Chocolate Drizzle Cake
- Troubleshooting
- Frequently Asked Questions
- Why This Recipe Works So Well
- Final Thoughts
- Brownie Refrigerator Cake
Why You’ll Love This Brownie Refrigerator Cake
This Brownie Refrigerator Cake is quick to prepare and easy to assemble. It is perfect for busy weeknights, gatherings, or any time you want a dessert that can be made ahead.
It is family-friendly and full of flavors people already love. Chocolate brownies, cream cheese filling, pudding, whipped topping, and chocolate garnish create a dessert that feels familiar and exciting.
It uses minimal ingredients. Brownie mix, cream cheese, powdered sugar, whipped topping, instant puddings, milk, and chocolate topping come together into a layered cake without a long shopping list.
It is ideal for make-ahead serving. Since the cake needs time in the refrigerator, you can prepare it before guests arrive.
It tastes rich and indulgent but surprisingly cool and refreshing when chilled. That makes it just as welcome at a summer picnic as it is at a winter family dessert table.
It stores well in the fridge and can also be frozen in individual slices. This makes it useful when you want to keep a sweet treat ready for later.
Recipe Details
Brownie Refrigerator Cake begins with 1 box brownie mix prepared according to the package instructions. The recipe also mentions 1 extra-large egg, or the egg amount required by the brownie mix instructions.
The brownie layer bakes at 350°F, or 175°C. It bakes for about 30 minutes, or until a toothpick inserted in the center comes out with a few moist crumbs.
The brownies should cool completely in the pan before the layers are added. This is important because warm brownies can affect the cream and pudding layers.
The cream cheese layer is made with softened cream cheese, sifted powdered sugar, and thawed whipped topping. The whipped topping is folded in gently to keep the layer light and airy.
The pudding layer uses 1 package instant chocolate pudding and 1 package instant vanilla pudding. Both pudding mixes are whisked with 3.5 cups milk for about 2 minutes, until thickened.
Another container of whipped topping is folded into the pudding mixture for extra creaminess. This creates a soft, cool pudding layer.
The dessert is assembled by layering half the brownie pieces, half the cream cheese mixture, and half the pudding mixture, then repeating those layers. The top is finished with whipped topping.
For the topping, use a grated Hershey bar or chocolate syrup for drizzling. After assembly, the cake should be covered with plastic wrap and refrigerated for a few hours before serving.
Ingredients
For the Brownie Layer
- 1 box brownie mix, prepared according to package instructions
- 1 extra-large egg, or as required by brownie mix instructions
For the Cream Cheese Layer
- 1 package cream cheese, softened (I love using Philadelphia for that perfect creaminess)
- 1 cup powdered sugar, sifted to avoid lumps
- 1 container whipped topping, thawed (Cool Whip works wonderfully)
For the Pudding Layer
- 1 package instant chocolate pudding
- 1 package instant vanilla pudding
- 3.5 cups milk (I prefer whole milk for a richer texture)
- 1 container whipped topping, for layering
For Topping
- 1 bar Hershey bar, grated, or chocolate syrup for drizzling (get creative with your chocolate!)
Ingredient Notes
Brownie mix creates the chocolate base of this refrigerator cake. It should be prepared according to the package instructions.
An extra-large egg is listed for the brownie layer, or the egg amount required by the brownie mix instructions. Follow your brownie mix directions so the base bakes properly.
Cream cheese gives the second layer richness and tang. It should be softened so it beats smooth and creamy.
Philadelphia cream cheese is mentioned as a favorite for perfect creaminess. Any cream cheese used should be soft enough to blend well.
Powdered sugar sweetens the cream cheese layer. Sifting it first helps avoid lumps and creates a smoother mixture.
Whipped topping makes the cream cheese layer light and airy. Cool Whip is mentioned as a good option.
Instant chocolate pudding brings deep chocolate flavor to the pudding layer. Instant vanilla pudding adds a softer, creamy contrast.
Milk brings the pudding mixes together. Whole milk is preferred for a richer texture.
The second container of whipped topping is folded into the pudding mixture and also used for layering. It makes the dessert cooler, creamier, and lighter.
A grated Hershey bar or chocolate syrup finishes the cake. Either option adds more chocolate and makes the top look ready to serve.
Optional Swaps, Variations, Add-Ins, and Serving Ideas
Mint Brownie Refrigerator Cake
Add a few drops of mint extract to the cream cheese layer. This gives the cake a cool, minty twist.
Mint pairs well with chocolate brownies and pudding. It is a nice variation when you want the dessert to feel refreshing.
Butterscotch Brownie Refrigerator Cake
Swap the chocolate pudding for butterscotch pudding. This creates a different flavor profile.
The dessert will still have the brownie base and cream cheese layer. The pudding layer will taste warmer and more caramel-like.
Gluten-Free Brownie Refrigerator Cake
Use a gluten-free brownie mix for a gluten-free version. Prepare it according to the package instructions.
Make sure the other ingredients also fit your needs. This keeps the entire dessert aligned with gluten-free serving.
Mascarpone Brownie Refrigerator Cake
Use mascarpone cheese instead of cream cheese. This gives the dessert a richer taste.
Mascarpone changes the flavor slightly while keeping the texture creamy. It is a good option for a more indulgent variation.
Greek Yogurt Cream Layer
Greek yogurt can be used as a lighter substitute for cream cheese. It may change the flavor and texture.
This option gives the layer a tangier taste. It is helpful when you want a lighter direction.
Berry Brownie Refrigerator Cake
Add fresh berries between the layers for a fruity summer touch. The berries bring freshness to the creamy chocolate dessert.
This variation is especially lovely for warm-weather gatherings. The fruit makes the cake feel brighter.
Dairy-Free Brownie Refrigerator Cake
Use dairy-free cream cheese and a whipped topping alternative. This creates a dairy-free direction for the cream layers.
Make sure the other ingredients also fit your needs. Dairy-free versions depend on the products used.
Vanilla Pudding Boost
Add a splash of vanilla extract to the pudding layer for extra flavor. This gives the pudding mixture more warmth.
The vanilla flavor works well with both chocolate and cream. It is a small way to deepen the dessert.
Chocolate Brand Variation
Experiment with different chocolate brands for unique taste profiles. The topping can change the final flavor.
A grated Hershey bar is listed, but chocolate syrup can also be used. Choose the topping style you prefer.
Crunchy Brownie Refrigerator Cake
Add crushed nuts or chocolate chips for a delightful crunch. These optional add-ins give texture to the soft layers.
The crunch contrasts with the creamy filling. It makes each bite feel more interesting.
Vanilla Ice Cream Serving
Serve slices with vanilla ice cream. The cold ice cream makes the chilled cake feel even more dessert-like.
This pairing is especially good for celebrations. It adds another creamy element.
Whipped Cream Serving
A dollop of whipped cream can be served with each slice. It adds a soft finish.
This works well if you want to dress up individual servings. It also looks pretty on the plate.
Extra Chocolate Finish
Serve extra grated chocolate or chocolate syrup on the side. This lets everyone add more chocolate if they want.
The cake is already rich, but extra topping makes it feel more indulgent. It is a good idea for chocolate lovers.
Why This Recipe Works
Brownie Refrigerator Cake works because each layer has a different texture. The brownie base is dense and chocolatey, the cream cheese layer is soft and sweet, the pudding layer is smooth, and the whipped topping keeps everything cool and light.
The brownie layer needs to cool completely before assembly. If it is warm, the cream cheese and pudding layers can soften too much.
The cream cheese layer works best when the cream cheese is beaten until smooth before the powdered sugar and whipped topping are added. This prevents lumps and creates a creamy layer.
Sifting the powdered sugar helps the filling stay smooth. It is a small step that improves the texture.
The pudding layer thickens after being whisked with milk for about 2 minutes. Once thickened, folding in whipped topping gives it extra creaminess.
The refrigerator time matters. Chilling for a few hours lets the flavors meld and helps the layers set.
The final chocolate topping makes the dessert look finished. Grated chocolate gives texture, while chocolate syrup adds shine.
Directions
Step 1: Preheat the Oven
Preheat your oven to 350°F, or 175°C. This is the temperature used to bake the brownie layer.
Let the oven fully heat before placing the brownie pan inside. A properly preheated oven helps the brownies bake evenly.
Step 2: Prepare the Brownie Mix
Add the brownie mix to a mixing bowl and prepare it according to the package instructions. Use the ingredients required by your brownie mix.
The recipe also lists 1 extra-large egg, or the egg amount required by the brownie mix instructions. Follow the directions that match your box.
Step 3: Mix the Brownie Batter
Stir the brownie batter until it is fully combined. Make sure there are no dry patches of mix left in the bowl.
The batter should look chocolatey and smooth enough to spread. Do not worry if it is thick, because brownie batter is meant to be rich.
Step 4: Grease the Baking Pan
Grease a baking pan before adding the batter. This helps prevent the brownie layer from sticking.
Make sure the bottom and sides are coated. A greased pan makes it easier to serve the chilled cake later.
Step 5: Pour in the Brownie Batter
Pour the prepared brownie batter into the greased baking pan. Use a spatula to scrape the bowl.
Spread the batter evenly across the pan. An even layer helps the brownies bake properly.
Step 6: Bake the Brownie Layer
Place the pan in the preheated oven. Bake for about 30 minutes.
The brownies are ready when a toothpick inserted in the center comes out with a few moist crumbs. This keeps the brownie layer gooey and rich.
Step 7: Cool the Brownies Completely
Remove the brownies from the oven and let them cool completely in the pan. Patience is important here.
The brownies must be cool before the cream and pudding layers are added. Warm brownies can make the layers loose.
Step 8: Soften the Cream Cheese
While the brownies cool, make sure the cream cheese is softened. Softened cream cheese mixes more smoothly.
Philadelphia cream cheese is mentioned for perfect creaminess. Use a softened package for the cream cheese layer.
Step 9: Beat the Cream Cheese
Place the softened cream cheese in a mixing bowl. Beat it until smooth and creamy.
A hand mixer makes this step easier, though a whisk can also be used. The goal is a lump-free base.
Step 10: Add the Powdered Sugar
Gradually add 1 cup sifted powdered sugar to the cream cheese. Sifting helps avoid lumps.
Mix until the powdered sugar is fully combined. The mixture should look smooth and sweet.
Step 11: Fold in Whipped Topping
Add 1 thawed container of whipped topping to the cream cheese mixture. Fold it in gently.
The whipped topping makes the cream cheese layer light and airy. Fold until everything is well blended.
Step 12: Set Aside the Cream Cheese Layer
Set the cream cheese mixture aside while you prepare the pudding. Keep it smooth and ready for layering.
Do not overmix it after it is combined. The airy texture is part of what makes the cake pleasant.
Step 13: Combine the Pudding Mixes
In a large mixing bowl, add 1 package instant chocolate pudding and 1 package instant vanilla pudding. Both mixes will create one pudding layer.
This combination gives the cake chocolate flavor with creamy vanilla balance. Make sure the bowl is large enough for whisking.
Step 14: Add the Milk
Pour in 3.5 cups milk. Whole milk is preferred for a richer texture.
The milk activates the instant pudding mixes. Pour it in steadily so the powders begin to dissolve.
Step 15: Whisk the Pudding
Whisk the pudding mixture for about 2 minutes. It should thicken into a pudding consistency.
The pudding should be a bit wobbly but able to hold its shape. This texture is ideal for layering.
Step 16: Fold in the Whipped Topping
Fold in another container of whipped topping. This gives the pudding layer extra creaminess.
Fold gently until combined. The pudding layer should look smooth, soft, and creamy.
Step 17: Decide How to Use the Brownies
Once the brownie layer is completely cool, decide whether to cut it into even squares or leave it whole depending on your serving style. The recipe allows either approach.
Cut brownie pieces are helpful for layered serving dishes. A whole layer creates a more structured cake.
Step 18: Begin the First Brownie Layer
In a serving dish, place half of the brownie pieces at the bottom. This creates the chocolate foundation.
Spread the pieces evenly so the next layers have a good base. The brownies do not need to look perfect.
Step 19: Add Half the Cream Cheese Mixture
Spread half of the cream cheese mixture over the brownie layer. Use a spatula to smooth it gently.
Try to cover the brownies evenly. This layer gives the cake creamy contrast.
Step 20: Add Half the Pudding Mixture
Pour half of the pudding mixture over the cream cheese layer. Spread it carefully.
Be generous and make sure the pudding reaches across the dish. Every bite should have pudding.
Step 21: Add the Remaining Brownies
Place the remaining brownie pieces over the pudding layer. This begins the second round of layering.
Spread them out so the dessert has chocolate throughout. The layers should look full and rich.
Step 22: Add the Remaining Cream Cheese Mixture
Spread the rest of the cream cheese mixture over the second brownie layer. Smooth it with a spatula.
Work gently so the layers stay distinct. A little movement is fine.
Step 23: Add the Remaining Pudding Mixture
Pour the remaining pudding mixture over the cream cheese layer. Spread it to cover the top evenly.
This completes the main layered structure. The cake should already look creamy and decadent.
Step 24: Add the Final Whipped Topping
Top the cake with the remaining whipped topping. Smooth it out or create swirls.
This final layer makes the dessert look light and finished. It also adds a cool creamy top.
Step 25: Add Chocolate Topping
Grate a Hershey bar over the top or drizzle with chocolate syrup. Use as much or as little as you like.
Grated chocolate gives the top texture, while syrup gives shine. Either finish works beautifully.
Step 26: Cover the Dish
Cover the dish with plastic wrap. Make sure it is sealed enough to protect the dessert in the refrigerator.
Covering helps keep the refrigerator cake fresh. It also prevents the top from drying out.
Step 27: Refrigerate Before Serving
Place the covered dish in the refrigerator for a few hours before serving. This chilling time lets the flavors meld beautifully.
The cake tastes best when cold. The layers become more settled and easier to slice or scoop.
Step 28: Slice and Serve
Serve the Brownie Refrigerator Cake chilled. Cut generous pieces and lift them carefully from the dish.
Add vanilla ice cream, whipped cream, extra grated chocolate, or chocolate syrup if desired. Serve cold for the best flavor.
Serving Ideas
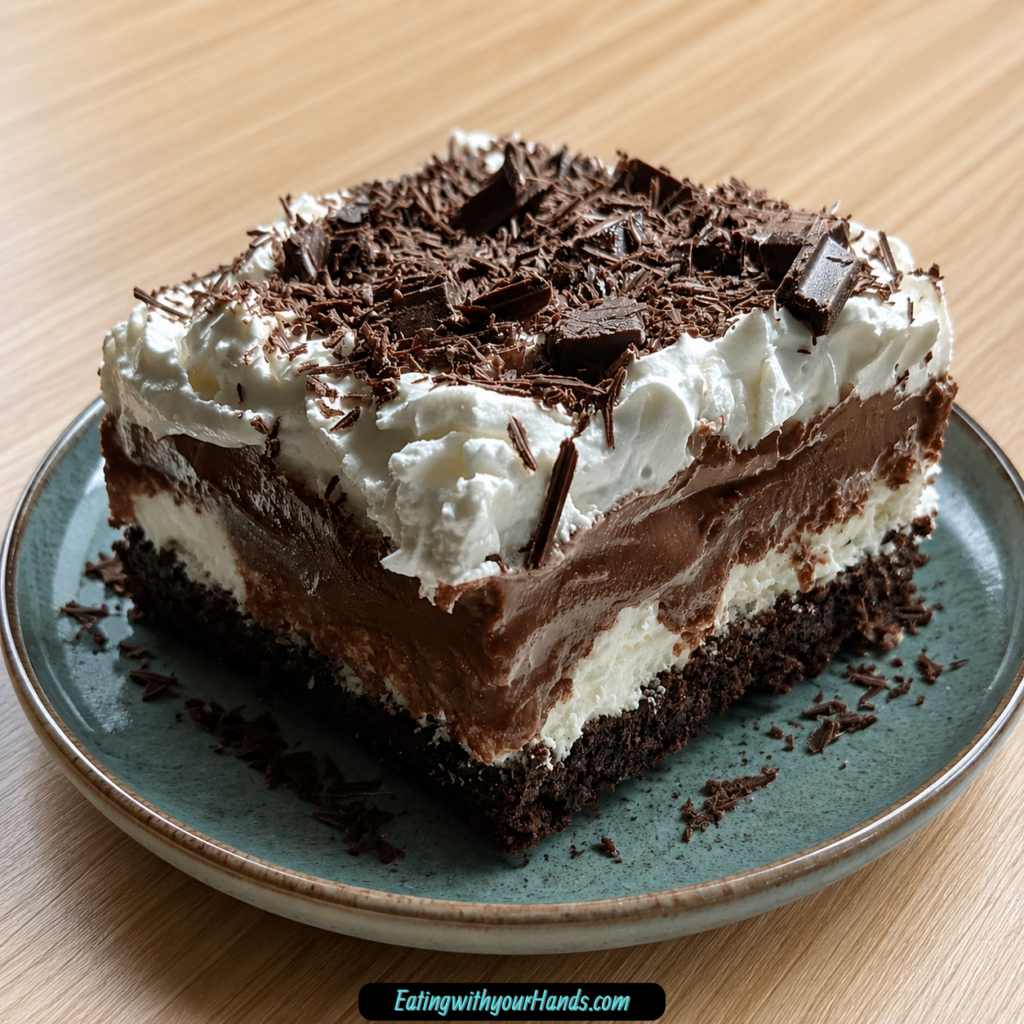
Brownie Refrigerator Cake is best served chilled. The cold layers make it creamy, refreshing, and rich without feeling too heavy.
Slice it into generous pieces for serving. The layers look beautiful when the cake is cut.
Vanilla ice cream pairs wonderfully with this dessert. It adds another cool, creamy element beside the brownie and pudding layers.
A dollop of whipped cream is also a lovely choice. It makes each slice feel even softer.
Extra grated chocolate can be served on the side. Chocolate syrup can also be drizzled over individual slices.
This dessert is perfect for potlucks, summer picnics, family gatherings, winter parties, and weeknight treats. It is easy to make ahead and bring out when ready.
Storage
Store leftover Brownie Refrigerator Cake in an airtight container in the refrigerator for up to 5 days. Keep it covered so it stays fresh.
Because the dessert has creamy layers, refrigerator storage is important. Serve it chilled for the best flavor.
Freezing
For longer storage, freeze individual slices wrapped tightly in plastic wrap. Place them in an airtight container for extra protection.
The slices can be frozen for up to 3 months. This makes the dessert easy to save for later.
Thawing
Thaw frozen slices in the refrigerator before enjoying. Overnight thawing works well.
This helps the creamy layers return to a better texture. Serve the slices chilled after thawing.
Make-Ahead
Brownie Refrigerator Cake is ideal for make-ahead serving. It needs a few hours in the refrigerator, so preparing it ahead of time works beautifully.
Assemble the cake, cover it with plastic wrap, and chill it until ready to serve. The flavors meld as it rests.
You can also freeze individual slices for later. Wrap them tightly and thaw them in the fridge when you want a sweet treat.
Helpful Notes for Best Results
Let the brownie layer cool completely before adding the cream cheese and pudding layers. This keeps the creamy layers from melting or sliding.
Beat the cream cheese until smooth before adding powdered sugar. Softened cream cheese is easier to blend.
Sift the powdered sugar to avoid lumps. This makes the cream cheese layer smoother.
Fold whipped topping gently into both the cream cheese mixture and the pudding mixture. Gentle folding keeps the layers light.
Whisk the pudding mixes with milk for about 2 minutes. The mixture should thicken into a wobbly but structured pudding consistency.
Cover and chill the finished cake for a few hours before serving. This helps the layers set and the flavors blend.
If you are out of powdered sugar, granulated sugar can be blended in a blender to make your own. Use this as a helpful backup.
For a dairy-free version, use dairy-free cream cheese and a whipped topping alternative. Choose products that fit your needs.
Variations
Mint Brownie Refrigerator Cake
Add a few drops of mint extract to the cream cheese layer. This gives the dessert a minty twist.
Mint works especially well with the brownie and chocolate pudding layers. It makes the cake feel cooler and fresher.
Butterscotch Brownie Refrigerator Cake
Swap out the chocolate pudding for butterscotch pudding. This creates a different flavor profile.
The dessert will still have a brownie base. The pudding layer will taste warmer and sweeter in a new way.
Gluten-Free Brownie Refrigerator Cake
Choose a gluten-free brownie mix. Prepare it according to the package instructions.
Make sure all other ingredients also fit your needs. This keeps the full dessert gluten-free.
Mascarpone Brownie Refrigerator Cake
Use mascarpone cheese instead of cream cheese. This gives the dessert a richer taste.
The texture remains creamy. The flavor becomes slightly different and more indulgent.
Greek Yogurt Brownie Refrigerator Cake
Greek yogurt can be used instead of cream cheese for a lighter option. It may change the flavor.
This swap gives the layer a tangier taste. Use it when you want a lighter direction.
Berry Brownie Refrigerator Cake
Add fresh berries between the layers. This gives the dessert a fruity summer touch.
The berries brighten the rich chocolate and cream. They also add color to the layers.
Dairy-Free Brownie Refrigerator Cake
Use dairy-free cream cheese and whipped topping alternatives. This creates a dairy-free version.
Make sure the brownie mix and other ingredients also fit your needs. Dairy-free results depend on the products used.
Vanilla Pudding Flavor Boost
Add a splash of vanilla extract to the pudding layer. This gives extra flavor.
Vanilla adds warmth to the creamy pudding. It works well with the chocolate.
Chocolate Brand Variation
Use different chocolate brands for the topping. This changes the final flavor.
A grated Hershey bar is listed, but chocolate syrup can also be used. Choose the chocolate finish you love.
Crunchy Brownie Refrigerator Cake
Add crushed nuts or chocolate chips. These optional add-ins bring crunch.
They create contrast with the soft cream and pudding layers. Use them if you enjoy texture.
Extra Chocolate Drizzle Cake
Drizzle more chocolate syrup over the top or over each slice. This makes the dessert even more chocolate-forward.
Serve extra syrup on the side. It lets everyone choose how much chocolate they want.
Troubleshooting
The Cream Cheese Layer Has Lumps
Make sure the cream cheese is softened before beating. Cold cream cheese does not blend as smoothly.
Sift the powdered sugar before adding it. This also helps keep the layer smooth.
The Brownie Layer Is Too Warm
Let the brownies cool completely before layering. Warm brownies can make the cream cheese and pudding layers loosen.
Patience is important. The layers come together best when the brownie base is cool.
The Pudding Layer Is Too Thin
Whisk the pudding mixes with milk for about 2 minutes. The mixture should thicken to a pudding consistency.
It should be a bit wobbly but hold its shape. If it looks too loose, give it the full whisking time.
The Layers Mix Together
Spread each layer gently with a spatula. Avoid pressing too hard.
Chilling also helps the layers settle. Cover the cake and refrigerate for a few hours before serving.
The Cake Does Not Slice Cleanly
Make sure it has chilled for a few hours. The chilling time helps the layers set.
Use a clean knife for slicing. Wipe the knife between cuts if you want neater pieces.
The Dessert Tastes Too Rich
Serve smaller slices or add fresh berries between the layers. Berries bring freshness to the dessert.
A dollop of whipped cream can also lighten each serving. Serve chilled for the most refreshing texture.
The Dessert Needs More Chocolate
Use grated Hershey bar on top or drizzle with chocolate syrup. Extra grated chocolate or syrup can also be served on the side.
Chocolate chips can be added for crunch. Different chocolate brands can create unique taste profiles.
The Dessert Needs a Dairy-Free Option
Use dairy-free cream cheese and a whipped topping alternative. Make sure the other ingredients fit your needs.
The texture and flavor may vary. Choose products that work well in chilled desserts.
Frequently Asked Questions
Can I freeze Brownie Refrigerator Cake?
Yes, Brownie Refrigerator Cake can be frozen. Wrap individual slices tightly in plastic wrap and place them in an airtight container.
They will keep well in the freezer for up to 3 months. When ready to enjoy, thaw the slices in the refrigerator overnight.
What can I use instead of cream cheese?
Mascarpone cheese can be used for a richer flavor. Greek yogurt can also be used for a lighter option.
Dairy-free cream cheese is a good alternative if you are avoiding dairy. Each option changes the flavor slightly.
How long does Brownie Refrigerator Cake last in the fridge?
Brownie Refrigerator Cake lasts in the refrigerator for up to 5 days. Store it in an airtight container.
Keep it covered so it stays fresh and delicious. Serve it chilled for the best texture.
Can I make this dessert gluten-free?
Yes, use a gluten-free brownie mix. Prepare it according to the package instructions.
Make sure the other ingredients also meet your needs. This keeps the full dessert gluten-free.
Can I use butterscotch pudding?
Yes, butterscotch pudding can replace the chocolate pudding. This creates a different flavor profile.
The dessert will still have the brownie layer and vanilla pudding. The butterscotch flavor makes it warmer and sweeter.
Can I add fresh berries?
Yes, fresh berries can be added between the layers. They give the dessert a fruity summer touch.
Berries pair well with chocolate and cream. They also make the cake feel a little lighter.
Can I make it dairy-free?
Yes, use dairy-free cream cheese and a whipped topping alternative. Check the other ingredients as needed.
The flavor and texture may change depending on the products. Keep the dessert chilled before serving.
What topping should I use?
You can use a grated Hershey bar or chocolate syrup. Both are listed options.
Grated chocolate gives texture, while chocolate syrup adds a smooth drizzle. Use as much or as little as you like.
Why This Recipe Works So Well
Brownie Refrigerator Cake works so well because it turns simple dessert components into a layered chilled cake that tastes bigger than the effort required. The brownie layer gives the dessert structure and chocolate richness.
The cream cheese layer adds tangy sweetness and softness. Powdered sugar sweetens it, while whipped topping makes it light and airy.
The pudding layer brings a smooth, cool texture. Chocolate pudding and vanilla pudding together create a creamy layer that tastes rich but still refreshing when chilled.
The final whipped topping gives the cake a soft finish. Grated chocolate or chocolate syrup makes the top look inviting.
The refrigerator time is what brings everything together. A few hours of chilling lets the flavors meld and the layers settle.
The recipe is also flexible. Mint extract, butterscotch pudding, gluten-free brownie mix, mascarpone cheese, Greek yogurt, fresh berries, dairy-free alternatives, vanilla extract, different chocolate brands, crushed nuts, chocolate chips, vanilla ice cream, whipped cream, grated chocolate, and chocolate syrup all give you ways to adapt it.
Final Thoughts
Brownie Refrigerator Cake is a cool, creamy layered dessert made with a brownie base, sweet cream cheese filling, chocolate and vanilla pudding, whipped topping, and a chocolate finish. It is rich, chilled, make-ahead friendly, and perfect for family gatherings, summer picnics, winter parties, potlucks, or easy weeknight dessert.
Serve it cold with vanilla ice cream, whipped cream, extra grated chocolate, or chocolate syrup, and keep leftovers covered in the refrigerator for up to 5 days. With its chocolatey base, airy cream layer, smooth pudding, and sweet topping, this dessert brings simple ingredients together in a way that feels generous, nostalgic, and ready to share.
Brownie Refrigerator Cake
Rich, creamy, chilled, and layered with classic dessert flavor, this Brownie Refrigerator Cake combines a baked brownie layer with a smooth cream cheese mixture, chocolate and vanilla pudding, whipped topping, and chocolate on top. It is a sweet American dessert for parties, potlucks, family gatherings, or any time you want a make-ahead refrigerator cake.
Recipe Details
- Prep Time: 30 minutes
- Cook Time: 30 minutes
- Total Time: 1 hour
- Course: Dessert
- Cuisine: American
- Servings: 12 pieces
- Calories: 350 kcal
Equipment
- Mixing bowl
- baking pan
Ingredients
For Topping
- 1 bar Hershey bar grated or chocolate syrup for drizzling
For the Pudding Layer
- 1 package instant chocolate pudding
- 1 package instant vanilla pudding
- 3.5 cups milk
- 1 container whipped topping
For the Cream Cheese Layer
- 1 package cream cheese softened
- 1 cup powdered sugar
- 1 container whipped topping
For the Brownie Layer
- 1 box brownie mix prepared according to package instructions
- 1 extra-large egg egg or as required by brownie mix
Instructions
Step 1: Prepare the Brownie Layer
Prepare brownie mix according to package instructions and bake in a baking pan. Use the brownie mix instructions as directed.
Step 2: Make the Cream Cheese Layer
In a mixing bowl, combine softened cream cheese, powdered sugar, and whipped topping until smooth. Mix until the layer looks creamy and evenly blended.
Step 3: Prepare the Puddings
Prepare instant chocolate and vanilla puddings according to package instructions using milk. Keep the pudding mixture ready for layering.
Step 4: Assemble the Layers
Layer the baked brownie, cream cheese mixture, and pudding in a serving dish. Spread each layer evenly so every piece has brownie, cream cheese, and pudding.
Step 5: Add the Topping
Top with additional whipped topping and grated chocolate or drizzle with chocolate syrup.
Notes
- Chill the cake in the refrigerator for a few hours before serving for better flavor.
Serving Suggestions
Serve this Brownie Refrigerator Cake chilled after it has rested in the refrigerator for a few hours. The brownie layer, cream cheese mixture, pudding, whipped topping, and chocolate finish make each piece rich, creamy, and dessert-ready.
This cake works well for make-ahead entertaining, potlucks, birthdays, and family dessert tables. Use grated Hershey bar or chocolate syrup for the topping, depending on the finish you prefer.
Storage
How to Store
Chill the cake in the refrigerator for a few hours before serving for better flavor. The recipe does not provide a specific refrigerator storage duration, so no exact storage time is added here.
Chill Time
The cake should be chilled in the refrigerator for a few hours before serving. This helps the layers settle and gives the dessert a better flavor.
Best Texture Tip
Layer the baked brownie, cream cheese mixture, and pudding evenly in the serving dish. This keeps each slice creamy, rich, and balanced.
Topping Tip
Top with additional whipped topping and grated chocolate or drizzle with chocolate syrup. No specific extra whipped topping quantity is provided, so no amount is added here.

Fernando is the creator and writer behind the food blog Eating with your Hands. Living and working in cities like Paris, Barcelona, and Berlin, and being married to a Canadian foodie, has given Fernando a passion and interest in food and inspired him to run EWYH.