
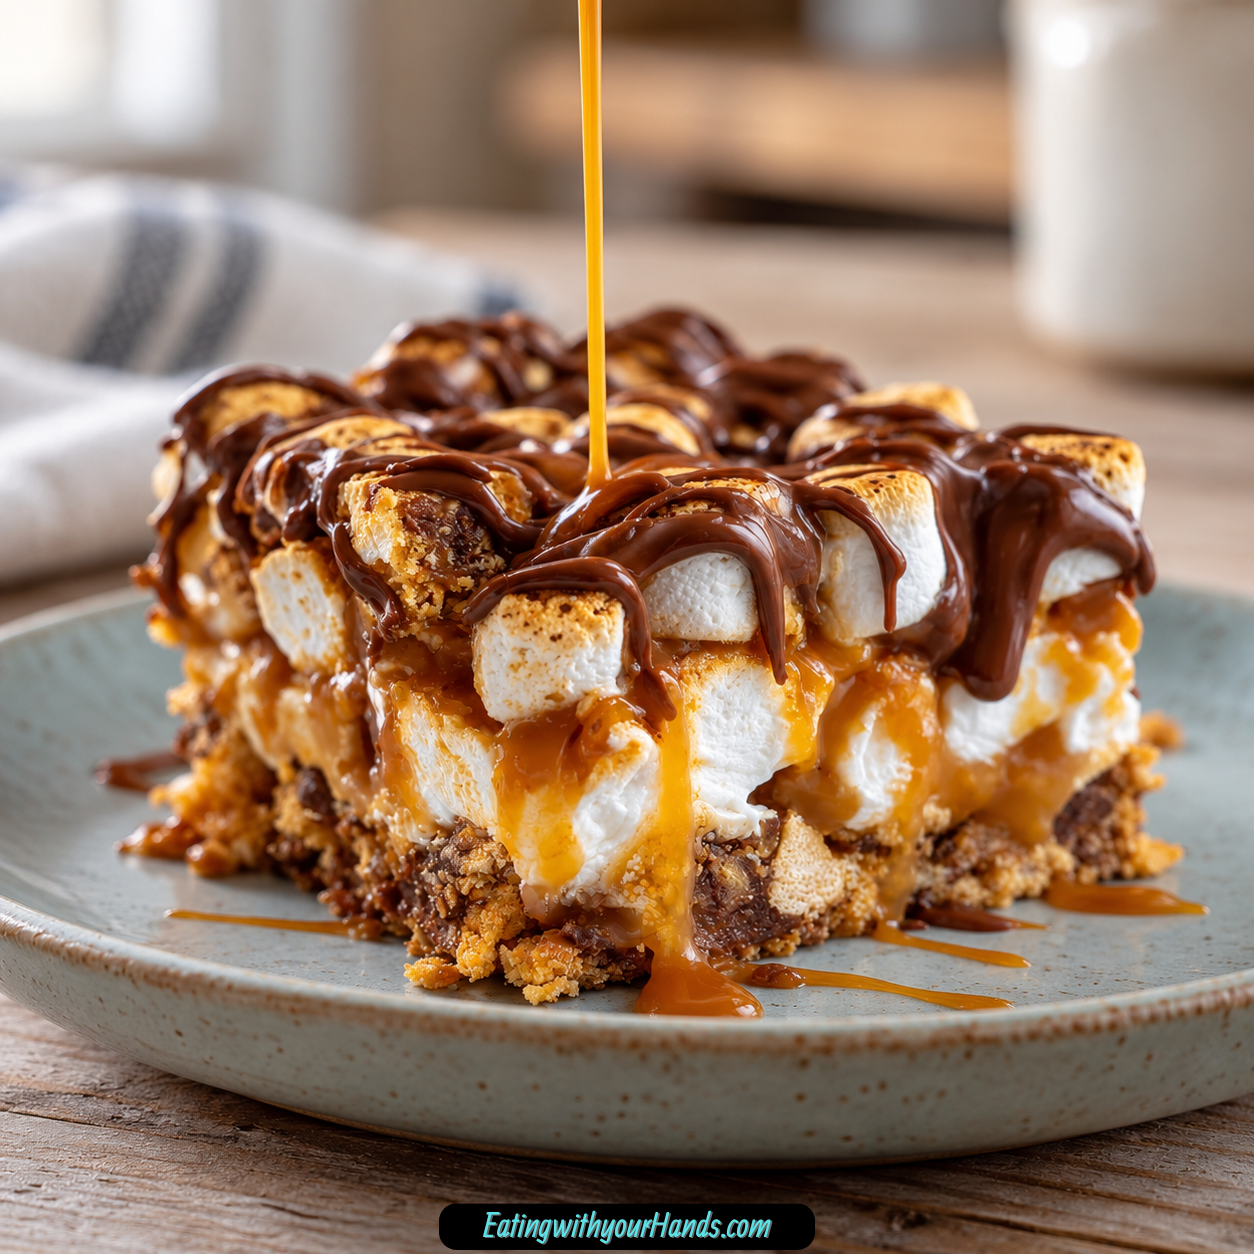
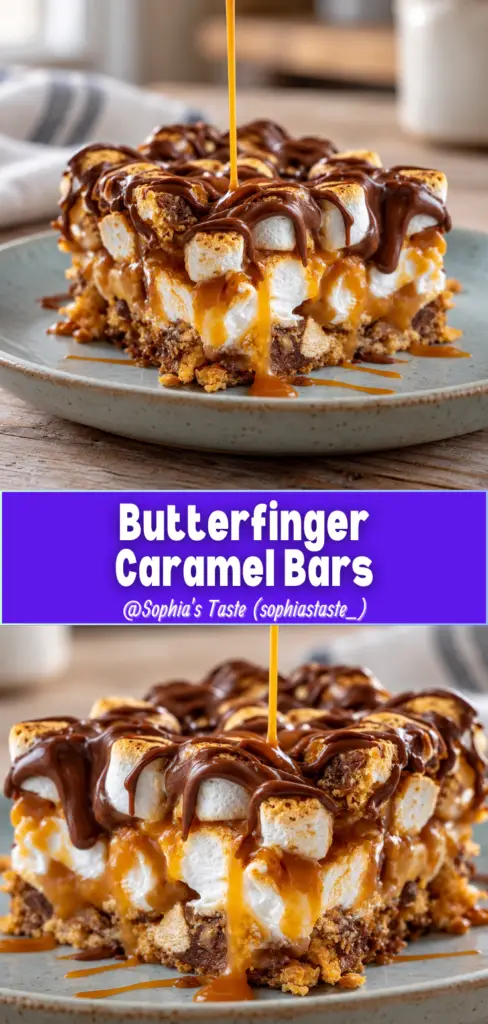
Butterfinger Caramel Bars You Must Try Now are the kind of no-bake dessert that disappears almost as quickly as it comes together. They start with a simple graham cracker base, get covered with soft mini marshmallows, drenched in silky caramel, sprinkled with crunchy Butterfinger Bites, and finished with a drizzle of semi-sweet chocolate.
This is the dessert for the days when you want something wildly sweet, sticky, crunchy, chewy, and easy. There is no oven to preheat, no dough to chill, and no complicated baking step standing between you and a tray of caramel candy-bar bars.
The flavor is playful and nostalgic. Graham crackers bring that s’mores-style foundation, marshmallows add softness, caramel makes everything gooey, and Butterfinger pieces give the peanut-buttery crunch that makes these bars so hard to stop eating.
The texture is the real hook. Every bite has crisp cracker, pillowy marshmallow, chewy caramel, shattering candy bits, and just enough chocolate on top to pull it all together.
They also look more impressive than the effort required. Once the caramel settles and the chocolate drizzle sets, the bars slice into sweet little squares that feel perfect for parties, bake sales, family gatherings, edible gifts, or late-night dessert emergencies.
This is one of those recipes that makes sense the moment you see it on the counter. People drift toward the pan, ask what it is, take one square, then usually come back for another.
Butterfinger Caramel Bars You Must Try Now are simple, no-bake, candy-loaded, and full of sweet-salty crunch. They are the kind of dessert that proves a saucepan, a baking dish, and a few pantry-style treats can create something unforgettable.
Table of Contents
- Why You’ll Love These Butterfinger Caramel Bars
- Recipe Details
- Ingredients
- Equipment You’ll Need
- Ingredient Notes
- Optional Swaps, Variations, and Flavor Ideas
- Classic Butterfinger Caramel Bars
- Regular Caramel Version
- Thick Caramel Sauce Version
- Graham Crumb Base
- Gluten-Free Butterfinger Caramel Bars
- Digestive Biscuit Bars
- Regular Butterfinger Bars Version
- Pretzel Caramel Bars
- Toffee Crunch Bars
- Sea Salt Butterfinger Bars
- Snickers Caramel Bars
- Reese’s Pieces Bars
- Cookies-and-Cream Bars
- Nutty Caramel Bars
- Chocolate Overload Bars
- Crispy Rice Caramel Bars
- Why This Recipe Works
- Directions
- Step 1: Prepare the Pan
- Step 2: Arrange the Graham Crackers
- Step 3: Add the Marshmallows
- Step 4: Chop the Butterfinger Bites
- Step 5: Combine Caramel and Milk
- Step 6: Melt the Caramel Slowly
- Step 7: Adjust the Caramel if Needed
- Step 8: Pour the Caramel Immediately
- Step 9: Add the Butterfinger Pieces
- Step 10: Melt the Chocolate
- Step 11: Drizzle the Chocolate
- Step 12: Let the Bars Cool
- Step 13: Chill for Cleaner Cuts
- Step 14: Lift From the Pan
- Step 15: Slice the Bars
- Step 16: Serve Chilled or Room Temperature
- Step 17: Warm for Ice Cream
- Step 18: Store the Extras
- Serving Ideas
- Storage
- Freezing
- Make-Ahead
- Helpful Notes for Best Results
- Variations
- Classic Butterfinger Caramel Bars
- Sea Salt Butterfinger Bars
- Milk Chocolate Butterfinger Bars
- No-Chocolate Butterfinger Bars
- Regular Caramel Candy Bars
- Thick Caramel Sauce Bars
- Gluten-Free Butterfinger Caramel Bars
- Digestive Biscuit Caramel Bars
- Pretzel Crunch Caramel Bars
- Toffee Bit Caramel Bars
- Snickers Caramel Bars
- Reese’s Pieces Caramel Bars
- Oreo Caramel Bars
- Nutty Caramel Bars
- Espresso Caramel Bars
- Troubleshooting
- Frequently Asked Questions
- Can I freeze Butterfinger Caramel Bars?
- How do I prevent the caramel from getting too sticky?
- Can I make these without marshmallows?
- Why did my caramel seize up when melting?
- How far in advance can I make these?
- Can I use regular Butterfinger bars?
- Can I make these gluten-free?
- Can I use milk chocolate instead of semi-sweet?
- Nutritional Information
- Why This Recipe Works So Well
- Final Thoughts
- Butterfinger Caramel Bars Recipe
Why You’ll Love These Butterfinger Caramel Bars
These bars are completely no-bake. You only need a saucepan, an 8×8 inch baking dish, and a little patience while they cool.
They take about 15 minutes of active work. Most of the time is hands-off cooling.
They have a perfect texture mix. Graham crackers, marshmallows, caramel, Butterfinger Bites, and chocolate create crunch, chew, softness, and snap.
They are easy to serve. Once cooled, they lift out with parchment and slice into neat bars.
They are great for sharing. Potlucks, bake sales, family gatherings, dessert boxes, and party trays are all perfect places for them.
They store well. Keep them at room temperature, refrigerate them, or freeze them for later.
Recipe Details
This recipe uses an 8×8 inch baking dish. Line it with parchment paper and leave overhang on the sides so the bars lift out easily.
The base uses 6½ graham crackers. Classic honey graham crackers work best.
The soft layer uses 2 cups mini marshmallows. Mini marshmallows melt slightly when the hot caramel hits them.
The caramel layer uses 1 bag of caramel bits, 11 ounces total, and 2 tablespoons milk. Caramel bits save time because there is no unwrapping.
The candy topping uses 1 bag of Butterfinger Bites, 10 ounces total, coarsely chopped. The rough chunks give the best crunch.
The chocolate drizzle uses 2 ounces semi-sweet chocolate. Milk chocolate can be used for a sweeter drizzle.
The caramel melts with milk over low heat in about 5 minutes. Stir until smooth and glossy.
The bars cool completely at room temperature for about 2 hours. For faster setting and cleaner cuts, chill them for about 30 minutes.
Ingredients
For the Butterfinger Caramel Bars
- 6 ½ graham crackers
- 2 cups mini marshmallows
- 1 bag caramel bits, 11 ounces
- 2 tablespoons milk
- 1 bag Butterfinger Bites, 10 ounces, coarsely chopped
- 2 ounces semi-sweet chocolate
Optional Swaps and Flavor Ideas
- 35–40 regular caramels
- Thick caramel sauce
- 1 cup graham cracker crumbs
- Gluten-free graham crackers
- Digestive biscuits
- Chopped regular Butterfingers, about 8 fun-size bars
- Crushed pretzels
- Toffee bits
- Milk chocolate
- Flaky sea salt
- Chopped Snickers
- Reese’s Pieces
- Crushed Oreos
- Toasted pecans
- Toasted peanuts
- Chopped walnuts
- Mini chocolate chips
- Crispy rice cereal
- Espresso powder
- Vanilla bean ice cream
- Powdered sugar for cut edges
Equipment You’ll Need
Basic Equipment
- 8×8 inch baking dish
- Parchment paper
- Medium saucepan
- Spoon or heatproof spatula
- Microwave-safe bowl
- Knife
- Cutting board
Optional Helpful Tools
- Offset spatula
- Airtight container
- Plastic wrap
- Freezer bag
Equipment Notes
An 8×8 inch baking dish gives the bars the right thickness. A larger pan would make thinner bars.
Parchment paper is important because caramel can stick. Leaving overhang gives you handles to lift the whole slab out.
A medium saucepan is used to melt the caramel bits with milk. Low heat keeps the caramel smooth.
A spoon or heatproof spatula helps spread the caramel before it sets. Work quickly once the caramel is melted.
A microwave-safe bowl makes melting the chocolate easy. Short microwave bursts help prevent overheating.
A sharp knife gives cleaner cuts. Running the knife under hot water between cuts can make the edges smoother.
Ingredient Notes
Graham crackers create the base of the bars. The classic honey kind works well because it balances the caramel and candy.
Mini marshmallows add softness and help create that s’mores-like layer. They also melt slightly under the hot caramel.
Caramel bits make this recipe easier because there is no unwrapping. They melt into a smooth layer with milk.
Milk loosens the caramel so it can pour. Use the exact amount for the best texture.
Butterfinger Bites bring the signature crunch. Coarsely chopping them gives better texture than very small crumbs.
Semi-sweet chocolate adds balance. It keeps the bars from tasting like pure caramel sweetness.
Milk chocolate can be used if you want a sweeter drizzle. It gives the bars a softer candy flavor.
Gluten-free graham crackers can be used if needed. Digestive biscuits can also work as a base.
Crushed pretzels or toffee bits can replace Butterfinger pieces for a different crunch. These are also helpful alternatives for some allergy needs.
Optional Swaps, Variations, and Flavor Ideas
Classic Butterfinger Caramel Bars
Use graham crackers, mini marshmallows, caramel bits, milk, Butterfinger Bites, and semi-sweet chocolate. This gives the full chewy-crunchy no-bake bar.
Let the bars cool completely before slicing. Clean cuts come from patience.
Regular Caramel Version
Use 35 to 40 regular caramels instead of caramel bits. Melt them with the milk until smooth.
This takes a little longer because the caramels need unwrapping. The texture still works beautifully.
Thick Caramel Sauce Version
Use thick caramel sauce in a pinch. Reduce the milk to 1 tablespoon.
The bars may be softer depending on the sauce. Chill before slicing for the best texture.
Graham Crumb Base
Use 1 cup graham cracker crumbs instead of whole crackers. Press the crumbs firmly into the pan.
This creates a more even base. It will not have the same cracker-sheet texture.
Gluten-Free Butterfinger Caramel Bars
Use gluten-free graham crackers. Keep the rest of the method the same.
Make sure all ingredients fit your needs. The bars still need to cool completely.
Digestive Biscuit Bars
Use digestive biscuits instead of graham crackers. They give the base a slightly different flavor.
Press or arrange them to cover the bottom. Break pieces as needed.
Regular Butterfinger Bars Version
Use chopped regular Butterfingers instead of Butterfinger Bites. About 8 fun-size bars works.
Chop coarsely so the topping has crunch. Press gently into the warm caramel.
Pretzel Caramel Bars
Use crushed pretzels instead of Butterfinger pieces. This gives a salty-sweet crunch.
The flavor is different but delicious. Semi-sweet chocolate works especially well here.
Toffee Crunch Bars
Use toffee bits as the topping. This makes the bars buttery and crunchy.
They will taste less peanut-buttery than the Butterfinger version. The caramel still ties everything together.
Sea Salt Butterfinger Bars
Sprinkle flaky sea salt over the warm caramel before adding Butterfinger pieces. The salt makes the sweetness pop.
Use a light hand. A little goes a long way.
Snickers Caramel Bars
Use chopped Snickers instead of Butterfinger Bites. This adds nougat and more caramel flavor.
The bars become softer and richer. Chill well before slicing.
Reese’s Pieces Bars
Use Reese’s Pieces for a peanut butter candy twist. The colorful topping makes the bars fun.
Press them gently into the warm caramel. Add chocolate drizzle if desired.
Cookies-and-Cream Bars
Use crushed Oreos as the topping. This gives a cookies-and-cream direction.
The bars will taste different from the Butterfinger version. The caramel still works with the cookie crunch.
Nutty Caramel Bars
Add toasted pecans, peanuts, or chopped walnuts. Press them into the caramel layer.
This adds extra crunch. Toasting deepens the nut flavor.
Chocolate Overload Bars
Mix mini chocolate chips into the marshmallow layer before pouring caramel. Add the chocolate drizzle as usual.
This version is extra rich. Serve in smaller pieces if desired.
Crispy Rice Caramel Bars
Add crispy rice cereal to the graham cracker base. It gives extra texture.
This is a fun variation for coffee snacking. Press the base firmly.
Why This Recipe Works
This recipe works because the layers are simple but strong. The graham crackers give structure, the marshmallows soften under hot caramel, the caramel binds the bars, and the Butterfinger pieces add crunch.
The parchment paper matters because caramel can be sticky. It lets you remove the bars without fighting the pan.
The caramel bits and milk create a pourable caramel layer. Low heat keeps the caramel from scorching or seizing.
Mini marshmallows melt just enough when the caramel goes over them. They help create a soft, chewy middle.
Butterfinger Bites are added while the caramel is still warm. Pressing them gently helps them stick.
The chocolate drizzle adds a finished look and a little balance. Semi-sweet chocolate keeps the bars from feeling too sugary.
Cooling time is essential. The caramel may look runny at first, but it sets as it cools.
Chilling before slicing makes cleaner edges. A hot knife helps the bars cut smoothly.
Directions
Step 1: Prepare the Pan
Line an 8×8 inch baking dish with parchment paper. Let the parchment hang over the edges.
Those overhanging pieces act like handles later. They make removing the bars much easier.
Step 2: Arrange the Graham Crackers
Place 6½ graham crackers in a single layer across the bottom of the pan. Break pieces as needed to fit.
The layer does not need to look perfect. The goal is to cover the base as evenly as possible.
Step 3: Add the Marshmallows
Sprinkle 2 cups mini marshmallows evenly over the graham crackers. Spread them so each area gets some marshmallow.
Do not press them down too hard. The hot caramel will settle them into place.
Step 4: Chop the Butterfinger Bites
Coarsely chop the 10-ounce bag of Butterfinger Bites. Keep the pieces chunky enough for texture.
Set them aside before melting the caramel. The caramel sets quickly, so the topping should be ready.
Step 5: Combine Caramel and Milk
Add the 11-ounce bag of caramel bits and 2 tablespoons milk to a medium saucepan. Place the saucepan over low heat.
Low heat is important. Caramel can burn if rushed.
Step 6: Melt the Caramel Slowly
Stir the caramel mixture gently until completely smooth. This takes about 5 minutes.
The caramel should ribbon off the spoon. It should look glossy and pourable.
Step 7: Adjust the Caramel if Needed
If the caramel is too thick, add milk ½ teaspoon at a time. Stir well after each addition.
If the caramel is too thin, cook it 1 to 2 minutes longer. It should coat the back of a spoon without running off immediately.
Step 8: Pour the Caramel Immediately
Pour the warm caramel over the marshmallows right away. Move quickly before it begins to firm up.
Tilt the pan gently to help the caramel spread. Use the back of a spoon to guide it into the corners.
Step 9: Add the Butterfinger Pieces
Sprinkle the chopped Butterfinger Bites over the warm caramel. Spread them evenly across the surface.
Press gently so the candy pieces stick. This is where the crunchy topping locks into the caramel.
Step 10: Melt the Chocolate
Place 2 ounces semi-sweet chocolate in a microwave-safe bowl. Microwave for 20 seconds, stir, then microwave for 10 more seconds if needed.
Stir until smooth. Do not overheat the chocolate.
Step 11: Drizzle the Chocolate
Drizzle the melted chocolate over the Butterfinger layer. Make zigzags or loose lines across the top.
The drizzle does not need to be perfect. Extra chocolate lines only make the bars more tempting.
Step 12: Let the Bars Cool
Let the bars cool completely at room temperature for about 2 hours. This lets the caramel set properly.
Do not cut too soon. Warm caramel can run and make messy slices.
Step 13: Chill for Cleaner Cuts
For cleaner cuts, refrigerate the pan for about 30 minutes before slicing. This firms the caramel and chocolate.
This is especially helpful in warm kitchens. Chilled bars slice more neatly.
Step 14: Lift From the Pan
Use the parchment overhang to lift the set bars from the pan. Place the slab on a cutting board.
If the edges stick slightly, loosen them gently. The parchment should do most of the work.
Step 15: Slice the Bars
Use a sharp knife to cut into bars. Run the knife under hot water between cuts for smoother edges.
Wipe the knife as needed. This keeps caramel from dragging through the layers.
Step 16: Serve Chilled or Room Temperature
Serve the bars chilled for firmer caramel. Serve at room temperature for a softer caramel pull.
Both textures are delicious. Choose based on how gooey you want them.
Step 17: Warm for Ice Cream
For a dessert plate, warm a bar for about 8 seconds in the microwave. Serve it over vanilla bean ice cream.
The warm caramel and cold ice cream create a beautiful contrast. Do not overheat or the bar may fall apart.
Step 18: Store the Extras
Layer bars between parchment sheets in an airtight container. Store at room temperature, in the refrigerator, or in the freezer.
Keep them away from heat. Warm rooms can soften the caramel and chocolate.
Serving Ideas
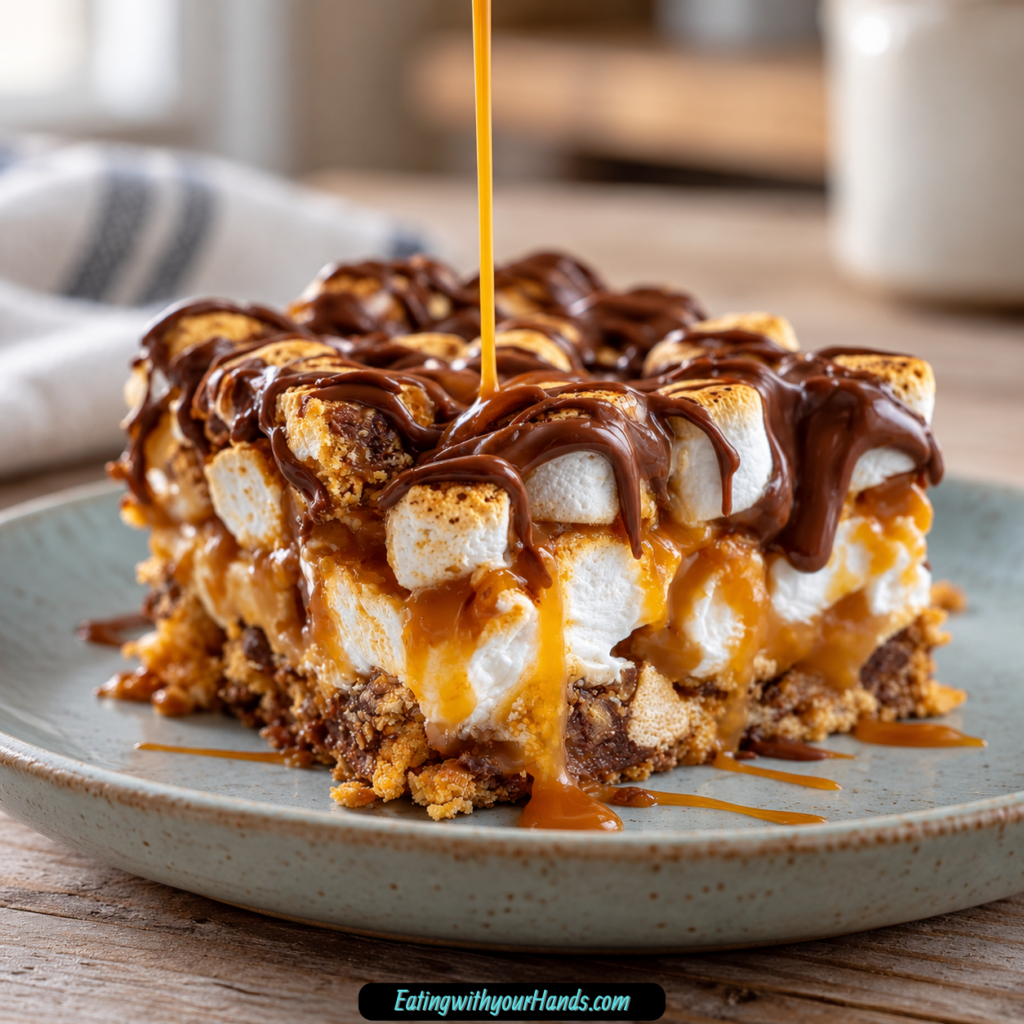
Serve these bars chilled when you want clean edges and a firmer bite. The caramel stays chewy but holds its shape well.
Serve them at room temperature when you want a softer caramel pull. This is especially comforting in cooler weather.
Serve slightly warmed over vanilla bean ice cream. About 8 seconds in the microwave is enough.
Cut them into full-size bars for dessert plates. Cut them into 1-inch squares for parties or when you want smaller bites.
Stack them in a cute box with wax paper between layers for gifting. They travel well as long as they are not left in heat.
Add them to a bake sale table. The candy-bar topping makes them stand out.
Serve them with coffee if you like a sweet afternoon treat. The caramel and chocolate work beautifully with a hot drink.
Keep a few hidden in the refrigerator for later. These bars have a habit of disappearing.
Storage
Store Butterfinger Caramel Bars in an airtight container. Layer parchment between bars to prevent sticking.
They keep at room temperature for up to 3 days. Room temperature gives the softest caramel texture.
They keep in the refrigerator for up to 1 week. Chilling makes the caramel firmer while still chewy.
If the bars harden in the refrigerator, microwave them for about 10 seconds. This brings back a softer texture.
Do not store them in a hot place. Heat can melt the chocolate and loosen the caramel.
For gifting, keep them cool until packed. Use wax paper between layers.
If the cut edges feel sticky, a light dusting of powdered sugar can help. Use only a little.
Freezing
These bars freeze well for up to 2 months. Wrap each bar tightly in plastic wrap.
Place the wrapped bars in a freezer bag. Press out excess air before sealing.
Thaw at room temperature for about 30 minutes before eating. The caramel should soften nicely.
Freezing individual bars makes them easy to grab one at a time. It also protects the texture better.
Make sure the bars are fully set before freezing. This keeps the layers cleaner.
For best results, freeze bars in a single layer first if they are soft. Stack after firm.
Do not thaw in a hot place. Let them soften gradually.
Make-Ahead
Butterfinger Caramel Bars are great for making ahead. They are best within 3 days, but they can still be served later if stored properly.
The bars can be made the day before a party. Chill them before slicing for neat pieces.
If making several days ahead, store them in the refrigerator. Let them sit at room temperature for 30 minutes before serving.
The caramel becomes firmer over time. Slightly undercooking it can help if you know the bars will sit for a while.
You can also freeze the bars for up to 2 months. Thaw only what you need.
Do not drizzle chocolate until the caramel and candy are set if you want a very precise look. Otherwise, the full recipe can be finished at once.
Make sure to keep parchment between layers. This protects the bars and makes serving easier.
Helpful Notes for Best Results
Use parchment paper with overhang. It is the easiest way to remove the bars from the pan.
Do not rush the caramel. Low and slow keeps it smooth.
Use the exact 2 tablespoons milk. Too much milk can make the caramel softer and messier.
Pour the caramel immediately after melting. It firms as it cools.
Press the Butterfinger pieces gently into the warm caramel. This helps them stick.
Let the bars cool completely before slicing. Warm bars can turn into caramel puddles.
Chill for 30 minutes before cutting if you want neat squares. Use a hot knife for smooth edges.
Keep extra Butterfinger Bites nearby only if you trust yourself. They tend to vanish during prep.
Variations
Classic Butterfinger Caramel Bars
Use graham crackers, mini marshmallows, caramel bits, milk, Butterfinger Bites, and semi-sweet chocolate. This gives the full no-bake candy bar dessert.
Cool completely before slicing. The caramel needs time.
Sea Salt Butterfinger Bars
Sprinkle flaky sea salt over the warm caramel. Add Butterfinger pieces after that.
The salt brings out the caramel and chocolate flavor. Use a light sprinkle.
Milk Chocolate Butterfinger Bars
Use milk chocolate for the drizzle instead of semi-sweet. The bars will taste sweeter.
This version is great for kids. Chill before cutting.
No-Chocolate Butterfinger Bars
Skip the chocolate drizzle. This lets the caramel and Butterfinger flavor shine more clearly.
The bars still taste rich and sweet. Slice after cooling.
Regular Caramel Candy Bars
Melt 35 to 40 regular caramels with milk instead of using caramel bits. Stir until smooth.
This works well if caramel bits are not available. Unwrapping takes extra time.
Thick Caramel Sauce Bars
Use thick caramel sauce and reduce milk to 1 tablespoon. Chill well before slicing.
The texture may be softer. Serve cold for cleaner pieces.
Gluten-Free Butterfinger Caramel Bars
Use gluten-free graham crackers. Keep the rest of the method the same.
Check all labels as needed. The structure stays similar.
Digestive Biscuit Caramel Bars
Use digestive biscuits for the base. Arrange or break them to fit the pan.
They give a slightly different flavor. The caramel works with them well.
Pretzel Crunch Caramel Bars
Use crushed pretzels instead of Butterfinger Bites. This gives a salty-sweet twist.
The bars will lose the Butterfinger flavor but gain extra crunch. Add chocolate drizzle if desired.
Toffee Bit Caramel Bars
Use toffee bits instead of Butterfinger pieces. This makes the topping buttery and crunchy.
They pair well with semi-sweet chocolate. Press into warm caramel.
Snickers Caramel Bars
Use chopped Snickers as the candy topping. This adds nougat and more caramel.
The bars become extra rich. Cut into smaller pieces if desired.
Reese’s Pieces Caramel Bars
Use Reese’s Pieces for a peanut butter candy variation. The topping adds crunch and color.
Press gently into the warm caramel. Let set completely.
Oreo Caramel Bars
Use crushed Oreos as the topping. This creates a cookies-and-cream flavor.
The bars become darker and more chocolate-forward. Use semi-sweet drizzle.
Nutty Caramel Bars
Add toasted pecans, peanuts, or walnuts to the caramel layer. Nuts add crunch and a toasted flavor.
Press them into the warm caramel. Use as much as desired without overcrowding.
Espresso Caramel Bars
Add a sprinkle of espresso powder to the caramel. This creates a deeper flavor.
Use a light amount. The caramel should still be the main flavor.
Troubleshooting
The Caramel Is Too Thick
Add milk ½ teaspoon at a time. Stir until the caramel loosens.
Do not add too much. The caramel should still set.
The Caramel Is Too Thin
Cook the caramel for another 1 to 2 minutes. Stir gently.
It should coat the back of a spoon. If it runs off immediately, it needs a little more time.
The Caramel Seized
The heat may have been too high or the stirring too aggressive. Keep the heat low next time.
To rescue it, add 1 teaspoon warm milk and stir until smoother. Work patiently.
The Caramel Firmed Too Fast
Warm the saucepan briefly or microwave the pan for about 10 seconds. This can loosen it enough to spread.
Work quickly when pouring. Caramel sets as it cools.
The Bars Are Too Sticky
They may need more cooling time. Let them set fully at room temperature or chill for 30 minutes.
Using too much milk can also make caramel softer. Measure carefully.
The Bars Fell Apart
They may have been cut too soon. Cool completely before slicing.
Make sure the Butterfinger pieces are pressed into warm caramel. This helps the topping stick.
The Graham Crackers Shifted
Pour the caramel slowly and tilt the pan gently. Use the back of a spoon to guide it.
Some movement is fine. The bars will still taste good.
The Chocolate Drizzle Is Too Thick
Warm it in short microwave bursts and stir. Add only a tiny amount of shortening or a similar helper if needed.
Do not overheat. Chocolate can seize too.
The Cuts Look Messy
Chill the bars for 30 minutes before slicing. Use a hot knife.
Wipe the knife between cuts. Caramel can drag through the layers.
The Bars Hardened in the Fridge
Microwave for about 10 seconds. This softens the caramel.
Letting them sit at room temperature for 30 minutes also helps. The texture becomes chewier.
Frequently Asked Questions
Can I freeze Butterfinger Caramel Bars?
Yes, these bars freeze well for up to 2 months. Wrap individual bars tightly in plastic wrap, then place them in a freezer bag.
Thaw at room temperature for about 30 minutes. The caramel softens nicely.
How do I prevent the caramel from getting too sticky?
Let the bars set completely before cutting. Chilling them for 30 minutes helps on warm days.
Use the exact 2 tablespoons milk. Too much milk can make the caramel stay extra gooey.
Can I make these without marshmallows?
You can, but the texture will be different. The marshmallows add softness and help create a s’mores-like layer.
If you skip them, try adding another graham cracker layer. The bars may not hold the same way.
Why did my caramel seize up when melting?
The heat may have been too high, or the caramel may have been stirred too hard. Keep the heat low and stir gently just until smooth.
If it seizes, add 1 teaspoon warm milk and stir. This can help bring it back.
How far in advance can I make these?
They are best within 3 days. They can be served up to about 5 days later if stored well.
If making ahead, refrigerate them and let them sit at room temperature for 30 minutes before serving. The caramel firms over time.
Can I use regular Butterfinger bars?
Yes, chopped regular Butterfingers work well. Use about 8 fun-size bars.
Chop them coarsely. Press them into the warm caramel.
Can I make these gluten-free?
Yes, use gluten-free graham crackers. You can also try gluten-free-friendly alternatives that fit your needs.
Check labels for all ingredients. The method stays the same.
Can I use milk chocolate instead of semi-sweet?
Yes, milk chocolate can be used. It makes the drizzle sweeter.
Semi-sweet chocolate gives more balance. Choose based on your preference.
Nutritional Information
Nutrition values are estimates and can vary based on brands, bar size, candy amount, chocolate drizzle, and substitutions. The estimate is based on one bar.
Each bar has about 280 calories. Portion size can change that number quickly.
Each bar has about 32g sugar. The caramel, marshmallows, candy, and chocolate contribute most of the sweetness.
Each bar has about 10g fat. About 4g is saturated fat.
Each bar has about 45g carbohydrates. Graham crackers, caramel, marshmallows, candy, and chocolate all contribute.
Each bar has about 3g protein. The candy and graham crackers contribute a small amount.
Each bar has about 150mg sodium. Ingredient brands can change the amount.
These bars are vegetarian but not vegan. They are meant to be an occasional sweet treat.
Why This Recipe Works So Well
Butterfinger Caramel Bars You Must Try Now work because every layer brings a different texture. The graham crackers are crisp, the marshmallows are soft, the caramel is chewy, the Butterfinger Bites are crunchy, and the chocolate drizzle finishes the top.
The caramel is warm when it hits the marshmallows. That warmth softens them just enough to become part of the filling.
The Butterfinger pieces stick best when pressed into warm caramel. Once cooled, the candy becomes locked into the topping.
Semi-sweet chocolate adds contrast. It keeps the bars from tasting only sweet.
The parchment paper makes the recipe much easier. Sticky desserts need a clean way out of the pan.
The bars cool into sliceable layers. Cutting too soon makes them messy, but waiting gives neat squares.
Chilling improves presentation. It firms the caramel and chocolate before slicing.
Most of all, this recipe works because it feels like a candy bar, a s’mores treat, and a caramel dessert all at once. It is sweet, crunchy, chewy, playful, and almost impossible to leave alone.
Final Thoughts
Butterfinger Caramel Bars You Must Try Now are made with graham crackers, mini marshmallows, caramel bits, milk, chopped Butterfinger Bites, and semi-sweet chocolate. The graham crackers form the base, marshmallows create a soft layer, melted caramel ties everything together, Butterfinger pieces add crunch, and chocolate drizzle gives the bars a finished candy-shop look.
Serve them chilled, at room temperature, slightly warmed over vanilla bean ice cream, cut into full bars, or sliced into 1-inch squares for party trays. With their no-bake method, 8×8 inch pan, parchment overhang, 15-minute active time, 5-minute caramel melting step, 2-hour room-temperature cooling time, 30-minute fridge shortcut, 20-second plus 10-second chocolate melting method, 8-second ice cream serving warm-up, 10-second caramel texture revival, 3-day room-temperature storage, 1-week refrigerator storage, 2-month freezer option, and variations like regular caramels, thick caramel sauce, graham crumbs, gluten-free grahams, digestive biscuits, regular Butterfinger bars, pretzels, toffee bits, milk chocolate, flaky sea salt, Snickers, Reese’s Pieces, Oreos, nuts, crispy rice cereal, and espresso powder, these bars are sticky, crunchy, sweet, and absolutely worth making.
Butterfinger Caramel Bars Recipe
Sweet, chewy, crunchy, and loaded with candy-bar flavor, these Irresistible Butterfinger Caramel Bars layer graham crackers, mini marshmallows, melted caramel, chopped Butterfinger Bites, and a semi-sweet chocolate drizzle. They come together quickly, cool into sliceable bars, and make an easy American dessert for parties, treat trays, or candy lovers.
Recipe Details
- Prep Time: 15 minutes
- Cook Time: 10 minutes
- Total Time: 25 minutes
- Course: Dessert
- Cuisine: American
- Servings: 12 bars
- Calories: 280 kcal
Ingredients
For the Butterfinger Caramel Bars
- 2 oz semi-sweet chocolate for drizzling
- 1 bag 10 oz Butterfinger Bites, coarsely chopped
- 2 tablespoon milk
- 1 bag 11 oz caramel bits
- 2 cups mini marshmallows
- 6 ½ graham crackers
Instructions
Step 1: Prepare the Baking Dish
Line a baking dish with parchment paper. Make sure the parchment sits flat enough to hold the layers neatly.
This helps the bars lift out more easily once they have cooled. Keep the prepared dish ready before melting the caramel.
Step 2: Add the Graham Cracker Base
Arrange the graham crackers in a single layer in the baking dish. Use 6 ½ graham crackers as listed.
The graham crackers create the base of the bars. Try to fit them closely together so the caramel and toppings sit evenly on top.
Step 3: Add the Marshmallows
Sprinkle the mini marshmallows evenly over the graham crackers. Spread them across the full base.
The marshmallows add a soft, sweet layer between the crackers and caramel. Keep them distributed evenly so every bar gets some.
Step 4: Melt the Caramel
In a saucepan, melt the caramel bits with the milk until smooth. Stir as the caramel melts so it blends with the milk.
Use 1 bag 11 oz caramel bits and 2 tablespoon milk. The caramel should be pourable before it goes over the marshmallows.
Step 5: Pour the Caramel Layer
Pour the melted caramel over the marshmallows. Spread it gently so the marshmallow layer is covered.
Work while the caramel is still warm and smooth. This helps it settle into the bars before the candy topping is added.
Step 6: Add the Butterfinger Bites
Top with the coarsely chopped Butterfinger Bites. Scatter them evenly over the caramel layer.
Use 1 bag 10 oz Butterfinger Bites, coarsely chopped. Press lightly only if needed so the pieces stick to the caramel.
Step 7: Drizzle the Chocolate
Drizzle melted semi-sweet chocolate over the top. Use 2 oz semi-sweet chocolate for the drizzle.
The chocolate adds a finished look and extra richness. Let it set before cutting the bars.
Step 8: Cool and Slice
Let the bars cool completely before cutting into bars. For best results, chill before serving.
Once fully cooled and set, slice into 12 bars. Serve after the caramel and chocolate have firmed enough to hold clean edges.
Notes
- Store in an airtight container for freshness.
- For best results, chill before serving.
Serving Suggestions
Serve Irresistible Butterfinger Caramel Bars after they have cooled completely and the chocolate drizzle has set. The graham cracker base, mini marshmallows, caramel bits, chopped Butterfinger Bites, and semi-sweet chocolate create a sweet, crunchy, chewy dessert bar with bold candy flavor.
This recipe makes 12 bars, making it useful for dessert trays, holiday treats, party sweets, or quick candy-style bars. Chill before serving for the best results, as noted.
For cleaner slices, wait until the bars are fully cooled before cutting. The caramel layer needs time to firm so the bars hold their shape.
Storage
How to Store
Store in an airtight container for freshness. The recipe does not provide a specific storage duration, so no exact number of days is added here.
Graham Cracker Tip
Use 6 ½ graham crackers and arrange them in a single layer. This creates the base for the bars.
Marshmallow Tip
Use 2 cups mini marshmallows. Sprinkle them evenly over the graham cracker layer.
Caramel Tip
Melt 1 bag 11 oz caramel bits with 2 tablespoon milk in a saucepan until smooth. Pour over the marshmallows while warm.
Butterfinger Tip
Use 1 bag 10 oz Butterfinger Bites, coarsely chopped. Add them over the melted caramel layer.
Chocolate Tip
Use 2 oz semi-sweet chocolate for drizzling. Let the drizzle set before slicing.
Chilling Tip
For best results, chill before serving. Let the bars cool completely before cutting into 12 bars.

Fernando is the creator and writer behind the food blog Eating with your Hands. Living and working in cities like Paris, Barcelona, and Berlin, and being married to a Canadian foodie, has given Fernando a passion and interest in food and inspired him to run EWYH.