
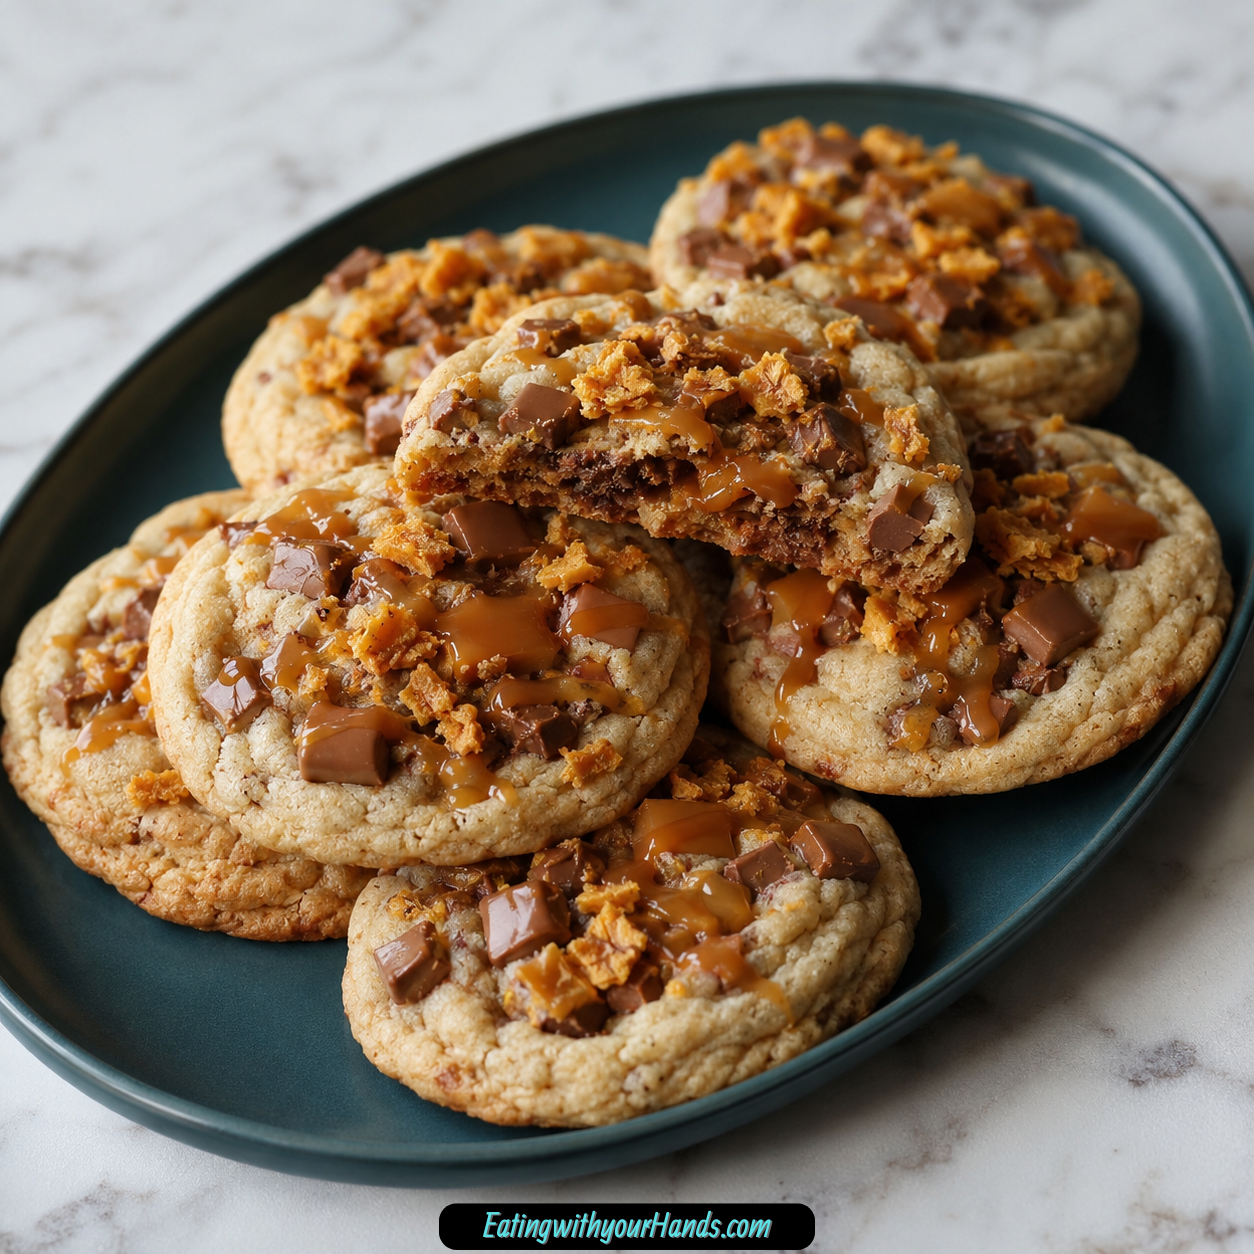

Butterfinger Caramel Crunch Cookies are the kind of cookies that feel like they were made for people who love a little chaos in the best possible way. They are soft, chewy, crunchy, gooey, buttery, sweet, and loaded with candy bar pieces that turn a simple cookie dough into something unforgettable.
This recipe has that homemade-cookie comfort, but it also brings the excitement of a candy-loaded dessert. Every bite gives you a different little surprise, from crisp Butterfinger bits to soft caramel pockets and melty chocolate chips if you choose to add them.
The inspiration behind these cookies feels wonderfully simple. A few leftover Butterfinger candy bars can become something much bigger than a pantry snack when they are folded into cookie dough with caramel bits and baked until golden around the edges.
That is what makes these cookies so fun. They taste like a treat you might have planned for a party, but they also have the relaxed feeling of a happy kitchen accident.
They are perfect for bake sales, lunchboxes, dessert platters, potlucks, lazy weekends, and holiday cookie trays. They also make about 24 cookies, which sounds like plenty until the first warm tray starts disappearing.
If you love cookies with texture, these are for you. The dough bakes into a soft center, the edges get lightly golden, the Butterfinger pieces add crisp candy crunch, and the caramel melts into sweet little pockets.
Table of Contents
- Why You’ll Love These Butterfinger Caramel Crunch Cookies
- Recipe Details
- Ingredients You’ll Need
- A Closer Look at the Ingredients
- The Flavor Behind These Cookies
- Directions
- Step 1: Prepare Your Baking Sheets
- Step 2: Measure the Flour Correctly
- Step 3: Mix the Dry Ingredients
- Step 4: Soften the Butter
- Step 5: Cream the Butter and Sugars
- Step 6: Add the Eggs One at a Time
- Step 7: Stir in the Vanilla Extract
- Step 8: Add the Dry Ingredients Gradually
- Step 9: Crush the Butterfinger Candy Bars
- Step 10: Prepare the Caramel Bits
- Step 11: Fold in the Add-Ins
- Step 12: Scoop the Cookie Dough
- Step 13: Chill the Dough if Needed
- Step 14: Bake the Cookies
- Step 15: Cool on the Baking Sheet
- Step 16: Transfer to a Wire Rack
- Step 17: Add the Caramel Drizzle
- Step 18: Finish With Butterfinger Garnish
- Helpful Tips for the Best Cookies
- Common Mistakes
- Variations to Try
- Serving Suggestions
- Storage Tips
- Freezing Baked Cookies
- Freezing the Dough
- Frequently Asked Questions
- Final Thoughts
- Butterfinger Caramel Crunch Cookies
Why You’ll Love These Butterfinger Caramel Crunch Cookies
These cookies are full of texture. You get soft cookie, crispy Butterfinger pieces, gooey caramel bits, and optional chocolate chips in every batch.
They are easy to make. The dough comes together with familiar baking ingredients and does not require complicated steps.
They are perfect for sharing. A batch makes about 24 cookies, which is great for parties, bake sales, gifting, or family dessert nights.
They taste nostalgic and fun. Butterfinger candy bars bring that familiar crispy peanut-buttery crunch, while caramel makes the cookies feel extra indulgent.
They are flexible. You can swap candy pieces, use gluten-free flour, try dairy-free options, or freeze the dough for future cookie cravings.
They look beautiful when finished. A drizzle of caramel sauce and extra crushed Butterfinger pieces makes them feel bakery-worthy without much extra effort.
Recipe Details
- Recipe name: Butterfinger Caramel Crunch Cookies
- Yield: About 24 cookies
- Oven temperature: 350°F (175°C)
- Bake time: 10-12 minutes
- Cooling time on baking sheet: 5 minutes
- Main texture: Soft, chewy, crunchy, and gooey
- Main add-ins: Crushed Butterfinger candy bars and caramel bits
- Optional add-in: Semi-sweet chocolate chips
- Finishing touch: Caramel sauce drizzle and crushed Butterfinger garnish
- Room temperature storage: Airtight container for up to 5 days
- Baked cookie freezer storage: Up to 3 months
- Cookie dough freezer storage: Up to 3 months
- Reheating tip: Microwave baked cookies for about 10 seconds
- Spread-prevention tip: Chill dough for 30 minutes if needed
Ingredients You’ll Need
Dry Ingredients
- 2 ½ cups all-purpose flour
- 1 teaspoon baking soda
- ½ teaspoon baking powder
- ½ teaspoon salt
Wet Ingredients
- 1 cup unsalted butter, softened
- 1 cup packed brown sugar
- ½ cup granulated sugar
- 2 large eggs, room temperature
- 2 teaspoon pure vanilla extract
Add-Ins and Toppings
- 1 cup crushed Butterfinger candy bars, about 4 standard bars
- ¾ cup caramel bits or chopped soft caramels
- 1 cup semi-sweet chocolate chips, optional but recommended
- ½ cup caramel sauce, homemade or store-bought
- ½ cup crushed Butterfinger pieces, for garnish
A Closer Look at the Ingredients
All-purpose flour gives the cookies their structure. Spoon and level the flour instead of scooping directly from the bag so the dough does not become too heavy.
Baking soda helps the cookies rise and spread properly. It supports that classic cookie texture with lightly golden edges.
Baking powder gives the dough a little extra lift. This helps the cookies bake up soft instead of flat and dense.
Salt balances the sweetness. With candy, caramel, brown sugar, and chocolate in the dough, a little salt keeps the flavor from tasting one-note.
Unsalted butter gives the cookies richness and softness. It should be softened, not melted, so it can cream properly with the sugars.
Brown sugar adds moisture and chewiness. Packing it into the measuring cup gives the dough the right amount of sweetness and depth.
Granulated sugar helps the edges bake with a slightly crisp finish. It also balances the heavier moisture from the brown sugar.
Room-temperature eggs blend more smoothly into the butter and sugar mixture. Cold eggs can make the dough harder to combine evenly.
Pure vanilla extract adds warmth. It makes the cookie base taste more complete and supports the candy and caramel flavors.
Crushed Butterfinger candy bars are the star of the recipe. They bring crispy crunch, candy sweetness, and that unmistakable Butterfinger flavor.
Caramel bits or chopped soft caramels create gooey pockets throughout the cookies. If using chopped soft caramels, tossing them with a little flour helps prevent sticking.
Semi-sweet chocolate chips are optional, but they make the cookies even more indulgent. The chocolate pairs beautifully with the caramel and candy crunch.
Caramel sauce is used after the cookies cool. A drizzle over the top gives them a pretty finish and adds more gooey caramel flavor.
Extra crushed Butterfinger pieces make the garnish. They add texture, color, and a clear clue about what is hidden inside the cookies.
The Flavor Behind These Cookies
These Butterfinger Caramel Crunch Cookies work because they combine several dessert textures in one bite. The cookie base is soft and chewy, while the candy pieces bring a crisp contrast.
The caramel bits melt into small pockets as the cookies bake. Some stay chewy, some soften, and some blend into the dough just enough to make each bite feel rich.
The optional chocolate chips make the cookies taste even more like a candy bar dessert. They are not required, but they do make the batch feel extra special.
The cookie dough itself is important too. Brown sugar brings chewiness, granulated sugar helps the edges, and butter ties everything together with that classic homemade-cookie flavor.
This is not a plain cookie with candy sprinkled in as an afterthought. The Butterfinger pieces, caramel, and cookie dough all work together to create something playful, sweet, and satisfying.
Directions
Step 1: Prepare Your Baking Sheets
Preheat your oven to 350°F (175°C). Line two baking sheets with parchment paper so the cookies do not stick and cleanup stays easy.
Parchment paper is especially helpful for this recipe because caramel can melt and cling to the pan. The paper gives the cookies a clean surface and makes them easier to remove after baking.
Set the prepared baking sheets aside while you make the dough. Having them ready helps you move smoothly once the cookie dough is mixed.
Step 2: Measure the Flour Correctly
Measure 2 ½ cups of all-purpose flour using the spoon-and-level method. Spoon the flour into the measuring cup, then level off the top without packing it down.
This step matters because too much flour can make the cookies dry or dense. The goal is a soft, chewy cookie, not a heavy one.
Once measured, add the flour to a medium bowl. This bowl will hold the rest of the dry ingredients too.
Step 3: Mix the Dry Ingredients
Add the baking soda, baking powder, and salt to the bowl with the flour. Whisk everything together until the ingredients are evenly combined.
Whisking helps distribute the leavening agents throughout the flour. That means the cookies bake more evenly and rise properly.
Set the dry mixture aside for now. You will add it to the wet ingredients after the butter, sugars, eggs, and vanilla are mixed.
Step 4: Soften the Butter
Make sure the unsalted butter is softened before you begin mixing. It should be soft enough to press gently, but it should not be melted.
If the butter is too cold, it will not cream smoothly with the sugars. If it is melted, the dough may become too loose and the cookies may spread too much.
If you are short on time, you can soften butter carefully in 10-second microwave bursts. Watch it closely so it does not melt.
Step 5: Cream the Butter and Sugars
In a large bowl, cream the softened butter, packed brown sugar, and granulated sugar until the mixture looks light and fluffy. This usually takes about 2-3 minutes with a hand mixer or stand mixer.
This step builds the texture of the cookies. The butter and sugar mixture should look smooth, slightly lighter in color, and well blended.
Do not rush this part if you want soft, chewy cookies. Properly creamed butter and sugar helps create a better cookie base.
Step 6: Add the Eggs One at a Time
Add the eggs one at a time, mixing well after each addition. This helps the dough stay smooth and evenly combined.
Room-temperature eggs blend best with the butter and sugar mixture. They help prevent the dough from looking separated or uneven.
After both eggs are mixed in, the dough should look creamy and slightly glossy. That is the perfect base for the vanilla and dry ingredients.
Step 7: Stir in the Vanilla Extract
Add the pure vanilla extract and mix until it is fully incorporated. Vanilla gives the cookie dough warmth and makes the sweet flavors taste more rounded.
This may seem like a small ingredient, but it matters. It supports the caramel, chocolate, and Butterfinger pieces without overpowering them.
Once the vanilla is mixed in, scrape down the sides of the bowl if needed. This helps make sure everything is evenly combined.
Step 8: Add the Dry Ingredients Gradually
Add the dry mixture to the wet mixture a little at a time. Mix just until the flour disappears into the dough.
Do not overmix once the flour has been added. Overmixing can make the cookies tougher instead of soft and chewy.
The dough should be thick, rich, and ready to hold all the candy pieces. This is exactly the texture you want before adding the mix-ins.
Step 9: Crush the Butterfinger Candy Bars
Crush the Butterfinger candy bars into small pieces until you have 1 cup. About 4 standard bars should give you the amount needed for the dough.
A simple way to crush them is to place the bars in a ziplock bag and tap them with a rolling pin. You want pieces, crumbs, and small crunchy bits.
Do not crush everything into dust. A mix of small pieces and fine bits gives the cookies better texture.
Step 10: Prepare the Caramel Bits
Measure ¾ cup caramel bits or chopped soft caramels. If using soft caramels, chop them into small pieces so they spread through the dough more evenly.
If the caramel pieces are sticky, toss them lightly with a bit of flour before folding them in. This helps keep them from clumping together.
Caramel is one of the best parts of this recipe. It creates little gooey pockets that make the cookies taste extra special.
Step 11: Fold in the Add-Ins
Fold the crushed Butterfinger pieces, caramel bits, and optional semi-sweet chocolate chips into the dough. Use a spatula and mix gently until everything is evenly distributed.
The dough will be thick and chunky. That is exactly what you want because every scoop should hold candy, caramel, and chocolate.
Take your time folding so the add-ins reach the bottom of the bowl. This helps every cookie bake with a balanced amount of mix-ins.
Step 12: Scoop the Cookie Dough
Use a cookie scoop or spoon to portion the dough onto the prepared baking sheets. Leave about 2 inches between each cookie.
The cookies will spread a little as they bake. Giving them space helps them bake evenly without running into each other.
Try to keep the scoops similar in size. This helps all the cookies finish baking at the same time.
Step 13: Chill the Dough if Needed
If the dough feels too warm or your cookies tend to spread, chill the dough for 30 minutes before baking. Cold dough helps the cookies hold their shape.
This step is especially useful if your kitchen is warm or the butter became too soft. Chilling firms up the butter and helps create thicker cookies.
You do not always need to chill the dough. Use this step when the dough feels loose or when you want a thicker, chewier result.
Step 14: Bake the Cookies
Bake the cookies at 350°F (175°C) for 10-12 minutes. The edges should look lightly golden, while the centers may still look a little soft.
Do not overbake them. These cookies are meant to be chewy, and the centers will continue to firm up as they cool.
Start checking at 10 minutes. A slightly soft center is better than a dry cookie.
Step 15: Cool on the Baking Sheet
Let the cookies cool on the baking sheets for 5 minutes after removing them from the oven. This gives them time to set.
Freshly baked cookies can be fragile, especially with melted caramel inside. Moving them too soon can cause them to break.
After 5 minutes, they should be firm enough to transfer. Use a spatula and move them gently.
Step 16: Transfer to a Wire Rack
Transfer the cookies to a wire rack to cool completely. This helps the bottoms stay from getting too soft.
Cooling fully is important if you plan to drizzle them with caramel sauce. Warm cookies can make the drizzle run too much.
The cookies will continue settling as they cool. The edges become slightly firmer while the centers stay soft and chewy.
Step 17: Add the Caramel Drizzle
Once the cookies are cooled, drizzle them with ½ cup caramel sauce. You can use homemade or store-bought caramel sauce.
The drizzle makes the cookies look beautiful and adds another layer of caramel flavor. It also makes them feel more special for parties or gifting.
Use as much or as little drizzle as you like. A light zigzag is enough, but a generous drizzle makes them extra indulgent.
Step 18: Finish With Butterfinger Garnish
Sprinkle the cookies with ½ cup crushed Butterfinger pieces while the caramel drizzle is still tacky. This helps the garnish stick.
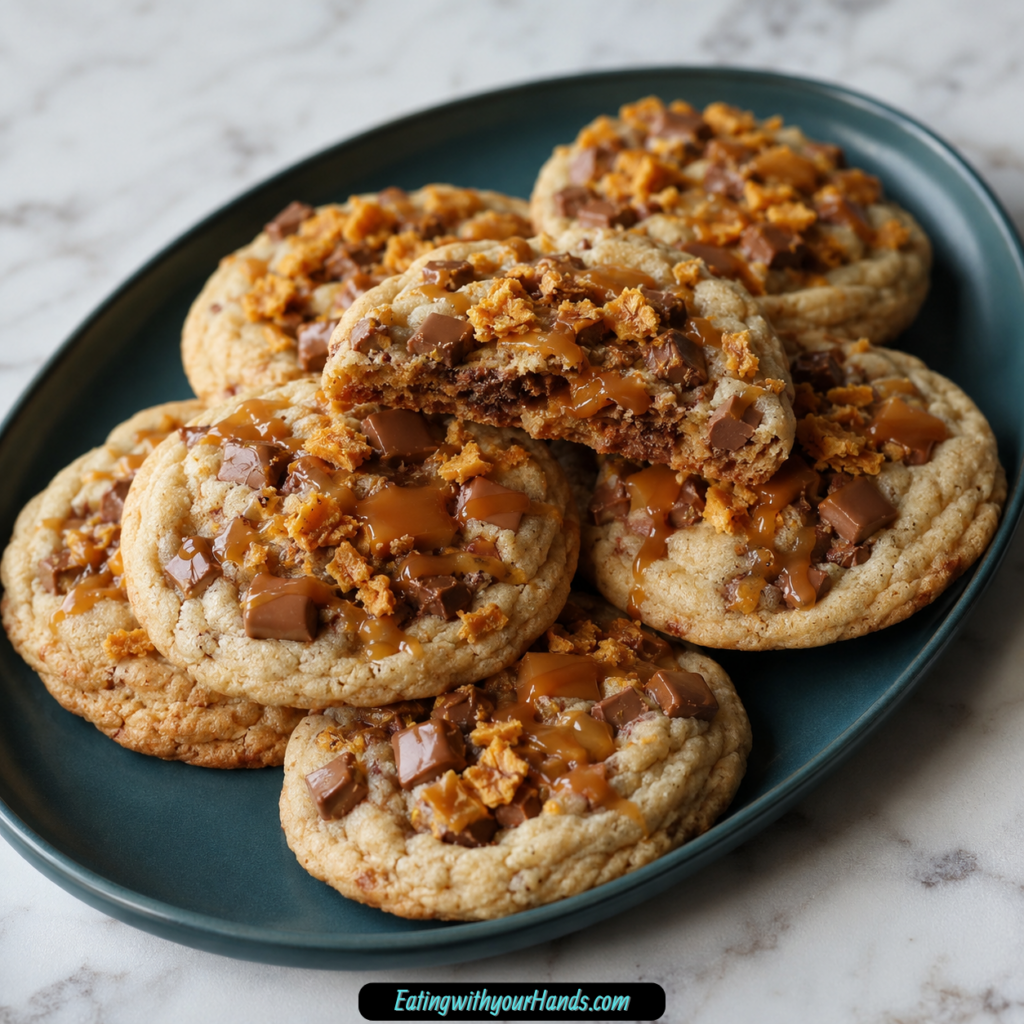
The extra candy on top gives the cookies more crunch and makes them look finished. It also tells everyone exactly what flavor they are about to enjoy.
Let the topping settle for a few minutes before stacking or storing. This keeps the cookies neater.
Helpful Tips for the Best Cookies
Use softened butter, not melted butter. Softened butter creams with the sugar and helps create the right cookie texture.
Spoon and level the flour. Too much flour can make the cookies thick in a dry way instead of soft and chewy.
Do not overmix after adding the flour. Mix only until the dough comes together.
Chill the dough for 30 minutes if the cookies spread too much. This helps the butter firm up and keeps the cookies thicker.
Use fresh baking soda and baking powder. Old leavening agents can make cookies bake flatter than expected.
Do not overcrowd the baking sheet. Give each dough scoop about 2 inches of space.
Let the cookies cool before drizzling. Cooled cookies hold the caramel sauce and garnish better.
Common Mistakes
Using Melted Butter Instead of Softened Butter
Melted butter can make the dough too loose. This may cause the cookies to spread more than you want.
Softened butter is the better choice here. It creams with the sugars and helps create a chewy cookie with structure.
Adding Too Much Flour
Scooping flour directly from the bag can pack too much flour into the measuring cup. This can make the cookies dry or dense.
Use the spoon-and-level method for better results. It keeps the dough balanced and soft.
Overmixing the Dough
Once the flour is added, the dough should be mixed gently. Overmixing can make the finished cookies tougher.
Stop when the dry ingredients are just combined. The add-ins will finish bringing the dough together as you fold them in.
Baking Too Long
The centers may look a little soft when the cookies come out of the oven. That is okay because they firm up while cooling.
If you wait until the centers look fully set in the oven, the cookies may turn out dry. Pull them when the edges are lightly golden.
Skipping the Cooling Time
The cookies need 5 minutes on the baking sheet before moving. This helps them set enough to transfer without breaking.
Cooling also lets the caramel settle. That gives you a better texture when you bite into the cookie.
Variations to Try
Reese’s Pieces or Peanut Butter Chips
Swap the chocolate chips for Reese’s Pieces or peanut butter chips. This gives the cookies an even stronger peanut butter candy flavor.
The Butterfinger pieces already have a bold candy flavor, and peanut butter-style add-ins make the cookies richer. This variation is great for peanut butter lovers.
Crushed Oreo Cookies
Add 1 cup crushed Oreos to the dough for a cookies-and-cream twist. The chocolate cookie pieces bring another layer of crunch.
This variation changes the flavor while keeping the same fun, loaded-cookie feeling. It is a great option when you want something extra playful.
Pretzel Pieces
Add a handful of crushed pretzels for a salty-sweet crunch. The saltiness balances the caramel and candy pieces beautifully.
Pretzels also make the cookies feel less purely sweet. They add texture and make each bite more interesting.
Gluten-Free Butterfinger Caramel Crunch Cookies
Use a 1:1 gluten-free flour blend instead of all-purpose flour. Make sure the blend includes xanthan gum for the right texture.
Also double-check the caramel bits or caramel sauce to make sure they fit your needs. Bake as usual once the swaps are made.
Dairy-Free Version
Use your favorite plant-based butter in place of regular butter. For the eggs, use flax eggs made with 1 tablespoon ground flaxseed plus 3 tablespoon water per egg.
Choose dairy-free caramel bits or drizzle with coconut caramel sauce. These swaps help make the cookies fit a dairy-free style while keeping the same general idea.
Different Candy Bar Swaps
If you do not have Butterfingers, crushed Heath bars or Skor bars can work well. Snickers can also be used if you want a more peanutty candy bar flavor.
The key is keeping some kind of crunch or candy texture in the dough. That is what makes these cookies feel special.
White Chocolate or Butterscotch Chips
If you want to skip semi-sweet chocolate chips, try white chocolate or butterscotch chips. Both options make the cookies sweeter and more dessert-like.
You can also leave the chips out completely. The Butterfinger and caramel still carry plenty of flavor on their own.
Serving Suggestions
Serve these cookies warm when the caramel is still soft and the chocolate chips are melty. This is when the texture feels the most indulgent.
Pair them with a cold glass of milk. The creamy milk balances the rich candy and caramel flavors.
Crumble a cookie over vanilla ice cream for an easy dessert. The Butterfinger crunch and caramel pieces make a simple bowl of ice cream feel special.
Serve them with coffee for a sweet afternoon treat. The buttery cookie base and caramel drizzle pair nicely with a warm drink.
Stack them on a dessert platter for parties or bake sales. The caramel drizzle and Butterfinger garnish make them stand out.
Pack them in lunchboxes once the caramel drizzle has set. They make a fun surprise treat when stored neatly.
Storage Tips
Store leftover cookies in an airtight container at room temperature for up to 5 days. Make sure they are completely cooled before storing.
Layer the cookies between sheets of parchment paper if they are drizzled with caramel. This helps keep them from sticking together.
The cookies stay soft when properly stored. The caramel and candy pieces may firm slightly, but the flavor remains delicious.
If you want that fresh-baked softness again, microwave a cookie for about 10 seconds. This warms the caramel and softens the center.
Freezing Baked Cookies
To freeze baked cookies, place them in a single layer first until firm. Then transfer them to a freezer bag.
They can be frozen for up to 3 months. This is a great option if you want cookies ready for later.
Thaw them at room temperature before serving. For a warmer texture, microwave briefly for about 10 seconds.
If possible, freeze before adding the caramel drizzle and garnish. You can decorate them after thawing for a fresher finish.
Freezing the Dough
You can freeze the cookie dough for up to 3 months. Scoop the dough into portions and place the dough balls on a baking sheet.
Freeze until solid, then transfer the dough balls to a freezer bag. This keeps them from sticking together.
When ready to bake, place the frozen dough balls on a prepared baking sheet. Add a couple of extra minutes to the baking time.
No thawing is needed. This makes it easy to bake fresh cookies whenever you want them.
Frequently Asked Questions
Can I Freeze the Dough?
Yes, the dough can be frozen for up to 3 months. Scoop it into portions, freeze the dough balls until solid, and transfer them to a freezer bag.
Bake directly from frozen when ready. Just add a couple of extra minutes to the baking time.
How Do I Prevent the Cookies From Spreading?
If the cookies spread too much, chill the dough for 30 minutes before baking. This firms up the butter and helps the cookies hold their shape.
Also make sure your baking soda and baking powder are fresh. Old leavening agents can affect the cookie texture.
Can I Double the Batch?
Yes, this recipe doubles beautifully. That makes it a great choice for holidays, bake sales, parties, or feeding a crowd.
Just make sure you have enough baking sheets and space to bake in batches. Give the cookies room on the pan so they do not run together.
What If I Don’t Have Butterfingers?
You can use crushed Heath bars, Skor bars, or Snickers instead. Reese’s Pieces or peanut butter chips can also work for a different twist.
Try to keep the crunchy candy element if possible. That crunch is a big part of what makes the cookies exciting.
Can I Make These Gluten-Free?
Yes, use a 1:1 gluten-free flour blend that includes xanthan gum. This helps keep the texture close to the original.
Also check your caramel bits and caramel sauce to make sure they fit your gluten-free needs. Then bake as usual.
Can I Make These Dairy-Free?
Yes, use plant-based butter and flax eggs. For each egg, combine 1 tablespoon ground flaxseed with 3 tablespoon water.
Use dairy-free caramel bits or coconut caramel sauce for the drizzle. You can also choose dairy-free chocolate chips if adding chocolate.
What Can I Use Instead of Caramel Bits?
You can chop soft caramels into small pieces. If they are sticky, toss them with a little flour before folding them into the dough.
This helps prevent clumping. The chopped caramels will still create gooey pockets as the cookies bake.
Are Chocolate Chips Required?
No, the chocolate chips are optional. The cookies are still rich and flavorful with just Butterfinger pieces and caramel.
That said, semi-sweet chocolate chips make the cookies feel extra indulgent. They add another layer of sweetness and meltiness.
Final Thoughts
Butterfinger Caramel Crunch Cookies are a dessert for anyone who loves cookies with personality. They are soft, chewy, crunchy, gooey, sweet, and filled with candy bar flavor from the inside out.
The crushed Butterfinger pieces make every bite crispy and nostalgic. The caramel bits melt into little pockets, and the optional chocolate chips make the cookies even more decadent.
They are easy enough for a casual afternoon but impressive enough for bake sales, parties, cookie boxes, and holiday trays. Once finished with caramel drizzle and extra Butterfinger pieces, they look just as fun as they taste.
Make them once, and they will probably become one of those recipes people ask about before the plate is even empty. And honestly, with cookies this chewy, crunchy, and caramel-loaded, it is very easy to understand why.
Butterfinger Caramel Crunch Cookies
These Butterfinger Caramel Crunch Cookies are soft, chewy, and loaded with candy-bar flavor. Crushed Butterfinger pieces add a sweet peanut-butter crunch, caramel bits bring gooey pockets of sweetness, and semi-sweet chocolate chips make each cookie extra rich. Finished with caramel sauce and more Butterfinger pieces on top, these cookies are perfect for bake sales, party trays, holiday cookie boxes, or anytime you want a fun dessert with plenty of texture.
Recipe Details
- Prep Time: 15 minutes
- Cook Time: 10 minutes
- Total Time: 25 minutes
- Course: Cookies, Dessert
- Servings: 24 cookies
Ingredients
For Drizzle and Topping
- ½ cup crushed Butterfinger pieces for garnish
- ½ cup caramel sauce homemade or store-bought
Add-ins
- 1 cup semi-sweet chocolate chips optional but recommended
- ¾ cup caramel bits or chopped soft caramels
- 1 cup crushed Butterfinger candy bars about 4 standard-size bars
Wet Ingredients
- 2 teaspoon pure vanilla extract
- 2 large eggs room temperature
- ½ cup granulated sugar
- 1 cup brown sugar packed
- 1 cup unsalted butter softened (2 sticks)
Dry Ingredients
- ½ teaspoon salt
- ½ teaspoon baking powder
- 1 teaspoon baking soda
- 2 ½ cups all-purpose flour
Instructions
Step 1: Prepare the Oven
Preheat the oven to 350°F (175°C).
Line baking sheets with parchment paper and set them aside.
Step 2: Mix the Dry Ingredients
In a bowl, whisk together the all-purpose flour, baking soda, baking powder, and salt.
Set the dry mixture aside.
Step 3: Cream the Butter and Sugars
In a large bowl, beat the softened unsalted butter, packed brown sugar, and granulated sugar until light and fluffy.
Step 4: Add the Eggs and Vanilla
Beat in the eggs one at a time.
Mix in the pure vanilla extract until smooth and fully combined.
Step 5: Make the Cookie Dough
Gradually add the dry ingredients to the wet ingredients.
Mix just until combined, being careful not to overmix the dough.
Step 6: Fold in the Add-ins
Fold in the crushed Butterfinger candy bars, caramel bits or chopped soft caramels, and semi-sweet chocolate chips.
Stir gently until the add-ins are evenly spread throughout the dough.
Step 7: Scoop the Cookies
Scoop the dough onto the prepared baking sheets.
Space the cookies about 2 inches apart so they have room to spread.
Step 8: Bake
Bake for 10-12 minutes, or until the edges are lightly golden and the centers still look soft.
Step 9: Cool
Let the cookies cool on the baking sheets for 5 minutes.
Transfer them to wire racks to cool completely.
Step 10: Add the Drizzle and Topping
Drizzle the cooled cookies with caramel sauce.
Sprinkle with extra crushed Butterfinger pieces before serving.
Notes
Store cookies in an airtight container at room temperature for up to 5 days.
Serving Suggestions
These Butterfinger caramel crunch cookies pair well with:
- Cold milk
- Hot coffee
- Iced coffee
- Vanilla ice cream
- Hot cocoa
- Chocolate drizzle
- Caramel milkshakes
- Holiday dessert trays
Storage
How to Store
Store cooled cookies in an airtight container at room temperature for up to 5 days.
Best Texture Tip
Do not overbake the cookies. Remove them when the edges are lightly golden and the centers still look soft so they stay chewy after cooling.

Fernando is the creator and writer behind the food blog Eating with your Hands. Living and working in cities like Paris, Barcelona, and Berlin, and being married to a Canadian foodie, has given Fernando a passion and interest in food and inspired him to run EWYH.