
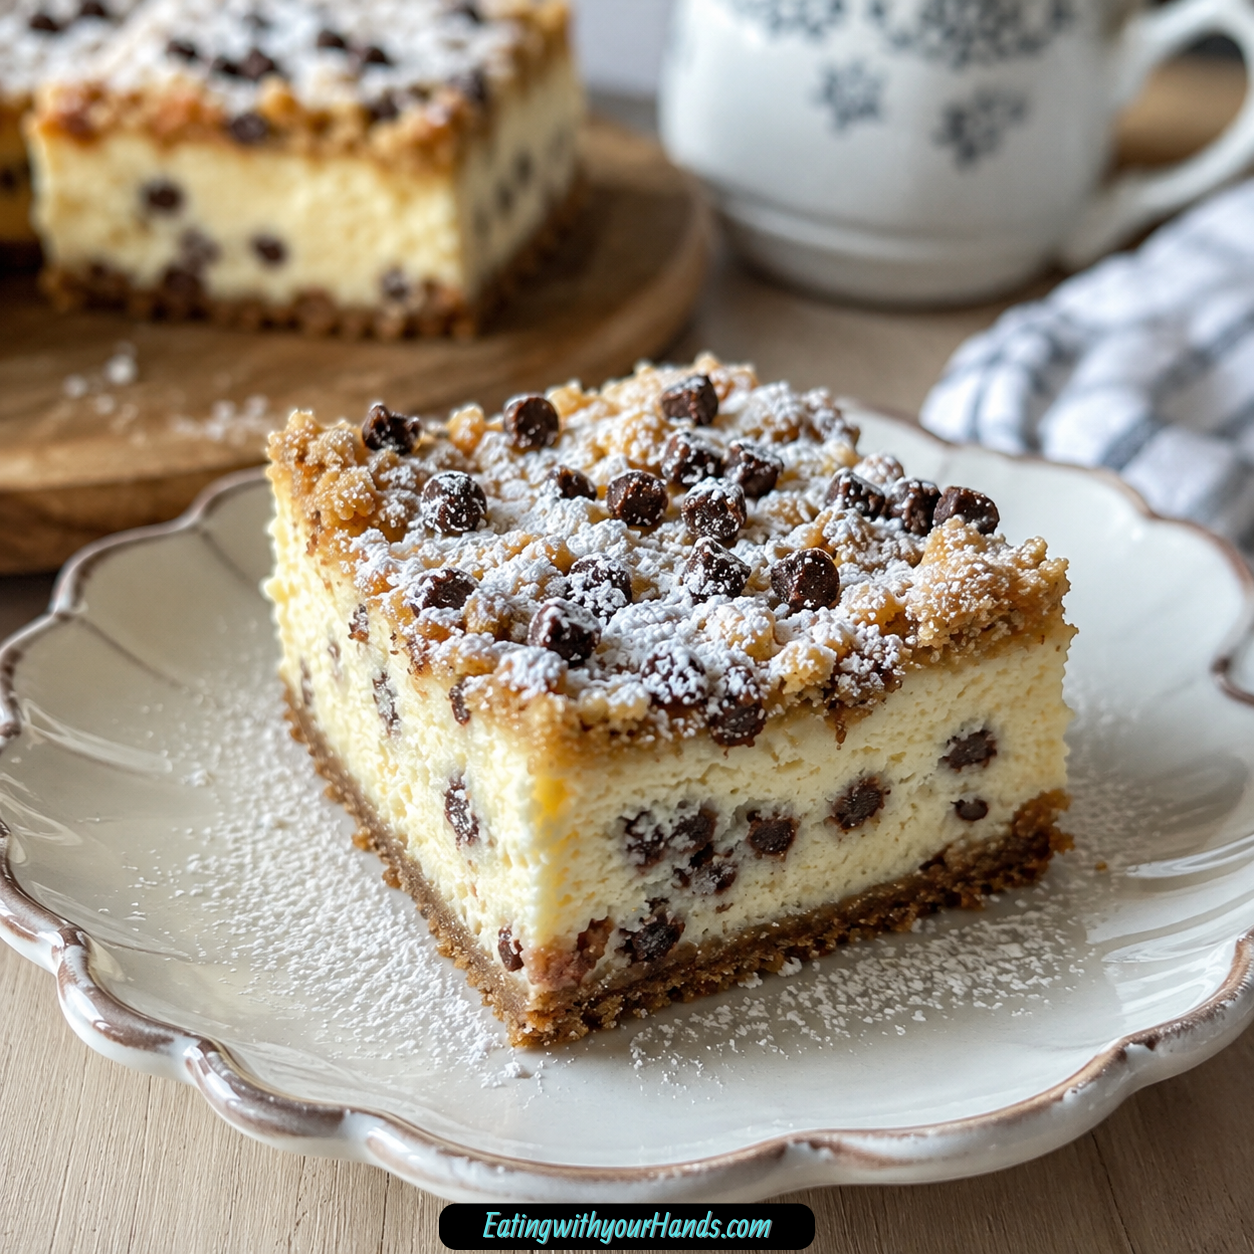
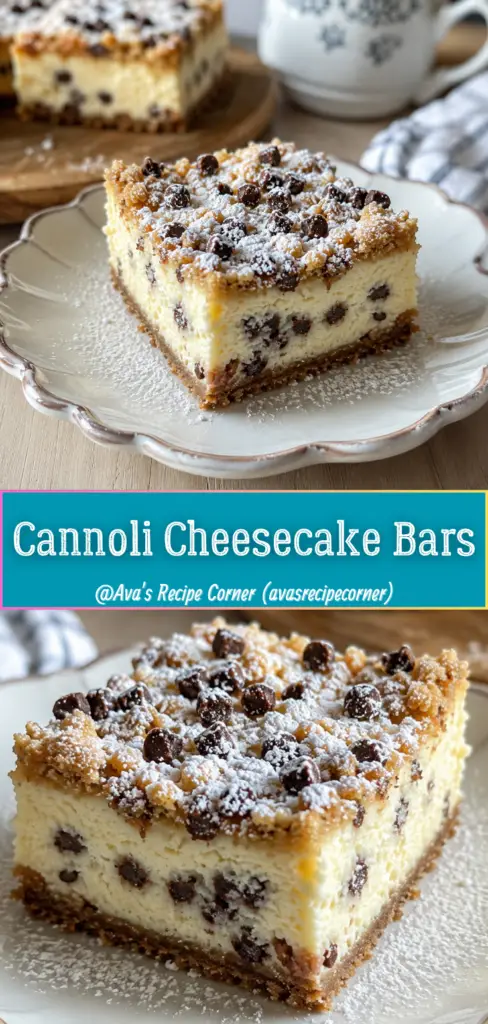
Cannoli Cheesecake Bars always feel like the kind of dessert that carries a little family history in every bite. They remind me of crowded holiday tables, the sound of conversation spilling from one room to another, and that irresistible sweetness in the kitchen that made everyone sneak closer before dessert was officially served.
There is something so comforting about a dessert that feels both familiar and special. These bars bring together the creamy richness of cheesecake with the classic flavor feeling of cannoli, then tuck everything over a buttery graham cracker crust.
I always think of these bars as the kind of recipe that makes people pause after the first bite. The filling is smooth and creamy, the ricotta gives it that cannoli-inspired character, and the mini chocolate chips bring little bursts of sweetness throughout.
They feel fancy enough for holidays, gatherings, and celebrations, but they are easy enough to make when you simply want something sweet for your family. With a quick 20-minute prep time, they do not ask for a long baking day, but they still deliver a dessert that looks thoughtful and tastes indulgent.
The powdered sugar on top gives the bars that beautiful snowy finish. It makes them feel a little nostalgic, a little festive, and completely ready for a dessert platter.
Whether you make them for a holiday table or a cozy night at home, Cannoli Cheesecake Bars have a way of making the moment feel sweeter. They are creamy, simple, memorable, and made for sharing with people you love.
Table of Contents
- Why You’ll Love These Cannoli Cheesecake Bars
- Recipe Details
- Ingredients
- Optional Swaps, Variations, Add-Ins, and Serving Ideas
- Why This Recipe Works
- Directions
- Step 1: Preheat the Oven
- Step 2: Prepare the Baking Pan
- Step 3: Measure the Graham Cracker Crumbs
- Step 4: Combine the Crust Ingredients
- Step 5: Press the Crust into the Pan
- Step 6: Bake the Crust
- Step 7: Cool the Crust Slightly
- Step 8: Begin the Cheesecake Filling
- Step 9: Add the Granulated Sugar Gradually
- Step 10: Add the Vanilla Extract
- Step 11: Add the Eggs
- Step 12: Fold in the Ricotta Cheese
- Step 13: Add the Mini Chocolate Chips
- Step 14: Check the Filling Texture
- Step 15: Pour the Filling Over the Crust
- Step 16: Bake the Bars
- Step 17: Cool in the Pan
- Step 18: Move the Bars to the Refrigerator
- Step 19: Dust with Powdered Sugar
- Step 20: Slice into Bars
- Step 21: Serve Chilled
- Serving Ideas
- Storage
- Reheating
- Freezing
- Make-Ahead
- Helpful Notes for Best Results
- Variations
- Troubleshooting
- Frequently Asked Questions
- Why This Recipe Works So Well
- Final Thoughts
- Cannoli Cheesecake Bars
Why You’ll Love These Cannoli Cheesecake Bars
These Cannoli Cheesecake Bars have a quick prep time of just 20 minutes. That makes them perfect for last-minute dessert cravings, holiday planning, or a sweet treat when the day already feels full.
They require minimal ingredients, and you probably have many of them in your pantry already. Graham cracker crumbs, butter, sugar, cream cheese, eggs, ricotta, vanilla, chocolate chips, and powdered sugar become a dessert that feels much more special than the effort involved.
They are family-friendly and a hit with both kids and adults. The creamy cheesecake texture and mini chocolate chips make each bar sweet, fun, and easy to love.
These bars are freezer-friendly, so you can make a batch ahead of time and store some for later enjoyment. Wrapped well, they can be frozen for up to three months.
They have a rich, creamy texture combined with classic cannoli flavors. That makes them feel fancy while still being very easy to prepare.
They are also perfect for gatherings, holidays, or any day that needs a little brightness. A tray of chilled cheesecake bars dusted with powdered sugar always feels welcoming.
Recipe Details
Cannoli Cheesecake Bars are baked dessert bars made with a graham cracker crust and a cheesecake filling flavored with cream cheese, ricotta cheese, vanilla extract, sugar, eggs, and mini chocolate chips. The bars are chilled, dusted with powdered sugar, sliced, and served cold.
The prep time is just 20 minutes. The crust bakes first for about 10 minutes, then the filled bars bake for about 30 minutes.
The oven temperature is 350°F, or 175°C. The bars are done when the edges are set but the center still has a slight jiggle.
After baking, the bars cool in the pan for about 15 minutes before being moved to the refrigerator. They need to chill for at least 2 hours before serving so they can set properly.
Leftover bars can be stored in an airtight container in the refrigerator for up to a week. They can also be frozen for up to three months when wrapped well.
Ingredients
For the Crust
- 1 ½ cups graham cracker crumbs (packed tightly in the measuring cup; about 12 full sheets will do the trick)
- 6 tbsp melted butter (unsalted is preferred for a rich flavor)
- ¼ cup granulated sugar (for that sweet crust)
For the Cheesecake Filling
- 16 oz cream cheese (full-fat, softened to room temperature for easy mixing)
- 1 cup ricotta cheese (whole milk ricotta gives the best texture)
- ½ cup granulated sugar (add this gradually for the best dissolving effect)
- 2 large eggs (room temperature helps prevent cracking in the cheesecake)
- 1 tsp vanilla extract (pure vanilla makes all the difference in flavor)
- ½ cup mini chocolate chips (regular-sized will sink; mini ones distribute perfectly)
For the Finish
- ¼ cup powdered sugar (for that gorgeous snowy finish on top)
Ingredient Notes
Graham cracker crumbs form the base of the crust. They should be packed tightly in the measuring cup, and about 12 full sheets will do the trick.
Melted butter holds the crust together. Unsalted butter is preferred because it gives rich flavor while letting you control the overall saltiness.
Granulated sugar sweetens both the crust and the cheesecake filling. The filling sugar should be added gradually for the best dissolving effect.
Full-fat cream cheese gives the bars their creamy cheesecake foundation. It should be softened to room temperature for easy mixing.
Whole milk ricotta gives the best texture for the cannoli-inspired filling. It adds the classic creamy character that makes these bars different from plain cheesecake bars.
Room temperature eggs help prevent cracking in the cheesecake. They should be mixed in gently because overmixing after adding eggs can lead to cracks.
Pure vanilla extract makes a big difference in flavor. It gives the filling warmth and brings out the sweetness of the cream cheese and ricotta.
Mini chocolate chips are important because they distribute perfectly through the filling. Regular-sized chocolate chips can sink, so mini ones are the better fit here.
Powdered sugar gives the bars their gorgeous snowy finish on top. It is added after chilling, right before serving.
Optional Swaps, Variations, Add-Ins, and Serving Ideas
Citrus Twist
Orange zest can be added to the filling for a refreshing citrus twist. It brings a bright note that works beautifully with the creamy cheesecake and chocolate chips.
Lemon zest is another option for the same kind of fresh lift. Either citrus direction makes the bars feel a little lighter and more fragrant.
Nutty Variation
You can swap the mini chocolate chips for chopped pistachios. This gives the bars a crunchy, nutty character that still feels dessert-table ready.
Your favorite nuts can also be used for added crunch. The helpful notes also mention adding a handful of chopped nuts to the filling for extra texture and flavor.
Gluten-Free Version
These bars can be made gluten-free by using gluten-free graham cracker crumbs for the crust. This keeps the same buttery crumb base while adjusting the ingredient for gluten-free needs.
The helpful notes repeat that gluten-free graham cracker crumbs can be used. This makes the bars easier to adapt for gatherings where guests may need that option.
Lighter Version
For a lighter version, try using light cream cheese and fat-free ricotta. This keeps the same cheesecake bar idea while changing the richness of the filling.
The main version uses full-fat cream cheese and whole milk ricotta for the best texture. The lighter variation gives you another direction when you want it.
Extract Variations
You can experiment with different extracts, like almond or hazelnut, to change the flavor profile. These extracts bring a different aroma to the creamy filling.
Vanilla is the main flavor in the recipe. Almond or hazelnut gives the bars a new personality while keeping the same structure.
Serving Pairings
These Cannoli Cheesecake Bars are best served chilled. Slice them into generous bars and arrange them on a lovely platter.
Fresh berries make a beautiful pairing. A scoop of vanilla ice cream can also turn the bars into an extra special treat.
Dairy-Free Direction
If you are in a pinch, cream cheese can be substituted with a dairy-free alternative for a dairy-free version. This changes the filling while keeping the cheesecake bar concept.
The main recipe uses traditional dairy ingredients. The dairy-free cream cheese alternative is included as a helpful substitution when needed.
Sugar Adjustment
To reduce sugar, you can use a sugar substitute that measures cup-for-cup. This keeps the recipe easier to adapt without changing the measuring style.
The main recipe uses granulated sugar and powdered sugar. The sugar substitute note applies when you want to reduce sugar.
Warm Spice Twist
For a unique twist, try mixing cinnamon into the cheesecake filling. Nutmeg can also be mixed in for a different warm flavor.
These spices add cozy depth to the creamy filling. They make the bars feel especially fitting for gatherings and cooler weather.
Why This Recipe Works
Cannoli Cheesecake Bars work because they take the creamy comfort of cheesecake and bring it into a simple bar format. The graham cracker crust gives a sweet, buttery base, while the cream cheese and ricotta filling gives the dessert its rich, smooth texture.
The mini chocolate chips are small but important. They distribute through the filling instead of sinking, giving you little chocolate moments in each bite.
The baking method also helps the texture. The crust is baked first so it can set before the creamy filling is added.
The chilling time gives the bars their final structure. At least 2 hours in the refrigerator helps them slice neatly and taste fully set.
The powdered sugar finish makes the bars feel complete. It adds visual charm and gives the dessert that soft, snowy look.
Directions
Step 1: Preheat the Oven
Preheat your oven to 350°F, or 175°C. This is the temperature needed for both setting the crust and baking the cheesecake filling.
Starting with a fully preheated oven helps the bars bake evenly. While the oven warms, you can prepare your pan and crust.
Step 2: Prepare the Baking Pan
Grab your baking pan and grease it lightly with butter or cooking spray. This helps prevent the bars from sticking when it is time to slice and serve.
A lightly greased pan makes the whole process easier later. No one wants the crust to cling to the pan after the bars have chilled and set.
Step 3: Measure the Graham Cracker Crumbs
Measure 1 ½ cups of graham cracker crumbs. Pack them tightly in the measuring cup, using about 12 full sheets to get the right amount.
The crumbs should be fine enough to combine well with butter and sugar. This creates the base for the crust.
Step 4: Combine the Crust Ingredients
In a mixing bowl, combine the graham cracker crumbs, ¼ cup granulated sugar, and 6 tablespoons melted butter. Stir until the mixture is evenly moistened.
The texture should resemble wet sand. This is the sign that the butter has coated the crumbs enough to help them hold together.
Step 5: Press the Crust into the Pan
Transfer the graham cracker mixture into the prepared baking pan. Press it firmly into the bottom in an even layer.
Use your hands or the back of a measuring cup to pack it down. A firm crust will hold up better once the creamy filling is added.
Step 6: Bake the Crust
Place the crust in the oven and bake for about 10 minutes. This helps set the crust before the cheesecake filling goes on top.
This short bake makes the base sturdier. It also keeps the crust from becoming too soft under the creamy filling.
Step 7: Cool the Crust Slightly
After the crust has baked, remove it from the oven and let it cool slightly. It does not need to be cold, but it should settle before the filling is poured over it.
This small pause helps the layers stay distinct. While the crust cools, you can prepare the cheesecake filling.
Step 8: Begin the Cheesecake Filling
In a separate mixing bowl, add the softened full-fat cream cheese. Beat it until it is smooth and creamy.
This is where the filling begins to take shape. Starting with smooth cream cheese helps prevent lumps later.
Step 9: Add the Granulated Sugar Gradually
Gradually add ½ cup granulated sugar to the cream cheese. Mix well as you add it so the sugar fully incorporates.
Adding the sugar gradually helps it dissolve more evenly into the cream cheese. The mixture should become smooth, creamy, and sweet.
Step 10: Add the Vanilla Extract
Add 1 teaspoon vanilla extract to the cream cheese mixture. Pure vanilla gives the filling the best flavor.
Mix until the vanilla is blended in. The filling should begin to smell warm, sweet, and inviting.
Step 11: Add the Eggs
Add the 2 large room temperature eggs to the filling. Mix until just combined.
Be gentle here because mixing too much after adding the eggs can lead to cracking. The goal is a smooth filling, not an overbeaten one.
Step 12: Fold in the Ricotta Cheese
Fold 1 cup whole milk ricotta cheese into the cheesecake mixture. Use a gentle motion so the filling stays creamy.
The ricotta gives these bars their cannoli-inspired character. It adds texture and richness without making the filling feel heavy.
Step 13: Add the Mini Chocolate Chips
Fold in ½ cup mini chocolate chips. Mini chocolate chips distribute perfectly through the filling.
Regular-sized chocolate chips can sink, so mini ones are the better choice. Fold just until they are evenly spread through the batter.
Step 14: Check the Filling Texture
Look at the filling before assembling the bars. It should appear creamy, inviting, and evenly blended.
Do not overmix at this point. Once the ricotta and mini chocolate chips are folded in, the filling is ready.
Step 15: Pour the Filling Over the Crust
Once the crust has baked and cooled slightly, pour the cheesecake filling over it. Spread it evenly with a spatula.
Make sure the filling reaches the corners and covers the crust in a smooth layer. This helps the bars bake evenly and slice neatly.
Step 16: Bake the Bars
Carefully place the pan back into the oven. Bake for about 30 minutes.
The bars are done when the edges are set but the center still has a slight jiggle. That gentle jiggle is part of the cheesecake texture and will settle as the bars cool.
Step 17: Cool in the Pan
When the baking time is finished, remove the pan from the oven. Let the bars cool in the pan for about 15 minutes.
Resist the temptation to cut into them right away. They need cooling and chilling time to set properly.
Step 18: Move the Bars to the Refrigerator
After the bars have cooled for about 15 minutes, move the pan to the refrigerator. Let the Cannoli Cheesecake Bars chill for at least 2 hours.
This chilling time helps them set perfectly. It also gives the flavor and texture time to become smooth and sliceable.
Step 19: Dust with Powdered Sugar
When you are ready to serve, dust the top with ¼ cup powdered sugar. This gives the bars their beautiful snowy finish.
The powdered sugar should be added after chilling. It makes the bars look polished and dessert-platter ready.
Step 20: Slice into Bars
Slice the chilled cheesecake into bars. Use generous pieces if serving for a gathering or smaller pieces if you want bite-sized treats.
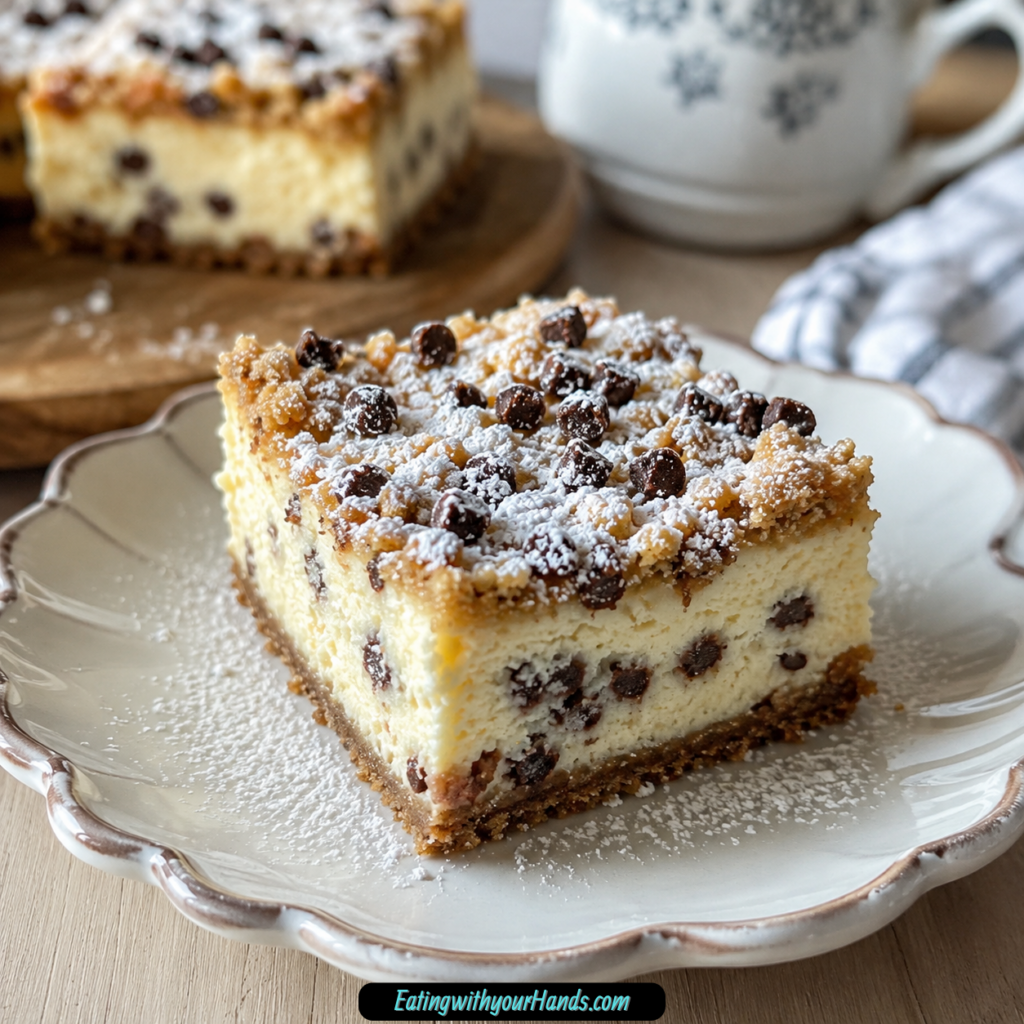
The bars should hold their shape after proper chilling. Each slice should show the crust, creamy filling, and chocolate chips.
Step 21: Serve Chilled
Serve the Cannoli Cheesecake Bars chilled. This is when their texture is at its best.
Place them on a lovely platter if serving guests. Add fresh berries or vanilla ice cream if you want an extra special treat.
Serving Ideas
Cannoli Cheesecake Bars are best served chilled. The cool, creamy texture helps the bars slice neatly and taste rich without feeling too soft.
Arrange the bars on a lovely platter for a beautiful presentation. The powdered sugar finish makes them look festive and inviting.
Fresh berries pair well with the creamy filling. They add color and a fresh contrast to the sweet bars.
A scoop of vanilla ice cream can make the dessert feel extra special. It is a lovely option when serving these bars after dinner.
These bars are perfect for holidays, gatherings, celebrations, or a cozy night in. They bring sweetness, nostalgia, and a little elegance to the table.
Storage
Store leftover bars in an airtight container in the refrigerator for up to a week. Keep them chilled so the cheesecake texture stays firm and creamy.
The bars are best served cold. Take out only what you plan to serve, then keep the rest covered in the fridge.
Reheating
These bars are meant to be served chilled, so reheating is not needed. Their creamy cheesecake texture is best straight from the refrigerator.
If frozen, thaw them before serving rather than warming them. This keeps the bars smooth, firm, and dessert-ready.
Freezing
Cannoli Cheesecake Bars can be frozen for up to three months. Wrap them tightly in plastic wrap or aluminum foil, then place them in an airtight container to prevent freezer burn.
Make sure the bars are well wrapped before freezing. This helps maintain their deliciousness for later enjoyment.
Make-Ahead
These bars are a wonderful make-ahead dessert because they need at least 2 hours to chill. You can prepare them before a gathering and keep them in the refrigerator until serving time.
They are also freezer-friendly, which makes them useful for planning ahead. Make a batch, wrap it well, and freeze for up to three months.
Because the bars are served chilled, they fit naturally into holiday or party prep. They can be ready before guests arrive, leaving you with one less thing to manage.
Helpful Notes for Best Results
Use softened, room temperature cream cheese for easy mixing. This helps the filling become smooth and creamy.
Room temperature eggs help prevent cracking in the cheesecake. Avoid overmixing once the eggs are added so the surface stays as smooth as possible.
Whole milk ricotta gives the best texture. If you do not have ricotta, blended cottage cheese can be used as a substitute.
Cream cheese can also work in a pinch as a ricotta substitute, though the texture will be slightly different. Keep that in mind when choosing your filling.
If adding nuts, a handful of chopped nuts can bring extra texture and flavor. Chopped pistachios or your favorite nuts are good options.
To reduce sugar, use a sugar substitute that measures cup-for-cup. This helps keep the recipe easier to adjust.
Variations
Citrus Cannoli Cheesecake Bars
Add a splash of orange zest or lemon zest to the filling for a refreshing citrus twist. This brightens the creamy cheesecake flavor.
The citrus works beautifully with vanilla, ricotta, cream cheese, and chocolate chips. It gives the bars a fresh, festive lift.
Pistachio Cannoli Cheesecake Bars
Swap the mini chocolate chips for chopped pistachios. This gives the bars a nutty crunch.
Pistachios are a natural fit for a cannoli-inspired dessert. They make the bars feel colorful and special.
Nutty Cheesecake Bars
Use your favorite nuts in place of the mini chocolate chips. You can also add chopped nuts to the filling for extra texture and flavor.
This variation changes the bite of the bars. It brings crunch into the creamy cheesecake layer.
Gluten-Free Cannoli Cheesecake Bars
Use gluten-free graham cracker crumbs for the crust. This keeps the same crumbly, buttery base while making the crust gluten-free.
The main filling can stay the same. Just make sure the ingredients you choose fit your needs.
Lighter Cannoli Cheesecake Bars
Use light cream cheese and fat-free ricotta for a lighter version. This changes the richness while keeping the same basic structure.
The full-fat and whole milk version gives the best texture. The lighter version is there when you want that option.
Almond or Hazelnut Cannoli Bars
Experiment with almond extract or hazelnut extract to change the flavor profile. These extracts give the bars a different aromatic note.
Vanilla remains the main flavor in the base version. Almond or hazelnut can make the bars feel new while staying creamy and sweet.
Spiced Cannoli Cheesecake Bars
Try mixing cinnamon or nutmeg into the cheesecake filling for a unique twist. These spices make the bars feel warmer and cozier.
This variation is especially nice for holiday gatherings. The spice adds depth without changing the dessert’s creamy identity.
Dairy-Free Cannoli Cheesecake Bars
Use a dairy-free cream cheese alternative if you need a dairy-free version. This is mentioned as a helpful option when cream cheese needs to be replaced.
The main recipe includes cream cheese and ricotta, so choose dairy-free ingredients that fit your needs. The goal is still a creamy bar with a sweet crust and dessert-style finish.
Troubleshooting
The Crust Falls Apart
Make sure the graham cracker crumbs, sugar, and melted butter are mixed until they resemble wet sand. This texture helps the crust hold together.
Press the mixture firmly into the pan. Use your hands or the back of a measuring cup to pack it down evenly.
The Filling Has Lumps
Use cream cheese that is softened to room temperature. Beat it until smooth before adding the other filling ingredients.
Adding sugar gradually also helps the mixture become smoother. Take your time before adding the eggs.
The Cheesecake Cracks
Make sure your ingredients are at room temperature before mixing. Room temperature eggs help prevent cracking.
Avoid overmixing once the eggs are added. Baking at a lower temperature and allowing the cheesecake to cool gradually can also help maintain that perfect surface.
The Center Looks Slightly Jiggly
The bars are done when the edges are set but the center still has a slight jiggle. This is normal for cheesecake bars.
The center will firm up as the bars cool and chill. Do not cut them before they have chilled for at least 2 hours.
The Chocolate Chips Sink
Use mini chocolate chips rather than regular-sized chocolate chips. Mini chips distribute perfectly through the filling.
Regular-sized chips can sink. That is why the recipe specifically calls for mini chocolate chips.
The Bars Are Too Soft to Slice
Make sure the bars chill in the refrigerator for at least 2 hours before serving. This helps them set perfectly.
If they are still too soft, give them more chilling time. Cold bars slice more cleanly and hold their shape better.
You Need a Gluten-Free Version
Use gluten-free graham cracker crumbs for the crust. This is the main adjustment needed for a gluten-free version.
The recipe mentions this option more than once. It is an easy way to adapt the bars for gluten-free needs.
Frequently Asked Questions
Can Cannoli Cheesecake Bars be frozen?
Yes, Cannoli Cheesecake Bars can be frozen for up to three months. Wrap them tightly in plastic wrap or aluminum foil.
Place the wrapped bars in an airtight container to prevent freezer burn. This helps maintain their texture and flavor for later.
What can I substitute for ricotta cheese?
If you do not have ricotta cheese, you can substitute it with cottage cheese that has been blended until smooth. Cream cheese can also work in a pinch.
The texture will be slightly different if using cream cheese. Whole milk ricotta gives the best texture in the main version.
How do I prevent the cheesecake from cracking?
Make sure your ingredients are at room temperature before mixing. Avoid overmixing once the eggs have been added.
Baking at a lower temperature and allowing the cheesecake to cool gradually can also help maintain a smooth surface. Gentle mixing and proper cooling are both important.
Can I make these bars gluten-free?
Yes, these bars can be made gluten-free by using gluten-free graham cracker crumbs. This changes the crust while keeping the rest of the dessert idea the same.
Make sure the ingredients you choose fit your gluten-free needs. The bars can still be creamy, sweet, and delicious.
How long do these bars last in the fridge?
Leftover Cannoli Cheesecake Bars can be stored in an airtight container in the refrigerator for up to a week. Keep them chilled until you are ready to serve.
They are best enjoyed cold. The chilled texture is part of what makes them so creamy and sliceable.
What can I serve with Cannoli Cheesecake Bars?
Serve them with fresh berries for a bright, colorful pairing. A scoop of vanilla ice cream can also make them feel extra special.
They are lovely on a dessert platter for holidays and gatherings. The powdered sugar finish makes them look beautiful without extra effort.
Can I add nuts to the filling?
Yes, you can add a handful of chopped nuts to the filling for extra texture and flavor. You can also swap the mini chocolate chips for chopped pistachios or your favorite nuts.
This gives the bars crunch and a slightly different flavor. It is a simple way to personalize the dessert.
Why This Recipe Works So Well
Cannoli Cheesecake Bars work so well because they turn classic dessert flavors into an easy-to-share bar. You get the creamy richness of cheesecake, the ricotta and chocolate chip character of cannoli, and the sweet crunch of a graham cracker crust.
The recipe is simple but thoughtful. Baking the crust first gives it strength, and chilling the bars after baking gives the filling time to set.
The texture is what makes them memorable. Cream cheese and ricotta create a creamy filling, mini chocolate chips spread sweetness evenly, and powdered sugar adds a delicate finish.
They are also practical for gatherings because they can be made ahead, stored in the refrigerator, or frozen for later. That makes them dependable for holidays, parties, or family dessert nights.
Most importantly, these bars feel like memory food. They are the kind of dessert that brings people back to the table, encourages one more small piece, and turns an ordinary evening into something sweet.
Final Thoughts
Cannoli Cheesecake Bars are more than a creamy dessert with a pretty powdered sugar top. They are the kind of treat that carries warmth, nostalgia, and the feeling of family gatherings in every chilled, chocolate-studded bite.
I hope these bars bring that same sweetness to your table. Make them for a holiday, a cozy night in, or a dessert spread with people you love, then savor the little moments that happen around every plate.
Cannoli Cheesecake Bars
Creamy, sweet, and inspired by classic cannoli flavor, these Cannoli Cheesecake Bars combine a buttery graham cracker crust with a rich cream cheese and ricotta filling. Mini chocolate chips add the perfect little bites of texture, while a snowy dusting of powdered sugar makes each bar feel ready for dessert tables, parties, or any special occasion.
Recipe Details
- Prep Time: 20 minutes
- Cook Time: 30 minutes
- Total Time: 50 minutes
- Course: Dessert
- Cuisine: Italian
- Servings: 12 bars
- Calories: 250 kcal
Equipment
- Mixing bowl
- baking pan
Ingredients
For the Crust
- 1 ½ cups graham cracker crumbs packed tightly in the measuring cup (about 12 full sheets)
- 6 tablespoon melted butter unsalted is preferred
- ¼ cup granulated sugar for that sweet crust
For the Cheesecake Filling
- 16 oz cream cheese full-fat, softened to room temp
- 1 cup ricotta cheese whole milk ricotta gives the best texture
- ½ cup mini chocolate chips regular-sized will sink, minis distribute perfectly
- ¼ cup powdered sugar for that gorgeous snowy finish
- 1 teaspoon vanilla extract pure vanilla makes all the difference
- 2 large eggs room temperature helps prevent cracking
- ½ cup granulated sugar dissolves best if added gradually
Instructions
Step 1: Prepare the Pan and Oven
Preheat your oven to 350°F (175°C). Grease a baking pan.
Step 2: Make the Graham Cracker Crust
In a mixing bowl, combine graham cracker crumbs, granulated sugar, and melted butter. Press this mixture into the bottom of the prepared pan.
Step 3: Beat the Cream Cheese Base
In another bowl, beat the cream cheese until smooth. Gradually add the sugar, vanilla extract, and eggs, mixing well.
Step 4: Add the Ricotta and Chocolate Chips
Fold in the ricotta cheese and mini chocolate chips until combined. Pour this mixture over the crust.
Step 5: Bake the Bars
Bake for 30 minutes or until set. Allow the bars to cool.
Step 6: Chill Before Serving
Refrigerate for at least 2 hours before serving. This helps the cheesecake layer firm up before slicing.
Step 7: Finish and Slice
Dust with powdered sugar before slicing into bars. Enjoy!
Notes
- These bars can be stored in the refrigerator for up to a week.
- You can also try adding your favorite nuts for extra texture.
Serving Suggestions
Serve these Cannoli Cheesecake Bars chilled after they have refrigerated for at least 2 hours. The cool cheesecake filling, creamy ricotta, mini chocolate chips, and buttery crust make each bar rich but easy to slice and share.
Dust the bars with powdered sugar right before slicing for that gorgeous snowy finish. They are a lovely dessert for gatherings, holidays, parties, or any occasion when you want a cheesecake-style treat with cannoli-inspired flavor.
Storage
How to Store
Store these bars in the refrigerator for up to a week. Keep them chilled so the cheesecake filling stays firm and ready to slice.
Chill Time
Refrigerate the bars for at least 2 hours before serving. This step helps the filling set properly after baking and cooling.
Best Texture Tip
Let the bars cool before refrigerating, then slice them after they have fully chilled. This gives the crust and creamy filling a cleaner, steadier texture.
Serving Tip
Dust with powdered sugar before slicing into bars. Add your favorite nuts for extra texture if desired, exactly as noted.

Fernando is the creator and writer behind the food blog Eating with your Hands. Living and working in cities like Paris, Barcelona, and Berlin, and being married to a Canadian foodie, has given Fernando a passion and interest in food and inspired him to run EWYH.