
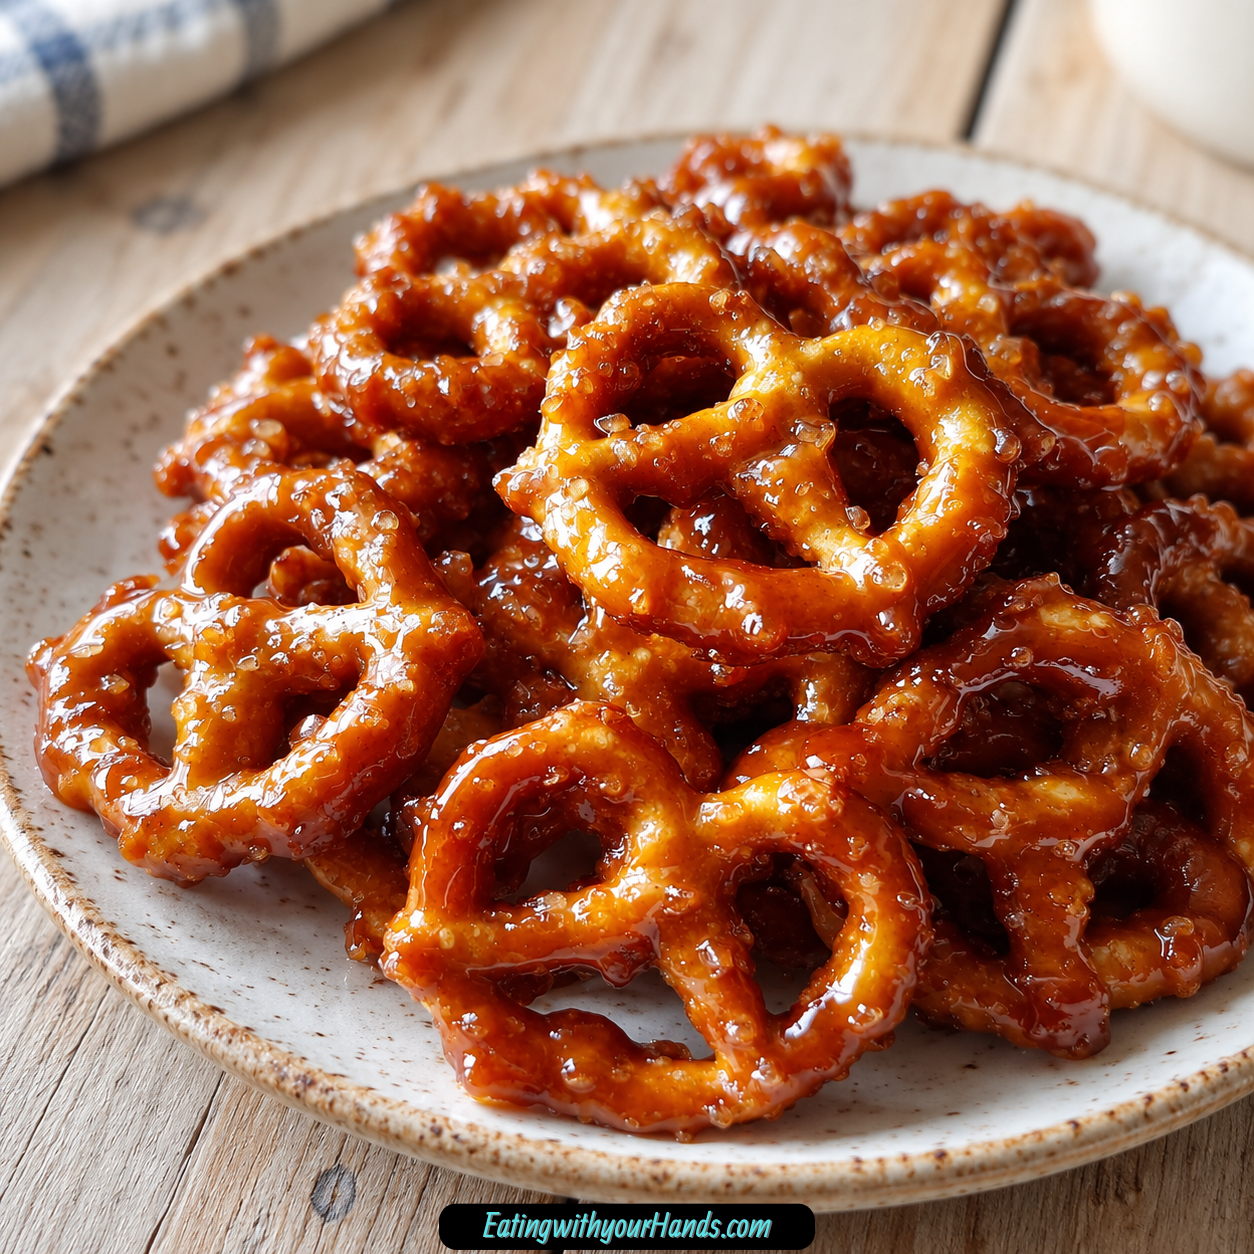
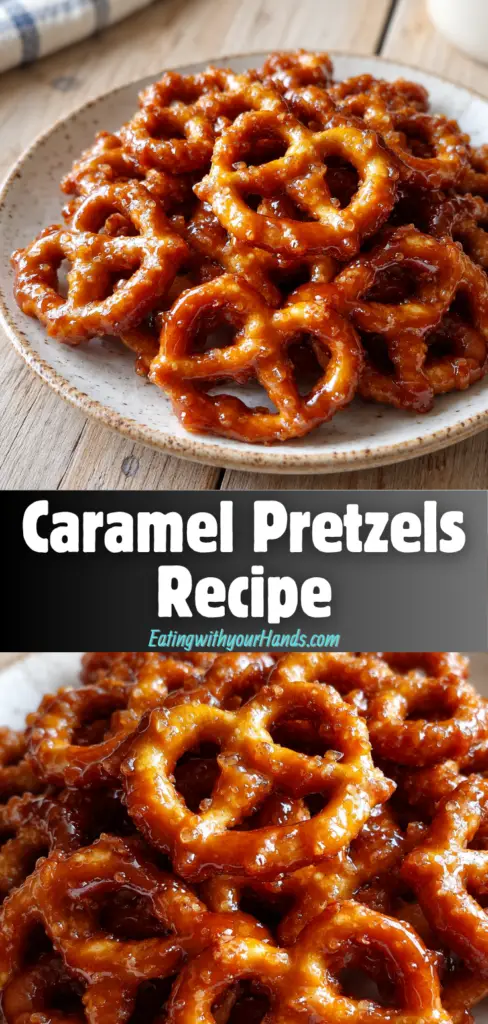
There is something almost impossible to resist about a snack that manages to be deeply sweet and unmistakably salty at the same time. That contrast is exactly what makes these Caramel Pretzels Recipe to Wow Everyone so memorable, with crisp mini pretzels wrapped in a glossy caramel coating that hardens into a wonderfully crunchy shell.
I have always had a soft spot for recipes that look as though they required far more work than they actually did. These caramel pretzels belong firmly in that category because a saucepan, a baking sheet, and five familiar ingredients are enough to create a treat that feels completely party-worthy.
The first time I made them for my niece’s birthday, I expected the chocolate desserts to disappear first. She has always been the person who reaches for anything chocolate before considering the rest of the table, so I was genuinely surprised when the caramel pretzels became the treat she could not stop talking about.
One bite apparently changed the plan. The crisp saltiness of the pretzel underneath the buttery caramel won her over so completely that the leftovers suddenly needed to be protected from everyone else.
Since then, these pretzels have become one of those recipes I make whenever I want something easy but still exciting enough to share. They work for birthdays, book clubs, holiday snack tables, casual movie nights, and those last-minute occasions when guests are already on the way.
The process is wonderfully direct. You arrange the pretzels, cook a simple caramel on the stovetop, pour it over the top, give everything a short bake, and let the coating cool until crisp.
That is all it takes to transform an ordinary bag of pretzels into something that tastes much more indulgent. Once the caramel sets, every bite has the snap of the pretzel followed by rich buttery sweetness.
The recipe also leaves plenty of room for personality. Dark chocolate, flaky sea salt, chopped nuts, cinnamon, or crushed candy canes can all turn the same basic caramel pretzel into something suited to a different occasion.
Table of Contents
- Why You’ll Love These Caramel Pretzels
- What Makes These Caramel Pretzels So Good?
- Recipe Overview
- Ingredients for Caramel Pretzels
- Choosing the Right Ingredients
- Equipment You’ll Need
- How to Make Caramel Pretzels
- Step 1: Preheat the Oven
- Step 2: Line the Baking Sheet
- Step 3: Arrange the Mini Pretzels
- Step 4: Measure Everything Before Starting the Caramel
- Step 5: Melt the Butter
- Step 6: Add the Sugar and Water
- Step 7: Bring the Caramel to a Boil
- Step 8: Boil Without Stirring for 3 Minutes
- Step 9: Remove From Heat and Add Vanilla
- Step 10: Pour the Caramel Over the Pretzels
- Step 11: Spread the Caramel
- Step 12: Bake for Exactly 5 Minutes
- Step 13: Add Optional Toppings at the Appropriate Time
- Step 14: Let the Pretzels Cool Completely
- Step 15: Break Into Pieces
- Tips for Perfect Caramel Pretzels
- Caramel Pretzel Variations
- How to Serve Caramel Pretzels
- Making Caramel Pretzels Ahead
- How to Store Caramel Pretzels
- Why Refrigeration Isn’t Ideal for Storage
- Common Caramel Pretzel Problems
- Frequently Asked Questions
- Nutritional Information
- Why These Caramel Pretzels Always Disappear So Fast
- Final Thoughts
- Irresistible Caramel Pretzels Recipe
Why You’ll Love These Caramel Pretzels
This is the kind of recipe that earns repeat status because it is simple enough to make casually and impressive enough to serve confidently. There is no dough to prepare, no candy thermometer required, and no long ingredient list standing between you and a tray of caramel-coated pretzels.
- Only five basic ingredients: Mini pretzels, butter, sugar, water, and vanilla create the classic version.
- Fast active preparation: The caramel cooks quickly and the pretzels need only 5 minutes in the oven.
- Sweet and salty in every bite: Crisp pretzels balance the buttery sugar coating.
- No complicated equipment: A saucepan and baking sheet handle most of the work.
- Great for parties: The finished pretzels are easy to serve by the handful.
- Simple to customize: Chocolate, sea salt, nuts, cinnamon, and candy canes all work as optional variations.
- Make-ahead friendly: Stored properly at room temperature, they stay good for about a week.
What I especially appreciate is that the basic recipe remains uncomplicated even when you dress it up. A drizzle of chocolate or a sprinkle of sea salt can make the batch look completely different without changing the preparation very much.
What Makes These Caramel Pretzels So Good?
The answer is texture as much as flavor. The mini pretzels remain crisp underneath while the caramel creates a brittle, buttery coating around them.
The salt already present on the pretzels keeps the sugar from tasting one-dimensional. Instead of being simply sweet, each bite moves back and forth between caramel richness and salty crunch.
Butter is another important part of the experience. One full cup gives the caramel a rich flavor and helps create a coating that spreads over the pretzels rather than behaving like plain hardened sugar.
Vanilla is added after the caramel comes off the heat. That small amount softens the sharper sweetness of the cooked sugar and gives the finished coating more depth.
Then there is the brief trip through the oven. Five minutes at 350°F helps the hot caramel settle over the pretzels before cooling into its final crisp texture.
The cooling step finishes the transformation. Warm caramel is still soft and stringy, but once completely cooled, it can be broken into crisp clusters that are much easier to eat and store.
Recipe Overview
| Detail | Information |
|---|---|
| Recipe | Caramel Pretzels Recipe to Wow Everyone |
| Main Ingredients | 5 |
| Oven Temperature | 350°F |
| Caramel Boiling Time | 3 minutes |
| Baking Time | 5 minutes |
| Room-Temperature Hardening | About 30–45 minutes |
| Optional Quick Chill | About 15 minutes |
| Estimated Serving Size | ½ cup |
| Room-Temperature Storage | About 1 week |
| Best Storage | Airtight container |
| Refrigeration for Storage | Not recommended |
The active preparation is short, which is why these are so convenient for parties. However, the caramel needs additional cooling time before the clusters reach their ideal crisp texture.
If you need them quickly, a brief 15-minute chill can speed up the hardening stage. For routine storage, though, room temperature is preferred because excess moisture can work against the crunchy texture.
Ingredients for Caramel Pretzels
For the Classic Caramel Pretzels
- 4 cups mini pretzels
- 1 cup (2 sticks) unsalted butter
- 1 cup granulated sugar
- 2 tablespoons water
- ½ teaspoon pure vanilla extract
Optional Variations and Toppings
- Melted chocolate chips
- Dark chocolate
- Flaky sea salt
- Chopped pecans
- Chopped almonds
- ½ teaspoon ground cinnamon
- Crushed candy canes
The basic recipe needs only five ingredients, which is one of its biggest advantages. Because the caramel cooks quickly, it is worth measuring everything before turning on the stove.
Choosing the Right Ingredients
Mini Pretzels
Four cups mini pretzels form the crunchy base. Small pretzel twists work particularly well because their shape gives the caramel plenty of surface area to cling to.
Large pretzel rods are not the preferred choice here. Mini pretzels are easier to spread across the baking sheet and easier to coat evenly.
Their built-in saltiness is also essential to the flavor. That salty bite is what prevents the caramel coating from feeling excessively sweet.
Unsalted Butter
The recipe uses 1 cup, or 2 sticks, unsalted butter. Using unsalted butter gives you more control over the overall saltiness because the pretzels already provide plenty of salt.
Salted butter can still be used when that is what you have available. If you choose it, avoid adding unnecessary extra salt elsewhere unless you specifically want a saltier variation.
Granulated Sugar
One cup granulated sugar provides the sweetness and structure of the caramel coating. Measure it normally without packing it down.
Once the butter, sugar, and water reach a boil, the mixture should not be stirred during the 3-minute cooking period. Leaving it alone helps reduce the risk of sugar crystallization.
Water
Only 2 tablespoons water are needed. This small amount helps the sugar mixture come together as the caramel begins cooking.
Regular tap water is sufficient. There is no special preparation needed for this ingredient.
Pure Vanilla Extract
The recipe uses ½ teaspoon pure vanilla extract. It is stirred into the caramel after the saucepan has been removed from the heat.
The caramel may bubble dramatically when the vanilla is added, so this step should be handled carefully. The reaction is expected, and the vanilla brings a richer finishing flavor to the coating.
Equipment You’ll Need
One reason this recipe is so practical is that the equipment list stays short. You do not need a stand mixer, food processor, or complicated candy-making setup.
- Medium saucepan
- Baking sheet
- Parchment paper
- Silicone spatula
- Measuring cups and spoons
- Small spoon or spatula for stirring
- Optional pastry brush
- Airtight container for storage
A silicone spatula is particularly helpful after the caramel is poured. It makes it easier to guide the coating across the pretzels before the baking sheet goes into the oven.
Parchment paper is also worth using. Caramel becomes extremely sticky as it cools, and the lining saves you from having to scrape hardened sugar off the baking sheet later.
How to Make Caramel Pretzels
The method moves quickly once the caramel begins cooking, so preparation matters. Have the pretzels arranged, vanilla measured, and oven preheated before the sugar mixture reaches the stove.
Step 1: Preheat the Oven
Set the oven to 350°F before making the caramel. Allow it to heat fully while you arrange the pretzels and measure the remaining ingredients.
The caramel moves from saucepan to baking sheet quickly. Having the oven ready prevents the hot mixture from sitting around while you wait for the temperature to rise.
Step 2: Line the Baking Sheet
Cover a baking sheet with parchment paper. Make sure the paper lies flat enough to support an even layer of pretzels.
Parchment is particularly useful because caramel can harden firmly onto an unlined metal surface. A lined pan makes both removal and cleanup much easier.
Step 3: Arrange the Mini Pretzels
Spread 4 cups mini pretzels across the prepared baking sheet in a single layer. Try to avoid stacking or heavily overlapping them.
A little contact between pretzels is perfectly fine, but each piece should have enough exposed surface to receive caramel. An even layer gives you more consistent clusters later.
Step 4: Measure Everything Before Starting the Caramel
Measure 1 cup butter, 1 cup granulated sugar, 2 tablespoons water, and ½ teaspoon vanilla before placing the saucepan over the heat. Keep the vanilla close to the stove but separate from the ingredients that cook.
Caramel can change quickly, so this is not the stage for searching through cabinets. Having everything ready allows you to concentrate entirely on the saucepan.
Step 5: Melt the Butter
Place the 1 cup unsalted butter in a medium saucepan over medium heat. Let it melt completely, watching the heat so the butter does not scorch.
Once the butter is fully liquid, move directly into the sugar stage. The mixture should remain smooth and hot.
Step 6: Add the Sugar and Water
Stir in 1 cup granulated sugar and 2 tablespoons water. Continue gently until the sugar dissolves into the melted butter mixture.
At this point, stirring is appropriate because you are bringing the ingredients together. Once the mixture reaches a boil, however, the method changes.
Step 7: Bring the Caramel to a Boil
Allow the mixture to come to a full boil over medium heat. Watch the saucepan closely as the color begins developing.
Once boiling, stop stirring. The next 3 minutes are important, and unnecessary stirring can encourage sugar crystals to form.
Step 8: Boil Without Stirring for 3 Minutes
Set a timer for exactly 3 minutes and remain near the stove. Let the mixture boil undisturbed while you watch it move toward a golden amber color.
Caramel can go from pleasantly golden to burned very quickly. Do not leave the kitchen or become distracted during this stage.
Step 9: Remove From Heat and Add Vanilla
As soon as the 3-minute boiling period is complete and the caramel has reached the desired golden color, remove the saucepan from the heat. Immediately stir in ½ teaspoon pure vanilla extract.
Expect bubbling when the vanilla hits the hot caramel. Keep your hands clear of the steam and hot mixture while stirring carefully.
Step 10: Pour the Caramel Over the Pretzels
Working quickly, pour the hot caramel over the single layer of mini pretzels. Move the saucepan across the baking sheet so the coating is distributed rather than concentrated in one spot.
Caramel starts thickening as it cools, so speed matters here. You do not need every pretzel perfectly covered at this exact moment because the next step helps distribute the mixture.
Step 11: Spread the Caramel
Use a silicone spatula to gently move the caramel over the pretzels. Try to cover as much of the surface as possible without crushing the pretzels.
Do not spend too long trying to make every piece identical. The charm of this snack is in the irregular caramel-coated clusters.
Step 12: Bake for Exactly 5 Minutes
Place the baking sheet in the preheated 350°F oven. Bake the pretzels for 5 minutes.
This is a short baking period, so avoid walking away. Leaving them in too long can darken the caramel beyond the intended flavor.
Step 13: Add Optional Toppings at the Appropriate Time
If using flaky sea salt, sprinkle it over the pretzels shortly after baking while the caramel is still warm enough for it to adhere. Crushed candy canes can also be added while the coating is still warm for a holiday variation.
Chocolate drizzle is better added after the caramel pretzels have cooled. Melt the chocolate and zigzag it over the set clusters with a spoon.
Step 14: Let the Pretzels Cool Completely
Leave the baking sheet at room temperature until the caramel becomes completely firm. This usually takes approximately 30–45 minutes.
Avoid trying to separate the pretzels while the caramel is still warm. Doing so creates sticky caramel strings rather than crisp clusters.
Step 15: Break Into Pieces
Once the caramel has hardened completely, break the pretzels into clusters of your preferred size. Some pieces may be individual pretzels while others form small groups.
This irregular shape is part of the appeal. The goal is simply to create manageable pieces that are easy to serve and snack on.
Tips for Perfect Caramel Pretzels
Stay Near the Caramel
This is not a recipe where you want to multitask during the boiling stage. Three minutes passes quickly, and caramel can darken faster than expected.
Watch both the clock and the color. A golden amber finish is what you want before removing the saucepan from the heat.
Don’t Stir Once the Caramel Boils
Stirring during the initial dissolving stage is fine. Once the mixture is boiling, leave it undisturbed for the 3-minute cooking period.
This helps reduce the chance of graininess caused by crystallized sugar. If crystals appear along the sides of the pan, a wet pastry brush can be used carefully to brush them down.
Work Quickly After Adding Vanilla
Once the saucepan comes off the heat, the process needs to move efficiently. Stir in the vanilla and pour the caramel over the pretzels without unnecessary delay.
The mixture thickens as it loses heat. Having the baking sheet prepared beforehand makes this stage much easier.
Let the Caramel Harden Completely
Warm caramel can feel set on the surface while still remaining soft underneath. Waiting the full cooling period gives you the best crisp texture.
Room-temperature hardening generally takes 30–45 minutes. If you are especially short on time, a brief 15-minute refrigeration period can help speed things along.
Don’t Store Warm Pretzels
Make sure the caramel is completely cool before transferring the clusters to a container. Trapped warmth can create moisture, which works against the crunchy texture.
Patience here is worthwhile. Properly cooled pretzels store much better and stay crisp longer.
Caramel Pretzel Variations
Dark Chocolate Drizzle
Allow the caramel pretzels to cool completely, then melt chocolate chips and drizzle the chocolate across the surface with a spoon. Dark chocolate is especially good because its stronger flavor balances the sweetness of the caramel.
Let the chocolate set before stacking or storing the pretzels. If you’re storing them in layers, place parchment between the layers to prevent sticking.
Flaky Sea Salt Caramel Pretzels
Sprinkle a small amount of flaky sea salt over the caramel shortly after the tray leaves the oven. The crystals stick best while the surface is still warm.
This variation emphasizes the sweet-salty character of the recipe. Use only a light sprinkle because the pretzels already contribute salt.
Nutty Caramel Pretzels
Add chopped pecans or almonds for extra crunch. They can be incorporated with the caramel-coated pretzels before baking.
The nuts bring another crisp texture and a richer flavor. Pecans and almonds both complement the buttery caramel well.
Cinnamon Caramel Pretzels
Add ½ teaspoon ground cinnamon to the sugar mixture. The cinnamon brings a warm flavor that makes the pretzels especially appealing during cooler months.
This version tastes distinctly different from the classic while keeping the same basic method. Cinnamon and caramel create a cozy combination without needing additional toppings.
Holiday Candy Cane Pretzels
For a festive variation, add crushed candy canes after baking while the caramel remains warm. The red-and-white pieces give the clusters a holiday appearance.
The candy cane pieces also introduce a fresh mint flavor. Sprinkle them evenly enough that most clusters receive a little bit.
Chocolate and Sea Salt Combination
The variations can also be combined. Dark chocolate drizzle with a little flaky sea salt creates an especially rich sweet-and-salty version.
Let the caramel cool before adding chocolate, then finish with the salt according to the texture you want. This is an easy way to make the simple recipe look particularly polished.
How to Serve Caramel Pretzels
These caramel pretzels need very little presentation because their glossy, irregular clusters already look inviting. Pile them into a large bowl for casual gatherings or arrange smaller pieces on a dessert tray.
They work especially well at birthday parties because guests can take a few pieces at a time. There is no need for slicing, utensils, or individual plating.
For book clubs and adult gatherings, the dark chocolate or sea salt versions can make the snack feel a little more sophisticated. The basic caramel version remains just as popular when you want something familiar.
During the holidays, place them in a decorative bowl alongside other seasonal treats. Candy cane pieces or chocolate drizzle can make the same recipe fit naturally onto a Christmas dessert table.
They can also be packaged in small bags when you want a homemade treat to share. Make sure the pretzels have cooled and hardened completely before packaging so they stay crisp.
Making Caramel Pretzels Ahead
These pretzels are a convenient make-ahead option because they do not need refrigeration for normal storage. Once the caramel has hardened completely, transfer the clusters to an airtight container.
Making them the day before a gathering removes one more task from the party schedule. The flavor and texture hold well when the container is kept dry and sealed.
If using chocolate drizzle, allow the chocolate to set before stacking the pieces. Parchment paper between layers can prevent decorated clusters from sticking together.
Avoid making them ahead and leaving them uncovered. Exposure to moisture and air can gradually soften the crisp coating.
How to Store Caramel Pretzels
Store completely cooled caramel pretzels in an airtight container at room temperature. A glass jar with a tight seal or a well-closed zip-top bag both work.
They remain good for approximately 1 week when stored properly. In many households, the more realistic problem is making them last that long.
Avoid routine refrigerator storage. Moisture in the refrigerator can affect the crunchy texture and make the pretzels softer than intended.
If using a zip-top bag, press out as much excess air as practical before sealing. Keep the container somewhere dry and away from unnecessary heat.
Chocolate-drizzled pretzels can be separated with parchment paper. This helps protect the decorative topping and prevents clusters from attaching to one another.
Why Refrigeration Isn’t Ideal for Storage
Caramel and pretzels both respond poorly to unnecessary moisture. A refrigerator can expose the finished snack to conditions that gradually reduce its crispness.
That is why room temperature in an airtight container is the preferred storage method. The pretzels remain more pleasantly crunchy when kept dry.
The brief 15-minute refrigerator method mentioned for cooling is different from long-term cold storage. It is simply a shortcut for helping hot caramel firm more quickly.
If you use that method, remove the pretzels once the coating has hardened. Let them return to normal serving conditions rather than leaving them refrigerated indefinitely.
Common Caramel Pretzel Problems
Why Did My Caramel Burn?
The most likely cause is cooking too long or using excessive heat. Caramel changes color very quickly near the end of cooking.
Stay beside the stove during the 3-minute boil and remove the saucepan promptly when the mixture reaches a golden amber color. A timer is extremely useful.
Why Is My Caramel Grainy?
Sugar crystals may have formed along the sides of the saucepan and fallen back into the mixture. Stirring after the caramel begins boiling can also contribute to crystallization.
Brush crystals from the sides with a wet pastry brush as needed while the sugar dissolves. Once the mixture reaches a boil, stop stirring completely.
Even a slightly grainy batch may still taste good. The texture simply will not be as smooth as the ideal version.
Why Are My Pretzels Stuck to the Pan?
An unlined baking sheet allows hot caramel to make direct contact with metal, where it can harden firmly. Parchment paper creates a protective layer that makes removal much easier.
If parchment is unavailable, lightly greased aluminum foil can work as an alternative. Avoid placing caramel directly onto an unprepared pan.
Why Are the Pretzels One Giant Sticky Mass?
They were probably stored before cooling completely or broken apart while the caramel was still warm. The coating needs time to harden before handling.
Wait approximately 30–45 minutes at room temperature. Once fully crisp, the slab can be broken into manageable clusters.
Why Isn’t My Caramel Coating Even?
Caramel begins thickening as soon as it leaves the heat. If it isn’t poured and spread quickly, some areas may receive more coating than others.
Prepare the pretzel tray before starting the saucepan. That allows you to pour immediately after adding the vanilla.
Perfectly identical coating is not necessary. Irregular caramel coverage actually gives the clusters their homemade appearance.
Frequently Asked Questions
Can I Use Salted Butter Instead of Unsalted?
Yes, salted butter can be used. Because the pretzels already contain salt, there is usually no need to add extra salt to the base recipe.
Some people even prefer the stronger salty contrast. The finished flavor remains very close to the original caramel pretzels.
How Do I Keep the Pretzels From Sticking to the Baking Sheet?
Line the baking sheet with parchment paper before arranging the pretzels. Caramel releases much more easily from parchment after it has cooled.
If parchment paper is unavailable, use aluminum foil lightly coated with cooking oil. Leaving the pan completely unlined makes cleanup much more difficult.
Can I Double the Recipe?
Yes, the recipe can be doubled for a larger gathering. Use two baking sheets rather than crowding twice the amount of pretzels onto one tray.
A larger quantity of caramel may require a little more time to develop the proper color. Watch the mixture carefully instead of relying solely on the clock.
Why Did My Caramel Become Grainy?
Sugar crystals are usually responsible. They may develop on the saucepan sides and return to the caramel during cooking.
A wet pastry brush can help wash crystals from the sides while the sugar dissolves. Most importantly, do not stir once the mixture begins boiling.
How Long Does Caramel Take to Harden?
At room temperature, expect approximately 30–45 minutes. The exact time may vary with room conditions and how thickly the caramel is distributed.
For faster cooling, the tray can be placed in the refrigerator for approximately 15 minutes. Do not use refrigeration as the normal long-term storage method.
Can I Add Chocolate?
Yes. Once the caramel pretzels have cooled, drizzle melted chocolate chips over them.
Dark chocolate works especially well because it balances the sweet caramel. Allow the chocolate to set before storing.
Can I Add Nuts?
Yes, chopped pecans or almonds make a delicious variation. They add an additional layer of crunch.
The nuts can be incorporated into the caramel-coated mixture before baking. Make sure they are distributed so the clusters remain easy to break apart.
Can I Make These Gluten-Free?
Gluten-free pretzels can replace regular mini pretzels. Check the labels of the remaining ingredients, including the vanilla, when gluten avoidance is important.
The general caramel preparation remains the same. The final texture may depend on the specific gluten-free pretzel used.
Are Caramel Pretzels Vegetarian?
The classic version is vegetarian. It uses pretzels, butter, sugar, water, and vanilla.
Optional toppings should also be checked if dietary restrictions matter. The basic recipe itself does not include meat.
Nutritional Information
The following values are estimates based on a serving size of approximately ½ cup. Exact nutrition varies according to pretzel brand, butter choice, portion size, and optional toppings.
| Nutrient | Estimated Amount Per ½ Cup |
|---|---|
| Calories | 200 |
| Fat | 10g |
| Saturated Fat | 6g |
| Carbohydrates | 25g |
| Sugar | 15g |
| Sodium | 180mg |
The butter contributes much of the fat and richness, while the pretzels and caramel sugar make up most of the carbohydrates. Salt in the pretzels contributes significantly to the sodium.
Using salted butter can alter the sodium amount. Chocolate, nuts, candy canes, or other toppings will also change the nutritional values.
These figures are intended as estimates rather than exact measurements for every batch. Portion size is especially important because the crunchy clusters make it very easy to keep reaching into the bowl.
Why These Caramel Pretzels Always Disappear So Fast
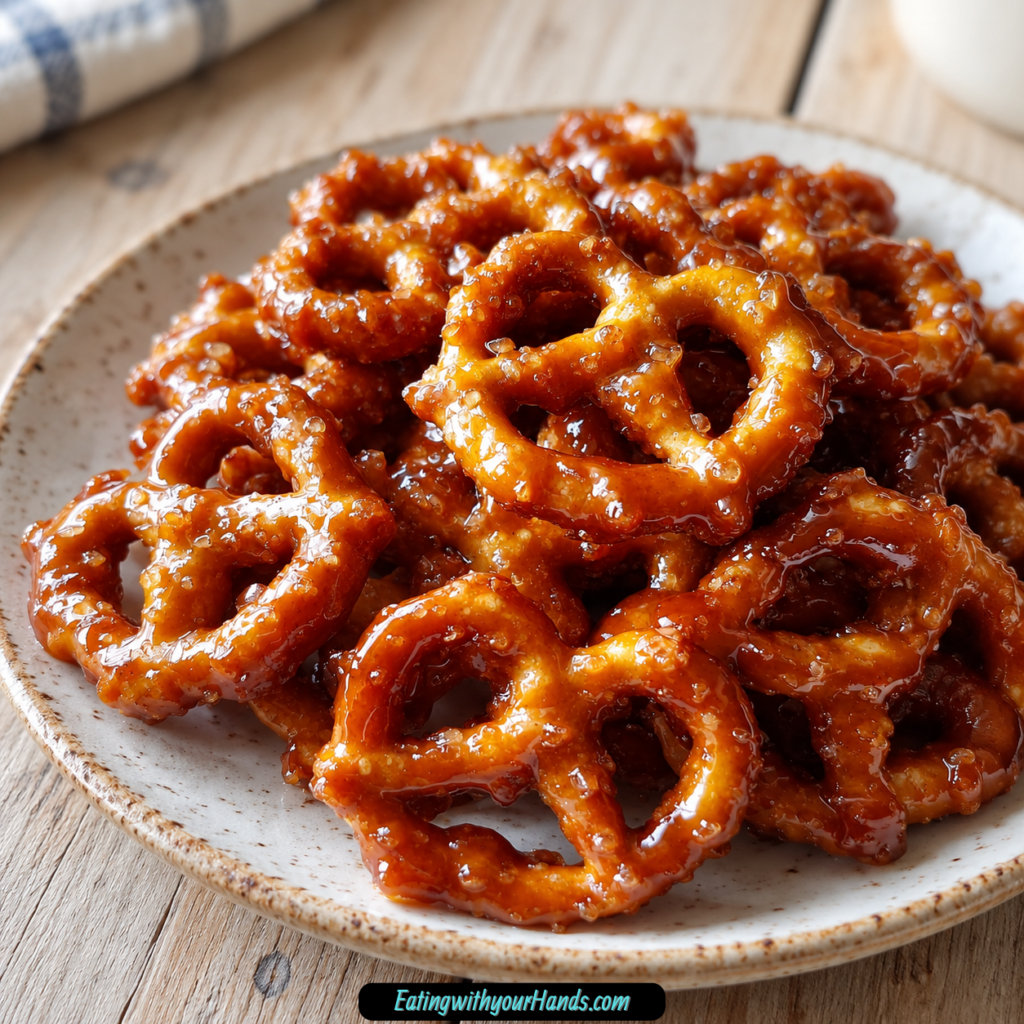
Some party snacks need elaborate decoration to attract attention. These do not, because the combination of glossy caramel and recognizable pretzel shapes immediately tells everyone exactly what kind of treat is waiting.
Then comes that first bite. The pretzel cracks, the hardened caramel breaks around it, and the salty base keeps the sweetness balanced enough that another piece sounds like an excellent idea.
I also think part of their appeal comes from how casual they are. Nobody needs a plate and fork, and there is no careful slicing required before people can start enjoying them.
A bowl can simply sit in the middle of the table while everyone helps themselves. Before long, people begin reaching back in without really noticing how quickly the pile is shrinking.
There is also something nostalgic about a snack this straightforward. Butter, sugar, vanilla, and pretzels are not complicated ingredients, yet together they create exactly the kind of treat people remember.
For me, the recipe will always be connected to that birthday when my niece unexpectedly chose caramel over chocolate. Recipes become traditions in funny ways sometimes, and this one earned its place after a single batch.
Final Thoughts
Caramel Pretzels Recipe to Wow Everyone turns 4 cups of mini pretzels into a crisp, buttery sweet-and-salty snack with only butter, granulated sugar, water, and vanilla. The caramel needs just 3 minutes of boiling without stirring, followed by a quick 5-minute bake at 350°F before cooling into its crunchy coating.
The classic version is already satisfying enough for parties, birthdays, and casual snacking, but the variations make it easy to adapt for different occasions. Add dark chocolate, flaky sea salt, pecans, almonds, cinnamon, or crushed candy canes when you want a different finish.
Most importantly, give the caramel enough time to cool before breaking the pretzels apart. That little bit of patience is what turns the warm, sticky mixture into the crisp clusters that make this simple treat so hard to stop eating.
Irresistible Caramel Pretzels Recipe
Sweet, buttery, crisp, and perfectly salty, these Irresistible Caramel Pretzels are an easy American dessert snack made with mini pretzels, butter, sugar, water, and vanilla. The pretzels are coated in a quick homemade caramel, baked briefly, then cooled until crunchy and ready to serve.
Recipe Details
- Prep Time: 10 minutes
- Cook Time: 8 minutes
- Total Time: 18 minutes
- Course: Dessert
- Cuisine: American
- Servings: 4 cups
- Calories: 200 kcal
Ingredients
For the Caramel Pretzels
- ½ teaspoon Vanilla
- 2 tablespoon Water
- 1 cup Sugar
- 1 cup Butter
- 4 cups Mini Pretzels
Instructions
Step 1: Preheat the Oven
Preheat the oven to 350°F (175°C).
Let the oven heat while you prepare the baking sheet and caramel mixture.
Step 2: Prepare the Baking Sheet
Line a baking sheet with parchment paper.
Spread the mini pretzels evenly across the prepared sheet so they are ready for the caramel coating.
Step 3: Melt the Butter
Place the butter in a saucepan over medium heat and melt it completely.
Stir as needed while the butter melts, keeping the heat steady.
Step 4: Add the Sugar and Water
Add the sugar and water to the melted butter.
Stir until the sugar dissolves and the mixture is evenly combined.
Step 5: Cook the Caramel
Bring the mixture to a boil.
Cook for 3 minutes without stirring. Let the caramel bubble undisturbed during this stage.
Step 6: Add the Vanilla
Remove the saucepan from the heat.
Stir in the vanilla until it is evenly incorporated into the caramel mixture.
Step 7: Coat the Pretzels
Pour the hot caramel mixture over the pretzels on the baking sheet.
Coat the pretzels as evenly as possible so each piece gets some of the buttery caramel.
Step 8: Bake
Place the coated pretzels in the oven and bake for 5 minutes.
This brief bake helps the caramel settle onto the pretzels.
Step 9: Cool and Serve
Remove the baking sheet from the oven and let the caramel pretzels cool before serving.
Once cooled, the coating will firm up and the pretzels will be ready to enjoy.
Notes
- Store in an airtight container for freshness.
- Adjust sugar to taste if needed.
Serving Suggestions
Serve Irresistible Caramel Pretzels once they have cooled and the caramel coating has set. The combination of crisp mini pretzels and buttery vanilla caramel creates a simple sweet-and-salty snack that works well for dessert tables, parties, movie nights, or casual treats.
This recipe makes 4 cups, so it is easy to place in a serving bowl or portion into smaller snack containers. Let the pretzels cool fully before serving so the caramel becomes less sticky and easier to handle.
If you prefer a slightly different sweetness level, adjust the sugar to taste as noted. Keep the same cooking method so the caramel still coats the pretzels properly.
Storage
How to Store
Store the caramel pretzels in an airtight container for freshness. The recipe does not provide a specific storage duration, so no exact number of days is added here.
Pretzel Tip
Use 4 cups Mini Pretzels and spread them evenly over the parchment-lined baking sheet before adding the caramel.
Butter Tip
Use 1 cup Butter and melt it over medium heat before adding the sugar and water.
Caramel Tip
Add 1 cup Sugar and 2 tablespoon Water to the melted butter. Bring the mixture to a boil and cook for 3 minutes without stirring.
Vanilla Tip
Use ½ teaspoon Vanilla. Stir it into the caramel after removing the saucepan from the heat.
Baking Tip
Bake the caramel-coated pretzels at 350°F (175°C) for 5 minutes.
Cooling Tip
Let the pretzels cool completely before serving so the caramel coating has time to set.

Fernando is the creator and writer behind the food blog Eating with your Hands. Living and working in cities like Paris, Barcelona, and Berlin, and being married to a Canadian foodie, has given Fernando a passion and interest in food and inspired him to run EWYH.