

There are certain recipes that feel like they belong to cold mornings, warm kitchens, and the kind of quiet family moments that stay with you long after the plate has been cleared. This Cheese Bread is one of those recipes.
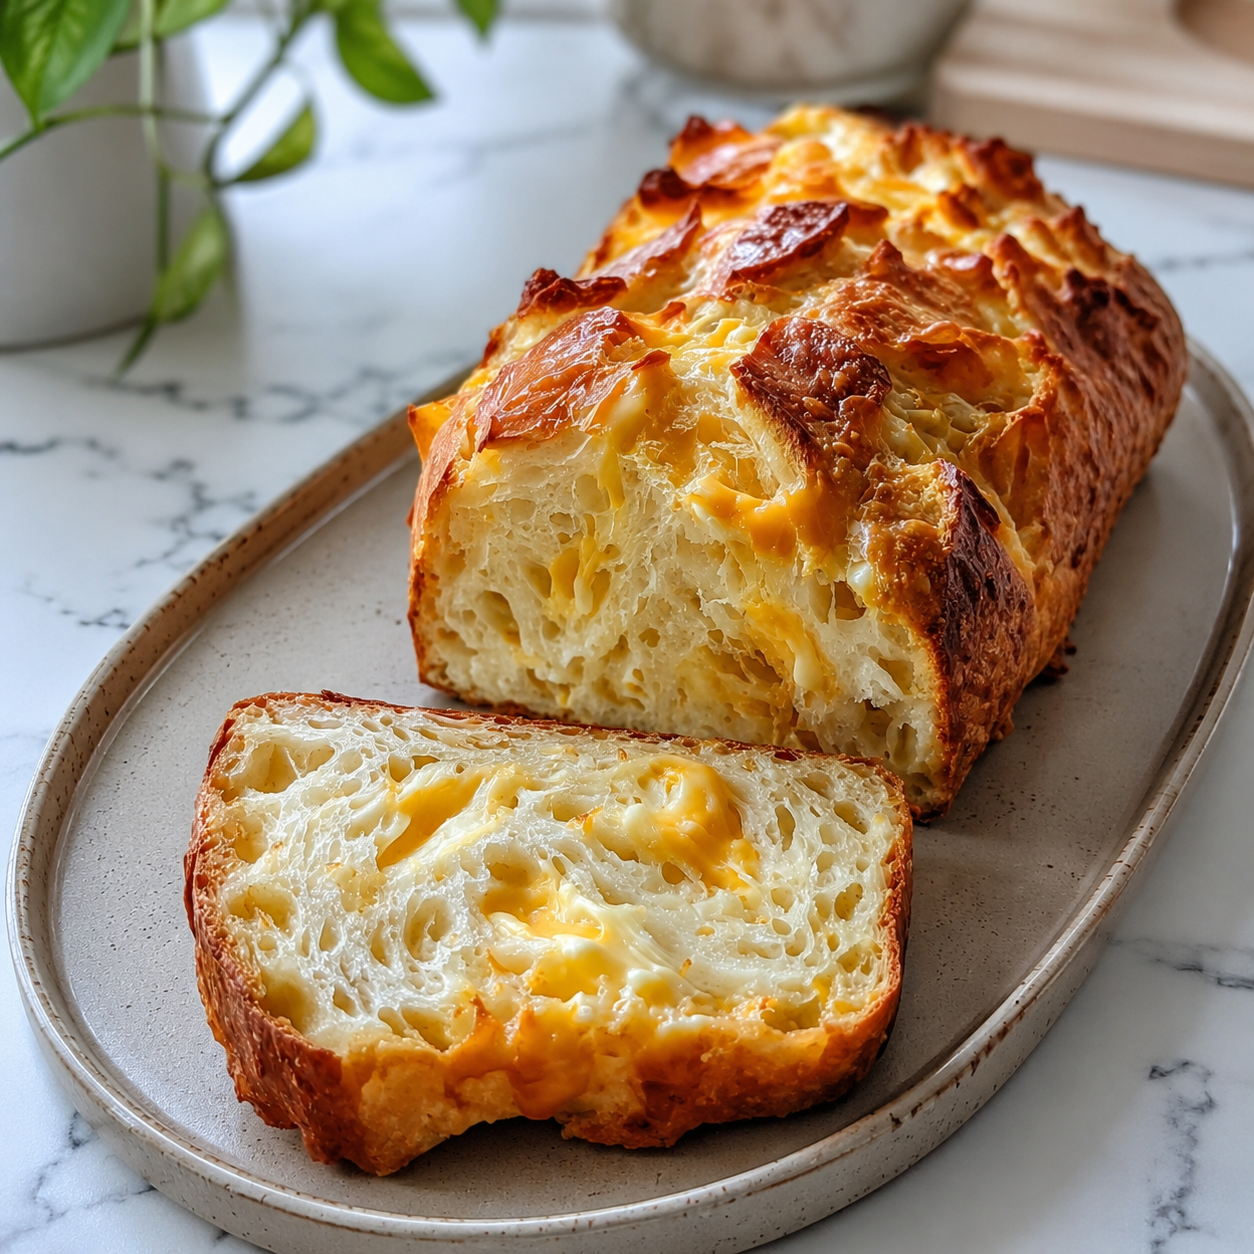
It is soft, fluffy, buttery, and filled with the comforting flavor of melted cheese. The aroma alone can make a kitchen feel warmer, especially on chilly Sunday mornings when something homemade feels like the best kind of comfort.
This is not a complicated bread recipe that asks you to knead dough, wait for yeast, or plan your entire day around rising time. It is a simple quick bread made with everyday ingredients, yet it still brings that cozy, fresh-baked feeling to the table.
Every slice has a tender crumb, a savory cheese flavor, and just enough richness from milk, melted butter, and egg. It is the kind of bread you can serve beside soup, pair with salad, enjoy as a snack, or warm up later when you want something simple and satisfying.
Table of Contents
- What Is Cheese Bread?
- Why This Cheese Bread Feels Like Home
- Recipe Overview
- Why You’ll Love This Cheese Bread
- Ingredients You’ll Need
- Ingredient Notes
- Choosing the Cheese
- Directions
- Step 1: Preheat the Oven
- Step 2: Grease the Loaf Pan
- Step 3: Gather All Ingredients
- Step 4: Measure the Dry Ingredients
- Step 5: Combine the Dry Ingredients
- Step 6: Add the Shredded Cheese
- Step 7: Prepare the Wet Ingredients
- Step 8: Combine Wet and Dry Mixtures
- Step 9: Watch the Batter Texture
- Step 10: Add Fresh Parsley If Using
- Step 11: Transfer the Batter to the Pan
- Step 12: Level the Batter
- Step 13: Bake the Cheese Bread
- Step 14: Check for Doneness
- Step 15: Cool the Bread in the Pan
- Step 16: Transfer to a Wire Rack
- Step 17: Garnish If Desired
- Step 18: Slice and Serve
- Pro Tips for the Best Cheese Bread
- Variations
- Serving Suggestions
- Storage Tips
- Reheating Tips
- Make-Ahead Notes
- Common Mistakes to Avoid
- Helpful Notes
- Frequently Asked Questions
- Final Thoughts
- Cheese Bread
What Is Cheese Bread?
Cheese Bread is a savory quick bread made with all-purpose flour, baking powder, salt, optional garlic powder, shredded cheddar cheese, milk, melted butter, and egg. It bakes into a soft, fluffy loaf with a warm cheesy flavor and a tender texture.
Unlike yeast bread, this recipe does not need rising time. The baking powder helps the bread lift in the oven, which makes the process easier and faster for both beginner bakers and experienced home cooks.
The texture is one of the best parts of this bread. It is sturdy enough to slice, but still soft enough to feel comforting when served warm.
The cheese melts into the batter as the loaf bakes, giving every slice a savory richness. If you add parsley, it also gets a small pop of color and freshness that makes the bread feel even more inviting.
Why This Cheese Bread Feels Like Home
The memory behind this recipe is part of what makes it special. Freshly baked cheese bread filling the kitchen on a chilly Sunday morning is the kind of detail that feels simple, but deeply meaningful.
It is easy to imagine the warmth of the oven, the smell of butter and cheese, and the comfort of gathering around a table before the day fully begins. Recipes like this are not only about flavor; they are also about the feeling they create.
This Cheese Bread has that homemade quality that makes people smile before they even take a bite. It feels cozy, generous, and familiar.
It is the kind of bread that can turn an ordinary meal into something more complete. A bowl of soup feels heartier beside it, a salad feels more satisfying with it, and a quiet snack feels more comforting when the bread is warm.
Recipe Overview
Prep Time: 15 minutes
Cook Time: 30 minutes
Total Time: 45 minutes
Servings: 8 slices
This recipe comes together quickly, which makes it useful for both planned meals and last-minute gatherings. With only 15 minutes of preparation and 30 minutes in the oven, you can have a warm loaf ready in under an hour.
The recipe makes 8 slices, which is a practical amount for a family meal, a small gathering, or a few days of snacking. It can also be made ahead and reheated, which makes it helpful for stress-free hosting.
Why You’ll Love This Cheese Bread
You will love this Cheese Bread because it is simple, reliable, and full of flavor. It uses basic pantry staples, which means you do not need a special shopping trip to make it.
The preparation is quick, taking only about 15 minutes before the loaf goes into the oven. That makes it a great option when you want homemade bread without a long process.
It is also beginner-friendly. The steps are straightforward, and there is no yeast, kneading, or complicated shaping involved.
This bread works for many occasions. You can serve it at a cozy family dinner, place it on the table for a holiday meal, or slice it thick for a simple snack.
It also offers make-ahead convenience. You can prepare it in advance, store it properly, and reheat it when you are ready to serve.
Ingredients You’ll Need
2 cups all-purpose flour: Sifted for a lighter texture.
2 teaspoons baking powder: Ensures a fluffy rise.
½ teaspoon salt: Enhances flavor.
¼ teaspoon garlic powder: Optional, but adds a lovely depth.
1 cup shredded cheddar cheese: Feel free to substitute with your favorite cheese, like mozzarella or gouda.
1 cup milk: Whole milk gives the best richness.
¼ cup melted butter: For that buttery goodness.
1 large egg: Binds the ingredients together.
1 tablespoon chopped fresh parsley: Optional, for a pop of color and freshness.
Ingredient Notes
All-purpose flour gives the bread its structure. Sifting the flour helps create a lighter texture, which is especially helpful in a quick bread where you want softness without overmixing.
Baking powder is what helps the loaf rise. Since this is not a yeast bread, the baking powder is essential for giving the bread its fluffy, lifted texture.
Salt may seem like a small ingredient, but it is important for flavor. It helps the cheese taste more pronounced and keeps the bread from tasting flat.
Garlic powder is optional, but it adds a savory depth that works beautifully with cheddar. If you enjoy a little extra warmth in your cheese bread, it is worth including.
Shredded cheddar cheese gives the bread its classic cheesy flavor. Using high-quality cheese makes a noticeable difference, so choose a cheese you truly enjoy.
Milk brings moisture to the batter. Whole milk gives the richest result, helping the bread bake up tender and flavorful.
Melted butter adds richness and that comforting buttery taste. It also helps the bread feel soft and satisfying.
The egg helps bind the ingredients together. It gives the loaf structure while also helping the texture stay tender.
Fresh parsley is optional, but it adds a pretty touch of green and a little freshness. It can make the finished loaf look more colorful and inviting.
Choosing the Cheese
Cheddar is the main cheese used in this recipe, and it gives the bread a bold, familiar flavor. It melts well and blends nicely into the soft bread texture.
You can also substitute with mozzarella or gouda if you prefer a different flavor. Mozzarella will give a milder taste, while gouda can bring a deeper, slightly richer character.
A blend of cheeses can also work if you want a more layered flavor. The most important thing is to use cheese you enjoy because the cheese flavor is central to the bread.
High-quality cheese will make the finished loaf taste better. Since this recipe is simple, each ingredient has a chance to stand out.
Directions
Step 1: Preheat the Oven
Begin by preheating your oven to 350°F. Giving the oven enough time to heat properly helps the bread bake evenly from the start.
A fully preheated oven is important for quick bread because the baking powder begins working once the batter is mixed and heated. If the oven is too cool, the bread may not rise as nicely.
While the oven heats, you can prepare your pan and ingredients. This keeps the process organized and prevents the batter from sitting too long before baking.
Step 2: Grease the Loaf Pan
Grease a loaf pan well to prevent the bread from sticking. Make sure to cover the bottom and sides, because cheese bread can cling to the pan if it is not properly prepared.
A well-greased pan also helps the loaf release cleanly after baking. This is especially helpful when you want neat slices and a smooth-looking loaf.
Take a moment to check the corners of the pan. Batter can settle into those areas, so they need to be greased too.
Step 3: Gather All Ingredients
Place all of your ingredients on the countertop before you begin mixing. This includes the flour, baking powder, salt, garlic powder, shredded cheddar cheese, milk, melted butter, egg, and parsley if using.
Having everything ready makes the recipe feel calm and easy. It also helps prevent mistakes, such as forgetting an ingredient or adding something at the wrong time.
Measure each ingredient carefully. Quick breads are simple, but accurate measurements help create the best texture.
Step 4: Measure the Dry Ingredients
Measure 2 cups of all-purpose flour into a mixing bowl. If you are sifting the flour, do that before combining it with the other dry ingredients.
Add 2 teaspoons of baking powder to the flour. This will help the bread rise and become fluffy in the oven.
Add ½ teaspoon of salt and ¼ teaspoon of garlic powder, if using. The garlic powder is optional, but it gives the bread a deeper savory flavor.
Step 5: Combine the Dry Ingredients
Stir the flour, baking powder, salt, and garlic powder together until evenly combined. This step helps distribute the baking powder throughout the flour.
Even distribution matters because it helps the loaf rise consistently. If the baking powder is not mixed well, some parts of the bread may rise more than others.
Use a spoon or whisk to break up any small clumps. The dry mixture should look light and evenly blended before you add the cheese.
Step 6: Add the Shredded Cheese
Add 1 cup of shredded cheddar cheese to the dry ingredients. Stir gently until the cheese is evenly coated with the flour mixture.
Coating the cheese with flour helps keep it distributed throughout the batter. This prevents all the cheese from sinking into one area of the loaf.
Make sure there are no large clumps of cheese stuck together. The goal is for every slice to have a good amount of cheesy flavor.
Step 7: Prepare the Wet Ingredients
In a separate bowl, add 1 cup of milk, ¼ cup of melted butter, and 1 large egg. These ingredients create the moist, rich base of the batter.
Whisk them together until the egg is fully blended into the milk and butter. The mixture should look smooth and consistent.
If the melted butter is very hot, let it cool slightly before adding it to the egg. This helps prevent the egg from reacting too quickly to the heat.
Step 8: Combine Wet and Dry Mixtures
Pour the wet mixture into the bowl with the dry ingredients and cheese. Add it slowly so it is easier to stir without splashing.
Use a spatula or spoon to gently fold the ingredients together. Stir only until the batter is just combined.
A few small lumps are completely fine. Overmixing can make the bread dense, so stop as soon as you no longer see large streaks of dry flour.
Step 9: Watch the Batter Texture
The batter should be thick, moist, and spoonable. It should not be as thin as pancake batter, and it should not be dry or crumbly.
If you see a small pocket of flour near the bottom of the bowl, fold it in gently. Scrape the sides and bottom so everything is incorporated without excessive stirring.
This is a key step for keeping the loaf soft. Gentle mixing helps protect the fluffy texture of the finished bread.
Step 10: Add Fresh Parsley If Using
If you are using chopped fresh parsley, fold it into the batter at this stage. The parsley adds color and a fresh note that looks beautiful in the finished loaf.
Use a light hand when mixing it in. You only need a few folds to distribute it through the batter.
If you prefer to use parsley only as a garnish, you can save it for after baking. Either way, it adds a nice finishing touch.
Step 11: Transfer the Batter to the Pan
Carefully pour or spoon the batter into the prepared loaf pan. Use a spatula to scrape every last bit from the bowl.
Spread the batter gently so it reaches the corners of the pan. Do not press it down too firmly, because you want to keep the batter light.
The top does not need to be perfectly smooth. A slightly rustic surface is normal for homemade quick bread.
Step 12: Level the Batter
Gently shake the pan or tap it lightly on the counter to help level the batter. This encourages the batter to settle evenly in the pan.
Be gentle so you do not knock too much air out of the mixture. A small shake is enough.
Leveling the batter helps the bread bake into a more even loaf. It also helps prevent one side from rising much higher than the other.
Step 13: Bake the Cheese Bread
Place the loaf pan in the preheated oven. Bake for 30 minutes, or until the top is golden brown.
As the bread bakes, the cheese melts into the loaf and the top begins to take on a warm, inviting color. The kitchen should start to smell buttery, cheesy, and comforting.
Avoid opening the oven too often during baking. Keeping the oven temperature steady helps the bread rise and bake properly.
Step 14: Check for Doneness
To check if the bread is done, insert a toothpick into the center of the loaf. It should come out clean.
If the toothpick comes out with wet batter, the bread needs more time. Return it to the oven and continue baking until the center is fully set.
The top should be golden and the loaf should feel firm enough to hold its shape. The toothpick test is important because the center can look done on the outside before it is fully baked inside.
Step 15: Cool the Bread in the Pan
Once the bread is baked, remove the loaf pan from the oven. Let the bread cool in the pan for about 5 minutes.
This short resting time helps the loaf settle and makes it easier to remove from the pan. If you try to take it out immediately, it may be too delicate.
The bread will still be warm, but it will begin to firm up slightly. This helps protect the fluffy texture when you transfer it.
Step 16: Transfer to a Wire Rack
Carefully remove the bread from the loaf pan and place it on a wire rack. A wire rack allows air to circulate around the bread as it cools.
This prevents steam from getting trapped underneath the loaf. If too much steam collects, the bottom can become damp.
Let the bread cool completely before slicing if you want the cleanest slices. If you prefer it warm, allow it to cool enough so it holds together well.
Step 17: Garnish If Desired
If desired, sprinkle chopped fresh parsley over the top before serving. This gives the bread a fresh, colorful finish.
The parsley is optional, but it adds a nice visual contrast to the golden loaf. It also makes the bread feel a little more polished when serving guests.
You can also keep the presentation simple. This bread already has plenty of warmth and charm on its own.
Step 18: Slice and Serve
Slice the cheese bread into 8 pieces. Thick slices work especially well because the bread is soft and fluffy.
Serve it warm if you want the cheese flavor to feel especially comforting. It can also be toasted later with a little butter on top.
This bread is delicious on its own, but it also pairs beautifully with soup or salad. It brings a cozy, savory touch to many simple meals.

Pro Tips for the Best Cheese Bread
Do not overmix the batter. Stirring too much can make the bread dense instead of soft and fluffy.
Use fresh baking powder for the best rise. Since baking powder is what gives this quick bread lift, stale baking powder can affect the final texture.
Grease the loaf pan thoroughly. This helps the bread release cleanly and prevents sticking around the edges.
Choose a cheese you truly enjoy. Because cheese is the main flavor, the quality and taste of the cheese will make a noticeable difference.
Let the bread cool before slicing. Cutting too soon can cause the loaf to crumble or compress.
Variations
Add cooked bacon bits for a savory twist. The bacon adds a salty, smoky flavor that pairs well with the cheese.
Incorporate fresh herbs like rosemary or thyme for an aromatic flavor. These herbs can make the bread feel more fragrant and special.
Use gluten-free flour if you want to make the recipe suitable for gluten-free diets. This gives you a way to adapt the bread while keeping the same general idea.
For a spicy kick, mix in jalapeños or red pepper flakes. This adds heat and makes the bread taste a little bolder.
Top the batter with extra cheese and herbs before baking for a cheesy crust. This creates a more flavorful top and makes the loaf look extra inviting.
Serving Suggestions
Serve this Cheese Bread warm and sliced thick. It is especially comforting when the bread is still soft and the cheese flavor feels rich.
It goes beautifully with a steaming bowl of soup. The soft bread is perfect for enjoying alongside something warm and cozy.
It also pairs well with a fresh salad. The savory richness of the bread balances the crispness of the greens.
You can enjoy it as a snack on its own, too. A slice toasted with a bit of butter makes a simple treat feel special.
Storage Tips
Store leftover cheese bread in an airtight container in the refrigerator for up to 3 days. Let the bread cool completely before storing it.
Keeping it airtight helps prevent it from drying out. Refrigeration keeps the bread fresh for short-term storage.
For longer storage, freeze individual slices. Wrap each slice in plastic wrap and then in foil to help protect it from freezer burn.
Frozen cheese bread can be stored for up to 3 months. When you are ready to enjoy it, thaw it in the refrigerator overnight and reheat it for the best texture.
Reheating Tips
Reheat slices in the oven or toaster to bring back the fluffy texture. This helps the bread feel warm and fresh again.
The oven works well if you are reheating several slices at once. A toaster is helpful when you only want one slice.
Warming the bread also brings the cheese flavor back to life. It makes leftovers feel much closer to freshly baked.
Make-Ahead Notes
This Cheese Bread can be made ahead of time, which makes it helpful for hosting or busy days. You can bake it in advance and reheat slices when needed.
The original recipe also notes that it can be prepared a day in advance and stored in the fridge before baking. Let it come to room temperature before placing it in the oven.
Make-ahead recipes like this can make meals feel easier. You still get the comfort of homemade bread without having to rush at the last minute.
Common Mistakes to Avoid
Overmixing the batter is one of the most common mistakes. Mix only until the ingredients are just combined so the bread stays light.
Not greasing the loaf pan can cause sticking. A properly greased pan makes it easier to remove the bread without tearing it.
Skipping the toothpick test can lead to underbaked bread. Always check the center before removing the loaf from the oven.
Using stale ingredients can affect both flavor and texture. Fresh ingredients help the bread rise well and taste its best.
Helpful Notes
For a dairy-free option, use almond milk and a non-dairy cheese alternative. This keeps the spirit of the recipe while making it fit dairy-free needs.
You can add chopped olives or sun-dried tomatoes for extra flavor. These additions bring a savory twist to the bread.
For more texture, consider mixing in ½ cup of Greek yogurt. This can make the loaf feel even more moist and tender.
For an herby touch, add 1 teaspoon of dried oregano or basil. These herbs pair nicely with cheese and give the bread a more aromatic flavor.
Frequently Asked Questions
Can Cheese Bread Be Frozen?
Yes, cheese bread can be frozen. Once the loaf is completely cooled, wrap individual slices tightly in plastic wrap and then in foil.
This helps prevent freezer burn and keeps the slices easier to reheat later. The bread can be stored in the freezer for up to 3 months.
How Do I Reheat Frozen Cheese Bread?
Thaw the slices in the refrigerator overnight. Once thawed, reheat them in the oven for the best texture.
You can also use a toaster for individual slices. Reheating helps bring back the soft, fluffy texture and warm cheese flavor.
Can I Substitute the Ingredients?
Yes, this recipe allows for several substitutions. All-purpose flour can be replaced with gluten-free flour for a gluten-free version.
Cheddar can be replaced with mozzarella, gouda, or a blend of cheeses you enjoy. If you are out of milk or need a dairy-free option, almond milk or another non-dairy alternative can work.
How Should I Store Leftovers?
Store leftover cheese bread in an airtight container in the refrigerator for up to 3 days. Make sure the bread is fully cooled before storing it.
For the best experience, reheat slices before serving. Warm cheese bread has a softer texture and a more comforting flavor.
Can This Recipe Be Made Ahead?
Yes, this cheese bread can be made ahead of time. You can prepare it a day in advance and store it in the refrigerator before baking.
Before baking, let it come to room temperature. This helps it bake more evenly when it goes into the oven.
What Should I Serve With Cheese Bread?
Cheese bread is wonderful with soup. Its savory flavor and soft texture make it a perfect side for something warm and comforting.
It also works well with salad. The richness of the bread balances fresh, crisp ingredients beautifully.
Why Is My Cheese Bread Dense?
Dense cheese bread is often caused by overmixing the batter. Stir only until the wet and dry ingredients are just combined.
Using stale baking powder can also affect the rise. Fresh baking powder helps the loaf become fluffy.
Can I Add More Flavor to the Bread?
Yes, you can add ingredients like cooked bacon bits, fresh herbs, jalapeños, red pepper flakes, chopped olives, or sun-dried tomatoes. These variations let you change the flavor while keeping the same basic bread.
You can also top the batter with cheese and herbs before baking. This creates a more flavorful crust.
Final Thoughts
This Cheese Bread is the kind of recipe that proves simple baking can still feel meaningful. With pantry staples, shredded cheese, milk, butter, and egg, you can create a warm loaf that brings comfort to the table.
It is soft, fluffy, savory, and easy enough for beginner bakers. It also has enough flavor and charm to serve at family dinners, holiday gatherings, or quiet afternoons when you just want something homemade.
What makes it truly special is the feeling it carries. The smell of cheese bread baking on a chilly morning can make a kitchen feel like home, and a warm slice can turn an ordinary meal into something memorable.
Whether you enjoy it beside soup, serve it with salad, toast it with butter, or share it with people you love, this Cheese Bread is a recipe worth keeping close. It is simple, cozy, and full of the kind of warmth that makes homemade food so comforting.
Cheese Bread

This homemade cheese bread is tender, fluffy, and full of savory cheese flavor. It works well as a quick snack, a simple side for dinner, or a warm bread to serve with soups and salads.
Recipe Information
- Prep Time: 15 minutes
- Cook Time: 30 minutes
- Total Time: 45 minutes
- Course: Bread, Snack
- Cuisine: American
- Servings: 8 slices
- Calories: 150 kcal
Equipment
- Mixing bowl
- Loaf pan
Ingredients
For the Bread
- ¼ cup melted butter
- 2 teaspoons baking powder
- 1 cup shredded cheddar cheese or any cheese of your choice
- 1 large egg
- ½ teaspoon salt
- 2 cups all-purpose flour
- 1 tablespoon chopped fresh parsley, optional, for garnish
- ¼ teaspoon garlic powder, optional
- 1 cup milk
Instructions
- Preheat the oven to 350°F (175°C), then lightly grease a loaf pan.
- In a mixing bowl, stir together the all-purpose flour, baking powder, salt, and garlic powder if using.
- Add the shredded cheddar cheese, or your preferred cheese, and mix until it is evenly distributed through the dry ingredients.
- In a separate bowl, whisk the milk, melted butter, and egg until smooth.
- Pour the wet mixture into the dry ingredients and stir just until combined. Avoid overmixing so the bread stays soft.
- Transfer the batter into the prepared loaf pan and spread it out evenly.
- Bake for 30 minutes, or until the bread is golden and a toothpick inserted into the center comes out clean.
- Let the bread cool for a few minutes before slicing.
- Garnish with chopped fresh parsley if desired.
Notes
- This cheese bread goes especially well with soups, salads, chili, or simple weeknight meals.
- You can use different cheeses to adjust the flavor, such as mozzarella, Monterey Jack, pepper Jack, or a cheese blend.
- For the best texture, slice the bread after it has cooled slightly so it holds together cleanly.

Fernando is the creator and writer behind the food blog Eating with your Hands. Living and working in cities like Paris, Barcelona, and Berlin, and being married to a Canadian foodie, has given Fernando a passion and interest in food and inspired him to run EWYH.