


There is something unforgettable about the smell of homemade pretzels baking in a warm kitchen. It is the kind of aroma that makes people drift toward the oven before the timer has even finished.
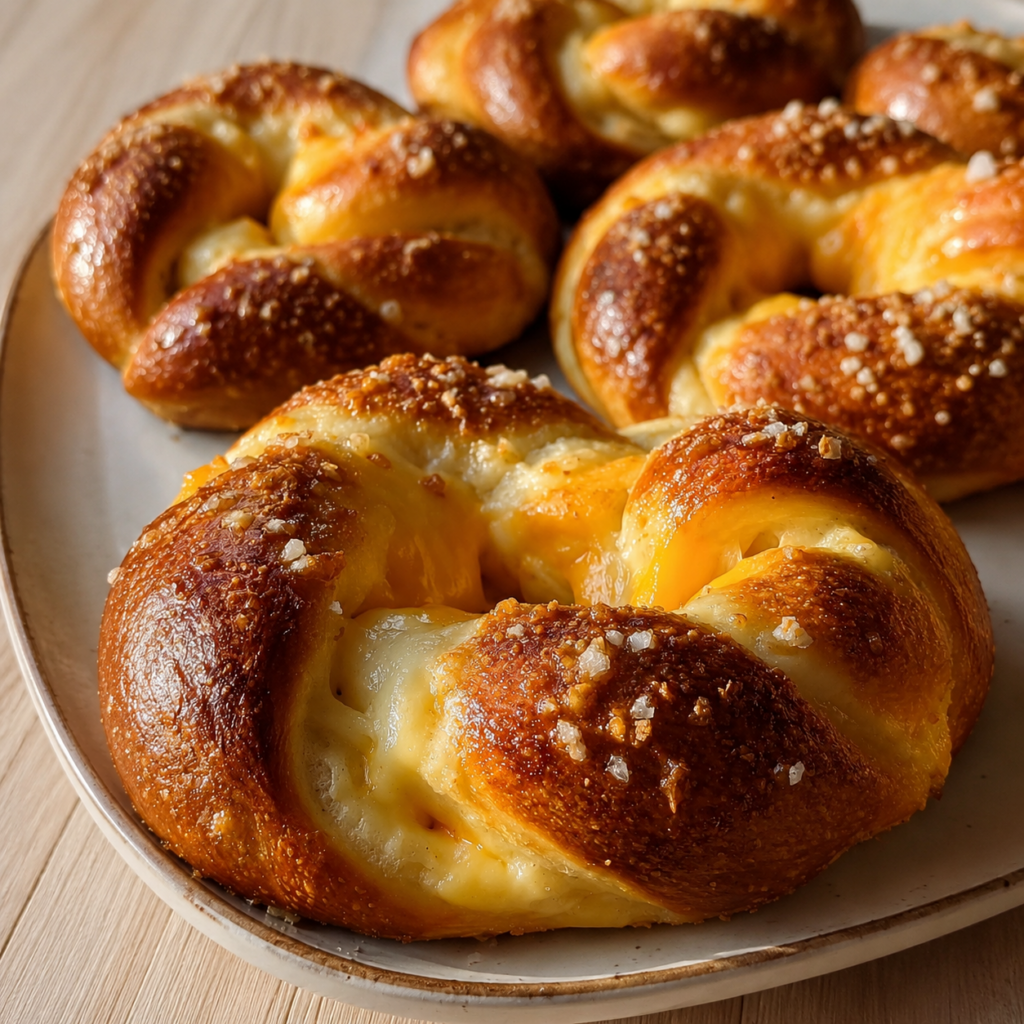
These Cheese-Stuffed Pretzels carry that same cozy feeling. They are soft, chewy, golden-brown, and filled with warm melted cheddar and mozzarella, making every bite feel comforting and joyful.
This is the kind of recipe that belongs to chilly evenings, family kitchens, movie nights, and casual gatherings where everyone wants something warm and satisfying. The dough is simple, the filling is cheesy, and the finished pretzels feel homemade in the best possible way.
Growing up, recipes like this had a special place in the home. The kitchen would fill with the scent of freshly baked dough, and the excitement would build as the pretzels turned golden in the oven.
The best part was always that first bite. The outside was tender and chewy, while the inside held a warm, gooey cheese center that made the whole recipe feel like a small celebration.
Table of Contents
- What Are Cheese-Stuffed Pretzels?
- Why This Recipe Feels So Special
- Recipe Overview
- Why You’ll Love These Cheese-Stuffed Pretzels
- Ingredients You’ll Need
- Ingredient Notes
- Directions
- Step 1: Prepare Your Mixing Bowl
- Step 2: Combine Warm Water, Sugar, and Yeast
- Step 3: Let the Yeast Become Frothy
- Step 4: Add the Flour, Salt, and Baking Soda
- Step 5: Knead the Dough
- Step 6: Check the Dough Texture
- Step 7: Place the Dough in a Greased Bowl
- Step 8: Let the Dough Rise
- Step 9: Preheat the Oven
- Step 10: Prepare the Baking Sheet
- Step 11: Punch Down the Dough
- Step 12: Divide the Dough Into 12 Pieces
- Step 13: Roll Each Piece Into a Rope
- Step 14: Prepare the Cheese Filling
- Step 15: Shape the Dough Into a U
- Step 16: Twist the Ends Together
- Step 17: Fold the Ends Down
- Step 18: Add the Cheese Filling
- Step 19: Seal the Dough Around the Cheese
- Step 20: Repeat With All Pretzels
- Step 21: Prepare the Baking Soda Bath
- Step 22: Dip Each Pretzel
- Step 23: Arrange Pretzels on the Baking Sheet
- Step 24: Brush With Beaten Egg
- Step 25: Sprinkle With Coarse Salt
- Step 26: Bake the Pretzels
- Step 27: Cool Slightly Before Serving
- Pro Tips for the Best Cheese-Stuffed Pretzels
- Variations
- Serving Suggestions
- Storage Tips
- Make-Ahead Instructions
- Common Mistakes to Avoid
- Helpful Notes
- Frequently Asked Questions
- Final Thoughts
- Cheese-Stuffed Pretzels
What Are Cheese-Stuffed Pretzels?
Cheese-Stuffed Pretzels are soft homemade pretzels filled with a mixture of shredded cheddar cheese and shredded mozzarella cheese. The dough is shaped into classic pretzels, filled with cheese, dipped in a baking soda bath, brushed with beaten egg, sprinkled with coarse salt, and baked until golden.
They combine the familiar chewiness of traditional pretzels with the comfort of melted cheese. The cheddar adds bold flavor, while the mozzarella gives the filling a soft, gooey texture.
These pretzels are perfect for parties, holidays, cozy family nights, movie snacks, or anytime you want a warm homemade treat. They feel fun enough for a gathering but comforting enough for a quiet evening at home.
The recipe takes 30 minutes to prepare, 20 minutes to bake, and 50 minutes total. It makes 12 scrumptious pretzels, which is just right for sharing.
Why This Recipe Feels So Special
Some snacks are enjoyable because they are quick, and some are memorable because they turn the kitchen into a place where people gather. These Cheese-Stuffed Pretzels do both.
The dough is soft and simple to work with, the cheese filling is familiar and satisfying, and the baking process fills the room with warmth. It is the kind of recipe that makes the kitchen feel alive.
There is also something joyful about shaping pretzels by hand. Rolling the dough into ropes, twisting each piece, and tucking cheese inside makes the recipe feel playful and personal.
When the pretzels come out of the oven golden, puffed, and salted, they feel like a reward for the time you spent making them. They are not just a snack; they are an experience.
Recipe Overview
Prep Time: 30 minutes
Cook Time: 20 minutes
Total Time: 50 minutes
Servings: 12 pretzels
This recipe gives you soft, chewy, cheese-filled pretzels in under an hour. The process includes making a yeast dough, letting it rise, shaping and filling the pretzels, dipping them in a baking soda bath, and baking them until golden brown.
The steps are beginner-friendly, even though the finished pretzels feel impressive. Once you understand the process, the recipe becomes very approachable.
Why You’ll Love These Cheese-Stuffed Pretzels
You will love these Cheese-Stuffed Pretzels because they are warm, cheesy, soft, and satisfying. They have the classic pretzel flavor you expect, but the melted cheese filling makes them even more comforting.
They are also made with simple ingredients. Warm water, sugar, yeast, flour, salt, baking soda, egg, cheese, and coarse salt come together to create something that feels special.
This recipe is great for unexpected guests or snack cravings because the preparation is manageable. With 30 minutes of prep time and 20 minutes in the oven, they are realistic for a cozy evening.
The method is beginner-friendly and can be mastered with patience. You do not need to be an expert baker to make a batch of soft homemade pretzels.
They are also ideal for gatherings. Whether served during holidays, family movie nights, or casual parties, they bring people together around warm food.
The make-ahead convenience is another reason to love them. You can prepare them in advance and freeze them for a later treat.
Ingredients You’ll Need
1.5 cups warm water at 110°F or 45°C: Make sure the water is warm but not hot so it activates the yeast effectively.
2 tablespoons granulated sugar: This helps feed the yeast and enhances the dough’s flavor.
2.25 teaspoons active dry yeast, or 1 packet: Always check the expiration date for best results.
4 cups all-purpose flour: Use high-quality flour for the best texture.
1 teaspoon salt: Enhances the overall flavor of the pretzels.
0.25 cup baking soda: Necessary for the alkaline bath that gives pretzels their classic taste.
1 large egg, beaten, for brushing: Gives the pretzels a beautiful golden finish.
1 cup shredded cheddar cheese: Sharp cheddar adds a robust flavor.
0.5 cup shredded mozzarella cheese: Adds that gooey, melty texture.
Coarse salt: Sprinkled on top for crunch and a flavor boost.
Ingredient Notes
Warm water is important because it wakes up the yeast. If the water is too cold, the yeast may not activate properly, and if it is too hot, it can damage the yeast.
Granulated sugar helps feed the yeast and gives the dough a little flavor. It does not make the pretzels overly sweet, but it supports the dough as it rises.
Active dry yeast is what gives the pretzels their soft, airy structure. Checking the expiration date matters because old yeast may not work as well.
All-purpose flour gives the dough structure. A good-quality flour helps create pretzels that are chewy, soft, and sturdy enough to hold the cheese filling.
Salt is essential for flavor. Without it, the dough may taste flat, even with the cheese filling and coarse salt on top.
Baking soda is used for the pretzel bath. This step gives the pretzels their classic flavor, chewy texture, and beautiful baked finish.
The beaten egg helps the pretzels bake into a lovely golden color. It also gives the surface a more polished look.
Cheddar cheese brings bold flavor to the filling. Sharp cheddar is especially nice because it stands out against the soft dough.
Mozzarella cheese adds gooey meltiness. It helps make the inside warm, stretchy, and satisfying.
Coarse salt finishes the pretzels with crunch and flavor. It gives each bite that familiar pretzel-style top.
Directions
Step 1: Prepare Your Mixing Bowl
Choose a mixing bowl large enough to hold the dough as it comes together. Since the dough will rise, the bowl should have enough extra space.
A comfortable mixing bowl makes the process easier and cleaner. You will start by activating the yeast, then add flour, salt, and baking soda to form the dough.
Step 2: Combine Warm Water, Sugar, and Yeast
Pour 1.5 cups of warm water into the mixing bowl. The water should be about 110°F or 45°C, warm to the touch but not hot.
Add 2 tablespoons of granulated sugar to the warm water. Stir gently so the sugar begins to dissolve.
Sprinkle in 2.25 teaspoons of active dry yeast. This is equal to 1 packet of yeast.
Step 3: Let the Yeast Become Frothy
Let the yeast mixture sit for about 5 minutes. During this time, the yeast should become frothy.
The frothy surface is a sign that the yeast is active. This step is important because it tells you the dough has a good chance of rising properly.
If the mixture does not become frothy, the yeast may be expired or the water temperature may not have been right. For best results, always start with fresh yeast and warm, not hot, water.
Step 4: Add the Flour, Salt, and Baking Soda
Once the yeast mixture is frothy, add 4 cups of all-purpose flour to the bowl. Add 1 teaspoon of salt and 0.25 cup baking soda.
These ingredients will turn the yeast mixture into a soft dough. The flour gives structure, the salt adds flavor, and the baking soda contributes to the pretzel character.
Mix everything together until a dough begins to form. At first, the mixture may look shaggy, but it will become smoother as you continue working it.
Step 5: Knead the Dough
Transfer the dough to a lightly floured surface. Knead it for about 5 to 7 minutes, or until it becomes smooth and elastic.
Kneading helps strengthen the dough. This is what gives the pretzels their chewy texture and helps them hold their shape.
Use the heel of your hand to push the dough forward, then fold it back and turn it slightly. Keep repeating this motion until the dough feels more even and stretchy.
Step 6: Check the Dough Texture
After kneading, the dough should feel smooth and elastic. It should not be overly sticky or dry.
If it sticks too much to the surface, use a light dusting of flour. Try not to add too much flour, because that can make the pretzels heavier.
A well-kneaded dough will feel soft but manageable. It should be able to stretch slightly without tearing right away.
Step 7: Place the Dough in a Greased Bowl
Lightly grease a clean bowl and place the dough inside. Turn the dough once so the surface gets lightly coated.
Greasing the bowl helps prevent sticking as the dough rises. It also makes it easier to remove the dough later.
Cover the bowl with a clean kitchen towel. The towel helps protect the dough while still allowing it to rest comfortably.
Step 8: Let the Dough Rise
Place the covered bowl in a warm spot and let the dough rise for 30 minutes. During this time, it should double in size.
This rising step helps create a softer pretzel texture. The yeast works during the rest period, making the dough lighter and easier to shape.
Do not rush this step. If the dough has not doubled, give it a little more time in a warm place.
Step 9: Preheat the Oven
While the dough finishes rising, preheat your oven to 425°F or 220°C. A hot oven helps the pretzels puff and brown properly.
Preheating also makes the baking process more predictable. The pretzels should go into an oven that is already at the correct temperature.
Step 10: Prepare the Baking Sheet
Line a baking sheet with parchment paper. This helps prevent the pretzels from sticking and makes cleanup easier.
Place the prepared baking sheet near your workspace. Once the pretzels are shaped and dipped, you will transfer them there before baking.
Parchment paper also helps protect the bottoms of the pretzels. It gives them a stable surface as they bake.
Step 11: Punch Down the Dough
Once the dough has doubled in size, gently punch it down. This releases excess air and makes the dough easier to divide.
Punching down does not mean being rough with the dough. A gentle press is enough to deflate it.
After punching it down, transfer the dough to a lightly floured surface. This is where you will divide and shape it.
Step 12: Divide the Dough Into 12 Pieces
Cut the dough into 12 equal pieces. Try to make the pieces as even as possible so the pretzels bake at the same rate.
Equal pieces also make the final pretzels look more consistent. This is especially helpful if you are serving them at a gathering.
You can shape the pieces into small balls first if that makes them easier to roll. Keeping them organized helps the shaping process go smoothly.
Step 13: Roll Each Piece Into a Rope
Take one piece of dough and roll it into a long rope about 20 inches in length. Use both hands and roll from the center outward.
The rope should be long enough to twist into a pretzel shape. If it is too short, the pretzel may be harder to fill and seal.
Try to keep the rope even from end to end. Uneven thickness can cause some parts to bake faster than others.
Step 14: Prepare the Cheese Filling
In a small bowl, combine 1 cup of shredded cheddar cheese and 0.5 cup of shredded mozzarella cheese. Mix them together so the filling is evenly blended.
The cheddar gives strong flavor, while the mozzarella adds gooey texture. Together, they create the warm cheese center that makes these pretzels so satisfying.
Keep the cheese mixture nearby while shaping. You will add a small amount to each pretzel before sealing the dough around it.
Step 15: Shape the Dough Into a U
Take one dough rope and form it into a U-shape on your work surface. The curved part should be closest to you, with the two ends pointing away.
This is the beginning of the classic pretzel shape. Try to keep the dough relaxed and even as you form it.
Do not pull the rope too aggressively. If the dough resists, let it rest briefly, then continue shaping.
Step 16: Twist the Ends Together
Take the two ends of the U and cross them over each other. Twist them together once to create the pretzel center.
This twist is what gives pretzels their familiar look. It also helps create a shape that can hold the filling.
Keep the twist snug but not too tight. The dough will expand slightly as it bakes.
Step 17: Fold the Ends Down
After twisting the ends, fold them back down toward the bottom curve of the U. This completes the pretzel shape.
Press the ends gently onto the dough so they stay in place. You want the pretzel to hold together through dipping and baking.
Make sure there is enough space in the center area for the cheese filling. The filling should be tucked in without stretching the dough too thin.
Step 18: Add the Cheese Filling
Place a small amount of the cheddar and mozzarella mixture in the center of each pretzel. Do not overfill.
Too much cheese can leak out during baking. A modest amount gives you a gooey center without making the pretzel difficult to seal.
Spread the cheese gently where it will be enclosed by dough. Keep it away from the edges that need to seal.
Step 19: Seal the Dough Around the Cheese
Carefully close the dough around the cheese filling. Pinch the seams firmly so the cheese stays inside.
This step matters because any open areas may allow cheese to leak during baking. Take your time and make sure each pretzel is sealed well.
If the dough feels too sticky, lightly flour your fingers. If it feels dry, press the seam a little more firmly.
Step 20: Repeat With All Pretzels
Continue rolling, shaping, filling, and sealing until all 12 pretzels are formed. Place each shaped pretzel on your work surface while you prepare the baking soda bath.
Try to keep the pretzels similar in size. This helps them bake evenly and makes the batch look beautiful.
Check each pretzel quickly before dipping. Make sure the seams are sealed and the cheese is tucked inside.
Step 21: Prepare the Baking Soda Bath
In a large pot, bring 8 cups of water and ⅔ cup baking soda to a boil. This bath is essential for classic pretzel flavor and texture.
The baking soda bath gives the pretzels their chewy exterior. It also helps them develop that familiar pretzel taste.
Use a pot large enough to dip the pretzels safely. The water should have room to move without overflowing.
Step 22: Dip Each Pretzel
Once the baking soda bath is boiling, carefully dip each pretzel into the water for about 30 seconds. Work one or a few at a time, depending on the size of your pot.
This step may feel small, but it is very important. Skipping the bath will change the texture and flavor of the pretzels.
Use a slotted spoon or similar tool to lift each pretzel from the water. Let excess water drip off before placing it on the prepared baking sheet.
Step 23: Arrange Pretzels on the Baking Sheet
Place the dipped pretzels onto the parchment-lined baking sheet. Leave space between them so they have room to puff as they bake.
If the pretzels are too close together, they may touch in the oven. Giving them space helps each one bake more evenly.
Make sure the pretzels are sitting flat. This helps them keep their shape while baking.
Step 24: Brush With Beaten Egg
Brush each pretzel with beaten egg. The egg wash helps create a beautiful golden finish.
Use a light, even coating. You do not need to soak the pretzels, just cover the surface.
This step also helps the coarse salt stick to the top. It gives the pretzels a polished homemade look.
Step 25: Sprinkle With Coarse Salt
Sprinkle coarse salt over the top of each egg-washed pretzel. The salt adds crunch and boosts the flavor.
Use enough to give the pretzels that classic salted finish. Avoid adding too much, especially if serving with salty dips.
The coarse salt creates a satisfying contrast with the soft dough and melted cheese. It makes each bite more flavorful.
Step 26: Bake the Pretzels
Place the baking sheet in the preheated oven. Bake the pretzels for 20 minutes, or until they are golden brown and puffed.
As they bake, the dough will become tender and chewy, and the cheese inside will melt. The kitchen will fill with the smell of warm bread and cheese.
Watch for a rich golden color. This is a good sign that the pretzels are ready.
Step 27: Cool Slightly Before Serving
Remove the pretzels from the oven and let them cool slightly before serving. The cheese inside will be very hot right away.
A short cooling time makes them easier to handle and eat. It also allows the filling to settle inside the dough.
Serve them while they are still warm. That is when the texture is softest and the cheese filling is at its best.
Pro Tips for the Best Cheese-Stuffed Pretzels
Use water that is warm, not hot, when activating the yeast. Water that is too hot can kill the yeast and prevent the dough from rising.
Let the dough rise until it doubles in size. This helps create the soft, chewy texture that makes homemade pretzels so satisfying.
Do not skip the baking soda bath. It is essential for the classic pretzel flavor and chewy exterior.
Avoid overfilling the pretzels with cheese. A small amount of filling is enough, and it helps prevent leaks during baking.
Seal the dough carefully around the cheese. A well-sealed pretzel will hold its filling better and bake more neatly.
Variations
Add garlic powder or paprika to the cheese filling for extra flavor. These spices can make the center taste warmer and more savory.
Use pepper jack cheese if you want a spicy kick. It adds heat while still giving you a creamy, melty filling.
Add herbs like chives or parsley into the dough for a fresh twist. This gives the pretzels a more aromatic flavor.
Make a sweet version by using chocolate or cinnamon sugar for the filling. This creates a completely different style of stuffed pretzel.
For a gluten-free option, substitute the all-purpose flour with a gluten-free blend. This allows the recipe to be adjusted for gluten-free needs.
Serving Suggestions
Serve Cheese-Stuffed Pretzels warm for the best texture and flavor. The dough is softest when warm, and the cheese filling is most enjoyable when melted.
They are wonderful with marinara sauce or mustard for dipping. Marinara gives them a cozy, cheesy-snack feeling, while mustard adds a classic pretzel contrast.
These pretzels are great for gatherings, movie nights, holidays, or family evenings at home. They are fun to serve because people can grab one and enjoy it without needing a formal meal.
You can also pair them with a refreshing salad or a bowl of soup. This turns them from a snack into a cozy, satisfying meal.
Storage Tips
Store leftover pretzels in an airtight container in the refrigerator for up to 3 days. Let them cool completely before storing so they keep their texture better.
For longer storage, freeze them for up to 2 months. Freezing is helpful if you want to make a batch ahead and save some for later.
To reheat, place them in the oven at 350°F for about 10 minutes. This helps restore their soft, chewy texture better than letting them sit cold.
Make-Ahead Instructions
You can prepare the dough and shape the pretzels in advance. Cover them and refrigerate for up to 24 hours before baking.
This makes the recipe easier when you want fresh pretzels with less work on the day you serve them. It is especially helpful for gatherings or busy evenings.
You can also freeze baked pretzels after they cool completely. Wrap each pretzel tightly in plastic wrap and store them in an airtight container for up to 2 months.
Common Mistakes to Avoid
One common mistake is not letting the dough rise long enough. The dough should double in size for the best texture.
Another mistake is skipping the baking soda bath. This step is essential because it gives pretzels their classic flavor and chewy exterior.
Overfilling the pretzels with cheese can cause leaks during baking. Use a small amount of filling and seal the dough carefully.
Using water that is too hot can damage the yeast. Make sure the water is warm, not hot, before adding the yeast.
Helpful Notes
For a richer flavor, use aged cheddar cheese. It gives the filling a stronger cheese taste.
You can substitute almond flour for a gluten-free option if needed. This is one way to adapt the dough for different needs.
Add cooked bacon bits or jalapeños to the cheese filling for a savory twist. These additions make the pretzels more flavorful and bold.
Consider using dairy-free cheese for a lactose-free version. This lets you keep the stuffed pretzel idea while adjusting the filling.
Experiment with different cheese combinations for unique flavors. Cheddar and mozzarella are classic here, but other cheeses can create a new experience.
Frequently Asked Questions
Can Cheese-Stuffed Pretzels Be Frozen?
Yes, Cheese-Stuffed Pretzels can be frozen. After baking, let them cool completely first.
Wrap each pretzel tightly in plastic wrap and store them in an airtight container. They can be frozen for up to 2 months.
Can I Substitute the Ingredients?
Yes, you can substitute several ingredients based on your preference. Pepper jack or gouda can be used instead of the listed cheeses.
For the dough, whole wheat flour can replace all-purpose flour for a healthier option. Honey can also be used instead of sugar.
How Should I Store Leftovers?
Store leftover pretzels in an airtight container in the refrigerator for up to 3 days. Let them cool completely before sealing the container.
Cooling first helps preserve the texture. If they are stored while still hot, trapped steam can make them softer than desired.
Can This Recipe Be Made Ahead?
Yes, you can prepare the dough and shape the pretzels in advance. Cover them and refrigerate for up to 24 hours before baking.
This lets you enjoy fresh pretzels with less effort on the day you serve them. It is a great option for parties, holidays, or planned snack nights.
Why Is the Baking Soda Bath Important?
The baking soda bath gives the pretzels their classic flavor and chewy texture. It is one of the most important steps in the recipe.
Skipping it will make the pretzels taste and feel less like traditional pretzels. For the best result, dip each pretzel for about 30 seconds.
Why Did My Pretzels Leak Cheese?
Cheese can leak if the pretzels are overfilled or not sealed well. Use only a small amount of cheese filling in each pretzel.
Pinch the dough firmly around the filling before dipping and baking. A secure seal helps keep the cheese inside.
What Should I Serve With Cheese-Stuffed Pretzels?
Serve them with marinara sauce or mustard for dipping. Both pair well with the soft dough and melted cheese.
You can also serve them with a salad or bowl of soup. This makes them feel more like a cozy meal instead of only a snack.
Final Thoughts
These Cheese-Stuffed Pretzels are the kind of homemade snack that makes a kitchen feel full of warmth. They are soft, chewy, golden, salty, and filled with melted cheddar and mozzarella.
They are perfect for chilly evenings, family movie nights, parties, holidays, or any moment when you want something comforting and fun to share. The process of rolling, twisting, filling, and baking them is just as memorable as eating them.
What makes this recipe so special is the feeling it creates. It invites people into the kitchen, fills the air with the smell of fresh-baked dough, and gives everyone something warm and cheesy to enjoy together.
So gather the ingredients, let the dough rise, twist each pretzel with care, and enjoy the moment when they come out of the oven golden and fragrant. These Cheese-Stuffed Pretzels are more than a snack; they are a cozy memory waiting to be made.
Cheese-Stuffed Pretzels

These cheese-stuffed pretzels are soft, chewy, and packed with a warm, melty blend of cheddar and mozzarella cheese. They make a satisfying homemade snack with a golden crust, savory filling, and classic coarse salt topping.
Recipe Information
- Prep Time: 30 minutes
- Cook Time: 20 minutes
- Total Time: 50 minutes
- Course: Snack
- Cuisine: American
- Servings: 12 pretzels
- Calories: 250 kcal
Equipment
- Mixing bowl
- Baking sheet
Ingredients
For the Dough
- 4 cups all-purpose flour
- 1 large egg, beaten, for brushing
- 1.5 cups warm water at 110°F (45°C)
- 1 teaspoon salt, to enhance flavor
- 2.25 teaspoons active dry yeast, 1 packet
- 0.25 cup baking soda, for dough
- 2 tablespoons granulated sugar, to feed the yeast
For the Cheese Filling
- 0.5 cup mozzarella cheese, shredded
- 1 cup cheddar cheese, shredded
For Topping
- Coarse salt, for sprinkling
Instructions
- Add the warm water, granulated sugar, and active dry yeast to a mixing bowl. Let the mixture rest for about 5 minutes, or until it becomes foamy.
- Stir in the all-purpose flour, salt, and baking soda until a dough begins to form.
- Knead the dough until it becomes smooth and elastic, then let it rise for 30 minutes.
- Preheat the oven to 425°F (220°C).
- Divide the dough into 12 equal pieces, then roll each piece into a long rope.
- Shape each rope into a U, twist the ends together, and form it into a pretzel shape.
- Add the shredded cheddar cheese and shredded mozzarella cheese as the filling before sealing each pretzel securely.
- Prepare a baking soda bath by adding ⅔ cup baking soda to boiling water.
- Dip each shaped pretzel into the baking soda bath for 30 seconds, then place it on a baking sheet.
- Brush the pretzels with the beaten egg and sprinkle coarse salt over the tops.
- Bake for 20 minutes, or until the pretzels are golden brown and cooked through.
Notes
- Try different cheeses in the filling, such as pepper Jack, Monterey Jack, or provolone.
- Add a pinch of garlic powder, smoked paprika, or Italian seasoning to the cheese filling for extra flavor.
- Seal the pretzels tightly around the cheese to help prevent the filling from leaking while baking.

Fernando is the creator and writer behind the food blog Eating with your Hands. Living and working in cities like Paris, Barcelona, and Berlin, and being married to a Canadian foodie, has given Fernando a passion and interest in food and inspired him to run EWYH.