
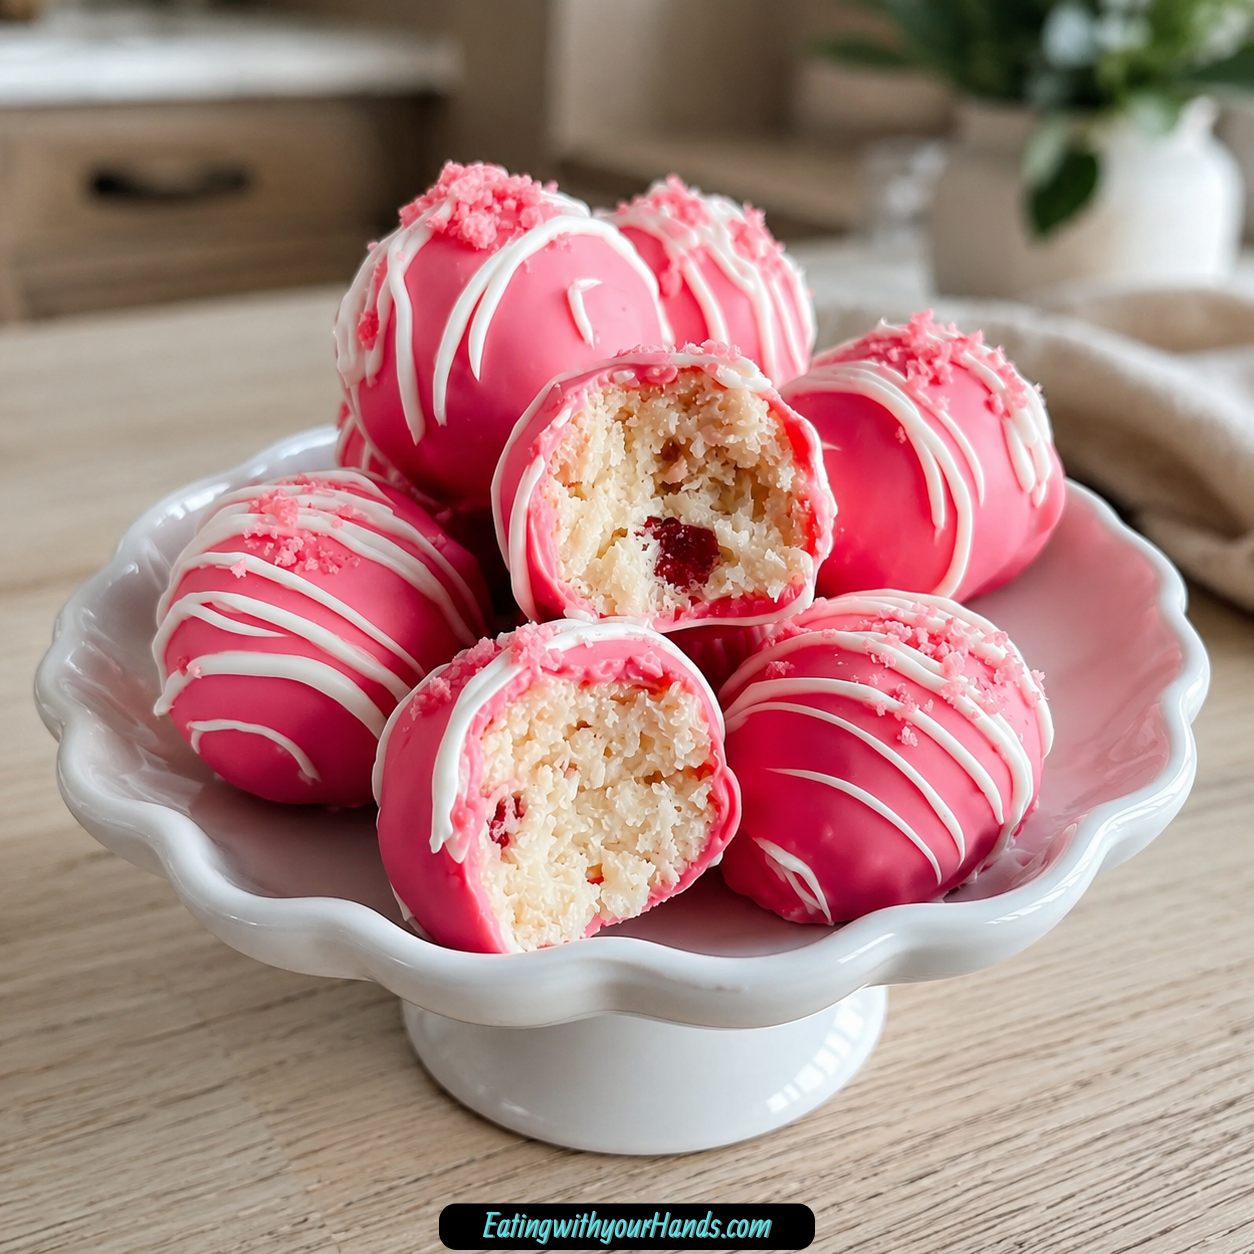
Cherry Chip Cheesecake Bites are bright, sweet, creamy little treats made with cherry chip cake mix, softened cream cheese, pink candy wafer melts, and white almond bark. They have a festive look, a soft cheesecake-style center, and a smooth candy coating that makes them perfect for parties, birthdays, holidays, movie nights, or any day that needs a cheerful dessert.
I love bite-sized desserts because they bring instant excitement to the table. There is something so joyful about a tray of colorful little sweets that everyone can grab, taste, and come back for without needing plates, forks, or a big slice of cake.
These Cherry Chip Cheesecake Bites carry that same playful spirit. The cherry chip flavor gives the inside a sweet, nostalgic taste, while the bright pink coating makes them feel fun before anyone even takes a bite.
The recipe is simple and wonderfully approachable. You mix cherry chip cake mix with softened cream cheese, roll the mixture into small balls, coat each one in melted candy wafers and white almond bark, then let them set until firm.
They are especially lovely for family gatherings because kids and adults both enjoy them. The small size makes them easy for little hands, and the bright color makes the whole dessert platter feel more festive.
Table of Contents
- Why You’ll Love These Cherry Chip Cheesecake Bites
- Recipe Details
- Ingredients
- Optional Swaps, Variations, Add-Ins, and Serving Ideas
- Why These Cherry Chip Cheesecake Bites Work
- Directions
- Step 1: Preheat the Oven
- Step 2: Prepare the Baking Sheet
- Step 3: Soften the Cream Cheese
- Step 4: Add the Cake Mix to the Bowl
- Step 5: Add the Cream Cheese
- Step 6: Mix Until Smooth
- Step 7: Check the Texture
- Step 8: Portion the Mixture
- Step 9: Roll Into Balls
- Step 10: Space the Balls
- Step 11: Prepare the Coating Bowl
- Step 12: Melt in Short Intervals
- Step 13: Check the Coating
- Step 14: Dip the First Cheesecake Ball
- Step 15: Return the Coated Bite to the Sheet
- Step 16: Continue Dipping
- Step 17: Add Optional Finishes
- Step 18: Let the Coating Set
- Step 19: Serve Chilled
- Step 20: Store Leftovers
- Serving Ideas
- Storage
- Reheating
- Freezing
- Make-Ahead
- Helpful Notes for Best Results
- Variations
- Lemon Cherry Cheesecake Bites
- Strawberry Cheesecake Bites
- Chocolate Cheesecake Bites
- Vanilla Cheesecake Bites
- Vanilla Extract Cherry Bites
- Sugar-Free Cherry Bites
- Gluten-Free Cherry Chip Bites
- Dark Chocolate Coated Bites
- Sprinkle Party Bites
- Mini Chocolate Chip Bites
- Crushed Nut Cheesecake Bites
- Dairy-Free Cherry Cheesecake Bites
- Mascarpone Cherry Bites
- Troubleshooting
- Frequently Asked Questions
- Why This Recipe Works So Well
- Final Thoughts
- Cherry Chip Cheesecake Bites
Why You’ll Love These Cherry Chip Cheesecake Bites
These Cherry Chip Cheesecake Bites are quick and easy to prepare. They take just 15 minutes of prep time, which makes them useful when you need a sweet treat without a long kitchen project.
They use minimal ingredients. Cherry chip cake mix, cream cheese, bright pink candy wafer melts, and white almond bark create the main recipe.
They are family-friendly and kid-approved. The bite-sized shape makes them easy to grab, and the bright coating makes them fun to eat.
They work for almost any occasion. Birthday parties, holiday celebrations, cozy movie nights, simple Saturday treats, and family dessert trays all feel right for these bites.
They are freezer-friendly. You can make a batch ahead of time and enjoy them later.
They look bright and festive. The pink coating makes them as fun to look at as they are to eat.
Recipe Details
These bites begin with 15.25 ounces cherry chip cake mix. The cherry chip flavor gives the center its sweet, playful character.
The cheesecake-style mixture also uses 8 ounces softened cream cheese. The cream cheese should be at room temperature for easy mixing.
The coating uses 12 ounces bright pink candy wafer melts and 4 ounces white almond bark. Together, they create the colorful outside.
The oven is preheated to 350°F (175°C) as directed. The provided method then focuses on mixing, rolling, melting, dipping, and setting the bites.
The mixture can be blended with a spatula or an electric mixer. It should become smooth and well blended before rolling.
The balls are rolled into tablespoon-sized portions. They are placed on a parchment-lined baking sheet with a little space between them.
The candy coating is melted in a microwave-safe bowl in 30-second intervals. Stir between each interval until completely melted and smooth.
Each ball is dipped into the melted coating, lifted with a fork, and returned to the baking sheet. The bites set at room temperature or in the refrigerator for a quicker set.
Ingredients
Cherry Cheesecake Center
15.25 ounces cherry chip cake mix
8 ounces cream cheese, softened
Pink Candy Coating
12 ounces bright pink candy wafer melts
4 ounces white almond bark
Ingredient Notes
Cherry chip cake mix gives these bites their main flavor. It also brings sweetness and a fun dessert-style center.
Cream cheese makes the mixture creamy and gives it that cheesecake-inspired texture. It should be softened to room temperature so it blends smoothly.
Bright pink candy wafer melts create the vibrant coating. They make the bites look festive and playful.
White almond bark adds a lovely contrast to the cherry flavor. It also helps make the coating smooth and sweet.
The cream cheese should not be cold when you mix it. Cold cream cheese can leave lumps in the filling.
The coating should be melted gently. Heating in short intervals helps keep it silky instead of burnt.
Optional Swaps, Variations, Add-Ins, and Serving Ideas
Lemon Cheesecake Bites
Replace the cherry chip cake mix with lemon cake mix for a fruity twist. This gives the bites a bright citrus flavor.
The pink coating can still be used for a festive look. The flavor will be different but still sweet and fun.
Strawberry Cheesecake Bites
Use strawberry cake mix instead of cherry chip cake mix. This keeps the fruit flavor sweet and colorful.
Strawberry works beautifully with candy coating. It also keeps the bites party-friendly.
Chocolate Cheesecake Bites
Use chocolate cake mix instead of cherry chip cake mix. This creates a richer dessert bite.
Chocolate cake mix pairs nicely with dark chocolate coating or colored sprinkles. It makes the bites feel more decadent.
Vanilla Cheesecake Bites
Use vanilla cake mix for a softer flavor. This gives the bites a more classic sweet base.
Vanilla is flexible and works with many different coatings. It is a good option for simple dessert trays.
Vanilla-Boosted Cherry Bites
Add a splash of vanilla extract to the cheesecake mixture for extra flavor depth. Vanilla makes the sweet center taste warmer and more rounded.
This small addition works well with cherry chip flavor. It gives the bites a little more bakery-style aroma.
Sugar-Free Cake Mix Version
For a healthier version, use a sugar-free cake mix. This changes the sweetness and final flavor.
Pair it with reduced-fat cream cheese if you want a lighter direction. The texture may vary.
Gluten-Free Cherry Cheesecake Bites
Make them gluten-free by choosing a gluten-free cherry chip cake mix. Make sure the other ingredients fit your gluten-free needs as well.
The mixing and coating steps stay the same. The texture may vary depending on the mix.
Dark Chocolate Coated Bites
Experiment with dark chocolate as a different candy coating. Dark chocolate gives the bites a richer finish.
This option creates stronger contrast with the sweet cherry center. It is a good choice for people who prefer less sweetness.
Sprinkle-Finished Cheesecake Bites
Use colored sprinkles for a fun finish. Sprinkles make the bites look even more festive.
Add them before the coating fully sets so they stick. This is especially nice for birthdays or holidays.
Textured Cheesecake Bites
Add mini chocolate chips or crushed nuts to the cheesecake mixture for texture. These mix-ins give the center little surprises.
Use this variation when you want more bite inside the creamy center. Keep the pieces small enough so the balls still roll easily.
Why These Cherry Chip Cheesecake Bites Work
These bites work because they turn a few sweet ingredients into a dessert that feels fun and polished. The cake mix brings flavor and structure, while the cream cheese creates a creamy texture.
Softened cream cheese is important. It blends into the cake mix more evenly and helps create a smooth mixture.
The tablespoon-sized portions make the bites easy to serve. They are small enough for parties and simple enough for casual snacking.
The candy coating gives each bite a finished shell. It adds color, sweetness, and a firm outside.
The white almond bark adds contrast. It supports the cherry flavor and makes the coating more interesting.
Letting the coating set properly is the final step that makes the bites feel complete. Once firm, they are easy to pick up, plate, store, and share.
Directions
Step 1: Preheat the Oven
Preheat your oven to 350°F (175°C). This is the temperature given for the recipe.
Even though the main method focuses on mixing, rolling, coating, and setting, begin with this step as instructed. It gets the kitchen ready for the dessert process.
While the oven preheats, gather the ingredients and tools. You will need a mixing bowl, a spatula or electric mixer, a baking sheet, parchment paper, a microwave-safe bowl, and a fork.
Step 2: Prepare the Baking Sheet
Line a baking sheet with parchment paper. This gives the rolled bites a clean place to rest.
Parchment paper helps prevent sticking. It also makes cleanup easier once the coating has set.
Set the baking sheet near your work area. You will use it first for the rolled balls and again after dipping.
Step 3: Soften the Cream Cheese
Make sure the 8 ounces cream cheese is softened to room temperature. This is important for smooth mixing.
Cold cream cheese can make the mixture lumpy and harder to blend. Soft cream cheese combines more easily with the cake mix.
Let it sit out until it is easy to press gently. Once softened, it is ready to use.
Step 4: Add the Cake Mix to the Bowl
Place 15.25 ounces cherry chip cake mix in a mixing bowl. This forms the sweet base of the bites.
Break up any large clumps if needed. This helps the cream cheese blend in evenly.
The cake mix gives the bites their cherry chip flavor. It also helps the mixture become thick enough to roll.
Step 5: Add the Cream Cheese
Add the softened cream cheese to the bowl with the cake mix. Place it directly over the dry mix.
The cream cheese brings moisture and creaminess to the center. It turns the cake mix into a cheesecake-style mixture.
Make sure the cream cheese is soft before blending. This step affects the final texture.
Step 6: Mix Until Smooth
Mix the cherry chip cake mix and cream cheese together until smooth and well blended. You can use a spatula or an electric mixer.
If using a spatula, press and fold the mixture until no dry cake mix remains. If using an electric mixer, mix gently until the texture becomes even.
The mixture should look thick and creamy. It should be firm enough to roll into balls.
Step 7: Check the Texture
Look at the mixture before rolling. It should hold together when pressed.
If there are dry streaks of cake mix, continue mixing. If there are cream cheese lumps, press and blend until smoother.
Do not rush this step. A well-blended center makes the finished bites taste better.
Step 8: Portion the Mixture
Take small amounts of the mixture for rolling. Aim for tablespoon-sized portions.
This size is just right for bite-sized treats. It also makes the bites easy to dip and serve.
Try to keep the portions similar. Similar-sized bites set more evenly and look better on a platter.
Step 9: Roll Into Balls
Roll each portion between your hands to form a ball. Work gently so the mixture stays compact.
The balls do not need to be perfectly round, but they should be smooth enough for coating. A smooth surface helps the candy coating cover them neatly.
Continue until all the mixture has been rolled. Place each ball on the parchment-lined baking sheet.
Step 10: Space the Balls
Arrange the rolled balls with a little space between them. This prevents them from sticking together.
Spacing also makes dipping easier later. You can pick up one ball at a time without disturbing the others.
Once all the balls are on the baking sheet, set them aside while you prepare the coating. Keep the work area organized.
Step 11: Prepare the Coating Bowl
Place 12 ounces bright pink candy wafer melts and 4 ounces white almond bark in a microwave-safe bowl. This will become the dipping coating.
The pink candy melts give the bites their vibrant color. The white almond bark adds sweet contrast.
Use a bowl deep enough for dipping. A deeper bowl makes it easier to coat each ball fully.
Step 12: Melt in Short Intervals
Microwave the coating in 30-second intervals. Stir between each interval.
Short intervals help prevent overheating. The goal is silky melted coating, not burnt candy.
Continue heating and stirring until the mixture is completely melted and smooth. Be patient so the coating stays glossy.
Step 13: Check the Coating
The coating should be smooth enough to dip the balls. It should flow easily from a spoon or fork.
If there are small unmelted pieces, stir first before microwaving again. Sometimes the remaining heat will finish melting them.
Do not overheat the coating. Too much heat can make it thick or difficult to work with.
Step 14: Dip the First Cheesecake Ball
Take one cheesecake ball and lower it into the melted coating. Make sure it is fully covered.
Use a fork to help turn and lift the ball. The coating should wrap around the entire surface.
Let the excess coating drip off before placing it back on the baking sheet. This keeps the bottom from becoming too thick.
Step 15: Return the Coated Bite to the Sheet
Place the coated bite back onto the parchment-lined baking sheet. Set it down gently.
Try not to drag it across the parchment. This helps keep the coating smooth.
Repeat this process one bite at a time. Work carefully so each one is fully coated.
Step 16: Continue Dipping
Dip each remaining cheesecake ball into the melted coating. Lift with a fork and let the excess drip off.
If the coating begins to thicken, stir it again. A smooth coating is easier to work with.
Continue until all the bites are coated. The baking sheet should now be filled with bright pink treats.
Step 17: Add Optional Finishes
If using colored sprinkles, add them before the coating sets. This helps them stick.
You can also experiment with different candy coatings, such as dark chocolate. The finish can change depending on the occasion.
Keep the decorating simple or playful. These bites are meant to look fun.
Step 18: Let the Coating Set
Let the coated bites cool at room temperature until the coating is firm. This allows the candy shell to harden.
If you want them to set faster, place them in the refrigerator. The cold helps the coating firm more quickly.
Do not stack the bites before they are fully set. The coating needs to harden first.
Step 19: Serve Chilled
Serve the Cherry Chip Cheesecake Bites chilled for the best taste and texture. Keep them in the refrigerator until it is time to dig in.
Arrange them on a festive platter. The bright pink color makes them look cheerful and party-ready.
They can be paired with fresh fruit or whipped cream for an extra touch. They are also delicious on their own.
Step 20: Store Leftovers
Place leftovers in an airtight container. Store them in the refrigerator for about 1 week.
For longer storage, freeze them for up to 1 month. Separate layers with parchment paper to prevent sticking.
Keep them chilled for the best texture. Let frozen bites soften slightly before serving if needed.
Serving Ideas
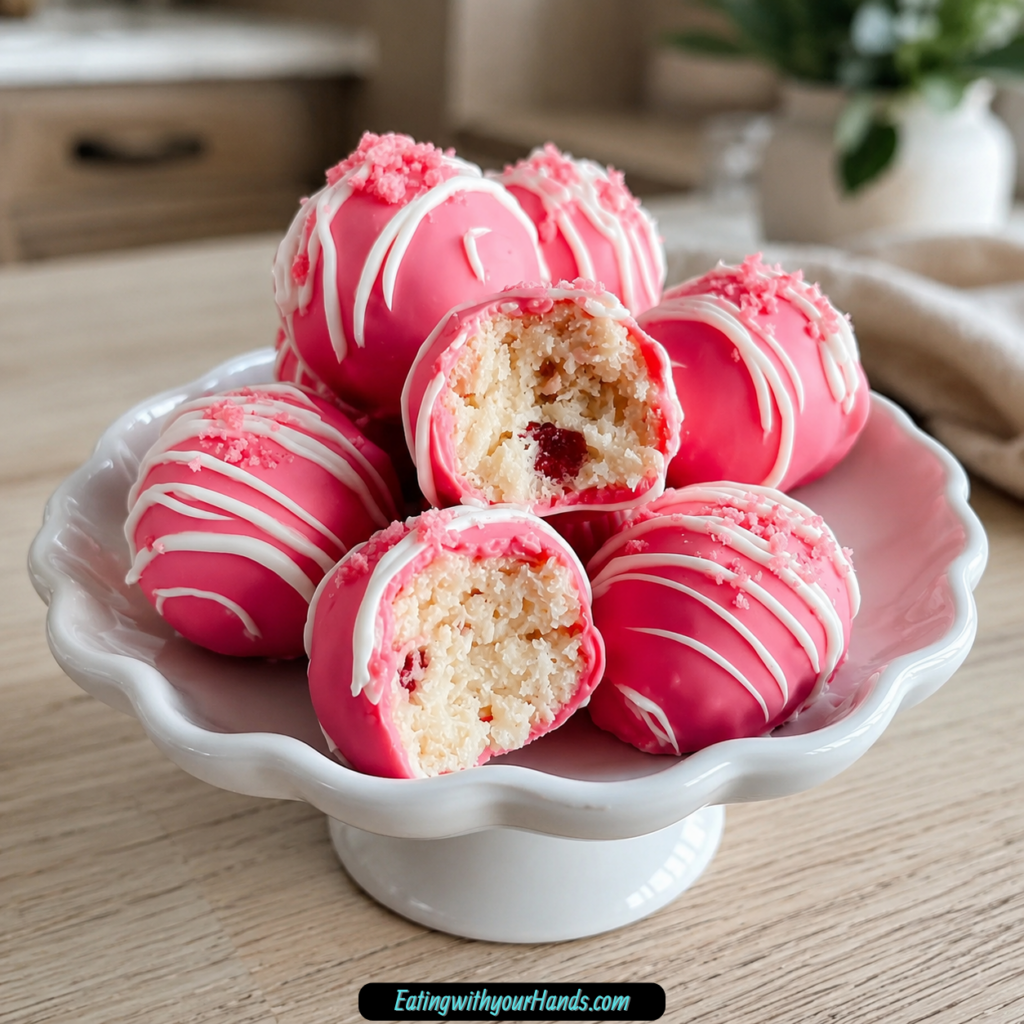
Serve Cherry Chip Cheesecake Bites on a festive platter. Their bright pink coating makes them look beautiful without much decoration.
They are best enjoyed chilled. The cold temperature keeps the center firm and the coating crisp.
Pair them with fresh fruit for a colorful dessert spread. The fruit adds freshness beside the sweet bites.
Whipped cream can be served on the side. It gives the platter a soft, creamy finish.
These bites are perfect for birthday parties. Their color and size make them easy for guests to grab.
They also fit holiday celebrations, cozy movie nights, simple Saturday desserts, and family gatherings. They bring a sweet little burst of fun to the table.
Storage
Store Cherry Chip Cheesecake Bites in an airtight container in the refrigerator. They will last for about 1 week.
Keep them chilled for the best taste and texture. The cream cheese center should stay cool.
If stacking the bites, separate layers with parchment paper. This helps prevent sticking and protects the coating.
Seal the container well. This keeps the bites fresh and ready to serve.
Reheating
These bites do not need reheating. They are best served chilled.
Do not microwave them. Heat can soften the coating and cream cheese center.
If they have been frozen, let them soften slightly before serving. Keep them cool for the best texture.
Serve them straight from the refrigerator when possible. That keeps them firm and easy to pick up.
Freezing
These bites can be frozen for up to 1 month. Place them in an airtight container.
Separate the layers with parchment paper. This prevents the coating from sticking together.
Freeze only after the coating is fully set. This helps the bites keep their shape.
When ready to enjoy, remove what you need and let them soften slightly if needed. Keep the rest frozen.
Make-Ahead
Cherry Chip Cheesecake Bites are great for making ahead. Prepare, dip, set, and store them until needed.
For short-term make-ahead storage, keep them in the refrigerator for about 1 week. Use an airtight container.
For longer storage, freeze them for up to 1 month. Place parchment paper between layers.
They are especially helpful for parties because they can be finished before guests arrive. Serve them chilled on a platter when ready.
Helpful Notes for Best Results
Make sure your cream cheese is softened to room temperature. This makes the mixture smoother.
Use a spatula or electric mixer, depending on what you have. Both can work as long as the mixture is well blended.
Roll the bites to about tablespoon size. This makes them easy to dip and eat.
Melt the candy coating in 30-second intervals. Stir between each interval to keep it smooth.
Do not overheat the coating. You want it silky, not burnt.
Use a fork to lift each coated ball. Let the excess coating drip off before returning it to the baking sheet.
For a nut-free version, make sure the almond bark is nut-free or use a different coating. Choose ingredients that fit your needs.
If you prefer a lighter bite, use reduced-fat cream cheese and light candy melts. The texture and flavor may vary.
Variations
Lemon Cherry Cheesecake Bites
Replace the cherry chip cake mix with lemon cake mix. This gives the bites a bright fruity twist.
The coating can stay pink for a fun contrast. The flavor will become more citrusy.
Strawberry Cheesecake Bites
Use strawberry cake mix instead of cherry chip cake mix. This gives the bites another berry-style flavor.
Strawberry cake mix keeps the treats colorful and sweet. It works well for spring or summer parties.
Chocolate Cheesecake Bites
Substitute chocolate cake mix for the cherry chip cake mix. This creates a richer bite.
Chocolate works well with dark chocolate coating. It is a great option for chocolate lovers.
Vanilla Cheesecake Bites
Use vanilla cake mix. This gives the bites a softer, classic flavor.
Vanilla works with almost any coating. It is easy to decorate for different occasions.
Vanilla Extract Cherry Bites
Add a splash of vanilla extract to the cheesecake mixture. This gives extra flavor depth.
Vanilla makes the cherry chip center taste warmer. It is a simple way to round out the flavor.
Sugar-Free Cherry Bites
Use a sugar-free cake mix for a healthier version. The sweetness will change.
Reduced-fat cream cheese can also be used. The texture may be slightly different.
Gluten-Free Cherry Chip Bites
Use a gluten-free cherry chip cake mix. This makes the bites gluten-free when other ingredients also fit your needs.
Follow the same rolling and coating steps. The final texture may vary.
Dark Chocolate Coated Bites
Use dark chocolate as a coating. This creates a richer finish.
Dark chocolate balances the sweetness of the cherry chip center. It gives the bites a more grown-up flavor.
Sprinkle Party Bites
Add colored sprinkles after dipping. The sprinkles stick best before the coating sets.
This makes the bites even more festive. Use colors that match your occasion.
Mini Chocolate Chip Bites
Add mini chocolate chips to the cheesecake mixture. They give the center extra texture.
This variation is great for chocolate lovers. Keep the chips small so rolling stays easy.
Crushed Nut Cheesecake Bites
Add crushed nuts to the cheesecake mixture for texture. They make the center more interesting.
Use this option only if nuts fit your needs. Keep the pieces small.
Dairy-Free Cherry Cheesecake Bites
Use a vegan cream cheese alternative. This creates a dairy-free option.
The flavor and texture may be different. Choose a product you enjoy.
Mascarpone Cherry Bites
Use mascarpone cheese as a cream cheese substitute. It gives a similar texture and flavor.
Mascarpone makes the bites feel rich and creamy. It is a good option for a slightly different cheesecake center.
Troubleshooting
Why Is My Mixture Lumpy?
The cream cheese may not have been softened enough. Let it come to room temperature before mixing.
Use a spatula or electric mixer until the mixture becomes smooth. Scrape the bowl as needed.
Why Is My Mixture Too Soft to Roll?
The cream cheese may be very soft, or the mixture may need a short chill. Let it firm slightly if needed before rolling.
Work with tablespoon-sized portions. Smaller bites are easier to shape.
Why Is My Coating Too Thick?
The coating may have cooled as you worked. Stir it well, or warm it briefly in the microwave.
Use 30-second intervals and stir between each one. Do not overheat.
Why Did My Coating Burn?
The candy melts or almond bark may have been heated too long. Microwave in short intervals only.
Stir between intervals. The remaining heat can melt small pieces without more microwaving.
Why Are the Bites Sticking Together?
They may have been stored without parchment between layers. Separate layers with parchment paper.
Make sure the coating is fully set before storing. Soft coating can stick.
Frequently Asked Questions
Can I Freeze Cherry Chip Cheesecake Bites?
Yes, these bites can be frozen. Place them in an airtight container separated by layers of parchment paper.
They will last for up to 1 month in the freezer. Let them soften slightly before serving if needed.
What Can I Substitute for Cream Cheese?
Mascarpone cheese can be used for a similar texture and flavor. It gives the bites a rich, creamy center.
For a dairy-free option, use a vegan cream cheese alternative. The flavor and texture may change.
How Long Do These Bites Last in the Refrigerator?
These bites last in the refrigerator for about 1 week when stored in an airtight container. Keep them chilled for the best taste and texture.
Make sure the coating is set before storing. Use parchment paper between layers if stacking.
Can I Use Another Cake Mix Flavor?
Yes, cherry chip cake mix can be substituted with another flavored mix, such as chocolate or vanilla. Lemon or strawberry cake mix can also be used for a fruity twist.
Each flavor will create a different bite. The same basic mixing and coating method applies.
Can I Make These Gluten-Free?
Yes, choose a gluten-free cherry chip cake mix. Make sure the coating and other ingredients also fit your gluten-free needs.
Follow the same steps. The texture may depend on the mix.
Can I Make These Nut-Free?
Yes, make sure the almond bark is nut-free or use a different coating. This is important if avoiding nuts.
Always check the coating ingredients. Choose what is safe for your needs.
Can I Add Mix-Ins?
Yes, mini chocolate chips or crushed nuts can be added to the cheesecake mixture. They give extra texture.
Keep the add-ins small. The mixture still needs to roll into balls and dip smoothly.
Why This Recipe Works So Well
Cherry Chip Cheesecake Bites work because they turn cake mix and cream cheese into a soft, sweet center that is easy to roll. The mixture becomes rich and cheesecake-like without needing a complicated filling.
The bright pink coating makes the bites look festive. It also adds sweetness and a smooth outer shell.
White almond bark adds contrast to the cherry flavor. It helps create a more interesting coating.
The tablespoon-sized shape makes the bites practical for gatherings. Guests can take one or two without needing a full dessert plate.
The recipe is flexible. Lemon, strawberry, chocolate, vanilla, gluten-free, sugar-free, light, dairy-free, and sprinkle-covered versions can all be made with the same general idea.
Most of all, these bites work because they feel joyful. They are colorful, creamy, sweet, and easy to share with people you love.
Final Thoughts
Cherry Chip Cheesecake Bites are creamy, colorful, sweet, and wonderfully fun to serve. With cherry chip cake mix, softened cream cheese, bright pink candy wafer melts, and white almond bark, they turn a handful of ingredients into a festive bite-sized dessert.
I love how these treats bring instant happiness to a table. The center is soft and sweet, the coating sets into a cheerful shell, and every little bite feels made for celebrations, movie nights, or family snacking.
Serve them chilled on a festive platter with fresh fruit, whipped cream, or colorful sprinkles, or tuck them into the freezer for a later treat. Whether you make them for a birthday, holiday, gathering, or simple weeknight dessert, Cherry Chip Cheesecake Bites bring a bright little moment of sweetness to every bite.
Cherry Chip Cheesecake Bites

These Cherry Chip Cheesecake Bites are sweet, creamy, colorful, and easy to make with cherry chip cake mix, softened cream cheese, bright pink candy wafer melts, and white almond bark. They are a fun bite-sized dessert for parties, holidays, dessert trays, gifting, or anytime you want a pretty no-fuss treat.
Recipe Details
- Prep Time: 15 minutes
- Cook Time: 10 minutes
- Total Time: 25 minutes
- Course: Dessert
- Cuisine: American
- Servings: 12 bites
- Calories: 150 kcal
Equipment
- Mixing bowl
- Baking sheet
Ingredients
For the Cheesecake Bites
- 8 ounce cream cheese, softened
- 15.25 ounce cherry chip cake mix
For the Coating
- 4 ounce white almond bark
- 12 ounce bright pink candy wafer melts
Instructions
Step 1: Mix the Cheesecake Bite Base
In a mixing bowl, combine the cherry chip cake mix and softened cream cheese until the mixture is well blended.
Step 2: Shape the Bites
Roll the mixture into small balls and place them on a baking sheet.
Step 3: Melt the Coating
Melt the bright pink candy wafer melts and white almond bark in the microwave until smooth.
Step 4: Dip the Cheesecake Balls
Dip each cheesecake ball into the melted coating, covering it evenly.
Step 5: Let the Coating Set
Return the dipped cheesecake bites to the baking sheet and let them set before serving.
Notes
Store the bites in an airtight container in the refrigerator for best results.
Serving Suggestions
- Serve chilled on a dessert tray for parties or holidays.
- Package in small treat boxes for edible gifts.
- Add to a pink-themed dessert table for birthdays, showers, or Valentine’s Day.
- Pair with coffee, tea, cold milk, or hot cocoa.
- Serve in mini paper cups for a neat bite-sized presentation.
Storage
How to Store
Store the bites in an airtight container in the refrigerator for best results.
Best Texture Tip
Keep the bites chilled so the cheesecake-style center stays firm and the candy coating holds its shape.
Serving Tip
Let the coating fully set before arranging the bites on a serving tray or storing them in a container.

Fernando is the creator and writer behind the food blog Eating with your Hands. Living and working in cities like Paris, Barcelona, and Berlin, and being married to a Canadian foodie, has given Fernando a passion and interest in food and inspired him to run EWYH.