
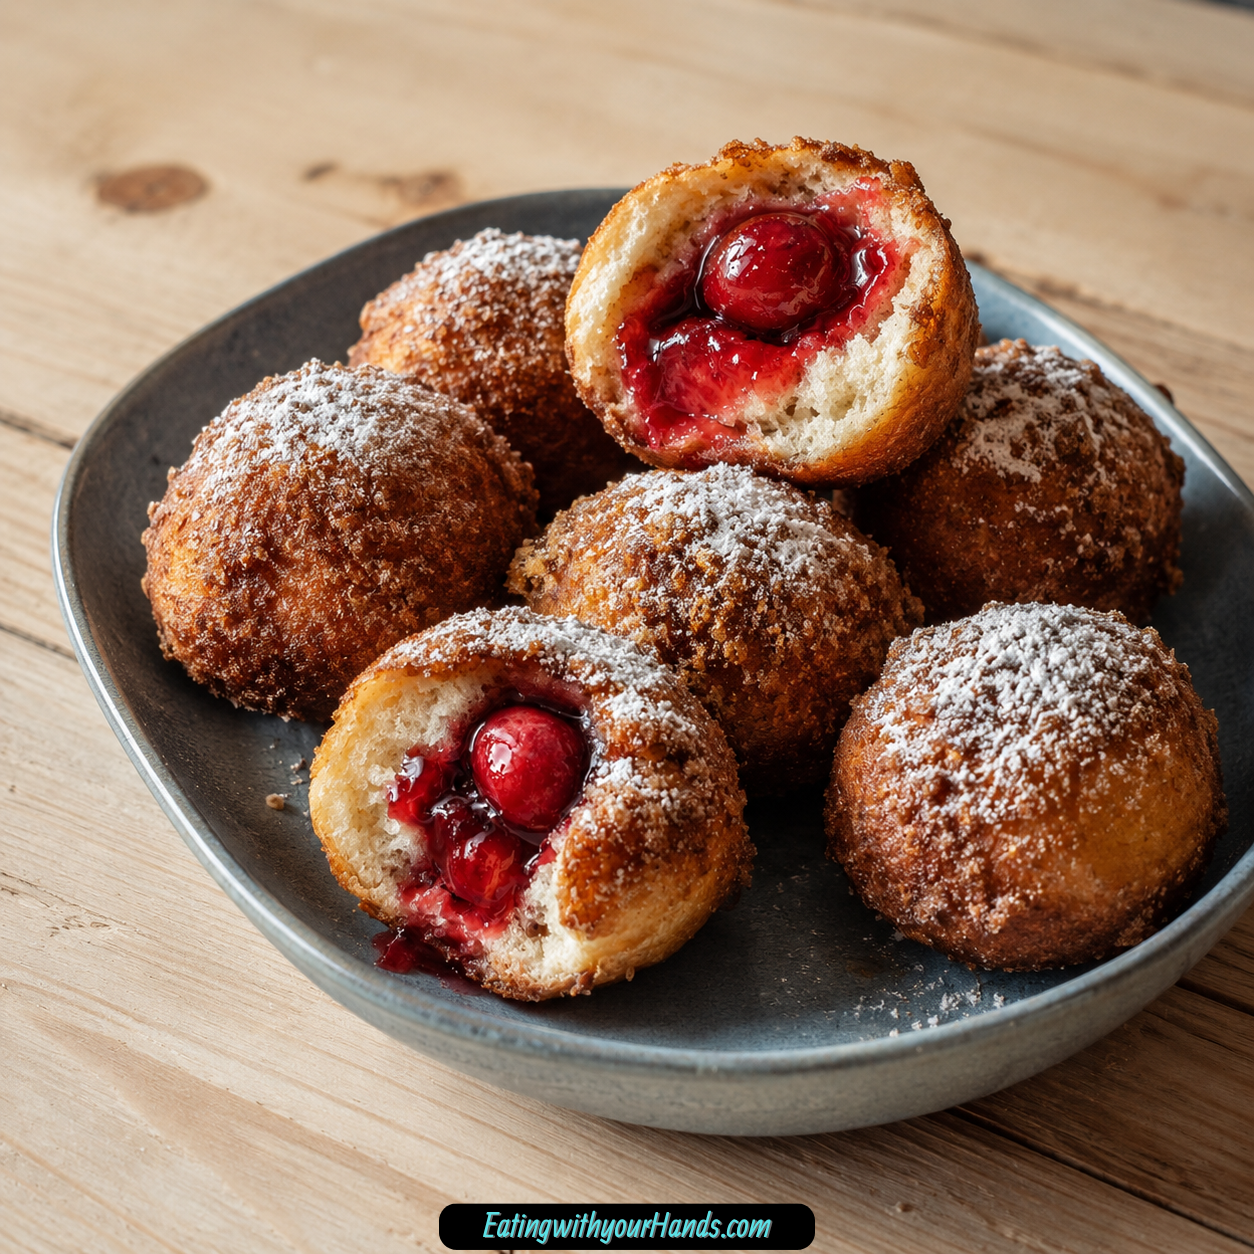
Cherry Pie Bombs are the kind of little dessert that can make the whole kitchen feel cheerful in minutes. They are warm, golden, buttery biscuit pockets filled with sweet cherry pie filling, brushed with melted butter, sprinkled with sugar, and served soft, gooey, and comforting.
There is something especially happy about a dessert that feels playful to make. The biscuit dough gets flattened, filled, pinched, rolled, and tucked onto a baking sheet like each one is hiding a sweet cherry surprise inside.
These little treats are simple, but they carry that cozy homemade feeling people remember. The warm scent of biscuit dough and cherry filling baking together makes them feel right for family nights, picnics, holidays, movie marathons, or cold evenings indoors.
Cherry Pie Bombs are also wonderfully practical. With refrigerated biscuit dough and canned cherry pie filling, the recipe comes together quickly and does not require a complicated crust or long baking project.
Each bite gives you soft biscuit on the outside and warm fruit filling inside. The melted butter gives the tops a golden finish, while granulated sugar and optional cinnamon add a sweet, aromatic touch.
Serve them warm with powdered sugar, whipped cream, or vanilla ice cream, and they become even more special. They are easy enough for a casual dessert and fun enough for kids to help shape, fill, and watch bake.
Table of Contents
- Why You’ll Love These Cherry Pie Bombs
- Recipe Details
- Ingredients
- Ingredient Notes
- Optional Swaps, Variations, Add-Ins, and Serving Ideas
- Why This Recipe Works
- Directions
- Step 1: Preheat the Oven
- Step 2: Prepare the Baking Sheet
- Step 3: Open the Biscuit Dough
- Step 4: Separate the Dough
- Step 5: Flatten the First Biscuit
- Step 6: Flatten the Remaining Biscuits
- Step 7: Add Cherry Pie Filling
- Step 8: Avoid Overfilling
- Step 9: Pinch the Edges
- Step 10: Seal Each Bomb Fully
- Step 11: Roll Into a Ball
- Step 12: Place Seam-Side Down
- Step 13: Melt the Butter
- Step 14: Brush the Tops
- Step 15: Add the Sugar
- Step 16: Add Cinnamon If Using
- Step 17: Bake the Cherry Pie Bombs
- Step 18: Check for Doneness
- Step 19: Remove from the Oven
- Step 20: Cool Slightly
- Step 21: Dust with Powdered Sugar
- Step 22: Add Whipped Cream If Desired
- Step 23: Serve Warm
- Step 24: Add Ice Cream for Dessert
- Serving Ideas
- Storage
- Reheating
- Freezing
- Make-Ahead
- Helpful Notes for Best Results
- Variations
- Troubleshooting
- Frequently Asked Questions
- Can I freeze Cherry Pie Bombs?
- What can I use instead of cherry pie filling?
- How do I know when Cherry Pie Bombs are done baking?
- Can I use puff pastry instead of biscuit dough?
- Can I make these gluten-free?
- Can I make these dairy-free?
- What toppings go well with Cherry Pie Bombs?
- How long do leftovers last?
- Why This Recipe Works So Well
- Final Thoughts
- Cherry Pie Bombs
Why You’ll Love These Cherry Pie Bombs
These Cherry Pie Bombs are quick and easy to prepare. They are ready in about 30 minutes, which makes them perfect when you want dessert without a long wait.
They use only a handful of ingredients. Refrigerated biscuit dough, cherry pie filling, sugar, cinnamon, butter, and optional toppings create a sweet treat with very little fuss.
They are budget-friendly and family-friendly. Kids can help flatten the biscuit dough, spoon in the filling, and shape each little bomb.
They fit almost any occasion. Serve them at casual get-togethers, festive celebrations, family game nights, cozy movie nights, picnics, or simple weeknight desserts.
They are freezer-friendly, so you can make a batch ahead of time and enjoy later. Baked bombs can be frozen for up to 2 months.
They are warm, comforting, and made to bring smiles. The flaky biscuit, cherry center, buttery top, and sweet finish make them feel like a small dessert celebration.
Recipe Details
Cherry Pie Bombs bake at 350°F, or 175°C. This temperature helps the biscuit dough bake to a golden brown finish.
The recipe is ready in about 30 minutes. The baking time is about 15 minutes, or until the tops are golden brown.
The recipe uses 1 can refrigerated biscuit dough. Pillsbury Grands is mentioned as an option for a fluffy texture.
The biscuit dough is separated into individual pieces. You should have about 8 little rounds ready to fill.
Each biscuit round is flattened with your fingers or a rolling pin until it is about 3 to 4 inches wide. The shape does not need to be perfect.
A generous spoonful of cherry pie filling goes in the center of each flattened biscuit. The edges are pinched together to seal the filling inside.
The filled biscuit is rolled into a ball and placed seam-side down on a baking sheet lined with parchment paper or a silicone mat. This helps keep the filling tucked inside while baking.
The tops are brushed with melted butter, then sprinkled with granulated sugar and a dash of optional cinnamon. After baking, the Cherry Pie Bombs cool slightly before serving.
Ingredients
For the Cherry Pie Bombs
- 1 can refrigerated biscuit dough (like Pillsbury Grands, for a fluffy texture)
- 1 can cherry pie filling (feel free to use homemade if you have it!)
- ¼ cup granulated sugar (for that sweet topping)
- 1 teaspoon cinnamon (optional, but adds a lovely warmth)
- 2 tablespoons melted butter (to brush on top for a golden finish)
Optional Serving Toppings
- Powdered sugar or whipped cream (optional, for serving and extra sweetness)
Ingredient Notes
Refrigerated biscuit dough makes this recipe fast and easy. Pillsbury Grands is mentioned as a good option for a fluffy texture.
Cherry pie filling gives the bombs their sweet, fruity center. Homemade cherry pie filling can be used if you have it.
Granulated sugar is sprinkled on top before baking. It gives the biscuit tops a sweet finish.
Cinnamon is optional but adds lovely warmth. It pairs well with the cherry filling and buttery biscuit dough.
Melted butter is brushed over the tops before baking. It helps create a shiny, golden finish.
Powdered sugar can be dusted over the warm Cherry Pie Bombs for extra sweetness. Whipped cream can also be served on top or alongside.
The ingredients are simple, but each one has a clear role. Together, they create a dessert that is warm, soft, fruity, and easy to share.
Optional Swaps, Variations, Add-Ins, and Serving Ideas
Blueberry Pie Bombs
Blueberry pie filling can be used instead of cherry pie filling. This gives the dessert a different fruit flavor while keeping the same easy method.
Blueberry works well with biscuit dough and a sweet topping. It is a fun way to change the recipe without changing the process.
Apple Pie Bombs
Apple pie filling can also be used for a cozy twist. It makes the bombs taste more like a handheld apple dessert.
Apple pairs beautifully with cinnamon. This version is especially nice for fall or chilly evenings.
Peach Pie Bombs
Peach pie filling is another fruit option. It gives the bombs a softer, summery sweetness.
This variation is lovely for picnics or warm-weather gatherings. The biscuit dough wraps around the peach filling just like the cherry version.
Mixed Berry Pie Bombs
A mixture of berries can be used if you do not have cherry pie filling. This gives the center a bright fruit flavor.
The filling can be made from other fruit pie fillings or a berry mixture. Keep the method the same and seal well.
Pumpkin Pie Bombs
Pumpkin pie filling can be used in the fall. This creates a seasonal touch with a warmer flavor.
A pinch of nutmeg can also be added for a fall-inspired spice note. This variation feels cozy and festive.
Nutmeg Spice Cherry Pie Bombs
A pinch of nutmeg can be added for a seasonal touch. It gives the cherry filling a little extra warmth.
Nutmeg changes the flavor gently. It works best when you want a cozier dessert.
Dairy-Free Cherry Pie Bombs
Use dairy-free biscuit dough and omit the butter for a dairy-free version. This keeps the recipe simple while adjusting for dairy-free needs.
Make sure the remaining ingredients also fit your needs. The texture and flavor may change depending on the dough used.
Lighter Cherry Pie Bombs
For a lighter version, bake instead of frying and serve with fresh fruit instead of whipped cream. This recipe is already baked, which keeps the method easy.
Fresh fruit can make the serving feel lighter. It also adds color to the plate.
Pecan Cherry Pie Bombs
Chopped pecans can be added to the cherry filling for a fun twist. They bring crunch to the soft, fruity center.
Pecans make the bombs feel a little richer. They pair well with cherry and cinnamon.
Walnut Cherry Pie Bombs
Chopped walnuts can also be added to the filling. They give a different nutty crunch.
Walnuts make the dessert more textured. Use them if you like a heartier bite.
Puff Pastry Cherry Bombs
Puff pastry can be used if you do not have biscuit dough. It creates a flakier alternative.
The texture will be different from biscuit dough. The filling and baking idea still stay simple and delicious.
Gluten-Free Cherry Pie Bombs
Use gluten-free biscuit dough to make these bombs gluten-free. This keeps the same shape and filling.
Make sure the cherry filling and toppings also fit your needs. The texture may vary depending on the dough.
Almond Cherry Pie Bombs
A hint of almond extract can be added for extra flavor. It gives the cherry filling a bakery-style aroma.
Because no quantity is provided, keep it as a small flavor idea. The almond note should support the cherry without overpowering it.
Why This Recipe Works
Cherry Pie Bombs work because they turn simple ingredients into a warm, filled dessert with very little effort. Biscuit dough becomes the soft outside, and cherry pie filling becomes the gooey center.
Flattening the biscuit rounds gives enough room for filling. A 3 to 4 inch width makes each round easier to seal.
Pinching the edges tightly is important. It keeps the cherry filling tucked inside while the bombs bake.
Placing the filled biscuits seam-side down gives extra support. The seam rests against the baking sheet, helping the bombs hold their shape.
Melted butter on top helps the biscuit dough brown beautifully. Sugar and optional cinnamon add sweetness and warmth.
Cooling slightly before serving also matters. It helps the bombs hold their shape and keeps the cherry goodness inside.
Directions
Step 1: Preheat the Oven
Preheat your oven to 350°F, or 175°C. This is the temperature used to bake the Cherry Pie Bombs until golden brown.
Let the oven fully heat before the baking sheet goes in. A properly preheated oven helps the biscuit dough bake evenly.
Step 2: Prepare the Baking Sheet
Line a baking sheet with parchment paper or a silicone mat. This helps prevent sticking and makes cleanup easier.
Set the prepared baking sheet near your work area. You will place each filled biscuit on it as soon as it is shaped.
Step 3: Open the Biscuit Dough
Open the can of refrigerated biscuit dough carefully. It may pop open with a fun little bang.
Remove the dough from the can gently. Try not to smash or tear the pieces as you separate them.
Step 4: Separate the Dough
Separate the biscuit dough into individual pieces. You should have about 8 little rounds.
Lay the rounds on a clean surface. These will become the outside of each Cherry Pie Bomb.
Step 5: Flatten the First Biscuit
Take one biscuit round and flatten it with your fingers or a rolling pin. Aim for about 3 to 4 inches wide.
The shape does not need to be perfect. A little rustic charm makes the finished bombs feel homemade.
Step 6: Flatten the Remaining Biscuits
Repeat the flattening process with the remaining biscuit rounds. Keep the thickness as even as you can.
Even rounds are easier to fill and seal. They also bake more consistently.
Step 7: Add Cherry Pie Filling
Place a generous spoonful of cherry pie filling in the center of each flattened biscuit. Keep the filling in the middle.
Think of the filling like a little treasure inside the dough. Avoid spreading it too close to the edges.
Step 8: Avoid Overfilling
Use enough filling to make each bomb sweet and satisfying, but do not add so much that the dough cannot close. Overfilling can make sealing difficult.
A generous spoonful is the guide. The edges still need room to pinch together.
Step 9: Pinch the Edges
Carefully bring the edges of the biscuit dough together over the cherry filling. Pinch the seams to seal.
Check for gaps as you pinch. This is the step that keeps the filling inside during baking.
Step 10: Seal Each Bomb Fully
Continue pinching until the cherry filling is enclosed. Make sure there are no open spaces.
A tight seal helps prevent leaks. Take a little extra time with this step.
Step 11: Roll Into a Ball
Gently roll the filled biscuit into a ball. Try to make it nice and round.
Do not press too hard. The goal is to shape the dough without squeezing out the filling.
Step 12: Place Seam-Side Down
Place the filled biscuit ball seam-side down on the prepared baking sheet. This helps the seam stay closed.
Repeat with the remaining filled biscuits. Leave space between each one.
Step 13: Melt the Butter
Melt 2 tablespoons butter. This will be brushed over the tops before baking.
The butter gives the bombs a golden finish. It also adds rich flavor.
Step 14: Brush the Tops
Brush the tops of the bombs with the melted butter. Coat each one lightly and evenly.
This helps the biscuits bake with a beautiful, shiny surface. It also helps the topping stick.
Step 15: Add the Sugar
Sprinkle ¼ cup granulated sugar over the tops. This gives the bombs a sweet topping.
Try to distribute the sugar evenly. Each bomb should get some sweetness on top.
Step 16: Add Cinnamon If Using
Sprinkle 1 teaspoon cinnamon over the tops if using. Cinnamon is optional but adds lovely warmth.
The cinnamon makes the bombs smell even more comforting as they bake. Use it if you enjoy that warm spice note.
Step 17: Bake the Cherry Pie Bombs
Place the baking sheet in the preheated oven. Bake for about 15 minutes.
The bombs should turn golden brown. The kitchen will smell sweet, buttery, and fruity.
Step 18: Check for Doneness
Look for a golden brown color on top. That is the main sign they are ready.
You can also gently press one. If it feels firm and springs back, it is ready.
Step 19: Remove from the Oven
Remove the baking sheet from the oven carefully. The filling inside will be hot.
Set the baking sheet on a safe surface. Let the bombs cool slightly before serving.
Step 20: Cool Slightly
Allow the Cherry Pie Bombs to cool on the baking sheet for a short time. This helps them hold their shape.
Cooling also helps keep the cherry filling inside. Do not rush into serving them while they are too hot.
Step 21: Dust with Powdered Sugar
If using powdered sugar, dust it over the warm bombs. This adds extra sweetness and a pretty finish.
A light dusting is enough. It makes the dessert look ready for serving.
Step 22: Add Whipped Cream If Desired
Serve with whipped cream if you like. It adds extra sweetness and creaminess.
Whipped cream can be added on the side or on top. It makes the bombs feel more indulgent.
Step 23: Serve Warm
Serve the Cherry Pie Bombs warm. The biscuit dough will be soft, and the cherry filling will be gooey.
They are best when everyone can enjoy them fresh. Gather around and serve while the centers are still warm.
Step 24: Add Ice Cream for Dessert
For a more complete dessert, serve with vanilla ice cream. The cold ice cream pairs beautifully with the warm cherry filling.
This is a great option for gatherings. It turns the simple bombs into a plated dessert.
Serving Ideas
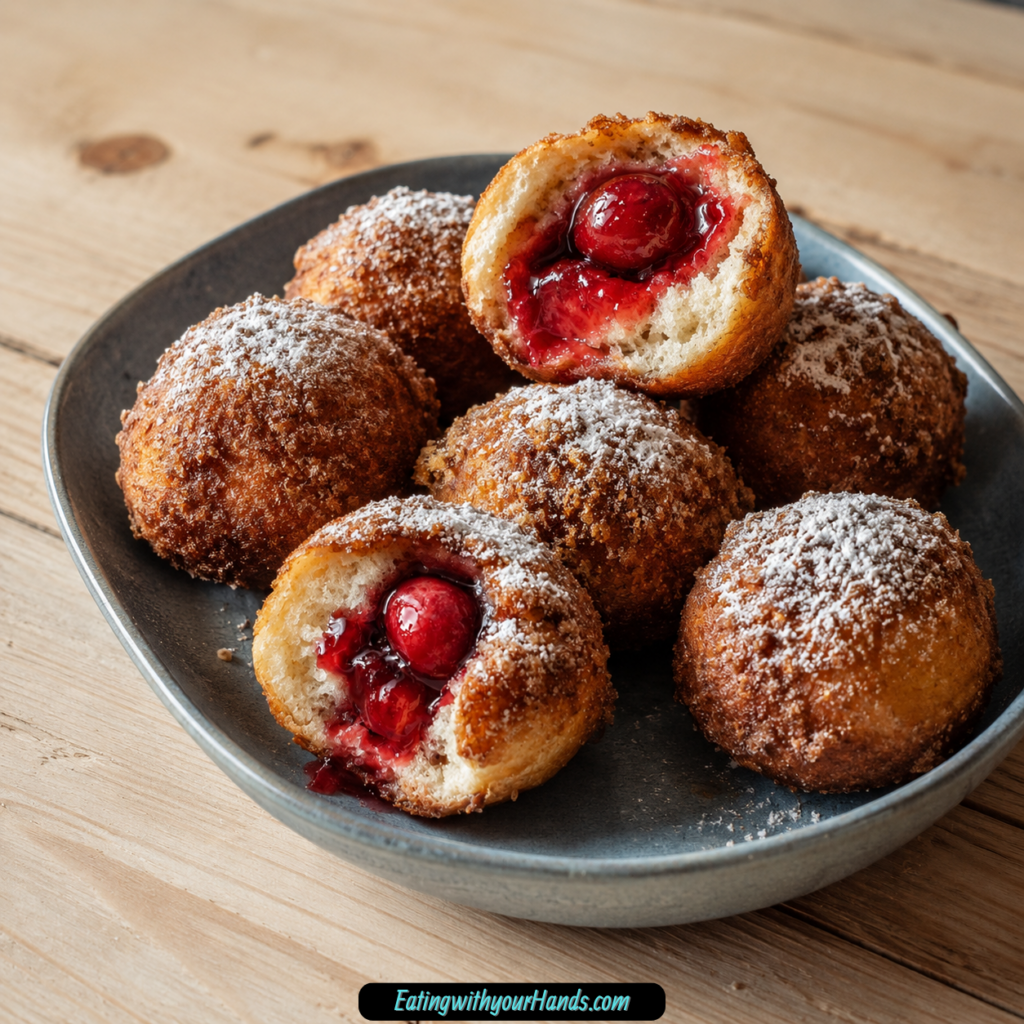
Cherry Pie Bombs are best served warm. The gooey cherry filling tastes especially comforting when the biscuit dough is fresh from the oven.
Dust them with powdered sugar for a sweet finish. It makes them look simple, pretty, and inviting.
Add whipped cream if you want extra indulgence. The creaminess pairs well with the warm fruit filling.
A scoop of vanilla ice cream makes them feel like a full dessert experience. The warm cherry center and cold ice cream make a lovely contrast.
Fresh fruit can be served alongside for a lighter option. This works especially well if you want to skip whipped cream.
Serve them for picnics, family nights, festive gatherings, movie marathons, or cozy winter evenings. Their handheld size makes them easy and fun to share.
Storage
Store leftover Cherry Pie Bombs in an airtight container in the refrigerator for up to 3 days. Let them cool before storing.
The biscuit texture may soften after refrigeration. Reheating helps bring back warmth and comfort.
Reheating
Reheat Cherry Pie Bombs in the oven at 350°F, or 175°C, for about 10 minutes. This restores their warm, delicious texture.
The oven is a good choice because it helps the biscuit exterior warm more evenly. Heat only until the centers are warmed through.
Freezing
Baked Cherry Pie Bombs can be frozen for up to 2 months. Make sure they are completely cooled first.
Place them in an airtight container or freezer bag. This helps protect them during storage.
When ready to enjoy, reheat them in the oven at 350°F, or 175°C, for about 10 minutes. Serve warm after reheating.
Make-Ahead
Cherry Pie Bombs are freezer-friendly, so they can be made ahead for later. Bake them, cool them completely, and freeze for up to 2 months.
This is helpful for busy weeks or future dessert nights. You can pull them from the freezer and reheat when needed.
For the best texture, reheat in the oven instead of serving cold. The warmth brings back the cozy biscuit and cherry filling feeling.
Helpful Notes for Best Results
Use refrigerated biscuit dough for the easiest method. Pillsbury Grands is mentioned as a good option for a fluffy texture.
Flatten each biscuit to about 3 to 4 inches wide. This gives enough space for the cherry filling.
Do not overfill the centers. Too much filling makes the bombs harder to seal.
Pinch the edges carefully so there are no gaps. This helps prevent cherry filling from leaking during baking.
Place the bombs seam-side down on the baking sheet. This helps the seal stay closed.
Brush with melted butter for a golden finish. Add sugar and optional cinnamon on top for sweetness and warmth.
Cool the bombs slightly before serving. This helps them hold their shape and keeps the filling inside.
For gluten-free needs, use gluten-free biscuit dough. For dairy-free needs, use dairy-free biscuit dough and omit the butter.
Variations
Blueberry Pie Bombs
Use blueberry pie filling instead of cherry. This gives the bombs a different fruit flavor.
Blueberry filling makes the dessert feel sweet and bright. The same biscuit method works well.
Apple Pie Bombs
Use apple pie filling for a cozy variation. Apple pairs nicely with cinnamon.
This version feels especially good in cooler weather. It tastes like a small apple dessert wrapped in biscuit dough.
Peach Pie Bombs
Use peach pie filling for a sunny twist. Peach gives the filling a softer fruit sweetness.
This variation is great for picnics or summer-style desserts. Serve warm or with ice cream.
Pumpkin Pie Bombs
Use pumpkin pie filling in the fall. This gives the bombs a seasonal touch.
Add a pinch of nutmeg if desired. The flavor becomes warmer and more autumn-like.
Mixed Berry Bombs
Use a mixture of berries instead of cherry pie filling. This gives the bombs a fresh, fruity center.
The method stays the same. Make sure the filling stays in the middle so the edges seal.
Nutmeg Cherry Pie Bombs
Add a pinch of nutmeg for a seasonal touch. It gives the cherry filling a warmer flavor.
This is a small change with a cozy effect. It works well in fall and winter.
Dairy-Free Cherry Pie Bombs
Use dairy-free biscuit dough and omit the butter. This makes the recipe dairy-free.
The texture and flavor may change based on the biscuit dough. Keep the same filling and shaping method.
Lighter Cherry Pie Bombs
Serve the baked bombs with fresh fruit instead of whipped cream. This gives them a lighter finish.
Because the bombs are baked, they already follow the lighter baked direction. Fresh fruit keeps the serving simple.
Pecan Cherry Pie Bombs
Add chopped pecans to the cherry filling. They bring crunch to the gooey center.
Pecans make the bombs taste richer. They are a fun twist.
Walnut Cherry Pie Bombs
Add chopped walnuts to the filling. They bring another crunchy option.
Walnuts give the filling a slightly different nutty flavor. They pair well with cherries.
Puff Pastry Cherry Bombs
Use puff pastry instead of biscuit dough if needed. This creates a flaky alternative.
The finished texture will be different. Puff pastry gives the bombs a lighter, crispier feel.
Gluten-Free Cherry Pie Bombs
Use gluten-free biscuit dough. This makes the recipe gluten-free.
Make sure the filling and toppings also fit your needs. The method stays the same.
Almond Cherry Pie Bombs
Add a hint of almond extract for extra flavor. It gives the cherry filling a more fragrant note.
Use this as a small flavor accent. The cherry filling should remain the main flavor.
Troubleshooting
The Filling Leaks Out
Make sure the edges are sealed tightly. Pinch the dough until there are no gaps.
Place the bombs seam-side down on the baking sheet. This gives the sealed edge more support.
The Dough Tears While Flattening
Flatten gently with your fingers or a rolling pin. Do not press too hard.
If a small tear happens, pinch it back together before filling. The dough does not need to look perfect.
The Bombs Are Hard to Seal
Use less filling if the dough will not close. A generous spoonful is enough, but overfilling makes sealing difficult.
Keep the filling in the center. Leave the edges clear so they can be pinched together.
The Tops Are Pale
Brush the tops with melted butter before baking. This helps create a golden finish.
Bake at 350°F, or 175°C, for about 15 minutes. They should become golden brown.
The Bombs Are Too Sweet
Use less sugar on top if you want to adjust the sweetness. Sugar substitutes can also be used according to the helpful notes.
Serve with fresh fruit instead of whipped cream. This gives a lighter finish.
The Recipe Needs to Be Dairy-Free
Use dairy-free biscuit dough and omit the butter. This is the dairy-free variation provided.
Check the filling and toppings as needed. The final texture may change slightly.
The Recipe Needs to Be Gluten-Free
Use gluten-free biscuit dough. This keeps the same filled-biscuit style.
Make sure other ingredients also fit gluten-free needs. The texture depends on the dough used.
The Bombs Lose Their Warm Texture
Reheat in the oven at 350°F, or 175°C, for about 10 minutes. This helps restore the warm, delicious texture.
Avoid overheating, because the filling can become very hot. Let them cool slightly before eating.
Frequently Asked Questions
Can I freeze Cherry Pie Bombs?
Yes, Cherry Pie Bombs can be frozen. Once they are baked and completely cooled, place them in an airtight container or freezer bag.
They will stay fresh for up to 2 months. When ready to enjoy, reheat in the oven at 350°F, or 175°C, for about 10 minutes.
What can I use instead of cherry pie filling?
Blueberry, apple, or peach pie filling can be used for a fun twist. A mixture of berries can also be used.
You can also make your own filling by simmering fresh or frozen cherries with sugar, cornstarch, and a splash of lemon juice until thickened. No exact quantities are needed here unless you already have a homemade filling recipe.
How do I know when Cherry Pie Bombs are done baking?
The Cherry Pie Bombs are done when they turn a lovely golden brown on top. This is the main sign to look for.
You can also gently press one. If it feels firm and springs back, the bombs are ready.
Can I use puff pastry instead of biscuit dough?
Yes, puff pastry can be used if you do not have biscuit dough. It gives the bombs a flaky alternative.
The texture will be different from biscuit dough. The filling and shaping idea remain similar.
Can I make these gluten-free?
Yes, use gluten-free biscuit dough. This creates a gluten-free version of the recipe.
Check the cherry filling and toppings as well. Ingredient labels matter for gluten-free needs.
Can I make these dairy-free?
Yes, use dairy-free biscuit dough and omit the butter. This is the listed dairy-free direction.
The bombs may not have the same buttery finish. They will still have the fruit-filled center.
What toppings go well with Cherry Pie Bombs?
Powdered sugar and whipped cream are both listed serving options. Vanilla ice cream also pairs beautifully with the warm bombs.
Fresh fruit can be used for a lighter serving. Cinnamon sugar on top adds warmth and sweetness.
How long do leftovers last?
Leftovers can be stored in an airtight container in the refrigerator for up to 3 days. Let them cool before storing.
For longer storage, freeze baked bombs for up to 2 months. Reheat in the oven before serving.
Why This Recipe Works So Well
Cherry Pie Bombs work so well because they take a few easy ingredients and turn them into a warm, filled dessert that feels homemade. The biscuit dough bakes golden around the sweet cherry center, creating a contrast of soft bread and gooey filling.
The process is simple enough for family baking. Flattening, filling, sealing, and rolling each piece makes the recipe interactive and fun.
The seam-side-down placement helps keep the filling tucked inside. It is a small detail that makes the finished bombs neater.
The melted butter, sugar, and optional cinnamon topping make the outside taste sweet and golden. They also help the bombs look more inviting.
The recipe is flexible for different fruit fillings and needs. Blueberry, apple, peach, pumpkin pie filling, berries, nutmeg, dairy-free dough, gluten-free dough, puff pastry, pecans, walnuts, almond extract, powdered sugar, whipped cream, vanilla ice cream, and fresh fruit all give you ways to adapt it.
Most of all, these little treats work because they feel joyful. They are easy to make, easy to share, and full of the kind of warm cherry sweetness that makes people gather in the kitchen.
Final Thoughts
Cherry Pie Bombs are warm, golden biscuit pockets filled with cherry pie filling, brushed with melted butter, sprinkled with sugar and optional cinnamon, then baked until beautifully golden. They are simple, comforting, freezer-friendly, and ready in about 30 minutes.
Serve them warm with powdered sugar, whipped cream, vanilla ice cream, or fresh fruit, and let their sweet cherry centers bring a little happiness to the table. Whether you make them for a picnic, a family night, a holiday dessert, or a cozy evening indoors, these little treats turn a handful of ingredients into something memorable.
Cherry Pie Bombs
Sweet, soft, buttery, and filled with cherry pie filling, these Cherry Pie Bombs turn refrigerated biscuit dough into a warm American dessert. A cinnamon-sugar coating and optional powdered sugar or whipped cream make them easy to serve for quick treats, family desserts, or cozy snack-style sweets.
Recipe Details
- Prep Time: 15 minutes
- Cook Time: 15 minutes
- Total Time: 30 minutes
- Course: Dessert
- Cuisine: American
- Servings: 8 bombs
Equipment
- oven
- Baking sheet
Ingredients
For Serving
- powdered sugar or whipped cream optional, for serving
For the Coating
- 2 tablespoons melted butter
- ¼ cup granulated sugar
- 1 teaspoon cinnamon optional
For the Filling
- 1 can cherry pie filling
For the Dough
- 1 can refrigerated biscuit dough like Pillsbury Grands
Instructions
Step 1: Preheat the Oven
Preheat your oven to 350°F (175°C).
Step 2: Separate the Biscuit Dough
Open the biscuit dough and separate it into individual pieces. Keep each biscuit intact so it can be flattened and filled.
Step 3: Fill Each Biscuit
Flatten each biscuit and place a spoonful of cherry pie filling in the center. Use enough filling to create a sweet center while still allowing the biscuit edges to close.
Step 4: Seal the Filling
Pinch the edges of the biscuit to seal the filling inside. Make sure the filling is enclosed before shaping.
Step 5: Shape the Bombs
Roll the filled biscuit into a ball and place it on a baking sheet. Arrange the bombs with space between them so they can bake evenly.
Step 6: Add the Butter and Sugar Coating
Brush the tops with melted butter. Sprinkle with granulated sugar and cinnamon.
Step 7: Bake Until Golden
Bake for 15 minutes or until golden brown.
Step 8: Cool Slightly and Serve
Allow to cool slightly before serving with powdered sugar or whipped cream if desired.
Notes
- These Cherry Pie Bombs are best served warm.
Serving Suggestions
Serve these Cherry Pie Bombs warm for the best soft biscuit texture and sweet cherry filling. The melted butter, granulated sugar, and optional cinnamon give the outside a simple bakery-style finish.
For serving, add powdered sugar or whipped cream if desired. They work well as a quick dessert, party treat, or cozy sweet snack when you want something simple and warm.
Storage
How to Store
The recipe does not provide specific storage instructions or storage duration, so no exact storage time is added here.
Best Texture Tip
These Cherry Pie Bombs are best served warm, exactly as noted. Let them cool slightly first so the filling is easier to enjoy.
Coating Tip
Brush the tops with melted butter before sprinkling with granulated sugar and cinnamon. Keep the cinnamon optional, as written.
Serving Tip
Serve with powdered sugar or whipped cream if desired. Both are optional finishing choices and do not change the main recipe.

Fernando is the creator and writer behind the food blog Eating with your Hands. Living and working in cities like Paris, Barcelona, and Berlin, and being married to a Canadian foodie, has given Fernando a passion and interest in food and inspired him to run EWYH.