
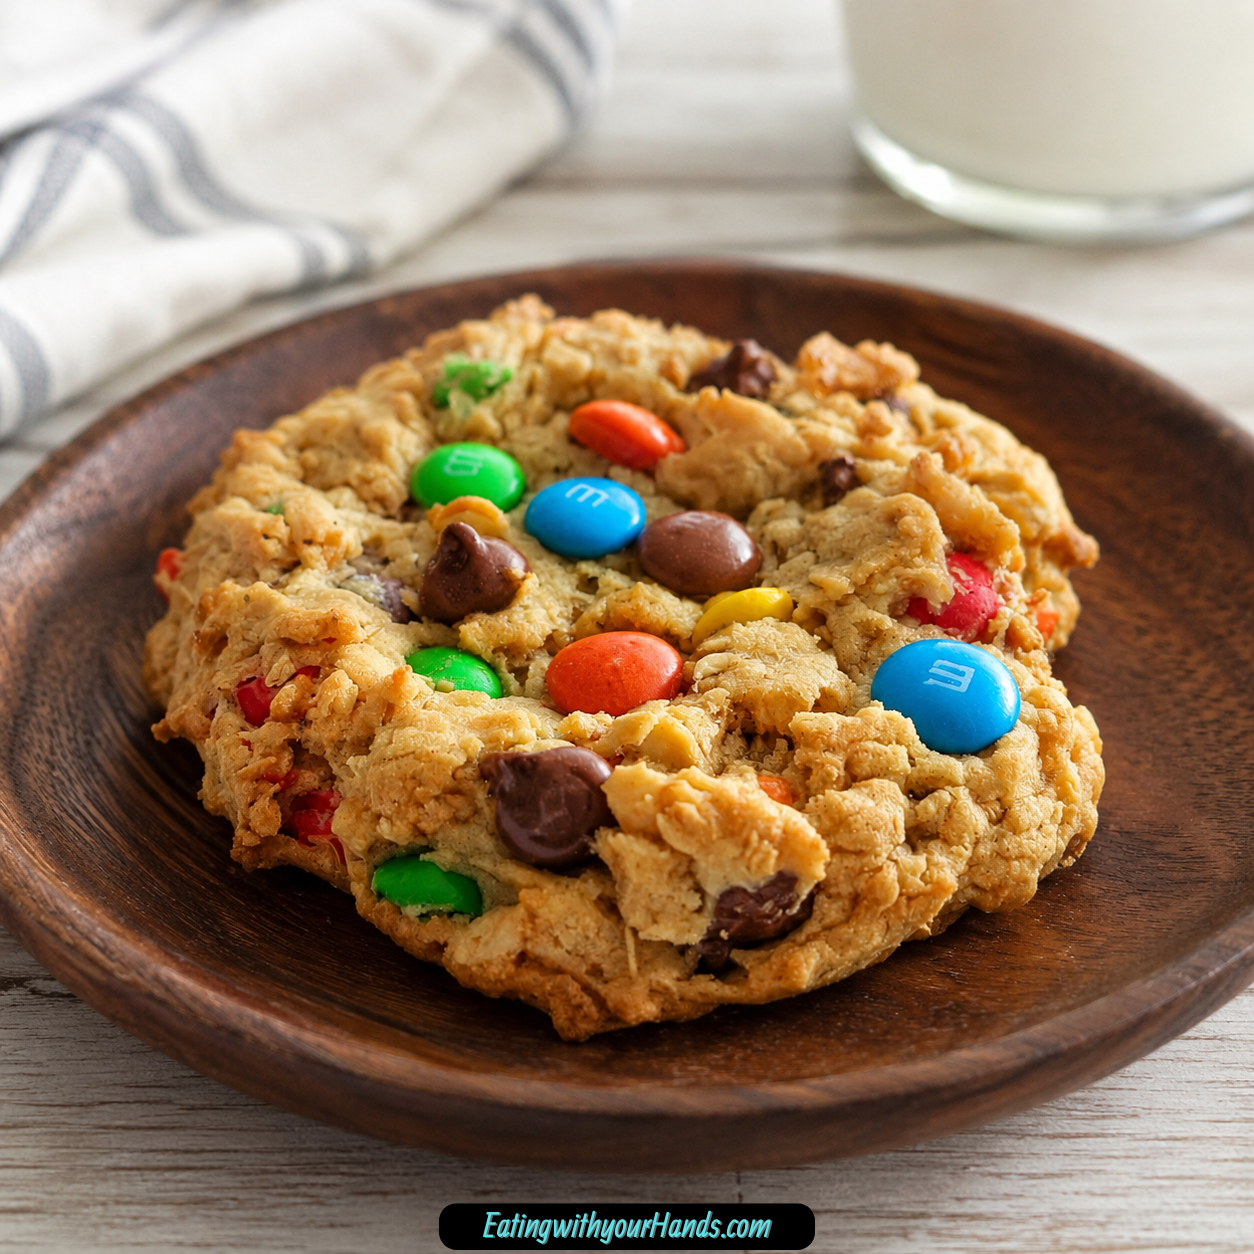
There is something instantly joyful about a tray of monster cookies. They look playful before you even taste them, with colorful M&Ms pressed into thick dough, little pockets of chocolate scattered throughout, and rolled oats giving every cookie that soft, hearty chew.
These Chewy Monster Cookies are the kind of cookie that feels made for sharing. They are sweet, salty, peanut buttery, chocolatey, colorful, and thick enough to feel satisfying without turning dry or heavy.
They carry that cozy homemade feeling that belongs to crisp weekends, busy family kitchens, school lunchboxes, bake sales, and dessert platters that disappear faster than expected. A warm cookie with soft peanut butter dough, melty mini chocolate chips, and bright candy pieces has a way of making everyone pause for a second cookie.
The recipe keeps the process simple but pays attention to texture. Slightly cool softened butter, conventional creamy peanut butter, old-fashioned rolled oats, and careful baking all help create cookies that stay soft and chewy for days.
Whether you make them for kids, neighbors, holiday trays, potlucks, or your own cookie jar, this is the kind of recipe that feels dependable. It is easy to mix, fun to customize, freezer-friendly, and cheerful enough to make an ordinary afternoon feel a little more special.
Table of Contents
- Why You’ll Love Chewy Monster Cookies
- Recipe Details
- Ingredients
- Optional Mix-In Ideas
- The Cozy Charm Behind Monster Cookies
- Why Butter Temperature Matters
- Why Conventional Creamy Peanut Butter Works Best
- Directions
- Step 1: Preheat the Oven
- Step 2: Line the Baking Sheet
- Step 3: Check the Butter Texture
- Step 4: Add the Granulated Sugar and Brown Sugar
- Step 5: Cream the Butter and Sugars
- Step 6: Add the Creamy Peanut Butter
- Step 7: Add the Egg
- Step 8: Add the Vanilla Extract
- Step 9: Whisk the Flour, Baking Soda, and Salt
- Step 10: Add the Dry Ingredients to the Wet Mixture
- Step 11: Add the Rolled Oats
- Step 12: Add the M&Ms
- Step 13: Add the Mini Semi-Sweet Chocolate Chips
- Step 14: Check the Dough Texture
- Step 15: Scoop the Dough
- Step 16: Add Extra M&Ms on Top
- Step 17: Bake the Cookies
- Step 18: Cool on the Baking Sheet
- Step 19: Transfer to a Wire Rack
- Serving Suggestions
- Storage
- Freezing Baked Cookies
- Freezing Cookie Dough
- Helpful Notes for Best Results
- Mix-In Ideas
- Allergy-Friendly Options
- Troubleshooting
- Frequently Asked Questions
- Why These Cookies Are Great for Kids and Parties
- Why This Recipe Belongs in a Cookie Jar
- Final Thoughts
- Chewy Monster Cookies
Why You’ll Love Chewy Monster Cookies
These cookies have a soft and chewy texture thanks to old-fashioned rolled oats and softened but still cool butter. The oats give the dough body, while the cooler butter helps the cookies stay thick instead of spreading too thin.
They also have a wonderful sweet-salty balance. Granulated sugar, light brown sugar, peanut butter, chocolate chips, M&Ms, and salt all work together so each bite tastes rich without being flat.
The colorful M&Ms make the cookies fun and kid-friendly. They are perfect for birthday parties, school lunches, bake sales, potlucks, and cookie trays that need something bright.
The recipe is customizable, too. You can swap in Reese’s Pieces, butterscotch chips, chopped pecans, nuts, white chocolate chips, dried fruit, chopped chocolate bars, or extra chocolate chips if you do not have M&Ms.
The cookies are freezer-friendly in two ways. You can freeze baked cookies, or you can freeze scooped dough balls and bake them straight from the freezer with 1 to 2 extra minutes added to the baking time.
They are also quick and easy. The prep time is only 15 minutes, and the ingredients are simple enough to keep the process relaxed.
Recipe Details
- Recipe name: Chewy Monster Cookies
- Prep time: 15 minutes
- Oven temperature: 350°F (175°C)
- Baking time: 10 to 12 minutes
- Cooling time on baking sheet: 5 minutes
- Butter texture: Softened but still cold and slightly firm to the touch
- Oats: Old-fashioned rolled oats, not quick oats
- Peanut butter: Conventional creamy peanut butter, such as Skippy or Jif
- Room temperature storage: Up to 5 days
- Freezer storage for baked cookies: Up to 3 months
- Freezer storage for dough balls: Bake from frozen and add 1 to 2 minutes
- Reheating: Microwave one cookie for 10 seconds
Ingredients
- ½ cup unsalted butter, softened but still cold
- ½ cup granulated sugar
- ½ cup packed light brown sugar
- ½ cup creamy peanut butter
- 1 large egg
- ½ teaspoon vanilla extract
- 1 ¼ cups all-purpose flour
- ½ teaspoon baking soda
- ½ teaspoon salt
- 1 cup old-fashioned rolled oats
- 1 cup M&Ms, plus extra for topping
- ½ cup mini semi-sweet chocolate chips
Optional Mix-In Ideas
- Reese’s Pieces
- Butterscotch chips
- Chopped pecans
- Nuts
- White chocolate chips
- Dried fruit
- Chopped chocolate bars
- Extra chocolate chips
The Cozy Charm Behind Monster Cookies
Monster cookies feel different from plain chocolate chip cookies because they bring several favorite cookie ingredients into one big, cheerful bite. There is peanut butter for richness, oats for chew, M&Ms for color, and mini chocolate chips for melty sweetness.
That combination makes them feel nostalgic and fun. They are not delicate or overly formal; they are the kind of cookies that look right on a lunchbox napkin, a bake sale table, a birthday platter, or a cooling rack in a busy kitchen.
The dough is thick, which is exactly what you want. A thick dough holds the oats, candy, and chocolate in place so every cookie has plenty of texture.
The extra M&Ms pressed on top before baking are more than decoration. They give each cookie that classic monster cookie look, making the tops colorful and inviting.
These cookies also have the kind of texture that makes them worth baking again. The edges become lightly golden, the centers stay slightly underbaked when pulled from the oven, and the cookies finish setting on the hot baking sheet.
That final resting time keeps them from becoming too crisp. It allows the centers to settle into a soft, chewy texture that stays pleasant after cooling.
Why Butter Temperature Matters
The recipe specifically calls for unsalted butter that is softened but still cold. This detail is important because butter temperature affects how much the cookies spread.
If the butter is too warm, the cookies may flatten more than intended. Slightly firm butter helps the dough stay thicker, which supports the chewy texture.
The butter should be soft enough to beat with the sugars, but it should not feel greasy or completely room temperature. When touched, it should still have a little cool firmness.
This small detail can make a noticeable difference in the finished cookie. Thick, chewy monster cookies depend on dough that has enough structure before it goes into the oven.
If your kitchen is warm, dough chilling can help. The recipe notes that chilling is not required, but 30 minutes of chilling can be useful if the dough feels too soft.
Why Conventional Creamy Peanut Butter Works Best
The recipe recommends conventional creamy peanut butter, such as Skippy or Jif. This style gives the dough a smoother, more consistent texture.
Natural peanut butter is not recommended for this recipe because it may cause spreading. Its oil separation and looser consistency can change how the dough behaves.
Peanut butter does several things in these cookies. It adds flavor, richness, saltiness, and moisture.
It also blends with the brown sugar and butter to give the cookies a soft, satisfying bite. When combined with oats and chocolate, it creates the familiar monster cookie flavor people love.
For a peanut-free version, sunflower seed butter can be used. This is one of the allergy-friendly options provided in the recipe notes.
Directions
Step 1: Preheat the Oven
Set your oven to 350°F (175°C). Let the oven fully preheat before the cookies go in.
A steady oven temperature helps the cookies bake evenly. Since these cookies bake for only 10 to 12 minutes, the starting temperature matters.
While the oven heats, gather your ingredients and prepare your baking sheet. This makes the mixing and scooping process much easier.
Step 2: Line the Baking Sheet
Line a baking sheet with parchment paper or a silicone baking mat. This helps prevent sticking and makes cleanup easier.
A lined baking sheet also protects the bottoms of the cookies. It gives them a smooth surface as they bake and cool.
Set the prepared baking sheet aside. Once the dough is mixed, you will scoop the dough directly onto this surface.
Step 3: Check the Butter Texture
Place ½ cup unsalted butter in a large mixing bowl. The butter should be softened but still cold.
It should be soft enough to cream with the sugars, but it should still feel slightly firm to the touch. This helps the cookies stay thick and chewy.
If the butter is too warm or greasy, the cookies may spread too much. In that case, let the butter cool slightly or plan to chill the dough later.
Step 4: Add the Granulated Sugar and Brown Sugar
Add ½ cup granulated sugar and ½ cup packed light brown sugar to the bowl with the butter. Both sugars play a role in the flavor and texture.
Granulated sugar adds sweetness and helps the cookie edges bake nicely. Light brown sugar adds moisture and richness.
Make sure the brown sugar is packed when measured. This keeps the recipe balanced as written.
Step 5: Cream the Butter and Sugars
Use a hand mixer or stand mixer to beat the butter, granulated sugar, and brown sugar together. Mix until the mixture looks light and creamy.
This should take about 2 minutes. The butter and sugars should be evenly combined, with no large streaks of butter remaining.
Creaming helps build the cookie base. It gives the dough a smoother texture before the peanut butter, egg, and vanilla are added.
Step 6: Add the Creamy Peanut Butter
Add ½ cup creamy peanut butter to the bowl. Mix until the peanut butter is smooth and fully blended into the butter-sugar mixture.
Use conventional creamy peanut butter for the best texture. Natural peanut butter may cause the cookies to spread.
The mixture should look thick, creamy, and uniform after mixing. This is the rich base that gives monster cookies their peanut butter flavor.
Step 7: Add the Egg
Add 1 large egg to the bowl. Beat until the egg is fully incorporated.
The egg helps bind the dough and gives the cookies structure. It also contributes to the soft texture.
Mix just until the egg disappears into the dough. There should be no visible streaks of egg remaining.
Step 8: Add the Vanilla Extract
Add ½ teaspoon vanilla extract. Mix until it is evenly blended.
Vanilla gives the cookies warmth and rounds out the peanut butter, sugar, oats, and chocolate. Even a small amount helps the dough taste more complete.
After mixing, the wet ingredients should look smooth and cohesive. Now the dry ingredients can be prepared separately.
Step 9: Whisk the Flour, Baking Soda, and Salt
In a separate bowl, combine 1 ¼ cups all-purpose flour, ½ teaspoon baking soda, and ½ teaspoon salt. Whisk them together.
Whisking helps distribute the baking soda and salt evenly through the flour. This prevents one part of the dough from being more salty or more leavened than another.
The flour should be spooned and leveled for accuracy. Too much flour can make the cookies dry or heavy.
Step 10: Add the Dry Ingredients to the Wet Mixture
Slowly add the dry mixture to the wet ingredients. Mix gently until just combined.
Do not overmix. Overmixing can make the cookies less tender.
Stop when no dry flour remains. The dough will begin to look thick, but the oats and mix-ins still need to be folded in.
Step 11: Add the Rolled Oats
Add 1 cup old-fashioned rolled oats to the dough. Do not use quick oats for this recipe.
Rolled oats provide the best texture. They give the cookies chew and structure without disappearing into the dough.
Fold them in with a spatula or wooden spoon. Stir just enough to distribute them evenly.
Step 12: Add the M&Ms
Add 1 cup M&Ms to the dough. Mini or regular M&Ms both work.
Fold them in gently so they are evenly spread throughout the dough. Try not to crush them as you stir.
The colorful candy pieces are part of what makes these cookies look like monster cookies. They add sweetness, crunch, and a fun appearance.
Step 13: Add the Mini Semi-Sweet Chocolate Chips
Add ½ cup mini semi-sweet chocolate chips. Fold them into the dough with the oats and M&Ms.
Mini chips distribute well through the thick dough. They add melty chocolate richness in every bite.
The dough should be thick after all the mix-ins are added. This is normal and helps the cookies bake up chewy and full.
Step 14: Check the Dough Texture
Before scooping, look at the dough. It should be thick and hold its shape.
If your kitchen is warm or the dough feels very soft, chilling is optional. The recipe notes that 30 minutes of chilling can help when needed.
Chilling is not required for the standard method. It is simply a useful adjustment if the dough needs more structure.
Step 15: Scoop the Dough
Use a tablespoon or small cookie scoop to drop rounded balls of dough onto the prepared baking sheet. Keep the scoops similar in size so the cookies bake evenly.
Leave about 2 inches between each cookie. This gives them room to spread slightly while baking.
A small cookie scoop can make the process faster and more consistent. However, a tablespoon works perfectly well.
Step 16: Add Extra M&Ms on Top
Press a few extra M&Ms onto the top of each dough ball before baking. This gives the cookies their classic colorful look.
Do not press too hard. The goal is to attach the candies to the surface without flattening the cookie dough completely.
This step makes the finished cookies look bright and inviting. It is also a fun step for kids to help with.
Step 17: Bake the Cookies
Place the baking sheet in the preheated 350°F (175°C) oven. Bake for 10 to 12 minutes.
The cookies are ready when the edges are just golden and the centers still look slightly underbaked. Do not overbake them.
The slightly underbaked centers will continue cooking on the hot baking sheet. This is what helps the cookies stay soft and chewy instead of turning crisp.
Step 18: Cool on the Baking Sheet
Remove the baking sheet from the oven and let the cookies rest on the sheet for 5 minutes. This resting step allows the centers to set.
Do not move the cookies immediately. They may be too soft when they first come out of the oven.
After 5 minutes, they will be sturdier but still tender. This short wait helps protect the chewy texture.
Step 19: Transfer to a Wire Rack
Move the cookies to a wire rack to cool completely. Use a spatula to lift them carefully.
Cooling on a rack allows air to circulate around the cookies. This helps them finish setting without becoming soggy on the bottom.
Once fully cooled, they can be served, stored, frozen, or packed into lunchboxes and trays.
Serving Suggestions
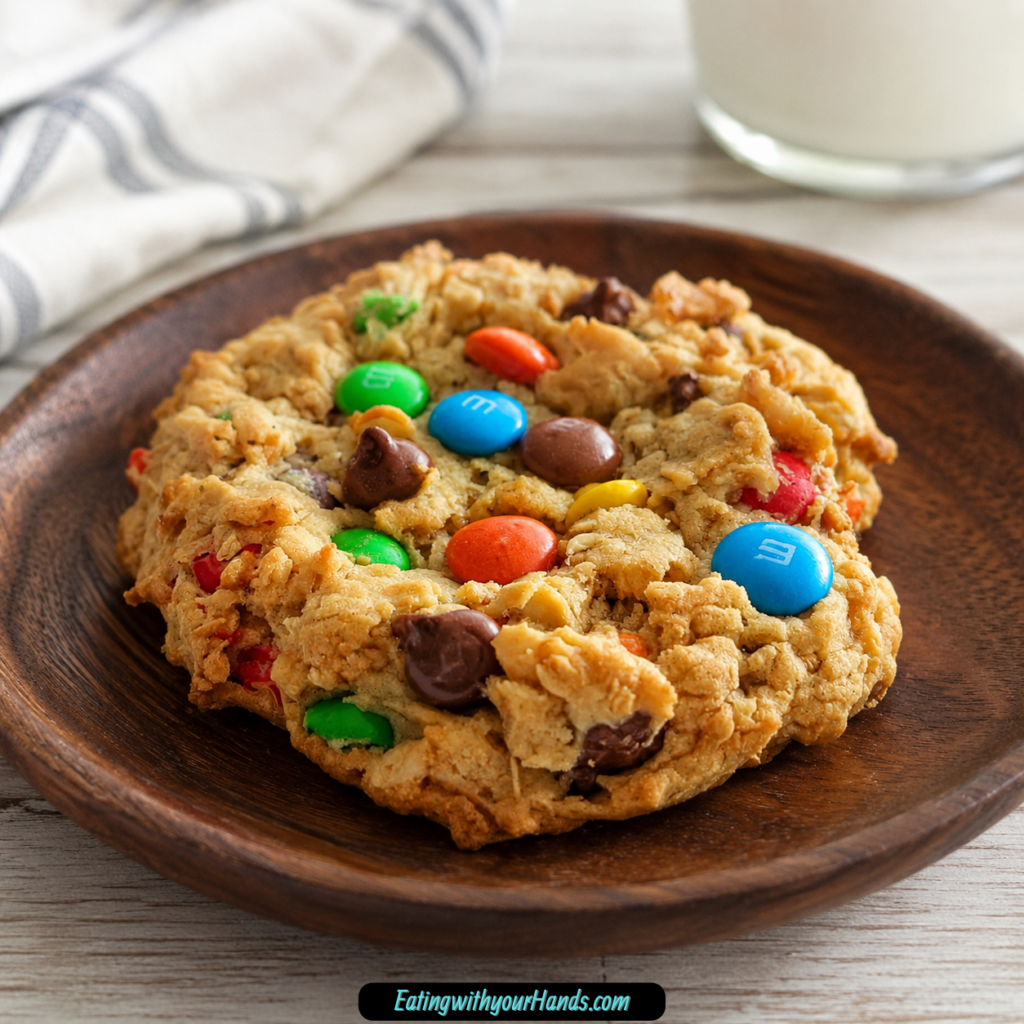
Serve these cookies warm with a glass of cold milk. The soft peanut butter dough, chocolate chips, and M&Ms taste especially good when the cookie is still slightly warm.
They also look beautiful stacked on a platter. Their colorful tops make them perfect for birthday parties, potlucks, bake sales, or casual dessert trays.
For lunchboxes or party favors, make mini versions. Smaller cookies are easy to pack and fun to share.
These cookies are also great for holiday trays. Their colors can fit into seasonal displays depending on the M&Ms you use.
For a soft and gooey leftover cookie, warm it in the microwave for 10 seconds. This brings back some of that fresh-baked texture.
Storage
Store the cooled cookies in an airtight container at room temperature. They will keep for up to 5 days.
To help keep the cookies soft, store them with a slice of bread. The cookies will absorb moisture from the bread and stay softer.
Make sure the cookies are completely cool before storing. Warm cookies can create condensation in the container.
Freezing Baked Cookies
Baked cookies can be frozen for up to 3 months. Freeze them first in a single layer.
Once firm, transfer them to a zip-top bag. This prevents the cookies from sticking together.
Thaw at room temperature when ready to serve. You can also microwave a cookie for 10 seconds if you want it soft and warm.
Freezing Cookie Dough
You can also freeze the dough before baking. Scoop the dough into balls, then freeze them.
Once frozen, the dough balls can be stored for later baking. This is helpful if you want fresh cookies without mixing a new batch.
Bake directly from frozen. Add 1 to 2 minutes to the baking time.
Helpful Notes for Best Results
The butter should be slightly firm to the touch, not fully room temperature. This helps the cookies stay thick.
Use conventional creamy peanut butter. Natural peanut butter may cause spreading because of its texture.
Do not overmix after adding the dry ingredients. Mix only until the flour disappears.
Use old-fashioned rolled oats, not quick oats. Rolled oats give the best chewy texture.
Dough chilling is not required, but it can help if your kitchen is warm. Chill for 30 minutes if the dough feels too soft.
Mix-In Ideas
Reese’s Pieces
Reese’s Pieces can be used instead of M&Ms. They keep the colorful candy look while adding more peanut butter flavor.
This is a good choice if you want the cookies to taste even more peanut buttery. Use them the same way you would use M&Ms.
Butterscotch Chips
Butterscotch chips add a deeper, sweeter flavor. They work well with peanut butter and oats.
Use them as part of the mix-ins if you want a warmer candy-like taste. They can replace some of the chocolate chips or be added as a variation.
Chopped Pecans
Chopped pecans add crunch. They also bring a nutty flavor that balances the sweetness.
Fold them into the dough with the oats, candies, and chocolate chips. Make sure they are evenly distributed.
White Chocolate Chips
White chocolate chips can be used for a creamier, sweeter variation. They also add a lighter color contrast.
This option works well with M&Ms and peanut butter. Use them as a swap or extra mix-in.
Dried Fruit
Dried fruit can be added for a chewy fruit note. It gives the cookies a different kind of texture.
Use it as a customization option when you want something beyond candy and chocolate. Fold it in gently with the other mix-ins.
Allergy-Friendly Options
For a peanut-free version, use sunflower seed butter. This is the recommended peanut-free swap in the recipe notes.
For a dairy-free version, use dairy-free chocolate chips. Make sure the other ingredients you choose fit your needs.
For gluten-free cookies, use a gluten-free all-purpose flour blend and make sure your oats are certified gluten-free. This keeps the recipe closer to the original texture while meeting gluten-free needs.
These swaps can change the final texture slightly. However, they are useful options when baking for different dietary needs.
Troubleshooting
Why Are My Cookies Flat?
The butter may have been too warm. Slightly cool softened butter helps the cookies stay thick.
Another possible reason is overmixing the dough. Mix only until the dry ingredients are just combined.
If your kitchen is warm, chill the dough for 30 minutes before baking. This can help the cookies hold their shape.
Why Are My Cookies Too Crisp?
They may have been overbaked. Monster cookies should be removed when the edges are just golden and the centers still look slightly underbaked.
The cookies continue cooking on the baking sheet during the 5-minute rest. This gives them structure without drying them out.
Why Is My Dough Too Soft?
The butter may have been too warm, or the kitchen may be hot. Chill the dough for 30 minutes if needed.
Cooler dough spreads less. This helps create thicker cookies.
Why Should I Avoid Natural Peanut Butter?
Natural peanut butter may cause spreading. Its texture and oil separation can affect the dough.
Conventional creamy peanut butter gives more consistent results. Skippy or Jif are recommended examples from the original recipe.
How Do I Keep the Cookies Soft?
Store them in an airtight container with a slice of bread. The cookies absorb moisture from the bread and stay soft.
Do not leave them uncovered for long periods. Air exposure can make cookies dry out faster.
Frequently Asked Questions
Can I Freeze These Cookies?
Yes, both baked cookies and cookie dough can be frozen. Baked cookies freeze well for up to 3 months.
Dough balls can also be frozen and baked straight from the freezer. Add 1 to 2 minutes to the baking time.
What If I Don’t Have M&Ms?
You can use any chocolate candy, chopped chocolate bars, or simply increase the amount of chocolate chips. The recipe is flexible with mix-ins.
The cookies will still have the same peanut butter, oat, and chocolate base. The appearance may change, but the method stays the same.
Can I Make These Gluten-Free?
Yes, use a gluten-free all-purpose flour blend and make sure your oats are certified gluten-free. This helps keep the cookie texture close to the original.
Follow the same mixing and baking instructions. The exact texture may vary depending on the flour blend.
Why Are My Cookies Flat?
The butter was most likely too warm, or the dough was overmixed. Use cooler butter and avoid overmixing.
If the dough feels too soft, chill it for 30 minutes. This helps the cookies bake thicker.
How Do I Keep the Cookies Soft?
Store them in an airtight container with a slice of bread. The cookies will absorb moisture and stay soft.
Also avoid overbaking. Pull them from the oven when the centers still look slightly underbaked.
Can I Use Quick Oats?
The recipe calls for old-fashioned rolled oats, not quick oats. Rolled oats give the best texture.
Quick oats may change the chewiness of the cookies. For the intended result, use old-fashioned rolled oats.
Can I Make Mini Cookies?
Yes, mini versions are great for lunchboxes or party favors. Watch the baking time carefully because smaller cookies may bake faster.
Keep the same visual cue in mind. The edges should be just golden, and the centers should not be overbaked.
Why These Cookies Are Great for Kids and Parties
Chewy Monster Cookies are naturally fun because they are colorful. M&Ms make the tops bright, and pressing a few extras on before baking gives each cookie a cheerful finish.
They are also sturdy enough for lunchboxes once cooled. The oats and peanut butter help give the cookies structure.
For parties, these cookies are easy to stack on a platter. They bring color to the dessert table without needing frosting or decoration.
They are also simple enough for kids to help make. Pressing extra M&Ms on top is an easy and satisfying task.
Because the recipe is freezer-friendly, it is also useful for planning ahead. You can prepare dough balls in advance and bake fresh cookies when needed.
Why This Recipe Belongs in a Cookie Jar
A good cookie jar recipe should be reliable, easy to repeat, and enjoyable for several days. These cookies fit that role well.
They stay soft and chewy when stored properly. The oats, peanut butter, and brown sugar all help create a cookie with staying power.
They also have enough mix-ins to keep them interesting. M&Ms, mini chocolate chips, and oats make every bite feel full.
The recipe is easy to adapt, which means it does not get boring. You can change the candies, chips, nuts, or add-ins while keeping the same base.
That makes it a practical cookie for everyday baking. It is simple, colorful, and satisfying without being complicated.
Final Thoughts
Chewy Monster Cookies are the kind of homemade treat that brings together comfort and fun in one colorful batch. With butter, granulated sugar, brown sugar, creamy peanut butter, egg, vanilla, flour, baking soda, salt, rolled oats, M&Ms, and mini semi-sweet chocolate chips, they bake into thick, soft, chewy cookies full of texture and flavor.
The most important details are simple but meaningful. Use softened but still cool butter, choose conventional creamy peanut butter, avoid quick oats, do not overmix, and pull the cookies from the oven when the edges are just golden and the centers still look slightly underbaked.
After resting for 5 minutes on the baking sheet, the cookies finish setting into the perfect chewy texture. From there, they can be served warm with milk, stacked on dessert platters, packed into lunchboxes, frozen for later, or reheated for a soft and gooey bite.
This is a recipe worth keeping close because it works for so many moments. Bake it for kids, parties, neighbors, holidays, or a quiet weekend at home, and you will have a batch of cookies that feels cheerful, nostalgic, and easy to love.
Chewy Monster Cookies
These chewy monster cookies are soft in the center, lightly crisp around the edges, and packed with plenty of texture. Creamy peanut butter, rolled oats, colorful M&Ms, and mini chocolate chips make every bite rich, sweet, and satisfying. They are an easy crowd-pleasing choice for parties, bake sales, lunchboxes, or casual family treats.
Recipe Details
- Prep Time: 15 minutes
- Cook Time: 12 minutes
- Total Time: 27 minutes
- Servings: 24 cookies
- Calories: 180 kcal
Ingredients
- 1 cup old-fashioned rolled oats
- 1 cup M&Ms plus extra to top cookies
- ½ cup mini semi-sweet chocolate chips
- 1 ¼ cups all-purpose flour
- ½ teaspoon baking soda
- ½ teaspoon salt
- ½ cup unsalted butter softened but still cold
- ½ cup granulated sugar
- ½ cup packed light brown sugar
- ½ cup creamy peanut butter
- 1 large egg
- ½ teaspoon vanilla extract
Instructions
Step 1: Prepare the Oven and Baking Sheet
Preheat the oven to 350°F (175°C). Line a baking sheet with parchment paper.
Step 2: Cream the Butter and Sugars
Add the butter, granulated sugar, and light brown sugar to a large bowl. Cream together until the mixture is light and fluffy.
Step 3: Add the Peanut Butter Mixture
Add the creamy peanut butter, egg, and vanilla extract. Beat until smooth and evenly combined.
Step 4: Combine the Dry Ingredients
In a separate bowl, whisk together the all-purpose flour, baking soda, and salt.
Step 5: Make the Cookie Dough
Gradually stir the dry ingredients into the wet mixture. Mix only until the dough is just combined.
Step 6: Fold in the Mix-Ins
Gently fold in the rolled oats, M&Ms, and mini semi-sweet chocolate chips until evenly distributed.
Step 7: Portion the Dough
Scoop the cookie dough into rounded tablespoons and place them on the prepared baking sheet, leaving 2 inches between each portion.
Press a few extra M&Ms onto the top of every dough ball.
Step 8: Bake the Cookies
Bake for 10-12 minutes, or until the edges are golden while the centers remain soft.
Step 9: Cool the Cookies
Let the cookies cool on the baking sheet for 5 minutes. Transfer them to a wire rack to finish cooling.
Notes
For extra chewiness, use cold softened butter and avoid overbaking the cookies.
The cookie dough balls can be frozen and baked directly from frozen.
For a different flavor, replace the M&Ms with Reese’s Pieces or another candy.
To make the cookies gluten-free, use GF-certified oats and a gluten-free flour blend.
Serving Suggestions
- Serve with a glass of cold milk.
- Add them to party or bake sale trays.
- Pack them into lunchboxes for a sweet treat.
- Pair with hot coffee or cocoa.
- Use them in holiday cookie boxes or homemade gift bags.
Storage
How to Store
Place the completely cooled cookies in an airtight container to help preserve their soft, chewy texture.
How to Freeze
Freeze portioned cookie dough balls for later baking. They can be transferred directly from the freezer to the oven.
Finished cookies may also be stored in a freezer-safe airtight container.
Best Texture Tip
Remove the cookies while the centers are still soft and let them finish setting on the baking sheet for 5 minutes. Avoid overbaking, as this helps maintain their chewy texture.

Fernando is the creator and writer behind the food blog Eating with your Hands. Living and working in cities like Paris, Barcelona, and Berlin, and being married to a Canadian foodie, has given Fernando a passion and interest in food and inspired him to run EWYH.