
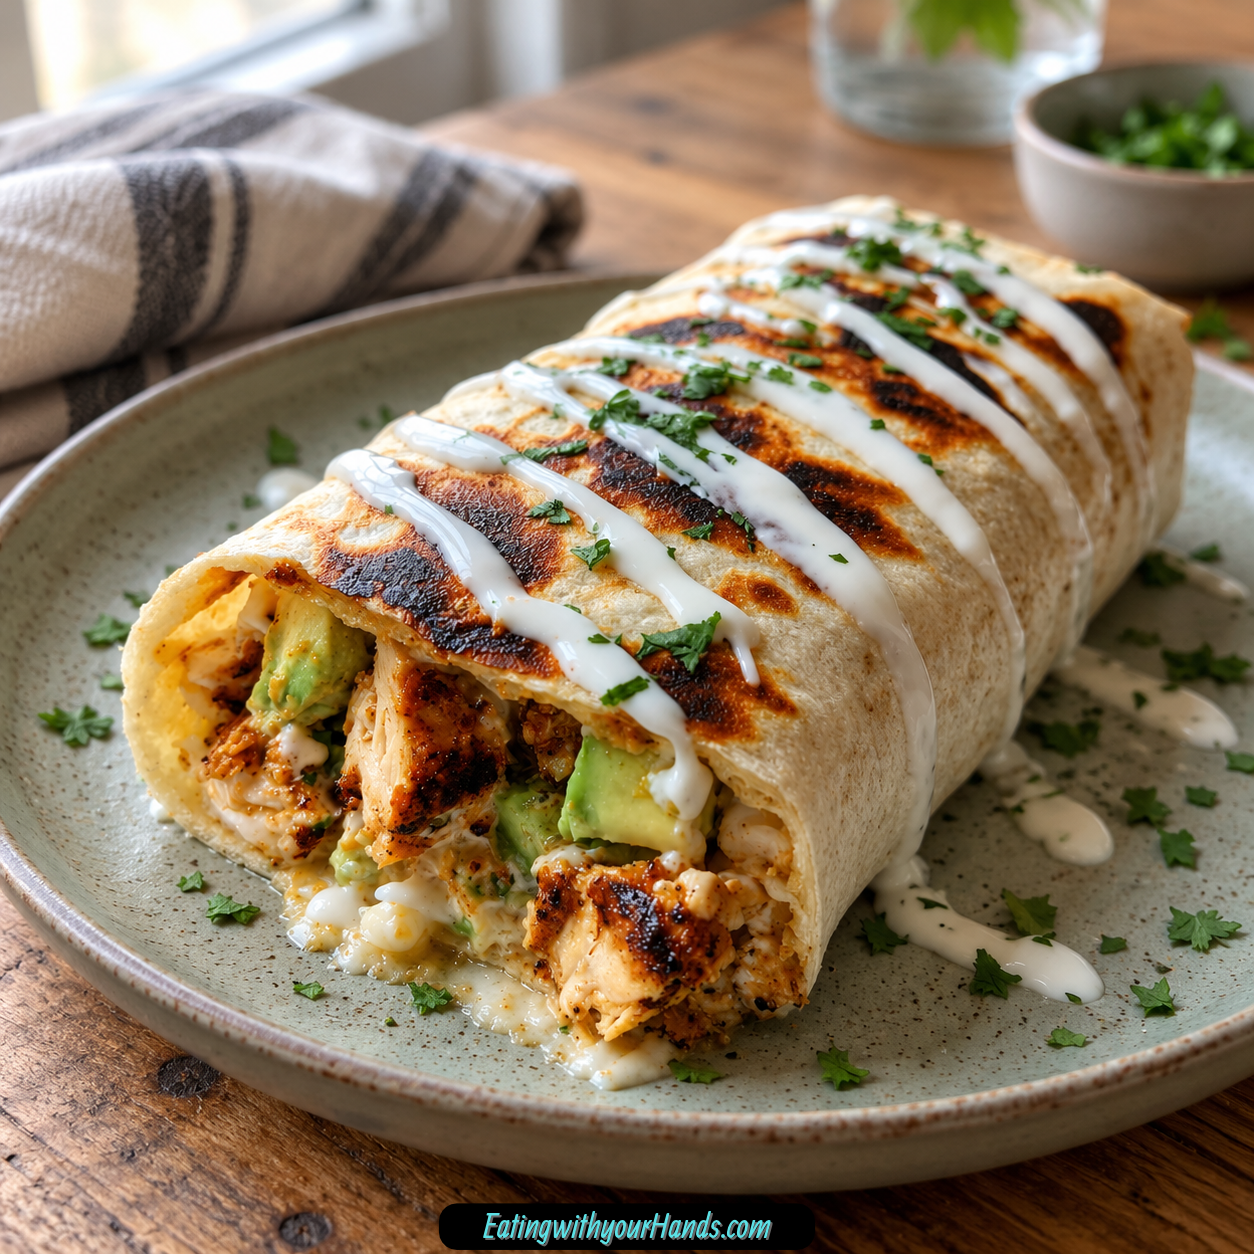

Some weeknights call for a dinner that feels homemade without asking you to spend the entire evening standing over the stove. These Chicken and Avocado Ranch Burritos are exactly that kind of meal, wrapping juicy taco-seasoned chicken, creamy avocado, mozzarella, sour cream, ranch dressing, and cilantro inside warm flour tortillas.
I started making them on one of those hectic nights when everyone was hungry and I needed dinner to happen quickly. The first batch disappeared so fast that my kids immediately asked whether we could have the same thing every night.
That reaction probably says more about these burritos than any long description could. They are creamy, savory, a little spicy, wonderfully messy, and ready in about 25 minutes from start to finish.
Chicken thighs are the foundation because they stay juicy while picking up all the flavor from taco seasoning. The avocado cools everything down, ranch adds its tangy creaminess, and mozzarella melts into the warm filling without overpowering the other ingredients.
Then there is the tortilla, which might seem like a small detail until you try rolling one cold. Warming it first makes the entire assembly easier and gives you that soft, flexible wrap that folds neatly around the filling instead of cracking at the edges.
I also love how forgiving this recipe is. Chicken breast, rotisserie chicken, shrimp, pepper jack, Greek yogurt, spinach wraps, low-carb tortillas, lettuce, jalapeños, roasted peppers, cabbage, and even a vegetarian filling can all take the burrito in a different direction.
For me, though, the original combination remains the one I return to most often. A warm tortilla, juicy chicken, ripe avocado, mozzarella, sour cream, ranch, and cilantro somehow manages to taste comforting and fresh at the same time.
That balance is what makes these burritos such an easy weeknight favorite. They feel indulgent enough to look forward to, but they are still practical enough to make when dinner needs to be on the table fast.
Table of Contents
- Why You’ll Love These Chicken and Avocado Ranch Burritos
- Ingredients for Chicken and Avocado Ranch Burritos
- Why Chicken Thighs Work So Well
- Taco Seasoning Brings the Bold Flavor
- Why Avocado Matters
- Ranch Dressing Ties Everything Together
- Mozzarella Keeps the Cheese Mild and Creamy
- Sour Cream Adds Another Creamy Layer
- Cilantro Brings Freshness
- How to Make Chicken and Avocado Ranch Burritos
- Step 1: Cut and Season the Chicken
- Step 2: Heat the Olive Oil
- Step 3: Cook the Chicken in a Single Layer
- Step 4: Prepare the Avocado and Fresh Ingredients
- Step 5: Warm the Tortillas
- Step 6: Spread the Ranch
- Step 7: Add the Cheese
- Step 8: Add the Chicken and Avocado
- Step 9: Add Sour Cream and Cilantro
- Step 10: Fold the Sides In
- Step 11: Toast the Burritos if Desired
- Step 12: Serve While Warm
- How to Keep the Chicken Juicy
- Why Warm Tortillas Make Better Burritos
- How to Keep Avocado Fresh
- Chicken Breast Variation
- Rotisserie Chicken Variation
- Shrimp Variation
- Pepper Jack Variation
- Greek Yogurt Variation
- Blue Cheese Dressing Variation
- Spinach Wrap Variation
- Low-Carb Tortilla Variation
- Lettuce Wrap Version
- Pickled Jalapeño Variation
- Roasted Red Pepper Variation
- Cabbage Variation
- Making the Burritos Spicier
- Vegetarian Variation
- Serving With Cilantro Lime Rice
- Serving With Charro Beans
- Street Corn Salad on the Side
- Lighter Side Options
- Meal Prep Ideas
- Refrigerator Storage
- Freezing Burritos
- Microwave Reheating
- Skillet Reheating
- Oven Reheating
- Frequently Asked Questions
- Nutritional Information
- The 25-Minute Dinner That Keeps Coming Back
- Juicy Chicken and Avocado Ranch Burritos in 25 Minutes
Why You’ll Love These Chicken and Avocado Ranch Burritos
The speed is the first obvious reason. From the moment you start seasoning the chicken to the point when the burritos are rolled and ready, the entire meal can come together in about 25 minutes.
The flavor also feels much bigger than the short ingredient list suggests. Taco seasoning gives the chicken warmth and spice, while avocado, ranch, sour cream, and mozzarella create a cool, creamy contrast.
Texture plays a major role too. Tender chicken, soft avocado, melted cheese, creamy dressing, fresh cilantro, and a warm tortilla make each bite feel complete.
The recipe is also highly adaptable. You can swap proteins, dairy ingredients, tortillas, or vegetables depending on what is already in your refrigerator.
It is especially useful for families because the heat level is easy to control. The standard version stays approachable, while jalapeños, spicy ranch, cayenne, or hot taco seasoning can make individual burritos much bolder.
And because the filling is easy to portion, the same recipe can work for dinner, lunch, meal prep, or a party platter. Slice the burritos diagonally for serving, or keep them whole when you want something quick and portable.
Ingredients for Chicken and Avocado Ranch Burritos
The ingredient list is straightforward, but each part brings something important. The chicken provides the savory center, while avocado, dairy, and ranch create the creamy balance that makes the burrito especially satisfying.
- 1 pound boneless, skinless chicken thighs, cut into 1-inch chunks
- 1 1.25-ounce package taco seasoning, or 2½ tablespoons homemade taco seasoning
- 1 tablespoon olive oil
- 4 burrito-size flour tortillas, 10 inches each
- 2 ripe avocados, halved, peeled, seeded, and diced
- 1 cup shredded mozzarella cheese
- ¼ cup sour cream
- ¼ cup ranch dressing
- ¼ cup chopped fresh cilantro leaves
Chicken thighs are the preferred choice because they stay juicy during the quick skillet cooking. Chicken breast can be used too, but the cooking time should be shortened slightly.
Ripe avocados should give a little when gently squeezed. Dice them close to assembly time so they stay fresh-looking and creamy.
Why Chicken Thighs Work So Well
Boneless, skinless chicken thighs bring moisture and richness to the filling. Cutting them into 1-inch chunks helps the pieces cook quickly and evenly.
The taco seasoning coats all of those small surfaces, so flavor reaches every bite. Cooking the chicken in chunks also makes it easier to distribute evenly among four tortillas.
Thigh meat is forgiving in a hot skillet. It stays juicy even when the edges develop a little golden color.
That makes it especially useful for a fast burrito filling. The meat should be fully cooked but still tender enough to stay pleasant once wrapped with the other ingredients.
Taco Seasoning Brings the Bold Flavor
One 1.25-ounce packet of taco seasoning seasons the full pound of chicken. If using homemade seasoning, 2½ tablespoons is the listed amount.
Toss the chicken thoroughly before it reaches the skillet. Every chunk should have seasoning on the outside rather than leaving some heavily coated and others plain.
The seasoning gives the burrito most of its warm, savory spice. The creamy ingredients then soften and balance those flavors.
This is also where the recipe becomes easy to customize. A hotter taco seasoning can make the burritos spicier without changing the rest of the method.
Why Avocado Matters
Two ripe avocados add richness without needing another cooked component. Their soft texture contrasts with the browned chicken and keeps the filling from feeling dry.
Dice them just before assembly whenever possible. Avocado darkens when it sits exposed for too long.
If you need to prepare it ahead, a little lime juice can help slow visible browning. The advance-prep window is about 12 hours before noticeable browning becomes more likely.
Avocado also helps cool the seasoned chicken. That hot-and-creamy contrast is one of the most enjoyable parts of the burrito.
Ranch Dressing Ties Everything Together
A quarter cup ranch dressing adds tang and moisture. Using about 1 tablespoon per tortilla spreads the flavor evenly across all four burritos.
Hidden Valley original mix prepared with buttermilk is one preferred option. The important thing is that ranch remains a noticeable part of the filling rather than disappearing completely.
Spreading it directly on the tortilla also helps distribute it from the first bite to the last. It acts almost like a creamy base underneath the other ingredients.
If you prefer more heat, spicy ranch can take its place. Blue cheese dressing is another option for a stronger, more grown-up flavor.
Mozzarella Keeps the Cheese Mild and Creamy
One cup shredded mozzarella gives the burritos a soft, melty cheese layer. Its mild flavor allows the ranch, avocado, and taco seasoning to remain prominent.
For extra melt, scatter the cheese directly onto the warm tortilla before adding the other fillings. The heat of the tortilla begins softening it immediately.
Pepper jack can replace mozzarella when you want additional spice. This is an easy switch because the rest of the filling can stay the same.
Keep the cheese distributed rather than piling most of it in one section. A balanced burrito is much easier to roll and more enjoyable to eat.
Sour Cream Adds Another Creamy Layer
A quarter cup sour cream gives the filling even more richness. A small dollop inside each tortilla is enough.
Full-fat sour cream creates the richest version. Greek yogurt can replace it if needed.
When using Greek yogurt, thin it with a small splash of milk first. That keeps its consistency closer to the sour cream it is replacing.
The tangy dairy works naturally with ranch and avocado. Together, those creamy elements keep the taco-seasoned chicken from feeling too intense.
Cilantro Brings Freshness
A quarter cup chopped fresh cilantro leaves finishes the standard filling. It adds a fresh herbal note among the richer ingredients.
If cilantro is not your preference, simply omit it. The burritos still have plenty of flavor from the remaining ingredients.
Sprinkle the cilantro over the filling before rolling. Spreading it out keeps any one bite from becoming overly herb-heavy.
Fresh cilantro also works well in several of the suggested side dishes. It can carry the same flavor into rice or pico de gallo.
How to Make Chicken and Avocado Ranch Burritos
The process moves quickly, so having the ingredients prepared before cooking makes assembly much easier. Season the chicken first, warm the tortillas while it cooks, then build the burritos while everything is still warm.
Step 1: Cut and Season the Chicken
Cut the 1 pound chicken thighs into approximately 1-inch chunks. Try to keep the pieces similar in size so they finish cooking at roughly the same time.
Place the chicken in a bowl and add the full 1.25-ounce packet taco seasoning, or 2½ tablespoons homemade seasoning. Toss until every piece is thoroughly coated.
Do not leave large patches of unseasoned chicken. The seasoning should form an even layer around the chunks before they reach the skillet.
Set the seasoned chicken nearby. The skillet can begin heating while you finish preparing the remaining ingredients.
Step 2: Heat the Olive Oil
Place a large skillet over medium-high heat. Add 1 tablespoon olive oil.
Let the oil heat until it begins to shimmer. That signals the pan is hot enough for the chicken.
Avoid putting the chicken into a cold skillet. Starting with properly heated oil helps the outside cook quickly.
Keep the chicken close by because the next step begins as soon as the oil is ready. The cooking time is only several minutes.
Step 3: Cook the Chicken in a Single Layer
Add the seasoned chicken to the hot skillet. Spread the pieces into a single layer rather than piling them on top of one another.
Cook for approximately 6–8 minutes, turning occasionally. The chicken is ready when there is no pink remaining and the edges have developed a golden-brown appearance.
Avoid crowding the pan if possible. Giving the chunks room helps them brown instead of simply steaming together.
Keep watching toward the end because chicken thighs can cook quickly at this size. Once fully cooked, remove the skillet from the heat.
Step 4: Prepare the Avocado and Fresh Ingredients
While the chicken cooks, halve, peel, seed, and dice the 2 ripe avocados. Wait until this stage rather than chopping them much earlier.
Chop enough fresh cilantro leaves to make ¼ cup. Keep the cilantro ready beside the avocado for assembly.
If using any optional additions such as jalapeños, roasted red peppers, or cabbage, prepare them now. Having everything lined up makes rolling much easier.
Keep the avocado pieces fairly distinct rather than mashing them. The chunks provide a creamy texture throughout the burrito.
Step 5: Warm the Tortillas
Warm the 10-inch flour tortillas one at a time in a dry skillet for about 15 seconds per side. This makes them softer and more flexible.
Another option is to place them between damp paper towels and microwave for about 30 seconds. The steam keeps the tortillas pliable.
Cold tortillas are more likely to crack during rolling. A warm tortilla bends around the filling instead of fighting against it.
Keep the warmed tortillas covered or work quickly. You want them soft during the assembly stage.
Step 6: Spread the Ranch
Lay one warm tortilla flat on your work surface. Spread about 1 tablespoon ranch dressing slightly off-center.
Repeat with the remaining tortillas. Using the ranch as the first layer distributes the creamy flavor underneath the filling.
Do not spread the dressing all the way to the edges. Leaving room around the border makes folding much easier.
Keep the filling area slightly below the center of the tortilla. That gives you enough tortilla above it to complete the roll.
Step 7: Add the Cheese
Sprinkle a portion of the shredded mozzarella over the warm tortilla. Putting the cheese down early allows the residual heat to begin softening it.
Divide the full 1 cup mozzarella reasonably evenly among the four burritos. Avoid concentrating most of the cheese in one wrap.
If using pepper jack instead, add it at the same point. Either cheese should stay close to the central filling line.
Do not spread cheese all the way to the edges. Keeping the border clear helps produce a tighter roll.
Step 8: Add the Chicken and Avocado
Spoon a portion of the cooked chicken over the cheese. Keep the chicken in a compact line rather than spreading it across the entire tortilla.
Add diced avocado over and around the chicken. Divide the 2 avocados across the four burritos as evenly as practical.
Avoid overfilling even if the ingredients look tempting. A burrito that is too full becomes harder to close.
Keep the filling slightly off-center. This positioning makes the first fold much easier.
Step 9: Add Sour Cream and Cilantro
Add a small dollop of sour cream to each burrito. Divide the ¼ cup across the four tortillas.
Sprinkle chopped cilantro over the filling. Use as much of the prepared ¼ cup as fits your preference.
At this stage, each tortilla should have ranch, cheese, chicken, avocado, sour cream, and cilantro. Keep all of those ingredients concentrated in the central area.
Take a moment to check the filling volume before rolling. If it looks too high, spread it slightly lengthwise instead of adding width.
Step 10: Fold the Sides In
Fold the left and right sides of the tortilla inward over the filling. This creates the closed ends of the burrito.
Hold those folds gently in place while bringing the lower edge of the tortilla up and over the filling. Tuck the filling inward as you begin rolling.
The goal is to keep everything contained without crushing the avocado. Firm pressure works better than aggressive squeezing.
Once the filling is enclosed, continue rolling away from you. Finish with the seam underneath.
Step 11: Toast the Burritos if Desired
For extra crunch, place a clean skillet over medium heat. Set the burritos seam-side down in the pan.
Toast for about 1–2 minutes until the bottom becomes golden. This also helps seal the seam.
Turn carefully if you want more color on another side. Remember that the filling becomes hotter as the burrito sits in the skillet.
This step is optional. The burritos can also be served immediately after rolling.
Step 12: Serve While Warm
Transfer the finished burritos to plates. Serve them whole or slice them diagonally.
If serving at a party, toothpicks can hold diagonal pieces together on a platter. The colorful chicken, avocado, cheese, and cilantro will be visible through the cut side.
Bring the burritos to the table while the chicken and cheese are still warm. The contrast with the cool avocado and ranch is best at this point.
Serve any chosen sides separately. The burrito itself is already complete enough to stand alone.

How to Keep the Chicken Juicy
Chicken thighs are naturally well suited to this recipe because they stay moist during skillet cooking. Still, the 1-inch pieces should not stay over the heat longer than necessary.
Cook until the chicken has no pink left and shows golden-brown edges. Once it reaches that point, move forward with assembly.
Chicken breast can be used, but reduce the cooking time by about 1–2 minutes. Breast meat dries faster than thighs.
The small size of the pieces means they cook rapidly. Stay close to the skillet rather than treating this like a long simmering recipe.
Why Warm Tortillas Make Better Burritos
A refrigerated or room-temperature tortilla can be stiff enough to split when folded. Warmth makes it softer and easier to wrap tightly.
The dry-skillet method takes about 15 seconds per side. The damp-paper-towel microwave method takes around 30 seconds.
For the microwave method, warming tortillas one at a time gives the most even result. A large stack can heat less consistently.
Do not overheat them until they become dry. You simply want a soft, flexible wrapper.
How to Keep Avocado Fresh
Dice avocado as close to assembly as possible. This is the easiest way to preserve its color and fresh appearance.
If you must prep the avocado early, add a little lime juice. This can give you roughly 12 hours before noticeable browning becomes more likely.
For longer meal prep, assemble the burritos without avocado and add fresh avocado before eating. This gives you the freshest color and texture.
Slight darkening during storage is normal. It does not automatically mean the avocado has become unusable.
Chicken Breast Variation
Boneless chicken breast can replace the thighs. Cut it into similar 1-inch chunks.
Season it with the same taco seasoning. Cook it in the olive oil using the same skillet method.
Reduce the cooking time by about 1–2 minutes. Chicken breast tends to dry out faster.
Once the meat is cooked through, assemble the burritos exactly as usual. Avocado and ranch still provide the creamy contrast.
Rotisserie Chicken Variation
Leftover rotisserie chicken makes the recipe even faster. Shred the chicken rather than cutting raw meat into chunks.
Toss it with a little taco seasoning and olive oil. Warm it through before assembling the burritos.
Because the meat is already cooked, there is no need for the original 6–8 minute raw-chicken cooking stage. The goal is simply to warm and season it.
This option is especially useful on very busy evenings. Everything else in the burrito can stay the same.
Shrimp Variation
Peeled shrimp can replace the chicken. Toss the shrimp with taco seasoning and let it marinate for about 15 minutes.
Sauté the shrimp for about 2 minutes. The cooking stage is much shorter than it is for chicken.
Combine the cooked shrimp with avocado, cheese, sour cream, ranch, and cilantro. Roll the tortillas the same way.
The result feels lighter but still keeps the creamy-spicy balance. Ranch and avocado continue to tie the filling together.
Pepper Jack Variation
Pepper jack cheese can replace mozzarella. This gives the burritos more spice without adding a separate ingredient.
Sprinkle it over the warm tortilla before the other fillings. The residual heat starts softening it just as it does with mozzarella.
This variation works especially well for people who enjoy a hotter burrito. It can also be paired with jalapeños for even more heat.
Keep the amount at 1 cup for the full batch. Divide it evenly among the four tortillas.
Greek Yogurt Variation
Plain Greek yogurt can replace sour cream. Thin it with a small splash of milk before using.
The yogurt adds tang while keeping the creamy role of sour cream. It can also contribute extra protein.
Add it as a small dollop during assembly. Do not spread so much that the burrito becomes overly wet.
Ranch and avocado remain in the filling. The yogurt is simply replacing one creamy component.
Blue Cheese Dressing Variation
Blue cheese dressing can replace ranch for a stronger flavor. This creates a more pronounced, adult-oriented version.
Spread it onto the tortilla in the same way. Keep the amount at about 1 tablespoon per burrito within the ¼ cup total.
The flavor is much bolder than ranch. Mozzarella can remain mild to let the dressing stand out.
Avocado still helps soften the stronger taste. The overall texture remains creamy and rich.
Spinach Wrap Variation
Spinach wraps can replace the flour tortillas. Their color gives the burritos a noticeably different appearance.
Warm them before rolling just as you would regular tortillas. Flexibility is still important for keeping the wrap intact.
The filling does not need to change. Chicken, avocado, ranch, mozzarella, sour cream, and cilantro all work the same way.
This is a simple way to vary the presentation. Kids may notice the color more than any major flavor difference.
Low-Carb Tortilla Variation
Low-carb tortillas can also be used. Warm them especially gently because they may tear more easily.
Keep the filling slightly compact when rolling. Avoid forcing too much chicken or avocado into one tortilla.
Fold the sides carefully before rolling forward. Gentle handling matters more than speed.
The filling remains unchanged unless you choose other substitutions. This version simply alters the wrapper.
Lettuce Wrap Version
Large butter lettuce leaves can replace tortillas for a keto-style option. The final result is much lighter and more delicate.
Use the lettuce leaves as the vessel for the filling rather than trying to roll them exactly like flour tortillas. Add chicken, avocado, ranch, cheese, sour cream, and cilantro in manageable portions.
Because lettuce is more fragile, smaller servings are easier to handle. The filling should not be piled too high.
Serve immediately. Lettuce does not have the same structure as a warmed flour tortilla.
Pickled Jalapeño Variation
Pickled jalapeños add heat and acidity. Scatter them over the filling before rolling.
They work especially well with ranch and avocado. The creamy ingredients keep the spice from overwhelming the burrito.
Use as much as fits your heat preference. This is one of the easiest ways to customize individual burritos.
Keep them optional when serving a family with different spice tolerances. A small bowl at the table works well.
Roasted Red Pepper Variation
Diced roasted red peppers add sweetness and color. Their soft texture fits easily among the chicken and avocado.
Add them during assembly after the chicken. Spread them evenly rather than piling them in one section.
This variation is more sweet than spicy. It works especially well when you want additional vegetables without adding heat.
Keep the pieces relatively small. That makes rolling easier.
Cabbage Variation
Thinly sliced cabbage adds a crisp texture. Bagged coleslaw mix is an easy shortcut.
Scatter a small amount over the filling before rolling. Its crunch contrasts nicely with avocado and sour cream.
Cabbage works especially well if you prefer more texture in every bite. It also holds up better than some softer vegetables.
Do not overfill the tortilla with it. A little is enough to make the contrast noticeable.
Making the Burritos Spicier
Hot taco seasoning can replace a milder blend. This increases the heat directly in the chicken.
Pickled or fresh diced jalapeños can also be added. Spicy ranch is another easy option.
A dash of cayenne can be mixed into the sour cream. This spreads the heat through one of the creamy components.
Start with one change rather than using every spicy addition at once. More heat can always be added later.
Vegetarian Variation
Black beans and roasted sweet potatoes can replace the chicken. Mash the beans slightly for a better filling texture.
Add extra avocado for more creaminess. Keep the ranch dressing as the element that ties everything together.
Assemble the burritos using the same warm tortillas and rolling technique. The result has a completely different center but keeps the creamy structure.
This version works even for people who normally prefer meat-based burritos. The familiar ranch and avocado flavors keep it satisfying.
Serving With Cilantro Lime Rice
Cilantro lime rice makes a natural side. Cook rice with a splash of lime juice and toss with chopped cilantro before serving.
The fresh citrus-herb flavor works alongside the creamy burrito. It also gives the meal a more complete restaurant-style feel.
Serve the rice on the side rather than inside unless you intentionally want a larger burrito. The original filling is already generous.
Keep the rice warm when serving. The burrito and rice together make a hearty dinner.
Serving With Charro Beans
Canned pinto beans can be simmered with bacon, garlic, and a pinch of cumin for an easy side. Their savory flavor works well beside the taco-seasoned chicken.
Serve the beans in a separate bowl or beside the burrito. This keeps the tortilla from becoming overloaded.
The beans are especially good when you want a more substantial plate. They also fit naturally with the other flavors.
Keep the burrito itself unchanged. The side simply adds another warm component.
Street Corn Salad on the Side
A simple street corn salad can be made with thawed frozen corn, mayo, cotija cheese, and chili powder. Its creamy-spicy flavor works naturally with the burritos.
Serve it chilled or cool beside the warm wraps. The corn adds sweetness and another texture.
This pairing is especially useful for summer gatherings. It feels casual and festive without requiring another complicated main dish.
Keep the serving portions moderate. The burritos are already rich and filling.
Lighter Side Options
A simple green salad with lime vinaigrette gives the meal a fresher direction. The dressing can be made from lime juice, olive oil, and salt.
Pico de gallo is another easy option. Tomatoes, onions, and cilantro bring freshness without adding another creamy element.
Sliced watermelon also works well on hot days. Its sweet juiciness contrasts nicely with the ranch and taco seasoning.
These lighter sides are useful when the burritos themselves feel rich enough. They brighten the plate without competing with the main flavors.
Meal Prep Ideas
The burritos can be individually wrapped for easy lunches. One meal-prep approach keeps them refrigerated for up to 3 days.
For the freshest avocado, leave it out during advance assembly and add it immediately before eating. This prevents the filling from darkening as quickly.
Another option is to pack the components separately and assemble burrito bowls at work or school. This keeps the textures more distinct.
Deconstructed bowls are especially useful when reheating chicken separately. Fresh avocado, ranch, cheese, and cilantro can be added after warming.
Refrigerator Storage
For assembled burritos containing avocado, wrap each cooled burrito tightly in aluminum foil. Refrigerate for up to about 2 days for the best avocado quality.
Keep the burritos sealed to reduce drying. Writing the storage date on the foil can make tracking easier.
The avocado may darken slightly during refrigeration. Some color change is normal.
If you know you will store them longer, keeping avocado separate is the better meal-prep strategy. Add it fresh when you are ready to eat.
Freezing Burritos
For longer storage, wrap the burritos tightly for freezer protection and place them in a freezer bag. They can be frozen for up to 3 months.
Transfer a frozen burrito to the refrigerator the night before you plan to eat it. Let it thaw gradually overnight.
Avocado may change somewhat during storage and reheating. For the freshest result, it can be kept out and added after warming.
Freezing is especially useful when preparing several burritos at once. Individual wrapping allows you to remove only what you need.
Microwave Reheating
Unwrap the burrito and place it on a microwave-safe plate. Drape a damp paper towel over the top.
Microwave for 1 minute. Flip the burrito and continue for another 30 seconds.
The damp towel helps the tortilla remain soft instead of drying out. Check the filling before eating because the center can become very hot.
Serve immediately once warmed through. Add fresh avocado afterward if you stored it separately.
Skillet Reheating
For a crisp exterior, place the unwrapped burrito in a dry skillet over medium heat. Toast for about 2–3 minutes per side.
The tortilla will regain some crispness while the filling heats inside. Turn carefully so the seam stays closed.
This method is particularly good for day-old burritos. It gives the tortilla more character than microwave reheating.
Watch the heat so the exterior does not burn before the center warms. Medium heat is enough.
Oven Reheating
Preheat the oven to 350°F. Wrap a thawed burrito in fresh foil and bake for about 15 minutes.
A frozen burrito can be heated for about 25 minutes. Keep it wrapped during heating.
This method works well when reheating several burritos for a group. The foil helps protect the tortilla from drying.
Check that the center is hot before serving. Unwrap carefully because steam can escape.
Frequently Asked Questions
Can I Use Chicken Breast Instead of Thighs?
Yes. Chicken breast can replace the thighs.
Cut it into 1-inch pieces and cook it with the same taco seasoning. Reduce the skillet time by about 1–2 minutes because breast meat dries out faster.
How Can I Make the Burritos Spicier?
Use hot taco seasoning instead of mild. Pickled or fresh jalapeños can also be added.
Spicy ranch or a dash of cayenne in the sour cream creates another layer of heat. Start with one change and add more only if needed.
Can I Prepare the Burritos Ahead Without Browning the Avocado?
The easiest approach is to assemble everything except the avocado. Add freshly diced avocado right before eating.
If the avocado must be included ahead of time, toss it with a little lime juice. This can delay noticeable browning for about 12 hours.
What’s the Best Way to Warm Tortillas?
Microwaving tortillas between damp paper towels for about 30 seconds makes them soft and flexible. Warm them one at a time for the most even result.
A dry skillet also works. Heat each tortilla for approximately 15 seconds per side.
Can I Make These Vegetarian?
Yes. Use slightly mashed black beans and roasted sweet potatoes in place of the chicken.
Add extra avocado for creaminess. Keep the ranch dressing to bring the filling together.
Can I Use Rotisserie Chicken?
Yes. Shred leftover rotisserie chicken and toss it with some taco seasoning and olive oil.
Warm it through before filling the tortillas. This makes the recipe even faster.
Can I Freeze the Burritos?
Yes. Wrap them securely and place them in a freezer bag for up to 3 months.
Thaw overnight in the refrigerator before reheating when possible. Fresh avocado can be added after warming for a better texture.
Can I Use Low-Carb Tortillas?
Yes. Warm them carefully because they may tear more easily.
Use the same filling but avoid overstuffing. Gentle rolling helps keep them intact.
Nutritional Information
One loaded Chicken and Avocado Ranch Burrito contains approximately 450 calories. Each burrito also provides about 28g protein and 30g carbohydrates.
Fiber is approximately 6g per serving. Unsaturated fat is around 14g, with avocado and olive oil contributing to that amount.
The exact values can change depending on the tortillas, cheese, dressing, avocado size, and any substitutions. Extra cheese, alternate dressings, or larger portions will naturally change the final numbers.
Avocado is one of the more variable ingredients because individual fruits can differ significantly in size. Measuring your portion can make the estimate more consistent when close tracking matters.
The 25-Minute Dinner That Keeps Coming Back
I have plenty of fast dinners that solve a scheduling problem, but not all of them become meals my family actually asks for again. These burritos earned that distinction almost immediately.
I think it comes down to how many comforting textures fit inside one tortilla. The chicken is hot and seasoned, the avocado is cool and creamy, the ranch is tangy, and the mozzarella softens into everything around it.
There is also no single complicated component holding the recipe together. Everything is familiar, which makes the final combination feel easy rather than fussy.
The first time my kids asked whether we could have them every night, I laughed because I knew exactly what they meant. There is something about a warm burrito filled with creamy avocado and ranch that makes dinner feel more exciting than the effort involved.
These days, I change the recipe depending on what is available. Rotisserie chicken makes it almost effortless, pepper jack adds heat, and a little cabbage gives the filling extra crunch.
Other times I do not change a thing. Chicken thighs, taco seasoning, avocado, mozzarella, sour cream, ranch, cilantro, and a warm flour tortilla are already enough.
I also appreciate how easily the recipe shifts between dinner and meal prep. Whole burritos work for a quick evening meal, diagonal slices look great on a party platter, and separate components can become an easy lunch bowl.
Even the reheating options are flexible. The microwave keeps things fast, the skillet brings back a crisp exterior, and the oven works well when several burritos need to be warmed together.
But fresh from the skillet is still my favorite moment. The tortilla is warm, the chicken is juicy, the cheese is beginning to melt, and the avocado and ranch keep everything creamy without weighing it down.
That is why Chicken and Avocado Ranch Burritos continue to show up in my kitchen week after week. They deliver the kind of dinner that tastes like more effort than it requires, which is exactly the kind of weeknight magic I never get tired of.
Juicy Chicken and Avocado Ranch Burritos in 25 Minutes

Juicy seasoned chicken, creamy avocado, melty mozzarella, sour cream, Ranch dressing, and fresh cilantro come together inside warm flour tortillas for an easy and satisfying burrito. Ready in just 25 minutes, these Chicken and Avocado Ranch Burritos make a quick American-style main course with plenty of creamy, savory flavor.
Recipe Details
- Prep Time: 10 minutes
- Cook Time: 15 minutes
- Total Time: 25 minutes
- Course: Main Course
- Cuisine: American
- Servings: 4 burritos
- Calories: 450 kcal
Ingredients
For the Chicken
- 1 pound boneless skinless chicken thighs, cut into 1-inch chunks
- 1 1.25-ounce package taco seasoning
- 1 tablespoon olive oil
For the Burritos
- 4 burrito-size flour tortillas, 10 inches each
- 2 avocados halved, peeled, seeded and diced
- 1 cup shredded mozzarella cheese
- ¼ cup sour cream
- ¼ cup Ranch dressing
- ¼ cup chopped fresh cilantro leaves
Instructions
Step 1: Season the Chicken
Place the chicken thigh pieces in a bowl and add the taco seasoning.
Toss until the 1-inch chicken chunks are evenly coated.
Step 2: Cook the Chicken
Heat the olive oil in a pan.
Add the seasoned chicken and cook until done.
Step 3: Warm the Tortillas
Warm the flour tortillas until soft and flexible.
Keep them ready for filling once the chicken has finished cooking.
Step 4: Add the Chicken and Avocado
Divide the cooked chicken among the 4 tortillas.
Top each tortilla with diced avocado.
Step 5: Add the Creamy Fillings
Add the shredded mozzarella cheese, sour cream, and Ranch dressing.
Finish with the chopped fresh cilantro leaves.
Step 6: Roll the Burritos
Fold and roll each filled tortilla into a burrito.
Keep the filling tucked securely inside as you roll.
Step 7: Serve
Serve the burritos once assembled.
Enjoy while the chicken is warm and the avocado and creamy fillings are fresh.
Notes
- Use fresh ingredients for the best flavor.
- Adjust seasoning to taste.
Serving Suggestions
Serve Juicy Chicken and Avocado Ranch Burritos soon after assembling for a satisfying combination of warm seasoned chicken and cool, creamy fillings. The avocado, sour cream, Ranch dressing, mozzarella, and cilantro give each burrito plenty of texture and flavor.
This recipe makes 4 burritos and works well as a quick lunch or easy main course. Warm tortillas make them easier to roll around the generous filling.
Adjust the seasoning to suit your preferred flavor level.
Storage
For the best texture, keep the cooked chicken and fresh burrito fillings separate until ready to assemble.
Chicken Tip
Use 1 pound boneless skinless chicken thighs cut into 1-inch chunks.
Season them with one 1.25-ounce package taco seasoning before cooking.
Tortilla Tip
Use 4 burrito-size flour tortillas, each about 10 inches.
Warm them before filling so they roll more easily.
Avocado Tip
Use 2 avocados, halved, peeled, seeded and diced.
Cheese Tip
Add 1 cup shredded mozzarella cheese across the 4 burritos.
Ranch Tip
Use ¼ cup Ranch dressing for the creamy filling.
Sour Cream Tip
Add ¼ cup sour cream along with the Ranch dressing.
Cilantro Tip
Use ¼ cup chopped fresh cilantro leaves.
Serving Tip
Roll the filled tortillas into burritos and serve.

Fernando is the creator and writer behind the food blog Eating with your Hands. Living and working in cities like Paris, Barcelona, and Berlin, and being married to a Canadian foodie, has given Fernando a passion and interest in food and inspired him to run EWYH.