
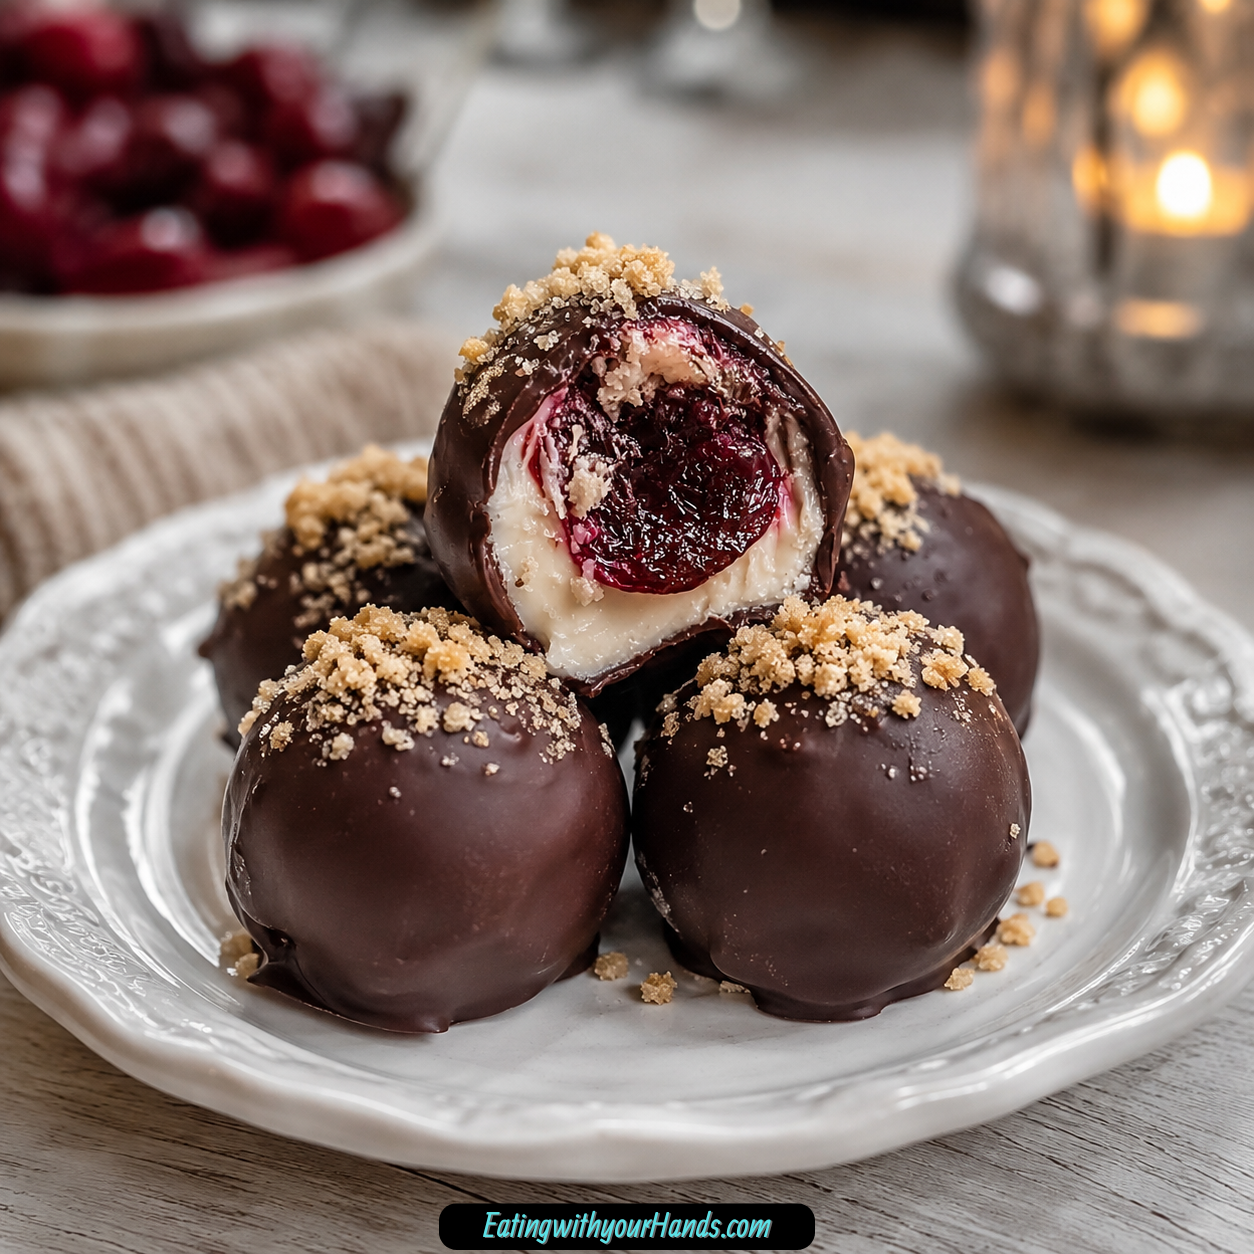
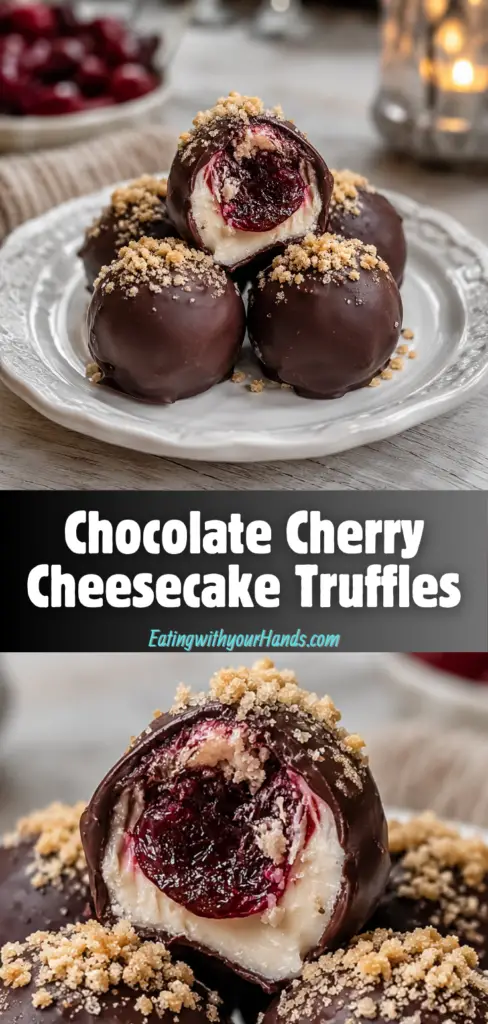
Chocolate Cherry Cheesecake Truffles are the kind of little dessert that feels far more special than the short ingredient list suggests. Each bite brings together creamy cheesecake filling, sweet powdered sugar, vanilla, chopped cherries, optional graham cracker texture, and a smooth chocolate coating that makes the truffles feel like a tiny celebration.
There is something deeply nostalgic about a homemade candy-style treat waiting in the refrigerator. It reminds me of kitchens where chocolate was melted slowly, bowls were scraped clean with a spoon, and someone always seemed to have a sweet surprise ready before the day ended.
These truffles carry that same feeling in a simple, no-bake form. The cream cheese filling is soft and rich, the cherries add tart fruitiness, and the chocolate shell gives each piece a satisfying finish.
They are perfect for holidays, family gatherings, dessert trays, parties, or a quiet afternoon treat with coffee or tea. Because they can be made ahead and stored in the refrigerator or freezer, they are also wonderfully convenient for busy seasons.
The flavor sits somewhere between cheesecake, chocolate-covered cherries, and a bite-sized candy. It is creamy, fruity, rich, and smooth, with the option of graham cracker crumbs for a little extra texture.
Chocolate Cherry Cheesecake Truffles are ready in just 30 minutes, which makes them especially appealing when you want a pretty dessert without baking. They look elegant on a platter but stay simple enough to make in an ordinary kitchen.
Table of Contents
- Why You’ll Love These Chocolate Cherry Cheesecake Truffles
- Recipe Details
- Ingredients
- Ingredient Notes
- Optional Swaps, Variations, Add-Ins, and Serving Ideas
- Why This Recipe Works
- Directions
- Step 1: Soften the Cream Cheese
- Step 2: Prepare the Mixing Bowl
- Step 3: Add the Cream Cheese
- Step 4: Add the Powdered Sugar
- Step 5: Add the Vanilla Extract
- Step 6: Mix Until Smooth
- Step 7: Chop the Dried Cherries
- Step 8: Prepare Fresh Cherries If Using
- Step 9: Add the Cherries
- Step 10: Add Graham Crackers If Desired
- Step 11: Mix the Filling Completely
- Step 12: Cover the Bowl
- Step 13: Chill the Filling
- Step 14: Prepare the Tray
- Step 15: Scoop the Filling
- Step 16: Roll Into Balls
- Step 17: Place on the Tray
- Step 18: Set Up the Double Boiler
- Step 19: Melt the Chocolate
- Step 20: Use the Microwave Option If Needed
- Step 21: Dip the First Truffle
- Step 22: Remove Excess Chocolate
- Step 23: Return to the Tray
- Step 24: Coat the Remaining Truffles
- Step 25: Add Toppings Before the Chocolate Sets
- Step 26: Let the Chocolate Harden
- Step 27: Serve Chilled
- Serving Ideas
- Storage
- Freezing
- Make-Ahead
- Helpful Notes for Best Results
- Variations
- Troubleshooting
- Frequently Asked Questions
- Why This Recipe Works So Well
- Final Thoughts
- Chocolate Cherry Cheesecake Truffles
Why You’ll Love These Chocolate Cherry Cheesecake Truffles
These Chocolate Cherry Cheesecake Truffles are quick and easy to make. They are ready in just 30 minutes, not including the time they sit while the chocolate hardens.
The recipe uses minimal ingredients, so there is a good chance you already have many of them at home. Cream cheese, powdered sugar, vanilla, cherries, chocolate chips, coconut oil, and optional graham crackers turn into a dessert that feels much more polished than the effort required.
They are perfect for family gatherings, parties, holiday trays, or a sweet treat for yourself. Their small size makes them easy to serve, share, package, chill, and bring out when dessert is needed.
The truffles are freezer-friendly, making them useful for make-ahead planning. They can be frozen for up to three months when stored in an airtight container with parchment paper between layers.
The flavor combines creamy cheesecake richness with the tart sweetness of cherries. Semi-sweet chocolate gives the outside a smooth coating, while dark chocolate can be used for a richer taste.
They are also easy to customize. You can change the fruit, use a different chocolate, add almond extract, make a lighter version, use a dairy-free cream cheese alternative, or roll them in cocoa powder or crushed nuts.
Recipe Details
Chocolate Cherry Cheesecake Truffles are no-bake cheesecake-style truffles made with softened cream cheese, powdered sugar, vanilla extract, chopped cherries, optional graham cracker crumbs, and a melted chocolate coating. The filling chills briefly before being shaped into small 1-inch balls.
The total time is 30 minutes. The filling chills in the refrigerator for about 15 minutes before shaping.
The truffles are coated in melted semi-sweet chocolate chips combined with coconut oil. Vegetable oil can be used instead of coconut oil to help with melting.
The chocolate can be melted using a double boiler. If you do not have a double boiler, a microwave-safe bowl can be used in 20-second intervals, stirring between each interval.
After dipping, the truffles sit at room temperature for about 10 to 15 minutes until the chocolate hardens. They can also be placed in the refrigerator to speed up the setting process.
The truffles should be stored in an airtight container in the refrigerator for up to one week. For longer storage, they can be frozen for up to three months with parchment paper between layers to prevent sticking.
Ingredients
For the Cheesecake Filling
- 8 oz Cream Cheese, softened (use full-fat for creaminess)
- 1 cup Powdered Sugar
- 1 teaspoon Vanilla Extract (pure for the best flavor)
- 1 cup Dried Cherries, chopped (or use fresh cherries for a juicier bite)
- ½ cup Graham Crackers, crushed (optional, for added texture)
For the Chocolate Coating
- 1 cup Semi-Sweet Chocolate Chips (or dark chocolate for a richer taste)
- 1 tablespoon Coconut Oil (or vegetable oil to help with melting)
Ingredient Notes
Softened cream cheese gives these truffles their cheesecake-style base. Full-fat cream cheese is suggested for creaminess.
Powdered sugar sweetens the filling and blends smoothly into the cream cheese. It helps create a soft, dessert-like texture.
Vanilla extract adds warmth and depth. Pure vanilla extract is noted as the best choice for flavor.
Dried cherries bring tartness, chew, and fruit flavor. Fresh cherries can be used instead if you prefer a juicier bite, but they should be pitted and chopped well.
Crushed graham crackers are optional, but they add texture. They also make the filling feel more like cheesecake.
Semi-sweet chocolate chips create the coating. Dark chocolate can be used for a richer taste.
Coconut oil helps the chocolate melt smoothly. Vegetable oil can be used instead if needed.
Optional Swaps, Variations, Add-Ins, and Serving Ideas
Dark Chocolate Cherry Truffles
Dark chocolate can be used instead of semi-sweet chocolate. It creates a richer, deeper chocolate flavor.
This variation works especially well if you want the chocolate to taste more intense. The cherries and cream cheese still keep the center creamy and fruity.
Fresh Cherry Cheesecake Truffles
Fresh cherries can be used instead of dried cherries for a juicier bite. Make sure to pit and chop them well before adding them to the filling.
Fresh cherries will change the texture of the truffles. They bring more moisture and a brighter fruit bite.
Cranberry or Strawberry Truffles
Dried cranberries can be used instead of cherries for a different fruity flavor. They bring tartness in a slightly different way.
Strawberries can also be used as another fruit direction. This gives the truffles a softer berry personality.
Almond Cherry Truffles
A splash of almond extract can be added for a nutty flavor profile. This gives the cherry filling another layer of flavor.
Almond extract should be treated as a flavor twist. It changes the truffles from simple cherry cheesecake to something more aromatic.
Lighter Cheesecake Truffles
Low-fat cream cheese can be used to make the truffles lighter. Greek yogurt is also mentioned as a lighter substitute.
These swaps change the richness and texture. The truffles will still carry the cheesecake-style idea.
Dairy-Free Truffles
A vegan cream cheese alternative can be used instead of cream cheese. This makes the truffles dairy-free.
The chocolate and other ingredients should also fit your dairy-free needs. The main listed dairy-free change is the vegan cream cheese alternative.
Cocoa or Nut-Coated Truffles
Instead of coating the truffles in chocolate, they can be rolled in cocoa powder. This gives them a softer, dusted finish.
Crushed nuts can also be used for added texture. For a nut-free version, simply omit any nuts in the coating or filling.
Graham Cracker Topping
Crushed graham crackers can be sprinkled on top before the chocolate sets. This gives the finished truffles a cheesecake-style look.
Extra chopped cherries can also be added on top before the chocolate hardens. This makes the truffles look more decorative and hints at the filling inside.
Elegant Serving Finish
Extra melted chocolate can be drizzled over the top for a touch of elegance. It makes the chilled truffles look more finished.
Serve them with a cup of coffee or tea for an afternoon treat. The creamy cherry filling and chocolate coating make them feel especially nice with a warm drink.
Why This Recipe Works
Chocolate Cherry Cheesecake Truffles work because they turn a cheesecake-style filling into a bite-sized dessert. Cream cheese, powdered sugar, vanilla, and cherries create a soft center that tastes rich and sweet.
The cherries are important because they cut through the creaminess. Their tart fruit flavor keeps the truffles from feeling too heavy.
The chocolate coating gives each truffle structure. Once the chocolate hardens, it creates a smooth outside around the creamy filling.
The short chill time makes shaping easier. After about 15 minutes in the refrigerator, the filling firms up enough to roll into small balls.
The coconut oil or vegetable oil helps the chocolate melt smoothly. This makes dipping easier and gives the coating a cleaner finish.
The recipe also works well for planning ahead. The truffles can be refrigerated for up to one week or frozen for up to three months.
Directions
Step 1: Soften the Cream Cheese
Set out 8 oz cream cheese so it can soften before mixing. Softened cream cheese is much easier to blend into a smooth filling.
Full-fat cream cheese is suggested for creaminess. Starting with a softened base helps prevent lumps later.
Step 2: Prepare the Mixing Bowl
Choose a mixing bowl large enough to hold the cream cheese, powdered sugar, vanilla, cherries, and optional graham crackers. This gives you room to mix without spilling.
A medium bowl works well for the filling. The mixture should be easy to scrape and cover before chilling.
Step 3: Add the Cream Cheese
Place the softened cream cheese into the mixing bowl. Spread it slightly with a spoon or spatula if needed.
This is the main cheesecake element of the truffles. It should be soft enough to mix smoothly with the powdered sugar.
Step 4: Add the Powdered Sugar
Add 1 cup powdered sugar to the cream cheese. The powdered sugar sweetens the filling and helps create a smooth texture.
Begin mixing slowly so the sugar does not puff out of the bowl. Once it starts blending, continue until the mixture looks creamy.
Step 5: Add the Vanilla Extract
Add 1 teaspoon pure vanilla extract. Pure vanilla gives the best flavor.
Mix it into the cream cheese and powdered sugar. The vanilla adds a warm flavor that supports the cherries and chocolate.
Step 6: Mix Until Smooth
Continue mixing until the cream cheese, powdered sugar, and vanilla are smooth and well blended. Do not worry if the filling looks a bit lumpy at first.
Keep mixing until the texture improves. The goal is a creamy base before the cherries are added.
Step 7: Chop the Dried Cherries
Chop 1 cup dried cherries. Smaller pieces will distribute more evenly through the truffle filling.
The cherries add tart flavor and chewy texture. They should be easy to bite into once the truffles are shaped.
Step 8: Prepare Fresh Cherries If Using
If using fresh cherries instead, pit and chop them well. Fresh cherries give a juicier bite.
Because fresh cherries contain more moisture, the texture will feel different. Make sure the pieces are small enough to mix through the filling.
Step 9: Add the Cherries
Add the chopped dried cherries, or prepared fresh cherries, to the cream cheese mixture. Fold them in until evenly distributed.
The filling should now look speckled with fruit. Every truffle should get some cherry flavor.
Step 10: Add Graham Crackers If Desired
If using them, add ½ cup crushed graham crackers. This step is optional.
The graham crackers give the filling extra texture. They also bring a cheesecake-crust style note to the truffles.
Step 11: Mix the Filling Completely
Stir until the cherries and optional graham crackers are fully incorporated. The filling should feel thick, creamy, and scoopable.
Make sure there are no plain pockets of cream cheese. The flavor should be evenly mixed before chilling.
Step 12: Cover the Bowl
Cover the bowl with plastic wrap. Press the wrap over the bowl so the filling is protected while it chills.
This keeps the mixture from drying out in the refrigerator. It also prepares it for easier shaping.
Step 13: Chill the Filling
Place the covered bowl in the refrigerator for about 15 minutes. This helps the filling firm up.
The mixture should become easier to handle after chilling. It does not need to freeze or become hard.
Step 14: Prepare the Tray
Line a tray with parchment paper. This gives the shaped truffles a place to rest before and after coating.
Parchment helps keep the truffles from sticking. It also makes cleanup easier.
Step 15: Scoop the Filling
After chilling, use a small cookie scoop or your hands to scoop out portions of the filling. Aim for small portions that can become 1-inch balls.
A cookie scoop helps keep the size consistent. Your hands also work if you prefer a more relaxed shape.
Step 16: Roll Into Balls
Roll each portion into a small ball about 1 inch in diameter. Do not stress if they are not perfect spheres.
The shape does not have to be flawless. The truffles will still taste rich, creamy, fruity, and chocolatey.
Step 17: Place on the Tray
Place each rolled truffle on the parchment-lined tray. Leave a little space between them.
They need room for the chocolate coating later. Spacing also keeps them from touching while they wait.
Step 18: Set Up the Double Boiler
Place a heatproof bowl over a pot of simmering water. Add 1 cup semi-sweet chocolate chips and 1 tablespoon coconut oil to the bowl.
This double boiler method melts the chocolate gently. Stir occasionally until the mixture becomes smooth.
Step 19: Melt the Chocolate
Continue stirring until the chocolate and coconut oil are fully melted. The chocolate should look glossy and smooth.
Do not rush the melting process. Gentle heat helps the coating stay smooth.
Step 20: Use the Microwave Option If Needed
If you do not have a double boiler, use a microwave-safe bowl. Heat the chocolate chips and coconut oil in 20-second intervals.
Stir between each interval. Continue until the chocolate is melted and smooth.
Step 21: Dip the First Truffle
Take one truffle and dip it into the melted chocolate using a fork. Make sure it is fully coated.
The chocolate should cover the entire filling. A full coating helps seal the creamy center.
Step 22: Remove Excess Chocolate
Lift the coated truffle with the fork. Gently tap the fork against the bowl to remove excess chocolate.
This keeps the coating from becoming too thick or puddling too much on the tray. Let the extra chocolate fall back into the bowl.
Step 23: Return to the Tray
Carefully place the coated truffle back onto the parchment-lined tray. Slide it off the fork gently.
Try to keep the coating as smooth as possible. A little unevenness is perfectly fine.
Step 24: Coat the Remaining Truffles
Repeat the dipping process with all the truffles. Work one at a time so each piece gets fully covered.
If the chocolate begins to thicken, warm it gently again. Smooth chocolate makes dipping easier.
Step 25: Add Toppings Before the Chocolate Sets
If desired, sprinkle crushed graham crackers over the coated truffles before the chocolate sets. Extra chopped cherries can also be added on top.
This gives the truffles a decorated finish. Add toppings right away so they stick to the chocolate.
Step 26: Let the Chocolate Harden
Let the truffles sit at room temperature for about 10 to 15 minutes. The chocolate should harden.
You can also place the tray in the refrigerator to speed up the process. Once set, the truffles are ready to serve or store.
Step 27: Serve Chilled
Serve the truffles chilled for the best texture. The filling should be creamy and firm enough to hold its shape.
They can be arranged on a plate or stored in a container until needed. Keep them refrigerated when not serving.
Serving Ideas
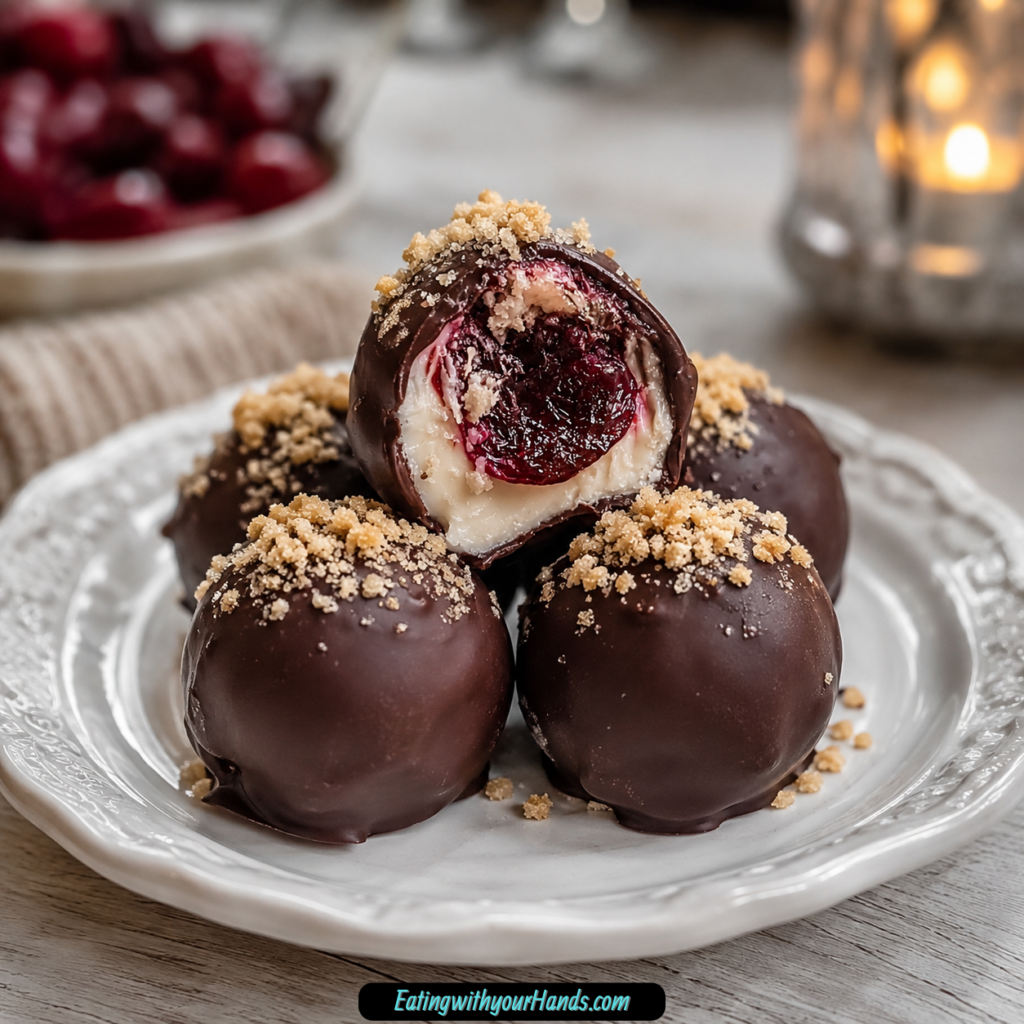
Chocolate Cherry Cheesecake Truffles are perfect served chilled. The cool filling holds its texture, and the chocolate coating gives each piece a smooth bite.
For a simple finish, garnish with a sprinkle of crushed graham crackers. This adds a little texture and makes the truffles look more like cheesecake bites.
A drizzle of extra melted chocolate on top adds elegance. It is an easy way to make the truffles feel more dressed up for a party tray.
Serve them with coffee or tea for a delightful afternoon treat. The richness of the chocolate and cream cheese pairs nicely with a warm drink.
These truffles also work well for holiday platters and family gatherings. Their small size makes them easy to pick up, pass around, and enjoy in one or two bites.
Storage
Store Chocolate Cherry Cheesecake Truffles in an airtight container in the refrigerator. They will keep for up to one week.
Keep them chilled until ready to serve. The filling stays firmer and the chocolate coating holds better when refrigerated.
Freezing
Chocolate Cherry Cheesecake Truffles can be frozen for up to three months. Place them in an airtight container and separate layers with parchment paper to prevent sticking.
When freezing, make sure the chocolate coating has fully hardened first. This helps the truffles keep their shape.
To enjoy later, move the truffles from the freezer to the refrigerator before serving. Serve chilled once they are ready.
Make-Ahead
These truffles can be made ahead of time and stored for a convenient treat. They are especially useful when preparing for holidays, parties, or dessert trays.
Because they keep in the refrigerator for up to one week, you can prepare them before the day you need them. For longer planning, freeze them for up to three months.
Parchment paper is helpful for storage. It keeps the truffles from sticking together in layers.
Helpful Notes for Best Results
Use softened cream cheese for the smoothest filling. Cold cream cheese is harder to mix and may stay lumpy.
Use full-fat cream cheese if you want the creamiest texture. Low-fat cream cheese or Greek yogurt can be used for a lighter version.
If using fresh cherries, pit and chop them well. Smaller pieces make rolling the truffles easier.
Graham crackers are optional, but they add texture. If you do not have graham crackers, crushed cookies or nuts can work as substitutes.
For a richer flavor, use dark chocolate instead of semi-sweet. This creates a deeper chocolate coating.
For a nut-free version, omit any nuts in the coating or filling. Choose graham crackers, crushed cookies, cocoa powder, or plain chocolate coating instead if those fit your needs.
To reduce sugar, use a sugar substitute in place of powdered sugar. This will change the sweetness and possibly the texture.
Let the chocolate harden fully before storing. This helps keep the truffles neat in the container.
Variations
Dark Chocolate Cherry Cheesecake Truffles
Use dark chocolate instead of semi-sweet chocolate chips. This creates a richer, more intense chocolate coating.
The cherry cheesecake filling still stays creamy and sweet. Dark chocolate simply makes the outside taste deeper.
Fresh Cherry Cheesecake Truffles
Use fresh cherries for a juicier bite. Make sure they are pitted and chopped well.
Fresh cherries give the filling a brighter fruit texture. The truffles may feel softer because fresh fruit has more moisture.
Cranberry Cheesecake Truffles
Use dried cranberries instead of cherries. This gives the truffles a different tart fruit flavor.
Cranberries work well with cream cheese, vanilla, and chocolate. They create a slightly different holiday-style bite.
Strawberry Cheesecake Truffles
Use strawberries instead of cherries for another fruity version. This makes the truffles softer and berry-forward.
The cheesecake filling and chocolate coating still work the same way. The fruit simply changes the flavor.
Almond Cherry Cheesecake Truffles
Add a splash of almond extract. This gives the filling a nutty flavor profile.
Almond and cherry make the truffles taste more aromatic. Use this when you want a more distinctive flavor.
Lighter Cheesecake Truffles
Use low-fat cream cheese or Greek yogurt for a lighter version. These swaps change the texture and richness.
Greek yogurt gives a tangier flavor. Low-fat cream cheese keeps the truffles closer to the original cream cheese structure.
Dairy-Free Cherry Truffles
Use a vegan cream cheese alternative instead of cream cheese. This creates a dairy-free option.
Choose chocolate and other ingredients that match your dairy-free needs. The filling should still be creamy enough to roll.
Cocoa-Dusted Truffles
Roll the truffles in cocoa powder instead of coating them in chocolate. This gives them a soft, dusted exterior.
The texture will be different from a chocolate shell. It is a simpler coating option with a rich cocoa finish.
Crushed Nut Truffles
Roll the truffles in crushed nuts for added texture. This creates crunch on the outside.
For a nut-free version, skip this option. Use chocolate, cocoa powder, graham cracker crumbs, or crushed cookies instead.
Troubleshooting
The Filling Is Too Soft to Roll
Chill the filling for about 15 minutes before shaping. This helps it firm up.
If it still feels too soft, keep it in the refrigerator a little longer. The mixture should be scoopable and able to hold a small ball shape.
The Filling Looks Lumpy
Keep mixing the cream cheese, powdered sugar, and vanilla until smooth. It may look a little lumpy at first.
Softened cream cheese helps prevent lumps. Let it sit out before starting for easier blending.
The Truffles Are Not Perfectly Round
Do not worry if the truffles are not perfect spheres. They will still taste wonderful.
A small cookie scoop can help make them more even. Your hands can also shape them gently.
The Chocolate Is Too Thick
Coconut oil helps the chocolate melt smoothly. Vegetable oil can also be used.
If the chocolate thickens while coating, warm it gently again. Smooth melted chocolate makes dipping easier.
The Chocolate Coating Looks Uneven
Tap the fork gently against the bowl after dipping. This removes excess chocolate.
Place the coated truffle carefully onto the parchment-lined tray. A little uneven coating is normal for homemade truffles.
The Toppings Will Not Stick
Add crushed graham crackers or chopped cherries before the chocolate sets. Once the chocolate hardens, toppings will not attach as easily.
Work shortly after dipping each truffle. This gives the topping time to settle into the coating.
The Truffles Stick Together in Storage
Separate layers with parchment paper. This is especially important when freezing.
Make sure the chocolate has hardened before stacking. Store in an airtight container for the best result.
Frequently Asked Questions
Can I freeze Chocolate Cherry Cheesecake Truffles?
Yes, these truffles can be frozen. Place them in an airtight container with parchment paper between layers.
They will keep well for up to three months. Keep them separated so they do not stick together.
What can I substitute for cream cheese?
Greek yogurt can be used for a lighter option. A vegan cream cheese alternative can be used to make the truffles dairy-free.
Low-fat cream cheese is another lighter variation. The texture and richness may change depending on the substitute.
How long do these truffles last?
These truffles can be stored in the refrigerator for up to one week. Keep them in an airtight container.
If frozen, they can last for about three months. Use parchment paper between layers for best storage.
Can I use fresh cherries?
Yes, fresh cherries can be used for a juicier bite. Pit and chop them well before adding them to the filling.
Fresh cherries may make the filling softer. Chill the mixture well before shaping.
Can I use a different chocolate?
Yes, dark chocolate can be used for a richer taste. Semi-sweet chocolate chips are the main option.
The chocolate should be melted with coconut oil or vegetable oil. This helps create a smoother coating.
What can I use instead of graham crackers?
Crushed cookies can be used if you do not have graham crackers. Nuts can also work as a substitute if you are not making a nut-free version.
Graham crackers are optional, so they can also be left out. They mainly add texture.
How should I serve these truffles?
Serve the truffles chilled. They can be garnished with crushed graham crackers or drizzled with extra melted chocolate.
Pair them with coffee or tea for an afternoon treat. They also work well on party platters or holiday dessert trays.
Why This Recipe Works So Well
Chocolate Cherry Cheesecake Truffles work so well because they give you cheesecake flavor in a small, no-bake dessert. The cream cheese filling feels rich, while the cherries keep it bright and fruity.
The powdered sugar blends into the cream cheese smoothly and sweetens the mixture without making the process complicated. Vanilla rounds out the filling and gives it a softer dessert flavor.
The chocolate coating makes the truffles feel complete. Once it hardens, it creates a smooth shell around the creamy cherry center.
The optional graham crackers add texture and a cheesecake-style reminder. They can be mixed into the filling or sprinkled on top before the chocolate sets.
The recipe also gives you plenty of room to make it fit the occasion. Dark chocolate, cranberries, strawberries, almond extract, low-fat cream cheese, Greek yogurt, vegan cream cheese, cocoa powder, crushed nuts, or crushed cookies can all change the truffles while keeping the same sweet bite-sized idea.
Final Thoughts
Chocolate Cherry Cheesecake Truffles are small enough to feel effortless but rich enough to make dessert feel memorable. The creamy filling, tart cherries, vanilla, optional graham cracker texture, and smooth chocolate coating come together in a bite that feels sweet, nostalgic, and beautifully shareable.
Keep them chilled for a party tray, tuck a batch into the freezer for later, or serve a few with coffee or tea when the day needs something special. These truffles prove that a simple bowl, a little chilling time, and a glossy coat of chocolate can turn familiar ingredients into a dessert worth lingering over.
Chocolate Cherry Cheesecake Truffles
Rich, creamy, and bite-sized, these Chocolate Cherry Cheesecake Truffles combine smooth cream cheese, powdered sugar, vanilla, chopped cherries, and a chocolate coating. They are sweet little dessert treats with cheesecake flavor, cherry sweetness, and a chocolate shell that makes them perfect for parties, holidays, dessert trays, or make-ahead treats.
Recipe Details
- Prep Time: 30 minutes
- Total Time: 30 minutes
- Course: Dessert
- Cuisine: American
- Servings: 24 truffles
- Calories: 120 kcal
Equipment
- Mixing bowl
- Double Boiler
Ingredients
For the Chocolate Coating
- 1 cup Semi-Sweet Chocolate Chips or dark chocolate
- 1 tablespoon Coconut Oil or vegetable oil
For the Truffle Filling
- 8 oz Cream Cheese softened
- 1 cup Dried Cherries chopped or use fresh cherries
- ½ cup Graham Crackers optional, crushed
- 1 teaspoon Vanilla Extract pure for best flavor
- 1 cup Powdered Sugar
Instructions
Step 1: Make the Cheesecake Filling
In a mixing bowl, combine softened cream cheese, powdered sugar, vanilla extract, dried cherries, and graham crackers. Mix until smooth.
Step 2: Chill the Mixture
Chill the mixture for about 15 minutes. This helps it firm up before shaping.
Step 3: Shape the Truffles
Scoop the chilled mixture and roll it into small balls. Keep the truffles evenly sized so they are easy to coat.
Step 4: Melt the Chocolate Coating
Melt the chocolate chips and coconut oil in a double boiler. Stir until the coating is smooth.
Step 5: Dip and Set
Dip each truffle in the chocolate. Place the coated truffles on a parchment-lined tray to set.
Notes
- Store truffles in the refrigerator for up to one week.
- You can also sprinkle crushed graham crackers on top for added texture.
Serving Suggestions
Serve these Chocolate Cherry Cheesecake Truffles chilled as a bite-sized dessert. The creamy filling, chopped cherries, vanilla, graham crackers, and chocolate coating make each truffle rich, sweet, and easy to enjoy.
They work well for dessert platters, holiday trays, parties, or small after-dinner treats. For added texture, sprinkle crushed graham crackers on top exactly as noted.
Storage
How to Store
Store truffles in the refrigerator for up to one week. Keep them chilled so the cheesecake filling and chocolate coating stay set.
Chill Time
Chill the truffle mixture for about 15 minutes before scooping and rolling. This makes the mixture easier to shape into small balls.
Best Texture Tip
Let the chocolate-coated truffles set on a parchment-lined tray after dipping. This helps the coating firm up neatly around each bite.
Topping Tip
You can sprinkle crushed graham crackers on top for added texture. No specific quantity is provided for the topping, so no extra amount is added here.

Fernando is the creator and writer behind the food blog Eating with your Hands. Living and working in cities like Paris, Barcelona, and Berlin, and being married to a Canadian foodie, has given Fernando a passion and interest in food and inspired him to run EWYH.