
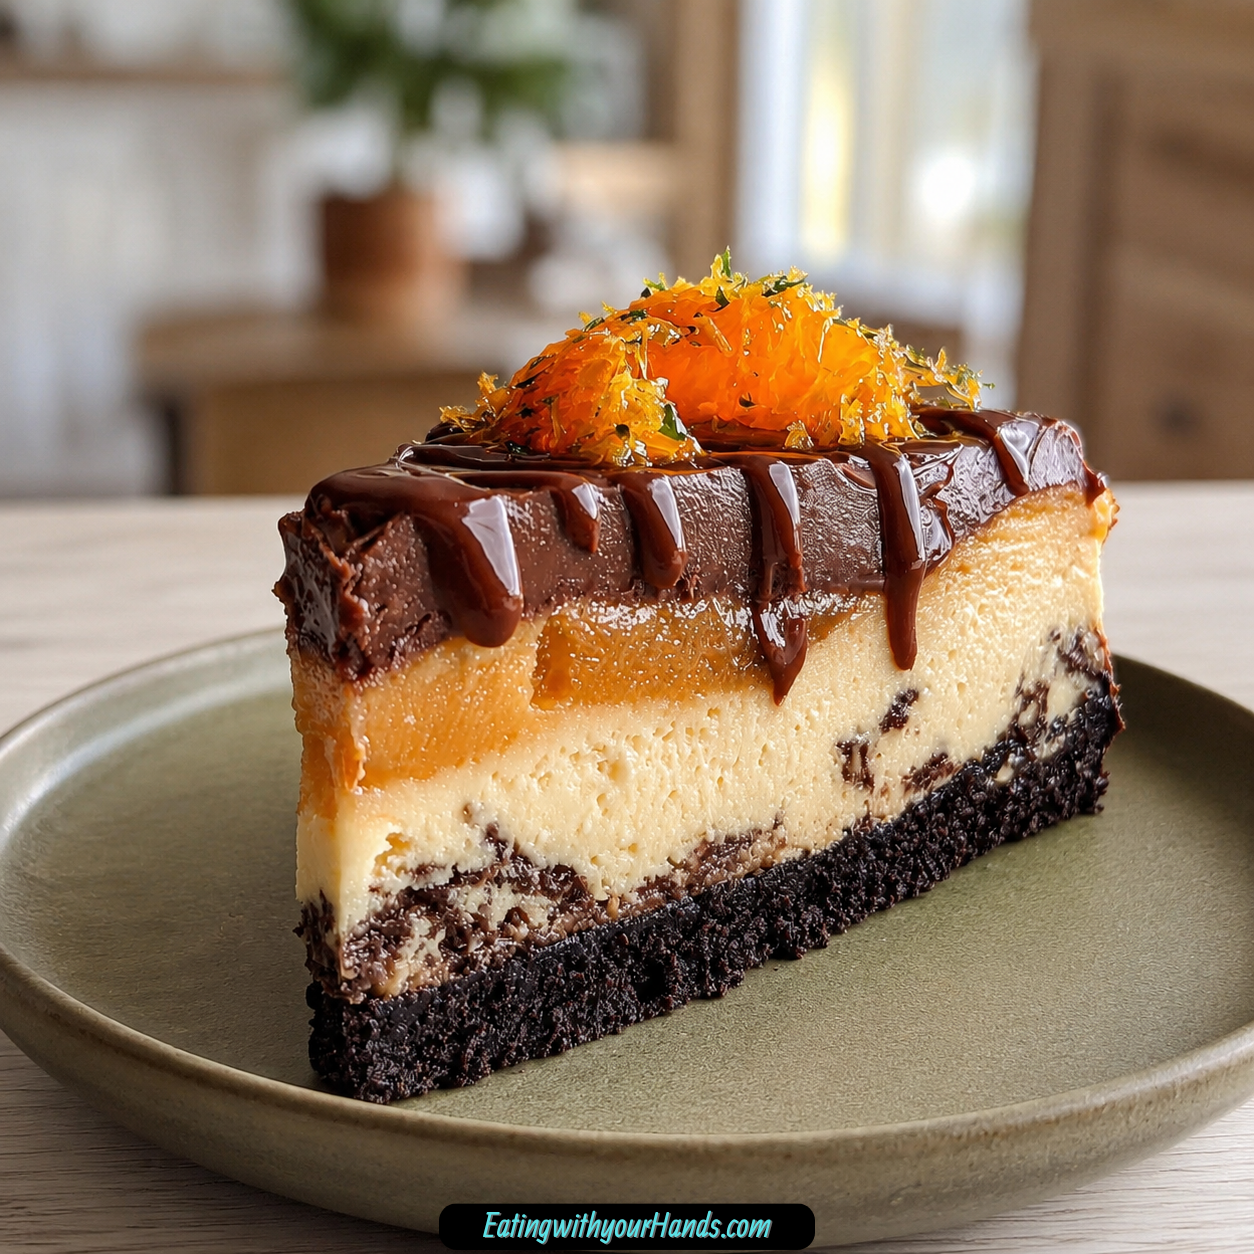
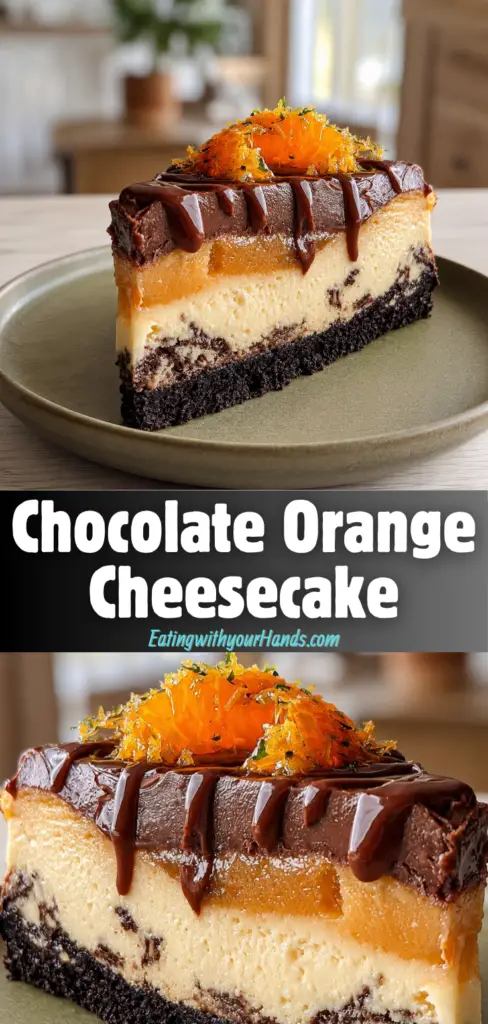
Chocolate Orange Cheesecake is the kind of dessert that feels rich, celebratory, and a little nostalgic before the first slice even reaches the plate. It has a buttery crushed biscuit base, a creamy chocolate-orange filling, bright orange zest, smooth cream cheese, double cream, and melted dark chocolate folded together into a no-bake cheesecake that feels special without being difficult.
This is a dessert made for the moments when you want the table to pause for a second. The chocolate brings depth and richness, while the orange gives the cheesecake a bright citrus lift that keeps every bite from feeling too heavy.
There is something beautifully familiar about chocolate and orange together. The combination tastes like birthdays, holidays, family gatherings, and the kind of dessert everyone notices when it appears in the center of the table.
The texture is velvety and creamy, with a biscuit crust that gives each slice a firm, buttery base. Because the cheesecake sets in the refrigerator, there is no oven involved and no baking stress.
The filling comes together with softened cream cheese, caster sugar, double cream, orange zest, orange extract, and melted dark chocolate. Once it is spread over the pressed base, the hardest part is simply waiting for it to chill.
Chocolate Orange Cheesecake is perfect for family gatherings, holiday feasts, cozy celebrations, birthdays, make-ahead entertaining, or anytime you want a dessert that feels elegant but approachable. It is quick to prepare, freezer-friendly, and rich enough to make even a small slice feel like a celebration.
Table of Contents
- Why You’ll Love This Chocolate Orange Cheesecake
- Recipe Details
- Ingredients
- Ingredient Notes
- Optional Swaps, Variations, Add-Ins, and Serving Ideas
- Greek Yogurt Chocolate Orange Cheesecake
- Orange Jelly Cheesecake
- Gluten-Free Chocolate Orange Cheesecake
- Mocha Chocolate Orange Cheesecake
- White Chocolate Orange Cheesecake
- Orange Peel Garnish
- Chocolate Sauce Finish
- Whipped Cream Side
- Store-Bought Crust Option
- Nutty Biscuit Base
- Salted Chocolate Finish
- Mascarpone Cheesecake
- Coconut Sugar Cheesecake
- Why This Recipe Works
- Directions
- Step 1: Prepare the Springform Pan
- Step 2: Set Out the Biscuit Base Ingredients
- Step 3: Crush the Biscuits
- Step 4: Check the Crumb Texture
- Step 5: Transfer the Crumbs
- Step 6: Add the Melted Butter
- Step 7: Mix the Base
- Step 8: Add the Base to the Pan
- Step 9: Press the Crust Firmly
- Step 10: Smooth the Base
- Step 11: Soften the Cream Cheese
- Step 12: Beat the Cream Cheese
- Step 13: Add the Caster Sugar
- Step 14: Use Granulated Sugar If Needed
- Step 15: Add the Double Cream
- Step 16: Wash the Oranges
- Step 17: Zest the Oranges
- Step 18: Add the Orange Zest
- Step 19: Add the Orange Extract
- Step 20: Melt the Dark Chocolate
- Step 21: Add the Melted Chocolate
- Step 22: Mix Until Smooth
- Step 23: Taste the Filling
- Step 24: Pour the Filling Over the Base
- Step 25: Smooth the Top
- Step 26: Cover the Cheesecake
- Step 27: Chill for at Least 4 Hours
- Step 28: Chill Overnight If Possible
- Step 29: Prepare to Release the Cheesecake
- Step 30: Release the Springform Pan
- Step 31: Slice the Cheesecake
- Step 32: Garnish with Orange Peel
- Step 33: Add Chocolate Sauce If Desired
- Step 34: Add Whipped Cream
- Step 35: Store Leftovers
- Step 36: Freeze Individual Slices
- Step 37: Thaw Before Serving
- Serving Ideas
- Storage
- Freezing
- Make-Ahead
- Helpful Notes for Best Results
- Variations
- Greek Yogurt Chocolate Orange Cheesecake
- Orange Jelly Chocolate Cheesecake
- Gluten-Free Chocolate Orange Cheesecake
- Mocha Orange Cheesecake
- White Chocolate Orange Cheesecake
- Graham Cracker Orange Cheesecake
- Heavy Cream Cheesecake
- Mascarpone Chocolate Orange Cheesecake
- Coconut Sugar Cheesecake
- Nutty Chocolate Orange Crust
- Salted Chocolate Orange Cheesecake
- Troubleshooting
- Frequently Asked Questions
- Why This Recipe Works So Well
- Final Thoughts
- Chocolate Orange Cheesecake
Why You’ll Love This Chocolate Orange Cheesecake
This Chocolate Orange Cheesecake has a quick and easy prep time of just 30 minutes. Since it is no-bake, you do not need to turn on the oven.
It uses minimal ingredients that are simple and accessible. Digestive biscuits, butter, cream cheese, sugar, cream, oranges, orange extract, and dark chocolate create the whole dessert.
The flavor combination is rich and bright. Dark chocolate gives the cheesecake depth, while orange zest and orange extract bring citrus freshness.
It is perfect for family gatherings and special occasions. The creamy filling and chocolate-orange flavor make it a crowd-pleasing dessert.
It can be made ahead of time and stored in the refrigerator. This makes entertaining easier because the cheesecake needs time to chill and set.
It is freezer-friendly, too. Leftover slices can be frozen in airtight containers for up to 3 months and thawed in the refrigerator before serving.
Recipe Details
Chocolate Orange Cheesecake is a no-bake dessert with a 30-minute prep time. It needs at least 4 hours to chill in the refrigerator, though overnight is even better.
The base is made with 250 g digestive biscuits and 100 g melted unsalted butter. Graham crackers can be used instead of digestive biscuits if you prefer a different flavor.
The biscuits are finely crushed, then mixed with melted butter until the crumbs resemble wet sand. The mixture should hold together when squeezed.
The crust is pressed into a lightly greased springform pan. It should be firm, compact, and even so it holds together when sliced later.
The filling is made with 600 g softened cream cheese, 150 g caster sugar, 300 ml double cream, zest from 2 large oranges, 1 teaspoon orange extract, and 100 g melted dark chocolate.
Heavy cream can be used as a substitute for double cream. Granulated sugar can be used if caster sugar is not available.
The dark chocolate should be good quality, around 70% cocoa for richness. The oranges should be washed before zesting.
After the filling is poured over the biscuit base, the top is smoothed with a spatula. The cheesecake is covered with plastic wrap and chilled until set.
Ingredients
For the Biscuit Base
- 250 g Digestive Biscuits, finely crushed (you can use graham crackers if you prefer a different flavor)
- 100 g Unsalted Butter, melted (ensure it’s unsalted for best flavor)
For the Chocolate Orange Filling
- 600 g Cream Cheese, softened (I love using Philadelphia for its creamy texture)
- 150 g Caster Sugar (this dissolves easily, but granulated sugar works too)
- 300 ml Double Cream (heavy cream can be used as a substitute)
- 2 large Oranges, zested (make sure to wash them before zesting!)
- 1 teaspoon Orange Extract (this adds a concentrated orange flavor; use pure extract if possible)
- 100 g Dark Chocolate, melted (choose a good quality chocolate, around 70% cocoa for richness)
Ingredient Notes
Digestive biscuits create the base of this cheesecake. They should be finely crushed so the crust presses together smoothly.
Graham crackers can be used instead of digestive biscuits if you prefer a different flavor. This gives the base a slightly different taste while keeping the same no-bake idea.
Unsalted butter binds the crumbs together. It should be melted before being mixed with the biscuit crumbs.
Cream cheese is the body of the filling. It should be softened before mixing so the cheesecake becomes smooth and creamy.
Philadelphia cream cheese is mentioned as a favorite for its creamy texture. Whatever cream cheese you use, room temperature softness helps prevent lumps.
Caster sugar sweetens the filling and dissolves easily. Granulated sugar can also be used if that is what you have.
Double cream makes the filling rich and thick. Heavy cream can be used as a substitute.
Orange zest brings fresh citrus aroma. The oranges should be washed before zesting.
Orange extract adds concentrated orange flavor. Pure extract is recommended if possible.
Dark chocolate gives the cheesecake its deep chocolate flavor. A good quality chocolate around 70% cocoa is recommended for richness.
Optional Swaps, Variations, Add-Ins, and Serving Ideas
Greek Yogurt Chocolate Orange Cheesecake
For a lighter version, swap half of the cream cheese for Greek yogurt. This changes the texture and makes the filling lighter.
The cheesecake will still have chocolate and orange flavor. The final creaminess may be different from the original version.
Orange Jelly Cheesecake
Add a layer of orange jelly on top for an extra citrus burst. This makes the cheesecake taste even brighter.
The jelly layer also adds a pretty finish. It gives the dessert another orange element.
Gluten-Free Chocolate Orange Cheesecake
Use gluten-free digestive biscuits to make the cheesecake gluten-free. This keeps the no-bake base while changing the biscuit.
The cheesecake can be naturally gluten-free if gluten-free biscuits are used. Check ingredients as needed.
Mocha Chocolate Orange Cheesecake
Incorporate a hint of espresso powder for a mocha twist. This deepens the chocolate flavor.
The espresso powder changes the flavor profile. It gives the cheesecake a more grown-up chocolate note.
White Chocolate Orange Cheesecake
Use white chocolate instead of dark chocolate for a sweeter flavor profile. This makes the cheesecake softer and sweeter in taste.
The orange flavor will still come through. The final dessert will be less dark and rich.
Orange Peel Garnish
Garnish each slice with a twist of orange peel. This makes the cheesecake look elegant.
The orange peel also signals the citrus flavor inside. It is a simple finishing detail.
Chocolate Sauce Finish
Drizzle chocolate sauce over each slice before serving. This adds a polished dessert look.
The extra chocolate makes the slice feel more indulgent. It is especially nice for special occasions.
Whipped Cream Side
Serve each slice with a dollop of whipped cream on the side. This adds a soft, light contrast.
Whipped cream works well with both chocolate and orange. It makes the dessert feel a little more festive.
Store-Bought Crust Option
If you are short on time, use a store-bought crust instead of making your own. This makes preparation even faster.
The flavor and texture will be different from the homemade biscuit base. It is a helpful shortcut.
Nutty Biscuit Base
Add finely chopped nuts to the base mixture for a nutty flavor. This gives the crust extra texture.
The nuts should be finely chopped so the base still presses together well. This variation changes the crust slightly.
Salted Chocolate Finish
Add a sprinkle of sea salt on top for a salted chocolate contrast. This gives the cheesecake a more complex finish.
The salt should be used as a topping. It balances the sweetness and chocolate richness.
Mascarpone Cheesecake
Substitute the cream cheese with mascarpone for a different texture. This creates a slightly different creamy filling.
The flavor will change from the original cream cheese version. It is a useful option if you want a softer style.
Coconut Sugar Cheesecake
Granulated sugar can be swapped with coconut sugar for a healthier alternative. This changes the sweetness and flavor.
The cheesecake will not taste exactly the same. It is another sweetener option from the recipe notes.
Why This Recipe Works
Chocolate Orange Cheesecake works because the flavors are strong but balanced. The chocolate is rich, the orange is bright, and the cream cheese keeps everything smooth and tangy.
The biscuit base gives the cheesecake structure. Crushed digestive biscuits and melted butter form a firm layer that supports the creamy filling.
The filling is no-bake, which makes the recipe approachable. Instead of relying on the oven, the cheesecake sets in the refrigerator.
Softened cream cheese is important for a smooth texture. Beating it first helps remove lumps before the other filling ingredients are added.
Caster sugar blends easily into the cream cheese. Double cream helps the filling thicken and feel rich.
Orange zest and orange extract give the cheesecake its citrus flavor. The zest brings freshness, while the extract adds concentrated orange taste.
Melted dark chocolate gives the dessert depth. Choosing a good quality chocolate around 70% cocoa makes the flavor richer.
The chill time is essential. At least 4 hours in the refrigerator allows the cheesecake to set, while overnight chilling gives the flavors more time to develop.
Directions
Step 1: Prepare the Springform Pan
Start with a springform pan. Lightly grease the bottom and sides with butter to help prevent sticking.
This small step makes serving easier later. It helps the cheesecake release more cleanly after chilling.
Step 2: Set Out the Biscuit Base Ingredients
Measure 250 g digestive biscuits and 100 g unsalted butter. Melt the butter before combining it with the crumbs.
If you prefer a different base flavor, graham crackers can be used instead of digestive biscuits. Keep the amount the same as listed.
Step 3: Crush the Biscuits
Place the digestive biscuits in a large resealable plastic bag. Seal the bag tightly.
Use a rolling pin to crush the biscuits into fine crumbs. The crumbs should be small enough to press into a compact base.
Step 4: Check the Crumb Texture
Look at the biscuit crumbs after crushing. They should be fine and even, without large pieces.
Large pieces can make the base crumble unevenly. Keep crushing until the texture looks consistent.
Step 5: Transfer the Crumbs
Pour the crushed biscuit crumbs into a mixing bowl. Make sure the bowl has enough room for stirring.
This is where the base begins to come together. The crumbs should be dry and loose before the butter is added.
Step 6: Add the Melted Butter
Pour the melted unsalted butter over the biscuit crumbs. Add it evenly across the bowl.
The butter will bind the crumbs together. It gives the base its rich flavor and firm texture.
Step 7: Mix the Base
Stir the biscuit crumbs and melted butter together. Keep mixing until all the crumbs are well coated.
The mixture should resemble wet sand. It should hold together when squeezed in your hand.
Step 8: Add the Base to the Pan
Pour the buttery biscuit mixture into the prepared springform pan. Spread it across the bottom.
Try to distribute the crumbs evenly before pressing. This helps create a level crust.
Step 9: Press the Crust Firmly
Use the back of a spoon or your hands to press the crumbs down firmly. Make the layer compact and even.
A firm base will hold together better when sliced. Take your time with this step.
Step 10: Smooth the Base
Check the edges and center of the crust. Press any loose crumbs back into place.
The crust does not need to look perfect, but it should be even. Set the pan aside while you make the filling.
Step 11: Soften the Cream Cheese
Use 600 g cream cheese, softened. The cream cheese should be at room temperature for a smoother texture.
Soft cream cheese is easier to beat. It helps prevent lumps in the cheesecake filling.
Step 12: Beat the Cream Cheese
Add the softened cream cheese to a large mixing bowl. Beat it with an electric mixer until smooth and creamy.
This step creates the base texture of the filling. Keep mixing until no obvious lumps remain.
Step 13: Add the Caster Sugar
Add 150 g caster sugar to the cream cheese. Caster sugar dissolves easily.
Continue mixing until the sugar is fully incorporated. The mixture should look creamy and smooth.
Step 14: Use Granulated Sugar If Needed
If caster sugar is not available, granulated sugar can be used. The texture may feel slightly different.
Mix well so the sugar blends into the cream cheese. The filling should still become creamy.
Step 15: Add the Double Cream
Pour in 300 ml double cream. Heavy cream can be used as a substitute.
Mix again until combined. The filling will begin to thicken beautifully.
Step 16: Wash the Oranges
Wash 2 large oranges before zesting. This is important because the zest goes directly into the filling.
Dry the oranges after washing. Clean zest gives the best flavor.
Step 17: Zest the Oranges
Zest the 2 large oranges. Avoid taking too much of the bitter white layer beneath the colored peel.
The zest brings fresh orange fragrance. Add it to the filling once prepared.
Step 18: Add the Orange Zest
Add the orange zest to the cream cheese mixture. Spread it across the bowl so it mixes evenly.
The zest gives the cheesecake a bright citrus flavor. It should be visible in small flecks.
Step 19: Add the Orange Extract
Add 1 teaspoon orange extract. Pure extract is recommended if possible.
The extract gives the filling a concentrated orange flavor. It strengthens the citrus taste.
Step 20: Melt the Dark Chocolate
Melt 100 g dark chocolate. Choose a good quality chocolate around 70% cocoa for richness.
The chocolate should be melted smoothly before being added. Let it be pourable but not scorching hot.
Step 21: Add the Melted Chocolate
Pour the melted dark chocolate into the filling. Add it gradually if that helps mixing.
The chocolate gives the cheesecake its deep flavor. It also changes the filling into a rich chocolate-orange mixture.
Step 22: Mix Until Smooth
Mix the filling until everything is smooth and well blended. The cream cheese, sugar, cream, orange zest, orange extract, and chocolate should be fully combined.
Stop and scrape the bowl if needed. The final filling should look silky and even.
Step 23: Taste the Filling
Taste a small amount of the filling if desired. This is the moment to check the balance of chocolate and orange.
The flavor should be creamy, rich, and citrusy. Once it tastes right, move to assembly.
Step 24: Pour the Filling Over the Base
Carefully pour the chocolate orange filling over the pressed biscuit base. Spread it gently so the crust stays intact.
The filling should cover the base completely. Work slowly and evenly.
Step 25: Smooth the Top
Use a spatula to smooth the top as much as you can. It does not have to look perfect.
A slightly rustic top still has charm. The cheesecake will look beautiful once sliced and garnished.
Step 26: Cover the Cheesecake
Cover the springform pan with plastic wrap. Make sure the top is protected.
Covering helps keep the cheesecake fresh while it chills. It also protects the surface in the refrigerator.
Step 27: Chill for at Least 4 Hours
Place the cheesecake in the refrigerator. Let it chill for at least 4 hours.
This time allows the cheesecake to set properly. Do not rush this step if you want clean slices.
Step 28: Chill Overnight If Possible
If you can wait, chill the cheesecake overnight. This is even better for setting and flavor.
Overnight chilling allows the chocolate and orange flavors to meld beautifully. It also helps the texture become firmer.
Step 29: Prepare to Release the Cheesecake
When ready to serve, remove the cheesecake from the refrigerator. Keep it in the pan at first.
Run a knife around the edge of the springform pan. This helps create a clean edge before releasing.
Step 30: Release the Springform Pan
Carefully open and remove the side of the springform pan. Move slowly so the cheesecake stays neat.
The edge should look clean from the knife step. If needed, smooth any small marks gently.
Step 31: Slice the Cheesecake
Slice the cheesecake into wedges. Use a clean knife for the neatest slices.
The biscuit base should hold under the creamy filling. Take your time cutting through the crust.
Step 32: Garnish with Orange Peel
Garnish each slice with a twist of orange peel if desired. This gives the dessert an elegant touch.
The garnish also highlights the orange flavor. It makes the plate look fresh.
Step 33: Add Chocolate Sauce If Desired
Drizzle chocolate sauce over each slice if you want a richer finish. This gives the dessert a more decorated look.
Use as much or as little as you like. The cheesecake is already chocolatey, so the drizzle is optional.
Step 34: Add Whipped Cream
Serve with a dollop of whipped cream on the side if desired. It adds a soft, creamy contrast.
Whipped cream makes the slice feel extra special. It works well for gatherings and celebrations.
Step 35: Store Leftovers
Cover leftover cheesecake with plastic wrap. Store it in the refrigerator for up to 5 days.
Keep it chilled until serving again. The cheesecake should stay covered to protect the texture.
Step 36: Freeze Individual Slices
For longer storage, slice the cheesecake and freeze individual pieces in airtight containers. They can be frozen for up to 3 months.
Freezing slices makes it easy to enjoy a piece later. Seal the containers well.
Step 37: Thaw Before Serving
Thaw frozen cheesecake slices in the refrigerator before enjoying. This gives the best texture.
Do not rush the thawing if you want the filling to stay creamy. Serve once fully thawed.
Serving Ideas
Serve Chocolate Orange Cheesecake chilled after it has fully set. The texture should be creamy, firm enough to slice, and smooth.
Run a knife around the edge of the springform pan before releasing it. This helps keep the outside clean and neat.
Slice the cheesecake into wedges. Each slice can be served plain or dressed up.
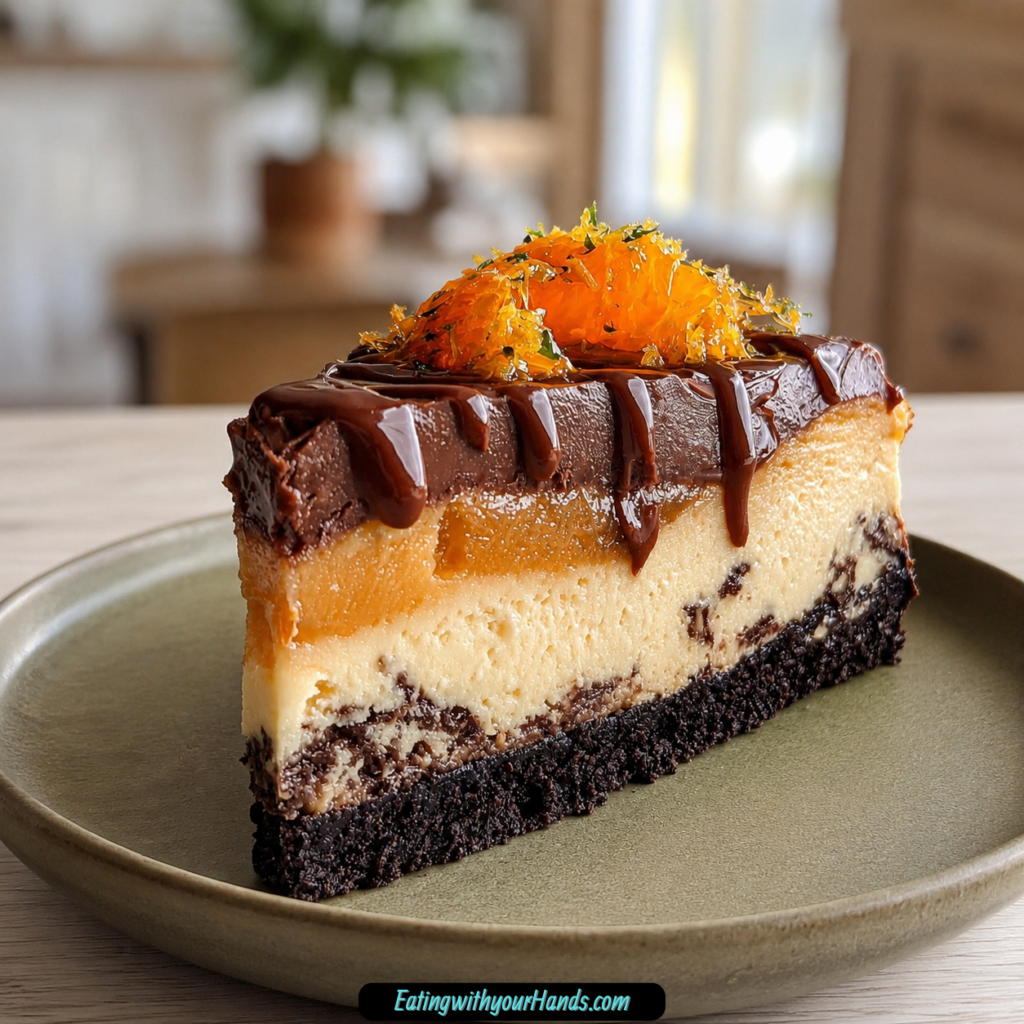
A twist of orange peel makes a beautiful garnish. It gives the slice a fresh citrus look.
Chocolate sauce can be drizzled over each slice for a more indulgent presentation. It adds shine and extra chocolate flavor.
Whipped cream on the side is also a lovely addition. It makes the dessert feel even more special for birthdays, holidays, and family gatherings.
Storage
Leftover Chocolate Orange Cheesecake can be covered with plastic wrap and stored in the refrigerator for up to 5 days. Keep it chilled until serving.
The cheesecake should stay covered so it does not dry out or absorb refrigerator odors. Plastic wrap works well for short-term storage.
For clean slices after storage, cut the cheesecake while it is still cold. The filling holds its shape best when chilled.
Freezing
Chocolate Orange Cheesecake can be frozen. Slice it into individual pieces and store them in airtight containers.
The slices will keep well in the freezer for up to 3 months. This makes it easy to enjoy a slice later.
Thaw the cheesecake in the refrigerator before serving. This gives the best texture and keeps the filling creamy.
Make-Ahead
This cheesecake is perfect for making ahead. It needs at least 4 hours to set, and overnight chilling is even better.
You can prepare it the day before a gathering. This gives the flavors time to meld and makes serving easier.
Keep the cheesecake covered in the refrigerator until ready to serve. Add garnishes like orange peel, chocolate sauce, or whipped cream right before serving.
Helpful Notes for Best Results
Make sure the cream cheese is at room temperature before mixing. This helps create a smoother filling.
Crush the biscuits finely for the base. Fine crumbs mix better with melted butter and press into a cleaner crust.
The biscuit mixture should look like wet sand and hold together when squeezed. This means the butter is well distributed.
Press the crust firmly into the springform pan. A compact base helps each slice hold together.
Wash the oranges before zesting. The zest goes directly into the filling and gives the cheesecake fresh citrus flavor.
Use good quality dark chocolate around 70% cocoa for richness. Melt it smoothly before mixing it into the filling.
If you are short on time, use a store-bought crust instead of making your own. For a nutty flavor, add finely chopped nuts to the base mixture.
A sprinkle of sea salt on top can create a salted chocolate contrast. Use gluten-free biscuits if you want the cheesecake to be gluten-free.
Variations
Greek Yogurt Chocolate Orange Cheesecake
Swap half of the cream cheese for Greek yogurt for a lighter version. This makes the filling a little less heavy.
The texture will change slightly. The chocolate and orange flavors will still remain.
Orange Jelly Chocolate Cheesecake
Add a layer of orange jelly on top. This gives the cheesecake an extra citrus burst.
It also makes the dessert look more colorful. The jelly adds another texture.
Gluten-Free Chocolate Orange Cheesecake
Use gluten-free digestive biscuits. This makes the cheesecake gluten-free.
The rest of the cheesecake can stay the same. Check all ingredients as needed.
Mocha Orange Cheesecake
Add a hint of espresso powder for a mocha twist. This deepens the chocolate flavor.
The orange still keeps the dessert bright. This variation tastes richer and more intense.
White Chocolate Orange Cheesecake
Use white chocolate instead of dark chocolate. This creates a sweeter flavor profile.
The dessert will taste less deep and more creamy-sweet. Orange still brings brightness.
Graham Cracker Orange Cheesecake
Use graham crackers instead of digestive biscuits. This gives the crust a different flavor.
The base method stays the same. Crush, mix with butter, and press into the pan.
Heavy Cream Cheesecake
Use heavy cream instead of double cream. This is listed as a substitute.
The filling will still be rich and creamy. Mix until combined and thickened.
Mascarpone Chocolate Orange Cheesecake
Use mascarpone instead of cream cheese for a different texture. This changes the filling.
The cheesecake will still be creamy. The flavor will differ from the original.
Coconut Sugar Cheesecake
Swap granulated sugar with coconut sugar for a healthier alternative. This changes the sweetness and flavor.
The texture may also vary slightly. Use it as an optional sweetener variation.
Nutty Chocolate Orange Crust
Add finely chopped nuts to the base mixture. This gives the crust a nutty flavor.
Make sure the nuts are finely chopped. The crust should still press together firmly.
Salted Chocolate Orange Cheesecake
Add a sprinkle of sea salt on top. This gives the dessert a salted chocolate contrast.
The salt should be light. It is meant to balance the sweetness and chocolate.
Troubleshooting
The Biscuit Base Crumbles
Make sure the biscuits are finely crushed. Large pieces can make the base unstable.
Mix the crumbs with melted butter until they resemble wet sand. Press the base firmly into the pan.
The Filling Has Lumps
Use softened cream cheese at room temperature. Beat it until smooth before adding the other ingredients.
Cold cream cheese can create lumps. Take your time with the first mixing step.
The Filling Is Too Loose
Make sure the cheesecake chills for at least 4 hours. Overnight is even better.
The cheesecake needs refrigerator time to set properly. Do not slice it too early.
The Chocolate Does Not Blend Smoothly
Use melted chocolate that is smooth and not too hot. Mix it well into the filling.
Scrape the bowl if needed. The filling should be evenly chocolatey.
The Orange Flavor Is Too Mild
The recipe uses both orange zest and orange extract. Make sure both are included.
Wash and zest 2 large oranges for the fresh citrus flavor. Pure orange extract is recommended if possible.
The Cheesecake Sticks to the Pan
Lightly grease the springform pan before adding the crust. This helps prevent sticking.
Run a knife around the edge before releasing the pan. This helps create a clean edge.
The Slices Are Messy
Chill the cheesecake long enough before slicing. A fully set cheesecake cuts more cleanly.
Use a clean knife when slicing into wedges. Move slowly through the creamy filling and biscuit base.
The Cheesecake Needs to Be Gluten-Free
Use gluten-free digestive biscuits. The cheesecake is naturally gluten-free if gluten-free biscuits are used.
Check all ingredient labels as needed. This keeps the dessert aligned with gluten-free needs.
Frequently Asked Questions
Can I freeze Chocolate Orange Cheesecake?
Yes, Chocolate Orange Cheesecake can be frozen. Slice it into individual pieces and store them in airtight containers.
It will keep well in the freezer for up to 3 months. Thaw in the refrigerator before enjoying for the best texture.
How can I substitute ingredients?
You can substitute cream cheese with mascarpone for a different texture. If you need a gluten-free option, use gluten-free digestive biscuits.
Granulated sugar can be swapped with coconut sugar for a healthier alternative. Heavy cream can also be used instead of double cream.
How long does the cheesecake need to set?
The cheesecake needs at least 4 hours to set in the refrigerator. Overnight chilling is even better.
This time allows the flavors to meld beautifully. It also helps create a clean slice.
Can I use graham crackers instead of digestive biscuits?
Yes, graham crackers can be used if you prefer a different flavor. Crush them finely just like the digestive biscuits.
Mix the crumbs with melted butter. Press the mixture firmly into the springform pan.
Can I use white chocolate?
Yes, white chocolate can be used instead of dark chocolate. It creates a sweeter flavor profile.
The cheesecake will taste different from the dark chocolate version. It will be lighter and sweeter.
Can I make this cheesecake lighter?
Yes, swap half of the cream cheese for Greek yogurt. This creates a lighter version.
The texture and flavor will change slightly. The cheesecake will still keep its chocolate orange character.
What can I use for garnish?
Orange peel, chocolate sauce, and whipped cream are all serving options. Each one gives the cheesecake a different finish.
Orange peel looks elegant and fresh. Chocolate sauce adds richness, and whipped cream adds softness.
Can I use a store-bought crust?
Yes, if you are short on time, you can use a store-bought crust. This makes the recipe even quicker.
The flavor and texture will be different from the homemade biscuit base. It is still a helpful shortcut.
Why This Recipe Works So Well
Chocolate Orange Cheesecake works so well because it brings together richness and brightness in one creamy dessert. The chocolate gives depth, while the orange zest and extract lift the flavor.
The no-bake method makes the recipe easy and approachable. The refrigerator does the setting work, so there is no oven timing to manage.
The biscuit base is simple but important. Digestive biscuits or graham crackers mixed with melted butter create a firm, buttery foundation.
The filling is smooth because the cream cheese is beaten first. Sugar, cream, orange zest, orange extract, and melted chocolate then blend into a rich filling.
The chill time gives the cheesecake its structure. Four hours is the minimum, and overnight chilling gives the best set and flavor.
The dessert is also flexible. Greek yogurt, orange jelly, gluten-free biscuits, espresso powder, white chocolate, orange peel, chocolate sauce, whipped cream, store-bought crust, finely chopped nuts, sea salt, mascarpone, and coconut sugar all give you ways to adapt it.
Most of all, this cheesecake works because it feels celebratory. It is creamy, citrusy, chocolatey, easy to make ahead, and beautiful enough for the center of a family table.
Final Thoughts
Chocolate Orange Cheesecake is a rich no-bake dessert made with a buttery digestive biscuit base, softened cream cheese, caster sugar, double cream, orange zest, orange extract, and melted dark chocolate. It takes just 30 minutes to prepare, then chills for at least 4 hours until set.
Serve it cold in clean wedges with orange peel, chocolate sauce, or whipped cream, and store leftovers in the refrigerator or freezer for later. Whether you make it for a birthday, holiday feast, family gathering, or cozy dessert night, this cheesecake brings creamy chocolate-orange comfort to every slice.
Chocolate Orange Cheesecake
Creamy, rich, citrusy, and smooth, this Chocolate Orange Cheesecake brings together a buttery digestive biscuit base with a chocolate-orange cream cheese filling. Dark chocolate, orange zest, orange extract, double cream, and caster sugar create a chilled American-style dessert with a bold chocolate flavor and a bright orange finish.
Recipe Details
- Prep Time: 30 minutes
- Total Time: 30 minutes
- Course: Dessert
- Cuisine: American
- Servings: 8 people
- Calories: 450 kcal
Equipment
- Mixing bowl
- Springform pan
Ingredients
For the Filling
- 600 g Cream Cheese softened
- 300 ml Double Cream
- 150 g Caster Sugar
- 100 g Dark Chocolate melted
- 2 oranges Orange Zest
- 1 teaspoon Orange Extract
For the Base
- 250 g Digestive Biscuits
- 100 g Unsalted Butter melted
Instructions
Step 1: Make the Biscuit Base
Crush the digestive biscuits and mix them with the melted butter. Stir until the biscuit crumbs are evenly coated.
Step 2: Press the Base Into the Pan
Press the biscuit mixture into the base of a springform pan. Spread it evenly so it forms the cheesecake base.
Step 3: Mix the Cheesecake Filling
In a mixing bowl, combine the cream cheese, caster sugar, double cream, orange zest, orange extract, and melted chocolate. Mix until smooth.
Step 4: Fill the Cheesecake
Pour the filling over the biscuit base. Smooth the top evenly.
Step 5: Chill Until Set
Refrigerate for at least 4 hours or until set.
Notes
- For best results, let the cheesecake chill overnight before serving.
Serving Suggestions
Serve this Chocolate Orange Cheesecake chilled after it has fully set. The buttery digestive biscuit base and creamy chocolate-orange filling make each slice rich, smooth, and bright with citrus flavor.
This dessert works well for gatherings, holidays, dinner parties, or any occasion where you want a creamy chocolate dessert with a fresh orange note. For best results, let the cheesecake chill overnight before serving.
Storage
How to Store
The recipe does not provide a specific storage duration, so no exact storage time is added here.
Chill Time
Refrigerate the cheesecake for at least 4 hours or until set. For best results, let the cheesecake chill overnight before serving.
Best Texture Tip
Serve the cheesecake only after the filling has set completely. This helps the slices hold their shape and keeps the filling smooth and creamy.
Flavor Tip
Use both orange zest and orange extract as listed. Together with the melted dark chocolate, they create the chocolate-orange flavor in the filling.

Fernando is the creator and writer behind the food blog Eating with your Hands. Living and working in cities like Paris, Barcelona, and Berlin, and being married to a Canadian foodie, has given Fernando a passion and interest in food and inspired him to run EWYH.