
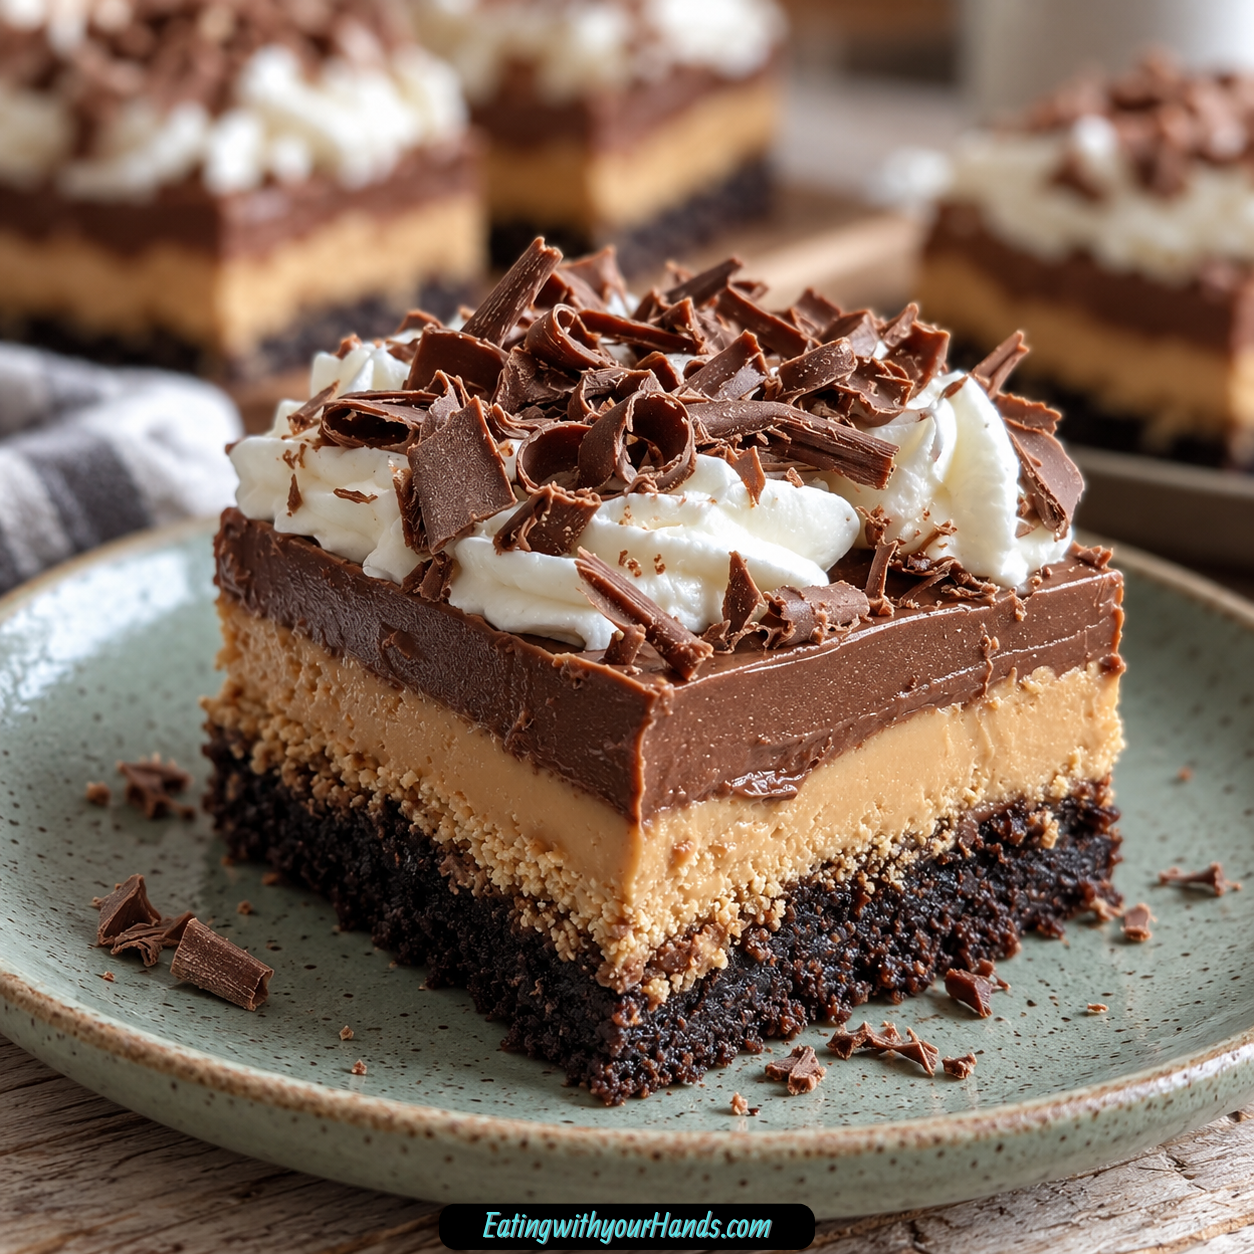
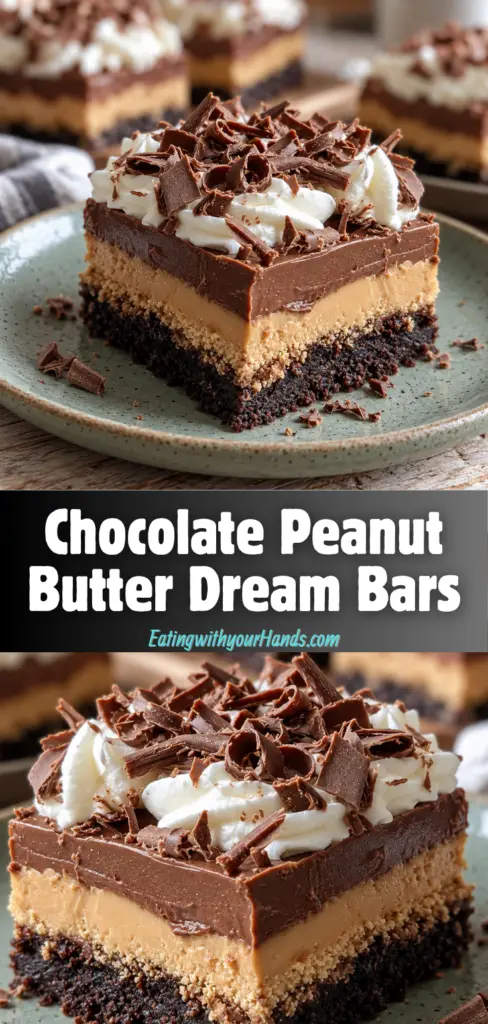
Chocolate Peanut Butter Dream Bars are the kind of layered dessert that makes people think you spent hours in the kitchen, even though the process is wonderfully simple. They start with a crunchy chocolate cookie crust, continue with a fluffy peanut butter cream cheese layer, and finish with a smooth chocolate pudding topping that ties everything together.
This dessert has the flavor of chocolate and peanut butter in the most comforting form. It is cool, creamy, rich, and sweet, with just enough crunch from the crust to make every bite interesting.
The best part is how low-stress the recipe feels. The crust gets a quick 10-minute bake, but the rest of the dessert sets in the refrigerator, which makes it perfect for warm weather, busy party days, or any moment when you want a make-ahead treat.
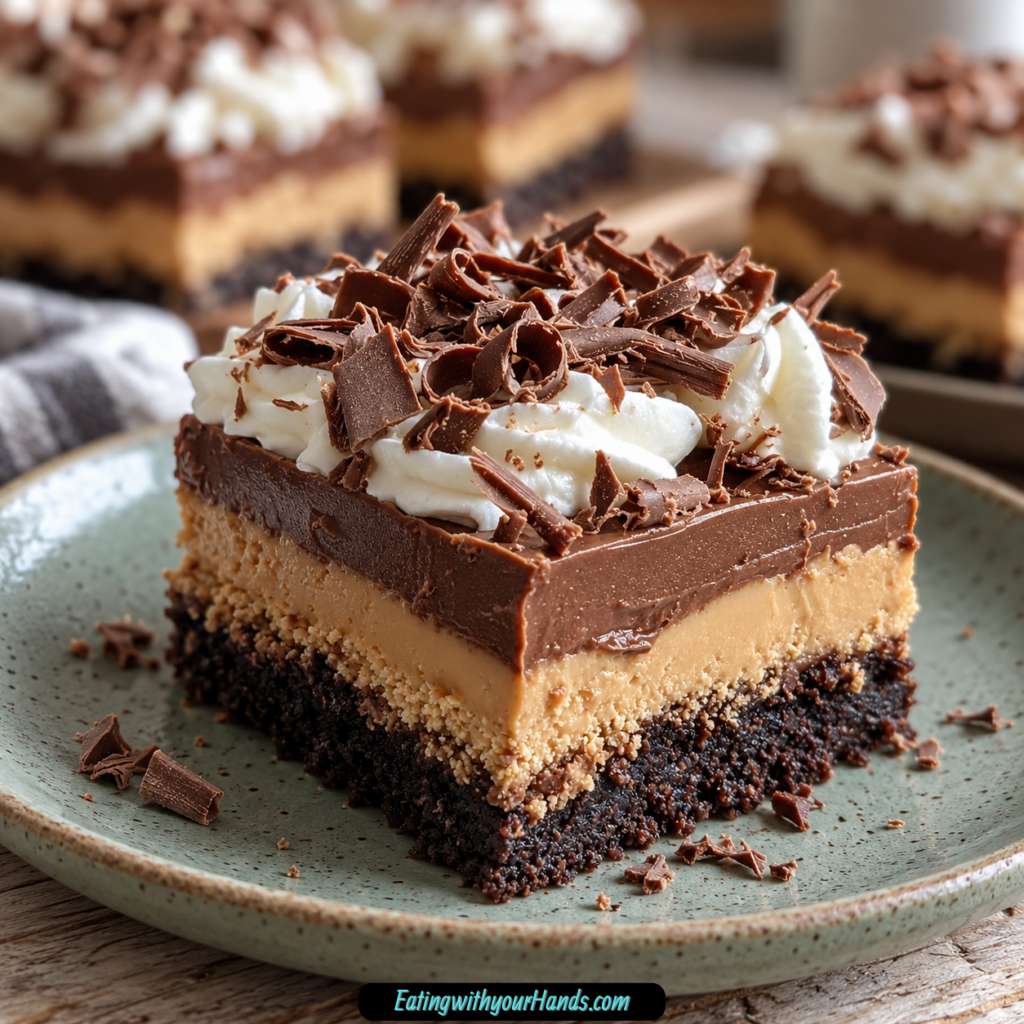
These bars are also wonderfully dramatic for how easy they are. Once sliced, the layers look beautiful: dark chocolate cookie crust, pale peanut butter filling, chocolate pudding, and a soft whipped topping finish if you choose to add it.
The peanut butter layer is the star for me. Creamy peanut butter, softened cream cheese, powdered sugar, and whipped topping become a smooth, cloud-like filling that tastes rich but still light enough to layer.
The chocolate pudding layer adds that silky finish. It keeps the bars cool and soft, making them feel a little like a chocolate mousse pie, but easier to portion and share.
This is the dessert I imagine on potluck tables, family dinner spreads, summer parties, backyard barbecues, and late-night dessert plates. It is simple enough for a weeknight but pretty enough to make people pause before taking the first bite.
Chocolate Peanut Butter Dream Bars are creamy, crunchy, chocolatey, peanut buttery, and deeply satisfying. They are proof that a dessert does not need complicated steps to feel unforgettable.
Table of Contents
- Why You’ll Love Chocolate Peanut Butter Dream Bars
- Recipe Details
- Ingredients
- Ingredient Notes
- Optional Swaps, Variations, Add-Ins, and Serving Ideas
- Classic Chocolate Peanut Butter Dream Bars
- Graham Cracker Crust Bars
- Gluten-Free Cookie Crust Bars
- Salty-Sweet Pretzel Crust Bars
- Nutty Chocolate Crust Bars
- Almond Butter Dream Bars
- Cashew Butter Dream Bars
- Cookie Butter Dream Bars
- Dark Chocolate Peanut Butter Bars
- Caramel Peanut Butter Dream Bars
- Mocha Peanut Butter Bars
- Crunchy Garnish Bars
- Why This Recipe Works
- Directions
- Step 1: Prepare the Baking Dish
- Step 2: Preheat the Oven
- Step 3: Crush the Cookies
- Step 4: Mix the Crust
- Step 5: Press the Crust Firmly
- Step 6: Bake the Crust
- Step 7: Soften the Cream Cheese
- Step 8: Beat the Peanut Butter Base
- Step 9: Fold in the Whipped Topping
- Step 10: Spread the Peanut Butter Layer
- Step 11: Whisk the Pudding
- Step 12: Let the Pudding Thicken
- Step 13: Add the Chocolate Layer
- Step 14: Chill the Bars
- Step 15: Garnish Before Serving
- Step 16: Slice Cleanly
- Step 17: Store Leftovers
- Step 18: Handle Freezing Carefully
- Serving Ideas
- Storage
- Freezing
- Make-Ahead
- Helpful Notes for Best Results
- Variations
- Classic Chocolate Peanut Butter Dream Bars
- Graham Cracker Dream Bars
- Gluten-Free Dream Bars
- Toasted Nut Crust Bars
- Almond Butter Chocolate Bars
- Cashew Butter Chocolate Bars
- Cookie Butter Dream Bars
- Dark Chocolate Dream Bars
- Caramel Swirl Dream Bars
- Mocha Peanut Butter Dream Bars
- Extra Crunch Dream Bars
- Natural Peanut Butter Version
- Troubleshooting
- Frequently Asked Questions
- Why This Recipe Works So Well
- Final Thoughts
- Chocolate Peanut Butter Dream Bars
Why You’ll Love Chocolate Peanut Butter Dream Bars
These bars have beautiful layers. The crust, peanut butter filling, and chocolate pudding topping create a dessert that looks impressive when sliced.
They are mostly no-bake. Only the crust needs a quick 10-minute bake.
They are make-ahead friendly. The bars need at least 4 hours to chill, and overnight chilling makes the layers even better.
They are rich but not difficult. The recipe uses familiar ingredients and simple mixing.
They fit almost any occasion. Serve them at potlucks, backyard barbecues, dinner parties, family gatherings, or quiet dessert nights.
They are easy to customize. You can change the crust, nut butter, pudding flavor, toppings, or garnish.
Recipe Details
This recipe uses a 9×13-inch baking dish. Grease the dish before pressing in the crust.
The crust bakes at 350°F (175°C) for 10 minutes. It must cool completely before the peanut butter layer is added.
The crust uses 16 oz chocolate sandwich cookies and ½ cup melted unsalted butter. If the crumb mixture seems too dry, add another tablespoon of butter.
The cookies should be crushed fine, like sand. This helps the crust pack firmly and hold together.
The peanut butter layer uses 1 cup creamy peanut butter, 8 oz softened cream cheese, 1 cup powdered sugar, and 8 oz thawed whipped topping.
Regular creamy peanut butter works best. Natural peanut butter can be used, but the texture may be grainier because it separates.
The chocolate layer uses 3.9 oz instant chocolate pudding mix and 1.5 cups milk. The pudding must be instant, not cook-and-serve.
The pudding and milk should be whisked for a full 2 minutes. Then the pudding should sit for 5 minutes to thicken.
The bars should chill for at least 4 hours. Overnight chilling gives the cleanest slices and best set.
Ingredients
For the Crust
- 16 oz chocolate sandwich cookies
- ½ cup unsalted butter, melted
For the Peanut Butter Layer
- 1 cup creamy peanut butter
- 8 oz cream cheese, softened
- 1 cup powdered sugar
- 8 oz whipped topping, thawed
For the Chocolate Layer
- 3.9 oz instant chocolate pudding mix
- 1.5 cups milk
For Garnish
- Extra whipped topping
- Chocolate curls
Optional Swaps, Add-Ins, and Finishes
- Salted butter
- 1 tablespoon extra melted butter
- Oreo cookies
- 2 cups graham cracker crumbs
- 16 full graham cracker sheets
- Gluten-free chocolate sandwich cookies
- Gluten-free vanilla sandwich cookies
- Gluten-free pretzels
- Toasted pecans
- Toasted almonds
- Almond butter
- Cashew butter
- Cookie butter
- Dark chocolate pudding mix
- Flaky sea salt
- Caramel sauce
- 1 teaspoon instant espresso powder
- Crushed peanuts
- Mini chocolate chips
- Cocoa powder
- ¼ cup extra powdered sugar
Ingredient Notes
Chocolate sandwich cookies create the crunchy chocolate base. Oreos work well, but any brand of chocolate sandwich cookie can be used.
The cookies should be crushed very finely. If the pieces are too large, the crust can crumble when sliced.
Melted butter binds the crumbs together. If the mixture looks dry instead of like wet sand, add another tablespoon of melted butter.
Creamy peanut butter gives the filling its smooth flavor. Regular peanut butter blends better than natural peanut butter.
Cream cheese adds tang and structure to the peanut butter layer. It should be softened so the filling does not turn lumpy.
Powdered sugar sweetens the peanut butter filling and keeps the texture smooth. Stir it before measuring if it has lumps.
Whipped topping makes the peanut butter layer light and fluffy. It should be thawed before folding.
Instant chocolate pudding mix is essential for the chocolate layer. Cook-and-serve pudding will not work the same way here.
Milk activates the instant pudding and creates the silky topping. Whole milk makes it extra creamy, but any kind can work.
Extra whipped topping and chocolate curls make the bars look finished. They are optional but highly recommended for serving.
Optional Swaps, Variations, Add-Ins, and Serving Ideas
Classic Chocolate Peanut Butter Dream Bars
Use chocolate sandwich cookies, melted butter, creamy peanut butter, cream cheese, powdered sugar, whipped topping, instant chocolate pudding, milk, extra whipped topping, and chocolate curls. This gives the full layered dessert.
Chill the bars until firm before slicing. Serve cold.
Graham Cracker Crust Bars
Swap the chocolate cookies for 2 cups graham cracker crumbs. That equals about 16 full graham cracker sheets.
Use the same amount of butter. The crust will taste sweeter and almost honey-like.
Gluten-Free Cookie Crust Bars
Use gluten-free chocolate or vanilla sandwich cookies. Keep the crumb texture fine.
The layers stay the same. Make sure every ingredient fits your gluten-free needs.
Salty-Sweet Pretzel Crust Bars
Use crushed gluten-free pretzels for a salty-sweet twist. Crush them finely so the crust holds.
This variation changes the flavor but keeps the layered idea. Add enough butter for a wet sand texture.
Nutty Chocolate Crust Bars
Replace half the cookies with finely chopped toasted pecans or almonds. Pulse them fine so the crust does not become chunky.
The nuts add richness and texture. Press the crust firmly.
Almond Butter Dream Bars
Use almond butter instead of peanut butter. The flavor becomes milder and nuttier.
The filling should still be smooth. Use creamy almond butter for best results.
Cashew Butter Dream Bars
Use cashew butter for a softer nut flavor. It creates a creamy, mellow filling.
This variation tastes different from peanut butter but still pairs well with chocolate. Keep the ratios the same.
Cookie Butter Dream Bars
Use cookie butter instead of peanut butter for a speculoos-inspired version. The flavor becomes warmer and more spiced.
This is a fun twist for cookie butter fans. Keep the filling smooth.
Dark Chocolate Peanut Butter Bars
Use dark chocolate pudding mix instead of regular chocolate pudding. The flavor becomes richer and slightly less sweet.
Sprinkle flaky sea salt on top before serving. The salt balances the chocolate and peanut butter.
Caramel Peanut Butter Dream Bars
Swirl a few tablespoons of caramel sauce into the peanut butter layer before adding the chocolate layer. The caramel creates little pockets of sweetness.
Do not add too much, or the layer may become loose. Keep the swirl gentle.
Mocha Peanut Butter Bars
Add 1 teaspoon instant espresso powder to the pudding mix. This creates a subtle mocha flavor.
The espresso makes the chocolate taste deeper. It should not overpower the peanut butter.
Crunchy Garnish Bars
Top the bars with crushed peanuts, mini chocolate chips, or both. These toppings add texture.
Add garnish shortly before serving. This keeps the top looking fresh.
Why This Recipe Works
This recipe works because every layer brings a different texture. The crust is crunchy, the peanut butter layer is fluffy, and the chocolate topping is smooth.
The quick-baked crust creates a sturdy base. Cooling it completely keeps the peanut butter layer from melting into it.
Cream cheese gives the peanut butter filling structure. Powdered sugar sweetens it, while whipped topping lightens it.
Folding the whipped topping gently keeps the layer airy. Beating it too hard can make the filling heavy.
Instant pudding creates a fast chocolate layer that sets in the refrigerator. Whisking for the full 2 minutes helps it thicken properly.
The 4-hour chill time is what makes the bars sliceable. Overnight chilling gives even cleaner layers.
The recipe also works because it is easy to adapt. Graham crackers, gluten-free cookies, nuts, almond butter, cashew butter, cookie butter, dark chocolate pudding, caramel, and espresso can all change the flavor.
Most of all, these bars work because they deliver big dessert energy with simple steps. They look layered and polished, but the process is friendly and forgiving.
Directions
Step 1: Prepare the Baking Dish
Grease a 9×13-inch baking dish with cooking spray or a light rub of butter. Make sure the corners are coated.
This helps the crust release more easily when serving. A prepared dish also makes slicing cleaner.
Step 2: Preheat the Oven
Preheat the oven to 350°F (175°C). The oven is only needed for the crust.
Let the oven heat fully before baking. A short bake helps the crust become more stable.
Step 3: Crush the Cookies
Crush 16 oz chocolate sandwich cookies into fine crumbs. The texture should look like sand, not gravel.
A food processor works quickly, but a zip-top bag and rolling pin also work. Fine crumbs make the crust hold better.
Step 4: Mix the Crust
Place the crumbs in a bowl and add ½ cup melted unsalted butter. Stir until the mixture looks like wet sand.
If the crumbs still look dry, add another tablespoon of melted butter. The mixture should clump when pressed.
Step 5: Press the Crust Firmly
Transfer the crumb mixture to the prepared baking dish. Press it firmly into the bottom.
Use the bottom of a measuring cup to pack it down evenly. A firm crust is less likely to crumble later.
Step 6: Bake the Crust
Bake the crust for 10 minutes. Remove it from the oven and let it cool completely.
Do not add the peanut butter layer to a warm crust. Warm crust can melt the filling and blur the layers.
Step 7: Soften the Cream Cheese
Make sure the 8 oz cream cheese is softened before mixing. Leave it on the counter for about 30 minutes.
If you are short on time, microwave it for 10 seconds. It should be soft, not hot.
Step 8: Beat the Peanut Butter Base
In a large bowl, beat 1 cup creamy peanut butter, the softened cream cheese, and 1 cup powdered sugar. Mix until smooth.
Scrape the bowl as needed. Lumps of cream cheese can hide in the mixture.
Step 9: Fold in the Whipped Topping
Add 8 oz thawed whipped topping to the peanut butter mixture. Fold gently with a spatula.
Use slow, sweeping motions. This keeps the layer fluffy.
Step 10: Spread the Peanut Butter Layer
Spread the peanut butter mixture over the completely cooled crust. Use the back of a spoon or spatula to smooth it evenly.
Try to keep the layer level from edge to edge. This makes the finished bars look cleaner.
Step 11: Whisk the Pudding
In a separate bowl, whisk 3.9 oz instant chocolate pudding mix with 1.5 cups milk. Whisk for a full 2 minutes.
Set a timer if needed. The full whisking time helps the pudding set properly.
Step 12: Let the Pudding Thicken
Let the pudding sit for 5 minutes. It will thicken as it stands.
Do not rush this step. Thicker pudding spreads more neatly over the peanut butter layer.
Step 13: Add the Chocolate Layer
Pour the thickened pudding over the peanut butter layer. Spread it gently.
Start from the center and work outward. This helps avoid dragging up the peanut butter layer.
Step 14: Chill the Bars
Place the dish in the refrigerator for at least 4 hours. Overnight chilling is even better.
The layers need time to set. This is what makes clean slices possible.
Step 15: Garnish Before Serving
Before serving, add extra whipped topping and chocolate curls if desired. You can also add cocoa powder, crushed peanuts, mini chocolate chips, or caramel drizzle.
Add garnish close to serving time. This keeps the top fresh and pretty.
Step 16: Slice Cleanly
Run a sharp knife under hot water, then wipe it dry. Slice the bars with steady cuts.
Repeat the hot-water wipe between slices for cleaner edges. This helps preserve the layers.
Step 17: Store Leftovers
Cover leftovers and refrigerate for up to 5 days. Place a paper towel over the top before wrapping to help prevent condensation.
Keep the bars chilled. The pudding and whipped layers stay best in the refrigerator.
Step 18: Handle Freezing Carefully
Freezing is not recommended because the pudding layer can become watery after thawing. If freezing is necessary, skip the whipped topping garnish and wrap individual slices tightly in plastic, then foil.
Thaw in the refrigerator overnight. Expect some texture change.
Serving Ideas
Serve these bars cold from the refrigerator. The layers hold best when chilled.
Add extra whipped topping before serving. It makes the top soft and pretty.
Chocolate curls give the bars a party-ready finish. Use a vegetable peeler to shave a chocolate bar if needed.
Dust with cocoa powder for a more polished look. Use a light hand.
Add crushed peanuts for crunch. This works especially well with the peanut butter layer.
Mini chocolate chips make the top fun and simple. They are easy and kid-friendly.
A caramel drizzle gives the bars extra sweetness. Add it just before serving.
Serve them at backyard barbecues, dinner parties, potlucks, family dinners, or book club. They fit almost anywhere.
Storage
Keep Chocolate Peanut Butter Dream Bars covered in the refrigerator. They stay good for up to 5 days.
Place a paper towel over the top before wrapping. This helps prevent condensation from dripping onto the pudding layer.
Do not leave them at room temperature for long. The creamy layers need to stay chilled.
For the cleanest texture, slice only what you need. Keep the rest of the pan covered.
The bars are even better the next day. The layers have time to settle and the flavor becomes richer.
Add garnish right before serving if possible. This keeps whipped topping fluffy and chocolate curls pretty.
If the crust softens slightly over time, the bars will still taste delicious. The layered texture remains the main appeal.
Freezing
These bars do not freeze well because the pudding layer can get watery after thawing. The texture may shift from smooth to weepy.
If freezing is absolutely necessary, freeze slices without whipped topping garnish. Wrap each piece tightly in plastic wrap, then foil.
Thaw overnight in the refrigerator. Do not thaw at room temperature for long.
Expect some texture change after freezing. The flavor can still be good, but the pudding may not look as neat.
For best results, make the bars ahead and refrigerate instead. They keep well for up to 5 days.
Because they are better after chilling overnight, refrigerator storage is the better planning method. Freezing should be a backup only.
Serve thawed slices cold. Add fresh garnish after thawing.
Make-Ahead
These bars are excellent for make-ahead dessert planning. They actually slice best after a long chill.
Make them the day before a party if possible. The layers become firmer after 24 hours in the refrigerator.
Wait to garnish until right before serving. This keeps the whipped topping fluffy and the chocolate curls neat.
The crust can be baked earlier in the day. Let it cool completely before adding filling.
The peanut butter layer should be spread only after the crust is cool. This keeps the layers distinct.
The pudding layer should be added after it thickens for 5 minutes. This helps it sit cleanly on top.
Make-ahead bars are perfect for potlucks and gatherings. The pan travels easily if kept chilled.
Helpful Notes for Best Results
Crush the cookies finely. Large crumbs make the crust more likely to fall apart.
Press the crust firmly. A measuring cup helps pack it tightly.
Cool the crust completely before adding the filling. Warm crust can melt the peanut butter layer.
Use softened cream cheese. Cold cream cheese can leave lumps.
Fold the whipped topping gently. This keeps the peanut butter layer fluffy.
Use instant pudding mix, not cook-and-serve. The recipe depends on instant pudding setting properly.
Whisk the pudding for the full 2 minutes. This prevents a loose chocolate layer.
Chill at least 4 hours. Overnight chilling gives the cleanest slices.
Variations
Classic Chocolate Peanut Butter Dream Bars
Use chocolate sandwich cookies, butter, creamy peanut butter, cream cheese, powdered sugar, whipped topping, instant chocolate pudding, milk, whipped topping garnish, and chocolate curls. This gives the full classic layered bar.
Serve cold. Chill well before slicing.
Graham Cracker Dream Bars
Use 2 cups graham cracker crumbs, about 16 full sheets, instead of chocolate sandwich cookies. Use the same amount of butter.
The crust becomes lighter and sweeter. It pairs beautifully with peanut butter.
Gluten-Free Dream Bars
Use gluten-free chocolate or vanilla sandwich cookies. Gluten-free pretzels can also create a salty-sweet crust.
Keep the crumbs fine. Check all other ingredients as needed.
Toasted Nut Crust Bars
Replace half the cookies with finely chopped toasted pecans or almonds. Pulse them fine first.
This gives the crust nutty depth. Avoid large chunks.
Almond Butter Chocolate Bars
Use almond butter instead of peanut butter. The filling becomes nutty but less peanut-forward.
Keep the texture smooth. Use a creamy almond butter.
Cashew Butter Chocolate Bars
Use cashew butter for a mild, creamy flavor. It pairs well with the chocolate pudding layer.
This variation is smooth and rich. Keep the same ratios.
Cookie Butter Dream Bars
Use cookie butter instead of peanut butter. The dessert becomes spiced and sweet.
This gives the bars a speculoos-inspired flavor. Keep the layers distinct.
Dark Chocolate Dream Bars
Use dark chocolate pudding mix. The chocolate layer becomes richer and slightly less sweet.
Sprinkle flaky sea salt on top before serving. This balances the richness.
Caramel Swirl Dream Bars
Swirl a few tablespoons of caramel sauce into the peanut butter layer before adding the chocolate pudding. Keep the swirl gentle.
The caramel creates gooey pockets. Do not add too much or the filling may loosen.
Mocha Peanut Butter Dream Bars
Add 1 teaspoon instant espresso powder to the pudding mix. The chocolate flavor becomes deeper.
The espresso should be subtle. It adds a mocha twist.
Extra Crunch Dream Bars
Garnish with crushed peanuts or mini chocolate chips. This adds texture to the soft layers.
Add toppings before serving. They look best fresh.
Natural Peanut Butter Version
Natural peanut butter can be used, but the texture may be grainier. Stir it very well first.
Add an extra ¼ cup powdered sugar to help stabilize the filling. The result may still be less smooth.
Troubleshooting
The Crust Is Crumbly
The crumbs may be too coarse or too dry. Crush them finer and add another tablespoon of melted butter if needed.
Press the crust firmly into the pan. A tightly packed crust holds better.
The Crust Got Soggy
The crust may not have cooled completely before filling was added. Let it cool to room temperature first.
Pressing the crust firmly also helps create a better barrier. Do not rush the cooling step.
The Peanut Butter Layer Has Lumps
The cream cheese was likely too cold. Soften it fully before mixing.
Microwave in 10-second bursts if needed. Beat until smooth before folding in whipped topping.
The Peanut Butter Layer Is Too Thick
The cream cheese may not have softened enough. Let it warm more and beat again.
Fold in the whipped topping gently. Do not overmix until dense.
The Pudding Did Not Set
Make sure instant pudding mix was used. Cook-and-serve pudding will not work the same way.
Whisk the pudding and milk for the full 2 minutes. Then let it sit 5 minutes before spreading.
The Bars Are Too Soft to Slice
They need more chill time. Chill at least 4 hours, preferably overnight.
For a quick fix, place the pan in the freezer for 30 minutes before slicing. This firms the layers.
The Layers Mixed Together
The crust may have been warm, or the pudding may have been spread too aggressively. Cool the crust completely and spread gently from the center outward.
A slightly swirled look is fine. The bars will still taste wonderful.
The Top Has Condensation
Covering too tightly can trap moisture. Place a paper towel over the top before wrapping.
This helps protect the pudding layer. Keep the bars refrigerated.
The Bars Do Not Look Perfect
Layered desserts can be a little rustic. Chill well and use a hot knife for cleaner slices.
Even uneven layers taste great. The texture and flavor matter most.
The Frozen Bars Turned Watery
The pudding layer does not freeze well. Thaw in the refrigerator and expect texture changes.
For best results, refrigerate instead of freezing. Add fresh garnish before serving.
Frequently Asked Questions
Can I freeze these dream bars?
Freezing is not recommended because the pudding layer can become watery when thawed. The texture may change.
If you must freeze them, skip the whipped topping garnish and wrap individual slices tightly in plastic, then foil. Thaw in the refrigerator overnight.
How do I keep the crust from getting soggy?
Let the baked crust cool completely before adding the peanut butter layer. Warm crust can melt the filling and soften the base.
Press the crust very firmly into the dish. A tight crust creates a better barrier.
Can I use natural peanut butter?
Yes, but the texture may be grainier because natural peanut butter tends to separate. Stir it extremely well first.
Add an extra ¼ cup powdered sugar if needed to help stabilize the filling. Regular creamy peanut butter gives the smoothest result.
My pudding layer is not setting. What happened?
The pudding must be instant pudding mix, not cook-and-serve. That is the most important detail.
Whisk the pudding with milk for the full 2 minutes. If it is still too soft after chilling, place the pan in the freezer for 30 minutes before slicing.
Can I make these ahead for a party?
Yes, these bars are better after 24 hours in the refrigerator. Make them the day before if possible.
Hold off on garnishing until right before serving. This keeps the whipped topping fluffy.
Can I use a different crust?
Yes, graham cracker crumbs, gluten-free sandwich cookies, gluten-free pretzels, or a mix of cookies and toasted nuts can work. Keep the crumbs fine.
Use enough butter so the mixture looks like wet sand. Press it firmly.
Can I use a different nut butter?
Yes, almond butter or cashew butter can work. Cookie butter is another fun option.
The flavor will change, but the layered dessert style remains. Use smooth spreads for the best texture.
How do I get clean slices?
Chill the bars at least 4 hours, preferably overnight. Then run a sharp knife under hot water and wipe it dry before slicing.
Wipe the knife between cuts. This keeps the layers cleaner.
Why This Recipe Works So Well
Chocolate Peanut Butter Dream Bars work because each layer brings something different to the dessert. The crust gives crunch, the peanut butter layer adds creamy fluff, and the pudding layer adds smooth chocolate richness.
The crust is baked briefly so it becomes sturdier. Cooling it fully protects the peanut butter layer.
The peanut butter layer works because cream cheese adds body, powdered sugar adds sweetness, and whipped topping adds lightness. Together, they create a fluffy filling that slices well after chilling.
Instant pudding makes the chocolate layer easy and reliable. Whisking it properly and letting it thicken before spreading keeps the top layer smooth.
The long chill is essential. It lets the layers firm, the flavors settle, and the bars slice cleanly.
The recipe also works because it can be changed without losing the basic structure. Crust swaps, nut butter swaps, dark chocolate pudding, caramel, espresso, and crunchy garnishes all fit naturally.
Make-ahead timing makes these bars even more useful. Since they are better after 24 hours, they are ideal for parties and busy schedules.
Most of all, these dream bars work because they feel indulgent with very little stress. They are cold, creamy, chocolatey, peanut buttery, and made for sharing.
Final Thoughts
Chocolate Peanut Butter Dream Bars are made with chocolate sandwich cookies, melted butter, creamy peanut butter, softened cream cheese, powdered sugar, thawed whipped topping, instant chocolate pudding mix, milk, and optional whipped topping and chocolate curls. The crust bakes for 10 minutes, then the creamy peanut butter and chocolate pudding layers chill until firm and sliceable.
Serve them cold with chocolate curls, cocoa powder, crushed peanuts, mini chocolate chips, caramel drizzle, or extra whipped topping for a dessert that looks polished but feels easy. With their 9×13 pan format, 4-hour minimum chill, overnight make-ahead option, 5-day refrigerator storage, and variations like graham cracker crust, gluten-free cookies, gluten-free pretzels, toasted pecans, toasted almonds, almond butter, cashew butter, cookie butter, dark chocolate pudding, flaky sea salt, caramel swirl, espresso powder, natural peanut butter, and extra powdered sugar for stability, these bars are creamy, crunchy, chocolate-peanut-butter perfection in every slice.
Chocolate Peanut Butter Dream Bars
Creamy, chocolatey, peanut buttery, and layered over a buttery cookie crust, these Chocolate Peanut Butter Dream Bars are a rich American-style dessert made for chilling, slicing, and sharing. A baked chocolate sandwich cookie crust holds a smooth peanut butter cream cheese layer, a chocolate pudding layer, and a whipped topping finish with chocolate curls.
Recipe Details
- Prep Time: 20 minutes
- Cook Time: 10 minutes
- Total Time: 30 minutes
- Course: Dessert
- Cuisine: American
- Servings: 12 bars
Equipment
- 9×13-inch baking dish
- mixing bowls
- electric mixer
Ingredients
For Garnish
- chocolate curls
- extra whipped topping
For the Chocolate Layer
- 1.5 cups milk
- 3.9 oz instant chocolate pudding mix 1 package
For the Peanut Butter Layer
- 8 oz whipped topping, thawed 1 container
- 1 cup powdered sugar
- 8 oz cream cheese, softened 1 package
- 1 cup creamy peanut butter
For the Crust
- ½ cup unsalted butter, melted
- 16 oz chocolate sandwich cookies, crushed 1 package
Instructions
Step 1: Prepare the Baking Dish
Preheat the oven to 350°F (175°C). Grease a 9×13-inch baking dish.
Make sure the dish is ready before mixing the cookie crust. This helps the crust go straight into the pan once the crumbs and butter are combined.
Step 2: Make the Chocolate Cookie Crust
Mix the crushed chocolate sandwich cookies and melted unsalted butter in a bowl. Stir until the crumbs are evenly moistened.
Press the mixture firmly into the bottom of the prepared 9×13-inch baking dish. Spread it into an even layer so the bars have a solid base.
Step 3: Bake and Cool the Crust
Bake the crust for 10 minutes. Let it cool before adding the peanut butter layer.
Cooling the crust helps the creamy layer spread more cleanly. Do not add the filling while the crust is still hot.
Step 4: Make the Peanut Butter Layer
In a large bowl, beat the creamy peanut butter, softened cream cheese, and powdered sugar until smooth. Fold in the thawed whipped topping.
The mixture should be creamy, fluffy, and evenly blended. Spread it over the cooled crust in an even layer.
Step 5: Make the Chocolate Pudding Layer
Whisk the instant chocolate pudding mix and milk for 2 minutes. Let it stand for 5 minutes.
Once the pudding has thickened, spread it over the peanut butter layer. Smooth the top gently so the chocolate layer covers the filling evenly.
Step 6: Chill the Bars
Refrigerate for at least 4 hours before serving. For best results, chill overnight.
The chilling time helps the layers set so the bars slice more cleanly. Keep the dessert cold until you are ready to garnish and serve.
Step 7: Garnish and Slice
Garnish with extra whipped topping and chocolate curls. Slice into 12 bars and serve chilled.
Chocolate chips can be substituted for chocolate curls if desired. Add the garnish before serving for the best finished look.
Notes
- For best results, chill overnight.
- You can substitute chocolate chips for chocolate curls.
Serving Suggestions
Serve Chocolate Peanut Butter Dream Bars chilled after the layers have had time to set. The chocolate sandwich cookie crust, creamy peanut butter layer, chocolate pudding, whipped topping, and chocolate curls make each slice rich and dessert-table ready.
This recipe makes 12 bars, so it works well for parties, potlucks, holidays, or make-ahead family desserts. Chill overnight for the best texture and cleanest slices.
For a simple garnish, use extra whipped topping and chocolate curls. If you do not have chocolate curls, chocolate chips can be used instead as noted.
Storage
How to Store
The recipe does not provide a specific storage duration, so no exact number of days is added here. Keep the bars refrigerated because the recipe requires chilling before serving.
Chilling Tip
Refrigerate for at least 4 hours before serving. For best results, chill overnight so the crust, peanut butter layer, and pudding layer can set completely.
Crust Tip
Use 16 oz chocolate sandwich cookies, crushed 1 package, with ½ cup melted unsalted butter. Press the mixture firmly into the bottom of the baking dish before baking.
Peanut Butter Layer Tip
Beat the creamy peanut butter, softened cream cheese, and powdered sugar until smooth before folding in the thawed whipped topping. Spread this layer only after the crust has cooled.
Pudding Tip
Whisk the instant chocolate pudding mix with 1.5 cups milk for 2 minutes, then let it stand for 5 minutes before spreading.
Garnish Tip
Use extra whipped topping and chocolate curls before serving. Chocolate chips can be substituted for chocolate curls.
Baking Tip
Bake the crust at 350°F (175°C) for 10 minutes. Let it cool before adding the peanut butter layer.

Fernando is the creator and writer behind the food blog Eating with your Hands. Living and working in cities like Paris, Barcelona, and Berlin, and being married to a Canadian foodie, has given Fernando a passion and interest in food and inspired him to run EWYH.