
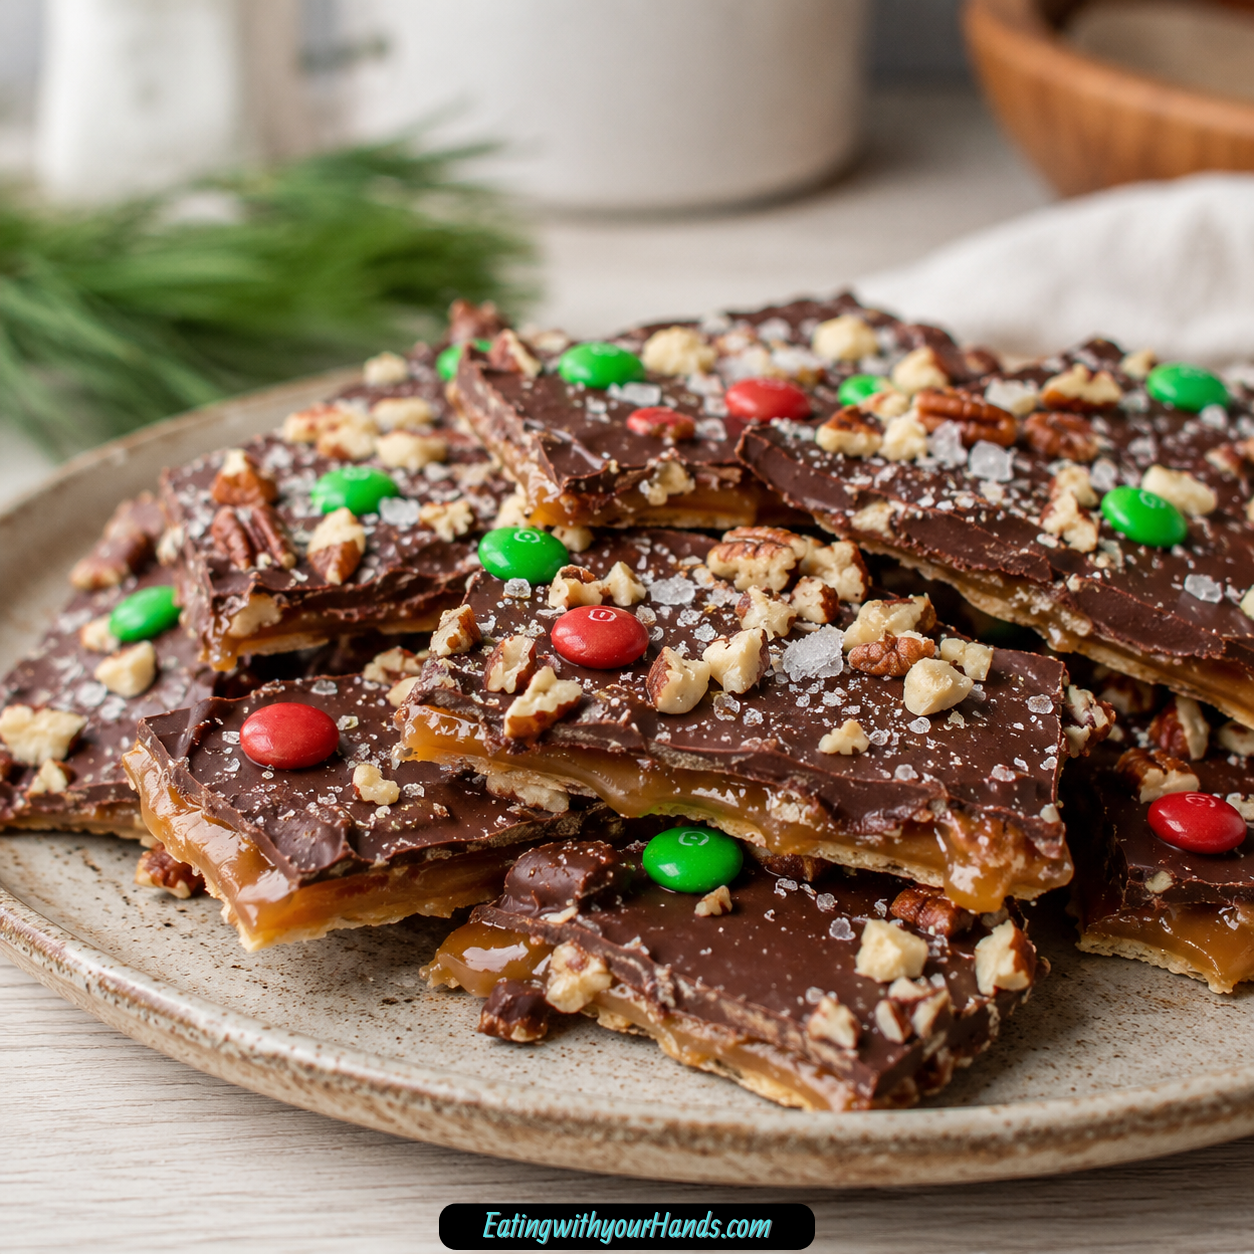
Christmas Crack is the kind of holiday treat that disappears from the counter faster than anyone wants to admit. It has that perfect mix of salty, sweet, crunchy, buttery, and chocolatey, all layered together in a way that feels almost too simple for how good it tastes.
I love recipes like this during the holidays because December baking can get overwhelming quickly. Between cookie trays, gift baskets, family gatherings, and last-minute treats, it is such a relief to have one dependable recipe that feels homemade and festive without needing complicated steps.
This Christmas Crack starts with crisp saltine crackers lined up in a single layer, then gets covered in a bubbling butter and brown sugar toffee. After a short bake, chocolate chips melt over the hot toffee and turn into a smooth topping that can be finished with nuts, sea salt, sprinkles, or crushed candy canes.
The result is a tray of crisp, buttery candy pieces that break into rustic shards and look beautiful in tins, jars, cookie trays, or dessert platters. It is the kind of treat people reach for casually at first, then come back for again because that sweet-salty crunch is hard to forget.
Table of Contents
- Why You’ll Love This Recipe
- Recipe Details
- Ingredients
- Optional Swaps, Variations, Add-Ins, and Serving Ideas
- Why This Christmas Crack Works
- Directions
- Step 1: Preheat the Oven to 350°F (175°C)
- Step 2: Line a Rimmed Baking Sheet
- Step 3: Arrange the Saltine Crackers
- Step 4: Melt the Butter
- Step 5: Stir in the Brown Sugar
- Step 6: Bring the Toffee Mixture to a Boil
- Step 7: Boil Undisturbed for 3 Minutes
- Step 8: Pour the Hot Toffee Over the Crackers
- Step 9: Spread the Toffee Evenly
- Step 10: Bake for 5 Minutes
- Step 11: Add the Chocolate Chips Immediately
- Step 12: Let the Chocolate Sit for 5 Minutes
- Step 13: Spread the Chocolate
- Step 14: Add Optional Toppings
- Step 15: Chill Until Fully Set
- Step 16: Lift Out and Break Into Pieces
- Serving Ideas
- Storage
- Reheating
- Freezing
- Make-Ahead
- Helpful Notes for Best Results
- Variations
- Troubleshooting
- Frequently Asked Questions
- Why This Recipe Works So Well
- Final Thoughts
- Christmas Crack
Why You’ll Love This Recipe
Christmas Crack is quick and easy, with only about 10 minutes of prep and 10 minutes of baking. The rest of the time is chilling, which makes it perfect when you want a holiday treat without a long afternoon of work.
It uses minimal ingredients. Saltine crackers, unsalted butter, packed brown sugar, semi-sweet chocolate chips, and optional nuts or sea salt come together with pantry-staple ease.
The flavor is wonderfully addictive. The crackers bring salty crunch, the butter and brown sugar create rich toffee, and the chocolate gives the whole tray a smooth, sweet finish.
It is perfect for gifting. Break it into pieces, pack it in jars or tins, and you have a festive homemade present that feels thoughtful without being fussy.
It is also easy to customize. Add chopped pecans, walnuts, festive sprinkles, crushed candy canes, crushed pretzels, seeds, or try a different cracker or chocolate-style topping.
Best of all, it stores well. You can keep it at room temperature, refrigerate it for longer freshness, or freeze it for future holiday snacking.
Recipe Details
Christmas Crack bakes at 350°F (175°C). The recipe uses a rimmed baking sheet lined with parchment paper or foil.
The base is made with 40 saltine crackers, about 1 sleeve. They should be arranged in a single layer, edge to edge, so the toffee can cover them evenly.
The toffee layer is made with 1 cup unsalted butter and 1 cup packed brown sugar. The butter is melted first, then the brown sugar is stirred in before the mixture is brought to a boil.
Once boiling, the toffee cooks undisturbed for 3 minutes. It should become thick and bubbly.
The hot caramel mixture is poured over the crackers and spread evenly with a spatula. The tray bakes for 5 minutes, just until the caramel bubbles and begins to soak into the crackers.
After baking, 2 cups semi-sweet chocolate chips are sprinkled over the hot caramel layer. They sit for 5 minutes to melt, then are spread into an even chocolate topping.
The pan chills for at least 2 hours, or until the chocolate is fully set and the toffee is firm. Once set, the candy is lifted out and broken into irregular pieces by hand or cut with a knife.
Ingredients
Cracker Base
40 saltine crackers, about 1 sleeve
Toffee Layer
1 cup unsalted butter, 2 sticks
1 cup packed brown sugar
Chocolate Topping
2 cups semi-sweet chocolate chips
Optional Finishes
½ cup chopped pecans or walnuts, optional
Sea salt for sprinkling, optional
Ingredient Notes
Saltine crackers create the crisp base and give the treat its salty contrast. Their simple flavor lets the buttery toffee and chocolate stand out.
Unsalted butter forms the rich base of the toffee. If you use salted butter, reduce or omit the sea salt topping to avoid over-salting.
Packed brown sugar combines with the butter to make the toffee layer. It gives the treat its caramel-like sweetness and deep flavor.
Semi-sweet chocolate chips melt into the smooth chocolate topping. Letting them sit on the hot toffee before spreading helps them soften properly.
Chopped pecans or walnuts are optional, but they add nutty crunch and depth. Sea salt is optional too, but it can enhance the sweet-salty balance.
Optional Swaps, Variations, Add-Ins, and Serving Ideas
Cracker Options
Saltine crackers are the classic base for Christmas Crack. You can also use Ritz crackers or graham crackers for a different base.
Ritz crackers make the treat richer and more buttery. Graham crackers create a sweeter, cookie-like version.
Chocolate and Topping Options
Semi-sweet chocolate chips are the main topping in this version. You can also try white chocolate chips or butterscotch for a variation.
A drizzle of melted peanut butter can also be added. This gives the candy another rich layer and makes it feel even more indulgent.
Festive Decorations
Holiday sprinkles and crushed candy canes can be added while the chocolate is still soft. They make the tray look festive and colorful.
Crushed candy canes bring a bright seasonal crunch. Sprinkles add an easy holiday look without changing the basic recipe.
Nut-Free Options
You can make this nut-free by leaving out the pecans or walnuts. Crushed pretzels or seeds can be used instead.
Crushed pretzels add salty crunch. Seeds provide texture without using nuts.
Gift Packaging
Christmas Crack is wonderful in jars or tins. It also fits beautifully into holiday gift baskets and cookie trays.
Make sure the candy is fully set before packaging. Firm chocolate and toffee keep the pieces neater.
Why This Christmas Crack Works
Christmas Crack works because each layer brings contrast. The crackers are crisp and salty, the toffee is buttery and sweet, and the chocolate is smooth and rich.
The butter and brown sugar boil together into a quick toffee. Boiling for 3 minutes without stirring helps the mixture thicken and become bubbly.
The short bake helps the caramel sink slightly into the crackers. This is what turns plain saltines into a crisp candy base.
The chocolate melts from the heat of the toffee instead of being melted separately. Waiting 5 minutes before spreading helps prevent the chocolate from becoming grainy or seizing.
The chilling time finishes the texture. After at least 2 hours in the refrigerator, the toffee becomes firm and the chocolate sets enough to break into pieces.
Directions
Step 1: Preheat the Oven to 350°F (175°C)
Preheat your oven to 350°F (175°C). This gives the oven time to reach the right temperature before the cracker and toffee layer goes in.
Christmas Crack bakes quickly, so the oven needs to be ready before you start assembling the pan. Once the toffee is poured, the tray goes into the oven right away.
A steady temperature helps the caramel bubble and soak into the crackers without overbaking. This short bake is part of what gives the candy its crisp texture.
Step 2: Line a Rimmed Baking Sheet
Line a rimmed baking sheet with parchment paper or foil. Make sure the lining covers all sides because the caramel can be very sticky.
A rimmed baking sheet is important because it prevents caramel overflow. The butter and brown sugar mixture will bubble in the oven, and the pan needs edges to hold it in place.
The parchment or foil also makes removal much easier after chilling. Once the candy sets, you can lift the whole sheet out instead of scraping pieces from the pan.
Step 3: Arrange the Saltine Crackers
Arrange 40 saltine crackers in a single layer on the prepared baking sheet. Place them edge to edge so they cover the surface evenly.
Try not to overlap the crackers. A flat, even layer helps the toffee coat every cracker and creates a cleaner finished texture.
This cracker layer becomes the base of the candy. The saltiness is what keeps the final treat from tasting only sweet.
Step 4: Melt the Butter
Place 1 cup unsalted butter in a medium saucepan over medium heat. Let it melt completely before adding the brown sugar.
The butter is the foundation of the toffee layer. It gives the candy its rich flavor and helps the sugar cook into a smooth mixture.
Keep the heat at medium so the butter melts steadily. You do not need to brown it or rush it.
Step 5: Stir in the Brown Sugar
Once the butter has melted, stir in 1 cup packed brown sugar. Continue stirring until the butter and sugar are combined.
The mixture should begin to look glossy and thick. The brown sugar will dissolve into the butter as it heats.
This step helps avoid grainy spots before the mixture boils. Stir until the sugar is fully incorporated.
Step 6: Bring the Toffee Mixture to a Boil
Bring the butter and brown sugar mixture to a boil. Watch it carefully as it heats.
Once the mixture reaches a boil, it will look thick, bubbly, and active. This is the moment when the toffee begins to form.
Make sure the sugar is fully dissolved before the boil becomes steady. This helps reduce the chance of grainy caramel.
Step 7: Boil Undisturbed for 3 Minutes
Let the mixture boil undisturbed for 3 minutes. Do not stir while it boils.
Stirring during this stage can cause graininess. Letting it boil on its own helps create a smoother toffee layer.
The mixture will become thicker and bubbly. Stay nearby so it does not boil over or cook too far.
Step 8: Pour the Hot Toffee Over the Crackers
Carefully pour the hot caramel mixture over the saltine crackers. Use caution because the toffee is very hot.
Try to pour it across the whole tray instead of only in the center. This makes spreading easier and helps coat every cracker.
The toffee will begin setting quickly as it touches the crackers. Work steadily but carefully.
Step 9: Spread the Toffee Evenly
Use a spatula to spread the toffee across the crackers. Coat every cracker as evenly as possible.
Do not worry if it is not perfectly smooth. The oven will help the toffee bubble and settle into the cracker layer.
Make sure the corners and edges get some toffee too. Those edge pieces are often the most delicious once baked.
Step 10: Bake for 5 Minutes
Place the baking sheet in the preheated oven and bake for 5 minutes. The caramel will bubble and begin to soak into the crackers.
This short bake is what transforms the layers into candy. The toffee loosens, spreads, and clings to the saltines.
Watch the tray carefully. The caramel should bubble, but it should not burn.
Step 11: Add the Chocolate Chips Immediately
Remove the baking sheet from the oven and immediately sprinkle 2 cups semi-sweet chocolate chips over the hot caramel layer. Spread them across the whole surface.
The heat from the toffee will soften the chocolate chips. You do not need to melt them separately.
Try to distribute the chips evenly. This makes it easier to spread the chocolate into one smooth layer after they soften.
Step 12: Let the Chocolate Sit for 5 Minutes
Let the chocolate chips sit on the hot toffee for 5 minutes. This gives them time to melt gently.
Do not spread too early. Spreading before the chocolate has softened can make it grainy or cause it to seize.
After 5 minutes, the chips should look glossy and soft. They are ready to spread.
Step 13: Spread the Chocolate
Use a spatula to spread the melted chocolate evenly over the toffee layer. Move gently so you do not disturb the crackers underneath.
The chocolate should cover the whole tray in a smooth layer. It does not need to look perfect, but even coverage gives every piece a rich topping.
Work from the center toward the edges. This helps the chocolate reach the corners without pushing too hard.
Step 14: Add Optional Toppings
If using, sprinkle ½ cup chopped pecans or walnuts over the melted chocolate. Add a small pinch of sea salt if desired.
You can also add festive sprinkles or crushed candy canes at this stage. All toppings should be added before the chocolate sets so they stick properly.
This is where the treat can look plain and classic or bright and holiday-ready. Keep the toppings even so every broken piece has a little something special.
Step 15: Chill Until Fully Set
Transfer the pan to the refrigerator and chill for at least 2 hours. The chocolate should be completely set and the toffee firm.
Do not rush this step. If the chocolate is still soft, the candy will smear when broken or cut.
The chill time makes the tray easier to handle. It also gives the Christmas Crack its signature snap.
Step 16: Lift Out and Break Into Pieces
Once fully set, lift the entire sheet out of the pan using the parchment or foil overhang. Place it on a flat surface.
Break the candy into irregular pieces by hand, or cut it with a knife. The rustic pieces are part of its charm.
If the tray has just come out of the fridge, let it sit at room temperature for 5 minutes before breaking. This helps prevent hurting your hands or cracking your pan.
Serving Ideas
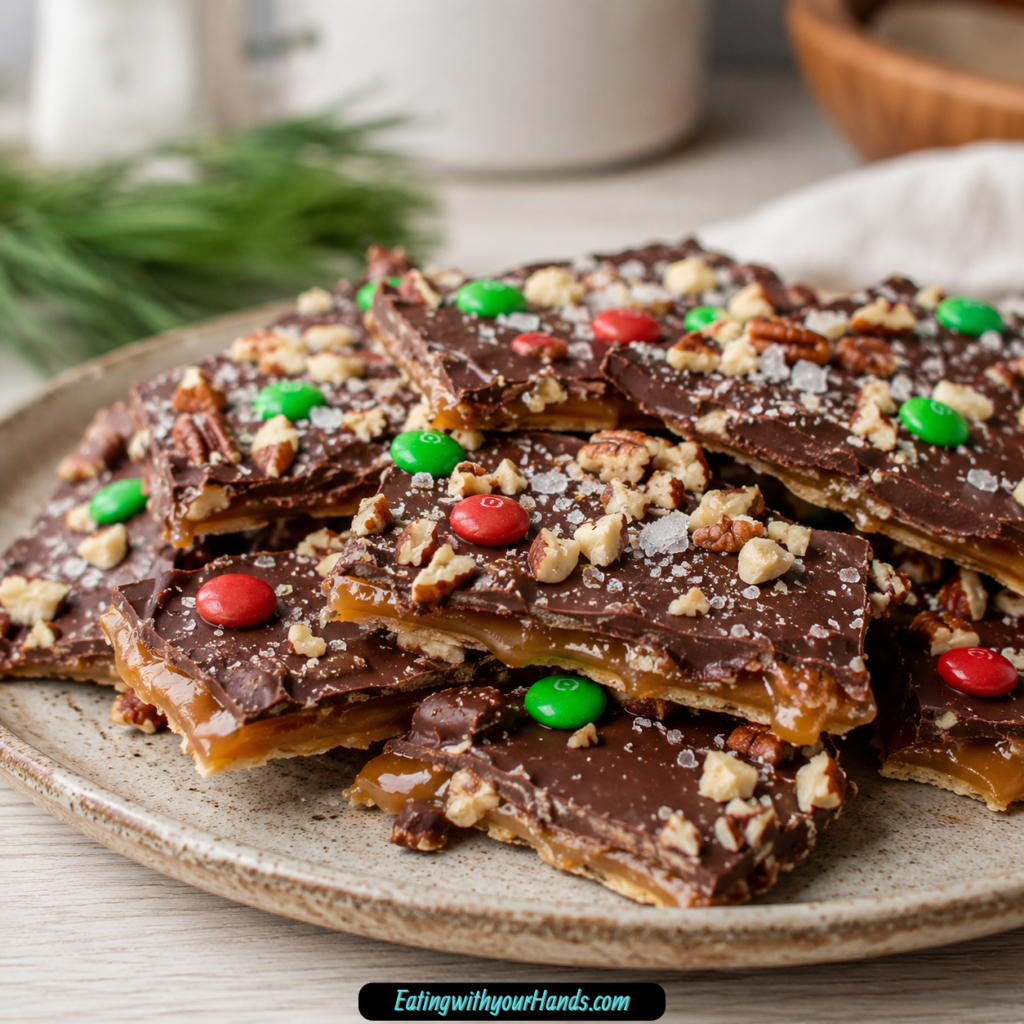
Serve Christmas Crack on dessert platters or cookie trays. Its shiny chocolate top and rustic broken pieces make it look beautiful among holiday sweets.
It is delicious with coffee, tea, or hot cocoa. The sweet-salty crunch pairs especially well with warm drinks.
Serve it chilled for extra crunch. Serve it at room temperature if you prefer a slightly softer texture.
Pack it into jars or tins for gifting. It also works well in holiday gift baskets because it stays fresh and travels nicely once set.
This treat is ideal for last-minute homemade presents. It feels festive without demanding a long baking day.
Storage
Store Christmas Crack in an airtight container for up to 1 week at room temperature. Keep it in a cool spot so the chocolate stays firm.
For longer freshness, refrigerate it for up to 2 weeks. Chilled pieces have an extra crisp texture.
Separate layers with parchment if needed. This helps keep the chocolate tops neat and prevents pieces from sticking together.
Make sure the candy is fully set before storing. Soft chocolate can smear, and warm toffee can stick.
Reheating
Christmas Crack does not need reheating. It is meant to be eaten once the chocolate and toffee are fully set.
If it has been refrigerated, let it sit at room temperature for 5 minutes before breaking or serving if you want a slightly softer texture. This can also make the pieces easier to handle.
Avoid warming it too much. Heat can soften the chocolate and toffee, making the pieces messy.
Freezing
Christmas Crack freezes well in a sealed container for up to 3 months. Make sure the pieces are fully set before freezing.
Use a tight container to protect the chocolate topping and crunchy cracker base. If stacking, place parchment between layers.
Thaw the candy before serving. It can be served chilled for extra crunch or at room temperature for a slightly softer bite.
Freezing makes it easy to prepare holiday treats ahead of time. You can make a batch before the busiest days and have it ready when you need it.
Make-Ahead
Christmas Crack is a great make-ahead treat. It stores for up to 1 week at room temperature, up to 2 weeks in the refrigerator, and up to 3 months in the freezer.
Make it ahead for cookie trays, holiday tins, gift baskets, and parties. Once chilled and broken, it is easy to pack and serve.
If gifting, wait until the chocolate is fully set before packaging. Firm pieces look cleaner and hold their shape better.
For the best texture, keep it cool until serving or gifting. This helps preserve the crisp toffee and cracker layers.
Helpful Notes for Best Results
Use a rimmed baking sheet to prevent caramel overflow. The toffee bubbles in the oven and needs a pan with edges.
Line the pan with foil or parchment for easy removal and cleanup. Make sure the lining covers the sides.
Do not stir the caramel while it boils for 3 minutes. Stirring can cause graininess.
Let the chocolate sit on the hot toffee before spreading. Spreading too early can make it grainy or cause it to seize.
If using salted butter, reduce or omit the sea salt topping. This keeps the candy from tasting too salty.
Let the tray sit at room temperature for 5 minutes if it has just come out of the fridge and feels too hard to break. This makes the process easier on your hands.
Variations
Nutty Christmas Crack
Add chopped pecans or walnuts over the melted chocolate. They add nutty crunch and depth.
This version looks classic and tastes rich. The nuts balance the sweetness of the toffee and chocolate.
Peppermint Christmas Crack
Sprinkle crushed candy canes over the chocolate before it sets. This gives the candy a festive peppermint crunch.
This version is beautiful for Christmas trays. It also adds color and seasonal flavor.
Sprinkle Christmas Crack
Add festive sprinkles over the melted chocolate. This is an easy way to make the treat look cheerful.
Sprinkles are especially fun for gifting and holiday dessert tables. Add them while the chocolate is still soft.
Ritz Cracker Version
Use Ritz crackers instead of saltines. This gives the base a richer, buttery flavor.
The method stays the same. Arrange the crackers in a single layer and pour the toffee over the top.
Graham Cracker Version
Use graham crackers for a sweeter base. This makes the candy taste more dessert-like.
Graham crackers create a different texture and flavor from saltines. They are a nice option when you want less salty contrast.
White Chocolate or Butterscotch Version
Try white chocolate chips or butterscotch for the topping. Each one changes the flavor of the finished candy.
White chocolate makes it sweeter and creamier. Butterscotch adds deeper sweetness.
Peanut Butter Drizzle Version
Drizzle with melted peanut butter for another layer of flavor. This makes the candy even richer.
Add the drizzle after the chocolate layer is spread. Let everything set completely before breaking.
Nut-Free Crunch Version
Leave out the nuts entirely. You can also use crushed pretzels or seeds instead.
Crushed pretzels add salty crunch, while seeds bring texture without nuts. This keeps the candy flexible for different needs.
Troubleshooting
Why Is My Caramel Grainy?
The caramel may have been stirred while boiling. Once the butter and brown sugar mixture reaches a boil, let it boil undisturbed for 3 minutes.
Also make sure the sugar is fully dissolved before the steady boil. This helps keep the toffee smoother.
Why Did My Chocolate Seize or Turn Grainy?
The chocolate may have been spread too early. Let the chocolate chips sit on the hot toffee for 5 minutes before spreading.
That resting time lets the chocolate melt gently. Once soft, it spreads more smoothly.
Why Is My Christmas Crack Sticky?
It may not have chilled long enough. Refrigerate for at least 2 hours, or until the chocolate is completely set and the toffee is firm.
Storage can also affect texture. Keep the pieces in an airtight container and refrigerate if your kitchen is warm.
Why Did the Toffee Spill Over?
The baking sheet may not have had a rim. Use a rimmed baking sheet to prevent caramel overflow.
Make sure the pan is properly lined with parchment or foil. The caramel is sticky and easier to manage with lining.
Why Are Some Crackers Not Covered?
The toffee may not have been spread evenly. After pouring, use a spatula to coat every cracker as well as possible.
Try pouring the toffee across the whole tray instead of only in one area. This gives you better coverage from the start.
Why Is It Too Hard to Break?
If it just came out of the refrigerator, let it sit at room temperature for 5 minutes. This helps prevent hurting your hands.
You can break it by hand or cut it with a knife. Irregular pieces are normal and part of the treat.
Frequently Asked Questions
Can I Use Salted Butter Instead of Unsalted?
Yes, salted butter can be used. Omit the sea salt topping or reduce it slightly to avoid over-salting.
The crackers already bring salty contrast. Adjust the added salt carefully.
Can I Double the Recipe?
Yes, you can double the recipe. Use two baking sheets or one very large sheet to ensure even layers.
The crackers should stay in a single layer. Crowded crackers will not coat as evenly.
Why Is My Caramel Grainy?
Boiling without stirring helps prevent graininess. Make sure the sugar is fully dissolved before the mixture reaches a steady boil.
Once boiling, let the mixture cook undisturbed for 3 minutes. This helps the toffee stay smoother.
Can I Make It Nut-Free?
Absolutely. Leave out the nuts or substitute with crushed pretzels or seeds.
This keeps the treat crunchy while avoiding pecans or walnuts. Add the topping while the chocolate is still soft.
How Do I Keep the Chocolate From Separating?
Let the chocolate sit on the hot toffee before spreading. Spreading too early can make it grainy or cause it to seize.
After 5 minutes, the chocolate should be soft enough to spread evenly. Use a spatula and move gently.
How Long Does Christmas Crack Last?
It lasts up to 1 week at room temperature in an airtight container. It can be refrigerated for up to 2 weeks.
It can also be frozen in a sealed container for up to 3 months. Thaw before serving.
Should I Serve It Chilled or at Room Temperature?
Either works. Serve chilled for extra crunch or at room temperature for a slightly softer texture.
If it has been refrigerated and is too hard to break, let it sit at room temperature for 5 minutes. This makes handling easier.
Why This Recipe Works So Well
Christmas Crack works so well because it turns simple pantry staples into something that tastes far more special than the effort involved. Saltine crackers, butter, brown sugar, and chocolate become crisp, buttery candy with almost no complicated steps.
The crackers are the perfect base because they are crisp and salty. They balance the rich toffee and chocolate so each piece has contrast.
The butter and brown sugar create a quick toffee layer that bakes into the crackers. The short oven time helps the caramel bubble and soak in slightly.
The chocolate topping gives the candy a smooth finish. Semi-sweet chocolate works especially well because it balances the sweetness of the toffee.
The optional toppings make the recipe easy to personalize. Nuts, sea salt, sprinkles, crushed candy canes, pretzels, seeds, or a peanut butter drizzle can all change the look and flavor.
Most of all, the recipe works because it feels joyful. It is quick, messy in the best way, easy to break into pieces, and perfect for passing around during the holidays.
Final Thoughts
Christmas Crack earns its place on holiday trays because it delivers everything people love in one simple bite. It is crunchy from the crackers, buttery from the toffee, rich from the chocolate, and perfectly balanced with that sweet-salty flavor that keeps everyone reaching back for more.
I love that it can be made quickly, packed beautifully, frozen ahead, or dressed up with sprinkles, candy canes, nuts, or sea salt. It is one of those recipes that feels festive without making the season more stressful.
Make a tray for gifting, keep a container in the fridge, or set it out with coffee, tea, or hot cocoa after dinner. Once you break that glossy sheet into crisp little pieces, it is easy to understand why this treat becomes a holiday favorite year after year.
Christmas Crack

Christmas Crack is a festive sweet-and-salty candy made with crisp saltine crackers, buttery brown sugar toffee, melted chocolate, and optional nuts or sea salt. It is crunchy, rich, easy to break into pieces, and perfect for holiday trays, edible gifts, cookie boxes, or simple Christmas snacking.
Recipe Details
- Prep Time: 10 minutes
- Cook Time: 10 minutes
- Chilling Time: 2 hours
- Total Time: 2 hours 20 minutes
- Servings: 24 pieces
- Calories: 210 kcal
Ingredients
- 2 cups semi-sweet chocolate chips
- ½ cup chopped pecans or walnuts optional
- Sea salt for sprinkling (optional)
- 40 saltine crackers ≈ 1 sleeve
- 1 cup packed brown sugar
- 1 cup unsalted butter 2 sticks
Instructions
Step 1: Prepare the Baking Sheet
Preheat oven to 350°F (175°C). Line a rimmed baking sheet with parchment paper or foil, then arrange the saltine crackers in a single layer.
Step 2: Make the Toffee Layer
In a saucepan, melt the butter over medium heat. Stir in the packed brown sugar and bring the mixture to a rolling boil.
Step 3: Boil the Toffee
Boil the butter and brown sugar mixture for 3 minutes without stirring.
Step 4: Pour Over the Crackers
Immediately pour the hot caramel over the saltine crackers, spreading it evenly across the cracker layer.
Step 5: Bake Until Bubbly
Bake for 5 minutes in the oven, until the caramel layer is bubbly.
Step 6: Add the Chocolate Chips
Remove the pan from the oven and sprinkle the semi-sweet chocolate chips over the hot caramel. Let them sit for 5 minutes to melt.
Step 7: Spread the Chocolate
Spread the melted chocolate evenly over the top with a spatula.
Step 8: Add Optional Toppings
Sprinkle the chopped pecans or walnuts and sea salt over the chocolate, if using.
Step 9: Chill Until Firm
Chill in the refrigerator for at least 2 hours, until set and firm.
Step 10: Break Into Pieces
Using the foil or parchment overhang, lift the candy out of the pan. Break it into pieces, then serve or store in an airtight container.
Notes
Use a rimmed baking sheet to help prevent spills.
Line the pan with foil or parchment so the candy can be lifted out easily.
For the best texture, do not skip the chilling step.
For variations, try white chocolate or butterscotch chips, crushed candy cane, or pretzel bits.
Store in an airtight container at room temperature or refrigerate. Keeps up to 1 week, or freeze for longer storage.
Serving Suggestions
- Add to Christmas cookie trays with fudge, sugar cookies, and chocolate bark.
- Package pieces in festive tins or treat bags for edible holiday gifts.
- Serve with hot cocoa, coffee, or cold milk for a sweet holiday snack.
- Break into smaller pieces for party bowls or dessert boards.
- Use as a quick make-ahead candy for holiday gatherings and potlucks.
Storage
How to Store
Store Christmas Crack in an airtight container at room temperature or refrigerate. It keeps up to 1 week.
How to Freeze
Freeze for longer storage.
Best Texture Tip
Chill the candy in the refrigerator for at least 2 hours before breaking it into pieces so the chocolate and toffee layers set firmly.
Make-Ahead Tip
This candy is easy to make ahead for holiday trays because it stores well in an airtight container and can also be frozen for longer storage.

Fernando is the creator and writer behind the food blog Eating with your Hands. Living and working in cities like Paris, Barcelona, and Berlin, and being married to a Canadian foodie, has given Fernando a passion and interest in food and inspired him to run EWYH.