
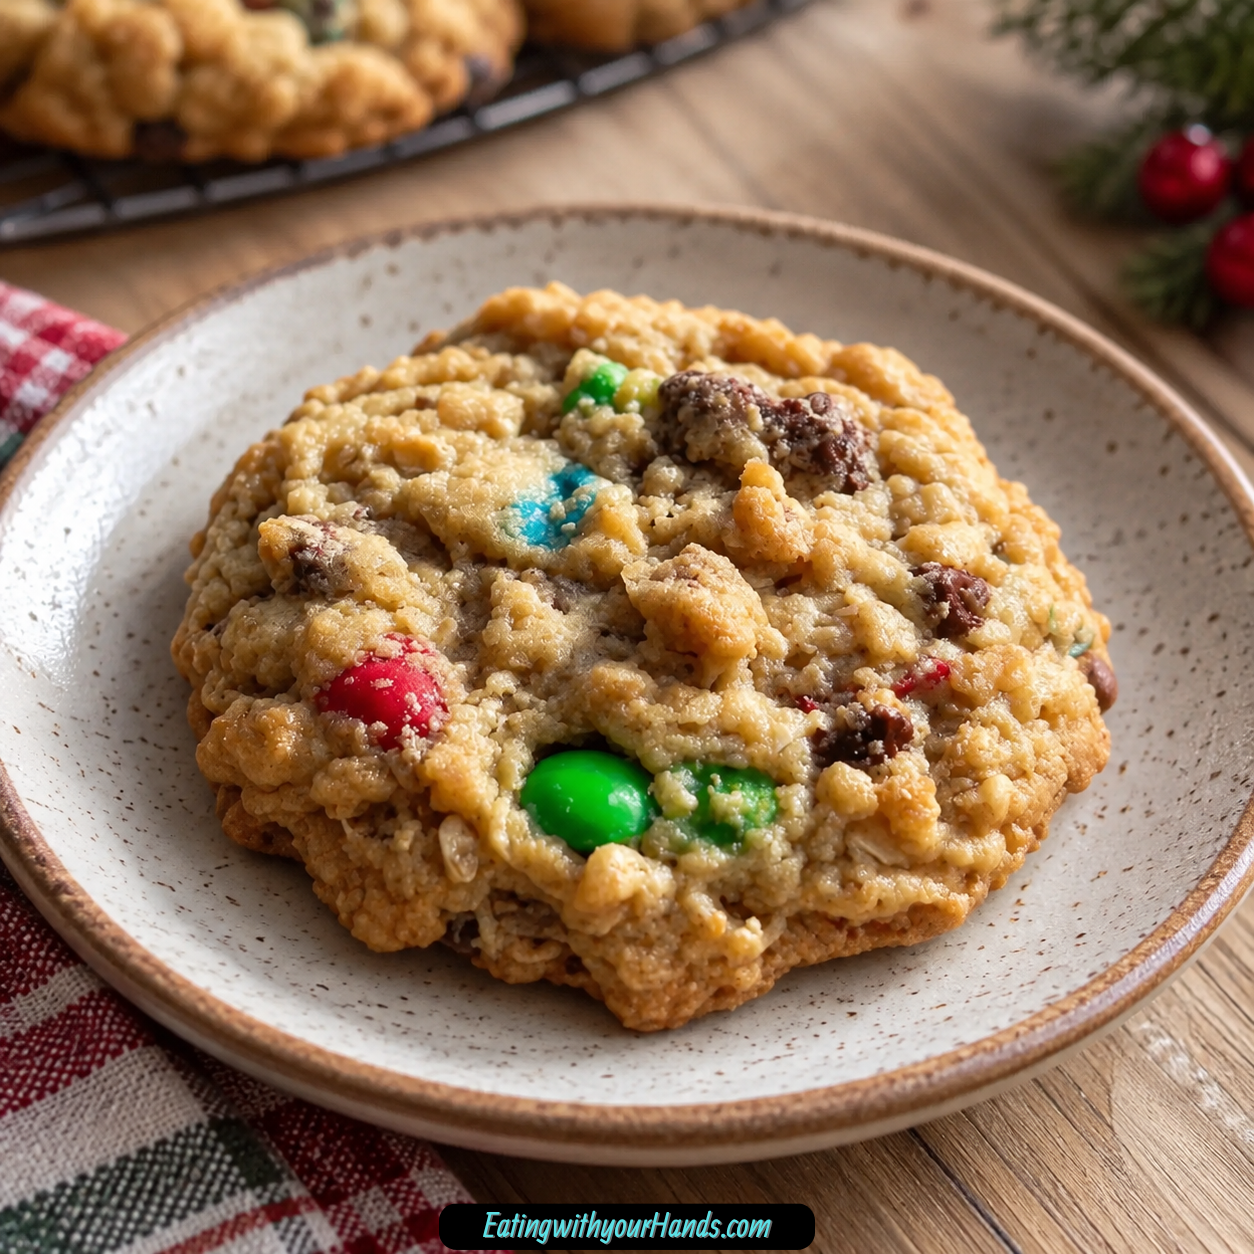
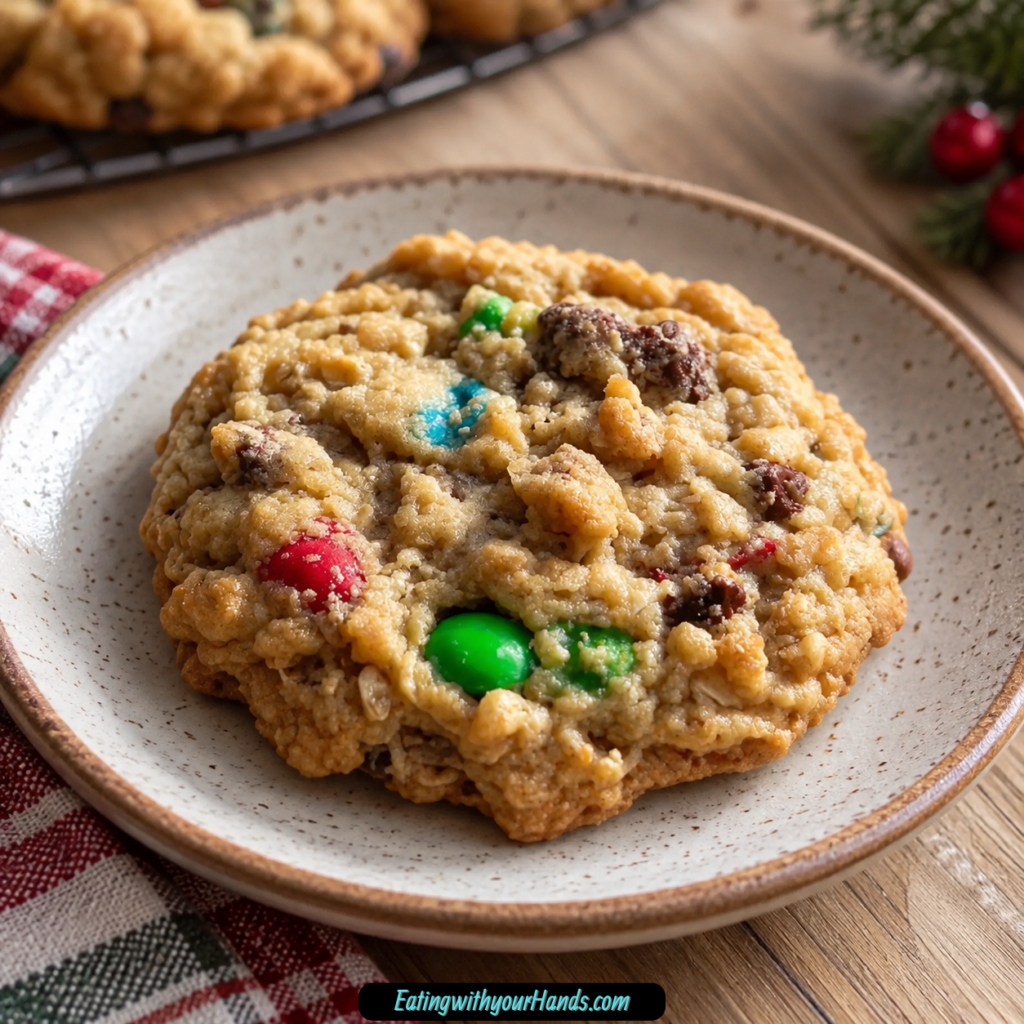
Christmas Monster Cookies are the kind of holiday cookie that instantly makes the kitchen feel brighter. They are thick, soft, chewy, sweet, colorful, and packed with the cozy mix of peanut butter, oats, chocolate chips, and festive red and green mini M&M’s.
These cookies feel like December in cookie form. They are cheerful enough for a holiday platter, simple enough for baking with kids, and sturdy enough for cookie boxes, gift tins, and Christmas Eve cookie plates.
What makes them so lovable is the “loaded cookie” personality. Every bite has a little bit of peanut butter warmth, brown sugar softness, oat chew, chocolate sweetness, and that bright candy crunch from the mini M&M’s.
They are also wonderfully practical for the holidays. The dough is easy to mix, the cookies bake quickly, and they stay soft for several days when stored properly.
This is the kind of cookie that belongs in a busy holiday kitchen. You can bake them for a cookie exchange, tuck them into jars for neighbors, freeze the baked cookies for later, or freeze dough balls so warm cookies are never too far away.
The texture is the real charm here. Peanut butter and oats create that classic monster-cookie chew, while the butter and sugars make the cookies soft in the center with golden edges.
The red and green mini M&M’s make the cookies feel instantly festive. Pressing a few on top of the dough before baking gives them that pretty bakery-style look.
Christmas Monster Cookies are easy, joyful, and generous. They are exactly the kind of cookie that makes people reach for one, then come back for another before the tray even cools.
Table of Contents
- Why You’ll Love These Christmas Monster Cookies
- Recipe Details
- Ingredients
- Ingredient Notes
- Optional Swaps, Variations, Add-Ins, and Serving Ideas
- Classic Christmas Monster Cookies
- Extra Thick Christmas Monster Cookies
- Bakery-Style Monster Cookies
- Pecan Christmas Monster Cookies
- Walnut Christmas Monster Cookies
- White Chocolate Monster Cookies
- Christmas Sprinkle Monster Cookies
- Gluten-Friendly Monster Cookies
- Quick Oat Monster Cookies
- Almond Butter Monster Cookies
- Sunflower Butter Monster Cookies
- Hot Cocoa Cookie Plate
- Coffee Cookie Tray
- Warm Milk and Cookies
- Why This Recipe Works
- Directions
- Step 1: Preheat the Oven
- Step 2: Prepare the Baking Sheet
- Step 3: Soften the Butter
- Step 4: Cream the Butter, Peanut Butter, and Sugars
- Step 5: Add the Eggs One at a Time
- Step 6: Add the Vanilla
- Step 7: Whisk the Dry Ingredients
- Step 8: Combine Wet and Dry Mixtures
- Step 9: Fold in the Chocolate Chips
- Step 10: Add the Mini M&M’s
- Step 11: Chill the Dough if Desired
- Step 12: Scoop the Dough
- Step 13: Add Extra M&M’s on Top
- Step 14: Bake the Cookies
- Step 15: Cool on the Baking Sheet
- Step 16: Transfer to a Wire Rack
- Step 17: Store the Cookies
- Step 18: Freeze if Needed
- Serving Ideas
- Storage
- Freezing
- Make-Ahead
- Helpful Notes for Best Results
- Variations
- Classic Christmas Monster Cookies
- Thick Christmas Monster Cookies
- Bakery-Style Christmas Monster Cookies
- Pecan Monster Cookies
- Walnut Monster Cookies
- White Chocolate Monster Cookies
- Sprinkle Monster Cookies
- Gluten-Friendly Christmas Monster Cookies
- Quick Oat Monster Cookies
- Almond Butter Monster Cookies
- Sunflower Butter Monster Cookies
- Extra Chocolate Monster Cookies
- Christmas Cookie Exchange Cookies
- Santa Plate Cookies
- Troubleshooting
- Frequently Asked Questions
- Why This Recipe Works So Well
- Final Thoughts
- Christmas Monster Cookies
Why You’ll Love These Christmas Monster Cookies
These cookies are packed with holiday fun. Red and green mini M&M’s make them look bright, cheerful, and ready for Christmas.
They are soft and chewy. Peanut butter, brown sugar, and old-fashioned oats create that classic monster-cookie texture.
They are easy to make. The dough uses simple ingredients, one bowl for wet ingredients, one bowl for dry ingredients, and no fancy equipment.
They are perfect for gifting. The cookies stay soft for 4 to 5 days in an airtight container and look beautiful in cookie boxes or jars.
They are kid-approved and Santa-approved. The colors, chocolate, and chewy texture make them a fun holiday baking project.
They are customizable. You can add chopped pecans, walnuts, white chocolate chips, Christmas sprinkles, or gluten-friendly swaps.
Recipe Details
These Christmas Monster Cookies bake at 350°F (175°C). The baking sheet does not need to be greased, though parchment paper can be used if desired.
The dough begins with ½ cup salted butter and ¼ cup peanut butter. The butter should be softened or room temperature so it creams easily with the sugars.
The sweetness comes from ½ cup granulated sugar and ½ cup brown sugar. Granulated sugar helps with golden edges, while brown sugar adds moisture and depth.
The dough uses 2 eggs and 2 teaspoons vanilla. The eggs bind the cookie dough, and the vanilla enhances the sweet, warm flavors.
The dry ingredients are 1 ½ cups all-purpose flour, 1 cup old-fashioned oats, 1 teaspoon salt, and 1 teaspoon baking soda. The oats give the cookies their signature chew.
The mix-ins are ½ cup mini chocolate chips and ½ cup mini M&M’s. Red and green Christmas M&M’s make the cookies festive.
The cookies bake for 10 to 12 minutes. They should be removed when the edges are golden and the centers still look slightly soft.
The cookies cool on the baking sheet for 5 minutes before moving to a wire rack. This helps them set and prevents breakage.
For thicker cookies that spread less, chill the dough for 30 minutes before baking. This is especially helpful if the butter was very soft.
Baked cookies keep in an airtight container for 4 to 5 days. They can also be frozen for up to 3 months.
Ingredients
For the Cookie Dough
- ½ cup salted butter, softened
- ¼ cup peanut butter
- ½ cup granulated sugar
- ½ cup brown sugar
- 2 eggs
- 2 teaspoons vanilla
- 1 ½ cups all-purpose flour
- 1 cup old-fashioned oats
- 1 teaspoon salt
- 1 teaspoon baking soda
For the Mix-Ins
- ½ cup mini chocolate chips
- ½ cup mini M&M’s, red and green Christmas varieties
Optional Add-Ins and Swaps
- ½ cup chopped pecans
- ½ cup chopped walnuts
- White chocolate chips
- Christmas sprinkles
- Gluten-free all-purpose baking flour
- Certified gluten-free oats
- Quick oats
- Almond butter
- Sunflower butter
Ingredient Notes
Salted butter gives these cookies richness and helps build the soft cookie base. Use room-temperature butter so it creams smoothly with the sugars.
Peanut butter adds flavor and chewiness. Only a small amount is needed, but it gives the cookies that classic monster-cookie personality.
Granulated sugar adds sweetness and helps the cookie edges turn lightly golden. It works with the brown sugar to create balance.
Brown sugar gives the cookies moisture and depth. It helps the centers stay soft and chewy.
Eggs bind the dough and give the cookies structure. Beat them in one at a time so the dough stays smooth.
Vanilla adds warmth to the dough. It makes the peanut butter, chocolate, oats, and candy flavors taste more complete.
All-purpose flour creates the cookie structure. Measure it carefully so the dough does not become too dry.
Old-fashioned oats give monster cookies their signature chew. They create a heartier texture than quick oats.
Salt balances the sweetness. Even though the recipe uses salted butter, the salt in the dough is still part of the flavor balance.
Baking soda helps the cookies rise and spread properly. It gives the cookies the right texture.
Mini chocolate chips make sure there is chocolate in every bite. Their small size works well with the mini M&M’s.
Mini M&M’s bring color, crunch, and sweetness. Red and green varieties make the cookies look perfect for Christmas.
Optional Swaps, Variations, Add-Ins, and Serving Ideas
Classic Christmas Monster Cookies
Make the cookies with salted butter, peanut butter, granulated sugar, brown sugar, eggs, vanilla, flour, oats, salt, baking soda, mini chocolate chips, and red and green mini M&M’s. This gives you the full soft, chewy, festive cookie.
Bake until the edges are golden and the centers still look slightly soft. Let them finish setting on the baking sheet.
Extra Thick Christmas Monster Cookies
Chill the dough for 30 minutes before baking. This helps the cookies spread less.
This is a great option if you want thicker, chewier cookies. The chilled dough will hold its shape better.
Bakery-Style Monster Cookies
Save a handful of mini M&M’s before mixing. Press them on top of each dough ball right before baking.
This makes the cookies look more polished. It also helps keep the candy color visible.
Pecan Christmas Monster Cookies
Add ½ cup chopped pecans to the dough. Pecans bring a warm, nutty crunch.
They pair nicely with peanut butter, oats, and chocolate. Fold them in with the mix-ins.
Walnut Christmas Monster Cookies
Add ½ cup chopped walnuts. Walnuts bring a slightly earthy crunch.
This variation makes the cookies feel heartier. Keep the rest of the recipe the same.
White Chocolate Monster Cookies
Use white chocolate chips for extra sweetness. They look pretty with red and green M&M’s.
You can use them as an added mix-in or as part of the chocolate-chip amount. Keep the dough balanced so it holds together.
Christmas Sprinkle Monster Cookies
Add Christmas sprinkles for more color. Fold them in gently with the chocolate chips and M&M’s.
Sprinkles make the cookies especially fun for kids. Use a modest amount so the dough does not become overloaded.
Gluten-Friendly Monster Cookies
Use gluten-free all-purpose baking flour and certified gluten-free oats. This keeps the cookie style similar while changing the flour and oat base.
The texture may vary slightly. Bake until the edges are golden and the centers remain soft.
Quick Oat Monster Cookies
Use quick oats if needed. The texture will be softer and less chewy than with old-fashioned oats.
Old-fashioned oats give the best classic monster-cookie texture. Quick oats can work in a pinch.
Almond Butter Monster Cookies
Use almond butter instead of peanut butter. The cookies may not be quite as chewy, but they will still have a nutty flavor.
This swap changes the flavor. Keep the amount the same.
Sunflower Butter Monster Cookies
Use sunflower butter if avoiding peanuts. The cookies may have a slightly different flavor and texture.
This is a useful peanut-free direction. Keep the other ingredients the same.
Hot Cocoa Cookie Plate
Serve these cookies with hot cocoa. The chocolate chips and festive M&M’s make them perfect for a Christmas drink pairing.
This is a cozy option for family movie nights. Serve the cookies slightly warm if possible.
Coffee Cookie Tray
Serve Christmas Monster Cookies with coffee. The oats, peanut butter, and chocolate make them satisfying with a warm drink.
They work well on an afternoon dessert tray. Their color makes the whole tray look festive.
Warm Milk and Cookies
Serve warm cookies with milk. This is a classic holiday pairing.
It also makes the cookies feel perfect for Christmas Eve. Their red and green colors look cheerful on a plate.
Why This Recipe Works
This recipe works because the dough has a strong balance of fat, sugar, oats, flour, and mix-ins. The peanut butter and oats create chew, while the butter and sugars keep the cookies soft.
Creaming the butter, peanut butter, granulated sugar, and brown sugar together builds the cookie base. It creates a smoother, lighter mixture before the eggs go in.
Adding the eggs one at a time helps the dough come together evenly. The vanilla brings warmth and sweetness.
Whisking the dry ingredients separately keeps the flour, oats, salt, and baking soda evenly distributed. This helps the cookies bake more consistently.
Mixing the dry ingredients into the wet ingredients gently is important. Overmixing can make the cookies tough.
The mini chocolate chips and mini M&M’s spread through the dough easily. Their small size helps every cookie get plenty of chocolate and candy.
Baking the cookies only until the centers still look soft keeps them chewy. They continue setting as they cool on the baking sheet.
The 5-minute rest on the baking sheet helps prevent breakage. It also gives the centers time to firm without overbaking.
Directions
Step 1: Preheat the Oven
Preheat your oven to 350°F (175°C). Let the oven fully heat before baking the cookies.
The baking sheet does not need to be greased. You can bake directly on the sheet or use parchment paper.
Step 2: Prepare the Baking Sheet
Set out your baking sheet and line it with parchment paper if desired. Parchment can make cleanup easier.
If you skip parchment, the cookies can still bake beautifully. Just make sure the baking sheet is clean and ready.
Step 3: Soften the Butter
Make sure the ½ cup salted butter is softened. It should mix easily but not be melted.
Room-temperature butter gives the best cookie texture. Butter that is too warm can make cookies spread too much.
Step 4: Cream the Butter, Peanut Butter, and Sugars
In a large mixing bowl, cream together ½ cup salted butter, ¼ cup peanut butter, ½ cup granulated sugar, and ½ cup brown sugar. Mix until smooth, fluffy, and lighter in color.
This step adds air to the dough. It also helps create the soft, chewy texture.
Step 5: Add the Eggs One at a Time
Add the 2 eggs one at a time. Mix well after each egg.
Adding them one at a time helps the dough stay smooth. The mixture should become glossy.
Step 6: Add the Vanilla
Stir in 2 teaspoons vanilla. Mix until evenly blended.
The vanilla brings out the sweetness in the dough. It also helps the peanut butter and chocolate flavors feel warmer.
Step 7: Whisk the Dry Ingredients
In a separate bowl, whisk together 1 ½ cups all-purpose flour, 1 cup old-fashioned oats, 1 teaspoon salt, and 1 teaspoon baking soda. Mix until the ingredients are evenly combined.
This step prevents pockets of baking soda or salt in the dough. It also helps the oats spread evenly.
Step 8: Combine Wet and Dry Mixtures
Gradually add the dry ingredients into the wet mixture. Mix gently until just combined.
Do not overmix. Overworking the dough can make the cookies tough and dense.
Step 9: Fold in the Chocolate Chips
Add ½ cup mini chocolate chips to the dough. Fold them in gently.
The small chips spread through the dough well. This gives chocolate in every bite.
Step 10: Add the Mini M&M’s
Fold in ½ cup mini M&M’s. Use red and green Christmas varieties for the most festive look.
Save a small handful if you want to press them onto the tops before baking. This makes the cookies look prettier.
Step 11: Chill the Dough if Desired
If you want thicker cookies that spread less, chill the dough for 30 minutes. This step is optional.
Chilling is helpful if the dough feels very soft. It also helps the cookies bake taller.
Step 12: Scoop the Dough
Drop rounded tablespoonfuls of dough onto the prepared baking sheet. Space them about 2 inches apart.
The cookies need room to spread. Keeping space between them helps the edges bake evenly.
Step 13: Add Extra M&M’s on Top
Press a few reserved mini M&M’s onto the top of each dough ball. This step is optional but makes the cookies look festive.
Adding some candies on top also helps prevent all the color from hiding inside the dough. Press gently so the dough stays rounded.
Step 14: Bake the Cookies
Bake for 10 to 12 minutes. The edges should be golden, and the centers should still look slightly soft.
Do not wait until the centers look fully firm. They will continue setting as they cool.
Step 15: Cool on the Baking Sheet
Let the cookies cool on the baking sheet for 5 minutes. This helps them firm up.
Moving them too soon can cause breakage. The cookies are delicate when hot.
Step 16: Transfer to a Wire Rack
Move the cookies to a wire rack to cool completely. Let them finish setting before storing.
Cooling fully helps preserve the texture. It also keeps steam from softening them in storage.
Step 17: Store the Cookies
Store cooled cookies in an airtight container. They stay soft for 4 to 5 days.
Keep the container sealed well. This helps protect the chewy texture.
Step 18: Freeze if Needed
Freeze baked cookies in a freezer-safe bag for up to 3 months. Thaw at room temperature.
To freeze dough balls, place them on a baking sheet first, then transfer to a bag once firm. Bake from frozen and add 1 to 2 minutes to the bake time.
Serving Ideas
Serve Christmas Monster Cookies with hot cocoa for the ultimate holiday treat. The chocolate chips, peanut butter, oats, and candy colors feel made for cozy winter mugs.
They are also wonderful with coffee. A cookie or two makes a sweet afternoon break during busy holiday weeks.
Warm milk is another simple pairing. It makes the cookies feel nostalgic and perfect for Christmas Eve.
Add them to cookie exchange trays. Their bright M&M’s make them stand out among more traditional holiday cookies.
Pack them into gift tins for neighbors, teachers, friends, or family. They stay soft for days, which makes them useful for gifting.
Place them on Santa’s cookie plate. The red and green candies make them look cheerful and festive.
Serve them slightly warm if you want the chocolate chips soft. Let them cool enough to hold together before moving.
For parties, pile them on a platter with other cookies. Their colorful tops make the whole dessert table feel happier.
Storage
Store cooled Christmas Monster Cookies in an airtight container. They stay soft for 4 to 5 days.
Make sure the cookies are fully cool before closing the container. Warm cookies can create steam and change the texture.
Keep them at room temperature. They are meant to stay soft and chewy.
If stacking cookies, place parchment between layers if you want to protect the candy tops. This is helpful for gifting.
The cookies are sturdy enough for cookie boxes and jars. They travel well when cooled completely.
Do not leave them uncovered for too long. Air can dry them out.
For the softest texture, seal the container tightly after each serving. This keeps the oats and brown sugar from drying.
Freezing
Baked Christmas Monster Cookies freeze well for up to 3 months. Place them in a freezer-safe bag once completely cool.
Thaw the cookies at room temperature before serving. They are easy to bring back for last-minute treats.
You can also freeze the dough balls. Scoop the dough onto a baking sheet first and freeze until firm.
Once the dough balls are frozen, transfer them to a bag. This keeps them from sticking together.
Bake frozen dough balls straight from the freezer. Add 1 to 2 minutes to the bake time.
Freezing dough is perfect for holiday planning. You can bake fresh cookies whenever you need them.
If freezing dough, press a few M&M’s on top before freezing or right before baking. This keeps the cookies looking festive.
Make-Ahead
Christmas Monster Cookies are excellent for make-ahead baking. You can bake them fully and store them in an airtight container for 4 to 5 days.
You can also freeze baked cookies for up to 3 months. Thaw at room temperature when ready to serve.
For fresh-baked cookies later, freeze the dough balls. This is the easiest way to have warm holiday cookies on demand.
If you want thicker cookies, chill the dough for 30 minutes before scooping and baking. You can also chill before freezing dough balls.
The dough can be mixed ahead for easier holiday baking. Keep it chilled if not baking right away.
For gift boxes, bake and cool completely before packing. This helps the cookies keep their shape.
Add the prettiest M&M’s on top before baking. This makes the finished cookies look more polished in tins and jars.
Helpful Notes for Best Results
Use room-temperature butter. It creams more easily and gives the cookies better texture.
Do not melt the butter. Melted butter can make the cookies spread more.
Chill the dough for 30 minutes if you want thicker cookies. This is especially useful if the dough feels soft.
Use old-fashioned oats for the best chewy texture. Quick oats make the cookies softer and less chewy.
Do not overmix after adding the dry ingredients. Mix only until everything is combined.
Save a handful of M&M’s for the tops. This makes the cookies look bright and festive.
Do not overbake. Remove the cookies when the centers still look slightly soft.
Let the cookies cool on the baking sheet for 5 minutes. They need that time to set.
Variations
Classic Christmas Monster Cookies
Use salted butter, peanut butter, granulated sugar, brown sugar, eggs, vanilla, flour, old-fashioned oats, salt, baking soda, mini chocolate chips, and red and green mini M&M’s. This gives the cookies their classic chewy monster-cookie texture and festive holiday look.
Bake until the edges are golden and the centers are still soft. Cool on the baking sheet before transferring.
Thick Christmas Monster Cookies
Chill the dough for 30 minutes before baking. This helps the cookies spread less.
The cookies will bake up thicker and chewier. Add 1 to 2 minutes only if needed.
Bakery-Style Christmas Monster Cookies
Reserve a handful of mini M&M’s and press them onto each dough ball before baking. This makes the cookies look colorful on top.
This also helps prevent the M&M’s from cracking as much. The cookies look prettier on platters.
Pecan Monster Cookies
Add ½ cup chopped pecans to the dough. Pecans add crunch and nutty flavor.
Fold them in with the chocolate chips and M&M’s. The cookies become a little more textured.
Walnut Monster Cookies
Add ½ cup chopped walnuts. Walnuts give a deeper nutty bite.
They pair well with peanut butter and oats. Keep the rest of the recipe unchanged.
White Chocolate Monster Cookies
Use white chocolate chips for extra sweetness. They look festive with red and green M&M’s.
You can use white chocolate chips alongside the mini chocolate chips or as part of the mix-ins. Keep the total amount balanced.
Sprinkle Monster Cookies
Add Christmas sprinkles to the dough. This makes the cookies even more colorful.
Fold gently so the sprinkles do not bleed too much. Use them for extra holiday flair.
Gluten-Friendly Christmas Monster Cookies
Substitute gluten-free all-purpose baking flour and certified gluten-free oats. This keeps the cookie style similar.
The texture may vary slightly. Watch the edges and centers while baking.
Quick Oat Monster Cookies
Use quick oats instead of old-fashioned oats if needed. The cookies will be softer and less chewy.
Old-fashioned oats are best for classic monster cookies. Quick oats are a backup.
Almond Butter Monster Cookies
Use almond butter instead of peanut butter. The cookies may be slightly less chewy.
This changes the flavor but keeps the general cookie idea. Use the same amount.
Sunflower Butter Monster Cookies
Use sunflower butter instead of peanut butter if avoiding peanuts. The texture may change slightly.
This is another useful swap. Keep the rest of the dough the same.
Extra Chocolate Monster Cookies
Add more chocolate flavor by using white chocolate chips along with mini chocolate chips. Keep the mix-ins balanced so the dough still holds together.
This version is sweeter and more candy-like. It works well for dessert trays.
Christmas Cookie Exchange Cookies
Bake a full batch and cool completely before packing. These cookies hold their shape well and stay soft longer than many holiday cookies.
Use parchment between layers if stacking. The candy tops will stay prettier.
Santa Plate Cookies
Use red and green M&M’s and press extra candies on top. Serve with warm milk.
The cookies look cheerful and festive. They are a fun Christmas Eve option.
Troubleshooting
The Cookies Spread Too Much
The butter may have been too soft or warm. Chill the dough for 30 minutes before baking.
Also make sure you measured the flour correctly. Dough that is too warm or too loose can spread.
The Cookies Are Too Thick
The dough may have been chilled longer than needed, or the flour may have been packed. Let the dough sit briefly before scooping if it is very firm.
Measure flour carefully next time. The cookies should spread slightly.
The Cookies Are Dry
They may have been overbaked. Remove them when the centers still look slightly soft.
Cookies keep setting after they come out of the oven. The 5-minute baking sheet rest finishes the texture.
The Cookies Are Tough
The dough may have been overmixed after the dry ingredients were added. Mix gently and stop once combined.
Overworking cookie dough can create dense cookies. Fold in mix-ins with care.
The Centers Look Undone
That is normal when the cookies first come out. The centers should look slightly soft.
Let them cool on the baking sheet for 5 minutes. They will firm up as they rest.
The M&M’s Cracked
Some cracking can happen during baking. To reduce it, press a few M&M’s on top of each dough ball right before baking instead of mixing them all in.
This also makes the cookies look more colorful. Use reserved candies for the best appearance.
The Dough Is Sticky
The dough may be warm. Chill it for 30 minutes.
Chilled dough is easier to scoop. It also helps the cookies bake thicker.
The Cookies Are Not Chewy
Quick oats may have been used, or the cookies may have baked too long. Old-fashioned oats give the best chew.
Do not overbake. Soft centers are important for chewy cookies.
The Cookies Taste Too Sweet
The salt balances the sweetness, so make sure it is included. You can also add nuts for contrast if desired.
Pecans or walnuts can help balance sweet chocolate and candy pieces. Keep the amount to ½ cup.
The Cookies Break When Moved
They may have been moved too soon. Let them cool on the baking sheet for 5 minutes.
Once they set slightly, transfer to a wire rack. Hot cookies are fragile.
Frequently Asked Questions
Can I use quick oats instead of old-fashioned oats?
Yes, quick oats can be used, but the texture will be softer and less chewy. Old-fashioned oats give the best classic monster-cookie texture.
If you want that hearty chew, use old-fashioned oats. Quick oats are better as a backup.
Can I leave out the peanut butter?
You can, but the cookies may not be as chewy. Peanut butter is part of what gives the cookies their monster-cookie texture.
You can substitute almond butter or sunflower butter if avoiding peanuts. The flavor and texture may change.
How do I keep the M&M’s from cracking?
Press a few M&M’s on top of each dough ball right before baking. This helps them stay more visible and pretty.
You can still fold some into the dough. Saving a handful for the tops gives the best appearance.
Can I double the recipe?
Yes, this recipe can be doubled. It is perfect for large batches, parties, gifting, and cookie exchanges.
Mix gently and avoid overworking the dough. Bake in batches if needed.
The butter may have been too soft or warm. Chill the dough for 30 minutes before baking to help the cookies stay thick and chewy.
Also avoid placing dough on a hot baking sheet. A hot sheet can make the dough spread quickly.
They stay soft for 4 to 5 days in an airtight container. Let them cool completely before storing.
Seal the container well after serving. This helps keep the texture fresh.
Yes, baked cookies can be frozen for up to 3 months. Place them in a freezer-safe bag.
Thaw at room temperature before serving. They make easy holiday treats.
Can I freeze the dough balls?
Yes, freeze the dough balls on a baking sheet first. Then transfer them to a bag.
Bake from frozen and add 1 to 2 minutes to the bake time. This is great for make-ahead holiday baking.
Why This Recipe Works So Well
Christmas Monster Cookies work so well because they combine the best parts of several favorite cookies. They have peanut butter flavor, oat chew, chocolate chips, candy crunch, and brown sugar softness all in one dough.
The salted butter and peanut butter create a rich base. Together, they help make the cookies flavorful and chewy.
Using both granulated sugar and brown sugar gives balance. Granulated sugar supports golden edges, while brown sugar keeps the centers moist.
The eggs and vanilla make the dough smooth and cohesive. They also help the cookies bake with structure and warmth.
Old-fashioned oats are important because they give monster cookies their classic texture. They make the cookies feel hearty without turning them heavy.
Mini chocolate chips and mini M&M’s spread evenly throughout the dough. This means every cookie has a good mix of chocolate and candy.
The baking time is also important. Pulling the cookies when the centers still look slightly soft keeps them from becoming dry.
The short cool on the baking sheet lets the cookies finish setting. This gives them soft centers with enough structure to move.
The recipe also works for holiday planning. The cookies store well, freeze well, and can be baked from frozen dough balls with only 1 to 2 extra minutes.
Most of all, these cookies work because they feel joyful. They are colorful, familiar, chewy, chocolatey, and exactly the kind of treat that makes holiday baking feel fun.
Final Thoughts
Christmas Monster Cookies are made with salted butter, peanut butter, granulated sugar, brown sugar, eggs, vanilla, all-purpose flour, old-fashioned oats, salt, baking soda, mini chocolate chips, and red and green mini M&M’s. The dough is mixed gently, scooped into rounded tablespoonfuls, baked at 350°F until golden at the edges, and cooled until soft and chewy.
Serve them with hot cocoa, coffee, warm milk, or pack them into cookie boxes for gifting. With their festive colors, chewy oat texture, peanut butter flavor, chocolate chips, freezer-friendly dough, and easy make-ahead storage, these cookies bring sweet Christmas energy to every plate.
Christmas Monster Cookies
Soft, chewy, colorful, and packed with holiday sweetness, these Christmas Monster Cookies bring together peanut butter, oats, mini chocolate chips, and red and green mini M&M’s in one festive cookie. With buttery dough, a tender center, golden edges, and plenty of Christmas color, they are a fun treat for cookie swaps, gifting, or baking with kids.
Recipe Details
- Prep Time: 15 minutes
- Cook Time: 12 minutes
- Total Time: 27 minutes
- Servings: 24 cookies
- Calories: 180 kcal
Ingredients
For the Christmas Monster Cookies
- ½ cup mini M&M’s red and green for Christmas
- ½ cup mini chocolate chips
- 1 teaspoon baking soda
- 1 teaspoon salt
- 1 cup old fashioned oats
- 1 ½ cups all-purpose flour
- 2 teaspoon vanilla extract
- 2 eggs
- ½ cup brown sugar
- ½ cup granulated sugar
- ¼ cup peanut butter
- ½ cup salted butter
Instructions
Step 1: Preheat the Oven
Preheat the oven to 350°F (175°C). Let the oven heat while you prepare the cookie dough.
Having the oven ready helps the cookies bake evenly once the dough is scooped. Keep an ungreased baking sheet nearby for shaping the dough.
Step 2: Cream the Butter, Peanut Butter, and Sugars
In a large bowl, cream the salted butter, peanut butter, granulated sugar, and brown sugar until the mixture becomes smooth and fluffy. Use room-temperature butter for easier creaming and a better cookie texture.
This creamy base gives the cookies their soft, chewy bite. Make sure the peanut butter and sugars are fully blended before adding the eggs.
Step 3: Add the Eggs and Vanilla
Beat in the eggs one at a time. After the eggs are mixed in, add the vanilla extract.
Mix until the wet base looks smooth and even. Adding the eggs gradually helps the dough come together more cleanly.
Step 4: Combine the Dry Ingredients
In a separate bowl, whisk together the all-purpose flour, old fashioned oats, salt, and baking soda. Stir until the oats and leavening are evenly distributed.
This dry mixture gives the monster cookies structure and chew. Mixing it separately helps the baking soda and salt spread through the dough more evenly.
Step 5: Finish the Dough
Slowly add the dry ingredients to the wet mixture. Mix only until just combined.
Stop once the flour and oats disappear into the dough. Overmixing is not needed for soft, chewy cookies.
Step 6: Fold in the Chocolate and M&M’s
Fold in the mini chocolate chips and the red and green mini M&M’s. Stir gently so the candy and chocolate are spread throughout the dough.
For a bakery-style presentation, press a few extra M&M’s on top of each dough ball before baking. This keeps more Christmas color visible on the finished cookies.
Step 7: Scoop the Cookies
Scoop rounded tablespoons of dough onto an ungreased baking sheet. Space the dough balls 2 inches apart.
If you want thicker cookies that spread less, chill the dough for 30 minutes before baking. This step is optional but helpful for a thicker texture.
Step 8: Bake Until Golden
Bake for 10-12 minutes, or until the edges are golden. The centers should still look soft enough to stay chewy as they cool.
Use the golden edges as your main cue. The cookies will continue setting on the baking sheet after they come out of the oven.
Step 9: Cool Completely
Cool the cookies on the baking sheet for 5 minutes. Then transfer them to a wire rack to cool completely.
Letting them rest briefly on the baking sheet helps them firm up before moving. Once cooled, they are ready to serve, store, or freeze.
Notes
- Use room-temperature butter for easier creaming and a better cookie texture.
- Chill dough for 30 minutes for thicker cookies that spread less.
- Press a few extra M&M’s on top of each dough ball before baking for bakery-style presentation.
- Replace peanut butter with almond or sunflower butter if needed.
- Cookies freeze well for up to 3 months.
Serving Suggestions
Serve Christmas Monster Cookies after they have cooled completely and the centers have settled into a chewy texture. The peanut butter, oats, mini chocolate chips, and red and green mini M&M’s make them festive enough for Christmas cookie trays, gift boxes, and cookie swaps.
For a more colorful finish, press extra M&M’s on top of each dough ball before baking. This helps the cookies look brighter and more bakery-style once they come out of the oven.
These cookies also work well for baking with kids because the dough is simple and the holiday candy makes them fun to decorate. Serve them as a cheerful dessert cookie or pack them into small holiday treat bags.
Storage
How to Store
The recipe does not provide a specific refrigerator or room-temperature storage duration, so no exact storage time is added here.
Freezer Tip
Cookies freeze well for up to 3 months. Store them properly for freezing, then thaw before serving.
Dough Tip
Chill the dough for 30 minutes if you want thicker cookies that spread less. This is especially helpful if the dough feels soft before baking.
Butter Tip
Use room-temperature butter for easier creaming and a better cookie texture. The softened butter blends more smoothly with the peanut butter and sugars.
Topping Tip
Press a few extra M&M’s on top of each dough ball before baking for a bakery-style look. This keeps the red and green candy visible on the surface.
Swap Tip
Replace peanut butter with almond or sunflower butter if needed. Keep the amount the same so the dough stays balanced.

Fernando is the creator and writer behind the food blog Eating with your Hands. Living and working in cities like Paris, Barcelona, and Berlin, and being married to a Canadian foodie, has given Fernando a passion and interest in food and inspired him to run EWYH.