
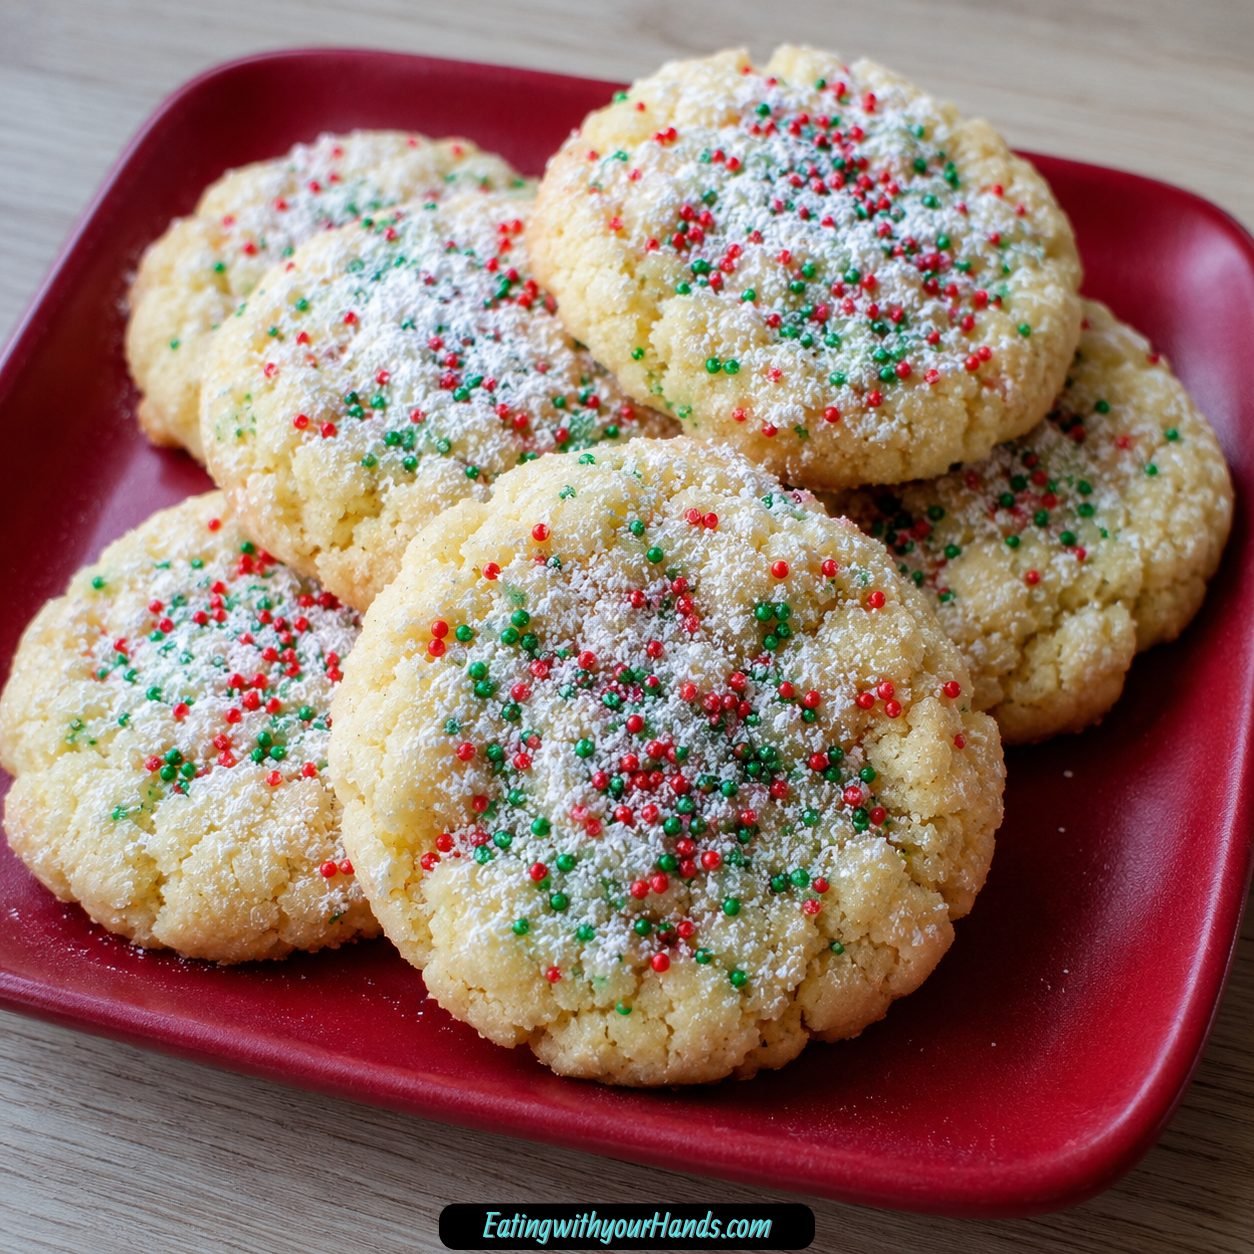
Christmas baking has a way of making even the busiest kitchen feel warm, familiar, and full of small traditions. Some recipes are beautiful but complicated, while others quietly become the ones you make every single year because they are easy, dependable, and loved by everyone who tries them.
These Christmas Ooey Gooey Butter Cookies are exactly that kind of holiday recipe. They are soft, rich, sweet, festive, and simple enough to make even when the season already feels packed with shopping lists, gatherings, wrapping paper, and a very full calendar.
The first time I made cookies like these, I remember needing something quick but still special enough to feel worthy of a Christmas dessert tray. I did not want a cookie that required chilling overnight, rolling dough into perfect shapes, or decorating with the patience of a professional baker.
What I wanted was a cookie that felt joyful without being stressful. One bite of that soft, buttery center and snowy powdered sugar coating made it clear that this recipe deserved a permanent place in the holiday baking rotation.
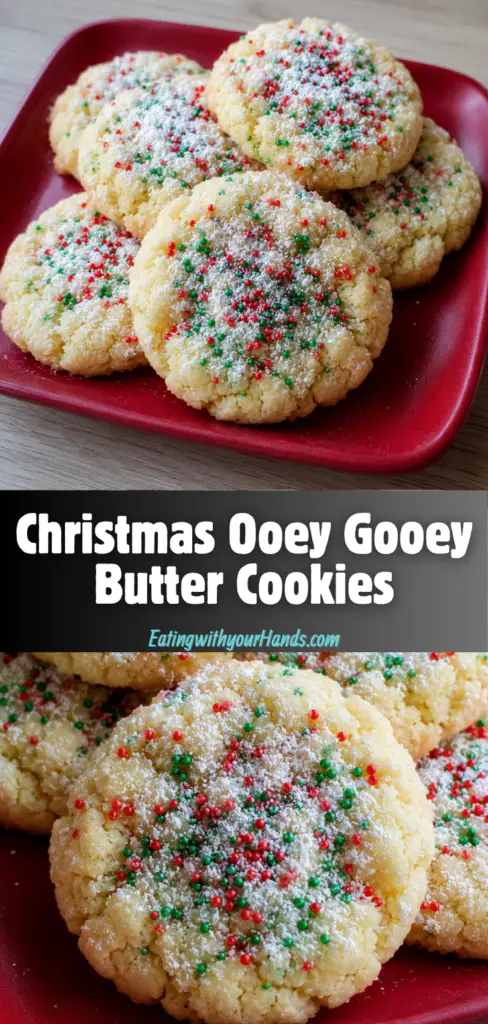
These cookies have that wonderful contrast that makes people reach for a second one almost immediately. The outside has a delicate powdered sugar finish, while the inside stays tender, gooey, and rich from the butter and cream cheese.
The red and green sprinkles give them a cheerful Christmas look without requiring any careful decorating. They are festive enough for cookie swaps and gift tins, but relaxed enough to bake on a quiet December afternoon just because the house needs something sweet.
Table of Contents
- Why You’ll Love These Christmas Ooey Gooey Butter Cookies
- What Makes These Cookies So Gooey and Soft
- Recipe Details
- Ingredients for Christmas Ooey Gooey Butter Cookies
- A Few Things to Know Before You Start
- Directions for Christmas Ooey Gooey Butter Cookies
- Step 1: Preheat the Oven
- Step 2: Prepare the Baking Sheet
- Step 3: Soften the Butter and Cream Cheese
- Step 4: Cream the Butter and Cream Cheese
- Step 5: Add the Egg
- Step 6: Mix in the Vanilla Extract
- Step 7: Add the Yellow Cake Mix Slowly
- Step 8: Check the Dough Texture
- Step 9: Chill the Dough
- Step 10: Portion the Dough
- Step 11: Roll the Dough Balls
- Step 12: Coat the Dough in Powdered Sugar
- Step 13: Arrange the Cookies on the Baking Sheet
- Step 14: Add the Sprinkles
- Step 15: Bake the Cookies
- Step 16: Cool on the Baking Sheet
- Step 17: Transfer to a Wire Rack
- How to Serve Christmas Ooey Gooey Butter Cookies
- How to Store These Cookies
- Helpful Notes for the Best Cookies
- Frequently Asked Questions
- Final Thoughts
- Christmas Ooey Gooey Butter Cookies
Why You’ll Love These Christmas Ooey Gooey Butter Cookies
The best thing about these cookies is how soft they stay. Cream cheese gives the dough a tender, almost melt-in-your-mouth texture, while the butter adds that classic richness every holiday cookie should have.
They are also wonderfully simple because the dough starts with yellow cake mix. That means you get a consistent texture and sweet vanilla-like base without measuring a long list of dry ingredients.
These cookies are perfect for Christmas cookie trays because they look festive without demanding complicated decorating skills. A generous roll in powdered sugar gives them a snowy finish, and a light touch of red and green sprinkles makes them instantly holiday-ready.
They are also great for beginner bakers. The steps are straightforward, the ingredients are easy to understand, and the only real patience required is letting the dough chill before shaping.
Another reason this recipe is so useful is that the cookies hold their softness well. They can stay tender for days when stored properly, which makes them practical for holiday prep, gifting, and make-ahead dessert trays.
Most of all, they taste like the kind of cookie people expect to find during Christmas. Sweet, buttery, soft, cheerful, and just a little nostalgic, they bring comfort without trying too hard.
What Makes These Cookies So Gooey and Soft
The gooey texture comes from the combination of softened butter, cream cheese, egg, and cake mix. Together, they create a dough that bakes into cookies with set edges and soft, slightly underbaked-looking centers.
The trick is not to overbake them. These cookies should come out of the oven when the edges are set but the centers still look tender, because they continue to settle as they cool on the baking sheet.
Chilling the dough also makes a big difference. Since the dough is thick and sticky, refrigeration helps it firm up enough to scoop, roll, and hold its shape in the oven.
Without chilling, the cookies may spread more than you want. That small wait helps keep them thick, soft, and beautifully rounded.
Powdered sugar is another important part of the recipe. It does not just make the cookies look snowy; it also helps create that classic crinkled appearance as the cookies bake and expand.
Recipe Details
- Recipe Name: Christmas Ooey Gooey Butter Cookies
- Recipe Style: Soft holiday cake mix cookies
- Best For: Christmas trays, cookie swaps, gifting, parties, and family baking
- Texture: Soft edges with gooey, tender centers
- Oven Temperature: 350°F (175°C)
- Chill Time: At least 30 minutes
- Bake Time: 10 to 12 minutes
- Cooling Time: 5 minutes on the baking sheet before transferring
- Storage: Airtight container at room temperature for up to 5 days
- Freezer Option: Baked cookies can be frozen for up to 2 months
Ingredients for Christmas Ooey Gooey Butter Cookies
Every ingredient in this recipe has a clear purpose. The list is short, but each part helps create the rich flavor, soft texture, and festive appearance that make these cookies so memorable.
Unsalted Butter
You need 1/2 cup unsalted butter, softened. The butter gives these cookies their rich, classic flavor and helps the dough bake into a tender cookie instead of something dry or crumbly.
Softened butter is important because it blends more smoothly with the cream cheese. If the butter is too cold, the mixture can stay lumpy, and if it is melted, the dough may become too loose.
Cream Cheese
You need 1 package of cream cheese, softened, which is 8 ounces. This is the ingredient that gives the cookies their signature soft, gooey texture and a slight tang that balances the sweetness.
Cream cheese makes these cookies feel richer than ordinary cake mix cookies. It also helps keep the centers tender for days after baking.
Egg
You need 1 large egg. The egg helps bind the dough together and gives the cookies enough structure to hold their shape once baked.
It also helps the dough become smooth and cohesive after the butter, cream cheese, and vanilla are mixed together. Without it, the texture would not set the same way.
Vanilla Extract
You need 1 teaspoon vanilla extract. Vanilla adds warmth and rounds out the sweetness of the cake mix, butter, and powdered sugar.
Even though it is a small amount, it helps the cookies taste more homemade. It gives the dough that familiar holiday bakery aroma as it bakes.
Yellow Cake Mix
You need 1 box yellow cake mix, 15.25 ounces. This is what makes the recipe quick, reliable, and easy to repeat during a busy holiday season.
Yellow cake mix creates a sweet, buttery base that pairs perfectly with cream cheese. It also helps give the cookies their soft, tender structure without needing separate flour, sugar, or leavening measurements.
Powdered Sugar
You need 1 cup powdered sugar for rolling the cookie dough balls. This gives the cookies their snowy Christmas look and helps form that pretty crinkled coating as they bake.
Be generous with the powdered sugar. A light coating can disappear into the dough, while a fuller coating gives the cookies a much prettier finish.
Red and Green Sprinkles
You need red and green sprinkles for the top of the cookies. They add color, holiday charm, and a simple decorative finish without any icing or extra work.
Use a light hand with the sprinkles. Too many can weigh down the tops or distract from the soft powdered sugar coating.
A Few Things to Know Before You Start
This dough is supposed to be thick and sticky. That is completely normal and part of what gives the cookies their soft, gooey centers.
Because the dough is sticky, chilling is not optional if you want the easiest shaping experience. Thirty minutes in the refrigerator makes the dough much more manageable and helps prevent the cookies from spreading too much.
It also helps to use a cookie scoop if you have one. A scoop keeps the cookies similar in size, which helps them bake evenly and look more consistent on a holiday tray.
The cookies should not look fully firm when you take them out of the oven. If the centers look slightly soft, that is usually exactly what you want.
Letting them rest on the baking sheet for 5 minutes is part of the baking process. During that time, the cookies finish setting while staying tender inside.
Directions for Christmas Ooey Gooey Butter Cookies
Step 1: Preheat the Oven
Preheat your oven to 350°F, or 175°C. Giving the oven enough time to fully heat helps the cookies bake evenly from the moment the tray goes in.
This is especially important for soft cookies like these. A steady oven temperature helps the edges set while the centers remain tender and gooey.
Step 2: Prepare the Baking Sheet
Line a baking sheet with parchment paper or a silicone baking mat. This keeps the cookies from sticking and makes cleanup much easier after baking.
Because these cookies are rolled in powdered sugar, a lined pan also helps protect the delicate coating. It makes it easier to lift the cookies once they have cooled slightly.
Step 3: Soften the Butter and Cream Cheese
Make sure both the butter and cream cheese are softened before mixing. They should be soft enough to blend smoothly, but not melted or greasy.
This step matters because cold cream cheese can leave little lumps in the dough. Taking a few extra minutes to start with softened ingredients gives the cookies a smoother, more even texture.
Step 4: Cream the Butter and Cream Cheese
Place the softened butter and softened cream cheese in a large mixing bowl. Beat them together until the mixture looks smooth, creamy, and fully combined.
Do not rush this part. A smooth base helps the egg, vanilla, and cake mix blend in more evenly later.
Step 5: Add the Egg
Add the large egg to the bowl and beat until it is fully incorporated. The mixture should become slightly looser and smoother as the egg blends in.
Scrape down the sides of the bowl if needed. This helps make sure no pockets of butter or cream cheese are left unmixed.
Step 6: Mix in the Vanilla Extract
Add the vanilla extract and mix it into the wet ingredients. This gives the dough a warm, sweet flavor that fits beautifully with the yellow cake mix.
Vanilla may seem like a small detail, but it helps the cookies taste more rounded. It softens the richness of the cream cheese and brings everything together.
Step 7: Add the Yellow Cake Mix Slowly
Add the yellow cake mix gradually, mixing on low speed. The dough will become thick and sticky as the cake mix absorbs the wet ingredients.
Mix only until everything is combined. Overmixing is not necessary, and stopping once the dough comes together helps keep the cookies tender.
Step 8: Check the Dough Texture
The finished dough should be thick, soft, and sticky. It will not feel like traditional roll-out cookie dough, and that is exactly right for this recipe.
If it feels difficult to handle, do not add extra dry ingredients. Chilling will firm it up and make it much easier to scoop and roll.
Step 9: Chill the Dough
Cover the bowl and refrigerate the dough for at least 30 minutes. This step helps the dough firm up so the cookies are easier to shape.
Chilling also helps the cookies bake thicker and softer. It keeps them from spreading too quickly in the oven and protects that gooey center.
Step 10: Portion the Dough
Once chilled, use a cookie scoop or spoon to portion the dough into 1-inch balls. Try to keep the portions similar in size so they bake evenly.
A cookie scoop makes this step much cleaner and faster. It also helps the finished cookies look consistent, which is especially nice for gifting or cookie trays.
Step 11: Roll the Dough Balls
Gently roll each portion between your hands to form a ball. If the dough starts to feel sticky, work quickly or chill it for a few more minutes.
The balls do not need to be perfect. A simple rounded shape is enough to help the cookies bake evenly and crack nicely through the powdered sugar coating.
Step 12: Coat the Dough in Powdered Sugar
Roll each dough ball generously in powdered sugar until fully coated. Make sure the surface is covered well, because some of the sugar will absorb into the dough as it bakes.
This coating gives the cookies their snowy holiday appearance. It also helps create the soft crinkled look that makes them so pretty on a Christmas plate.
Step 13: Arrange the Cookies on the Baking Sheet
Place the coated dough balls on the prepared baking sheet about 2 inches apart. This gives them room to spread slightly without touching.
Even though chilling helps control spreading, the cookies still need space. Crowding the pan can make them bake unevenly and lose their clean shape.
Step 14: Add the Sprinkles
Sprinkle a small amount of red and green sprinkles over the tops of the cookies. Use just enough to add cheerful color without covering the powdered sugar.
A light touch works best here. The sprinkles should make the cookies look festive, not heavy or crowded.
Step 15: Bake the Cookies
Bake the cookies for 10 to 12 minutes. The edges should look set, but the centers should still appear soft and slightly underdone.
This is the most important timing detail in the whole recipe. If you bake them until the centers look completely firm, the cookies may lose some of their gooey texture.
Step 16: Cool on the Baking Sheet
Remove the baking sheet from the oven and let the cookies cool on the pan for 5 minutes. During this time, they will continue to set without becoming dry.
Do not try to move them immediately. They are soft when hot, and that short rest helps them hold together.
Step 17: Transfer to a Wire Rack
After 5 minutes, carefully move the cookies to a wire rack to cool completely. Use a thin spatula and handle them gently.
Once cooled, the cookies will still be soft but easier to pick up. Their centers should remain tender, rich, and perfectly gooey.
How to Serve Christmas Ooey Gooey Butter Cookies
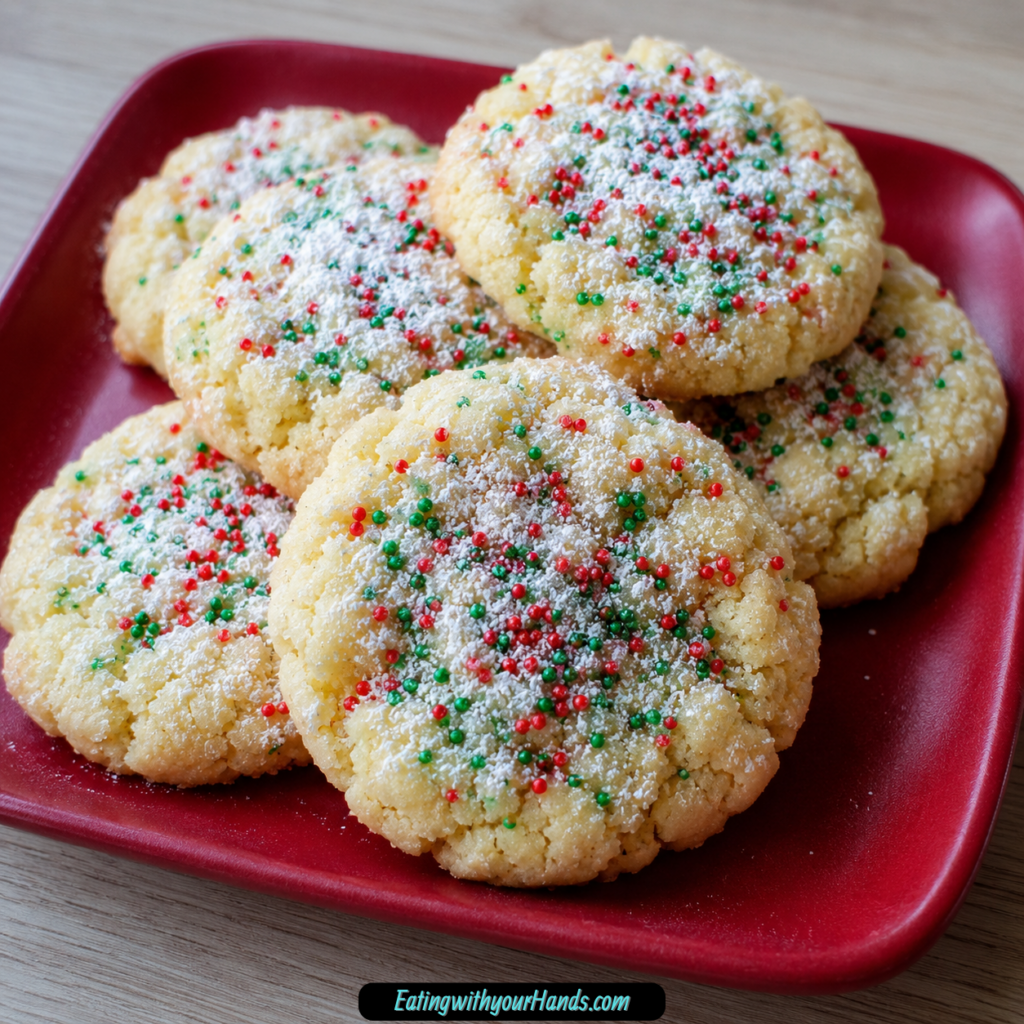
These cookies are wonderful slightly cooled, when the centers are still soft and the powdered sugar coating is delicate. That is when they have the best balance of richness, sweetness, and gooey texture.
They fit beautifully on Christmas cookie platters with gingerbread, shortbread, chocolate cookies, and other holiday favorites. Their snowy look and colorful sprinkles make them stand out without needing fancy decoration.
They are also lovely with hot cocoa, coffee, or a glass of cold milk. The richness of the cookie pairs well with something simple to drink.
For gifting, stack them gently in festive tins or containers. Because they are soft cookies, it is best not to pack them too tightly.
How to Store These Cookies
Store the cookies in an airtight container at room temperature for up to 5 days. This helps keep them soft and protects them from drying out.
If you want to help maintain the soft texture, add a slice of bread to the container. The cookies can absorb a little moisture from the bread, which helps them stay tender.
If your kitchen is warm, you can refrigerate the cookies for up to 7 days. Let them come closer to room temperature before serving for the best texture.
You can also freeze baked cookies for up to 2 months. Thaw them at room temperature before serving, and handle them gently so the powdered sugar coating stays as pretty as possible.
Helpful Notes for the Best Cookies
Chilling the dough is one of the most important steps. It makes the dough easier to roll and helps keep the cookies thick and soft as they bake.
Do not overbake the cookies. They should look slightly underdone in the center when you remove them from the oven, because they continue to set as they cool.
Use a light hand with the sprinkles. Too many sprinkles can weigh down the tops, while just a few add the perfect festive touch.
A cookie scoop is helpful if you want uniform cookies. Even sizing helps them bake at the same rate and makes the finished batch look polished.
If you want to change the flavor slightly, you can use white cake mix or butter cake mix instead of yellow cake mix. You can also add almond extract for a bakery-style twist or mix mini chocolate chips into the dough for a richer version.
Frequently Asked Questions
Why Are My Cookies Flat?
Flat cookies usually happen when the dough is too warm or has not chilled long enough. Make sure to refrigerate the dough for at least 30 minutes before rolling and baking.
The butter should also be softened, not melted. Melted butter can make the dough too loose and encourage spreading.
Can I Make the Dough Ahead of Time?
Yes, you can make the dough ahead and refrigerate it for up to 48 hours before baking. Keep it covered so it does not dry out in the refrigerator.
If the dough becomes very firm after a longer chill, let it sit at room temperature for a few minutes before scooping. It should still be chilled, but workable.
Do These Cookies Stay Soft?
Yes, these cookies stay soft because of the cream cheese in the dough. When stored in an airtight container, they can remain tender for several days.
The key is not overbaking them. Pulling them from the oven while the centers still look soft helps preserve that gooey texture.
Can I Skip the Sprinkles?
Yes, you can skip the sprinkles if you prefer a simpler snowy cookie. The powdered sugar coating alone still gives them a beautiful Christmas look.
You can also use colored sanding sugar if you want a different festive finish. Just keep the topping light so the cookies do not become too heavy.
Are These Cookies Very Sweet?
They are sweet and rich, as holiday cookies should be, but the cream cheese helps balance the flavor. That slight tang keeps the sweetness from feeling flat.
The powdered sugar coating adds sweetness too, so the cookie feels very dessert-like. They are best enjoyed as a soft, festive treat rather than an everyday plain cookie.
Can I Use a Different Cake Mix?
Yes, the original recipe notes that white cake mix or butter cake mix can work as variations. Yellow cake mix gives a classic buttery sweetness, but those swaps can still fit the recipe.
Changing the cake mix will slightly change the flavor and color. The basic soft, gooey texture should still remain similar.
Can I Add Chocolate Chips?
Yes, mini chocolate chips can be mixed into the dough for extra indulgence. Mini chips work especially well because they distribute more evenly through the dough.
Keep the amount reasonable so the dough still holds together properly. The goal is to add a little richness without overwhelming the soft cookie base.
Final Thoughts
Christmas Ooey Gooey Butter Cookies are the kind of recipe that makes holiday baking feel easier without making it feel less special. They are quick, soft, festive, and comforting, with that rich cream cheese texture that makes every bite feel a little more memorable.
What I love most is that they deliver the joy of Christmas cookies without asking for complicated decorating or a long ingredient list. A cake mix, a few simple additions, powdered sugar, and sprinkles come together to create something that looks cheerful and tastes wonderfully homemade.
They are perfect for beginner bakers, busy holiday weeks, cookie exchanges, and last-minute dessert trays. They also have the kind of soft, sweet charm that makes people ask for the recipe after just one bite.
If you need a cookie that feels festive, reliable, and genuinely fun to make, these belong on your list. Once you see those snowy little cookies cooling on the tray, it is easy to understand why they become a Christmas tradition so quickly.
Christmas Ooey Gooey Butter Cookies
These Christmas Ooey Gooey Butter Cookies are soft, rich, and wonderfully tender with a sweet powdered sugar coating and festive red and green sprinkles. Cream cheese, softened butter, and yellow cake mix create a cookie dough that bakes into gooey centers with lightly set edges. They are simple to make and perfect for Christmas cookie trays, holiday parties, edible gifts, bake sales, or cozy December baking days when you want something festive without complicated steps.
Recipe Details
- Prep Time: 15 minutes
- Cook Time: 12 minutes
- Total Time: 27 minutes
- Servings: 24 cookies
- Calories: 180 kcal
Ingredients
- Red and green sprinkles for decorating
- 1 cup powdered sugar
- 1 box 15.25 ounces yellow cake mix
- 1 teaspoon vanilla extract
- 1 large egg
- 1 8-ounce package cream cheese, softened
- ½ cup unsalted butter softened
Instructions
Step 1: Prepare the Oven
Preheat the oven to 350°F (175°C).
Line a baking sheet with parchment paper or a silicone baking mat.
Step 2: Mix the Butter and Cream Cheese
In a large bowl, beat the softened unsalted butter and softened cream cheese until smooth and creamy.
Step 3: Add the Egg and Vanilla
Add the egg and vanilla extract.
Mix until fully incorporated and the mixture looks smooth.
Step 4: Add the Cake Mix
Slowly add the yellow cake mix.
Mix on low speed until the dough comes together and no dry streaks remain.
Step 5: Chill the Dough
Cover the dough and refrigerate for at least 30 minutes.
This helps firm the dough and keeps the cookies from spreading too much.
Step 6: Shape the Cookies
Scoop the chilled dough into 1-inch balls.
Roll each portion gently between your hands until smooth.
Step 7: Coat in Powdered Sugar
Roll each dough ball in powdered sugar until fully coated.
Place the coated dough balls on the prepared baking sheet about 2 inches apart.
Step 8: Add Sprinkles
Sprinkle the tops lightly with red and green sprinkles.
Use a light amount so the soft cookies stay tender.
Step 9: Bake
Bake for 10-12 minutes, or until the edges are set and the centers still look soft.
Do not overbake, as the cookies should stay gooey in the middle.
Step 10: Cool
Let the cookies cool on the baking sheet for 5 minutes.
Transfer them to a wire rack to cool completely.
Notes
Chilling the dough is essential to prevent excessive spreading.
Do not overbake. The cookies should look slightly underdone in the center when removed from the oven.
Use a light hand with sprinkles to avoid weighing down the soft cookies.
Store in an airtight container at room temperature for up to 5 days.
Freeze baked cookies for up to 2 months, then thaw at room temperature before serving.
Serving Suggestions
These Christmas ooey gooey butter cookies pair well with:
- Hot cocoa
- Cold milk
- Coffee
- Eggnog
- Peppermint tea
- Holiday cookie trays
- Christmas dessert boards
- Edible gift boxes
Storage
How to Store
Store cooled cookies in an airtight container at room temperature for up to 5 days.
How to Freeze
Freeze baked cookies in a freezer-safe container for up to 2 months.
Best Texture Tip
Pull the cookies from the oven when the edges are set but the centers still look soft. They will continue to firm up slightly as they cool.

Fernando is the creator and writer behind the food blog Eating with your Hands. Living and working in cities like Paris, Barcelona, and Berlin, and being married to a Canadian foodie, has given Fernando a passion and interest in food and inspired him to run EWYH.