
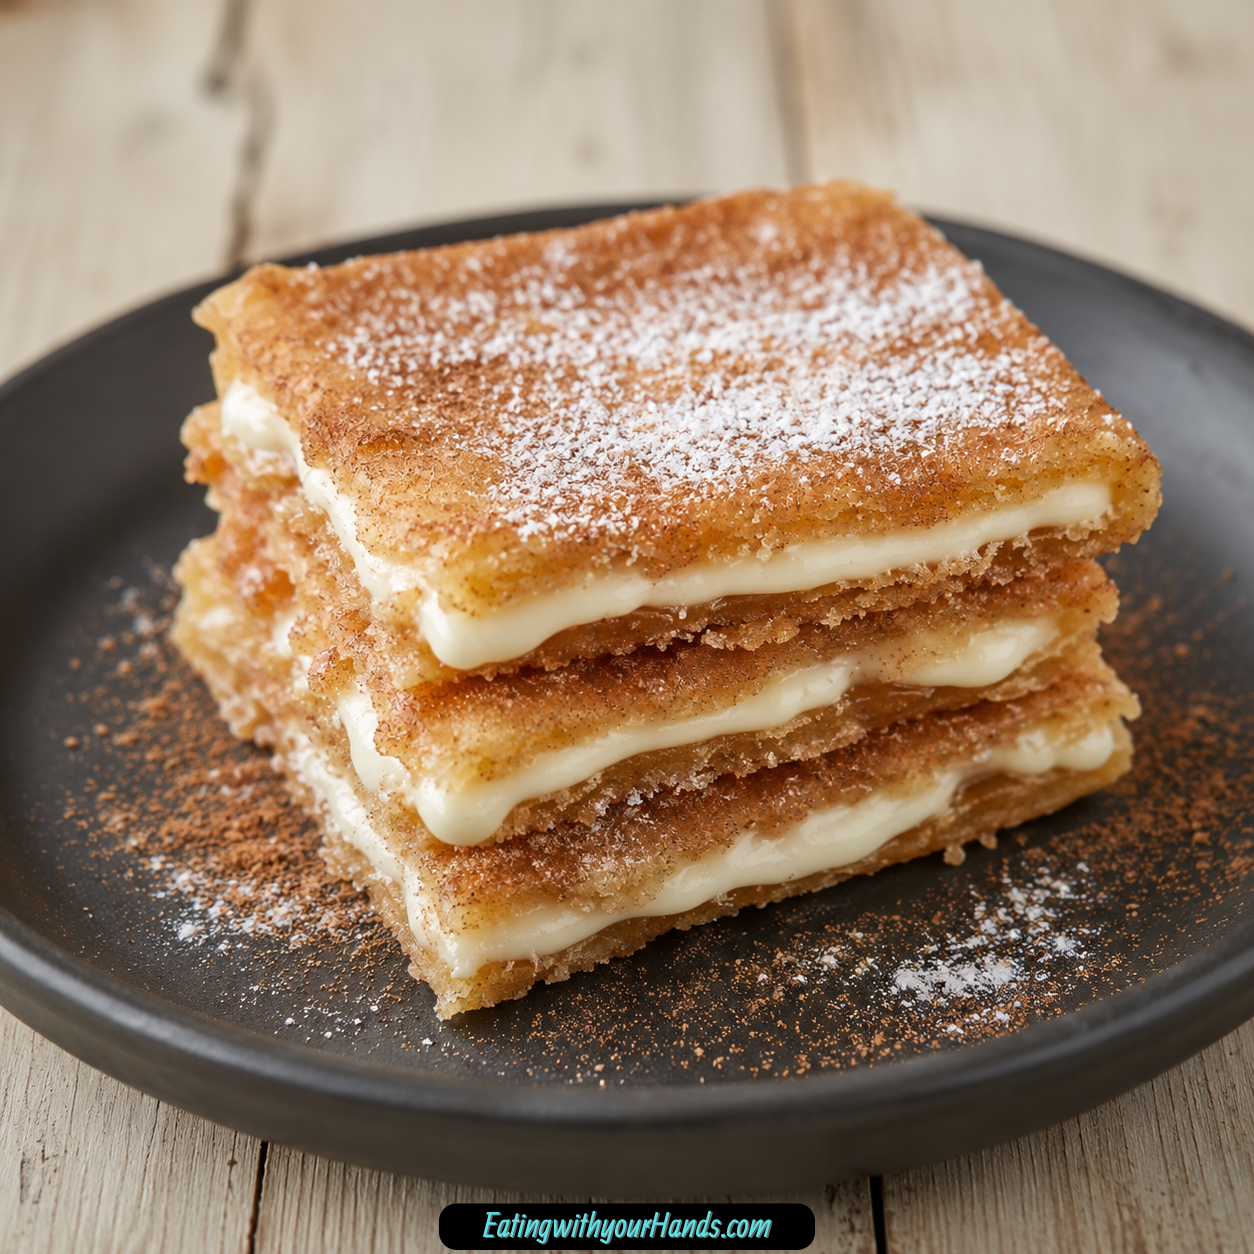
Some desserts feel like they were made for the moments when you want something sweet, crunchy, and a little bit nostalgic without committing to a complicated baking project. Churro cracker candy is exactly that kind of treat, bringing together a crisp saltine base, a bubbling brown sugar caramel, a creamy white chocolate topping, and a sparkling cinnamon-sugar finish.
It has the cozy flavor of churros, the easy structure of cracker candy, and the kind of sweet-salty crunch that makes people reach back for another piece before they even realize they have finished the first one. This is the recipe I would make when the holiday tray needs one more treat, when a bake sale table needs something eye-catching, or when a weeknight deserves a dessert that feels fun without being fussy.
What makes this candy so lovable is how much reward it gives for such simple effort. You do not need a candy thermometer, you do not need special equipment, and you do not need to spend the afternoon hovering over the stove.
The layers do the work beautifully. Saltine crackers give the candy a crisp, slightly salty foundation, the buttery brown sugar mixture bakes into a rich caramel layer, white chocolate adds a smooth and creamy top, and the cinnamon sugar brings in that unmistakable churro-inspired finish.
Once the candy sets, it can be broken into golden shards that look rustic, festive, and completely gift-worthy. It is the kind of homemade treat that looks charming in a candy bowl, tucked into a cookie tin, or packed into small treat bags for sharing.
Table of Contents
- Why You’ll Love This Churro Cracker Candy
- The Sweet-Salty Magic Behind This Candy
- Recipe Details
- Ingredients
- Optional Flavor Variations
- Understanding the Ingredients
- Directions
- Step 1: Preheat the Oven
- Step 2: Line the Baking Sheet
- Step 3: Arrange the Saltine Crackers
- Step 4: Melt the Butter
- Step 5: Stir in the Brown Sugar, Vanilla, and Cinnamon
- Step 6: Bring the Caramel to a Gentle Boil
- Step 7: Check the Caramel Consistency
- Step 8: Pour the Hot Caramel Over the Crackers
- Step 9: Spread the Caramel Evenly
- Step 10: Bake Until the Caramel Bubbles
- Step 11: Add the White Chocolate Chips
- Step 12: Spread the Melted White Chocolate
- Step 13: Mix the Cinnamon-Sugar Topping
- Step 14: Sprinkle the Churro Topping
- Step 15: Cool the Candy Completely
- Step 16: Lift the Candy From the Pan
- Step 17: Break Into Pieces
- Serving Suggestions
- Storage
- Presentation Tips
- Helpful Notes for Best Results
- Flavor Variations
- Frequently Asked Questions
- Can I Use Graham Crackers Instead of Saltines?
- Can I Use Chocolate Chips Instead of White Chocolate?
- Why Didn’t My Chocolate Chips Melt?
- Can I Make This Dairy-Free?
- How Do I Avoid Overcooking the Caramel?
- Do I Need a Candy Thermometer?
- How Long Does the Candy Take to Set?
- Can I Score the Candy Before Breaking It?
- Why This Recipe Is Great for Holidays and Gifts
- Why This Candy Works for Beginners
- Final Thoughts
- Churro Cracker Candy
Why You’ll Love This Churro Cracker Candy
This recipe is quick enough to make when you do not have much time but still want something that tastes special. From start to finish, it takes about 25 minutes, which makes it especially helpful for busy holiday schedules or last-minute dessert needs.
The ingredient list is made from everyday staples, yet the finished candy tastes layered and indulgent. Saltines, butter, brown sugar, vanilla, cinnamon, white chocolate, and granulated sugar come together in a way that feels much more exciting than the list suggests.
The flavor is inspired by churros, but the method is closer to classic cracker candy. That combination creates a dessert bark with a crisp base, a buttery caramel layer, and a sweet cinnamon finish.
It is also a wonderful recipe for gifting. Broken into irregular pieces, the candy looks pretty and homemade in the best way, with a golden surface and a cinnamon-sugar sparkle.
Kids can help with the cinnamon-sugar topping, which makes the recipe feel playful and family-friendly. The sprinkling step is simple, fun, and satisfying because the topping clings beautifully to the melted white chocolate.
Another reason to love this recipe is how adaptable it is. You can add cayenne for heat, switch the chocolate, or finish the top with crushed nuts like pecans or almonds.
The Sweet-Salty Magic Behind This Candy
The best snack-style desserts usually have more than one thing happening at once. Churro cracker candy works because it balances sweet, salty, crunchy, creamy, buttery, and spiced elements in every piece.
The saltine crackers are important because they keep the candy from tasting flat. Their crisp texture and subtle saltiness create contrast against the caramel and white chocolate.
The caramel layer brings depth and richness. Brown sugar gives the mixture a warm sweetness, while butter makes it smooth and indulgent.
Cinnamon is used in two places, which helps carry the churro flavor throughout the candy. One teaspoon goes into the caramel, and another teaspoon is mixed with granulated sugar for the final dusting.
White chocolate creates a creamy top layer that softens the stronger caramel flavor. It also gives the cinnamon sugar something to cling to while the surface is still melted.
When everything sets, the result is a candy bark that breaks apart easily and gives you a different little mix of texture in every shard. Some pieces may have more chocolate, some may have more cinnamon sugar, and the irregular edges make the candy feel handmade and inviting.
Recipe Details
- Prep time: About 25 minutes start to finish
- Oven temperature: 350°F (175°C)
- Pan size: Large baking sheet, about 10×15 inches
- Base: About 40 saltine crackers
- Caramel cook time: 3 to 4 minutes
- Baking time: 5 to 7 minutes
- Chocolate softening time: 2 to 3 minutes
- Setting time: About 20 to 30 minutes in the refrigerator, if chilling to speed up the process
- Storage at room temperature: Up to 1 week
- Storage in refrigerator: Up to 2 weeks
- Storage in freezer: Up to 2 months
Ingredients
- 1 sleeve of saltine crackers, about 40 crackers
- 1 cup unsalted butter
- 1 cup brown sugar
- 1 teaspoon vanilla extract
- 1 teaspoon ground cinnamon
- 1½ cups white chocolate chips
- ¼ cup granulated sugar
- 1 teaspoon ground cinnamon, for dusting
Optional Flavor Variations
- A pinch of cayenne
- Dark chocolate instead of white chocolate
- Milk chocolate instead of white chocolate
- Crushed nuts, such as pecans or almonds
Understanding the Ingredients
A recipe this simple depends on each ingredient doing its job well. There are not many components, but every layer adds something important to the final candy.
Saltine Crackers
The saltine crackers form the crisp foundation of the candy. One sleeve, about 40 crackers, is used to cover the bottom of a large baking sheet in a single even layer.
Their salty flavor is part of what makes the candy so addictive. Without that contrast, the caramel, white chocolate, and cinnamon sugar would taste much sweeter and heavier.
The crackers also create the structure for the bark. Once covered with caramel and baked, they hold everything together and give each broken piece a satisfying crunch.
Unsalted Butter
The recipe uses 1 cup of unsalted butter to make the caramel layer. Butter is one of the main flavors in the candy, so the original recipe notes that good-quality unsalted butter is worth using.
Because the butter is paired with brown sugar and cooked into a bubbling mixture, it becomes the rich base of the caramel. It also helps the mixture spread across the crackers.
Unsalted butter gives you a clean, rich flavor while allowing the saltines to provide the salty note. This balance keeps the candy sweet and savory in the right places.
Brown Sugar
One cup of brown sugar is stirred into the melted butter. Light or dark brown sugar can both be used.
Light brown sugar will keep the flavor a little softer, while dark brown sugar adds a deeper molasses note. Either option works within the recipe.
As the brown sugar cooks with the butter, it thickens into a caramel-like layer. This is the part that bakes into the crackers and gives the candy its rich, toffee-style personality.
Vanilla Extract
One teaspoon of vanilla extract is added to the caramel mixture. It brings warmth and helps round out the sweetness of the brown sugar.
Because the ingredient list is short, vanilla makes a noticeable difference. It gives the caramel a more complete flavor without changing the churro-inspired direction of the recipe.
Ground Cinnamon
Ground cinnamon appears twice in this candy. The first teaspoon goes into the caramel, and the second teaspoon is mixed with granulated sugar for the topping.
This double use of cinnamon is what ties the entire recipe back to churro flavor. It makes the caramel taste spiced and gives the top that familiar cinnamon-sugar finish.
White Chocolate Chips
The recipe uses 1½ cups of white chocolate chips for the topping layer. They are sprinkled over the hot caramel after baking and allowed to sit for 2 to 3 minutes so they can soften.
Once softened, the chips are spread across the surface with an offset spatula or the back of a spoon. This creates a creamy layer that balances the crunch underneath.
White chocolate also gives the cinnamon sugar a smooth surface to stick to. When the candy sets, the top becomes sweet, creamy, and lightly spiced.
Granulated Sugar
The ¼ cup of granulated sugar is mixed with 1 teaspoon of cinnamon for the final dusting. This topping gives the candy its signature churro-style look and flavor.
It should be sprinkled over the melted white chocolate right away. The chocolate needs to still be soft so the cinnamon sugar can attach properly.
Directions
Step 1: Preheat the Oven
Start by preheating your oven to 350°F (175°C). This gives the oven time to reach the correct temperature before the prepared pan goes inside.
The candy only bakes for 5 to 7 minutes, so the oven temperature needs to be ready from the beginning. A properly heated oven helps the caramel bubble evenly across the crackers.
While the oven warms, gather the ingredients and prepare your pan. Having everything nearby makes the recipe much easier because some steps move quickly once the caramel is hot.
Step 2: Line the Baking Sheet
Use a large baking sheet, about 10×15 inches. Line it with parchment paper or foil, leaving some overhang around the edges.
That overhang is helpful later because it allows you to lift the candy out once it has cooled and set. It also makes cleanup much easier, which matters because caramel can be sticky.
Do not skip the lining step. The original recipe specifically notes that lining the pan makes removal and cleanup a breeze.
Step 3: Arrange the Saltine Crackers
Place the saltine crackers in a single, even layer on the prepared baking sheet. Use about 40 crackers, or enough to completely cover the bottom of the pan.
Try to keep the crackers close together so there are not large gaps. The caramel will be poured over the top, and a tight cracker layer helps create an even sheet of candy.
If a few crackers need to be adjusted or tucked into place, take a moment to straighten them now. Once the caramel is ready, you will want to pour and spread quickly.
Step 4: Melt the Butter
Place 1 cup of unsalted butter in a medium saucepan over medium heat. Let it melt fully before adding the rest of the caramel ingredients.
Stir occasionally as the butter melts so it heats evenly. You do not need to brown the butter or cook it longer than necessary at this stage.
The goal is simply to create a smooth melted base for the brown sugar, vanilla, and cinnamon. Once the butter is melted, move directly into building the caramel mixture.
Step 5: Stir in the Brown Sugar, Vanilla, and Cinnamon
Add 1 cup of brown sugar to the melted butter. Stir it in so the sugar begins to dissolve and combine with the butter.
Next, add 1 teaspoon of vanilla extract and 1 teaspoon of ground cinnamon. Stir again until the mixture looks evenly blended.
The cinnamon should be distributed throughout the caramel, not sitting in one spot. This helps the churro flavor reach the whole tray of candy.
Step 6: Bring the Caramel to a Gentle Boil
Keep the saucepan over medium heat and bring the mixture to a gentle boil. Stir constantly as it heats.
Once it begins bubbling, continue cooking for 3 to 4 minutes. The mixture should become thick and bubbly.
Watch carefully during this step because caramel can burn if it is neglected. Stirring constantly keeps the butter and sugar moving and helps the mixture cook evenly.
Step 7: Check the Caramel Consistency
After 3 to 4 minutes, the caramel should look thicker than when it started. It should be bubbling gently and have a rich, glossy appearance.
Do not cook it for more than 4 minutes. The original recipe specifically notes that the caramel should thicken but not darken too much.
If the caramel becomes too dark, the flavor may turn bitter. Medium heat and steady stirring are the safest way to avoid overcooking.
Step 8: Pour the Hot Caramel Over the Crackers
Carefully pour the hot caramel mixture over the arranged saltine crackers. Work slowly enough to control the pour but quickly enough that the caramel does not begin setting in the saucepan.
Try to distribute the caramel across the pan instead of pouring it all in one place. This makes spreading easier.
Be careful because the caramel is very hot. Keep your hands away from the stream and use a spatula to guide the mixture rather than touching it.
Step 9: Spread the Caramel Evenly
Use a spatula to spread the caramel over the crackers. Aim to cover every edge so the cracker layer bakes into one cohesive sheet.
Work quickly because the caramel begins to firm as it cools. It does not have to look perfectly smooth, but it should reach across the entire cracker base.
Pay attention to the corners and edges of the pan. Those areas are easy to miss, and covering them helps every piece have good flavor once the candy is broken apart.
Step 10: Bake Until the Caramel Bubbles
Place the tray in the preheated oven. Bake for 5 to 7 minutes.
The caramel should be bubbling all over when the tray is ready to come out. This bubbling helps the caramel settle into the cracker layer and creates the candy’s rich texture.
Stay close near the end of baking. The caramel should bubble, but it should not burn.
Once the surface is bubbling evenly, remove the tray from the oven. Move quickly to the next step while the caramel is still hot.
Step 11: Add the White Chocolate Chips
Sprinkle 1½ cups of white chocolate chips evenly over the hot caramel layer. Try to distribute them across the full surface instead of piling them in the center.
The heat from the caramel will begin softening the chips. Let them sit for 2 to 3 minutes before spreading.
This waiting time is important because it prevents dragging the chips through the caramel before they are ready. The original recipe notes that waiting a couple of minutes helps the chips melt fully and spread more smoothly.
Step 12: Spread the Melted White Chocolate
After the chips have softened, use an offset spatula or the back of a spoon to spread the white chocolate across the entire surface. Use gentle strokes so you do not disturb the cracker and caramel layers underneath.
The chocolate does not need to look perfectly polished. A smooth, even coating is the goal.
If some chips resist melting, the original recipe suggests returning the tray to the oven for 1 minute. This can help stubborn chips soften enough to spread.
Step 13: Mix the Cinnamon-Sugar Topping
In a small bowl, combine ¼ cup granulated sugar with 1 teaspoon ground cinnamon. Stir until the cinnamon is evenly distributed through the sugar.
This mixture creates the final churro-inspired topping. It gives the candy a sweet spiced finish and a lightly textured surface.
Make sure the topping is ready before the chocolate begins to set. It needs to be sprinkled while the white chocolate is still soft.
Step 14: Sprinkle the Churro Topping
Immediately sprinkle the cinnamon-sugar mixture over the melted white chocolate. Cover the surface evenly so each piece of candy gets that churro-style finish.
Do not wait too long after spreading the chocolate. If the chocolate sets before the topping is added, the cinnamon sugar will not stick as well.
This step is also a fun one for kids to help with. The topping is easy to scatter, and it gives the candy its finished look almost instantly.
Step 15: Cool the Candy Completely
Let the candy cool completely at room temperature. If you want to speed up the process, place the tray in the refrigerator for about 20 to 30 minutes.
The candy must be fully set before you try to break it apart. If it is still soft, the layers may bend or smear instead of snapping cleanly.
Cooling gives the caramel and white chocolate time to firm up. Once set, the candy will be easier to lift, handle, and portion.
Step 16: Lift the Candy From the Pan
Use the parchment paper or foil overhang to lift the candy out of the baking sheet. Place it on a clean surface or cutting board.
Move carefully so the sheet does not crack before you are ready. If it does crack, that is completely fine because the candy will be broken into pieces anyway.
This is one of the reasons the lining step is so helpful. It keeps the candy from sticking to the pan and makes removal much easier.
Step 17: Break Into Pieces
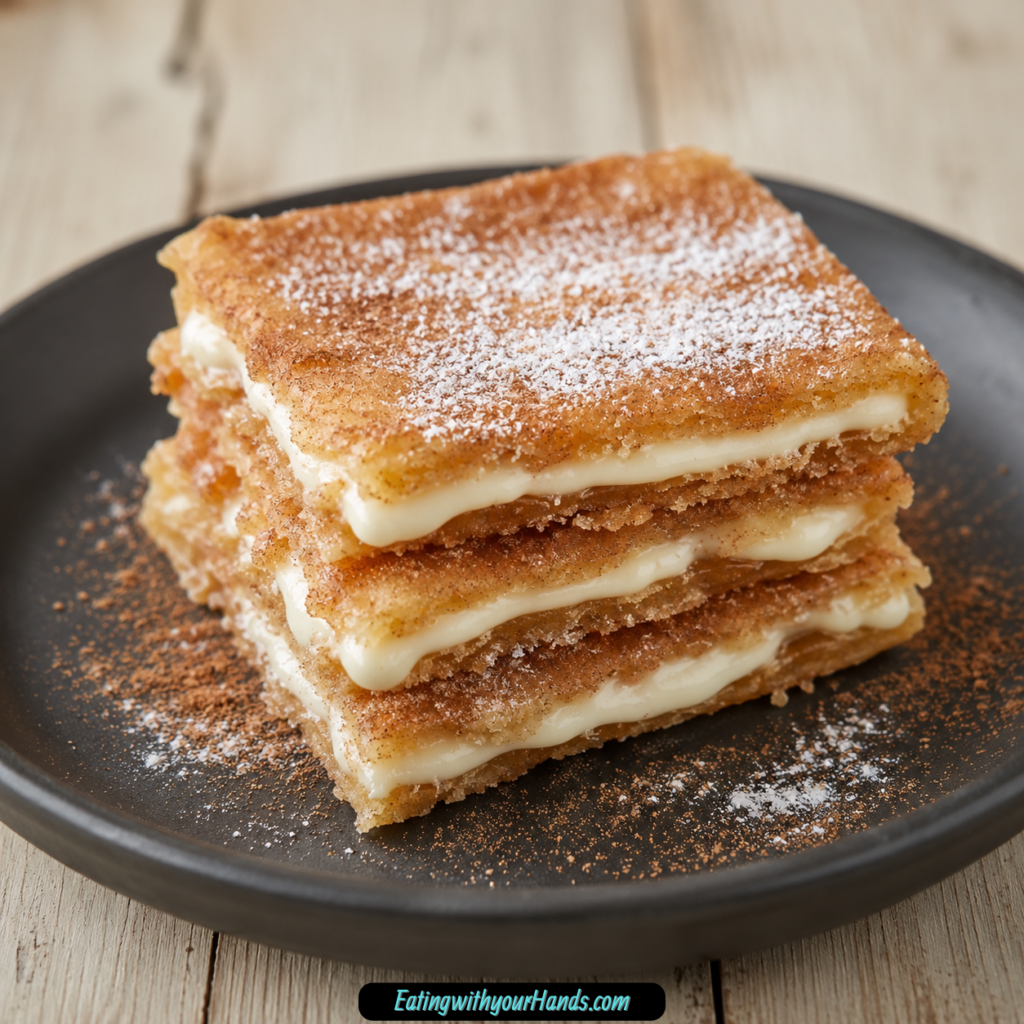
Break the set candy into irregular shards for a rustic look. This style makes the candy feel homemade and charming.
If you prefer cleaner pieces, the original recipe suggests scoring it before it fully sets. That can help guide the breaks into more even portions.
Either style works. Rustic pieces are lovely for candy bowls and cookie tins, while cleaner pieces can look neat in gift bags or arranged on dessert platters.
Serving Suggestions
Churro cracker candy is easy to serve because it does not require slicing, plating, or utensils. Once broken into pieces, it can be placed directly in candy bowls or on dessert platters.
It makes a beautiful addition to holiday cookie tins. The golden cracker candy pieces add a different texture beside cookies, bars, and other baked sweets.
Small treat bags are another great option. The candy works well for party favors, teacher gifts, or any moment when you want to share something homemade without making an elaborate dessert.
For a dessert table, pile the pieces loosely so the cinnamon-sugar top is visible. The irregular shards give the display a relaxed, festive feel.
This is also a wonderful treat to keep on hand for casual snacking. A piece or two after dinner can feel satisfying because the candy has crunch, sweetness, spice, and a little salt all in one bite.
Storage
Store the candy in an airtight container once it has fully cooled and set. Keeping it sealed helps protect the texture and prevents the pieces from becoming stale.
At room temperature, the candy can be stored for up to 1 week. Choose a cool, dry place so the chocolate and caramel layers stay firm.
For longer storage and extra crunch, refrigerate the candy for up to 2 weeks. The colder temperature can help the pieces stay crisp.
The candy can also be frozen in a sealed container for up to 2 months. Let it thaw at room temperature before serving.
If stacking pieces, you can place parchment between layers to help keep them separated. This is especially useful if you want the pieces to stay neat for gifting.
Presentation Tips
For a rustic look, break the candy into uneven shards. This gives each piece a handmade appearance and makes the tray look abundant.
For cleaner pieces, score the candy before it fully sets. This helps guide where it breaks later.
When gifting, choose pieces with a nice balance of cracker, caramel, white chocolate, and cinnamon sugar. The best pieces show off all the layers.
You can pack the candy in small treat bags, tuck it into cookie tins, or arrange it in candy bowls. It is sturdy enough for gifting and pretty enough for a holiday dessert spread.
Helpful Notes for Best Results
Always line the tray with parchment paper or foil. This is one of the simplest steps, but it makes a major difference when it is time to remove the candy.
Use good-quality unsalted butter because butter is a key flavor in the caramel. A rich butter flavor helps the caramel layer taste fuller.
When adding the white chocolate chips, give them time to soften before spreading. If you try to spread too soon, the chips may drag across the caramel instead of melting into a smooth layer.
If the chips do not melt easily, place the tray back in the oven for 1 minute. Some brands of chocolate chips contain stabilizers that make them slower to melt.
Cook the caramel gently over medium heat and do not boil it for more than 4 minutes. It should thicken, but it should not become overly dark.
Work quickly once the caramel is poured over the crackers. The mixture firms as it cools, so spreading it immediately helps cover the base evenly.
Flavor Variations
Spicy-Sweet Churro Cracker Candy
Add a pinch of cayenne to create a spicy-sweet twist. The heat should be subtle enough to complement the cinnamon and caramel.
This variation works especially well if you enjoy a little warmth with sweet desserts. The cayenne adds contrast without changing the basic method.
Chocolate Swap Variation
White chocolate gives the candy a creamy, sweet top layer, but the original recipe notes that dark or milk chocolate can also be used. Each option changes the personality of the candy.
Dark chocolate creates a stronger contrast with the cinnamon sugar. Milk chocolate gives the candy a sweeter and more classic chocolate flavor.
Semi-sweet chocolate also works well if you want something between dark and milk chocolate. The churro topping still fits nicely over any of these chocolate choices.
Nutty Churro Cracker Candy
Sprinkle crushed nuts over the chocolate before it sets. Pecans or almonds are specifically mentioned as good options.
The nuts add crunch and make the candy feel a little more layered. They also look attractive on top of the chocolate and cinnamon sugar.
Add the nuts while the chocolate is still soft. This helps them stick to the surface as the candy cools.
Graham Cracker Version
Saltines are the base of the main recipe, but graham crackers can be used instead. The original recipe notes that this version will be sweeter overall.
Use the same quantity when swapping graham crackers for saltines. The method remains the same.
This variation can be nice if you want a less salty and more dessert-like base. The churro topping will still pair well with the caramel and chocolate.
Frequently Asked Questions
Can I Use Graham Crackers Instead of Saltines?
Yes, graham crackers can be used instead of saltines. The finished candy will be sweeter overall, but it will still be delicious.
Use the same quantity when making the swap. Arrange them in a single even layer just as you would with the saltines.
Can I Use Chocolate Chips Instead of White Chocolate?
Absolutely. Dark, milk, or semi-sweet chocolate chips can all be used instead of white chocolate chips.
These chocolate options contrast nicely with the cinnamon-sugar topping. The method for softening and spreading the chocolate remains the same.
Why Didn’t My Chocolate Chips Melt?
Some chocolate chip brands contain stabilizers that help the chips hold their shape. This can make them slower to melt on top of the hot caramel.
If needed, place the tray back in the oven for 1 minute. That extra warmth should help the chips soften enough to spread.
Can I Make This Dairy-Free?
Yes, the original recipe notes that this candy can be made dairy-free. Use vegan butter and dairy-free white chocolate chips.
Follow the same general method. Keep an eye on how the dairy-free ingredients melt and spread, since they may behave slightly differently.
How Do I Avoid Overcooking the Caramel?
Boil the caramel gently over medium heat for no more than 4 minutes. Stir constantly while it cooks.
The mixture should thicken but not darken too much. Watching the color and keeping the heat moderate will help prevent burning.
Do I Need a Candy Thermometer?
No candy thermometer is needed for this recipe. The caramel is cooked by time and appearance instead.
After 3 to 4 minutes of gentle boiling, it should be thick and bubbly. That is the cue to pour it over the crackers.
How Long Does the Candy Take to Set?
The candy can cool completely at room temperature. To speed up the process, refrigerate it for about 20 to 30 minutes.
Make sure it is fully set before breaking it apart. The layers should feel firm, not soft or sticky.
Can I Score the Candy Before Breaking It?
Yes, scoring is a good option if you want cleaner pieces. Mark the surface before the candy fully sets.
If you prefer a rustic look, simply let it set completely and break it into irregular shards. Both methods work well.
Why This Recipe Is Great for Holidays and Gifts
Churro cracker candy has the kind of appearance that makes it feel festive without requiring detailed decorating. The cinnamon-sugar surface, creamy chocolate layer, and caramel-coated cracker base look beautiful once broken into pieces.
It fits naturally into holiday cookie boxes because it adds contrast. While cookies tend to be soft, chewy, or crumbly, this candy brings crisp texture and a sweet-salty flavor.
It is also easy to portion for gifting. Small bags, tins, or candy boxes can be filled with irregular shards, and the candy still looks intentional.
Because it stores well, it can be made ahead for busy seasons. Room temperature storage works for up to 1 week, refrigeration extends it up to 2 weeks, and freezing is possible for up to 2 months.
That flexibility makes the recipe useful when you want to prepare treats before guests arrive or before gift bags need to be assembled. It is simple, but it still feels thoughtful.
Why This Candy Works for Beginners
Some homemade candy recipes can feel intimidating because they involve exact temperatures or special tools. This one keeps the process much more approachable.
There is no thermometer to read and no complicated sugar stage to identify. You only need to cook the butter, brown sugar, vanilla, and cinnamon until the mixture is thick and bubbly.
The baking step is also short. Once the caramel-coated crackers bubble in the oven, the white chocolate can be added and spread.
The final cinnamon-sugar topping is simple but important. It gives the candy its churro-style finish and makes the whole recipe feel complete.
For beginner cooks, this is a rewarding recipe because the transformation happens quickly. A pan of crackers becomes a tray of shiny, spiced dessert bark in only a few steps.
Final Thoughts
Churro cracker candy is the kind of dessert that proves simple ingredients can create something surprisingly memorable. With saltines, buttery brown sugar caramel, creamy white chocolate, and cinnamon sugar, it captures the sweet, salty, crunchy, and spiced qualities that make snack-style desserts so hard to resist.
It is quick enough for a weeknight treat but special enough for holidays, bake sales, party favors, and homemade gifts. The recipe does not ask for complicated tools or advanced candy-making skills, which makes it easy to return to again and again.
The method is straightforward: line the pan, arrange the crackers, make the cinnamon caramel, bake until bubbly, soften and spread the white chocolate, add the cinnamon-sugar topping, cool, and break into pieces. Every step builds a layer of flavor and texture.
Once you make it, it is easy to understand why this candy rarely lasts long on the counter. It has the comfort of churro flavor, the crunch of cracker candy, and the charm of a homemade treat that looks beautiful even when broken into imperfect golden shards.
Churro Cracker Candy
Churro cracker candy is a crisp, buttery dessert bark layered with rich brown sugar caramel, creamy white chocolate, and a generous coating of cinnamon sugar. The combination of sweet, salty, crunchy, and warmly spiced flavors makes every piece especially satisfying. Ready in just 25 minutes, this easy treat is perfect for holiday dessert trays, homemade gifts, parties, or casual snacking.
Recipe Details
- Prep Time: 10 minutes
- Cook Time: 15 minutes
- Total Time: 25 minutes
- Servings: 12
- Calories: 210 kcal
Ingredients
- 1 sleeve saltine crackers about 40 crackers
- 1 cup brown sugar
- 1 cup unsalted butter
- 1 teaspoon vanilla extract
- 1 teaspoon ground cinnamon
- 1½ cups white chocolate chips
- ¼ cup granulated sugar
- 1 teaspoon ground cinnamon for dusting
Instructions
Step 1: Prepare the Baking Sheet
Preheat the oven to 350°F (175°C). Line a baking sheet with parchment or foil, then arrange the saltine crackers in a single layer so they cover the sheet.
Step 2: Cook the Cinnamon Caramel
Melt the unsalted butter in a saucepan over medium heat. Stir in the brown sugar, vanilla extract, and 1 teaspoon ground cinnamon.
Bring the mixture to a boil and cook for 3-4 minutes, stirring constantly.
Step 3: Coat the Crackers
Pour the hot caramel mixture over the arranged crackers. Carefully spread it into an even layer so the crackers are fully covered.
Step 4: Bake Until Bubbling
Bake for 5-7 minutes, or until the caramel is bubbling across the surface.
Step 5: Add the White Chocolate
Remove the baking sheet from the oven and immediately sprinkle the white chocolate chips over the hot crackers.
Let them sit for 2-3 minutes to soften, then spread the melted white chocolate evenly over the caramel layer.
Step 6: Make the Cinnamon Sugar Topping
Combine the granulated sugar and 1 teaspoon ground cinnamon for dusting in a bowl. Sprinkle the mixture evenly over the melted white chocolate.
Step 7: Cool and Break Into Pieces
Allow the candy to cool completely at room temperature, or refrigerate it until fully set.
Once firm, break the candy into pieces and serve.
Notes
Use parchment for easier cleanup and simple removal from the baking sheet.
For an extra-crisp texture, chill the candy before breaking it into pieces.
The white chocolate may be swapped with milk or dark chocolate for a different flavor variation.
Store the finished candy in an airtight container at room temperature, or refrigerate it for a longer shelf life.
Serving Suggestions
- Arrange the pieces on holiday cookie and candy trays.
- Package them in treat bags or decorative tins for edible gifts.
- Serve with hot coffee, tea, or cocoa.
- Add the candy to a dessert board with cookies and fresh fruit.
- Enjoy a few pieces as a quick sweet-and-salty snack.
Storage
How to Store
Keep the completely cooled candy in an airtight container at room temperature. Refrigerate it when you want it to stay firm for longer.
How to Freeze
Place the set candy pieces in a freezer-safe airtight container, separating layers when needed to prevent them from sticking together.
Best Texture Tip
Allow the caramel and chocolate layers to set completely before breaking the candy. Chilling it first will create cleaner pieces with a crunchier texture.

Fernando is the creator and writer behind the food blog Eating with your Hands. Living and working in cities like Paris, Barcelona, and Berlin, and being married to a Canadian foodie, has given Fernando a passion and interest in food and inspired him to run EWYH.