
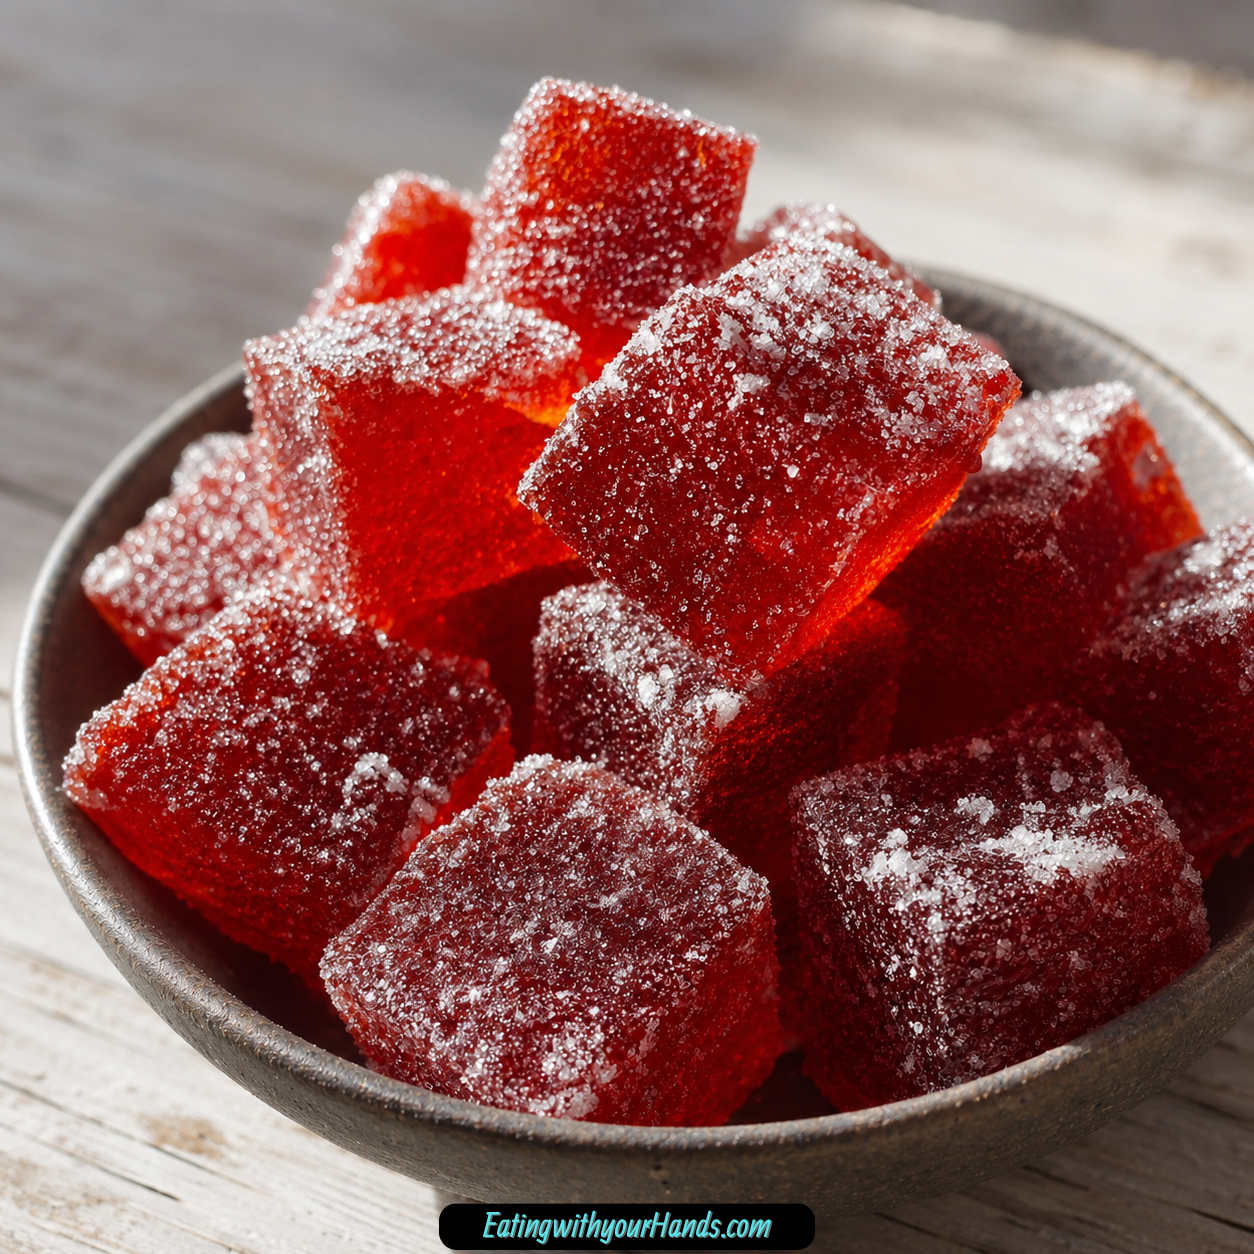
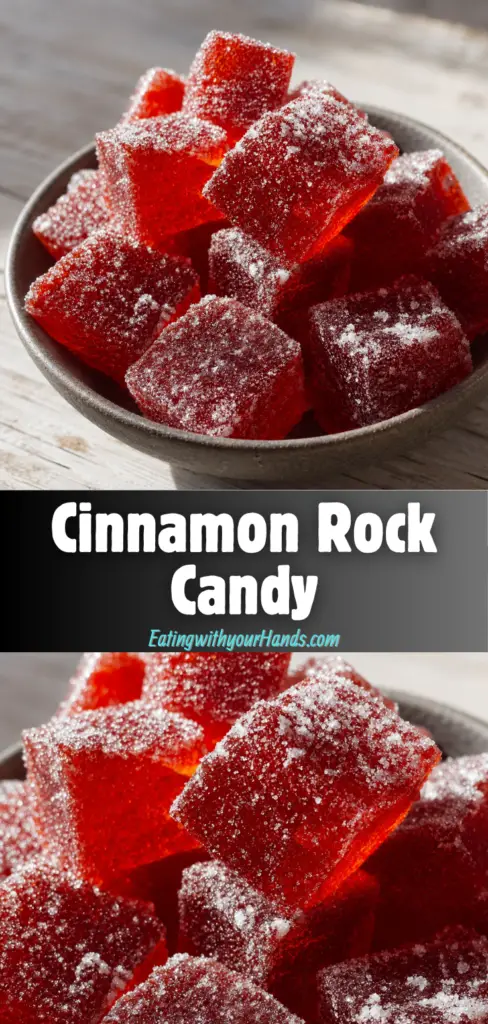
Cinnamon Rock Candy is the kind of homemade treat that feels like it belongs in a holiday tin, tucked between pieces of parchment paper and passed around with a smile. It is glossy, crunchy, sweet, warmly spiced, and full of that bold cinnamon flavor that makes a kitchen smell instantly festive.
There is something wonderfully nostalgic about making candy at home. The bubbling sugar, the careful watching of the thermometer, the bright color, and the satisfying crack when the cooled candy breaks into pieces all make the process feel like a small kitchen tradition.
This recipe is simple in ingredients but exciting in method. Granulated sugar, light corn syrup, water, cinnamon extract, optional red food coloring, and powdered sugar come together to create a candy that looks cheerful and tastes warmly sweet.
The most important step is cooking the sugar mixture to 300°F, also known as the hard crack stage. Once it reaches that point, the mixture cools into firm, brittle candy that can be broken into pieces.
Cinnamon Rock Candy is especially lovely for holidays, festive gatherings, cozy nights, dessert tables, and homemade gifts. Wrapped in cute packages, it becomes a sweet little present for friends, neighbors, and family.
It also stores well, which makes it a practical make-ahead treat. Keep it in an airtight container at room temperature for up to three weeks, or freeze it between parchment layers for up to three months.
Table of Contents
- Why You’ll Love This Cinnamon Rock Candy
- Recipe Details
- Ingredients
- Ingredient Notes
- Optional Swaps, Variations, Add-Ins, and Serving Ideas
- Why This Recipe Works
- Directions
- Step 1: Prepare the Baking Sheet
- Step 2: Gather the Saucepan
- Step 3: Measure the Granulated Sugar
- Step 4: Add the Light Corn Syrup
- Step 5: Add the Water
- Step 6: Set the Heat
- Step 7: Stir Gently
- Step 8: Watch for Dissolved Sugar
- Step 9: Bring the Mixture to a Boil
- Step 10: Attach the Candy Thermometer
- Step 11: Boil to Hard Crack Stage
- Step 12: Avoid Wandering Away
- Step 13: Use the Cold Water Test If Needed
- Step 14: Remove from Heat Immediately
- Step 15: Add the Cinnamon Extract
- Step 16: Add Optional Red Food Coloring
- Step 17: Add Other Coloring If Desired
- Step 18: Pour the Hot Candy
- Step 19: Spread the Candy
- Step 20: Let the Candy Cool
- Step 21: Check That It Is Fully Set
- Step 22: Break Into Pieces
- Step 23: Dust With Powdered Sugar
- Step 24: Serve the Candy
- Step 25: Package for Gifts
- Serving Ideas
- Storage
- Freezing
- Make-Ahead
- Helpful Notes for Best Results
- Variations
- Troubleshooting
- Frequently Asked Questions
- Can I freeze Cinnamon Rock Candy?
- What can I substitute for cinnamon extract?
- How long does this candy last?
- Can I use a different food coloring?
- Is it possible to make this candy without a thermometer?
- Is Cinnamon Rock Candy gluten-free?
- Can I make the candy less sugary?
- How should I serve Cinnamon Rock Candy?
- Why This Recipe Works So Well
- Final Thoughts
- Cinnamon Rock Candy
Why You’ll Love This Cinnamon Rock Candy
This Cinnamon Rock Candy has a quick prep time of just 15 minutes. The candy can be made and enjoyed in less than an hour when you include the cooking and cooling time.
The recipe uses minimal ingredients. Sugar, corn syrup, water, cinnamon flavoring, optional food coloring, and powdered sugar are all you need.
It is family-friendly because kids love the sweet, crunchy texture and warm cinnamon flavor. The finished candy feels fun, colorful, and festive.
It is perfect for gifting during the holidays. Package the pieces in cute bags or containers and share them with friends and neighbors.
It works for many occasions, from festive gatherings to cozy nights in. It can also be served on dessert tables as a sweet, crunchy addition.
It is long-lasting when stored properly. Keep it away from moisture and enjoy it over several weeks.
Recipe Details
Cinnamon Rock Candy begins with 3 ¾ cups granulated sugar, 1 ½ cups light corn syrup, and 1 cup water. These ingredients are combined in a medium-sized saucepan over medium heat.
The sugar mixture is stirred gently until the sugar dissolves completely. After that, the mixture is brought to a boil.
A candy thermometer is attached to the side of the saucepan. It should not touch the bottom of the pan, because that can affect the reading.
The mixture boils until it reaches 300°F, which is the hard crack stage. This can take about 10 to 15 minutes.
Once the mixture reaches 300°F, the saucepan is immediately removed from the heat. Cinnamon extract is stirred in, and optional red food coloring can be added at that point.
The hot candy mixture is carefully poured onto a greased baking sheet. It cools completely at room temperature, which usually takes about 30 minutes.
After cooling, the candy is broken into pieces of the desired size. Powdered sugar is dusted over the pieces to add sweetness and help prevent sticking.
The candy can be stored in an airtight container at room temperature for up to three weeks. It can also be frozen for up to three months when layered between parchment paper.
Ingredients
For the Cinnamon Rock Candy
- 3 ¾ cups granulated sugar – I usually go for a quality brand like Domino or C&H for that perfect sweetness.
- 1 ½ cups light corn syrup – This is essential for that shiny finish and chewy texture. I like Karo brand.
- 1 cup water – Just plain old tap water works great here!
- 1 teaspoon cinnamon extract – For that warm, spicy flavor; you can also use pure cinnamon for a more intense taste.
- ½ teaspoon red food coloring (optional) – If you want to make your candy pop visually, this is a fun addition!
- Powdered sugar (for dusting) – This adds a lovely sweet finish and prevents the pieces from sticking together.
Ingredient Notes
Granulated sugar is the main ingredient in this candy. A quality brand like Domino or C&H is mentioned as a good option for sweetness.
Light corn syrup helps create the shiny finish and chewy texture. Karo is mentioned as a preferred brand.
Water helps dissolve the sugar and corn syrup into a smooth candy base. Plain tap water works well.
Cinnamon extract gives the candy its warm, spicy flavor. Pure cinnamon or ground cinnamon can be used for a more intense or more subtle flavor depending on the direction you choose.
Red food coloring is optional. It gives the candy a bright, festive appearance and can be swapped with other food coloring if desired.
Powdered sugar is used after the candy cools. It adds a sweet finish and helps keep the pieces from sticking together.
Every ingredient should be measured before you start cooking. Candy making moves quickly once the mixture reaches temperature, so preparation makes the process calmer.
It is also important to keep utensils and surfaces dry. Moisture can cause unwanted crystallization, which can affect the candy texture.
Optional Swaps, Variations, Add-Ins, and Serving Ideas
Nutmeg Cinnamon Rock Candy
Add a pinch of nutmeg for a spiced twist. It gives the candy a warmer holiday flavor.
Nutmeg works well with cinnamon. It makes the finished pieces taste even cozier.
Clove Cinnamon Rock Candy
A pinch of clove can also be added for a spiced twist. Clove brings a bold, deep flavor.
Use this variation when you want the candy to feel extra festive. It pairs naturally with cinnamon.
Vanilla Rock Candy
Vanilla extract can be substituted for cinnamon extract. This creates a different aroma while still tasting great.
The candy will lose the classic cinnamon flavor. It becomes softer and sweeter in flavor.
Maple Rock Candy
Maple extract can be used instead of cinnamon. This creates a sweet, fall-inspired version.
The maple flavor gives the candy a cozy seasonal feeling. It is a fun change from the cinnamon version.
Colorful Holiday Candy
Different colors of food coloring can be swirled in before pouring. This creates a festive appearance.
Use any food coloring you like. The color will affect the final look of the candy.
Red Cinnamon Candy
Use the optional red food coloring for a classic festive look. The bright red color makes the candy pop visually.
This version looks beautiful on holiday platters. It also makes packaged gifts feel cheerful.
Gluten-Free Cinnamon Rock Candy
This candy is naturally gluten-free, but ingredient labels should still be checked. Certified gluten-free ingredients are best when needed.
Make sure every ingredient fits your needs. This includes extracts and food coloring.
Almond Extract Twist
A few drops of almond extract can be added for a unique twist. It gives the candy a different aroma.
Almond changes the flavor profile. Use it when you want a more distinctive candy.
Peppermint Extract Twist
Peppermint extract can also be added for a unique twist. It gives the candy a cool flavor.
This is a festive variation. Peppermint makes the candy feel especially suited to holidays.
Lower Sugar Direction
For a lower sugar option, consider using sugar substitutes designed for cooking and candy making. This can change the texture and result.
Use only substitutes intended for candy making. Candy texture depends heavily on the sugar structure.
Gift Packaging
Package the candy in cute bags for gifts. It makes a thoughtful holiday treat for friends and neighbors.
The candy stores well, so it is useful for make-ahead gifting. Dusting with powdered sugar helps prevent sticking.
Dessert Table Serving
Serve Cinnamon Rock Candy as a sweet addition to a dessert table. Its color and crunch make it stand out.
It is delightful on its own. It also adds variety beside softer desserts.
Why This Recipe Works
Cinnamon Rock Candy works because sugar, corn syrup, and water cook into a hot candy syrup that hardens as it cools. Reaching the correct temperature is what gives the candy its crunchy texture.
The light corn syrup helps the candy cook into a shiny, smooth mixture. It also supports the finished texture.
The candy thermometer helps you know when the syrup reaches 300°F. That temperature is the hard crack stage.
Removing the saucepan from heat immediately after reaching 300°F protects the candy from overcooking. The flavoring and optional color are stirred in after the heat is off.
Pouring the hot mixture onto a greased baking sheet allows it to cool into a thin, breakable sheet. Once fully cooled, it can be cracked into pieces.
The powdered sugar dusting helps the pieces stay separated. It also gives the candy a softer, finished look.
Directions
Step 1: Prepare the Baking Sheet
Prepare a large greased baking sheet before you begin cooking the candy. The hot mixture needs somewhere ready to go as soon as it reaches the correct temperature.
Make sure the baking sheet is dry before greasing it. Dry surfaces help prevent unwanted crystallization.
Step 2: Gather the Saucepan
Choose a medium-sized saucepan. It should be large enough to hold the sugar mixture as it heats and boils.
Set the saucepan on the stovetop before measuring the ingredients. Candy making becomes easier when everything is ready.
Step 3: Measure the Granulated Sugar
Measure 3 ¾ cups granulated sugar. Add it to the saucepan.
The sugar is the foundation of the candy. A quality brand like Domino or C&H is mentioned for a perfect sweetness.
Step 4: Add the Light Corn Syrup
Measure 1 ½ cups light corn syrup and add it to the saucepan. This ingredient is essential for the shiny finish and chewy texture.
Karo is mentioned as a preferred brand. Scrape the measuring cup well so the full amount goes into the pan.
Step 5: Add the Water
Add 1 cup water to the saucepan. Plain tap water works great.
The water helps the sugar and corn syrup dissolve. It creates the liquid base that will boil into candy.
Step 6: Set the Heat
Place the saucepan over medium heat. Begin warming the sugar, corn syrup, and water together.
Do not rush this step with heat that is too high. Medium heat gives the sugar time to dissolve.
Step 7: Stir Gently
Stir the mixture gently until the sugar dissolves completely. Use a dry utensil.
The mixture should become smoother as the sugar melts into the liquid. This is the stage where the sweet aroma begins to fill the kitchen.
Step 8: Watch for Dissolved Sugar
Continue stirring only until the sugar is dissolved. Look for a clear, smooth syrup-like mixture.
Once the sugar dissolves, you can move into the boiling stage. The candy will become hotter and more serious from here.
Step 9: Bring the Mixture to a Boil
Let the mixture come to a boil. Keep an eye on it as it heats.
This is where the candy-making process truly begins. The temperature will start climbing.
Step 10: Attach the Candy Thermometer
Attach a candy thermometer to the side of the saucepan. Make sure the thermometer does not touch the bottom of the pan.
A correct thermometer position gives a better reading. Touching the bottom can make the temperature inaccurate.
Step 11: Boil to Hard Crack Stage
Allow the mixture to boil until it reaches 300°F. This is the hard crack stage.
This can take about 10 to 15 minutes. Stay close and watch the thermometer carefully.
Step 12: Avoid Wandering Away
Do not wander too far while the candy boils. The temperature can climb quickly near the end.
Candy needs close attention. Reaching 300°F is the goal, not guessing by appearance alone.
Step 13: Use the Cold Water Test If Needed
If you do not have a thermometer, use the cold water test. Drop a small amount of the boiling candy into cold water.
If it forms hard, brittle threads, it is ready. A thermometer is still the best way to make sure.
Step 14: Remove from Heat Immediately
Once the mixture reaches 300°F, immediately remove the saucepan from heat. Set it carefully on a heat-safe surface.
The candy syrup is extremely hot. Handle the pan with care.
Step 15: Add the Cinnamon Extract
Stir in 1 teaspoon cinnamon extract. This gives the candy its warm, inviting flavor.
Mix carefully but thoroughly. You want the flavor evenly distributed throughout the candy.
Step 16: Add Optional Red Food Coloring
If using it, add ½ teaspoon red food coloring at this point. This gives the candy a bright, festive look.
Stir until the color is evenly mixed. Use caution because the candy is still very hot.
Step 17: Add Other Coloring If Desired
Different food coloring can be used if you want another color. The final appearance will change based on what you choose.
You can also swirl in different colors before pouring for a festive look. Work quickly because the candy will begin to set as it cools.
Step 18: Pour the Hot Candy
Carefully pour the hot candy mixture onto the greased baking sheet. Be cautious because it is super hot.
Move slowly and deliberately. Avoid touching the candy mixture.
Step 19: Spread the Candy
Spread the mixture evenly over the baking sheet. It does not need to be perfect.
The candy will spread and settle as it cools. A rustic shape is completely fine.
Step 20: Let the Candy Cool
Let the candy cool completely at room temperature. This usually takes about 30 minutes.
Do not rush the cooling step. The candy needs time to harden properly.
Step 21: Check That It Is Fully Set
Before breaking the candy, make sure it has cooled and hardened. It should feel firm.
If it still feels soft or tacky, give it more time. Fully set candy breaks more cleanly.
Step 22: Break Into Pieces
Once cooled, break the candy into pieces of your desired size. Bite-sized pieces are great for easy snacking.
You can make larger or smaller pieces depending on how you plan to serve or package it. The crackling sound is part of the fun.
Step 23: Dust With Powdered Sugar
Dust the broken candy pieces with powdered sugar. This adds sweetness and helps prevent sticking.
Toss or coat the pieces gently. Make sure the candy is cool before dusting.
Step 24: Serve the Candy
Serve the Cinnamon Rock Candy on a pretty platter. It looks festive and inviting.
The candy is delicious on its own. It also works well as part of a holiday dessert table.
Step 25: Package for Gifts
Package the candy in cute bags or containers if gifting. Keep the pieces separated and dry.
This makes a lovely homemade treat for friends, neighbors, and family. The bright color and cinnamon flavor make it feel special.
Serving Ideas
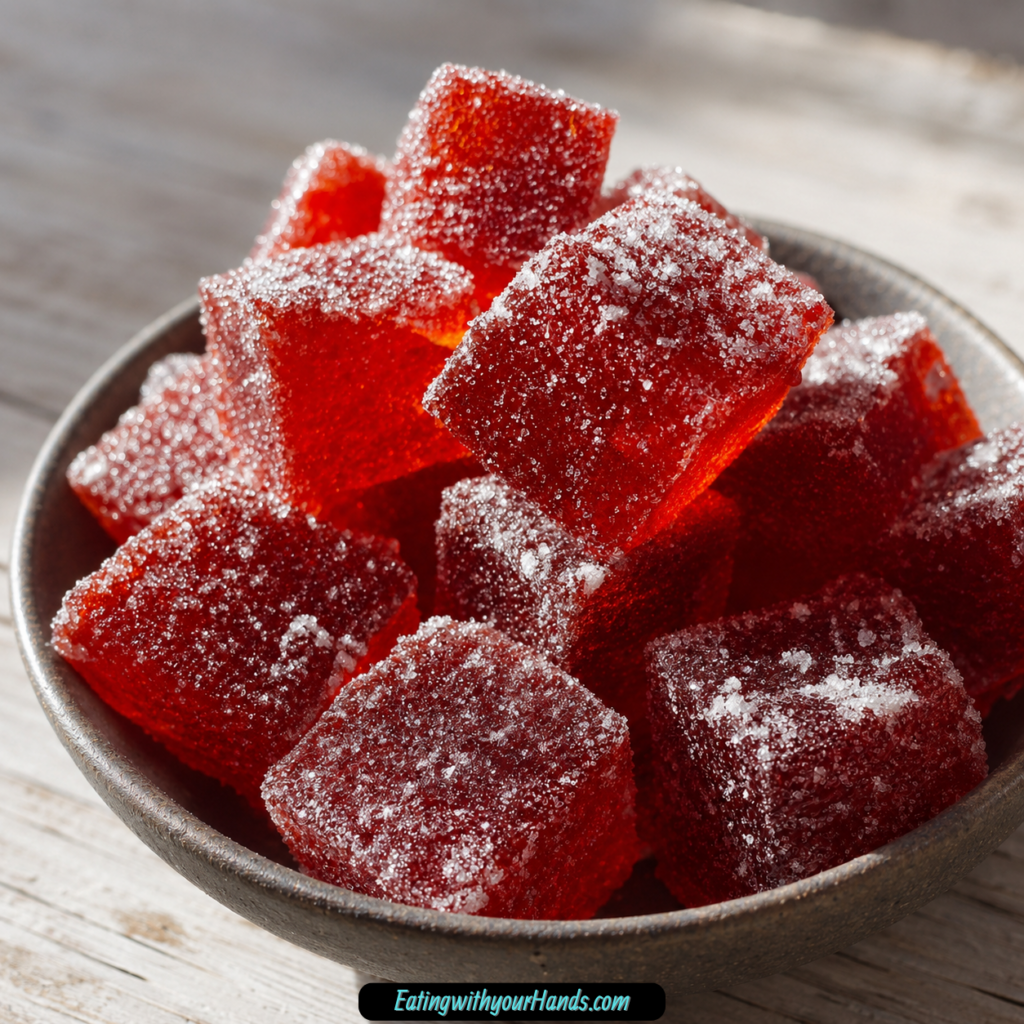
Serve Cinnamon Rock Candy on a festive platter for sharing. The red color, powdered sugar dusting, and broken pieces make it feel cheerful and homemade.
It is also perfect for cute gift bags. Share it with friends and neighbors during the holidays.
Place it on a dessert table for a crunchy sweet option. It adds contrast beside softer desserts.
Serve it during festive gatherings. The cinnamon flavor feels especially warm and nostalgic.
It also works for cozy nights in. A few pieces of crunchy cinnamon candy can feel like a small homemade treat.
If you make different colors, arrange them together for a more playful look. The appearance can be changed with any food coloring you like.
Storage
Store Cinnamon Rock Candy in an airtight container at room temperature for up to three weeks. Keep it away from moisture.
Moisture can make the candy sticky. A dry container helps preserve the texture.
Freezing
Cinnamon Rock Candy can be frozen for up to three months. Layer the pieces between sheets of parchment paper to prevent sticking.
Place the layered candy in an airtight container. This helps protect it while frozen.
Make-Ahead
This candy is excellent for making ahead. It lasts up to three weeks at room temperature when stored properly.
For longer storage, freeze it for up to three months. Use parchment paper between layers to keep the pieces from sticking.
Because it stores well, it is useful for holiday gifting. Make it ahead, package it neatly, and keep it ready for sharing.
Helpful Notes for Best Results
Use a candy thermometer for the most reliable result. The mixture needs to reach 300°F, the hard crack stage.
Make sure the thermometer does not touch the bottom of the saucepan. This helps the reading stay accurate.
If you do not have a thermometer, use the cold water test. The candy should form hard, brittle threads when dropped into cold water.
Keep all utensils and surfaces dry. This helps avoid unwanted crystallization.
Remove the saucepan from heat immediately once the candy reaches 300°F. Then add the cinnamon extract and optional food coloring.
Use caution when pouring the hot candy mixture. It is extremely hot and should be handled carefully.
Let the candy cool completely before breaking it. This usually takes about 30 minutes at room temperature.
Dust the pieces with powdered sugar after breaking. This helps prevent sticking and adds a sweet finish.
Variations
Nutmeg Cinnamon Rock Candy
Add a pinch of nutmeg. This gives the candy a spiced twist.
Nutmeg adds a cozy warmth. It is especially nice for holiday batches.
Clove Cinnamon Rock Candy
Add a pinch of clove. This creates a deeper spiced flavor.
Clove is bold, so the candy will taste more intense. It pairs well with cinnamon.
Vanilla Rock Candy
Use vanilla extract instead of cinnamon extract. This gives the candy a different aroma.
The flavor becomes softer and less spicy. It is a good option for a different candy style.
Maple Rock Candy
Use maple extract instead of cinnamon. This creates a sweet, fall-inspired version.
Maple gives the candy a warm seasonal flavor. It is a fun twist for autumn.
Multi-Color Rock Candy
Swirl in different colors of food coloring before pouring. This creates a festive look.
Work quickly while the candy is hot. The color will affect the final appearance.
Gluten-Free Cinnamon Rock Candy
Make this candy gluten-free by ensuring all ingredients are certified gluten-free. The candy is naturally gluten-free, but labels still matter.
Check extracts, food coloring, and other packaged ingredients. This keeps the candy safe for gluten-free needs.
Ground Cinnamon Candy
If you do not have cinnamon extract, ground cinnamon can be used for a milder flavor. It gives a more subtle cinnamon note.
This is also mentioned as a helpful substitute. The texture and appearance may vary slightly.
Almond Cinnamon Candy
Add a few drops of almond extract for a unique twist. It gives the candy a different sweet aroma.
Almond extract changes the flavor profile. It can make the candy feel more special.
Peppermint Cinnamon Candy
Add a few drops of peppermint extract for a unique twist. It gives the candy a cooler note.
This variation is especially festive. It can be used when you want a holiday-style flavor.
Lower Sugar Candy Direction
Use sugar substitutes designed for cooking and candy making if you want a lower sugar option. This may affect the finished candy.
Candy making depends on sugar behavior. Use only substitutes meant for this kind of cooking.
Troubleshooting
The Candy Does Not Harden
The mixture may not have reached 300°F. Hard crack stage is necessary for the candy to set properly.
Use a candy thermometer if possible. If you do not have one, use the cold water test.
The Thermometer Reading Seems Wrong
Make sure the candy thermometer does not touch the bottom of the saucepan. It should sit in the boiling mixture.
Touching the pan bottom can give an inaccurate reading. Adjust it carefully.
The Candy Turns Sticky
Moisture can make the candy sticky. Store it in an airtight container and keep it away from moisture.
Powdered sugar also helps prevent sticking. Dust the pieces after breaking them.
The Candy Crystallizes
Make sure utensils and surfaces are dry. Moisture can encourage unwanted crystallization.
Stir gently while dissolving the sugar. Once boiling, focus on temperature and avoid unnecessary disturbance.
The Flavor Is Too Mild
Cinnamon extract gives stronger cinnamon flavor. Ground cinnamon can be more subtle.
Pure cinnamon can be used for a more intense taste. Choose based on the flavor you want.
The Candy Needs More Color
Red food coloring is optional and can make the candy pop visually. You can also use other food coloring.
Different colors will change the final appearance. Swirled colors can make the candy more festive.
The Pieces Stick Together
Dust the candy with powdered sugar after breaking. This helps keep the pieces separated.
For freezing, layer the candy between parchment paper. This prevents the pieces from sticking together.
The Candy Is Too Sweet
This candy is naturally sweet because it is made with sugar and corn syrup. A lower sugar option would require sugar substitutes designed for cooking and candy making.
Changing the sugar may change the result. Use substitutes carefully.
Frequently Asked Questions
Can I freeze Cinnamon Rock Candy?
Yes, Cinnamon Rock Candy can be frozen. Layer it between sheets of parchment paper to prevent sticking.
It will stay fresh for up to three months in the freezer. Store it in an airtight container.
What can I substitute for cinnamon extract?
If you do not have cinnamon extract, ground cinnamon can be used for a milder flavor. Vanilla extract can also be used for a different twist.
Maple extract is another variation option. The flavor will change depending on what you choose.
How long does this candy last?
Cinnamon Rock Candy lasts up to three weeks when stored in an airtight container at room temperature. Keep it away from moisture.
Moisture can make the candy sticky. A dry container helps it stay crunchy.
Can I use a different food coloring?
Yes, you can use any food coloring you like. The color will affect the final appearance.
Different colors can make the candy feel more festive or match a celebration. Have fun with the visual style.
Is it possible to make this candy without a thermometer?
A thermometer is the best way to ensure you reach the hard crack stage. However, you can use a cold water test.
Drop a small amount of the boiling candy into cold water. If it forms hard, brittle threads, it is ready.
Is Cinnamon Rock Candy gluten-free?
This candy is naturally gluten-free, but you should always check ingredient labels. Certified gluten-free ingredients are best when needed.
Extracts, food coloring, and other packaged products should be checked. This keeps the candy aligned with gluten-free needs.
Can I make the candy less sugary?
For a lower sugar option, consider using sugar substitutes designed for cooking and candy making. The final texture may change.
Candy making depends on sugar structure. Choose substitutes carefully.
How should I serve Cinnamon Rock Candy?
Serve it on a festive platter or package it in cute bags for gifts. It is delightful on its own.
It also works as a sweet addition to dessert tables during holiday gatherings. The crunchy texture makes it stand out.
Why This Recipe Works So Well
Cinnamon Rock Candy works so well because it turns a short list of ingredients into a treat that feels festive and memorable. Sugar, corn syrup, water, and cinnamon extract become shiny, crunchy candy with a warm spice flavor.
The hard crack stage is the key to the recipe. Cooking the mixture to 300°F creates the brittle texture that lets the candy break into pieces.
The cinnamon extract gives the candy its signature flavor. Red food coloring can make it look bright and cheerful, while powdered sugar keeps the pieces from sticking.
The recipe is also practical for gifting. It lasts for weeks at room temperature and can be frozen for longer storage.
The variations make it easy to personalize. Nutmeg, clove, vanilla extract, maple extract, different food coloring, almond extract, peppermint extract, ground cinnamon, certified gluten-free ingredients, and sugar substitutes for candy making can all create a different version.
Most of all, this candy works because it feels like a little holiday memory in each piece. The crackle, the cinnamon scent, and the sparkling pieces make it more than just candy; they make it a tradition worth bringing back.
Final Thoughts
Cinnamon Rock Candy is a sweet, crunchy homemade candy made with granulated sugar, light corn syrup, water, cinnamon extract, optional red food coloring, and a dusting of powdered sugar. It is simple to prepare, festive to serve, and full of warm cinnamon flavor.
Make it for holiday gifts, cozy nights, dessert tables, or family gatherings, then store it in an airtight container so the pieces stay crisp and ready to share. With its bright color, nostalgic crackle, and sweet cinnamon warmth, this candy is the kind of homemade treat that brings a little joy to every bite.
Cinnamon Rock Candy
Sweet, crunchy, and warmly spiced, this Cinnamon Rock Candy is made with granulated sugar, light corn syrup, cinnamon extract, and optional red food coloring. The candy cooks to hard crack stage, cools into a crisp sheet, and breaks into pieces for a classic American candy treat.
Recipe Details
- Prep Time: 15 minutes
- Cook Time: 30 minutes
- Total Time: 45 minutes
- Course: Candy
- Cuisine: American
- Servings: 10 pieces
- Calories: 150 kcal
Equipment
- Candy thermometer
- Saucepan
Ingredients
For Dusting
- Powdered sugar
For the Candy
- 3 ¾ cups granulated sugar
- 1 ½ cups light corn syrup
- 1 cup water
- 1 teaspoon cinnamon extract
- ½ teaspoon red food coloring optional
Instructions
Step 1: Start the Candy Mixture
Combine granulated sugar, corn syrup, and water in a saucepan. Stir over medium heat until the sugar dissolves.
Step 2: Boil to Hard Crack Stage
Bring the mixture to a boil. Use a candy thermometer to check the temperature until it reaches 300°F, or hard crack stage.
Step 3: Add the Cinnamon Flavor
Remove the saucepan from the heat. Stir in cinnamon extract and food coloring if using.
Step 4: Pour and Cool
Pour the mixture onto a greased baking sheet. Let it cool completely.
Step 5: Break and Dust
Break the cooled candy into pieces. Dust with powdered sugar before serving.
Notes
- This candy can be stored in an airtight container for several weeks.
Serving Suggestions
Serve this Cinnamon Rock Candy after it has cooled completely, broken into pieces, and been dusted with powdered sugar. The crunchy texture and strong cinnamon flavor make it a sweet treat for candy dishes, holidays, gift bags, or party tables.
The optional red food coloring gives the candy a classic cinnamon-candy look if desired. Keep the powdered sugar dusting for the final step so the pieces are ready to serve.
Storage
How to Store
Store this candy in an airtight container for several weeks. Keep the pieces covered so they stay protected after cooling and breaking.
Best Texture Tip
Let the candy cool completely before breaking it into pieces. This helps it set properly into a crisp rock candy texture.
Candy Temperature Tip
Cook the candy mixture until it reaches 300°F, or hard crack stage. Use the candy thermometer to check the temperature accurately.
Dusting Tip
Dust the broken candy pieces with powdered sugar before serving. This gives the finished candy its final sweet coating.

Fernando is the creator and writer behind the food blog Eating with your Hands. Living and working in cities like Paris, Barcelona, and Berlin, and being married to a Canadian foodie, has given Fernando a passion and interest in food and inspired him to run EWYH.