
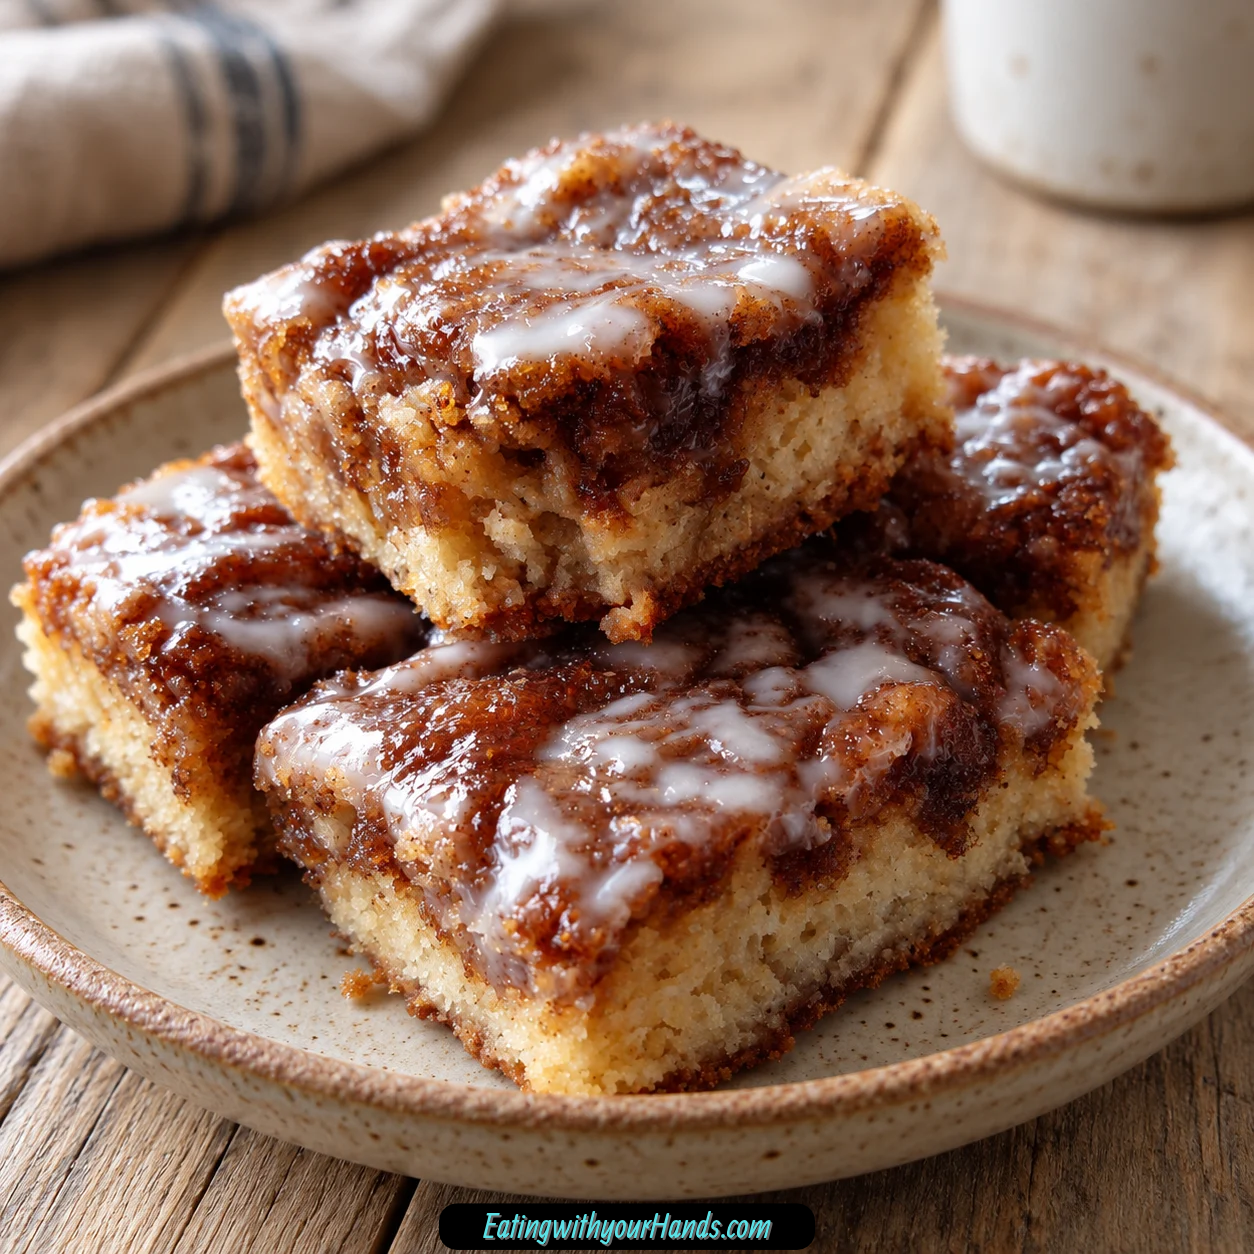

There is something about the smell of cinnamon drifting from a warm oven that can change the entire mood of a kitchen. It carries that familiar bakery warmth that makes an ordinary morning feel slower, cozier, and just a little more special.
That is exactly why these Cinnamon Roll Bliss Bars have become one of my favorite shortcuts when I am craving the feeling of homemade cinnamon rolls without wanting to spend hours rolling and shaping dough. They bring together soft, chewy bars, plenty of brown sugar sweetness, warm cinnamon, and a simple powdered sugar glaze in a much easier format.
I still think about the first pan I made for my niece’s sleepover. The girls were laughing and talking so loudly that I wondered whether anyone would even notice dessert, but somehow the entire pan vanished before bedtime.
That memory comes back every time cinnamon starts warming in the oven. What began as an easy treat for a room full of giggling kids turned into one of those dependable recipes I now reach for whenever I need something comforting without a complicated baking schedule.
These bars have the cozy personality of cinnamon rolls, but the process feels much closer to making a simple pan of blondie-style bars. There is no yeast to wait on, no individual rolls to shape, and no need to worry about getting a spiral perfectly even.
The batter comes together from familiar baking staples, then a layer of cinnamon goes across the top before baking. Once the bars have cooled, a simple powdered sugar and milk glaze gives them that unmistakable cinnamon-roll finish.
The texture is one of my favorite parts. The edges set beautifully, while the center stays soft and pleasantly chewy instead of becoming dry or cake-like.
They are also easy to cut according to the occasion. Large squares feel perfect for brunch or an afternoon coffee break, while tiny pieces work beautifully on a dessert tray when you need something people can pick up and eat in a couple of bites.
And somehow, no matter how I slice them, the result is usually the same. The plate empties far faster than I expect.
Table of Contents
- Why You’ll Love These Cinnamon Roll Bliss Bars
- Ingredients for Cinnamon Roll Bliss Bars
- Why Brown Sugar Matters
- Why Melted Butter Works Here
- Room-Temperature Eggs Blend More Smoothly
- Fresh Cinnamon Makes a Difference
- The Role of Baking Powder and Salt
- Equipment You’ll Need
- How to Make Cinnamon Roll Bliss Bars
- Step 1: Preheat the Oven and Prepare the Pan
- Step 2: Combine the Dry Ingredients
- Step 3: Mix the Melted Butter and Brown Sugar
- Step 4: Add the Eggs and Vanilla
- Step 5: Fold the Dry Ingredients Into the Wet Mixture
- Step 6: Spread the Batter Into the Pan
- Step 7: Add the Cinnamon
- Step 8: Bake Until the Edges Begin to Pull Away
- Step 9: Cool Before Glazing
- Step 10: Make the Powdered Sugar Glaze
- Step 11: Drizzle the Glaze
- Step 12: Cut and Serve
- How to Avoid Dry Cinnamon Bars
- Why Cooling Before Cutting Matters
- Parchment Paper Makes Everything Easier
- Pecans or Walnuts
- Raisins or Dried Cranberries
- Serving Cinnamon Roll Bliss Bars for Brunch
- Serving at Parties
- Serving With Coffee
- Serving With Vanilla Ice Cream
- Make-Ahead Tips
- How to Double the Recipe
- Storage
- How to Reheat
- How to Freeze Cinnamon Roll Bliss Bars
- Frequently Asked Questions
- Nutritional Information
- The Bars That Always Bring Back One Sweet Memory
- Cinnamon Roll Bliss Bars Recipe
Why You’ll Love These Cinnamon Roll Bliss Bars
These bars give you the flavors associated with a warm cinnamon roll without requiring a traditional rolled dough. That alone makes them incredibly useful when you want a cozy homemade dessert but do not have hours to spend in the kitchen.
The texture lands right in that satisfying space between soft and chewy. Melted butter and brown sugar create richness, while the eggs help the bars hold together without losing that tender center.
Cinnamon gives the top its warm, bakery-like aroma. As the bars bake, that spice spreads through the kitchen and makes the whole recipe feel more elaborate than the short ingredient list suggests.
They also fit easily into a busy schedule. The baking time is only about 20–25 minutes, and the entire batch can be made in under an hour when cooling and glazing are included.
Another reason I love them is how flexible they are. Pecans, walnuts, raisins, dried cranberries, and even a scoop of vanilla ice cream can all take the same base in a different direction.
And because the recipe uses a 9×13-inch pan, it is naturally suited to sharing. One batch can become generous brunch portions or much smaller party-sized squares.
Ingredients for Cinnamon Roll Bliss Bars
The bar batter uses a short list of simple baking ingredients. Careful measuring matters, especially with the flour and brown sugar, because both affect the final texture.
- 2 ½ cups all-purpose flour, spooned and leveled
- 1 cup unsalted butter, melted and cooled slightly
- 1 ½ cups packed brown sugar
- 2 large eggs, preferably room temperature
- 2 teaspoons cinnamon
- 1 teaspoon vanilla extract
- ½ teaspoon salt
- 1 teaspoon baking powder
For the glaze, powdered sugar and milk are whisked together until smooth. Adjust the consistency by adding more milk a teaspoon at a time for a thinner glaze or more powdered sugar for a thicker one.
The simplicity of the ingredient list is part of the charm. There is nothing complicated hiding in the recipe, yet the combination still creates a dessert that feels warm, rich, and celebratory.
Why Brown Sugar Matters
Brown sugar gives these bars much of their character. Its deeper sweetness works naturally with cinnamon and makes the batter taste warmer than a simple white-sugar base would.
Measure the 1 ½ cups by packing the sugar firmly into the cup. That ensures the amount stays consistent and gives the bars the sweetness and moisture they need.
Brown sugar also contributes to the chewy texture. Combined with melted butter, it creates a rich base that stays soft instead of baking into something dry and crumbly.
The mixture should look a little like wet sand when butter and brown sugar are first stirred together. That appearance is exactly what you want before the eggs and vanilla are added.
Why Melted Butter Works Here
The recipe uses 1 cup unsalted butter that has been melted and then cooled slightly. That melted butter makes the batter quick to mix and helps create the soft, chewy texture these bars are known for.
Do not pour piping-hot butter directly over the eggs. Letting it cool slightly prevents the heat from interfering with the batter.
The butter should still be fully liquid when mixed with the sugar. You want the richness of melted butter without the temperature being so high that it starts cooking ingredients prematurely.
Unsalted butter also gives you better control over the final flavor. The measured ½ teaspoon salt can then balance the sweetness without competing with extra salt from the butter.
Room-Temperature Eggs Blend More Smoothly
Two large eggs give the batter structure. Letting them come closer to room temperature helps them combine more smoothly with the melted butter and brown sugar.
Add the eggs one at a time. Mix well after each addition so the wet ingredients stay cohesive.
This gradual approach also helps keep the batter smooth. Once the eggs and vanilla are incorporated, the wet mixture is ready for the dry ingredients.
There is no need to whip the eggs aggressively. The goal is an even batter rather than an airy cake mixture.
Fresh Cinnamon Makes a Difference
Cinnamon is the defining flavor of these bars. The 2 teaspoons scattered over the top create the warm, fragrant finish that gives the dessert its cinnamon-roll personality.
Fresh cinnamon has a stronger aroma than a jar that has been sitting forgotten in the pantry for years. Because the spice is so prominent here, fresher cinnamon gives you a more noticeable result.
You can sprinkle it evenly and leave it that way. For a more decorative look, use your fingers to create small swirls across the surface before baking.
The cinnamon does not need a separate filling mixture. Its job is to sit across the top of the soft brown sugar batter and bake into the surface.
The Role of Baking Powder and Salt
One teaspoon baking powder gives the bars enough lift to keep the texture from becoming overly dense. Check the expiration date if your baking powder has been sitting in the pantry for a long time.
The ½ teaspoon salt balances the sweetness. Brown sugar, cinnamon, vanilla, and glaze all benefit from that small savory counterpoint.
Whisk both into the flour before combining the dry and wet mixtures. This distributes them evenly throughout the batter.
That simple dry-mixing step helps prevent concentrated pockets of baking powder or salt. Even distribution is especially important in a large 9×13-inch pan.
Equipment You’ll Need
A 9×13-inch baking pan is the central piece of equipment for this recipe. Two mixing bowls are useful so the dry ingredients and wet ingredients can be prepared separately.
A whisk or spoon handles most of the mixing. A spatula is helpful for folding the batter together and spreading it evenly into the pan.
Parchment paper is optional but very useful. Lining the pan makes it easier to lift the entire batch out once cooled.
For the glaze, use a small bowl and whisk. A spoon works for casual drizzling, while a piping bag can create more controlled zigzags.
How to Make Cinnamon Roll Bliss Bars
The method is straightforward, but a few small details make a big difference in texture. Measure the flour lightly, cool the melted butter slightly, mix only until the dry ingredients disappear, and begin checking the bars before the full baking time has passed.
Step 1: Preheat the Oven and Prepare the Pan
Preheat the oven to 350°F (175°C). Grease a 9×13-inch baking pan with butter or cooking spray.
If you want the easiest removal later, line the pan with parchment paper as well. Leave enough parchment extending above the sides to create handles for lifting the cooled bars.
Set the prepared pan aside while you mix the batter. Giving the oven enough time to heat fully helps the bars bake evenly from the moment they go in.
Step 2: Combine the Dry Ingredients
Place the 2 ½ cups spooned-and-leveled all-purpose flour in a mixing bowl. Add 1 teaspoon baking powder and ½ teaspoon salt.
Whisk until the dry ingredients look evenly combined. This helps distribute the leavening and salt throughout the flour before it meets the wet mixture.
Do not pack the flour into the measuring cup. Spoon it in gently and level the top so too much flour does not accidentally make the finished bars dry.
Step 3: Mix the Melted Butter and Brown Sugar
In a second bowl, combine 1 cup melted unsalted butter with 1 ½ cups packed brown sugar. Make sure the butter has cooled slightly before mixing.
Stir until the mixture looks evenly blended and resembles wet sand. Break up any larger brown sugar lumps as you go.
The mixture may look dense at this stage. That is normal and will change once the eggs are incorporated.
Step 4: Add the Eggs and Vanilla
Crack in the first egg and mix until it disappears completely into the butter and sugar. Add the second egg and mix again until smooth.
Stir in 1 teaspoon vanilla extract. The wet mixture should now look more cohesive and glossy.
Avoid beating excessively. You want the ingredients evenly blended, not whipped full of air.
Step 5: Fold the Dry Ingredients Into the Wet Mixture
Add the dry ingredients gradually to the wet mixture. Fold gently rather than stirring aggressively.
Continue only until no obvious flour streaks remain. Once the batter is uniform, stop mixing.
Overmixing can work against the soft, chewy texture you want. The batter only needs enough mixing to bring everything together.
Step 6: Spread the Batter Into the Pan
Transfer the batter into the prepared 9×13-inch pan. Use a spatula or the back of a spoon to spread it toward every corner.
Smooth the surface so the thickness is reasonably even. An uneven layer can create some sections that bake faster than others.
Do not worry about making the top perfectly polished. The cinnamon will be added next and gives the surface its final character.
Step 7: Add the Cinnamon
Sprinkle 2 teaspoons cinnamon evenly over the surface of the batter. Try to cover the entire pan so every bar receives that warm spice flavor.
If you want a subtle swirled appearance, use your fingers to create small swirls across the top. Keep the movement gentle rather than deeply stirring the cinnamon into the batter.
The cinnamon should remain primarily near the surface. As it bakes, its aroma will spread through the entire pan.
Step 8: Bake Until the Edges Begin to Pull Away
Place the pan in the preheated oven and bake for about 20–25 minutes. Begin checking at 18 minutes because ovens can vary.
The bars are ready when the edges just begin pulling away slightly from the pan and the top looks golden brown. Do not wait for the center to become dry or deeply browned.
Removing them at the right point protects the chewy texture. Overbaking is one of the easiest ways to turn soft bars into dry ones.
Step 9: Cool Before Glazing
Remove the pan from the oven and let the bars cool for at least 15 minutes. Resist cutting immediately even though the cinnamon aroma makes that difficult.
Cooling gives the interior time to settle and become easier to slice. It also prevents the glaze from disappearing completely into an extremely hot surface.
If you lined the pan with parchment, you can eventually lift the cooled batch out for easier glazing and cutting. Wait until the bars feel stable enough to move.
Step 10: Make the Powdered Sugar Glaze
Place powdered sugar in a bowl and whisk in milk until the mixture becomes smooth. Adjust the consistency gradually rather than adding a large amount of liquid at once.
For a thinner glaze, add more milk 1 teaspoon at a time. For a thicker glaze, whisk in additional powdered sugar.
The finished glaze should be smooth enough to drizzle. Keep adjusting until it flows the way you want across the cooled bars.
Step 11: Drizzle the Glaze
Use a spoon to drizzle the glaze over the surface. Move back and forth across the pan for loose lines or zigzags.
A piping bag can be used when you want more precise decoration. Either method gives the bars that classic sweet white finish associated with cinnamon rolls.
Let the glaze sit until it has had time to set. Cutting too quickly can smear the lines across the surface.
Step 12: Cut and Serve
Once the glaze has set, cut the bars into squares. Choose larger pieces for brunch or smaller pieces for parties and bake sales.
Use a sharp knife and wipe the blade if glaze begins collecting between cuts. Parchment makes it especially easy to work on a flat surface outside the baking pan.
Serve at room temperature or warm slightly before eating. The cinnamon aroma becomes especially inviting again with a little warmth.

How to Avoid Dry Cinnamon Bars
Overbaking is the biggest risk. Begin checking at 18 minutes even though the normal range is 20–25 minutes.
The edges only need to start pulling slightly away from the pan. Waiting until every part looks deeply baked can remove too much moisture.
Correct flour measurement matters just as much. Spoon flour into the measuring cup and level it rather than scooping directly from the bag.
Melted butter is another important part of the intended texture. Do not reduce or skip it when you want the same soft, chewy result.
Why Cooling Before Cutting Matters
Freshly baked bars are still setting when they leave the oven. Cutting too soon can cause the interior to crumble or compress.
At least 15 minutes of cooling gives the structure time to stabilize. More cooling makes especially clean squares easier.
The glaze also benefits from a cooler surface. On very hot bars, it can melt too quickly and disappear rather than sitting visibly on top.
Patience gives you cleaner pieces and a prettier finish. It is one of the simplest ways to improve the final presentation.
Parchment Paper Makes Everything Easier
Greasing the pan works, but parchment provides another level of convenience. Once the bars cool, you can lift the entire slab out instead of cutting directly against the sides of the pan.
This is especially helpful when you want neat portions. A flat cutting board gives you more room to make straight cuts.
Parchment also makes glazing easier if you prefer to remove the bars first. Any drips land on the paper rather than becoming stuck around the bottom edges of the pan.
Leave a little overhang on opposite sides. Those strips become convenient handles once the batch is cool.
Pecans or Walnuts
Chopped pecans can be stirred into the batter when you want extra crunch. Their nutty flavor fits naturally with brown sugar and cinnamon.
Walnuts work in the same way. They give the soft bars a more pronounced textural contrast.
Fold either nut into the batter before spreading it into the pan. Keep the mixing gentle so you do not overwork the flour.
This variation works especially well when the bars are served for breakfast or brunch. The added crunch makes each bite feel a little more substantial.
Raisins or Dried Cranberries
Raisins can be stirred into the batter for little pockets of chewy sweetness. Dried cranberries create a slightly tarter variation.
For a softer texture, plump the dried fruit in warm water first. Drain thoroughly before folding it into the batter.
The fruit should complement the cinnamon rather than overwhelm it. Scatter it evenly so one section of the pan does not end up overloaded.
Either variation gives the bars a more old-fashioned, cozy character. They still pair beautifully with the powdered sugar glaze.
Serving Cinnamon Roll Bliss Bars for Brunch
Large squares work especially well at brunch. Their cinnamon flavor feels right at home beside a hot cup of coffee.
Serve them slightly warm if possible. A short burst of heat softens the center and makes the cinnamon aroma more noticeable.
You can arrange the bars on a platter and let everyone help themselves. The glaze gives them enough visual appeal that they do not need complicated decoration.
They are especially useful when you want cinnamon-roll flavor without having to manage yeast dough early in the morning. Bake the bars, glaze, slice, and the entire pan is ready to share.
Serving at Parties
For parties, cut the bars into much smaller squares. Bite-sized portions let guests sample them without committing to a large dessert.
Arrange the pieces on a serving plate after the glaze has fully set. The white drizzle across the cinnamon-speckled tops makes the tray look festive without extra work.
Smaller cuts also stretch one pan further. This is useful for potlucks, bake sales, and crowded dessert tables.
Do not be surprised if people return for a second tiny square. Small portions have a way of making “just one more” especially tempting.
Serving With Coffee
A warm cinnamon bar and a steaming cup of coffee is one of my favorite ways to enjoy this recipe. The cinnamon, brown sugar, and vanilla fit naturally into a quiet morning or afternoon break.
Microwave an individual piece for about 10 seconds if it has cooled completely. That brief warmth restores some of the just-baked softness.
The glaze will soften slightly as well. Eat immediately while the center is warm.
This is also a lovely way to enjoy leftovers the next day. The bars hold up well enough that breakfast can feel almost as good as the first serving.
Serving With Vanilla Ice Cream
A scoop of vanilla ice cream can turn a leftover bar into a more indulgent dessert. The cold ice cream melts slowly against the warm cinnamon square.
This pairing works particularly well the next day. Reheat the bar briefly, then add the ice cream just before serving.
The vanilla flavor supports the cinnamon and brown sugar without competing with them. It also adds a creamy contrast to the chewy texture.
Use this option when you want the bars to feel less like a breakfast pastry and more like a plated dessert.
Make-Ahead Tips
The batter can be prepared ahead when necessary. It keeps in the refrigerator for about 1 hour if you need to bake in batches.
Keep it chilled until you are ready to put the next pan into the oven. Then bake according to the same visual cues rather than relying only on time.
The baked bars also store well once completely cooled. This makes them useful when you need dessert ready before guests arrive.
Glaze after cooling so the finish stays visible. If you want especially tidy slices, allow the glaze to set before cutting.
How to Double the Recipe
The recipe can be doubled successfully. Use two separate 9×13-inch pans rather than stacking or crowding everything into one oversized baking situation.
Baking two pans separately helps keep the heat distribution more even. Stacking pans in the oven can lead to inconsistent results.
If both pans cannot bake properly at the same time, refrigerate part of the batter for up to 1 hour. Bake the batches one after another.
This approach is especially useful for bake sales or larger gatherings. Two pans disappear surprisingly quickly once people discover them.
Storage
Store cooled Cinnamon Roll Bliss Bars in an airtight container at room temperature. They keep well for up to 3 days.
Arrange the pieces carefully so the glaze does not get heavily smeared. If stacking, allow the glaze to set before placing one layer over another.
Room-temperature storage keeps the centers pleasantly soft. Keep the container sealed so the edges do not dry out.
The bars can be eaten directly from the container or warmed briefly. Either way, the cinnamon flavor remains strong.
How to Reheat
Place one bar on a microwave-safe plate. Heat for about 10 seconds.
That short amount of time brings back some of the fresh-from-the-oven warmth. It also softens the center without turning the bar overly hot.
Serve immediately. The cinnamon aroma becomes more noticeable again as the bar warms.
Avoid long microwave intervals. A small amount of heat is all you need.
How to Freeze Cinnamon Roll Bliss Bars
Wrap individual bars tightly in plastic wrap. Place the wrapped pieces together inside a freezer bag.
Freeze for up to 2 months. Individual wrapping makes it easy to remove exactly as many bars as you need.
Thaw at room temperature when a craving hits. Once fully thawed, they can be enjoyed as they are or warmed briefly.
The individual portions also make the freezer useful for controlling how much of the batch is available at once. You do not have to thaw the entire pan.
Frequently Asked Questions
Can I Use Margarine Instead of Butter?
Butter is preferred because it provides the rich flavor and texture these bars are designed around. Margarine will not create exactly the same result.
If necessary, use a high-fat margarine with at least 80% fat. Keep the same amount as the butter.
Expect the flavor to be somewhat different. Real butter remains the preferred choice for the classic version.
How Do I Prevent Dry Bars?
Begin checking the pan at 18 minutes rather than waiting automatically for 25 minutes. The bars are ready when the edges just begin pulling away.
Measure the flour correctly by spooning and leveling it. Too much flour can dry out the finished texture.
Do not omit the melted butter. It plays an important role in keeping the bars rich and soft.
Can I Double the Recipe?
Yes. Use two separate 9×13-inch pans.
Avoid stacking the pans in the oven because that can create uneven baking. Bake in separate batches if necessary.
The batter can stay refrigerated for about 1 hour while waiting. This makes doubling especially practical for bake sales or parties.
Can I Add Nuts?
Yes. Chopped pecans or walnuts can be stirred into the batter.
They add crunch and make the bars feel a little heartier. Fold them in gently before transferring the batter to the pan.
Can I Add Dried Fruit?
Yes. Raisins or dried cranberries can both work well.
For softer pieces, soak them briefly in warm water before using. Drain thoroughly before folding them into the batter.
When Should I Add the Glaze?
Wait until the bars have cooled. A cooler surface keeps the glaze from melting completely into the bars.
Whisk powdered sugar and milk until smooth, then drizzle over the top. Let the glaze set before slicing for cleaner presentation.
How Do I Make the Glaze Thinner or Thicker?
For a thinner consistency, add milk 1 teaspoon at a time. Whisk after each addition before deciding whether more is needed.
For a thicker glaze, add more powdered sugar. Keep adjusting gradually until the texture works for drizzling.
Nutritional Information
One generously sized bar, approximately 1/12 of the pan, contains roughly 280 calories. It also provides about 12g fat, 40g carbohydrates, and 3g protein.
These values are estimates and can vary according to the exact flour, butter, sugar, glaze, and portion size. Optional nuts, dried fruit, ice cream, or other additions will change the final numbers.
Cutting the pan into smaller portions will naturally change the nutrition per piece. Larger brunch-sized squares will contain more than smaller party portions.
Use the figures as a general guide. The exact values depend on the ingredients and how the pan is divided.
The Bars That Always Bring Back One Sweet Memory
Even after making these bars many times, I still associate the smell with that first sleepover batch. There is something about cinnamon baking with brown sugar and butter that brings the memory back before I even open the oven.
I can still picture a kitchen full of noise, laughter, and girls who were supposedly saving room for snacks later in the night. The entire pan disappearing before bedtime answered that question pretty quickly.
Since then, the recipe has followed me into much quieter occasions. Sometimes it is a lazy Sunday morning, sometimes a potluck, and sometimes it is simply a cinnamon craving that will not leave me alone.
What I love is that the bars never feel like a compromise just because they are easier than cinnamon rolls. They have their own soft, chewy texture and their own way of delivering that warm spice flavor.
The brown sugar makes them rich, while vanilla gives the batter a familiar sweetness. Then that layer of cinnamon hits the heat and suddenly the whole kitchen smells like somewhere you want to stay for a while.
The glaze is the final little transformation. A simple drizzle takes the pan from cinnamon bars to something that immediately brings cinnamon rolls to mind.
Some batches get nuts, and occasionally dried fruit finds its way into the batter. Most of the time, though, I keep them simple because butter, brown sugar, cinnamon, vanilla, and glaze already do exactly what I want.
They also have that dangerous quality of being very easy to cut smaller. One generous square can quickly become two “tiny” pieces when I wander back through the kitchen later.
That is probably part of why these Cinnamon Roll Bliss Bars have stayed in my baking rotation for so long. They are simple enough for a spontaneous craving, warm enough for a cozy morning, and memorable enough to become attached to the kinds of moments I still smile about years later.
Cinnamon Roll Bliss Bars Recipe

Soft, chewy, and filled with warm cinnamon flavor, these Cinnamon Roll Bliss Bars bring together a rich brown sugar batter with a simple powdered sugar glaze. They are easy to bake, easy to slice, and perfect when you want the cozy flavor of cinnamon in a simple dessert bar.
Recipe Details
- Prep Time: 15 minutes
- Cook Time: 25 minutes
- Total Time: 40 minutes
- Course: Dessert
- Cuisine: American
- Servings: 12 bars
- Calories: 280 kcal
Ingredients
For the Bars
- 2 teaspoons cinnamon
- 1 teaspoon vanilla extract alcohol-free
- 2 large eggs
- 1 ½ cups brown sugar
- 1 cup unsalted butter melted
- ½ teaspoon salt
- 1 teaspoon baking powder
- 2 ½ cups all-purpose flour
For the Glaze
- 1 tablespoon milk
- ½ cup powdered sugar
Instructions
Step 1: Prepare the Oven and Pan
Preheat the oven to 350°F (175°C).
Grease a baking pan and set it aside while you prepare the batter.
Step 2: Mix the Dry Ingredients
In a bowl, combine the all-purpose flour, baking powder, and salt.
Stir until the dry ingredients are evenly blended.
Step 3: Combine the Butter and Brown Sugar
In another bowl, mix the melted unsalted butter with the brown sugar.
Stir until the mixture is smooth and evenly combined.
Step 4: Add the Eggs and Vanilla
Add the eggs and alcohol-free vanilla extract to the butter and brown sugar mixture.
Stir until everything is fully incorporated.
Step 5: Finish the Batter
Gradually add the dry ingredients to the wet mixture.
Mix until a thick, even batter forms.
Step 6: Fill the Pan
Spread the batter evenly in the prepared baking pan.
Smooth the top so the bars bake at an even thickness.
Step 7: Add the Cinnamon
Sprinkle the cinnamon evenly over the surface of the batter.
Distribute it from edge to edge for a warm cinnamon flavor throughout the finished bars.
Step 8: Bake
Bake for 20–25 minutes, or until the bars are golden brown.
Remove the pan from the oven once the top has developed a warm golden color.
Step 9: Make the Glaze
Combine the powdered sugar and milk.
Stir until smooth and ready to drizzle.
Step 10: Glaze and Slice
Let the bars cool, then drizzle the glaze over the top.
Cut into 12 squares and serve.
Notes
- Store in an airtight container for up to 3 days.
- For extra flavor, add chopped nuts or raisins.
Serving Suggestions
Serve Cinnamon Roll Bliss Bars after they have cooled and the glaze has been drizzled over the top. The soft brown sugar base, cinnamon layer, and simple sweet glaze create a cozy dessert with a chewy texture and classic cinnamon flavor.
This recipe makes 12 bars, making it easy to portion for dessert trays, casual gatherings, or everyday treats.
For an extra layer of flavor and texture, add chopped nuts or raisins if desired. The bars can be served once the glaze has settled over the cooled surface.
Storage
Store the bars in an airtight container for up to 3 days.
Flour Tip
Use 2 ½ cups all-purpose flour with the baking powder and salt.
Butter Tip
Use 1 cup melted unsalted butter and combine it with the brown sugar before adding the eggs and vanilla.
Brown Sugar Tip
Use 1 ½ cups brown sugar for the rich, chewy base.
Vanilla Tip
Use 1 teaspoon alcohol-free vanilla extract.
Cinnamon Tip
Use 2 teaspoons cinnamon and sprinkle it over the batter before baking.
Glaze Tip
Mix ½ cup powdered sugar with 1 tablespoon milk until smooth.
Drizzle the glaze over the cooled bars.
Baking Tip
Bake at 350°F (175°C) for 20–25 minutes, until golden brown.
Variation Tip
Add chopped nuts or raisins for extra flavor if desired.

Fernando is the creator and writer behind the food blog Eating with your Hands. Living and working in cities like Paris, Barcelona, and Berlin, and being married to a Canadian foodie, has given Fernando a passion and interest in food and inspired him to run EWYH.