
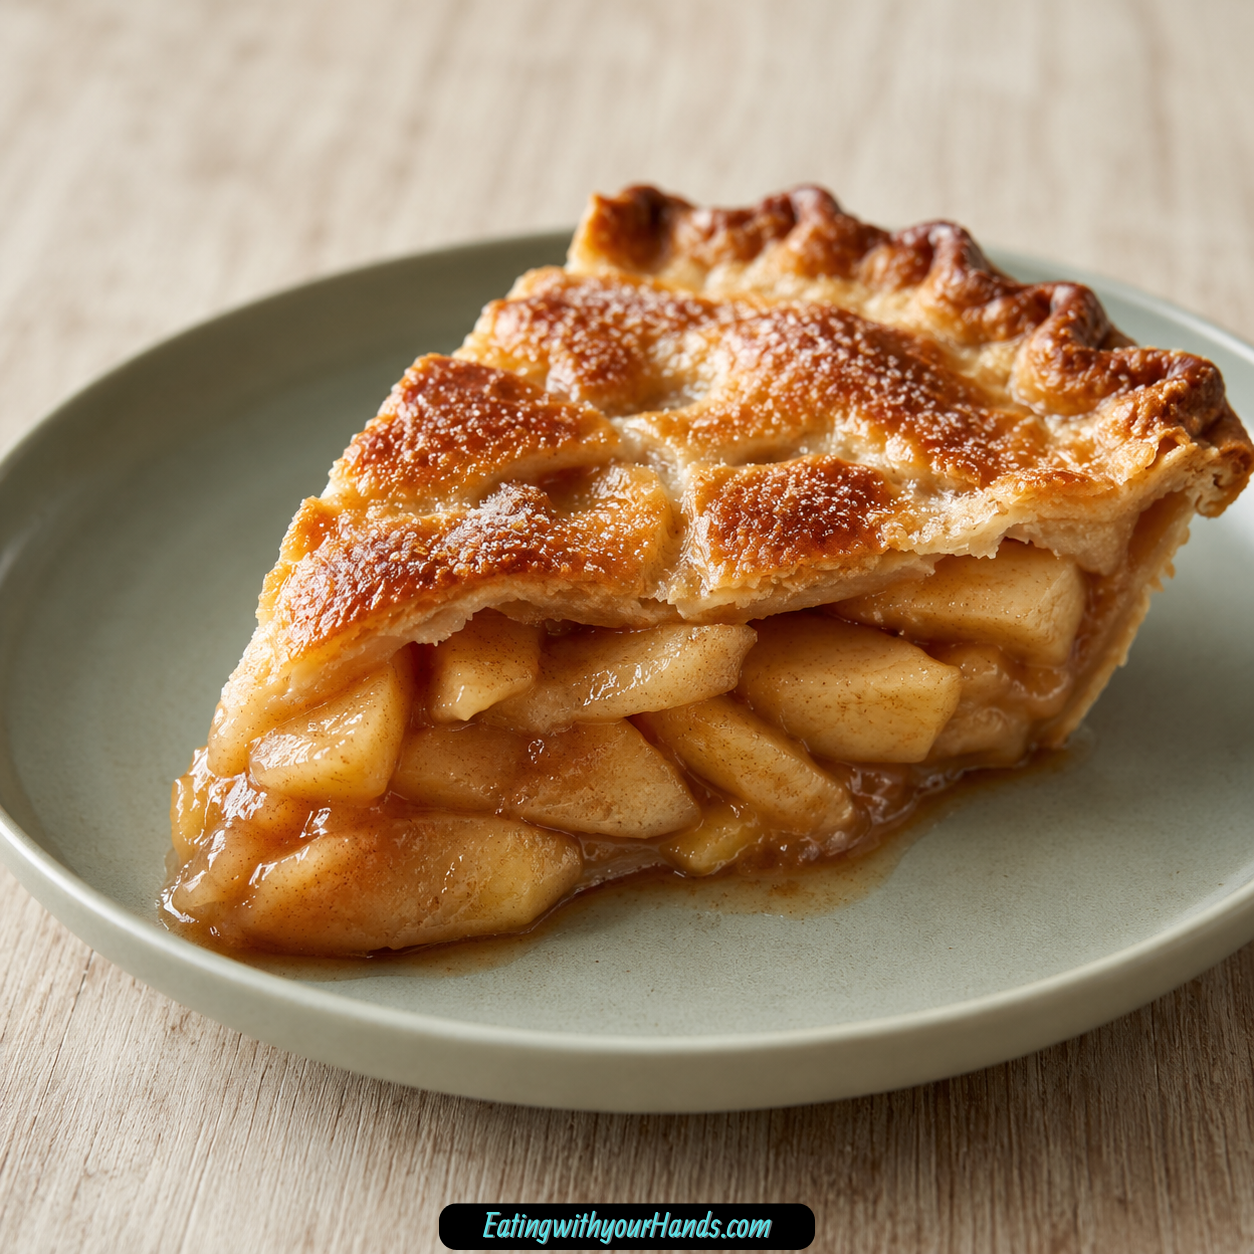
There are desserts that taste good, and then there are desserts that feel like home before the first slice is even cut. A classic apple pie belongs in that second category because it brings together everything comforting about baking: buttery crust, warm spices, tender apples, and that unmistakable aroma that seems to fill every corner of the kitchen.
For many people, apple pie is tied to holidays, family tables, slow weekends, and those little “just because” baking days when comfort matters more than occasion. This version keeps that traditional feeling alive with a flaky double crust and a spiced apple filling that is sweet, balanced, and thick enough to slice beautifully.
What I love most about this pie is that it feels timeless without being intimidating. You do not need professional pastry skills or a complicated filling process to make something warm, golden, and deeply satisfying.
The apples are cooked briefly with butter, sugar, spices, flour, cornstarch, and a splash of apple cider vinegar before going into the crust. That small stovetop step gives the filling a head start, helps the juices thicken, and makes the pie feel more reliable once it comes out of the oven.
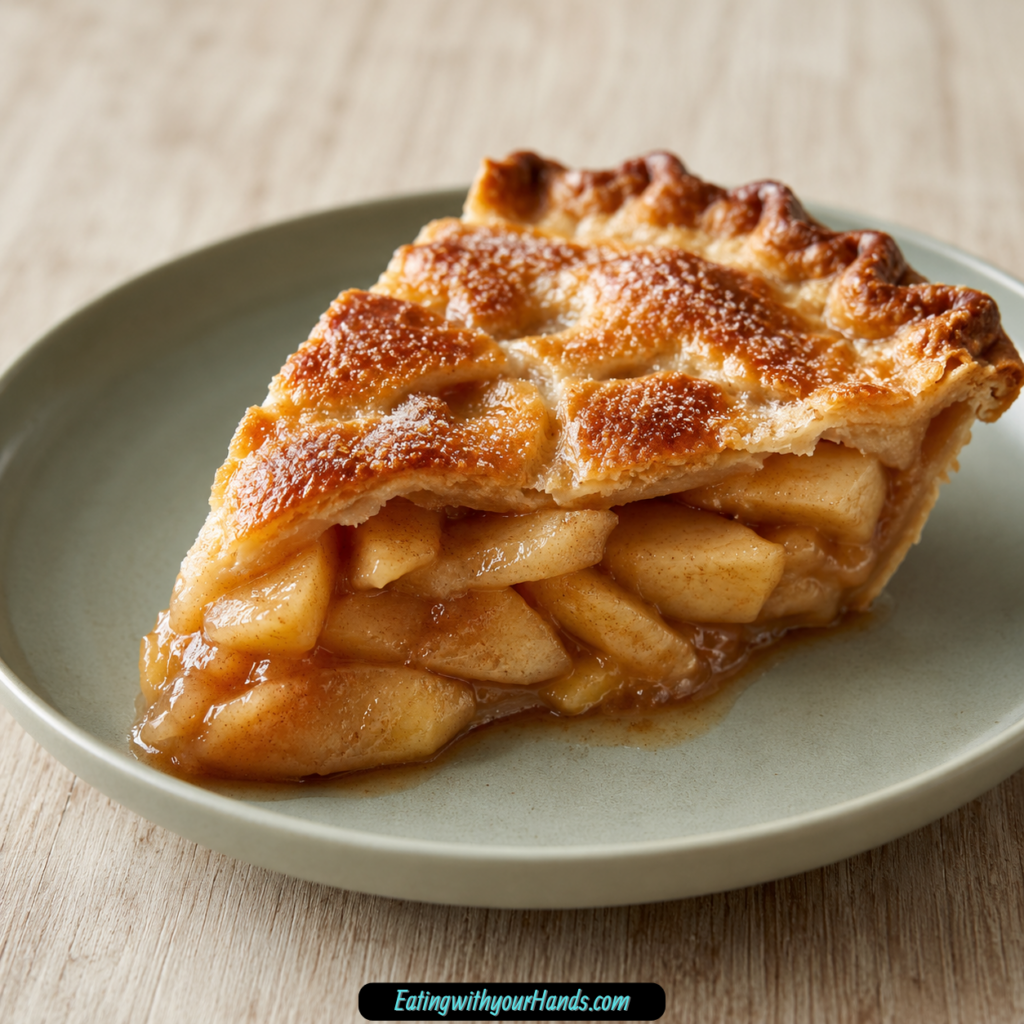
The finished pie is exactly what a classic apple pie should be. The crust bakes up golden and flaky, the filling becomes glossy and fragrant, and each slice holds together with just the right amount of soft, spiced apple.
Table of Contents
- Why You’ll Love This Apple Pie
- What Makes This Apple Pie Special
- Recipe Details
- Ingredients for Classic Apple Pie
- For the Apple Filling
- For the Crust
- Before You Start Baking
- Directions for Classic Apple Pie
- Step 1: Preheat the Oven
- Step 2: Prepare the Apples
- Step 3: Melt the Butter
- Step 4: Add the Apples to the Skillet
- Step 5: Add the Spices and Salt
- Step 6: Add the Sugar
- Step 7: Add the Flour and Cornstarch
- Step 8: Add the Apple Cider Vinegar
- Step 9: Cook the Filling
- Step 10: Let the Filling Cool Slightly
- Step 11: Roll Out the Bottom Crust
- Step 12: Fit the Dough Into the Pie Dish
- Step 13: Add the Apple Filling
- Step 14: Roll Out the Top Crust
- Step 15: Place the Top Crust Over the Filling
- Step 16: Trim the Edges
- Step 17: Crimp the Crust
- Step 18: Cut Steam Vents
- Step 19: Brush With Beaten Egg
- Step 20: Add Optional Sugar on Top
- Step 21: Bake the Pie
- Step 22: Use a Baking Sheet for Spills
- Step 23: Protect the Edges If Needed
- Step 24: Cool the Pie
- Step 25: Slice and Serve
- Apple Pie Variations
- Serving Suggestions
- Storage Tips
- Freezing and Reheating
- Helpful Notes for the Best Apple Pie
- Frequently Asked Questions About Apple Pie
- Final Thoughts
- Apple Pie
Why You’ll Love This Apple Pie
This apple pie has the kind of flavor that feels familiar in the best possible way. It is sweet but not overwhelming, warmly spiced but not too intense, and rich without feeling heavy.
The crust is one of the biggest reasons this pie works so well. A double pie dough gives the filling a buttery base and a golden top, while the beaten egg brushed over the surface creates a beautiful finish.
The filling is just as important. Honeycrisp apples bring sweetness and structure, while Granny Smith apples can be used if you prefer more tartness.
The combination of cinnamon and allspice gives the apples warmth. A small amount of kosher salt balances the sweetness, and apple cider vinegar adds brightness so the filling does not taste flat.
This pie is also more approachable than it looks. If you can roll out dough, stir apples in a skillet, and crimp a crust, you can make a pie that feels completely homemade.
It is also the kind of dessert that fits almost any occasion. Serve it for Thanksgiving, bring it to a gathering, bake it on a Sunday afternoon, or make it simply because the day could use something cozy.
What Makes This Apple Pie Special
The filling is cooked before it goes into the crust, which gives you more control over the final texture. Instead of hoping the apples soften perfectly in the oven, you start that process in a skillet.
That short cooking time also allows the juices to begin thickening. Flour and cornstarch work together to help prevent a soupy filling, while still leaving the apples tender and glossy.
The apple cider vinegar may seem like a small detail, but it is an important one. It brings a little brightness that keeps the pie from tasting overly sweet.
The sugar works with the butter and apple juices to create a syrupy coating around the fruit. As the pie bakes, that mixture settles into a soft, spiced filling that slices beautifully after cooling.
The crust also matters. Whether you use homemade double pie dough or a good-quality store-bought crust, the double layer gives the pie that traditional look and comforting texture.
Recipe Details
- Recipe Name: Classic Apple Pie Recipe
- Recipe Style: Double-crust apple pie
- Oven Temperature: 375°F (190°C)
- Pie Dish Size: 9-inch pie dish
- Filling Cook Time: About 10 minutes
- Bake Time: 45 to 50 minutes
- Cooling Time: At least 1 hour
- Best Served: Slightly warm
- Storage at Room Temperature: 1 to 2 days, covered
- Refrigerator Storage: Up to 4 days, covered tightly
- Freezer Storage: Up to 3 months, wrapped tightly
Ingredients for Classic Apple Pie
This apple pie uses simple, familiar ingredients, but each one plays a clear role. The apples provide the heart of the dessert, the spices bring warmth, and the crust holds everything together in a flaky golden shell.
For the Apple Filling
You need 2 tablespoons unsalted butter. The butter adds richness and helps the apples cook into a warm, flavorful filling.
You need 2.5 pounds apples, about 5 large Honeycrisps, peeled, cored, and cut into wedges. Honeycrisp apples are sweet and hold their shape well, while Granny Smith apples can also be used if you want a more tart pie.
You need 1/4 teaspoon ground allspice. Allspice adds a gentle warmth that deepens the flavor of the filling.
You need 1/2 teaspoon ground cinnamon. Cinnamon gives the pie its classic apple-spice aroma and flavor.
You need 1/4 teaspoon kosher salt. Salt balances the sugar and keeps the filling from tasting one-dimensional.
You need 3/4 cup sugar, plus 1 tablespoon. The sugar sweetens the apples and helps create that glossy syrupy filling.
You need 2 tablespoons all-purpose flour. Flour helps thicken the apple juices as the filling cooks and bakes.
You need 2 tablespoons cornstarch. Cornstarch adds extra thickening power so the filling sets properly instead of becoming too loose.
You need 1 tablespoon apple cider vinegar. The vinegar brightens the filling and keeps the sweetness balanced.
For the Crust
You need 1 recipe double pie dough, homemade or store-bought. The double crust gives the pie a bottom shell and a golden top layer.
You need 1 egg, lightly beaten. The egg is brushed over the top crust to help it bake with a shiny, golden finish.
Before You Start Baking
Before turning on the stove, peel, core, and cut the apples into wedges. This is the most hands-on part of the recipe, but it sets up the entire pie.
Try to keep the apple wedges fairly even in size. Even pieces cook at a similar rate and give the finished filling a better texture.
If you are using store-bought pie dough, keep it cold until you are ready to roll and shape it. Cold dough is easier to handle and bakes into a flakier crust.
If you are using homemade dough, have both halves ready before you begin assembling the pie. One half will line the dish, and the other will become the top crust.
It is also helpful to have a wire rack ready before the pie comes out of the oven. The pie needs to cool for at least an hour so the filling can set.
Directions for Classic Apple Pie
Step 1: Preheat the Oven
Preheat your oven to 375°F, or 190°C. Starting with a fully heated oven helps the crust bake properly and gives the filling steady heat from the beginning.
This is a simple step, but it matters. A cold or underheated oven can make the crust bake unevenly and affect the final texture.
Step 2: Prepare the Apples
Peel, core, and cut the apples into wedges. You want about 2.5 pounds of apples, which is roughly 5 large Honeycrisps.
Try to cut the wedges into similar sizes. This helps the apples soften evenly when they cook in the skillet and later bake in the pie.
Step 3: Melt the Butter
Place a large skillet over medium heat and add the unsalted butter. Let it melt fully before adding the apples and other filling ingredients.
The butter creates the rich base for the filling. It also helps coat the apples as they begin to warm and release their juices.
Step 4: Add the Apples to the Skillet
Add the peeled, cored, and wedged apples to the melted butter. Stir gently so the apples begin to coat in the butter.
Do not mash or break the apples as you stir. You want the pieces to soften slightly while still keeping enough shape for the finished pie.
Step 5: Add the Spices and Salt
Sprinkle the ground allspice, ground cinnamon, and kosher salt over the apples. Stir until the spices are evenly distributed.
This step gives the apples their classic warm flavor. The salt may be small in amount, but it helps the sweetness and spices taste more balanced.
Step 6: Add the Sugar
Add the 3/4 cup sugar plus 1 tablespoon to the skillet. Stir until the apples are coated and the sugar begins to dissolve into the butter and apple juices.
As the apples heat, the sugar helps form a glossy syrup around them. This syrup becomes part of the thick, flavorful filling.
Step 7: Add the Flour and Cornstarch
Sprinkle in the all-purpose flour and cornstarch. Stir carefully so the thickeners are evenly mixed through the apples and juices.
Using both flour and cornstarch helps the filling set well. This reduces the chance of a watery pie once it is baked and sliced.
Step 8: Add the Apple Cider Vinegar
Pour in the apple cider vinegar and stir again. The vinegar adds brightness and helps balance the sweetness of the filling.
It should not make the pie taste sour. Instead, it quietly sharpens the apple flavor and keeps the filling from feeling too heavy.
Step 9: Cook the Filling
Cook the apple mixture for about 10 minutes, stirring occasionally. The apples should soften slightly, but they should not become mushy.
You are looking for a glossy, syrupy consistency around the apples. The filling should look thickened and fragrant before you remove it from the heat.
Step 10: Let the Filling Cool Slightly
Remove the skillet from the heat and let the apple filling cool for a short time. Hot filling placed directly into cold dough can make the crust too soft.
The filling does not need to be completely cold. It should simply cool enough that it will not melt the dough as soon as it touches it.
Step 11: Roll Out the Bottom Crust
On a lightly floured surface, roll out one half of the pie dough until it is about 12 inches wide. Work gently so the dough stays tender.
If the dough begins to stick, add a little flour underneath. If it becomes too warm or soft, pause and chill it briefly before continuing.
Step 12: Fit the Dough Into the Pie Dish
Carefully transfer the rolled dough into a 9-inch pie dish. Press it gently into the bottom and sides without stretching it.
Let the edges hang slightly over the rim of the dish. This extra dough will help you seal the top and bottom crusts together later.
Step 13: Add the Apple Filling
Spoon the slightly cooled apple filling into the bottom crust. Spread it evenly so the apples fill the pie shell from edge to edge.
Try to arrange the apples so there are no large empty spaces. An even filling helps the top crust sit more smoothly.
Step 14: Roll Out the Top Crust
Roll out the second half of the pie dough on a lightly floured surface. It should be large enough to cover the top of the pie.
Keep the dough as even as possible. A smooth top crust bakes more evenly and is easier to trim and crimp.
Step 15: Place the Top Crust Over the Filling
Drape the rolled top crust over the apple filling. Let it settle naturally over the apples without pressing it down too firmly.
The top crust should cover the filling fully. If any areas seem stretched or thin, gently adjust the dough before sealing.
Step 16: Trim the Edges
Trim any uneven or overly long edges from the dough. Leave enough dough around the rim to seal the top and bottom crusts together.
This step helps the pie look neater. It also makes crimping easier and prevents thick, heavy edges from baking unevenly.
Step 17: Crimp the Crust
Crimp the edges together using your fingers or a fork. This seals the pie and gives it that classic homemade look.
The crimp does not need to be perfect. A rustic edge still looks beautiful and makes the pie feel handmade.
Step 18: Cut Steam Vents
Cut a few slits in the top crust with a sharp knife. These vents allow steam to escape as the filling bubbles.
Steam vents help prevent pressure from building under the crust. They also make it easier to see when the filling is bubbling during baking.
Step 19: Brush With Beaten Egg
Brush the top crust with the lightly beaten egg. Use a light, even coating over the surface and crimped edges.
The egg wash helps the crust bake to a golden, shiny finish. It gives the pie that classic polished look.
Step 20: Add Optional Sugar on Top
If you want a slightly sweeter finish, sprinkle a little extra sugar over the egg-washed crust. This is optional, but it adds a pretty sparkle and light crunch.
Use a small amount so the crust does not become overly sweet. The filling already has enough sugar to carry the dessert.
Step 21: Bake the Pie
Place the pie in the preheated oven and bake for 45 to 50 minutes. The pie is ready when the crust is deep golden brown and the filling bubbles through the vents.
Bubbling filling is an important sign. It means the thickened apple juices have heated properly and the filling is cooking through.
Step 22: Use a Baking Sheet for Spills
Slide a baking sheet under the pie halfway through baking if needed. This catches any bubbling juices that may escape from the crust.
A baking sheet makes cleanup much easier. Apple pie filling can become sticky when it drips onto the oven.
Step 23: Protect the Edges If Needed
If the crust edges brown too quickly, tent them with foil. This helps protect the rim while the rest of the pie finishes baking.
You do not need a special pie shield. A simple strip of aluminum foil can work well.
Step 24: Cool the Pie
Remove the pie from the oven and place it on a wire rack. Let it cool for at least 1 hour before slicing.
This waiting time is important. The filling needs time to set, and cutting too soon can make the juices run out.
Step 25: Slice and Serve
Once the filling has had time to settle, slice the pie with a sharp knife. Serve it slightly warm for the best flavor and texture.
Each slice should have tender apples, thickened filling, and flaky crust. A scoop of vanilla ice cream makes it even more classic.
Apple Pie Variations
Classic apple pie is wonderful as written, but it also welcomes small changes. Once you understand the basic recipe, you can adjust the flavor or texture while keeping the pie familiar.
Add Nuts for Crunch
You can add chopped pecans or walnuts to the filling. They bring a nutty flavor and a little crunch that contrasts nicely with the soft apples.
Keep the amount modest so the apples still remain the focus. The nuts should support the filling, not take it over.
Add Caramel
For a sweeter, richer version, drizzle caramel sauce over the filling before adding the top crust. You can also drizzle warm caramel over each slice when serving.
Caramel works naturally with apples and cinnamon. It makes the pie feel more indulgent and dessert-like.
Change the Spices
You can swap the allspice for a pinch of nutmeg or cardamom. This gives the pie a slightly different warmth while keeping the classic apple flavor.
Small changes are best with spices. A little goes a long way in a pie filling.
Serve With Cheddar
Serving apple pie with sharp cheddar on the side is a classic option. The salty, sharp cheese contrasts with the sweet apple filling in a surprising but satisfying way.
This is especially nice if you like desserts that are not purely sweet. The cheese adds a savory edge to each bite.
Make Mini Pies
Use the same filling and crust to make smaller hand pies or tarts. This is a fun way to turn the recipe into individual portions.
Mini pies may need adjusted baking time, so watch them closely. The same filling flavors still work beautifully in a smaller format.
Serving Suggestions
Apple pie is best served slightly warm. If the pie has cooled completely, a quick 10 seconds in the microwave can warm an individual slice.
Vanilla ice cream is the classic pairing for a reason. The cold creaminess melts into the warm apples and buttery crust.
Fresh whipped cream is another beautiful option. A little cinnamon in the whipped cream makes it feel even more connected to the pie.
Leftover apple pie also makes a wonderful breakfast treat. A slice with coffee feels cozy, simple, and very hard to resist.
Storage Tips
If you plan to eat the pie within 1 to 2 days, you can keep it covered at room temperature. Use foil or plastic wrap and keep it away from heat and direct sunlight.
For longer storage, place the pie in the refrigerator. It will stay fresh for up to 4 days when covered tightly.
Make sure the pie is fully cooled before storing. Covering a warm pie can trap steam and affect the crust texture.
If storing slices, place them in an airtight container. This makes it easier to reheat only what you need.
Freezing and Reheating
Apple pie can be frozen for later. Wrap it tightly in plastic wrap and then foil, and freeze for up to 3 months.
To reheat a frozen or chilled pie, bake it at 350°F, or 175°C, for about 30 minutes, or until warmed through. This helps bring back some of the fresh-baked feeling.
Individual slices can also be frozen. Wrap each slice separately so you can take out one portion whenever you want.
When reheating slices, warm them gently. You want the filling heated through without drying out the crust.
Helpful Notes for the Best Apple Pie
Choose Apples That Hold Their Shape
Honeycrisp apples are sweet and hold their texture well. Granny Smith apples add tartness and can be used if you prefer a sharper filling.
You can also mix both types. Combining sweet and tart apples gives the pie more balance.
Do Not Skip the Apple Cider Vinegar
The vinegar may seem unusual, but it brightens the filling. It keeps the sugar and apples from tasting overly sweet.
A small amount is all you need. It blends into the filling and supports the apple flavor.
Let the Pie Cool Before Slicing
Cooling is one of the most important steps. Even if the pie looks ready, the filling needs at least an hour to set.
Cutting too soon can make the filling run out. Waiting gives you cleaner slices and better texture.
Adjust Sugar Based on the Apples
Taste your apples if possible. If they are very sweet, you can reduce the sugar by a tablespoon or two.
This keeps the filling balanced. Apple sweetness can vary, so a little flexibility helps.
Protect the Crust Edges
If the crust edges brown too quickly, use foil. This prevents the rim from getting too dark while the center finishes baking.
A homemade foil shield works fine. It does not need to be fancy to be effective.
Make It Dairy-Free
For a dairy-free version, swap the butter in the filling for coconut oil. Use a vegan pie crust as well.
The flavor will be slightly different, but the pie can still be delicious. The apples and spices remain the heart of the recipe.
Make It Gluten-Free
A 1:1 gluten-free flour blend can work for thickening the filling. You can also use a gluten-free pie crust option.
The filling should still cook and thicken in a similar way. Watch texture and bake time as needed.
Frequently Asked Questions About Apple Pie
What Is the Best Type of Apple for Apple Pie?
Honeycrisp apples are a great choice because they are sweet and hold their shape well. They make a filling that is flavorful without turning too mushy.
Granny Smith apples are also a good option if you prefer a tart pie. You can mix Honeycrisp and Granny Smith apples for a balance of sweet and tart.
Can I Use Store-Bought Pie Crust?
Yes, store-bought pie crust works well for this recipe. It is a good time-saving option when you want homemade pie flavor without making dough from scratch.
Choose a good-quality crust if possible. The filling is flavorful, so a nice crust helps the whole pie taste better.
Why Is My Apple Pie Filling Too Runny?
The pie may not have cooled long enough. Letting it sit for at least 1 hour gives the flour and cornstarch time to set the filling.
If it is still too liquid next time, a little extra cornstarch can help. Also make sure the filling bubbles during baking so the thickeners activate properly.
Can I Make This Pie Ahead of Time?
Yes, you can assemble the pie a day ahead and bake it when you are ready. Keep it chilled until baking.
You can also bake it fully, let it cool, and store it at room temperature for up to 2 days. Warm it slightly before serving for the best experience.
Can I Freeze Apple Pie?
Yes, apple pie freezes well. Wrap it tightly in plastic wrap and foil, then freeze for up to 3 months.
To reheat, bake at 350°F, or 175°C, for about 30 minutes, or until warmed through. Individual slices can also be wrapped and frozen separately.
How Long Should Apple Pie Cool Before Serving?
Let the pie cool for at least 1 hour. This gives the filling time to thicken and makes slicing easier.
The pie can still be slightly warm when served. It simply needs enough resting time so the filling does not run everywhere.
Can I Add Caramel to the Filling?
Yes, caramel can be drizzled over the filling before adding the top crust. It adds sweetness and richness.
You can also add caramel when serving instead. That gives you more control over how sweet each slice becomes.
Final Thoughts
Classic Apple Pie is one of those desserts that never really needs reinventing. It only needs good apples, a flaky crust, warm spices, and enough patience to let the filling cool before slicing.
This version keeps everything cozy and familiar while using a stovetop filling method that helps the apples soften and the juices thicken before baking. That makes the finished pie flavorful, reliable, and beautifully sliceable.
The combination of Honeycrisp apples, cinnamon, allspice, butter, sugar, flour, cornstarch, and apple cider vinegar creates a filling that tastes sweet, warm, and balanced. Wrapped in a double crust and baked until golden, it becomes the kind of pie people remember.
Serve it warm with vanilla ice cream, enjoy it with whipped cream, or save a slice for breakfast with coffee the next morning. However you serve it, this apple pie brings exactly the kind of comfort a classic dessert should.
Apple Pie
This Apple Pie is a classic American dessert with a flaky double crust and a warm, spiced apple filling. The apples cook down with butter, cinnamon, allspice, sugar, and apple cider vinegar until tender and thickened before being baked inside the crust. It is the kind of pie that works beautifully for holidays, family dinners, or a cozy weekend dessert. Serve it warm for a comforting slice with a golden crust and bubbling apple center.
Recipe Details
- Prep Time: 30 minutes
- Cook Time: 1 hour
- Total Time: 1 hour 30 minutes
- Course: Dessert, Pie
- Cuisine: American
- Servings: 8 slices
Ingredients
For the Crust
- 1 recipe double pie dough or pre-made crust
- 1 egg lightly beaten
For the Filling
- 2.5 pounds apples peeled, cored, and cut into wedges (about 5 large Honeycrisps)
- 2 tablespoons unsalted butter
- 0.75 cup sugar plus 1 tablespoon
- 1 tablespoon apple cider vinegar
- 2 tablespoons all-purpose flour
- 2 teaspoons cornstarch
- 0.5 teaspoon ground cinnamon
- 0.25 teaspoon ground allspice
- 0.25 teaspoon kosher salt
Instructions
Step 1: Preheat the Oven
Preheat your oven to 375°F (190°C) so it is ready once the pie is assembled.
Step 2: Cook the Apple Filling
In a large skillet, melt the butter over medium heat. Add the apples, allspice, cinnamon, salt, sugar, flour, cornstarch, and apple cider vinegar. Stir everything together until the apples are evenly coated.
Step 3: Thicken the Filling
Cook the apple mixture, stirring occasionally, until the apples soften and the liquid thickens, about 10 minutes. Remove the skillet from the heat and let the filling cool slightly.
Step 4: Add the Bottom Crust
Roll out one half of the pie dough and fit it into a 9-inch pie dish. Spoon the apple filling into the crust and spread it evenly.
Step 5: Add the Top Crust
Roll out the second half of the pie dough and place it over the apple filling. Trim the excess dough and crimp the edges to seal the pie. Cut a few slits in the top crust so steam can escape while baking.
Step 6: Brush and Bake
Brush the top crust with the beaten egg. Bake for 45-50 minutes, or until the crust is golden brown and the filling is bubbling.
Step 7: Cool Before Serving
Let the pie cool on a wire rack for at least 1 hour before slicing and serving.
Notes
Serve the pie warm with vanilla ice cream or whipped cream for an extra indulgent dessert.
Serving Suggestions
- Vanilla ice cream
- Whipped cream
- Hot coffee
- Salted caramel sauce
- Cheddar cheese slices
- Holiday dessert tables
- Warm apple cider
Storage
How to Store
Let the pie cool completely, then cover it tightly or place slices in an airtight container. Store at room temperature for short-term serving or refrigerate for longer freshness.
How to Reheat
Warm individual slices gently until the filling is heated through and the crust softens slightly.
Best Texture Tip
Allow the pie to cool for at least 1 hour before slicing so the filling has time to set and the slices hold together better.

Fernando is the creator and writer behind the food blog Eating with your Hands. Living and working in cities like Paris, Barcelona, and Berlin, and being married to a Canadian foodie, has given Fernando a passion and interest in food and inspired him to run EWYH.