
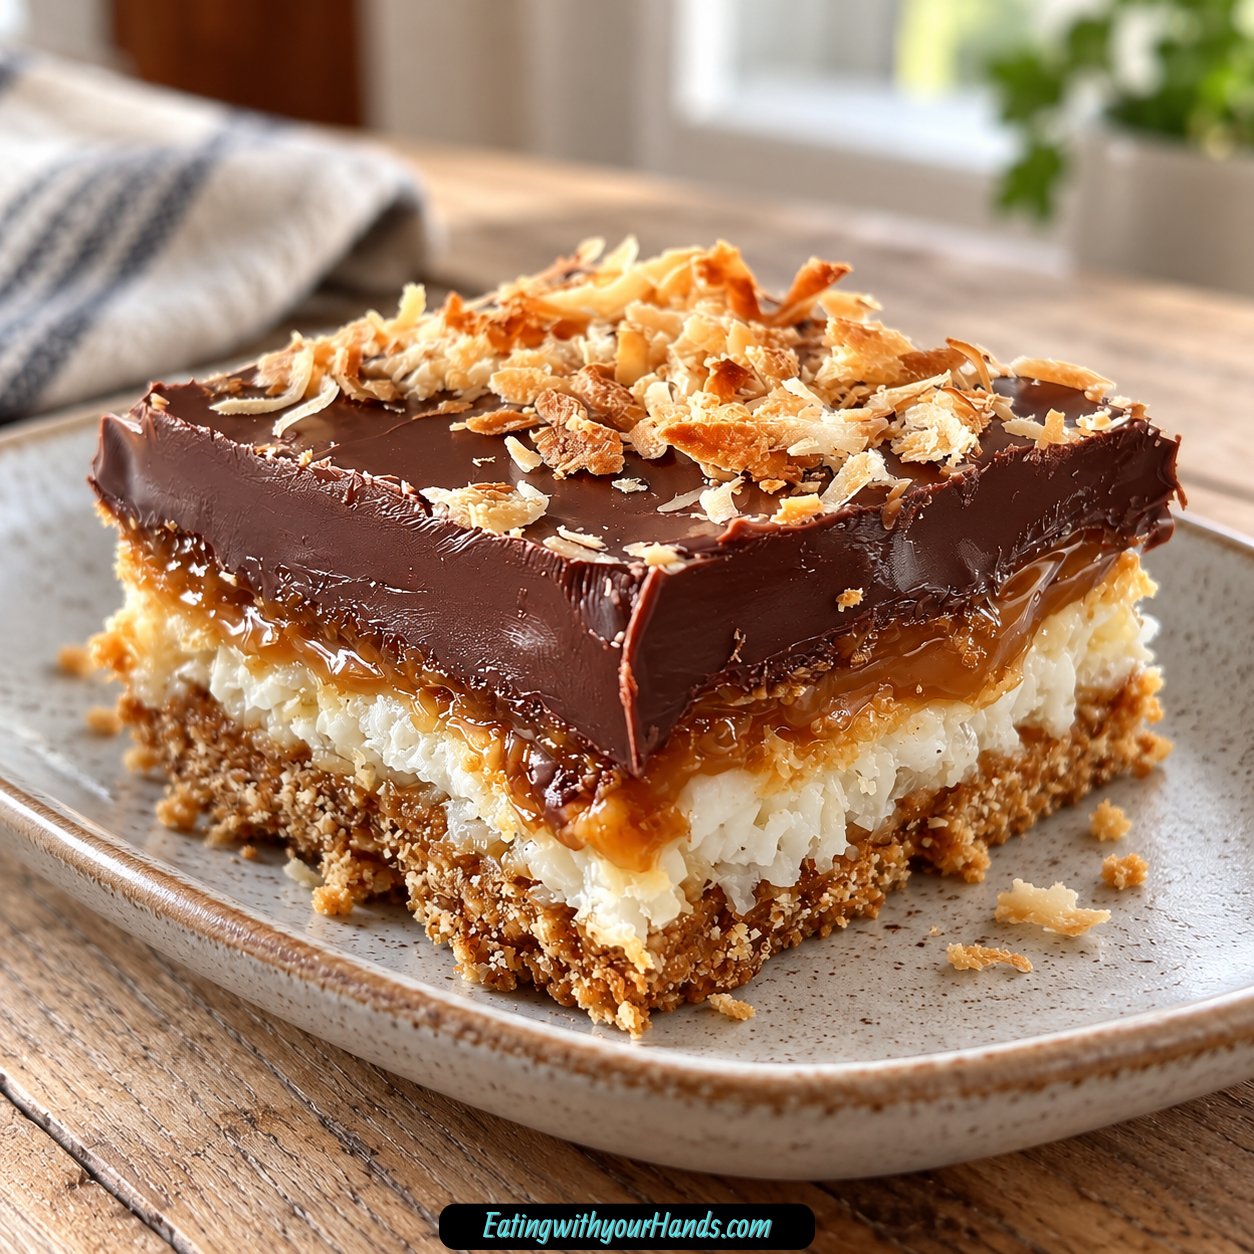
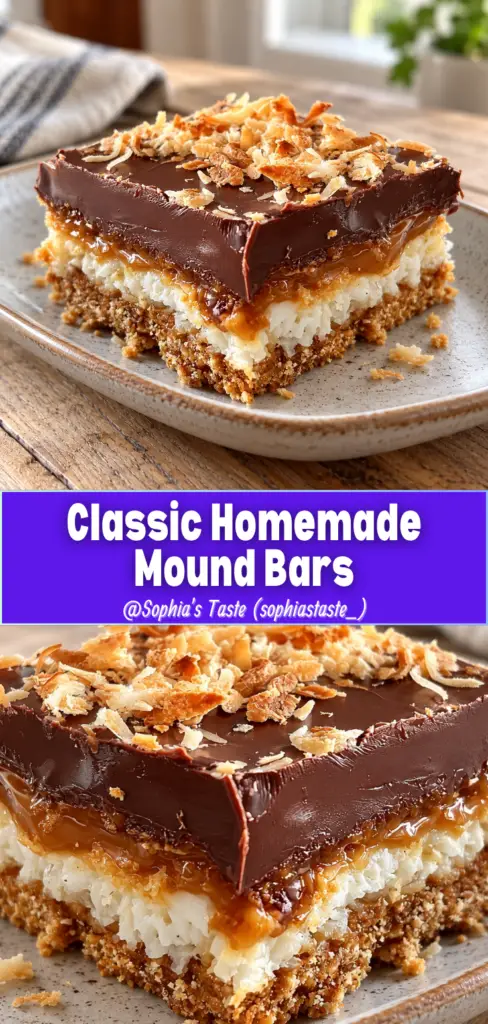
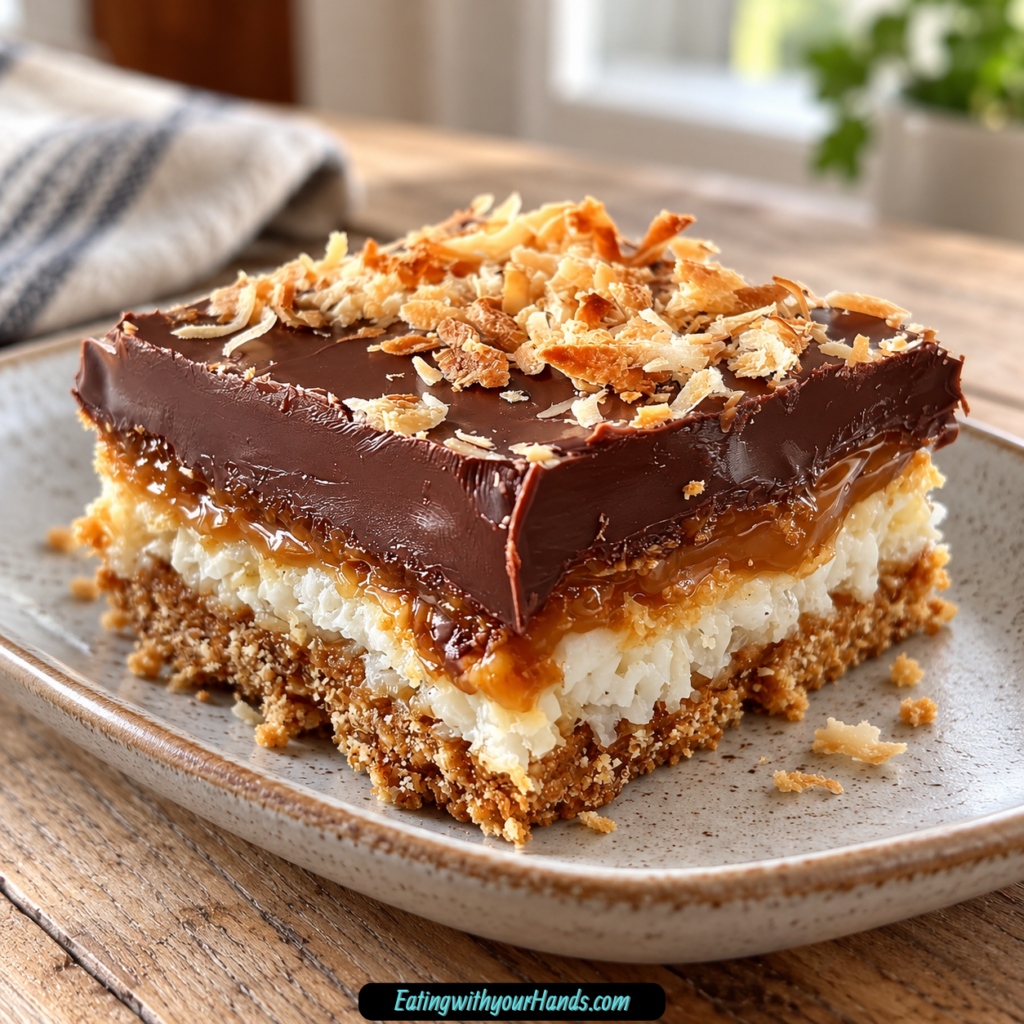
Classic Homemade Mound Bars are the kind of dessert that feels simple, nostalgic, and deeply satisfying from the very first bite. They bring together a buttery graham cracker crust, a sweet chewy coconut layer, and a smooth semisweet chocolate topping in one rich bar that tastes like a homemade version of a beloved candy-shop treat.
These bars are made for coconut and chocolate lovers. The flavor is sweet, mellow, and comforting, with the coconut giving that soft chew and the chocolate adding a glossy, decadent finish.
What makes them so easy to love is how straightforward they are. There is no candy thermometer, no complicated sugar syrup, and no fussy technique that makes the recipe feel intimidating.
Everything begins with a graham cracker crumb crust. The crumbs are mixed with white sugar and melted butter until they look like wet sand, then pressed firmly into a 9×13-inch baking dish.
The coconut layer could not be simpler. Sweetened condensed milk is spread over the crust, then flaked coconut is sprinkled over the top and gently pressed so it adheres.
After baking, the bars cool completely before the chocolate goes on. That cooling step matters because the melted chocolate spreads better over a firm coconut layer.
Once the chocolate is set, the bars slice into squares or rectangles that are perfect for parties, holidays, potlucks, bake sales, or a quiet sweet treat at home. Classic Homemade Mound Bars are rich, chewy, easy to prepare, and full of old-fashioned dessert charm.
Table of Contents
- Why You’ll Love These Classic Homemade Mound Bars
- Recipe Details
- Ingredients
- Equipment You’ll Need
- Ingredient Notes
- Optional Swaps, Variations, and Flavor Ideas
- Why This Recipe Works
- Directions
- Step 1: Preheat the Oven
- Step 2: Prepare the Baking Dish
- Step 3: Make the Graham Cracker Crumbs
- Step 4: Mix the Crust Ingredients
- Step 5: Press the Crust Into the Pan
- Step 6: Add the Sweetened Condensed Milk
- Step 7: Add the Coconut
- Step 8: Bake the Bars
- Step 9: Cool Completely
- Step 10: Melt the Chocolate
- Step 11: Spread the Chocolate Topping
- Step 12: Add Optional Toppings
- Step 13: Chill the Bars
- Step 14: Lift From the Pan
- Step 15: Cut Into Pieces
- Step 16: Serve Chilled or Room Temperature
- Serving Ideas
- Storage
- Freezing
- Make-Ahead
- Helpful Notes for Best Results
- Variations
- Troubleshooting
- Frequently Asked Questions
- Nutritional Information
- Why This Recipe Works So Well
- Final Thoughts
- Classic Homemade Mound Bars Recipe
Why You’ll Love These Classic Homemade Mound Bars
These bars use simple pantry ingredients. Graham cracker crumbs, sugar, butter, sweetened condensed milk, coconut, and chocolate chips are all you need.
They are easy to prepare. The crust is pressed, the coconut layer is added, the bars are baked, and the chocolate topping is spread after cooling.
They have a beautiful texture. The crust is buttery, the coconut is chewy, and the chocolate topping is smooth.
They are great for making ahead. The bars need time to cool and chill, so they are perfect for preparing before a gathering.
They are easy to customize. Add toasted coconut, almonds, chocolate swirls, peppermint, holiday sprinkles, or dairy-free ingredients.
They store and freeze well. That makes them a practical dessert when you want something ready for later.
Recipe Details
This recipe uses a 9×13-inch baking dish. The dish should be lightly greased or lined with parchment paper.
The oven temperature is 350°F (175°C). The bars bake for 20 to 25 minutes.
The crust uses 2 cups graham cracker crumbs, ¼ cup white sugar, and ¼ cup melted butter. The mixture should resemble wet sand before pressing.
The coconut layer uses 1 can of sweetened condensed milk, 14 ounces total, and 2 cups flaked coconut. Sweetened coconut is traditional, but unsweetened coconut can also work.
The chocolate topping uses 1 package semisweet chocolate chips, 12 ounces total, melted until smooth. Dark chocolate can be used if preferred.
The bars should cool completely after baking before the chocolate topping is added. This keeps the layers neat.
After the chocolate is spread, the dish chills for 30 to 60 minutes. The chocolate should be fully set before slicing.
The bars can be cut into squares or rectangles. They can be served chilled or at room temperature.
Ingredients
For the Graham Cracker Crust
- 2 cups graham cracker crumbs
- ¼ cup white sugar
- ¼ cup melted butter
For the Coconut Layer
- 1 can sweetened condensed milk, 14 ounces
- 2 cups flaked coconut
For the Chocolate Topping
- 1 package semisweet chocolate chips, 12 ounces, melted
Optional Variations and Toppings
- Toasted coconut
- Chopped almonds
- Dark chocolate chips
- Milk chocolate chips
- Crushed peppermint
- Red and green sprinkles
- Coconut condensed milk
- Dairy-free chocolate chips
Equipment You’ll Need
Basic Equipment
- 9×13-inch baking dish
- Mixing bowl
- Spatula
- Measuring cups
- Microwave-safe bowl or double boiler
- Knife
- Parchment paper, optional
Equipment Notes
A 9×13-inch baking dish gives these bars the right thickness. It gives enough room for the crust, coconut layer, and chocolate topping to spread evenly.
Parchment paper is optional but helpful. It makes it easier to lift the bars out for cleaner slicing.
A mixing bowl is used for the graham cracker crust. The crumbs, sugar, and melted butter should be stirred until evenly moistened.
A spatula helps spread the sweetened condensed milk and melted chocolate. It also helps press the coconut gently into place.
A microwave-safe bowl is useful for melting chocolate chips in 30-second intervals. A double boiler also works if you prefer gentler heat.
A sharp knife is best for cutting clean bars. Let the chocolate set fully before slicing.
Ingredient Notes
Graham cracker crumbs create the buttery base. A food processor gives a fine, even crumb.
White sugar adds sweetness to the crust. It also helps the crust hold together.
Melted butter gives the crust richness. It moistens the crumbs and helps them press into a firm layer.
Sweetened condensed milk acts as the glue for the coconut. It adds creamy sweetness and helps create the chewy middle.
Flaked coconut is the heart of the recipe. Sweetened coconut is traditional, but unsweetened coconut can be used too.
Semisweet chocolate chips create the smooth topping. The chocolate layer balances the sweet coconut center.
Dark chocolate can be used if you prefer a deeper flavor. It makes the bars taste less sweet.
Coconut condensed milk and dairy-free chocolate chips can be used for a dairy-free variation. The flavor will still stay close to the original idea.
Toasted coconut adds deeper flavor. It can be toasted in a dry pan before layering.
Chopped almonds give the bars an Almond Joy-style twist. Add them before the chocolate layer.
Optional Swaps, Variations, and Flavor Ideas
Classic Homemade Mound Bars
Use the graham cracker crust, sweetened condensed milk, flaked coconut, and semisweet chocolate topping exactly as written. This gives the full nostalgic coconut-chocolate bar.
Cool completely before adding chocolate. Chill until set before slicing.
Toasted Coconut Mound Bars
Toast the coconut in a dry pan before layering. This gives the bars a deeper coconut flavor.
Let the coconut cool slightly before adding it. Press it gently into the condensed milk layer.
Almond Joy-Style Bars
Add a layer of chopped almonds before spreading the chocolate topping. This gives the bars a nutty crunch.
The almonds pair well with coconut and chocolate. Use an even layer so every slice gets some.
Dark Chocolate Mound Bars
Use dark chocolate instead of semisweet chocolate. The topping becomes deeper and less sweet.
This is a good choice if you want more chocolate intensity. Melt it gently.
Milk Chocolate Swirl Bars
Use milk chocolate chips along with dark or semisweet chocolate chips. Swirl the melted chocolates together for a layered chocolate effect.
The result looks pretty and tastes sweeter. Chill until fully set.
Holiday Peppermint Bars
Sprinkle crushed peppermint over the chocolate before it sets. This adds crunch and holiday flavor.
Use a light hand if you want coconut to remain the main flavor. Chill before slicing.
Christmas Sprinkle Bars
Add red and green sprinkles before the chocolate sets. This makes the bars festive for holiday trays.
Sprinkles add color without changing the recipe much. They are easy and cheerful.
Dairy-Free Mound Bars
Use coconut condensed milk and dairy-free chocolate chips. This creates a dairy-free option.
The coconut flavor may become more pronounced. Chill well before slicing.
Mini Mound Bites
Make the bars in mini muffin tins for bite-sized treats. Press a little crust into each cup, add coconut, bake, and top with chocolate.
These are great for parties. Chill until the chocolate is set.
Why This Recipe Works
This recipe works because the layers are simple and balanced. The graham cracker crust gives structure, the coconut layer gives chew, and the chocolate topping gives a smooth finish.
The crust is pressed firmly into the pan so it can support the topping. If the crust is loose, the bars may crumble.
Sweetened condensed milk binds the coconut layer. It makes the center chewy and rich without needing complicated candy-making.
The coconut is pressed gently into the condensed milk. This helps the layers stick together while baking.
Baking for 20 to 25 minutes sets the coconut layer and gives the edges color. The center should be set before the bars cool.
Cooling completely before adding chocolate keeps the topping neat. Warm bars can make the chocolate behave differently.
Chilling after adding chocolate allows the top to firm. This gives cleaner slices and better presentation.
Serving chilled or at room temperature both work. Chilled bars are firmer, while room-temperature bars are softer.
Directions
Step 1: Preheat the Oven
Preheat the oven to 350°F (175°C). Let it heat fully before baking.
A fully preheated oven helps the crust and coconut layer bake evenly. This is important for clean, sturdy bars.
Step 2: Prepare the Baking Dish
Lightly grease a 9×13-inch baking dish. You can also line it with parchment paper for easier removal.
If using parchment, leave a little overhang on the sides. This helps lift the bars out after chilling.
Step 3: Make the Graham Cracker Crumbs
Use 2 cups graham cracker crumbs. If starting with whole crackers, crush them finely or use a food processor.
Fine crumbs make a more even crust. Large pieces can make the base less compact.
Step 4: Mix the Crust Ingredients
In a mixing bowl, combine the graham cracker crumbs, ¼ cup white sugar, and ¼ cup melted butter. Stir until everything is evenly moistened.
The mixture should look like wet sand. It should clump lightly when pressed.
Step 5: Press the Crust Into the Pan
Transfer the crumb mixture to the prepared baking dish. Press it firmly and evenly across the bottom.
Use a flat-bottomed cup or the back of a spoon if desired. A firm crust helps the bars slice cleanly.
Step 6: Add the Sweetened Condensed Milk
Pour the 14-ounce can of sweetened condensed milk over the crust. Spread it evenly with a spatula.
Try to cover the crust from edge to edge. This layer helps hold the coconut.
Step 7: Add the Coconut
Sprinkle 2 cups flaked coconut evenly over the condensed milk layer. Spread it gently across the entire surface.
Press the coconut lightly so it adheres. Do not pack it too hard.
Step 8: Bake the Bars
Place the dish in the oven and bake for 20 to 25 minutes. The edges should be golden, and the center should be set.
Watch the edges near the end. Golden edges mean the coconut layer is ready.
Step 9: Cool Completely
Remove the pan from the oven. Let the bars cool completely in the pan.
Do not add chocolate while the bars are still warm. Cooling helps the layers firm up.
Step 10: Melt the Chocolate
Place the 12-ounce package of semisweet chocolate chips in a microwave-safe bowl. Microwave in 30-second intervals, stirring between each interval until smooth.
You can also melt the chocolate with a double boiler. Either method works as long as the chocolate becomes smooth.
Step 11: Spread the Chocolate Topping
Pour the melted chocolate over the cooled coconut layer. Spread it evenly with a spatula.
Cover the entire top. Smooth the surface as much as you like.
Step 12: Add Optional Toppings
If using crushed peppermint, red and green sprinkles, or any decorative topping, add it before the chocolate sets. Sprinkle evenly over the top.
This is the best time for toppings to stick. Once the chocolate hardens, they will not adhere as well.
Step 13: Chill the Bars
Place the dish in the refrigerator for 30 to 60 minutes. The chocolate should be fully set.
Do not rush slicing. Set chocolate gives cleaner cuts.
Step 14: Lift From the Pan
If you used parchment paper, lift the bars from the pan using the parchment overhang. Place them on a cutting board.
If you greased the pan without parchment, cut directly in the dish. Use gentle pressure.
Step 15: Cut Into Pieces
Cut the bars into squares or rectangles. Choose the size based on how rich you want each serving to be.
A sharp knife gives the cleanest edges. Wipe the knife between cuts if needed.
Step 16: Serve Chilled or Room Temperature
Serve the bars chilled for a firmer texture. Serve them at room temperature for a softer bite.
Both versions are delicious. Choose the texture you prefer.
Serving Ideas
Serve these bars chilled on a dessert tray. The chocolate stays firm, and the layers look clean.
Serve them at room temperature when you want a softer coconut bite. The chocolate relaxes slightly without losing its shape.
Add them to holiday cookie trays. Their chocolate-coconut flavor fits beautifully with other sweets.
Serve them at birthday parties or family gatherings. They are easy to cut and share.
Pack them for potlucks or bake sales. They travel well once the chocolate is set.
Cut them into smaller squares for richer dessert platters. The bars are sweet, so small pieces work well.
Serve with coffee for a cozy afternoon treat. The chocolate and coconut are lovely with a warm drink.
Keep a few frozen for later cravings. They thaw nicely and make an easy sweet treat.
Storage
Store the bars in an airtight container. Keep parchment between layers if stacking.
They can be stored chilled or at room temperature. Chilled bars have a firmer chocolate topping.
Room-temperature bars are softer. This can be a good texture if serving soon.
Make sure the chocolate is fully set before storing. This prevents smearing.
Keep the container covered so the bars do not dry out. Coconut can lose moisture if left uncovered.
If storing for a party, chill first and slice after the chocolate sets. This gives neater pieces.
The bars are make-ahead friendly. Their layers hold well after chilling.
Freezing
These bars freeze beautifully. Make sure they are fully cooled and the chocolate is completely set before freezing.
Cut them into squares or rectangles first. This makes it easier to thaw only what you need.
Place parchment between layers. Store them in a freezer-safe container.
Thaw chilled or at room temperature before serving. The texture stays rich and chewy.
Freezing is a good option for holiday prep. You can make a batch ahead and save it.
If adding delicate decorations, freeze carefully so the toppings stay intact. A flat container works best.
Serve after thawing once the chocolate softens slightly. The bars are still delicious cold.
Make-Ahead
Classic Homemade Mound Bars are naturally make-ahead friendly. They need cooling and chilling time, so preparing them early works well.
You can bake the crust and coconut layer ahead, cool it completely, then add the chocolate later. This helps manage the timing.
You can also finish the full recipe and chill it until ready to slice. The chocolate topping protects the coconut layer.
For the cleanest pieces, chill the bars before cutting. Slice after the chocolate is fully set.
If making for holidays, bake and freeze them ahead. Thaw before arranging on trays.
If making for a party, prepare them the day before. Keep them covered until serving.
These bars do not require last-minute work. That makes them ideal for gatherings.
Helpful Notes for Best Results
Press the crust firmly. A loose crust can crumble when sliced.
Spread the condensed milk evenly. It helps the coconut layer bind.
Press the coconut gently into the milk layer. This keeps the top from falling apart.
Bake until the edges are golden and the center is set. Do not remove too early.
Cool completely before adding chocolate. Warm layers can make the topping messy.
Melt chocolate slowly in 30-second intervals. Stir each time for smoothness.
Chill until the chocolate is fully set. This takes about 30 to 60 minutes.
Use parchment paper if you want easy removal. It makes slicing and serving simpler.
Variations
Classic Homemade Mound Bars
Use graham cracker crumbs, white sugar, melted butter, sweetened condensed milk, flaked coconut, and semisweet chocolate chips. This gives the full classic version.
Bake, cool, top with chocolate, chill, and slice. Serve chilled or at room temperature.
Toasted Coconut Mound Bars
Toast the coconut in a dry pan before adding it to the condensed milk layer. This gives the bars deeper coconut flavor.
Cool the toasted coconut slightly before layering. Press gently so it adheres.
Almond Coconut Bars
Add chopped almonds before the chocolate topping. This creates an Almond Joy-style variation.
Spread the almonds evenly. Each bite should get coconut, chocolate, and crunch.
Dark Chocolate Coconut Bars
Use dark chocolate instead of semisweet chocolate. The topping becomes bolder.
This is a good choice if you want less sweetness. It balances the condensed milk nicely.
Milk and Dark Chocolate Swirl Bars
Use both milk chocolate and dark chocolate chips. Melt them separately or together for a layered chocolate effect.
Swirl gently before chilling. Do not overmix if you want visible contrast.
Peppermint Holiday Bars
Sprinkle crushed peppermint over the chocolate before it sets. This adds crunch and festive flavor.
Use this version for holiday trays. Chill until the chocolate is firm.
Red and Green Sprinkle Bars
Add red and green sprinkles before the chocolate sets. This creates an easy holiday look.
The sprinkles add color without changing the main flavor. They are simple and fun.
Dairy-Free Coconut Bars
Use coconut condensed milk and dairy-free chocolate chips. This creates a dairy-free version.
The coconut flavor may be stronger. Chill fully before slicing.
Mini Coconut Chocolate Bites
Make the recipe in mini muffin tins. Press crust into each cup, add condensed milk and coconut, bake, top with chocolate, and chill.
These are perfect for bite-sized treats. Watch the portions closely.
Troubleshooting
The Crust Is Crumbly
The crust may not have been pressed firmly enough. Press it tightly into the pan before adding the condensed milk.
The crumbs should be evenly moistened with butter. Stir until the texture looks like wet sand.
The Coconut Layer Falls Apart
The coconut may not have been pressed into the condensed milk. Press gently after sprinkling.
Make sure the bars baked until the center was set. Cooling also helps the layer firm.
The Bars Are Too Sweet
Use dark chocolate for the topping. It balances the sweetness better than milk chocolate.
You can also use unsweetened coconut. The flavor will be less sweet.
The Chocolate Topping Cracked
The bars may have been too cold when cut, or the chocolate layer may have been very firm. Let them sit briefly before slicing.
Use a sharp knife. Wiping the knife between cuts helps.
The Chocolate Is Grainy
It may have overheated while melting. Melt in 30-second intervals and stir between each.
A double boiler is a gentler option. Stop heating once smooth.
The Chocolate Did Not Spread Smoothly
The chocolate may have cooled too much before spreading. Work while it is melted and fluid.
Use a spatula to guide it across the top. Spread gently.
The Bars Stuck to the Pan
Parchment paper helps prevent sticking. Use it next time with overhang.
If the pan was only greased, run a knife carefully around the edges. Lift pieces gently.
The Coconut Browns Too Much
The bars may have baked too long. Check at 20 minutes.
The edges should be golden, not deeply browned. Remove when the center is set.
The Center Seems Too Soft
The bars may need the full 25 minutes. Bake until the center is set.
Cooling and chilling also help. Do not cut before the chocolate and layers firm.
The Bars Are Hard to Slice
Chill until set, then use a sharp knife. Let them sit a few minutes if the chocolate is too firm.
Cut with steady pressure. Wipe the knife between cuts for cleaner edges.
Frequently Asked Questions
Can I use unsweetened coconut?
Yes, unsweetened coconut can be used. Sweetened coconut is traditional, but unsweetened works too.
The bars will taste less sweet. The condensed milk still adds sweetness.
Can I use dark chocolate instead of semisweet?
Yes, dark chocolate can be used if preferred. It gives the bars a deeper flavor.
Dark chocolate also helps balance the sweet coconut layer. Melt it gently.
Can I make these dairy-free?
Yes, use coconut condensed milk and dairy-free chocolate chips. This creates a dairy-free option.
Make sure any other ingredients fit your needs. The method stays the same.
Do I need a candy thermometer?
No, a candy thermometer is not needed. The recipe only requires melting, mixing, baking, and chilling.
This is one of the reasons the bars are so simple. There is no candy-making stage.
Can I make these ahead for a party?
Yes, these bars are make-ahead friendly. They need time to cool and chill, so making them early works well.
Store them covered until serving. Cut after the chocolate sets.
Can I freeze homemade Mound Bars?
Yes, these bars freeze well. Cut them first and place parchment between layers.
Thaw before serving. They can be enjoyed chilled or closer to room temperature.
Can I make mini versions?
Yes, use mini muffin tins for bite-sized treats. Press crust into each cup and layer the coconut and chocolate.
Watch the portions and baking time closely. Smaller treats may set faster.
How should I cut clean bars?
Chill the bars until the chocolate is fully set. Use a sharp knife and wipe it between cuts.
Parchment paper also helps. Lift the slab out before cutting if possible.
Nutritional Information
Nutrition values can vary based on ingredient brands, chocolate choice, coconut type, serving size, and any added toppings. No exact nutrition numbers are included here.
Sweetened condensed milk, coconut, graham crackers, butter, sugar, and chocolate all contribute to the final values. Dark chocolate, dairy-free chocolate, or unsweetened coconut will change the totals.
Cutting the bars into smaller squares creates smaller servings. Larger rectangles will naturally be richer.
These bars are meant to be a sweet dessert. They are best enjoyed as an occasional treat.
If precise nutrition matters, calculate using your exact ingredients and number of servings. This gives the most accurate result.
The recipe can be adjusted slightly with dark chocolate or unsweetened coconut. These swaps change sweetness and flavor.
The texture stays rich and chewy either way. Coconut and chocolate remain the main stars.
Why This Recipe Works So Well
Classic Homemade Mound Bars work because the layers are simple and clear. The graham cracker crust gives crunch, the coconut layer gives chew, and the chocolate topping gives richness.
The crust is buttery enough to hold together but not overly heavy. White sugar helps bind and sweeten it.
Sweetened condensed milk acts like the glue for the coconut. It bakes into a chewy, sweet layer that holds its shape.
The coconut brings texture and flavor. It is the heart of the bar.
Semisweet chocolate gives the topping a smooth finish. It balances the coconut layer and creates that candy-bar feeling.
The chilling step helps the chocolate set. This makes the bars easier to slice and serve.
The recipe is easy to adapt because the base is dependable. Toppings, nuts, chocolate types, and holiday finishes can all be changed.
Most of all, this recipe works because it takes a familiar chocolate-coconut flavor and gives it homemade warmth. It is simple, nostalgic, rich, and satisfying.
Final Thoughts
Classic Homemade Mound Bars are made with graham cracker crumbs, white sugar, melted butter, sweetened condensed milk, flaked coconut, and semisweet chocolate chips. The crust is pressed into a 9×13-inch baking dish, the condensed milk and coconut form a chewy layer, the bars bake until golden and set, and the smooth melted chocolate topping finishes everything after cooling.
Serve them chilled or at room temperature for holidays, potlucks, birthday parties, family gatherings, bake sales, or cozy weekend dessert plates. With their 350°F oven temperature, 9×13-inch pan, 20-to-25-minute bake time, complete cooling step, 30-second chocolate melting intervals, 30-to-60-minute chill time, parchment lifting option, square-or-rectangle slicing style, and variations like toasted coconut, chopped almonds, dark chocolate, milk chocolate swirls, crushed peppermint, red and green sprinkles, coconut condensed milk, dairy-free chocolate chips, and mini muffin tin bites, these bars are chewy, chocolatey, coconut-rich, and wonderfully easy to make.
Classic Homemade Mound Bars Recipe
Chewy, rich, coconut-filled, and topped with smooth melted chocolate, these Mound Bars layer a buttery graham cracker crust with sweetened condensed milk, flaked coconut, and semisweet chocolate chips. They bake until golden, chill until set, and slice into an easy nostalgic dessert made with simple pantry staples.
Recipe Details
- Prep Time: 15 minutes
- Cook Time: 25 minutes
- Chill Time: 30 minutes
- Total Time: 1 hour 10 minutes
- Servings: 24
- Calories: 290 kcal
Ingredients
For the Graham Cracker Crust
- ¼ cup melted butter
- ¼ cup white sugar
- 2 cups graham cracker crumbs
For the Coconut Layer
- 2 cups flaked coconut
- 1 14 oz can sweetened condensed milk
For the Chocolate Topping
- 1 12 oz package semisweet chocolate chips, melted
Instructions
Step 1: Prepare the Baking Dish
Preheat the oven to 350°F (175°C). Grease or line a 9×13-inch baking dish.
Getting the dish ready first makes the crust easier to press in right after mixing. The bars will bake in this dish, cool completely, then chill after the chocolate layer is added.
Step 2: Make the Graham Cracker Crust
Mix the graham cracker crumbs, white sugar, and melted butter. Stir until the crumbs are evenly moistened.
Press the mixture into the prepared 9×13-inch baking dish. Spread it into an even layer so the bars have a sturdy base.
Step 3: Add the Sweetened Condensed Milk
Pour the sweetened condensed milk over the crust. Spread it evenly across the graham cracker layer.
This layer helps bind the coconut and gives the bars their sweet, chewy texture. Try to cover the crust evenly from edge to edge.
Step 4: Add the Coconut
Sprinkle the flaked coconut over the sweetened condensed milk layer. Press it lightly so it settles into the milk.
Use 2 cups flaked coconut as listed. Toast the coconut for extra flavor if desired, as noted.
Step 5: Bake Until Golden
Bake for 20-25 minutes, until golden. Remove the dish from the oven and cool completely.
Do not add the chocolate while the bars are still warm. Cooling the baked layers first helps the melted chocolate spread cleanly on top.
Step 6: Add the Chocolate Topping
Melt the semisweet chocolate chips. Spread the melted chocolate over the cooled bars.
Use 1 12 oz package semisweet chocolate chips, melted. Smooth the chocolate over the top so every bar gets an even chocolate layer.
Step 7: Chill and Slice
Chill until the chocolate sets. Once firm, cut into squares and serve.
The recipe includes a 30-minute chill time. Slice the bars after the chocolate has set so the squares hold their shape.
Notes
- Toast coconut for extra flavor.
- Add chopped almonds for an Almond Joy twist.
- Store in an airtight container up to 5 days or freeze for 1 month.
- Use dairy-free swaps for a vegan-friendly version.
Serving Suggestions
Serve Mound Bars chilled or after the chocolate has fully set. The graham cracker crust, sweetened condensed milk, flaked coconut, and semisweet chocolate topping create a chewy, chocolate-coconut dessert with a nostalgic candy-bar style flavor.
This recipe makes 24 servings, making it a great choice for dessert trays, holidays, potlucks, bake sales, or easy make-ahead sweets. Cut the bars into squares once the chocolate layer is firm for the neatest pieces.
For extra flavor, toast the coconut before adding it. For an Almond Joy twist, add chopped almonds as noted.
Storage
How to Store
Store the bars in an airtight container up to 5 days. Make sure the chocolate topping has fully set before stacking or storing.
Freezer Tip
Freeze the bars for 1 month. Keep them in an airtight container so the crust, coconut layer, and chocolate topping stay protected.
Crust Tip
Use 2 cups graham cracker crumbs, ¼ cup white sugar, and ¼ cup melted butter. Press the mixture evenly into the 9×13-inch baking dish.
Coconut Tip
Use 2 cups flaked coconut. Toast the coconut for extra flavor if desired.
Chocolate Tip
Use 1 12 oz package semisweet chocolate chips, melted. Spread over the cooled bars before chilling.
Variation Tip
Add chopped almonds for an Almond Joy twist. Use dairy-free swaps for a vegan-friendly version.
Chilling Tip
Chill until the chocolate sets before cutting into squares. The listed chill time is 30 minutes.

Fernando is the creator and writer behind the food blog Eating with your Hands. Living and working in cities like Paris, Barcelona, and Berlin, and being married to a Canadian foodie, has given Fernando a passion and interest in food and inspired him to run EWYH.