
Some desserts feel like they belong to slow weekends, warm kitchens, and the kind of table where people naturally gather before the coffee is even poured. Coffee Cake Cheesecake is one of those desserts.
It brings together two comforting favorites in one beautiful slice: the creamy richness of cheesecake and the crumbly sweetness of coffee cake. The result is a dessert that feels cozy, generous, and just a little bit nostalgic.
There is something special about the smell of cinnamon and brown sugar baking over a creamy cheesecake filling. It fills the kitchen with the kind of aroma that makes everyone ask what is in the oven.
This recipe feels like the dessert version of a quiet weekend morning. It has a buttery biscuit crust, a smooth cream cheese filling, and a sweet spiced crumble that gives every bite texture and warmth.
Coffee Cake Cheesecake is perfect for family gatherings, cozy evenings at home, holidays, celebrations, or any moment when you want a dessert that feels homemade and memorable. It is simple enough for beginner bakers, but the finished cheesecake looks and tastes like something made with care.
It is also a wonderful make-ahead dessert. After chilling in the refrigerator, the flavors settle, the texture firms, and the cheesecake becomes even easier to slice and serve.
Table of Contents
- What Is Coffee Cake Cheesecake?
- Why You’ll Love This Coffee Cake Cheesecake
- Recipe Details
- Ingredients You’ll Need
- A Closer Look at the Ingredients
- The Cozy Flavor Behind This Dessert
- Directions
- Step 1: Preheat the Oven
- Step 2: Prepare the Springform Pan
- Step 3: Crush the Digestive Biscuits
- Step 4: Melt the Butter
- Step 5: Mix the Crust
- Step 6: Press the Crust Into the Pan
- Step 7: Start the Cheesecake Filling
- Step 8: Add the Sour Cream
- Step 9: Add the Sugar
- Step 10: Add the Eggs
- Step 11: Check the Filling Texture
- Step 12: Pour the Filling Over the Crust
- Step 13: Prepare the Crumble Topping
- Step 14: Prepare the Cinnamon Sugar
- Step 15: Add the Crumble Topping
- Step 16: Add the Cinnamon Sugar
- Step 17: Bake the Cheesecake
- Step 18: Cool Gradually in the Oven
- Step 19: Cool at Room Temperature
- Step 20: Chill the Cheesecake
- Step 21: Release and Slice
- Step 22: Serve Chilled
- Common Mistakes to Avoid
- Helpful Tips
- Variations
- Serving Suggestions
- Storage Tips
- Freezing Instructions
- Make-Ahead Notes
- Frequently Asked Questions
- Final Thoughts
- Coffee Cake Cheesecake
What Is Coffee Cake Cheesecake?
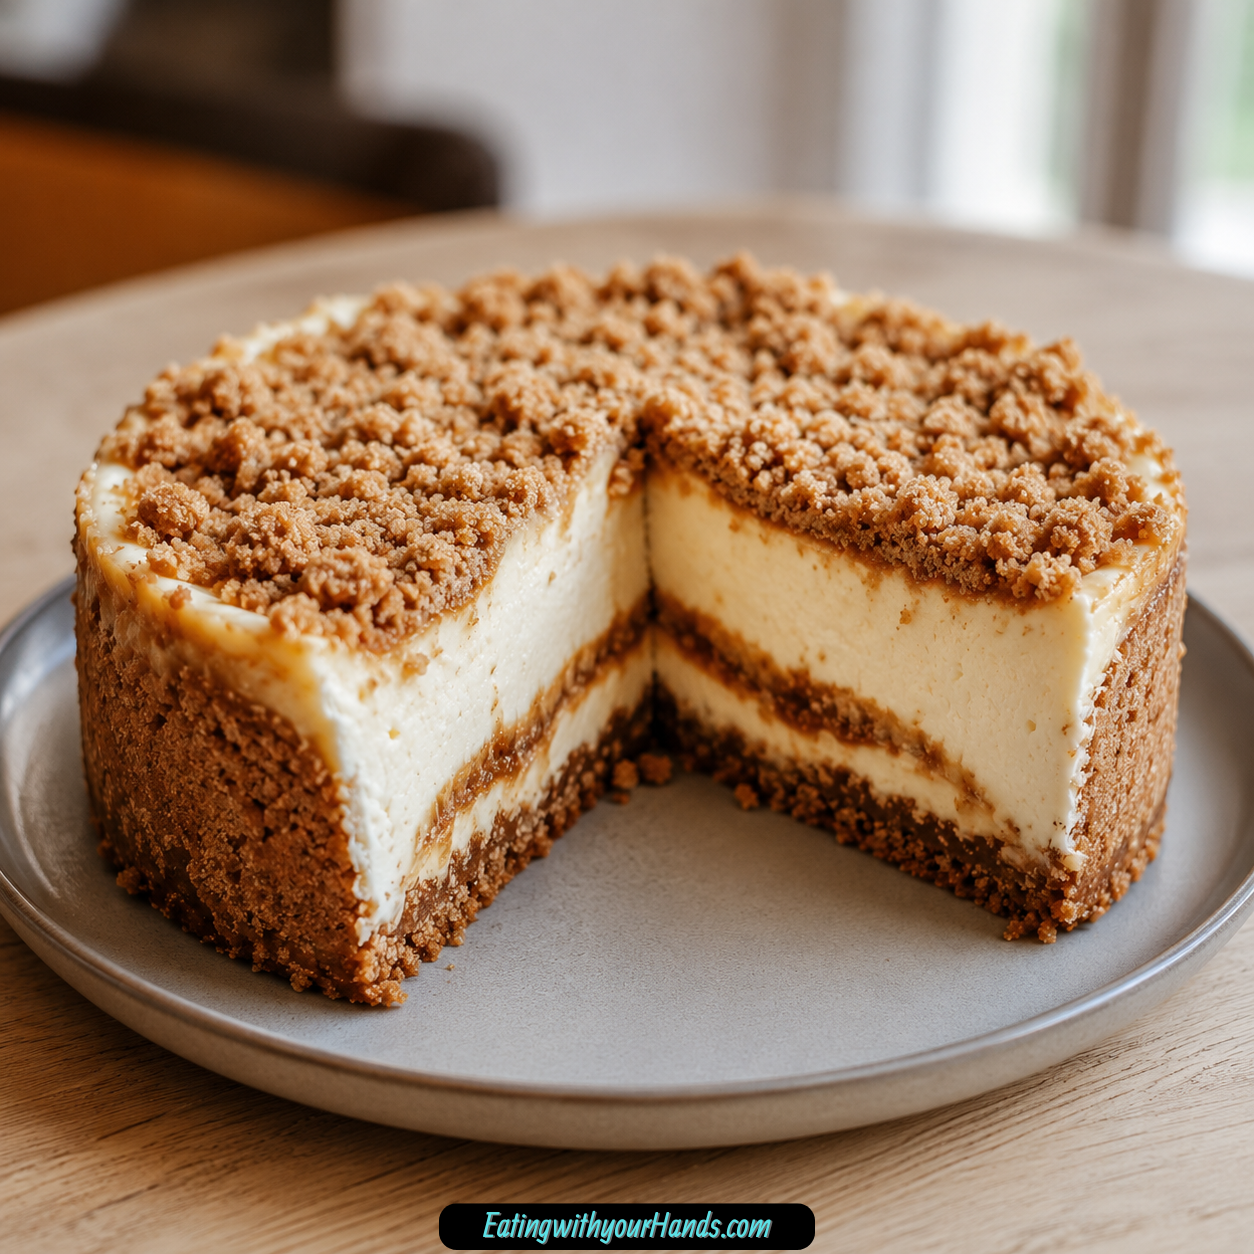
Coffee Cake Cheesecake is a dessert that combines the creamy filling of a classic cheesecake with the crumbly, cinnamon-sugar style topping of coffee cake. It is rich, sweet, softly spiced, and perfect for sharing.
In this version, the crust is made from digestive biscuits and melted butter. The filling is made with cream cheese, sour cream, sugar, and eggs.
The topping is a crumble made with cinnamon, dark brown sugar, and all-purpose flour. There is also a cinnamon sugar element made with dark brown sugar and cinnamon, giving the dessert that cozy coffee cake flavor.
The cheesecake bakes slowly, then cools gradually in the oven before chilling in the refrigerator. This helps create the best texture and reduces the chance of cracks.
The finished dessert is creamy underneath and crumbly on top. It is the kind of slice that pairs beautifully with coffee or tea.
Why You’ll Love This Coffee Cake Cheesecake
Coffee Cake Cheesecake gives you the best of both desserts. You get the rich, creamy texture of cheesecake and the sweet crumble topping of coffee cake in one recipe.
It is easy enough for beginner bakers. The steps are simple and clear: make the crust, mix the filling, prepare the topping, assemble, bake, cool, chill, and serve.
The ingredients are straightforward. Digestive biscuits, butter, cream cheese, sour cream, sugar, eggs, cinnamon, dark brown sugar, and flour come together into a dessert that feels special without being complicated.
It is a crowd-pleaser for holidays, family gatherings, celebrations, and cozy nights at home. The flavor is comforting, familiar, and rich enough to feel like a treat.
It can be made ahead of time, which is especially helpful when preparing for guests. Chilling the cheesecake gives the flavors time to meld and the texture time to set.
This dessert also stores well. Leftovers can be kept in the refrigerator for several days, or slices can be frozen for later.
Recipe Details
- Recipe name: Coffee Cake Cheesecake
- Prep time: 20 minutes
- Cook time: 60 minutes
- Total time: 80 minutes
- Servings: 8 pieces
- Oven temperature: 325°F (160°C)
- Crust: Digestive biscuits and melted butter
- Filling: Cream cheese, sour cream, sugar, and eggs
- Topping: Cinnamon, dark brown sugar, and all-purpose flour
- Cinnamon sugar: Dark brown sugar and cinnamon
- Best served: Chilled
- Chilling time: At least 4 hours before serving
- Storage: Airtight container in the refrigerator for up to 5 days
- Freezer-friendly: Yes, slices can be frozen for up to 3 months
- Serving ideas: Whipped cream, extra cinnamon sugar, coffee, or tea
Ingredients You’ll Need
For the Crust
- 200 g digestive biscuits
- 100 g butter
For the Filling
- 450 g cream cheese
- 200 g sour cream
- 150 g sugar
- 3 eggs
For the Topping
- 1 teaspoon cinnamon
- 70 g dark brown sugar
- 100 g all-purpose flour
For the Cinnamon Sugar
- 50 g dark brown sugar
- 1 teaspoon cinnamon
A Closer Look at the Ingredients
Digestive biscuits create the base of the cheesecake. Once crushed and mixed with melted butter, they form a firm, buttery crust.
Butter helps bind the biscuit crumbs together. Coconut oil can be used as a dairy-free substitute if needed.
Cream cheese is the heart of the filling. Full-fat cream cheese gives the best texture and flavor.
Sour cream adds smoothness and a gentle tang to the cheesecake. Greek yogurt can be used instead if you want a thicker filling.
Sugar sweetens the cheesecake filling. Granulated sugar works well here and blends into the cream cheese mixture.
Eggs help the cheesecake set as it bakes. For an egg-free version, flax eggs or a commercial egg replacer can be used.
Cinnamon gives the topping and cinnamon sugar their cozy warmth. It is essential to the coffee cake feeling of this dessert.
Dark brown sugar adds deep sweetness with a molasses-rich flavor. It makes the crumble taste warmer and richer.
All-purpose flour gives the topping its crumbly texture. Gluten-free flour may be used if you are adapting the dessert, along with gluten-free digestive biscuits.
The Cozy Flavor Behind This Dessert
Coffee Cake Cheesecake works because it brings together contrast. The filling is smooth and creamy, while the topping is crumbly and sweet.
The crust gives the dessert structure. It adds a buttery base that supports the rich filling.
The cheesecake filling is soft, thick, and creamy. The sour cream keeps it from feeling too heavy.
The crumble topping adds the coffee cake personality. Cinnamon, dark brown sugar, and flour create a sweet spiced layer that bakes over the creamy filling.
The cinnamon sugar adds another warm note. It makes the dessert feel even more like something meant for coffee, tea, and slow conversation.
Directions
Step 1: Preheat the Oven
Preheat your oven to 325°F (160°C). This moderate oven temperature helps the cheesecake bake slowly and evenly.
Cheesecake needs gentle baking to create a smooth texture. Too much heat can cause puffing, cracking, or uneven baking.
Let the oven fully preheat before placing the cheesecake inside. A steady oven temperature is important for the best result.
Step 2: Prepare the Springform Pan
Take out a springform pan and set it on your work surface. This type of pan makes it easier to release the cheesecake after it has chilled.
Make sure the pan is clean and ready before preparing the crust. Once the biscuit mixture is mixed, you will want to press it in right away.
You can also set the pan on a baking sheet if you want easier handling later. This makes it simpler to move in and out of the oven.
Step 3: Crush the Digestive Biscuits
Place 200 g digestive biscuits in a mixing bowl, food processor, or sealed bag. Crush them into fine crumbs.
A food processor makes this step quick. A rolling pin also works well if you place the biscuits in a sturdy bag.
The crumbs should be fine enough to press into a crust. Large pieces can make the base uneven or crumbly.
Step 4: Melt the Butter
Melt 100 g butter in a small saucepan or microwave. The butter should be fully melted so it can coat the crumbs evenly.
If using coconut oil for a dairy-free option, melt it the same way. It should be liquid before mixing with the biscuit crumbs.
Let the melted butter cool for a brief moment if it is extremely hot. It should still be pourable.
Step 5: Mix the Crust
Pour the melted butter over the crushed digestive biscuits. Stir until the crumbs are well coated.
The mixture should resemble wet sand. When pressed together, it should hold its shape slightly.
If some crumbs still look dry, keep mixing until the butter is evenly distributed. A well-mixed crust presses more firmly into the pan.
Step 6: Press the Crust Into the Pan
Transfer the biscuit mixture into the bottom of the springform pan. Press it firmly into an even layer.
Use the bottom of a measuring cup, a glass, or your fingers to compact the crust. A firm crust helps the cheesecake slice cleanly.
Make sure the base is even from edge to edge. Uneven crust can make some slices thicker or more fragile than others.
Step 7: Start the Cheesecake Filling
In a clean mixing bowl, add 450 g cream cheese. Beat it with an electric mixer on medium speed until smooth and creamy.
This step is important because smooth cream cheese creates a smoother filling. If the cream cheese has lumps now, they may remain in the cheesecake.
Take your time and beat until the texture looks soft and even. For a lighter texture, the helpful notes suggest beating the cream cheese until fluffy before adding other ingredients.
Step 8: Add the Sour Cream
Add 200 g sour cream to the beaten cream cheese. Mix until combined.
The sour cream adds creaminess and a gentle tang. It also helps make the filling feel rich without being overly dense.
Scrape down the sides of the bowl as needed. This helps make sure no cream cheese is stuck unmixed along the edges.
Step 9: Add the Sugar
Add 150 g sugar to the cream cheese and sour cream mixture. Mix until fully incorporated.
The sugar should blend smoothly into the filling. You do not want grainy pockets of sugar in the cheesecake.
Continue mixing just until the texture is smooth. Avoid beating longer than necessary once everything is combined.
Step 10: Add the Eggs
Add 3 eggs to the filling mixture. Mix until the eggs are fully combined.
Do not overmix after adding the eggs. Overmixing can introduce too much air, which may cause the cheesecake to puff up during baking.
Use a moderate speed and stop once the filling looks silky. Scrape the sides and bottom of the bowl to make sure everything is incorporated.
Step 11: Check the Filling Texture
The filling should look smooth, creamy, and pourable. It should not have visible lumps of cream cheese.
If needed, scrape down the bowl one more time and mix briefly. This helps create an even texture.
Do not keep mixing just for the sake of it. Once the filling is smooth, it is ready.
Step 12: Pour the Filling Over the Crust
Carefully pour the cream cheese filling over the prepared biscuit crust. Pour slowly so the crust stays even.
Use a spatula to spread the filling gently. The top should be smooth and level.
Try not to drag the spatula too deeply into the filling. You do not want to disturb the crust underneath.
Step 13: Prepare the Crumble Topping
In a separate bowl, combine 1 teaspoon cinnamon, 70 g dark brown sugar, and 100 g all-purpose flour. Mix until fully combined.
The mixture should look crumbly. This topping gives the cheesecake its coffee cake-style texture.
Break up any clumps of brown sugar with your fingers or a spoon. Even mixing helps the topping bake evenly.
Step 14: Prepare the Cinnamon Sugar
In another small bowl, combine 50 g dark brown sugar with 1 teaspoon cinnamon. Stir until the cinnamon is evenly distributed.
This mixture adds an extra layer of sweet spice. Dark brown sugar works beautifully with cinnamon because of its deep flavor.
Keep it ready for assembly. It will support the cozy flavor of the topping.
Step 15: Add the Crumble Topping
Sprinkle the topping mixture evenly over the cheesecake filling. Try to cover the surface generously.
Do this gently so the topping rests on top of the filling rather than sinking too deeply. A light hand works best.
Make sure the topping reaches close to the edges. This gives every slice that crumbly coffee cake finish.
Step 16: Add the Cinnamon Sugar
Sprinkle the cinnamon sugar over the top as part of the final coffee cake-style layer. Spread it evenly so the flavor is balanced.
The cinnamon sugar gives the dessert extra warmth and sweetness. It also helps create that cozy spiced aroma as the cheesecake bakes.
Do not pile it all in one area. Even distribution gives the best flavor in each slice.
Step 17: Bake the Cheesecake
Place the cheesecake in the preheated oven. Bake for 60 minutes.
The cheesecake is ready when the center is set but still slightly jiggly. It should not look liquid, but it should not be completely firm either.
This slight jiggle is important. The cheesecake will continue setting as it cools.
Step 18: Cool Gradually in the Oven
Once the cheesecake has baked, turn off the oven. Leave the cheesecake inside for an additional hour to cool gradually.
This step helps reduce the risk of cracks. Sudden temperature changes can cause cheesecake to crack on top.
Do not rush this process. Gradual cooling is one of the most important parts of making a smooth cheesecake.
Step 19: Cool at Room Temperature
After the hour in the oven, remove the cheesecake and allow it to cool completely at room temperature. Keep it in the pan during this stage.
Letting it cool fully before refrigeration helps protect the texture. Placing a hot cheesecake directly into the fridge can affect how it sets.
Be patient here. A cheesecake needs time to settle before it is chilled.
Step 20: Chill the Cheesecake
For best results, chill the cheesecake in the refrigerator for at least 4 hours before serving. This helps the filling firm up properly.
Chilling also allows the flavors to meld. The cream cheese, cinnamon, brown sugar, and crumble become more balanced after resting.
This dessert is perfect for making ahead because of this step. You can prepare it a day or two in advance.
Step 21: Release and Slice
Once chilled, carefully release the cheesecake from the springform pan. Use a gentle hand so the crust stays intact.
Slice into 8 pieces. A clean knife can help create neater slices.
Wipe the knife between cuts if needed. This keeps the creamy filling and crumbly topping looking tidy.
Step 22: Serve Chilled
Serve Coffee Cake Cheesecake chilled. This gives the filling the best texture.
You can top each slice with a dollop of whipped cream. A sprinkle of extra cinnamon sugar also makes a lovely finish.
This dessert pairs beautifully with a hot cup of coffee or tea. It works well as an afternoon treat or an after-dinner indulgence.

Common Mistakes to Avoid
Not letting the cheesecake cool gradually can lead to cracks. Always leave it in the oven after baking so it cools slowly.
Skipping the chilling time can result in a softer texture. Aim for at least 4 hours in the refrigerator before serving.
Overmixing the filling can introduce too much air. This may cause the cheesecake to puff up during baking.
Using low-fat cream cheese can affect both texture and flavor. Full-fat cream cheese gives the best result.
Cutting the cheesecake before it is fully chilled can make the slices messy. Let it set properly for clean pieces.
Helpful Tips
Beat the cream cheese until smooth before adding the other filling ingredients. This helps create a lighter, creamier texture.
Scrape down the sides of the mixing bowl while making the filling. This ensures everything is evenly incorporated.
Add chocolate chips to the filling if you want a rich chocolate flavor. This is an optional twist from the helpful notes.
Use gluten-free digestive biscuits if you need a gluten-free option. Make sure other ingredients are also suitable for your needs.
To make it nut-free, ensure all ingredients are processed in a nut-free environment. This is important if serving someone with nut allergies.
Chill the cheesecake thoroughly before serving. The texture is best when it has had time to firm up.
Variations
Add a layer of fruit preserves under the cheesecake filling for a fruity twist. Raspberry or blueberry preserves both work well.
Use pumpkin puree and spices to create a seasonal pumpkin coffee cake cheesecake in the fall. This gives the dessert a cozy autumn flavor.
Try adding different nuts like pecans or walnuts to the topping for extra crunch. This adds texture and richness.
For a dairy-free version, use cashew cream instead of cream cheese and almond milk yogurt in place of sour cream. Coconut oil can also replace butter in the crust.
Use Greek yogurt instead of sour cream for a thicker filling. This changes the texture slightly while keeping the filling creamy.
Use flax eggs or a commercial egg replacer for an egg-free version. This lets you adapt the recipe if needed.
Serving Suggestions
Serve Coffee Cake Cheesecake chilled for the best texture. The filling should be firm, creamy, and smooth.
A dollop of whipped cream makes a beautiful topping. It adds softness and makes the dessert feel even more special.
You can also sprinkle extra cinnamon sugar on top before serving. This adds a sweet spiced finish.
This cheesecake pairs beautifully with a hot cup of coffee. It also works well with tea for an afternoon treat.
Serve it after dinner as a cozy dessert. It is rich enough to feel indulgent but familiar enough to please a crowd.
For family gatherings, slice it into 8 pieces and serve on dessert plates. The crumbly topping makes each slice look inviting.
Storage Tips
Store leftover Coffee Cake Cheesecake in an airtight container in the refrigerator for up to 5 days. Make sure it has cooled completely before refrigerating.
Keeping it covered helps protect the texture. It also prevents the cheesecake from absorbing other refrigerator odors.
The cheesecake is best served chilled. Remove slices from the refrigerator when ready to serve.
If the topping softens slightly after storage, that is normal. The flavor will still be rich and comforting.
Do not leave the cheesecake at room temperature for too long. Since it contains cream cheese, sour cream, and eggs, refrigeration is important.
Freezing Instructions
Coffee Cake Cheesecake can be frozen for up to 3 months. Freezing individual slices makes it easy to thaw only what you need.
Wrap each slice tightly in plastic wrap. Then wrap it again in aluminum foil to help prevent freezer burn.
Place the wrapped slices in a freezer-safe container or bag if desired. This gives extra protection.
Thaw the slices in the refrigerator overnight before serving. This helps preserve the texture.
Serve chilled once thawed. The cheesecake should be allowed to soften gradually in the refrigerator, not rushed at room temperature.
Make-Ahead Notes
Coffee Cake Cheesecake is perfect for making ahead. You can prepare it a day or two in advance and keep it refrigerated.
The chilling time helps the flavors develop. It also makes the texture firmer and easier to slice.
Make sure the cheesecake chills for at least 4 hours before serving. Longer chilling is even more convenient if you are preparing for an event.
Keep the cheesecake covered in the refrigerator until you are ready to serve. Add whipped cream or extra cinnamon sugar shortly before presenting it.
Frequently Asked Questions
Can Coffee Cake Cheesecake Be Frozen?
Yes, Coffee Cake Cheesecake can be frozen. Wrap individual slices tightly in plastic wrap and then in aluminum foil.
This helps keep the slices fresh and prevents freezer burn. Thaw in the refrigerator overnight before serving.
Can Ingredients Be Substituted in Coffee Cake Cheesecake?
Yes, several substitutions can be made. Gluten-free digestive biscuits can be used for a gluten-free crust.
For a dairy-free option, use coconut oil instead of butter and cashew cream in place of cream cheese. Greek yogurt can also be swapped for sour cream for a thicker filling.
How Do I Store Leftovers?
Store leftovers in an airtight container in the refrigerator for up to 5 days. Let the cheesecake cool completely before refrigerating.
This helps maintain the texture. Serve chilled for the best result.
Can Coffee Cake Cheesecake Be Made Ahead?
Yes, this cheesecake is perfect for making ahead. You can prepare it a day or two in advance.
Chill it in the refrigerator for at least 4 hours before serving. This gives the filling time to set and the flavors time to develop.
How Do I Prevent Cracks?
Let the cheesecake cool gradually in the oven after baking. Turn off the oven and leave the cheesecake inside for an additional hour.
Avoid overmixing the filling because too much air can make the cheesecake puff up. Gentle mixing helps create a smoother finish.
Can I Make This Gluten-Free?
Yes, use gluten-free digestive biscuits for the crust. Make sure any other ingredients, including flour if adapting the topping, are suitable for gluten-free needs.
The original note specifically recommends gluten-free digestive biscuits for a gluten-free dessert. Always check labels.
Can I Make This Dairy-Free?
Yes, the recipe can be adapted. Use coconut oil instead of butter, cashew cream instead of cream cheese, and almond milk yogurt in place of sour cream.
The flavor and texture will change, but the dessert can still follow the same idea. Choose substitutes you already enjoy.
What Should I Serve with Coffee Cake Cheesecake?
Serve it chilled with whipped cream or extra cinnamon sugar. Coffee and tea both pair beautifully with this dessert.
It works as an afternoon treat or an after-dinner dessert. It is also lovely for family gatherings and celebrations.
Final Thoughts
Coffee Cake Cheesecake is the kind of dessert that feels warm, nostalgic, and generous. It brings together the creamy richness of cheesecake with the sweet crumble of coffee cake, creating a slice that feels both familiar and special.
The digestive biscuit crust gives it a buttery base, the cream cheese filling makes it smooth and rich, and the cinnamon brown sugar topping brings cozy flavor. Every layer adds something important.
This dessert is especially wonderful because it can be made ahead. After chilling, the texture sets beautifully, the flavors deepen, and the cheesecake becomes ready for clean slices and easy serving.
Whether you make it for a holiday, a family gathering, an afternoon coffee treat, or a quiet evening at home, Coffee Cake Cheesecake is made for sharing. It is sweet, creamy, crumbly, and full of the kind of comfort that turns a simple dessert into a lasting memory.
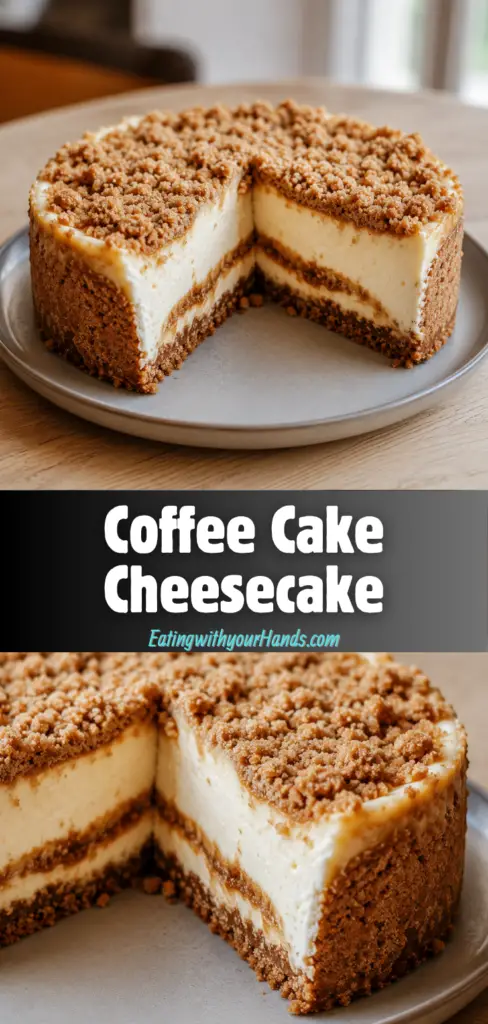
Coffee Cake Cheesecake

This Coffee Cake Cheesecake is a rich, creamy American dessert with a buttery biscuit crust, smooth cream cheese filling, and a sweet cinnamon crumble-style topping. It brings together the cozy flavor of coffee cake and the silky texture of cheesecake in one satisfying dessert. The dark brown sugar and cinnamon add warmth, while the crumbly topping gives each slice a soft, bakery-style finish. For the best texture, chill the cheesecake before slicing and serving.
Recipe Details
- Prep Time: 20 minutes
- Cook Time: 1 hour
- Total Time: 1 hour 20 minutes
- Course: Dessert
- Cuisine: American
- Servings: 8 pieces
- Calories: 350 kcal
Equipment
- Mixing bowl
- Springform pan
Ingredients
For the Filling
- 150 g Sugar
- 200 g Sour Cream Greek yogurt can be used for a thicker filling.
- 3 pieces Eggs For an egg-free version, opt for flax eggs or a commercial egg replacer.
- 450 g Cream Cheese Choose full-fat for the best results.
For the Cinnamon Sugar
- 1 teaspoon Cinnamon Adds warmth and spice.
- 50 g Dark Brown Sugar Works harmoniously with cinnamon.
For the Crust
- 100 g Butter Substitute coconut oil for a dairy-free option.
- 200 g Digestive Biscuits Use gluten-free options for a gluten-free dessert.
For the Topping
- 70 g Dark Brown Sugar Enhances the crumble’s taste with molasses-rich depth.
- 1 teaspoon Cinnamon Essential for that cozy flavor warmth.
- 100 g All-Purpose Flour Creates the perfect crumbly topping texture.
Instructions
Step 1: Preheat the Oven
Preheat your oven to 325°F (160°C).
Step 2: Make the Biscuit Crust
Crush the digestive biscuits into fine crumbs.
Mix the crumbs with the melted butter until evenly combined.
Press the mixture firmly into the bottom of a springform pan to form the crust.
Step 3: Prepare the Cheesecake Filling
In a mixing bowl, beat the cream cheese until smooth.
Add the sour cream, sugar, and eggs.
Mix until the filling is fully combined and creamy.
Step 4: Add the Filling to the Pan
Pour the cheesecake filling over the prepared biscuit crust.
Spread it evenly in the springform pan.
Step 5: Make the Cinnamon Topping
In a separate bowl, combine the topping ingredients.
Mix until the mixture forms a crumbly texture.
Step 6: Top the Cheesecake
Sprinkle the cinnamon topping evenly over the cheesecake filling.
Step 7: Bake
Bake in the preheated oven for 60 minutes, or until the center is set.
Step 8: Cool and Slice
Let the cheesecake cool before slicing.
For the best texture, chill it in the refrigerator for a few hours before serving.
Notes
Chill the cheesecake in the refrigerator for a few hours before serving for best results.
Serving Suggestions
This coffee cake cheesecake pairs well with:
- Hot coffee
- Iced coffee
- Black tea
- Whipped cream
- Fresh berries
- Caramel drizzle
- A light dusting of cinnamon
Storage
How to Store
Store leftover cheesecake in an airtight container in the refrigerator.
How to Serve Later
Serve chilled straight from the refrigerator, or let each slice sit at room temperature for a few minutes before serving for a softer texture.

Fernando is the creator and writer behind the food blog Eating with your Hands. Living and working in cities like Paris, Barcelona, and Berlin, and being married to a Canadian foodie, has given Fernando a passion and interest in food and inspired him to run EWYH.