
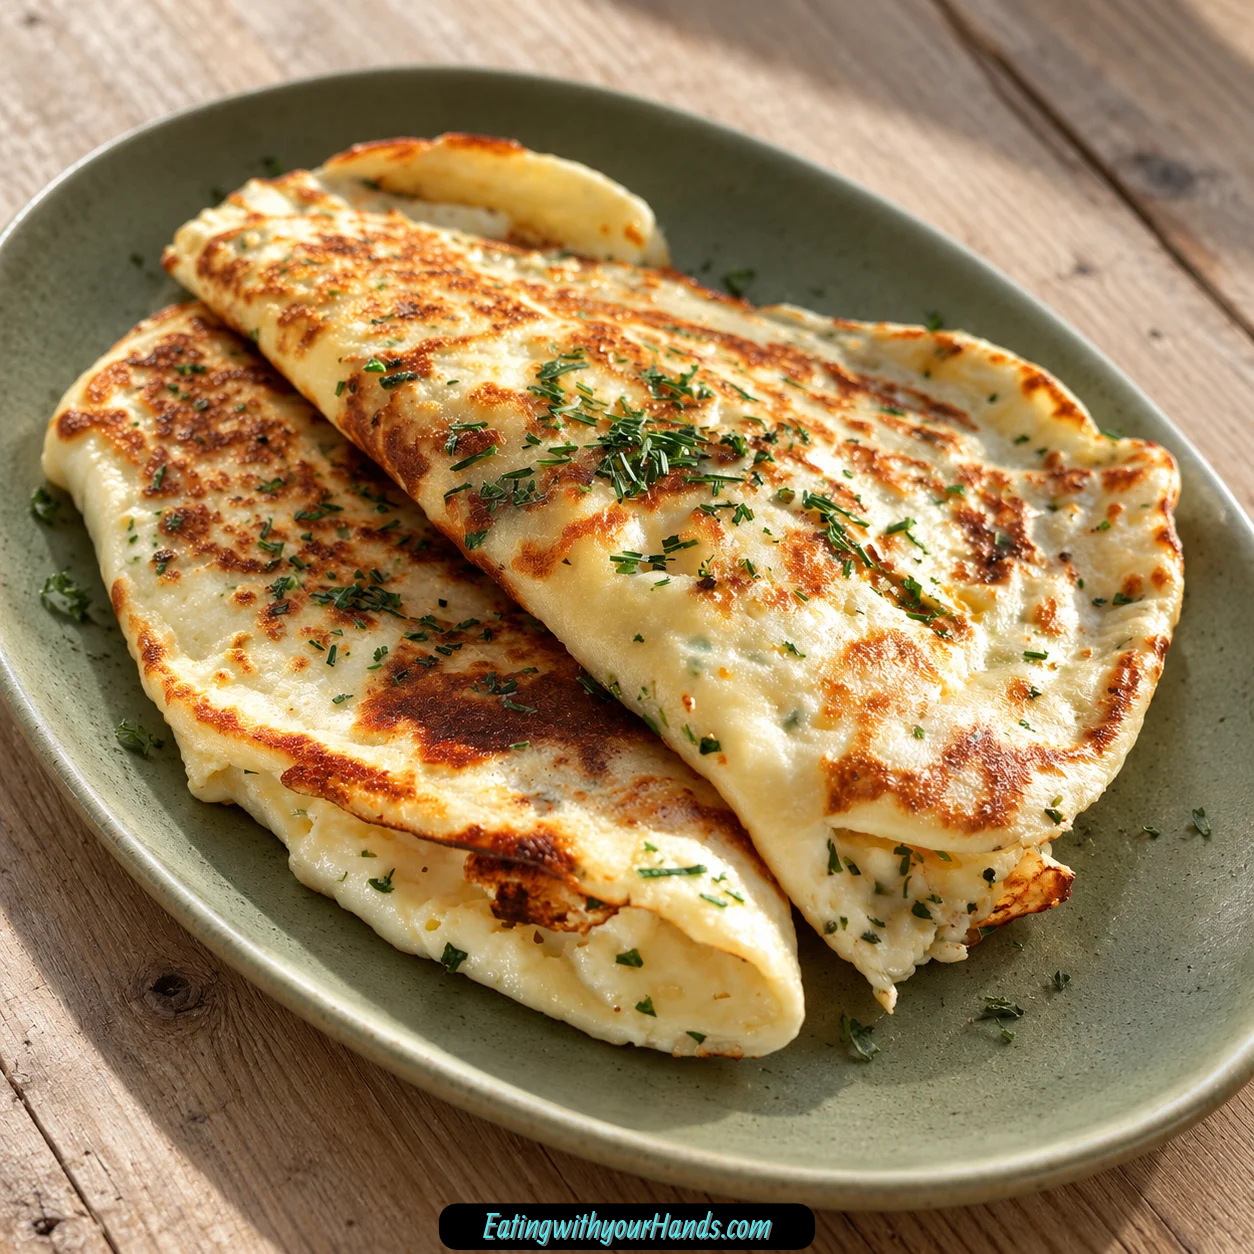
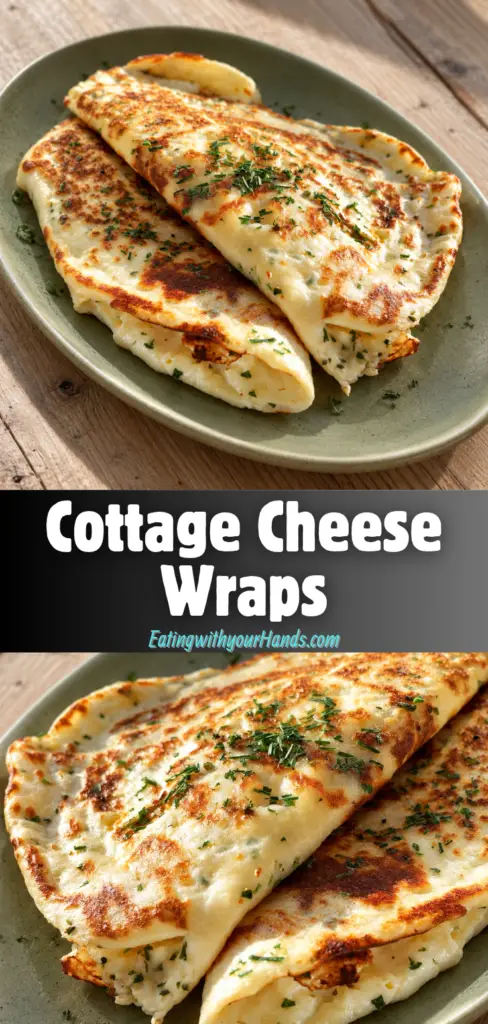
There are certain recipes that quietly solve a problem you did not realize you were having until they become part of your weekly routine. These Cottage Cheese Wraps did exactly that for me, turning a few simple ingredients into a flexible, protein-packed base that can carry breakfast fillings, lunch ingredients, roasted vegetables, or whatever else happens to be waiting in the refrigerator.
I first started making them because I needed a quick lunch that would feel substantial without leaving me searching for another snack an hour later. After years of experimenting with healthier meals, including plenty of ideas that never deserved a second attempt, this one immediately earned a permanent spot in my kitchen.
What surprised me most was how little the recipe asked for. Cottage cheese, eggs, Parmesan, garlic powder, and Italian seasoning become a smooth batter in the blender, then bake into a thin sheet that can be sliced, folded, rolled, and filled.
The simplicity makes these wraps especially useful on busy days. I can blend the batter in less time than it takes to decide what kind of sandwich I want, and once a batch is baked, the wraps are easy to keep ready for meals over the next few days.
They are also wonderfully forgiving. If you like experimenting with seasonings, cheeses, or fillings, the basic wrap gives you plenty of room to change things without making the entire meal complicated.
Some days I fill them with turkey, spinach, and roasted red peppers. Other days they become breakfast wraps with eggs, bacon, and avocado, and I have even used the baked base as a quick pizza-style crust when that sounded better than rolling anything at all.
That versatility is what keeps me coming back. Instead of thinking of Cottage Cheese Wraps as one complete meal, I think of them as a practical homemade foundation that can move in whatever direction the rest of my day requires.
And because each wrap contains about 12 grams of protein while staying relatively light, they manage to feel satisfying without being overly heavy. For a recipe made from only five basic ingredients, that is a pretty impressive amount of work being done by one simple baked sheet.
Table of Contents
- Why You’ll Love These Cottage Cheese Wraps
- Ingredients for Cottage Cheese Wraps
- Why Full-Fat Cottage Cheese Works Best
- The Role of the Eggs
- Why Parmesan Adds So Much Flavor
- Garlic Powder and Italian Seasoning
- Equipment You’ll Need for Cottage Cheese Wraps
- How to Make Cottage Cheese Wraps
- Step 1: Preheat the Oven
- Step 2: Line the Baking Sheet
- Step 3: Add Everything to the Blender
- Step 4: Blend Until Completely Smooth
- Step 5: Pour the Batter Onto the Baking Sheet
- Step 6: Spread to About ¼ Inch Thick
- Step 7: Bake for About 20 Minutes
- Step 8: Check the Center for Doneness
- Step 9: Cool for About 5 Minutes
- Step 10: Remove and Cut the Wrap
- Step 11: Fill and Roll
- How Thick Should Cottage Cheese Wraps Be?
- How to Prevent Rubbery Wraps
- How to Keep the Wraps Flexible
- How to Keep the Wraps From Sticking
- Cutting the Wraps Cleanly
- Low-Fat Cottage Cheese Variation
- Silken Tofu Variation
- Parmesan Alternatives
- Taco-Seasoned Wraps
- Za’atar Variation
- Curry-Spiced Variation
- Smoked Paprika Variation
- Basil and Sun-Dried Tomato Variation
- Mediterranean Filling
- Breakfast Filling
- Turkey Lunch Wrap
- Veggie Wrap
- Using the Wrap as a Pizza Base
- Meal Prep With Cottage Cheese Wraps
- Refrigerator Storage
- Skillet Reheating
- Microwave Reheating
- Freezing Cottage Cheese Wraps
- Frequently Asked Questions
- Nutritional Information for Cottage Cheese Wraps
- The Wrap That Earned a Permanent Place in My Fridge
- Cottage Cheese Wraps: 5-Ingredient Protein Powerhouse You Need
Why You’ll Love These Cottage Cheese Wraps
The speed is one of the biggest advantages. The batter can go from ingredients to blender to baking sheet in only a few minutes, which makes the recipe especially useful when meal prep did not happen according to plan.
Protein is another major reason these wraps have become such a favorite. Each wrap provides about 12 grams, giving you a sturdy base for fillings without relying on a traditional flour tortilla.
The texture is surprisingly flexible when the thickness and baking time are right. A properly baked wrap stays firm enough to hold a filling while remaining pliable enough to fold or roll.
They are also easy to customize. Italian seasoning creates the standard version, but taco seasoning, za’atar, curry powder, smoked paprika, dried basil, or other listed variations can completely change the personality of the finished wrap.
The recipe is light without tasting plain. Parmesan brings enough savory richness that the wraps feel flavorful even before anything is added inside.
Most importantly, they fit into real life. Make them for a fast breakfast, pack them for lunch, store them for meal prep, or fill them with whatever combination of vegetables, protein, and sauce sounds appealing that day.
Ingredients for Cottage Cheese Wraps
Only five ingredients are required for the standard version. Each one contributes either structure, flavor, richness, or seasoning to the final wrap.
- 1 cup full-fat cottage cheese
- 2 large eggs
- 4 tablespoons grated Parmesan cheese
- 1 teaspoon garlic powder
- 1 teaspoon Italian seasoning
Full-fat cottage cheese gives the wraps the best combination of richness and flexibility. Low-fat cottage cheese can work when necessary, though the finished wraps may be slightly less pliable.
The eggs help the blended mixture set as it bakes. Large eggs are the intended size, and room-temperature eggs can blend a little more smoothly even though cold eggs still work.
Why Full-Fat Cottage Cheese Works Best
The cottage cheese is the heart of the recipe. Once blended, the curds disappear into a smooth batter that becomes the body of the baked wrap.
Full-fat cottage cheese gives the mixture more richness and helps the finished sheet stay flexible. That matters because a wrap that becomes too dry or firm will be more likely to crack when rolled.
Low-fat cottage cheese can still be used in a pinch. Just expect a slightly different texture and less pliability.
For a dairy-free alternative, blended silken tofu can stand in for the cottage cheese. The result will have its own texture and flavor, but it provides another option when dairy is not suitable.
The Role of the Eggs
Two large eggs provide the structure that allows the batter to bake into a cohesive sheet. They help transform the blended cottage cheese into something that can be cut and handled rather than remaining soft like a dip.
Large eggs are important because changing the size can alter the amount of liquid in the batter. Extra-large eggs can make the mixture looser and may affect the finished texture.
Room-temperature eggs can blend more smoothly with the cottage cheese. However, eggs straight from the refrigerator can still be used when you are making the recipe in a hurry.
If low-fat cottage cheese is used, an extra egg yolk can be added for additional richness. That variation helps compensate somewhat for the leaner dairy.
Why Parmesan Adds So Much Flavor
Four tablespoons of grated Parmesan give these wraps their savory backbone. The cheese adds enough depth that the baked sheet tastes seasoned even without a filling.
Freshly grated Parmesan from the refrigerated section is preferred. The shelf-stable powdered version does not provide the same texture or flavor.
Because the amount is relatively small, Parmesan does not turn the wraps into a heavy cheese dish. Instead, it gives the cottage cheese and eggs a richer finish.
Cheddar can replace Parmesan when necessary. Nutritional yeast is another alternative when you want a vegan-style cheesy note in a variation.
Garlic Powder and Italian Seasoning
One teaspoon garlic powder provides a strong savory base without requiring any chopping. It blends evenly through the batter and gives every piece the same amount of flavor.
If you enjoy more garlic, the amount can be doubled. That makes the wraps noticeably bolder without changing the method.
One teaspoon Italian seasoning gives the standard version its herbal character. It is an easy pantry shortcut that works naturally with Parmesan.
The seasoning can also be changed completely when you want a different style of wrap. Taco seasoning, za’atar, curry powder, smoked paprika, or dried basil can all move the flavor in another direction.
Equipment You’ll Need for Cottage Cheese Wraps
A blender or food processor is the easiest way to create the smooth batter. It does not need to be an expensive machine as long as it can break down the cottage cheese curds.
You will also need a baking sheet lined with parchment paper. The parchment makes removing the finished wrap much easier and reduces sticking.
A standard oven is all that is required for baking. No special convection setting or unusual equipment is necessary.
A spatula is helpful for spreading the batter into an even layer. A pizza cutter or knife can then divide the baked sheet once it has cooled slightly.
How to Make Cottage Cheese Wraps
The method is simple, but thickness, blending time, and cooling all affect how easy the wraps are to handle. Keeping those three details consistent gives you a much more reliable result.
Step 1: Preheat the Oven
Preheat the oven to 375°F or 190°C. Let it come fully to temperature before placing the batter inside.
Starting in a properly heated oven helps the wrap set evenly from the beginning. Avoid sliding the pan in early while the oven is still warming.
While the oven heats, prepare the baking sheet and gather the five ingredients. Once blending begins, the batter comes together very quickly.
Step 2: Line the Baking Sheet
Cover the baking sheet with parchment paper. Make sure the paper lies flat enough that the batter can be spread evenly.
Parchment is especially useful because the baked wrap needs to lift away cleanly after cooling. Skipping this step can make removal much more frustrating.
If parchment is unavailable, a light coating of oil can help reduce sticking. Parchment still gives the most dependable nonstick surface.
Keep the lined sheet close to the blender. The batter can go directly onto it as soon as it is smooth.
Step 3: Add Everything to the Blender
Place 1 cup full-fat cottage cheese, 2 large eggs, 4 tablespoons grated Parmesan, 1 teaspoon garlic powder, and 1 teaspoon Italian seasoning into the blender. Add all five ingredients before blending.
There is no need to mix anything separately first. The blender handles the entire batter at once.
Keep the ingredients within the listed proportions for the standard version. The balance between cottage cheese and eggs helps create the right baked texture.
Once everything is inside, secure the lid. The mixture only needs a short blending time.
Step 4: Blend Until Completely Smooth
Blend the ingredients for about 30 seconds. The mixture should resemble a smooth pancake batter without visible cottage cheese lumps.
Stop halfway through if necessary and scrape down the sides. This makes sure any thicker cottage cheese stuck above the blades gets incorporated.
Do not continue blending far beyond the point of smoothness. Over-blending can contribute to a more rubbery finished texture.
Once the batter looks uniform, stop the machine. It is now ready to spread.
Step 5: Pour the Batter Onto the Baking Sheet
Pour the blended mixture onto the parchment-lined sheet. Use a spatula to guide any remaining batter from the blender.
Begin spreading from the center outward. The goal is a thin, even rectangle rather than a thick mound.
Try to keep the edges reasonably consistent with the middle. Large thickness differences can make one area bake faster than another.
Work gently rather than scraping the parchment aggressively. The batter should spread fairly easily.
Step 6: Spread to About ¼ Inch Thick
Continue smoothing the batter until it is approximately ¼ inch thick. This thickness gives the wrap enough strength to hold together while still allowing it to bend.
If the batter is left much thicker, the finished sheet may not roll as easily. If it is spread too thin, it can become fragile and tear.
Take a little extra time at this stage to create an even surface. Correct thickness is one of the most important details in the recipe.
The rectangle does not have to look perfectly geometric. Evenness matters more than flawless edges.
Step 7: Bake for About 20 Minutes
Place the baking sheet in the preheated oven. Bake for approximately 20 minutes.
The edges should become slightly golden. The center should feel set and spring back when gently touched.
If your oven tends to run hot, begin checking around the 18-minute mark. The wrap should be fully baked without becoming overly dry.
Avoid opening the oven repeatedly during the early part of baking. Let the sheet set before checking toward the end.
Step 8: Check the Center for Doneness
Insert a toothpick into the center if you are uncertain. It should come out clean.
If wet batter remains on the toothpick, bake for another 2 minutes. Check again after that short extension.
The goal is a fully set center without overbaking the edges. A wrap left in too long can become firmer and less pleasant to roll.
Remove the baking sheet once the center is cooked. Set it somewhere safe for the brief cooling period.
Step 9: Cool for About 5 Minutes
Let the baked wrap cool for approximately 5 minutes. This makes it easier to handle without making it completely cold.
The sheet should still have some warmth when you begin cutting and rolling. That warmth helps preserve flexibility.
Do not rush immediately into peeling it from the parchment. A few minutes of rest allows the structure to settle.
At the same time, avoid leaving it untouched for an unnecessarily long period if you intend to roll it right away. Slight warmth works in your favor.
Step 10: Remove and Cut the Wrap
Gently separate the baked sheet from the parchment paper. Work carefully around the edges first.
Use a knife or pizza cutter to divide the sheet into rectangles or squares. A pizza cutter can glide through cleanly without dragging the wrap.
The pieces can be sized according to how you plan to fill them. Keep them large enough to fold or roll around the ingredients you choose.
Handle each piece carefully while it is still warm. The texture becomes easier to understand once you have made the first batch.
Step 11: Fill and Roll
Place your chosen filling near one side of a wrap. Avoid piling ingredients so high that the wrap has to stretch excessively.
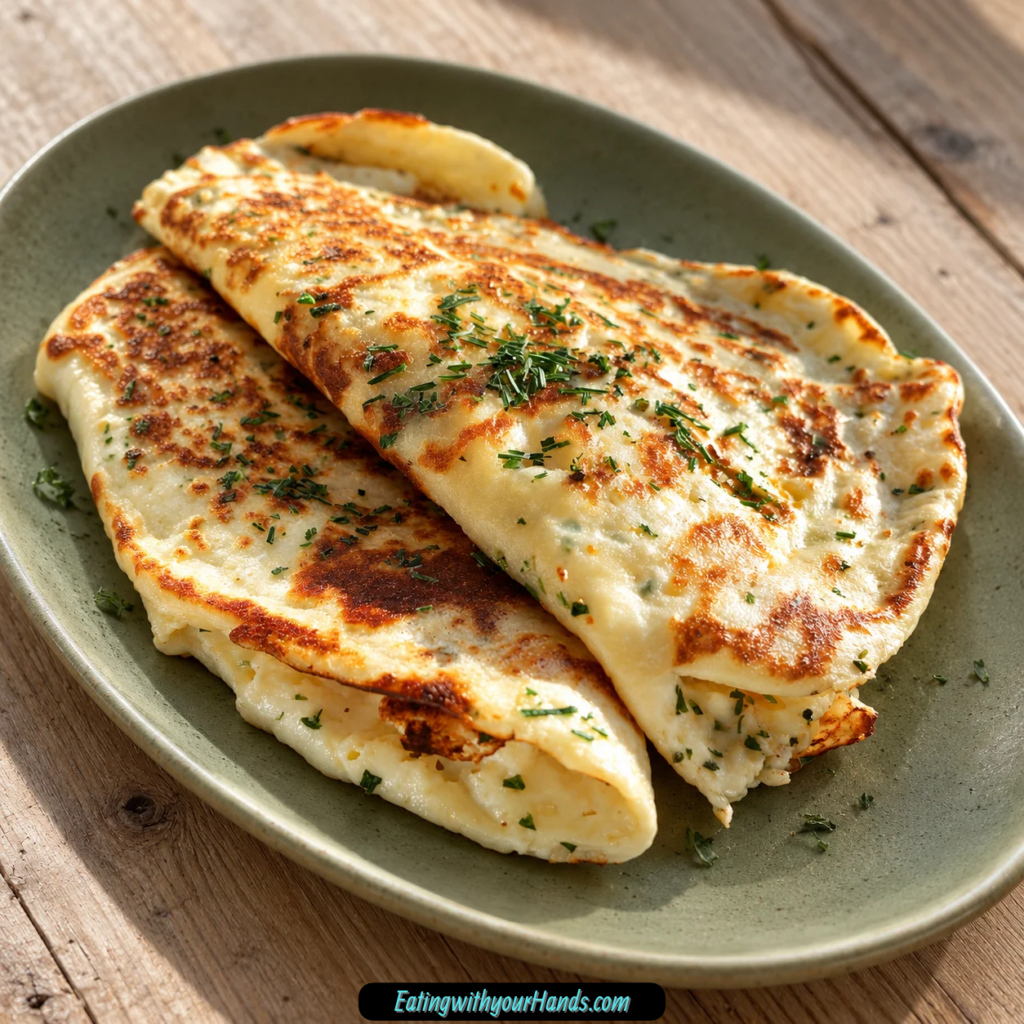
Roll the wrap burrito-style if you want a fully enclosed meal. Folding it like a taco works just as well when you prefer something faster.
Because the base is neutral and savory, it works with breakfast, Mediterranean, vegetable, or deli-style fillings. The filling can change while the wrap itself stays the same.
Serve immediately or store the plain wraps separately for later use. Keeping fillings out until serving gives the best texture for meal prep.
How Thick Should Cottage Cheese Wraps Be?
About ¼ inch is the target thickness. That gives the baked sheet enough body to remain intact while keeping it thin enough to roll.
A thicker layer can turn into something more like a baked egg-and-cheese slab. It may still taste good, but it will not behave as well as a flexible wrap.
A layer that is too thin can dry out and tear. This is especially noticeable around the edges.
Use the spatula to check different areas before baking. A little extra attention before the pan goes into the oven saves frustration later.
How to Prevent Rubbery Wraps
Rubbery texture usually comes from baking too long or blending too aggressively. Keep the standard baking time close to 20 minutes and begin checking early if your oven runs hot.
Stop blending as soon as the batter becomes smooth. There is no benefit to continuing for several extra minutes.
Use large eggs rather than extra-large eggs. Too much liquid can change the structure of the batter.
The cooling period matters too. Five minutes gives the wrap enough time to settle without becoming stiff from sitting too long.
How to Keep the Wraps Flexible
Use full-fat cottage cheese for the most pliable result. Its additional richness gives the baked sheet a softer texture.
Do not spread the batter thinner than the suggested ¼ inch. Extremely thin areas become more fragile.
Let the wraps cool only slightly before rolling. They are easiest to handle when warm enough to bend comfortably.
If a wrap has cooled completely and feels less flexible, place it back in a warm oven for about 30 seconds. That brief reheating can make it easier to fold again.
How to Keep the Wraps From Sticking
Parchment paper is the simplest solution. It creates a barrier between the batter and the baking sheet and makes removal much easier.
Make sure the parchment covers the entire area where batter will be spread. Exposed metal can catch the edges.
If parchment is unavailable, a light spray of oil can be used. The result may not release quite as effortlessly.
Let the baked sheet rest briefly before peeling. Pulling too aggressively while it is piping hot can make handling more difficult.
Cutting the Wraps Cleanly
A pizza cutter is especially useful because it rolls through the sheet without pulling at the surface. This makes clean rectangles easier to create.
A sharp knife can also work. Use smooth cuts rather than sawing back and forth unnecessarily.
Decide how you want to use the wraps before cutting. Larger rectangles are useful for rolling, while smaller pieces can work for folding.
There is no requirement that every piece be identical. Function matters more than perfect appearance.
Low-Fat Cottage Cheese Variation
Low-fat cottage cheese can replace full-fat when necessary. The finished wraps may be somewhat less pliable.
For additional richness, an extra egg yolk can be added. This helps offset some of the difference created by leaner cottage cheese.
Keep the rest of the method the same. Blend until smooth and bake at 375°F.
Watch the texture carefully during cooling. Less flexible wraps may need gentler handling during rolling.
Silken Tofu Variation
Blended silken tofu can be used as a dairy-free alternative to cottage cheese. It creates a different version of the wrap while filling a similar base role.
Blend it until smooth with the other ingredients used in your chosen variation. Expect the flavor and texture to differ from the standard full-fat cottage cheese version.
This substitution is especially useful when dairy is not an option. The finished wrap can still be used with a wide range of fillings.
Treat the recipe as an adaptable base. The standard version remains centered on cottage cheese, but the concept can move in other directions.
Parmesan Alternatives
Nutritional yeast can provide a cheesy-style flavor in a vegan-oriented variation. Its flavor differs from Parmesan but works as another savory option.
Shredded cheddar can also replace Parmesan. This creates a richer and more familiar cheese flavor.
Use the alternative as part of the same blended batter. The texture may change somewhat depending on the cheese.
The standard Parmesan version remains the most familiar reference point. Variations are useful when you need to work with what is already available.
Taco-Seasoned Wraps
Replace the Italian seasoning with taco seasoning for a completely different flavor direction. This works especially well with fillings such as beans, avocado, chicken, or spicy vegetables.
Keep the garlic powder if you enjoy it. The seasoning blend becomes the main change.
Blend and bake exactly as usual. The finished sheet will carry the taco flavor throughout rather than relying only on the filling.
This version is useful when you want the wrap itself to match a Mexican-inspired meal. Fill it after baking with whatever combination suits you.
Za’atar Variation
Za’atar can replace the Italian seasoning for a more aromatic variation. It gives the wrap a completely different savory personality.
Use it in the blended batter. No separate topping is necessary.
The resulting wrap works especially well with Mediterranean-style fillings. Hummus, cucumber, feta, and tzatziki all fit naturally with that direction.
Keep the same baking method. The seasoning changes, but the basic wrap technique stays familiar.
Curry-Spiced Variation
Curry powder can replace the Italian seasoning. This creates a warmer, more intensely flavored base.
Blend it with the cottage cheese, eggs, Parmesan, and garlic powder. Bake using the same time and temperature.
The wrap can then be paired with vegetables or proteins that suit the curry flavor. It becomes a much more assertive foundation than the standard Italian-herb version.
Start with the listed seasoning framework rather than adding many extra ingredients at once. The simplicity of the base is part of its usefulness.
Smoked Paprika Variation
Smoked paprika can be added when you want a deeper, smokier flavor. This is one of the easiest ways to make the wraps feel noticeably different.
Blend it with the other ingredients before baking. The color may also change slightly.
Smoked paprika pairs well with savory lunch fillings. It can work especially nicely with turkey, vegetables, or cheese.
The same ¼-inch thickness remains important. Seasoning changes should not alter the way the batter is spread.
Basil and Sun-Dried Tomato Variation
Dried basil and sun-dried tomatoes can be added for a more Mediterranean-style wrap. This creates a stronger flavor than the plain Italian-seasoned version.
Blend the base ingredients and incorporate the variation according to your preferred texture. The finished sheet will have a more distinct savory character.
This version works especially well with fresh vegetables and cheese fillings. It can also be enjoyed folded rather than tightly rolled.
Keep the baking time close to the standard method. Check the center rather than relying only on color.
Mediterranean Filling
Spread hummus over a Cottage Cheese Wrap and add cucumber slices and crumbled feta. Finish with a drizzle of tzatziki.
The creamy hummus and feta work well with the savory wrap. Cucumber gives the filling a fresh, crisp contrast.
This combination feels substantial without requiring additional cooking. It is especially useful for a quick lunch.
Roll the wrap or fold it like a taco. Both serving styles work depending on how much filling you use.
Breakfast Filling
Fill a wrap with scrambled eggs, crispy bacon, and avocado. The soft egg and creamy avocado pair naturally with the Parmesan-flavored base.
Bacon adds a crisp, salty contrast. This makes the wrap especially satisfying as a breakfast meal.
Keep the filling moderate so the wrap closes comfortably. Warm wraps are particularly easy to roll around eggs.
Serve immediately for the best texture. The combination works especially well when the wrap itself has been freshly reheated.
Turkey Lunch Wrap
Turkey slices, spinach, and roasted red peppers create a simple grab-and-go lunch. The filling requires very little assembly.
Lay the turkey evenly across the wrap before adding spinach and peppers. Keep the vegetables relatively dry so the wrap stays firm.
Roll tightly enough to keep everything together. The protein-rich base and turkey make this a particularly substantial lunch option.
Store the plain wraps separately until the day you plan to fill them. Fresh assembly gives the best texture.
Veggie Wrap
Grilled zucchini, caramelized onions, and goat cheese make a flavorful vegetarian filling. Preparing the vegetables the night before can make assembly especially quick.
Let roasted or grilled vegetables cool before storing. Add them to the wrap when you are ready to eat.
Goat cheese gives the filling a creamy, tangy element. The vegetables bring both sweetness and texture.
This combination works well with the standard Italian seasoning. No additional sauce is required unless you want one.
Using the Wrap as a Pizza Base
The baked sheet can also work as a quick pizza-style base. This is especially useful when rolling does not sound appealing.
Keep the wrap flat rather than cutting it into narrow pieces. Add your preferred pizza toppings according to the version you want to make.
The savory cottage cheese and Parmesan base already suits pizza-style flavors. That makes the transition especially easy.
Think of this as another way to use the same basic recipe rather than a completely different preparation. The baked wrap becomes the foundation instead of the wrapper.
Meal Prep With Cottage Cheese Wraps
These wraps are especially useful for meal prep because they can be stored plain. Keeping fillings separate prevents moisture from softening them prematurely.
Bake a batch, let the wraps cool, and place parchment between the layers. This keeps individual pieces from sticking together.
Store them in an airtight container in the refrigerator. They keep well for up to 3 days.
Fill them on the day you plan to eat them. This preserves the best combination of texture and freshness.
Refrigerator Storage
Place cooled wraps in an airtight container. Separate the layers with parchment paper.
Refrigerate for up to 3 days. The parchment keeps the surfaces from sticking together during storage.
Avoid filling the wraps before storing when possible. Wet ingredients can make them softer over time.
Take out only the number you need. Reheat briefly if you want more flexibility before filling.
Skillet Reheating
Place a wrap in a skillet and heat for about 30 seconds per side. This quickly restores warmth and pliability.
The skillet method works especially well when you want the wrap warm but not overly soft. Watch closely because the reheating time is short.
Remove as soon as the wrap bends easily. There is no need to brown it heavily.
Add fillings immediately afterward. A warm wrap is easier to roll.
Microwave Reheating
Wrap a Cottage Cheese Wrap in a damp paper towel. Microwave for about 15 seconds.
The moisture from the towel helps prevent the wrap from drying out. Because the wrap heats quickly, avoid walking away.
Check the texture after the first short burst. Additional heating may not be necessary.
Fill and serve once it is soft and warm. This is one of the fastest reheating methods for busy lunches.
Freezing Cottage Cheese Wraps
The wraps can be frozen for up to 2 months. Place parchment paper between each one before putting them into a freezer bag.
The paper makes it easier to remove individual wraps later. You do not have to thaw the entire batch at once.
For the gentlest thawing method, move a wrap to the refrigerator overnight. It will be ready to reheat or fill the next day.
A quick 30-second microwave reheating can also be used when you need one faster. Frozen wraps may be slightly less flexible than fresh ones but can still be used.
Frequently Asked Questions
Can I Freeze Cottage Cheese Wraps?
Yes. Layer them with parchment paper inside a freezer bag.
They can be frozen for up to 2 months. Thaw overnight in the refrigerator or use a short microwave reheating when needed.
Can I Use Low-Fat Cottage Cheese?
Yes. The wraps will usually be slightly less pliable than the full-fat version.
Adding an extra egg yolk can bring more richness. Full-fat cottage cheese still gives the preferred texture.
How Do I Keep the Wraps From Sticking?
Use parchment paper on the baking sheet. It creates the easiest release after baking.
A light coating of oil can be used if parchment is unavailable. Parchment remains the more reliable option.
Why Did My Wrap Turn Rubbery?
Overbaking and over-blending are common causes. Keep blending close to 30 seconds and baking close to 20 minutes.
Use large eggs rather than extra-large ones. Too much liquid can also affect the finished texture.
Can I Make Cottage Cheese Wraps Without a Blender?
Yes. Mash the cottage cheese thoroughly with a fork, then whisk it vigorously with the remaining ingredients.
The batter will not become quite as smooth. Small visible curds may remain in the finished wrap.
What Thickness Should I Aim For?
Spread the batter to about ¼ inch. This gives you the best balance between strength and flexibility.
A thicker sheet can be harder to roll. A thinner one may tear more easily.
Can I Change the Seasonings?
Yes. Taco seasoning, za’atar, curry powder, smoked paprika, dried basil, and other listed variations all work.
Seasoning changes are one of the easiest ways to keep the wraps interesting. The standard recipe uses Italian seasoning.
Can I Use Cheddar Instead of Parmesan?
Yes. Shredded cheddar can replace the Parmesan.
The flavor and texture will change somewhat. Blend it into the batter and follow the same basic method.
Nutritional Information for Cottage Cheese Wraps
One wrap, equal to roughly one-quarter of the recipe, contains approximately 120 calories. It also provides about 12g protein, which is one of the main reasons the recipe works so well as a filling base.
Each wrap contains about 5g fat and 4g carbohydrates. Sugar is approximately 2g per wrap.
These values apply to the wrap itself before any filling is added. Turkey, eggs, bacon, hummus, cheese, avocado, sauces, or vegetables will change the final nutritional profile.
Different cottage cheese brands and ingredient substitutions can also change the numbers. The listed values are best treated as estimates for the standard full-fat version.
The Wrap That Earned a Permanent Place in My Fridge
I did not expect a blended mixture of cottage cheese, eggs, Parmesan, and seasoning to become one of the things I make most often. I simply wanted a quick lunch that would keep me satisfied through a busy afternoon.
The first batch changed my mind almost immediately. What came out of the oven was simple, flexible, savory, and much more useful than I had expected.
At first, I treated the wraps like any other lunch base. I filled them with whatever vegetables or protein were easiest and considered the recipe a convenient little shortcut.
Then I started realizing how many different meals could grow from the same batch. Breakfast could mean eggs and avocado, lunch could become turkey and spinach, and dinner could be roasted vegetables with goat cheese.
That versatility is especially valuable on the weeks when I am trying to use what is already in the refrigerator. Instead of needing one exact filling, I can let the leftovers decide what kind of wrap I am making.
The seasonings have become part of the fun too. Italian seasoning is still the version I return to most often, but smoked paprika, taco seasoning, curry powder, or za’atar can make the next batch feel completely different.
I also appreciate that the wraps do not require special equipment beyond things I already use. A basic blender, a lined baking sheet, and an ordinary oven are enough to make the whole recipe work.
Meal prep is probably where they have become most useful. A few plain wraps stored between parchment sheets give me several days of easy meals without committing to the same filling over and over again.
Some mornings I warm one in a skillet for 30 seconds per side. Other times a damp paper towel and 15 seconds in the microwave are all I have time for, and both routes get lunch moving quickly.
That reliability is why Cottage Cheese Wraps have stayed in my routine. They are simple enough for the busiest day, flexible enough to keep from becoming boring, and satisfying enough that I am not thinking about another meal the moment lunch is finished.
For five uncomplicated ingredients, that is a lot of value from one baking sheet. And every time I pull another batch from the oven, I am still a little surprised that something this easy can become such a useful part of the week.
Cottage Cheese Wraps: 5-Ingredient Protein Powerhouse You Need
Soft, savory, and made with just five simple ingredients, these Cottage Cheese Wraps combine full-fat cottage cheese, eggs, Parmesan, garlic powder, and Italian seasoning into an easy baked wrap. They come together in only 25 minutes and can be rolled around your favorite vegetables or proteins for a simple main dish.
Recipe Details
- Prep Time: 5 minutes
- Cook Time: 20 minutes
- Total Time: 25 minutes
- Course: Main Dish
- Cuisine: International
- Servings: 4 wraps
- Calories: 120 kcal
Ingredients
For the Cottage Cheese Wraps
- 1 cup full-fat cottage cheese
- 2 large eggs
- 4 tablespoon grated Parmesan cheese
- 1 teaspoon garlic powder
- 1 teaspoon Italian seasoning
Instructions
Step 1: Preheat the Oven
Preheat the oven to 375°F (190°C).
Prepare a lined baking sheet for the cottage cheese mixture.
Step 2: Blend the Ingredients
Combine the full-fat cottage cheese, eggs, grated Parmesan cheese, garlic powder, and Italian seasoning.
Blend until the mixture is smooth and evenly combined.
Step 3: Spread the Mixture
Pour the blended mixture onto the lined baking sheet.
Spread it into an even layer so it bakes consistently.
Step 4: Bake
Bake for 20 minutes.
The wrap mixture is ready when it becomes golden and firm.
Step 5: Cool Slightly
Remove the baked mixture from the oven and let it cool slightly.
Allowing it to rest briefly makes it easier to handle.
Step 6: Cut or Roll
Cut the baked mixture into wraps or roll it as desired.
Use the finished wraps with your preferred vegetables or proteins.
Notes
- Store wraps in an airtight container in the fridge for up to 3 days.
- Fill wraps with your favorite vegetables or proteins.
Serving Suggestions
Use Cottage Cheese Wraps as a simple base for your favorite vegetables or proteins. Their savory Parmesan, garlic, and Italian seasoning flavor makes them easy to pair with a variety of fillings.
This recipe makes 4 wraps and can be cut or rolled after the baked mixture has cooled slightly. Serve them once they are firm enough to handle comfortably.
Storage
Store the wraps in an airtight container in the refrigerator for up to 3 days.
Cottage Cheese Tip
Use 1 cup full-fat cottage cheese.
Blend it thoroughly with the remaining ingredients until smooth.
Egg Tip
Use 2 large eggs to bring the wrap mixture together.
Parmesan Tip
Add 4 tablespoon grated Parmesan cheese for savory flavor.
Garlic Tip
Use 1 teaspoon garlic powder.
Seasoning Tip
Add 1 teaspoon Italian seasoning to the mixture before blending.
Baking Tip
Bake at 375°F (190°C) for 20 minutes.
The wraps should be golden and firm before removing them from the oven.
Serving Tip
Fill the finished wraps with your favorite vegetables or proteins.

Fernando is the creator and writer behind the food blog Eating with your Hands. Living and working in cities like Paris, Barcelona, and Berlin, and being married to a Canadian foodie, has given Fernando a passion and interest in food and inspired him to run EWYH.