
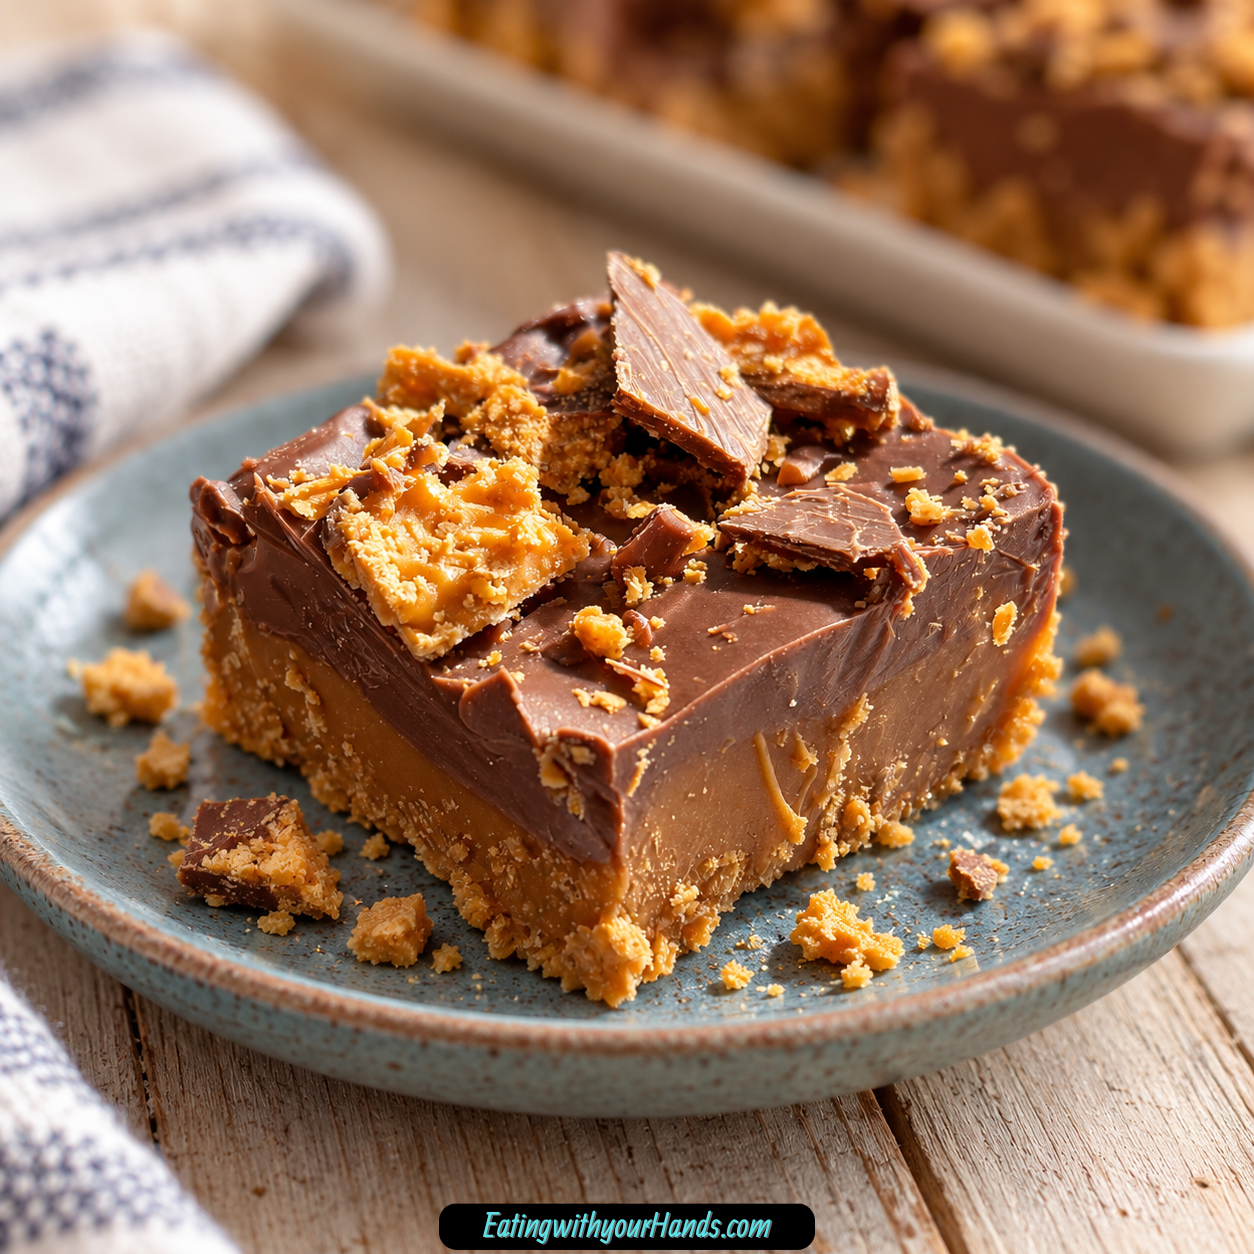
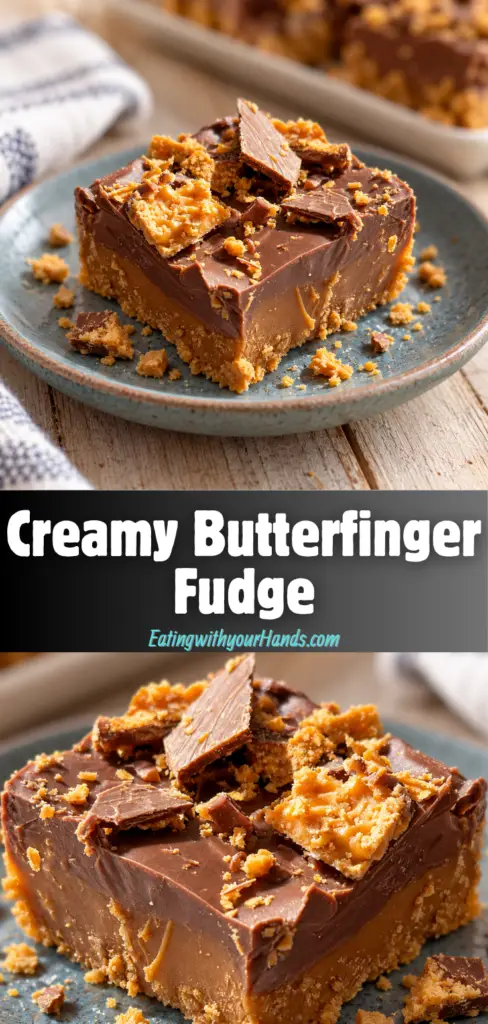
Creamy Butterfinger Fudge is the kind of no-bake treat that feels almost unfairly easy for how rich, crunchy, and addictive it turns out. It starts with smooth chocolate fudge, then gets loaded with chopped Butterfinger pieces so every square has that creamy-crispy candy bar texture tucked inside.
This is the dessert for the days when you want something sweet without turning on the oven. It needs a saucepan, an 8×8-inch pan, a little stirring, and enough patience to let the refrigerator finish the job.
The first bite is all about contrast. The chocolate fudge is soft and velvety, while the Butterfinger bits bring crispy, peanut-buttery crunch that keeps each square interesting.
It is rich, but not heavy in a boring way. The sweetened condensed milk makes it creamy, the heavy cream softens the texture, and the chopped candy gives every piece a little spark.
This is also a perfect recipe for last-minute gifts and dessert trays. Once the fudge is chilled and cut into neat squares, it looks polished enough for holidays, potlucks, birthdays, or little treat boxes.
The active work is quick, about 15 minutes. Most of the time is simply waiting while the fudge firms in the refrigerator.
There is something especially fun about using chopped candy bars in a homemade dessert. It feels playful, nostalgic, and a little mischievous, like turning a candy stash into something people will think took much more effort.
Creamy Butterfinger Fudge is the kind of recipe that people remember. It tastes like smooth chocolate, crunchy candy, and a little bit of childhood wrapped into one bite-sized square.
Table of Contents
- Why You’ll Love Creamy Butterfinger Fudge
- Recipe Details
- Ingredients
- Ingredient Notes
- Optional Swaps, Variations, Add-Ins, and Serving Ideas
- Classic Creamy Butterfinger Fudge
- Milk Chocolate Butterfinger Fudge
- Dark Chocolate Butterfinger Fudge
- Peanut Butter Boost Fudge
- Salty-Sweet Butterfinger Fudge
- Halloween Butterfinger Fudge
- Peanut Butter Drizzle Fudge
- Crushed Peanut Butterfinger Fudge
- Crunch Bar Fudge
- Peanut Butter Cup Fudge
- Dairy-Free Direction
- Firmer Fudge Fix
- Why This Recipe Works
- Directions
- Step 1: Prepare the Pan
- Step 2: Use Foil if Needed
- Step 3: Chop the Butterfinger Bars
- Step 4: Add the Chocolate to the Saucepan
- Step 5: Add Sweetened Condensed Milk and Cream
- Step 6: Melt Over Low Heat
- Step 7: Stir Until Smooth
- Step 8: Fix Grainy Chocolate if Needed
- Step 9: Remove from Heat
- Step 10: Fold in the Roughly Chopped Butterfingers
- Step 11: Transfer to the Pan
- Step 12: Add the Butterfinger Topping
- Step 13: Add Optional Finishes
- Step 14: Chill in the Refrigerator
- Step 15: Use the Freezer Shortcut if Needed
- Step 16: Lift the Fudge Out
- Step 17: Cut Into Squares
- Step 18: Serve or Store
- Serving Ideas
- Storage
- Freezing
- Make-Ahead
- Helpful Notes for Best Results
- Variations
- Classic Creamy Butterfinger Fudge
- Milk Chocolate Butterfinger Fudge
- Dark Chocolate Butterfinger Fudge
- Peanut Butter Butterfinger Fudge
- Salted Butterfinger Fudge
- Halloween Butterfinger Fudge
- Peanut Butter Drizzle Fudge
- Crushed Peanut Fudge
- Crunch Bar Fudge
- Peanut Butter Cup Fudge
- Dairy-Free Butterfinger-Style Fudge
- Firmer Chocolate Fudge
- Troubleshooting
- Frequently Asked Questions
- Why This Recipe Works So Well
- Final Thoughts
- Butterfinger Fudge
Why You’ll Love Creamy Butterfinger Fudge
This fudge is no-bake. You do not need an oven, which makes it great for warm days or busy kitchens.
It uses only a handful of ingredients. Chocolate chips, sweetened condensed milk, heavy cream, and Butterfinger bars do the work.
The texture is fantastic. Smooth fudge surrounds crunchy Butterfinger pieces.
It is fast to prepare. The active time is about 15 minutes before chilling.
It is great for gifting. Cut the fudge into squares and pack it into little boxes or bags.
It stores well. Keep it in the refrigerator for up to a week or freeze it for up to 2 months.
Recipe Details
This recipe uses an 8×8-inch pan. Line the pan with parchment paper and leave the edges hanging over the sides like handles.
The fudge mixture melts in a medium saucepan over low heat. Low heat is important so the chocolate stays smooth.
The chocolate base uses 3 cups semi-sweet chocolate chips. A good-quality brand gives the smoothest texture.
The creamy ingredient is 14 oz sweetened condensed milk. Do not substitute evaporated milk because it is not the same.
The texture booster is ¼ cup heavy cream. It makes the fudge softer and creamier.
The main candy mix-in is 2 cups roughly chopped Butterfinger bars. This is about 8 full-size bars.
The topping uses 1 cup finely chopped Butterfinger bars. These get sprinkled over the top like crunchy candy confetti.
The fudge chills in the refrigerator for at least 2 hours. If short on time, the freezer can set it faster in about 45 minutes.
A hot-water knife helps cut clean squares. Run the knife under hot water, dry it quickly, then slice.
Ingredients
For the Butterfinger Fudge
- 3 cups semi-sweet chocolate chips
- 14 oz sweetened condensed milk
- ¼ cup heavy cream
- 2 cups roughly chopped Butterfinger bars
- 1 cup finely chopped Butterfinger bars
Optional Swaps, Add-Ins, and Finishes
- Milk chocolate chips
- Dark chocolate chips
- ¼ cup creamy peanut butter
- Flaky sea salt
- Fun-size Butterfingers
- Melted peanut butter
- Crushed peanuts
- Crunch bars
- Chopped peanut butter cups
- Dairy-free chocolate chips
- Coconut cream
- Extra ½ cup chocolate chips
Ingredient Notes
Semi-sweet chocolate chips give the fudge a balanced chocolate flavor. They are sweet enough for fudge but not as sugary as milk chocolate.
Milk chocolate chips can be used for a sweeter version. This makes the fudge taste more nostalgic and candy-like.
Dark chocolate chips can be used for a deeper flavor. They make the fudge less sweet and more intense.
Sweetened condensed milk is essential for the creamy texture. Evaporated milk should not be used because it will not create the same fudge base.
Heavy cream adds smoothness. That small amount helps take the texture from simple to extra creamy.
Roughly chopped Butterfinger bars create the crunchy pieces inside the fudge. Pea-sized chunks are a good target because they give noticeable crunch without making the fudge hard to slice.
Finely chopped Butterfinger bars go on top. They create a pretty finish and make the candy flavor obvious before anyone takes a bite.
Parchment paper makes removing the fudge much easier. The overhanging edges become handles after chilling.
A sharp knife dipped in hot water helps with clean cuts. This is especially useful because the candy pieces can drag through the fudge.
Optional Swaps, Variations, Add-Ins, and Serving Ideas
Classic Creamy Butterfinger Fudge
Make the fudge with semi-sweet chocolate chips, sweetened condensed milk, heavy cream, roughly chopped Butterfinger bars, and finely chopped Butterfinger topping. This gives the full creamy-crunchy version.
Chill until firm before slicing. Let it sit at room temperature for about 10 minutes before serving for the best texture.
Milk Chocolate Butterfinger Fudge
Use milk chocolate chips instead of semi-sweet. This makes the fudge sweeter and more kid-friendly.
The flavor becomes extra nostalgic. It leans closer to a candy bar-style dessert.
Dark Chocolate Butterfinger Fudge
Use dark chocolate chips for a bolder flavor. The darker chocolate balances the sweetness of the candy pieces.
This version is great for people who like richer chocolate. Keep the Butterfinger amount the same.
Peanut Butter Boost Fudge
Stir in ¼ cup creamy peanut butter with the chocolate mixture. It makes the fudge taste even more peanut-buttery.
The peanut butter blends into the base and deepens the flavor. Use creamy peanut butter for the smoothest texture.
Salty-Sweet Butterfinger Fudge
Sprinkle flaky sea salt over the top before chilling. The salt makes the chocolate flavor pop.
Use a light sprinkle. Butterfinger fudge is rich, and too much salt can overpower it.
Halloween Butterfinger Fudge
Use leftover fun-size Butterfingers. Chop them into pieces and use them just like full-size bars.
This is a great way to use extra candy after Halloween. Remove the wrappers before chopping.
Peanut Butter Drizzle Fudge
Drizzle melted peanut butter over the top before chilling. It adds a pretty finish and extra peanut flavor.
Let the drizzle set with the fudge. Slice once firm.
Crushed Peanut Butterfinger Fudge
Sprinkle crushed peanuts over the top with the finely chopped Butterfinger. This adds more crunch.
It also gives the fudge a saltier finish. Use it if you love texture.
Crunch Bar Fudge
Use chopped Crunch bars if you do not have Butterfingers. The flavor will change, but the crispy candy texture still works.
It will not have the same peanut-buttery crunch. It is still a good emergency swap.
Peanut Butter Cup Fudge
Use chopped peanut butter cups instead of Butterfingers. The fudge will be softer and creamier.
It will not have the same crisp texture. The peanut butter flavor will be richer and smoother.
Dairy-Free Direction
Use dairy-free chocolate chips and coconut cream instead of heavy cream. The texture will be slightly different.
Use compatible candy if needed. The fudge can still be rich and satisfying.
Firmer Fudge Fix
If your fudge is too soft, add an extra ½ cup chocolate chips next time. This helps it set more firmly.
Chilling time matters too. Give it the full 2 hours in the refrigerator.
Why This Recipe Works
This recipe works because chocolate chips and sweetened condensed milk create a smooth fudge base. The mixture melts into a thick, creamy chocolate layer.
Heavy cream softens the texture just enough. It makes the fudge feel rich without becoming stiff.
Butterfinger pieces bring crunch and peanut-buttery flavor. Roughly chopped pieces stay noticeable in each bite.
The finely chopped topping makes the fudge look finished. It also adds candy crunch right on the surface.
Low heat protects the chocolate. High heat can make chocolate grainy or separated.
Constant stirring keeps the mixture smooth. It also prevents scorching on the bottom of the saucepan.
Chilling gives the fudge time to firm. Once set, it can be lifted out easily with parchment handles.
Resting the fudge briefly at room temperature before serving gives it a softer bite. The chocolate becomes melt-in-your-mouth while the Butterfinger pieces stay crisp.
Directions
Step 1: Prepare the Pan
Line an 8×8-inch pan with parchment paper. Leave the edges hanging over the sides.
These overhangs will act like handles when the fudge is firm. They make lifting the whole slab much easier.
Step 2: Use Foil if Needed
If you do not have parchment paper, aluminum foil can work in a pinch. Spray it lightly with cooking spray.
Parchment is still the easiest option. It releases more cleanly.
Step 3: Chop the Butterfinger Bars
Roughly chop enough Butterfinger bars to make 2 cups. Aim for pea-sized chunks with some smaller crumbs.
Then finely chop enough Butterfinger bars to make 1 cup for the topping. A food processor works, or you can crush them in a zip-top bag with a rolling pin.
Step 4: Add the Chocolate to the Saucepan
Place 3 cups semi-sweet chocolate chips in a medium saucepan. Use a saucepan with enough room to stir comfortably.
Keep the heat off until the other creamy ingredients are added. This helps everything melt together evenly.
Step 5: Add Sweetened Condensed Milk and Cream
Add 14 oz sweetened condensed milk and ¼ cup heavy cream to the saucepan. Stir gently to combine.
Do not use evaporated milk. Sweetened condensed milk is what gives the fudge its creamy set.
Step 6: Melt Over Low Heat
Place the saucepan over low heat. Stir constantly as the chocolate melts.
Low heat is important. Rushing this step can make the chocolate grainy.
Step 7: Stir Until Smooth
Continue stirring until every chocolate chip has melted. The mixture should look glossy, thick, and velvety.
If you see any stubborn chips, keep stirring gently. Do not turn up the heat too high.
Step 8: Fix Grainy Chocolate if Needed
If the chocolate starts looking grainy or separated, remove the pan from the heat. Whisk in a splash more warm cream until smooth again.
This can help bring the mixture back together. Low heat prevents the problem in the first place.
Step 9: Remove from Heat
Once the chocolate mixture is fully smooth, remove the saucepan from the heat. Set it on a heat-safe surface.
This prevents the Butterfinger pieces from melting too much when they are added. You want them to stay crunchy.
Step 10: Fold in the Roughly Chopped Butterfingers
Add the 2 cups roughly chopped Butterfinger bars to the warm fudge mixture. Fold gently but thoroughly.
Make sure the candy is spread throughout the fudge. Every square should have crunchy pieces.
Step 11: Transfer to the Pan
Pour the fudge mixture into the prepared 8×8-inch pan. Use a spatula to spread it evenly.
Push the fudge into the corners. Smooth the surface as much as you like.
Step 12: Add the Butterfinger Topping
Sprinkle the 1 cup finely chopped Butterfinger bars over the top. Spread them evenly.
Lightly press the topping into the fudge. This helps the pieces stick after chilling.
Step 13: Add Optional Finishes
If using flaky sea salt, sprinkle it on now. If using melted peanut butter drizzle, add it before chilling.
Crushed peanuts can also be added at this stage. Press lightly so toppings stick.
Step 14: Chill in the Refrigerator
Place the pan in the refrigerator. Chill for at least 2 hours, or until firm.
Do not rush the full refrigerator set if you want clean squares. The fudge needs time to firm up.
Step 15: Use the Freezer Shortcut if Needed
If you are short on time, place the fudge in the freezer for about 45 minutes. Do not forget it there.
The freezer sets it faster, but the fudge should not turn into a hard brick. Watch the time.
Step 16: Lift the Fudge Out
Once the fudge is firm, use the parchment handles to lift it out of the pan. Place it on a cutting board.
Peel away the parchment from the sides. The slab should hold together well.
Step 17: Cut Into Squares
Run a sharp knife under hot water, then dry it quickly. Slice the fudge with steady pressure.
Repeat the hot-water trick between cuts for cleaner edges. This makes the pieces look neat.
Step 18: Serve or Store
Let the fudge sit at room temperature for about 10 minutes before serving. This gives it a softer, melt-in-your-mouth texture.
Store leftovers in an airtight container in the refrigerator for up to a week. For longer storage, freeze for up to 2 months.
Serving Ideas
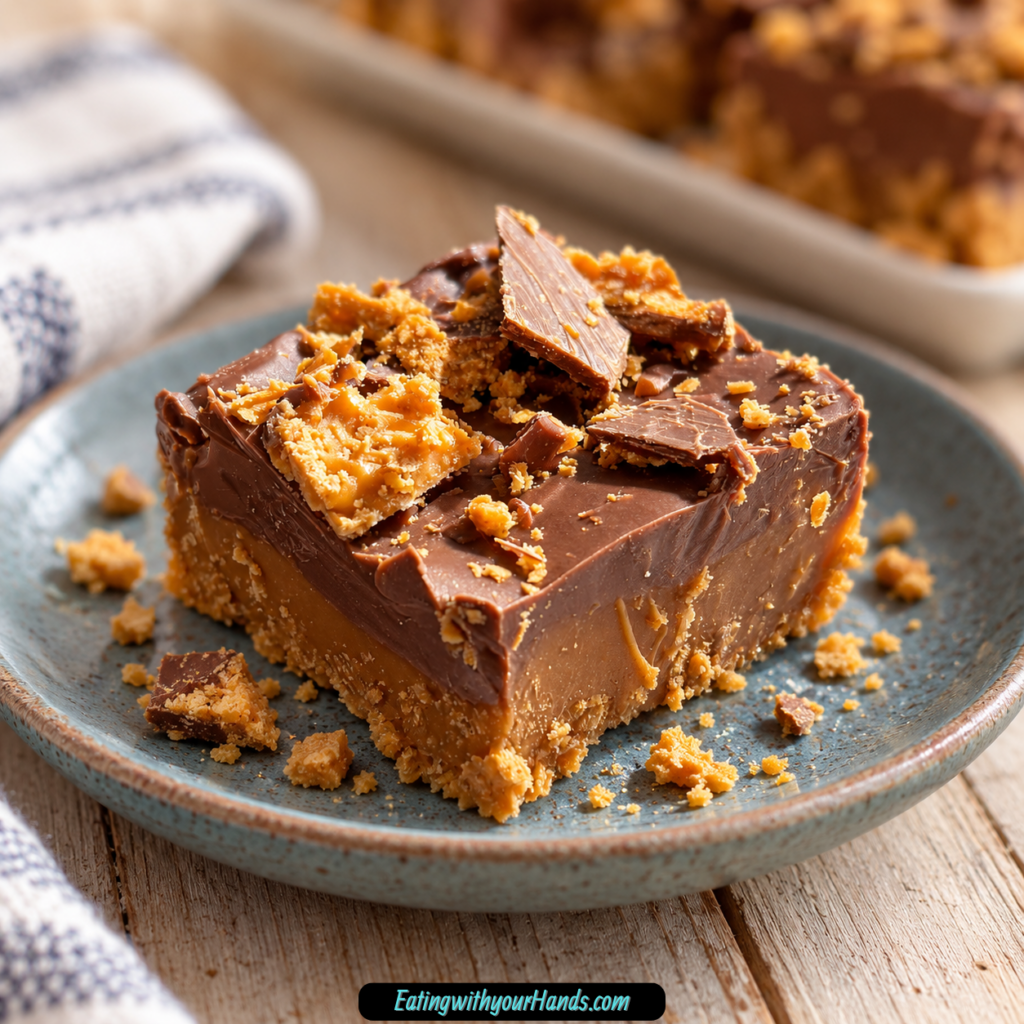
Serve Butterfinger fudge straight from the refrigerator if you like a firm bite. Let it rest at room temperature for 10 minutes if you prefer a softer texture.
Cut it into small squares because the fudge is rich. A little piece goes a long way.
Serve it on dessert platters for holidays or parties. The chopped candy topping makes it look festive without extra decorating.
Wrap pieces in wax paper for quick gifts. It feels homemade and fun.
Add it to treat boxes with cookies or candy. The crunchy texture makes it stand out.
Serve with coffee for an afternoon sweet. The chocolate and candy flavor works nicely with a warm drink.
Keep a batch in the fridge for surprise guests. It is easy to serve quickly.
Hide a few squares in the freezer if you want a later treat. They thaw beautifully.
Storage
Store the fudge in an airtight container in the refrigerator. It keeps for up to a week.
Layer pieces with parchment if stacking. This keeps them from sticking together.
Let the fudge sit at room temperature for about 10 minutes before serving. The texture becomes softer and creamier.
Do not leave the fudge uncovered in the refrigerator. It can dry out or pick up other flavors.
Keep it chilled when not serving. This helps it stay firm.
If the topping loosens after cutting, press it gently back into the surface. The flavor will still be perfect.
For the neatest gift packaging, chill well before wrapping. Firm fudge is easier to handle.
Freezing
Butterfinger fudge freezes well for up to 2 months. Freeze pieces in a single layer first so they do not stick together.
Once frozen, transfer the pieces to a freezer bag. Layer parchment between pieces if needed.
Thaw the fudge overnight in the refrigerator. It will taste like it was freshly made.
Do not thaw at high heat. Gentle thawing protects the texture.
You can freeze the whole slab, but pieces are easier to serve later. Cut before freezing if you want grab-and-go portions.
Wrap tightly to protect the chocolate. This keeps the texture creamy.
Label the freezer bag if desired. This helps track the 2-month storage time.
Make-Ahead
This fudge is an excellent make-ahead dessert. It needs at least 2 hours to chill, so making it ahead is practical.
Prepare it the day before a party or gift exchange. Keep it chilled until ready to cut or serve.
You can cut the fudge into squares and store it in layers with parchment. This makes serving easier.
If gifting, package it after it is fully chilled and firm. Room-temperature fudge can become soft while handling.
For the best serving texture, let pieces sit out for about 10 minutes before guests arrive. This gives the chocolate a softer bite.
You can also freeze the fudge ahead for up to 2 months. Thaw overnight in the refrigerator before serving.
Make-ahead fudge is especially helpful during holidays. It lets you prepare a treat without using oven space.
Helpful Notes for Best Results
Use low heat when melting the chocolate. High heat can make the fudge grainy.
Stir constantly while the chocolate melts. Do not walk away from the saucepan.
Use sweetened condensed milk, not evaporated milk. They are not interchangeable here.
Chop the Butterfingers unevenly on purpose. Bigger chunks and smaller crumbs create better texture.
Press the topping lightly into the fudge. This keeps it from falling off after cutting.
Chill long enough for a clean set. At least 2 hours in the refrigerator is best.
Use a hot knife for clean cuts. Dry it before slicing so water does not get into the fudge.
Even messy fudge tastes great. Clean edges are nice, but flavor matters most.
Variations
Classic Creamy Butterfinger Fudge
Make the fudge with semi-sweet chocolate chips, sweetened condensed milk, heavy cream, and chopped Butterfinger bars. Top with finely chopped Butterfinger pieces.
This gives the full creamy, crunchy version. Chill until firm.
Milk Chocolate Butterfinger Fudge
Use milk chocolate chips instead of semi-sweet. This makes the fudge sweeter.
It is a great choice for a kid-friendly version. The flavor becomes very candy-like.
Dark Chocolate Butterfinger Fudge
Use dark chocolate chips for a deeper, less sweet flavor. It balances the Butterfinger pieces well.
This version tastes richer. Let it sit at room temperature before serving.
Peanut Butter Butterfinger Fudge
Stir in ¼ cup creamy peanut butter with the chocolate mixture. This boosts the peanut flavor.
The base becomes richer. Use creamy peanut butter for smooth blending.
Salted Butterfinger Fudge
Sprinkle flaky sea salt on top before chilling. It makes the chocolate flavor stronger.
Use a small amount. The fudge should still taste sweet.
Halloween Butterfinger Fudge
Use leftover fun-size Butterfingers. Chop them and fold them into the fudge.
This is a great way to use extra Halloween candy. Remove the wrappers first.
Peanut Butter Drizzle Fudge
Drizzle melted peanut butter over the top before chilling. It looks pretty and tastes rich.
Let the drizzle set with the fudge. Slice once firm.
Crushed Peanut Fudge
Add crushed peanuts on top for extra crunch. They pair well with Butterfinger pieces.
Use them with or without the candy topping. Press lightly.
Crunch Bar Fudge
Use chopped Crunch bars if Butterfingers are not available. The fudge will still have crispy texture.
The flavor will not be the same. It is a useful swap in a pinch.
Peanut Butter Cup Fudge
Use chopped peanut butter cups instead of Butterfingers. This gives a softer, creamier candy mix-in.
The crunch will be different. The peanut butter flavor will still work.
Dairy-Free Butterfinger-Style Fudge
Use dairy-free chocolate chips and coconut cream instead of heavy cream. The texture will be slightly different.
Check candy choices if needed. The method stays similar.
Firmer Chocolate Fudge
Add an extra ½ cup chocolate chips if the fudge is too soft. This helps it set more firmly.
Also make sure it chills long enough. Soft fudge often just needs more time.
Troubleshooting
The Fudge Is Too Soft
It may not have chilled long enough. Return it to the refrigerator until firm.
Next time, add an extra ½ cup chocolate chips for a firmer set. This helps the chocolate-to-milk ratio.
The Chocolate Turned Grainy
The heat may have been too high. Remove from heat and whisk in a splash of warm cream.
Next time, use low heat and stir constantly. Slow melting gives smoother fudge.
The Chocolate Separated
High heat can cause separation. Take the pan off the burner immediately.
Whisk gently with a splash of warm cream. The mixture may smooth back out.
The Butterfinger Pieces Lost Their Crunch
The mixture may have been too hot when the candy was added. Remove the pan from heat first.
Fold in the candy gently. Do not cook the Butterfinger pieces in the fudge base.
The Topping Falls Off
The finely chopped topping may not have been pressed in enough. Press it lightly while the fudge is still soft.
Do not press too hard. Just enough contact helps it stick.
The Fudge Is Hard to Cut
It may be too cold. Let it sit at room temperature for 10 minutes.
Use a hot, dry knife for cleaner slices. Repeat between cuts.
The Squares Look Messy
Candy pieces can make clean cuts tricky. Use the hot-water knife method.
Messy edges are normal with crunchy candy fudge. The flavor stays excellent.
The Fudge Tastes Too Sweet
Use dark chocolate chips next time. You can also add flaky sea salt on top.
Small pieces help because the fudge is rich. Serve bite-sized squares.
The Fudge Tastes Too Intense
Use milk chocolate chips next time for a sweeter, softer flavor. Let the fudge sit at room temperature before serving.
The texture will feel creamier after resting. Cold fudge tastes firmer and stronger.
The Fudge Stuck to the Pan
Line the pan with parchment and leave overhang next time. Those handles make removal easy.
If using foil, spray it lightly. Parchment is still the better choice.
Frequently Asked Questions
Can I freeze Butterfinger fudge?
Yes, freeze the fudge in a single layer first so the pieces do not stick together. Then transfer them to a freezer bag.
It keeps for up to 2 months. Thaw overnight in the refrigerator.
What if I do not have Butterfingers?
Crunch bars or chopped peanut butter cups can work in a pinch. The flavor and texture will be different.
Butterfingers give the signature crispy peanut-buttery crunch. Use them when possible.
Why is my fudge too soft?
It may not have chilled long enough, or the chocolate-to-milk ratio may need adjustment. Chill longer first.
Next time, add an extra ½ cup chocolate chips for a firmer set. This helps the fudge hold its shape.
Can I make this dairy-free?
Yes, use dairy-free chocolate chips and coconut cream instead of heavy cream. The texture will be slightly different.
Choose compatible candy if needed. The fudge can still taste rich and satisfying.
How long does the fudge last?
It keeps in an airtight container in the refrigerator for up to a week. Keep parchment between layers if stacking.
For longer storage, freeze for up to 2 months. Thaw in the refrigerator overnight.
Do I need a candy thermometer?
No, this recipe does not require a candy thermometer. The mixture melts over low heat until smooth.
The refrigerator sets the fudge. The main key is gentle heat and proper chilling.
Can I use milk chocolate?
Yes, milk chocolate chips work well. The fudge will be sweeter and more candy-like.
This is a good option for kids or anyone who likes sweeter fudge. Chill the same way.
Can I add peanut butter?
Yes, stir in ¼ cup creamy peanut butter with the chocolate. It boosts the peanut flavor.
Use creamy peanut butter for the smoothest texture. Mix until fully blended.
Why This Recipe Works So Well
Creamy Butterfinger Fudge works because it uses a simple chocolate base that sets beautifully once chilled. Sweetened condensed milk creates creaminess, and chocolate chips provide structure.
Heavy cream makes the fudge smoother. It softens the texture just enough.
Butterfinger bars add crunch, sweetness, and peanut-buttery flavor. Rough chunks inside the fudge create contrast.
The finely chopped Butterfinger topping adds texture and makes the fudge look finished. It also announces the flavor before the first bite.
Low heat keeps the chocolate smooth. Constant stirring prevents scorching and graininess.
The parchment-lined pan makes the fudge easy to lift and cut. This keeps the slab neat.
Chilling gives the fudge time to firm into sliceable squares. Resting briefly before serving makes the texture creamier.
Most of all, this recipe works because it delivers big flavor with very little effort. It is creamy, crunchy, sweet, nostalgic, and easy enough to make whenever a candy-loaded treat sounds necessary.
Final Thoughts
Creamy Butterfinger Fudge is made with semi-sweet chocolate chips, sweetened condensed milk, heavy cream, roughly chopped Butterfinger bars, and finely chopped Butterfinger topping, then chilled until firm and cut into rich squares. It is smooth, crunchy, no-bake, and ready with only about 15 minutes of active work before the refrigerator takes over.
Serve it slightly softened after 10 minutes at room temperature, wrap it for gifts, bring it to potlucks, or keep a quiet freezer stash for sweet emergencies. With its 1-week refrigerator storage, 2-month freezer option, hot-knife cutting method, and variations like milk chocolate, dark chocolate, peanut butter, flaky sea salt, fun-size candy, peanut butter drizzle, crushed peanuts, Crunch bars, peanut butter cups, dairy-free chocolate, coconut cream, and extra chocolate chips for firmness, this fudge is a simple candy-bar dessert worth making again and again.
Butterfinger Fudge
Rich, creamy, chocolatey, and full of crunchy candy pieces, this Butterfinger Fudge combines semi-sweet chocolate chips, sweetened condensed milk, heavy cream, and chopped Butterfinger candy bars into an easy no-bake-style dessert. Roughly chopped Butterfinger pieces are mixed into the fudge, while finely chopped candy is pressed on top for extra crunch and a sweet candy-bar finish.
Recipe Details
- Prep Time: 10 minutes
- Cook Time: 5 minutes
- Total Time: 15 minutes
- Course: Dessert
- Cuisine: American
- Servings: 24 pieces
Equipment
- 8×8 inch baking pan
- Parchment paper
- Medium saucepan
Ingredients
For the Butterfinger Fudge
- 1 cup finely chopped Butterfinger candy bar for topping
- 2 cups roughly chopped Butterfinger candy bar mixed into fudge batter
- ¼ cup heavy cream
- 14 oz sweetened condensed milk
- 3 cups semi-sweet chocolate chips Ghirardelli brand
Instructions
Step 1: Prepare the Pan
Line an 8×8 inch baking pan with parchment paper. Leave overhang on two sides so the fudge can be lifted out more easily after it firms.
Make sure the parchment sits neatly in the pan before the chocolate mixture is made. This helps the finished fudge release cleanly for slicing.
Step 2: Melt the Chocolate Mixture
In a medium saucepan over low heat, combine the semi-sweet chocolate chips, sweetened condensed milk, and heavy cream. Stir constantly as the chocolate melts.
Keep the heat low so the mixture becomes smooth without scorching. Continue stirring until the chocolate is fully melted and the fudge base looks glossy and even.
Step 3: Add the Butterfinger Pieces
Remove the saucepan from the heat. Stir in the 2 cups of roughly chopped Butterfinger candy bar pieces until evenly distributed.
Fold gently so the candy pieces spread throughout the fudge batter. The rough chopped pieces add crunchy Butterfinger texture inside each square.
Step 4: Fill the Pan
Pour the fudge mixture into the prepared 8×8 inch baking pan. Spread it evenly from corner to corner.
Smooth the top so the fudge sets into an even layer. Work while the mixture is still soft enough to spread easily.
Step 5: Add the Topping
Sprinkle the top with 1 cup of finely chopped Butterfinger candy bar pieces. Press lightly so the topping adheres to the fudge.
The finely chopped candy adds a crunchy top layer and makes each piece look finished. Press gently without pushing the topping too deeply into the fudge.
Step 6: Chill Until Firm
Refrigerate for at least 2 hours, until firm. The chilling time helps the fudge set enough for clean squares.
Once firm, lift the fudge out of the pan using the parchment overhang. Cut into 24 pieces before serving.
Notes
- Store fudge in an airtight container in the refrigerator for up to one week.
- For cleaner cuts, use a sharp knife dipped in hot water.
Serving Suggestions
Serve Butterfinger Fudge chilled after it has set fully in the refrigerator. The smooth chocolate fudge base, sweetened condensed milk, heavy cream, and crunchy Butterfinger pieces make each square rich, sweet, and candy-packed.
This recipe makes 24 pieces, so it is easy to portion for dessert trays, holiday candy boxes, parties, gifting, or quick chocolate cravings. The finely chopped Butterfinger topping gives the fudge extra crunch and a more finished look.
For cleaner cuts, use a sharp knife dipped in hot water as noted. Wipe the knife between cuts if needed so the squares stay neat.
Storage
How to Store
Store fudge in an airtight container in the refrigerator for up to one week. Keep it chilled so the pieces stay firm.
Chilling Tip
Refrigerate for at least 2 hours before cutting. This chilling time is separate from the listed Total Time and helps the fudge firm up properly.
Chocolate Tip
Use 3 cups semi-sweet chocolate chips, with Ghirardelli brand listed. Melt them slowly with the sweetened condensed milk and heavy cream over low heat.
Butterfinger Tip
Use 2 cups roughly chopped Butterfinger candy bar pieces mixed into the fudge batter. Use 1 cup finely chopped Butterfinger candy bar pieces for topping.
Pan Tip
Line the 8×8 inch baking pan with parchment paper and leave overhang on two sides. This makes the fudge easier to remove once firm.
Cutting Tip
Use a sharp knife dipped in hot water for cleaner cuts. Cut the chilled fudge into 24 pieces.

Fernando is the creator and writer behind the food blog Eating with your Hands. Living and working in cities like Paris, Barcelona, and Berlin, and being married to a Canadian foodie, has given Fernando a passion and interest in food and inspired him to run EWYH.