
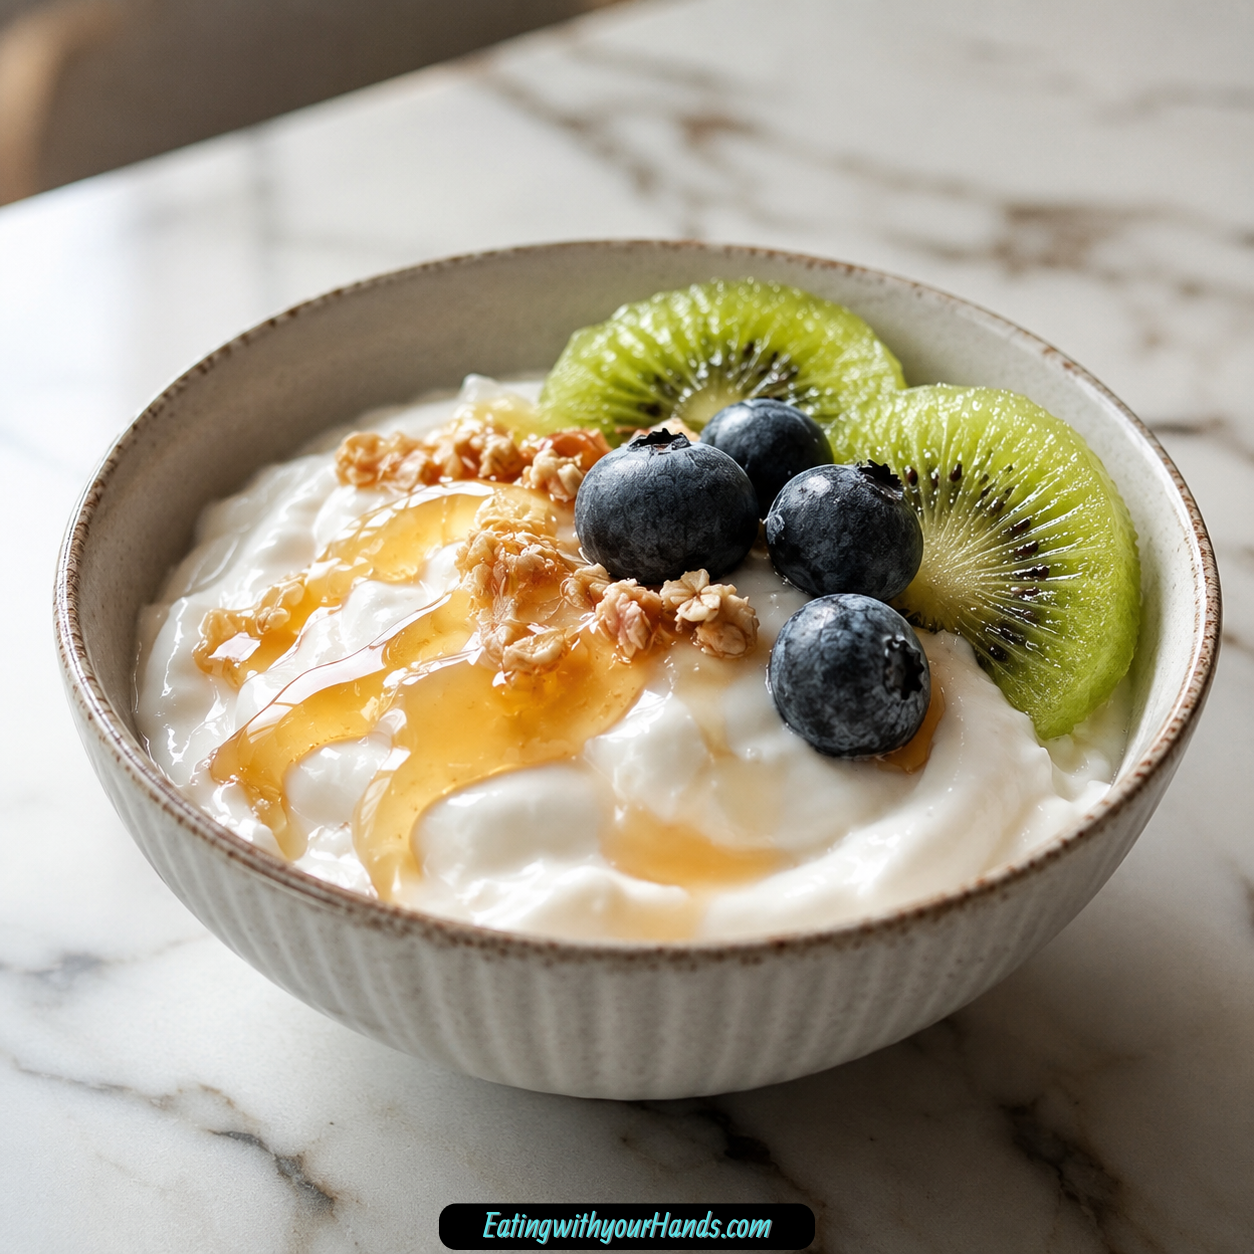
Creamy Homemade Crock Pot Yogurt is one of those kitchen projects that feels almost too simple to be as satisfying as it is. You start with milk and a small amount of plain yogurt, then let gentle heat and time transform them into something thick, tangy, fresh, and wonderfully creamy.
The first time you make yogurt in a slow cooker, it really does feel a little magical. There is no complicated equipment, no long ingredient list, and no need to stand over the stove stirring a pot for hours.
What makes this recipe so special is the control it gives you. You decide how tangy you want the yogurt, how thick you want it, and how you want to serve it once it is chilled.
The process is slow, but the work is minimal. The crock pot heats the milk, the starter adds live cultures, and the covered slow cooker holds warmth long enough for the yogurt to ferment.
This is the kind of recipe that makes breakfast feel easier for days. Once the yogurt is made and chilled, you can scoop it into bowls, layer it with granola, swirl it with fruit, blend it into smoothies, or strain it into Greek-style yogurt.
It is also a recipe that makes you feel resourceful. With just a gallon of milk and 1/2 cup of plain yogurt with active, live cultures, you can create a fresh homemade staple that feels much more rewarding than opening a store-bought tub.
Table of Contents
- Why You’ll Love Homemade Crock Pot Yogurt
- What Makes Crock Pot Yogurt So Simple
- Recipe Details
- Ingredients for Homemade Crock Pot Yogurt
- Whole Milk
- Plain Yogurt Starter
- Before You Start
- Directions for Creamy Homemade Crock Pot Yogurt
- Step 1: Pour the Milk Into the Crock Pot
- Step 2: Set the Crock Pot to Low
- Step 3: Heat the Milk to 180°F
- Step 4: Avoid Boiling the Milk
- Step 5: Turn Off the Crock Pot
- Step 6: Let the Milk Cool to 110°F
- Step 7: Check the Warmth
- Step 8: Prepare the Yogurt Starter
- Step 9: Whisk in the Starter
- Step 10: Keep the Mixture Undisturbed
- Step 11: Put the Lid Back On
- Step 12: Wrap the Crock Pot in a Thick Towel
- Step 13: Let the Yogurt Ferment
- Step 14: Avoid Peeking Too Much
- Step 15: Check the Yogurt After 8 Hours
- Step 16: Transfer to Containers
- Step 17: Chill the Yogurt
- Step 18: Save Starter for Next Time
- Step 19: Stir or Strain Before Serving
- Step 20: Serve and Flavor as Desired
- Homemade Crock Pot Yogurt Variations
- Serving Ideas
- Storage Tips
- Freezing Tips
- Helpful Notes for Perfect Homemade Crock Pot Yogurt
- Troubleshooting Homemade Crock Pot Yogurt
- Frequently Asked Questions About Homemade Crock Pot Yogurt
- Can I Use Non-Dairy Milk Like Almond or Coconut?
- Why Did My Yogurt Separate With Watery Liquid?
- My Yogurt Did Not Thicken. What Went Wrong?
- Can I Use Flavored Yogurt as a Starter?
- Can I Use 2% Milk?
- How Do I Make Greek Yogurt?
- How Long Does Homemade Yogurt Last?
- Can I Use My Homemade Yogurt as the Next Starter?
- Final Thoughts
- Homemade Crock Pot Yogurt
Why You’ll Love Homemade Crock Pot Yogurt
You will love this homemade crock pot yogurt because it uses only two ingredients. All you need is milk and plain yogurt with active, live cultures.
It is also wonderfully hands-off. Once the milk is heated, cooled, and mixed with the starter, the slow cooker holds the environment while the cultures do their work.
The texture can be creamy and thick, especially when made with whole milk. If you want it even thicker, you can strain it through cheesecloth for Greek-style yogurt.
The flavor is fresh, tangy, and customizable. You can keep it plain, sweeten it after fermenting, add vanilla, swirl in fruit, or turn it into a savory dip.
It is also budget-friendly compared to buying small containers of yogurt. One gallon of milk can turn into a generous batch.
The recipe is perfect for busy mornings because the yogurt can be made ahead. Once it is chilled in the fridge, breakfast is ready whenever you are.
What Makes Crock Pot Yogurt So Simple
Crock pot yogurt is simple because the slow cooker handles the heating stage without needing a separate pot. You pour the milk directly into the crock pot and let it warm on low.
The milk is heated to 180°F. This step helps prepare the milk so it can become thick, creamy yogurt.
After heating, the milk cools to 110°F. That cooling step matters because adding starter yogurt while the milk is too hot can harm the live cultures.
Once the starter is whisked in, the crock pot is covered and wrapped in a thick towel. This keeps the mixture warm while it ferments.
After 8 hours, the yogurt will still be warm and somewhat loose. It firms up after at least 2 hours in the refrigerator.
The whole process is mostly waiting. That is what makes it such a useful recipe for overnight prep.
Recipe Details
- Recipe Name: Creamy Homemade Crock Pot Yogurt Recipe
- Recipe Style: Slow cooker homemade yogurt
- Main Ingredients: Milk and plain yogurt with active, live cultures
- Milk Amount: 1 gallon whole milk
- Starter Amount: 1/2 cup plain yogurt with active, live cultures
- Heating Time: About 2.5 to 3 hours on low
- Heating Temperature: 180°F
- Cooling Temperature: 110°F
- Cooling Time: About 1 hour, depending on the kitchen
- Fermentation Time: 8 hours
- Longer Fermentation Option: Up to 12 hours for more tang
- Chilling Time: At least 2 hours
- Storage: Refrigerate in clean, airtight containers for up to 2 weeks
- Greek-Style Option: Strain through cheesecloth for 1 to 2 hours, or longer for a thicker result
- Very Thick Option: Strain up to 4 hours for yogurt cheese texture
Ingredients for Homemade Crock Pot Yogurt
This recipe has one of the shortest ingredient lists possible. Even though it only uses two main ingredients, choosing them carefully makes a big difference.
Whole Milk
You need 1 gallon whole milk. Whole milk gives the creamiest yogurt.
Do not use ultra-pasteurized milk because it will not culture properly in this method. Regular pasteurized milk is the right choice.
Whole milk creates the richest texture. You can use 2% milk if you prefer, but the yogurt will be a little thinner.
Low-fat milk can also work, but the final yogurt will not be as thick and creamy. The higher fat content of whole milk gives the best result.
Plain Yogurt Starter
You need 1/2 cup plain yogurt with active, live cultures. This is the starter that turns the milk into yogurt.
Check the label carefully. It must say live and active cultures and should not contain gelatin or additives.
Plain Greek yogurt can work as a starter. Any plain, unflavored yogurt works as long as it has active cultures.
Do not use flavored yogurt as the starter. Flavored yogurts can contain ingredients that interfere with culturing.
Before You Start
Before beginning, make sure your slow cooker is clean. Since yogurt depends on fermentation, clean equipment helps everything taste fresh.
Use a thermometer if you have one. This recipe depends on heating the milk to 180°F and cooling it to 110°F before adding the starter.
Set aside enough time for the process. The milk heats for about 2.5 to 3 hours, cools for about an hour, ferments for 8 hours, then chills for at least 2 hours.
Choose containers for storing the finished yogurt. Clean, airtight containers are best, and glass jars work beautifully.
Plan to save 1/2 cup of the finished yogurt for your next batch. This lets you keep the yogurt cycle going without buying another starter right away.
Directions for Creamy Homemade Crock Pot Yogurt
Step 1: Pour the Milk Into the Crock Pot
Pour 1 gallon whole milk directly into the crock pot. There is no need to use another pot for this step.
Adding the milk straight to the slow cooker keeps the process simple. It also cuts down on cleanup.
Step 2: Set the Crock Pot to Low
Turn the crock pot to low. Let the milk heat slowly for about 2.5 to 3 hours.
The slow heating helps warm the milk gently. This is one of the reasons the crock pot method feels so easy.
Step 3: Heat the Milk to 180°F
Use a thermometer to check the milk temperature. The milk should reach 180°F.
This step is important because it prepares the milk proteins for thick, creamy yogurt. The original recipe calls this the step that makes the milk ready to turn into yogurt.
Step 4: Avoid Boiling the Milk
Watch the milk as it approaches the target temperature. It should heat to 180°F, but you do not want it boiling over.
Do not walk away for too long near the end of the heating time. A thermometer helps you catch the right moment.
Step 5: Turn Off the Crock Pot
Once the milk reaches 180°F, turn off the crock pot. Leave the milk in the slow cooker.
Now the milk needs to cool before you add the starter. This waiting step is just as important as heating.
Step 6: Let the Milk Cool to 110°F
Let the milk cool down to 110°F. This takes about an hour, depending on your kitchen.
Do not rush this step. If the milk is too hot when the yogurt starter is added, it can damage the live cultures.
Step 7: Check the Warmth
Use a thermometer for the most accurate result. The milk should be warm, not hot.
The original guidance also describes it as warm like a baby’s bath. It should not feel hot enough to sting or make you pull your finger away.
Step 8: Prepare the Yogurt Starter
Measure 1/2 cup plain yogurt with active, live cultures. Make sure it is unflavored and free of gelatin or additives.
This starter is what introduces the live cultures to the milk. Without active cultures, the milk will not become yogurt.
Step 9: Whisk in the Starter
Add the 1/2 cup yogurt starter to the cooled milk. Whisk until completely smooth.
No lumps should remain. A smooth mixture gives the finished yogurt a better texture.
Step 10: Keep the Mixture Undisturbed
Once the starter is mixed in, avoid overworking the milk. The cultures need a calm, warm environment.
Do not keep whisking after the starter is fully blended. At this stage, the yogurt needs time more than movement.
Step 11: Put the Lid Back On
Place the lid back on the crock pot. Make sure it sits securely.
The lid helps hold warmth inside. That warmth is essential for fermentation.
Step 12: Wrap the Crock Pot in a Thick Towel
Wrap the whole crock pot in a thick towel. Think of it as tucking the yogurt in for the night.
The towel keeps the warmth from escaping too quickly. This helps the cultures stay active during the 8-hour fermentation.
Step 13: Let the Yogurt Ferment
Leave the wrapped crock pot alone for a full 8 hours. Do not stir or disturb it during this time.
This is when the milk transforms into yogurt. The waiting is the hardest part, but it is also where the recipe does its work.
Step 14: Avoid Peeking Too Much
Resist the urge to check the yogurt constantly. Disturbing it can interfere with the fermentation.
Keeping the lid closed helps the temperature stay steady. A stable environment leads to better results.
Step 15: Check the Yogurt After 8 Hours
After 8 hours, uncover the crock pot and check the yogurt. It will still be warm and may look a bit loose.
Do not panic if it is not fully firm yet. It thickens more after chilling in the refrigerator.
Step 16: Transfer to Containers
Scoop the yogurt into clean containers. Mason jars or airtight containers work well.
Use clean utensils to keep the yogurt fresh. This is especially important because the yogurt will be stored for up to 2 weeks.
Step 17: Chill the Yogurt
Place the containers in the refrigerator and chill for at least 2 hours. This helps the yogurt firm up.
The longer it sits, the thicker and tangier it can become. Chilling is what gives the final texture.
Step 18: Save Starter for Next Time
Before flavoring the whole batch, save 1/2 cup of the plain yogurt. Use it as the starter for your next batch.
This gives you an ongoing homemade yogurt supply. Just remember to save it plain and unflavored.
Step 19: Stir or Strain Before Serving
If the yogurt has whey on top, either stir it back in or pour it off. Both options are fine.
Stirring the whey back in makes the yogurt creamier. Pouring it off makes the yogurt thicker.
Step 20: Serve and Flavor as Desired
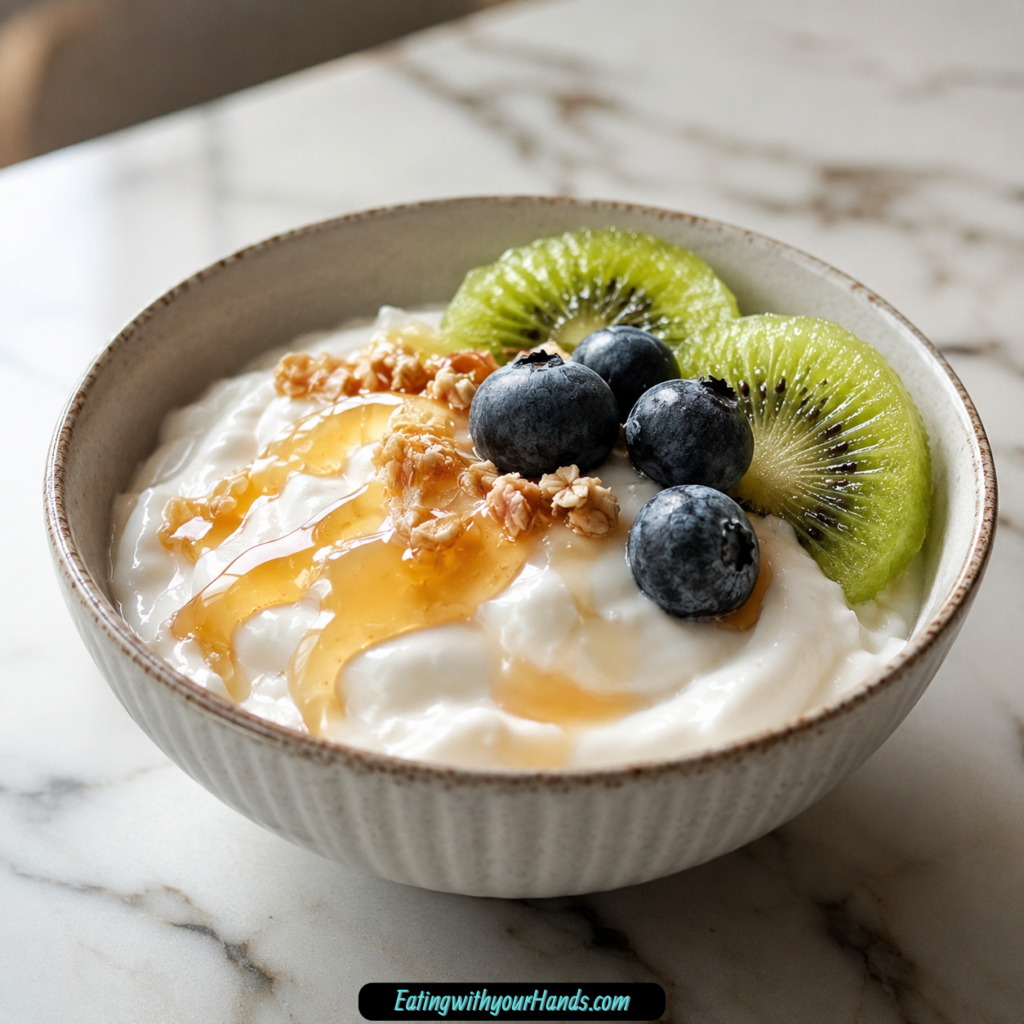
Serve the yogurt plain or add honey, maple syrup, fruit, granola, jam, vanilla, or savory seasonings. Add flavor after fermentation.
Flavoring after the yogurt is done gives you more control. It also keeps your saved starter plain for the next batch.
Homemade Crock Pot Yogurt Variations
Once you master the basic method, you can change the texture and flavor in many ways. The plain yogurt becomes a base for sweet breakfasts, savory dips, and thicker Greek-style bowls.
Greek-Style Yogurt
Line a colander with cheesecloth and add the finished yogurt. Let it strain in the refrigerator for 1 to 2 hours.
The longer it drains, the thicker it becomes. Straining removes whey and creates a thicker texture.
Extra-Thick Yogurt Cheese
For a very thick result, strain the yogurt for up to 4 hours. This creates a yogurt cheese-style texture.
This version is much thicker than regular yogurt. It is good when you want a spoon-standing consistency.
Sweet Vanilla Yogurt
After fermenting, stir in a splash of vanilla extract and a drizzle of honey. This creates a simple sweet breakfast yogurt.
Do not add the vanilla or honey before fermenting. Flavoring is best after the yogurt is fully made.
Maple Yogurt
Stir in maple syrup after the yogurt has chilled. This gives it a gentle sweetness.
Maple syrup works especially well with granola or fruit. Add as much or as little as you like.
Fruit Swirl Yogurt
Layer chilled yogurt with homemade jam or fresh mashed berries. This gives you a fruit-on-the-bottom style yogurt.
You can also swirl the fruit through the yogurt. Keep some plain yogurt aside first if you need starter for the next batch.
Savory Yogurt Dip
Skip the sweet flavors and add garlic powder and dill. This turns the yogurt into a tangy veggie dip.
This savory version can also be used as a base for other dips. The tangy yogurt works well with herbs and seasonings.
Smoothie Cubes
If you have extra yogurt, freeze it in ice cube trays. Use the cubes later in smoothies.
This is a good way to prevent waste. It also makes smoothies thicker and creamier.
Serving Ideas
Homemade crock pot yogurt is wonderful for breakfast bowls. Spoon it into a bowl and add honey, granola, and fresh fruit.
It also works beautifully in parfaits. Layer yogurt with granola and fruit in a glass for an easy breakfast that looks special.
For a quick snack, portion yogurt into small jars. Add a drizzle of honey after chilling for a grab-and-go option.
Use it in smoothies for extra creaminess. It can replace store-bought yogurt in your usual smoothie routine.
For savory meals, use it as a base for tzatziki. It also works as a tangy topping for baked potatoes.
You can eat it plain, too. Fresh homemade yogurt has a clean tangy flavor that does not need much.
Storage Tips
Store homemade yogurt in clean, airtight containers in the refrigerator. Glass mason jars are a great option.
The yogurt will stay fresh in the fridge for up to 2 weeks. Always use clean spoons when scooping to help keep it fresh.
If liquid appears on top after a few days, that is whey. You can stir it back in or pour it off.
Keep the yogurt plain until you are ready to serve if you want the most flexibility. This makes it easier to use for sweet or savory dishes.
Save 1/2 cup plain yogurt for the next batch. Store it separately so it does not accidentally get sweetened or flavored.
Freezing Tips
You can freeze extra yogurt in ice cube trays. These cubes are especially useful for smoothies.
Freeze the yogurt until solid, then transfer the cubes to a freezer-safe container or bag. This makes it easier to grab only what you need.
The texture may change after freezing, so frozen yogurt cubes are best for blending rather than eating plain. Smoothies are the easiest use.
Freezing is a helpful option if you made more yogurt than you can finish. It keeps the batch from going to waste.
Helpful Notes for Perfect Homemade Crock Pot Yogurt
Use the Right Milk
Whole milk gives the creamiest yogurt. Regular pasteurized milk is the best choice for this method.
Do not use ultra-pasteurized milk. It will not culture right in this recipe.
Check the Starter Label
The starter must be plain yogurt with active, live cultures. Check the label carefully before using it.
Avoid yogurt with gelatin or additives. Flavored yogurt should not be used as a starter.
Use a Thermometer
A thermometer is very helpful for this recipe. The milk needs to reach 180°F, then cool to 110°F before the starter is added.
Guessing can lead to problems. If the milk is too hot, the cultures may not survive.
Do Not Rush the Cooling Step
Cooling to 110°F is important. Adding starter too early can ruin the batch.
Let the milk cool naturally. It usually takes about an hour, depending on the temperature of your kitchen.
Keep the Crock Pot Warm During Fermentation
Wrapping the slow cooker in a thick towel helps hold warmth. The cultures need that gentle warmth to ferment.
If your house runs cold, try fermenting the yogurt in the oven with just the light on. The gentle warmth helps the cultures do their work.
Let It Chill Before Judging the Texture
The yogurt will be warm and loose after fermentation. It firms up in the refrigerator.
Chill for at least 2 hours before deciding whether it is thick enough. If you want it thicker, strain it.
Strain for Thickness
If the yogurt is too thin, strain it through cheesecloth. One to two hours gives a Greek-style thickness.
For a much thicker result, strain up to 4 hours. Save the whey if you want to use it later for smoothies or bread-making.
Troubleshooting Homemade Crock Pot Yogurt
Why Is My Yogurt Too Thin?
Thin yogurt can happen if the milk was not heated properly, the starter was weak, or the fermentation temperature dropped too much. Straining can fix many texture issues after the batch is finished.
Use whole milk for the creamiest texture. Low-fat milk works, but it will be thinner.
Why Did My Yogurt Not Thicken?
The starter may not have had live cultures, the milk may have been too hot when the starter was added, or the crock pot may not have stayed warm enough. These are the most common causes.
Next time, check the starter label, cool the milk to 110°F, and wrap the crock pot well. A warm fermentation environment matters.
Why Is There Watery Liquid on Top?
That liquid is whey, and it is normal. It can appear after a few days in the refrigerator.
Stir it back in for creamier yogurt or pour it off for thicker yogurt. The yogurt is still perfectly good.
Why Is My Yogurt Not Tangy Enough?
Let it ferment longer next time. You can ferment up to 12 hours if you want more tang.
The original note mentions that 10 hours gives a nice bite. Longer fermentation creates a stronger flavor.
Why Is My Yogurt Too Tangy?
Ferment for less time next time. An 8-hour fermentation is the base method.
Tang increases as fermentation time increases. Chill the yogurt once it reaches the flavor you like.
Why Did My Yogurt Separate?
Some separation is normal. Stir the yogurt before serving if you want it smoother.
If there is a lot of whey, pour some off or strain the yogurt. The texture can still be saved.
What If My Batch Fails?
Even a batch that does not set perfectly can still be useful. The original note suggests using “failed” yogurt in pancakes or muffins.
Do not stress too much. Homemade yogurt gets easier once you learn how your slow cooker and kitchen temperature behave.
Frequently Asked Questions About Homemade Crock Pot Yogurt
Can I Use Non-Dairy Milk Like Almond or Coconut?
You can try, but it is trickier. Dairy milk has proteins that thicken well into yogurt.
For non-dairy yogurt, add a thickener such as tapioca starch or agar agar. Use a store-bought non-dairy yogurt as the starter and treat it as an experiment because results vary.
Why Did My Yogurt Separate With Watery Liquid?
That watery liquid is whey. It is completely normal.
You can stir it back in for a creamier texture or pour it off for thicker yogurt. Some separation can happen after a few days in the fridge.
My Yogurt Did Not Thicken. What Went Wrong?
There are three likely causes. The starter may not have had live cultures, the milk may have been too hot when the starter was added, or the yogurt may not have stayed warm enough during fermentation.
Next time, check the starter label, cool the milk to 110°F, and wrap the crock pot well. Those three details matter most.
Can I Use Flavored Yogurt as a Starter?
No, stick to plain yogurt. Flavored yogurts can contain additives that interfere with culturing.
You can add flavors later after the yogurt has fermented and chilled. Keep your starter plain.
Can I Use 2% Milk?
Yes, 2% milk can be used. The yogurt will be a little thinner than yogurt made with whole milk.
Whole milk gives the creamiest result. Low-fat options work, but the texture changes.
How Do I Make Greek Yogurt?
Strain the finished yogurt through cheesecloth in the refrigerator. One to two hours gives a thick Greek-style texture.
For an even thicker yogurt cheese texture, strain up to 4 hours. The longer it strains, the thicker it gets.
How Long Does Homemade Yogurt Last?
Store it in clean, airtight containers in the refrigerator for up to 2 weeks. Always use clean utensils.
If whey forms on top, stir it in or pour it off. That does not mean the yogurt has gone bad.
Can I Use My Homemade Yogurt as the Next Starter?
Yes, save 1/2 cup of plain homemade yogurt for your next batch. Set it aside before adding sweeteners or flavors.
This helps you keep making yogurt without buying a new starter every time. Make sure the saved yogurt stays plain and clean.
Final Thoughts
Creamy Homemade Crock Pot Yogurt is one of those recipes that changes the way you look at a basic ingredient. With only 1 gallon of whole milk and 1/2 cup plain yogurt with active, live cultures, you can make a fresh, tangy, creamy batch right in your slow cooker.
The process is simple but thoughtful. Heat the milk to 180°F, cool it to 110°F, whisk in the starter, wrap the crock pot, ferment for 8 hours, and chill until thickened.
Once the yogurt is ready, you can make it completely your own. Strain it for Greek-style yogurt, sweeten it with honey or maple syrup, layer it with fruit, use it in smoothies, or turn it into a savory dip with garlic powder and dill.
The recipe is also practical. It stores in the refrigerator for up to 2 weeks, can be frozen into smoothie cubes, and gives you a starter for the next batch if you remember to save 1/2 cup.
Most of all, homemade crock pot yogurt feels satisfying because it is so simple. A slow cooker, two ingredients, gentle warmth, and a little patience turn ordinary milk into something creamy, useful, and completely worth making again.
Homemade Crock Pot Yogurt
Homemade Crock Pot Yogurt is a simple, budget-friendly way to make creamy yogurt at home with just whole milk and yogurt that contains active, live cultures. The slow, gentle heating and long fermentation time help create a smooth texture and tangy flavor. This recipe is useful for breakfast, snacks, smoothies, parfaits, or meal prep. Once chilled, the yogurt can be served plain, sweetened, or paired with fruit and granola.
Recipe Details
- Prep Time: 15 minutes
- Cook Time: 3 hours
- Fermentation Time: 8 hours
- Total Time: 11 hours 15 minutes
- Course: Breakfast, Snack
- Cuisine: Global
- Servings: 8 cups
Equipment
- Crock Pot
- Thermometer
Ingredients
- ½ cup yogurt with active, live cultures no other additives
- 1 gallon whole milk
Instructions
Step 1: Heat the Milk
Pour the whole milk into the crock pot. Heat on low for 2.5 to 3 hours, until the milk reaches 180°F.
Step 2: Cool the Milk
Turn off the crock pot and let the milk cool until it reaches 110°F.
Step 3: Add the Yogurt Starter
Whisk in the yogurt with active, live cultures until it is fully blended into the cooled milk.
Step 4: Keep the Crock Pot Warm
Cover the crock pot with a lid. Wrap it in a thick towel to help maintain warmth during fermentation.
Step 5: Ferment the Yogurt
Let the crock pot sit undisturbed for 8 hours so the yogurt can ferment properly.
Step 6: Chill Before Serving
After fermentation, refrigerate the yogurt for at least 2 hours before serving.
Notes
For thicker yogurt, strain it through cheesecloth for 1-2 hours after fermentation.
Serving Suggestions
- Fresh berries
- Granola
- Honey
- Maple syrup
- Sliced bananas
- Smoothie bowls
- Breakfast parfaits
Storage
How to Store
Store the finished yogurt in airtight containers in the refrigerator after it has chilled.
How to Freeze
Freezing is not ideal for the smoothest yogurt texture, but it can be frozen for use in smoothies if needed.
Best Texture Tip
For a thicker consistency, strain the yogurt through cheesecloth for 1-2 hours after fermentation, as noted in the original recipe.

Fernando is the creator and writer behind the food blog Eating with your Hands. Living and working in cities like Paris, Barcelona, and Berlin, and being married to a Canadian foodie, has given Fernando a passion and interest in food and inspired him to run EWYH.