
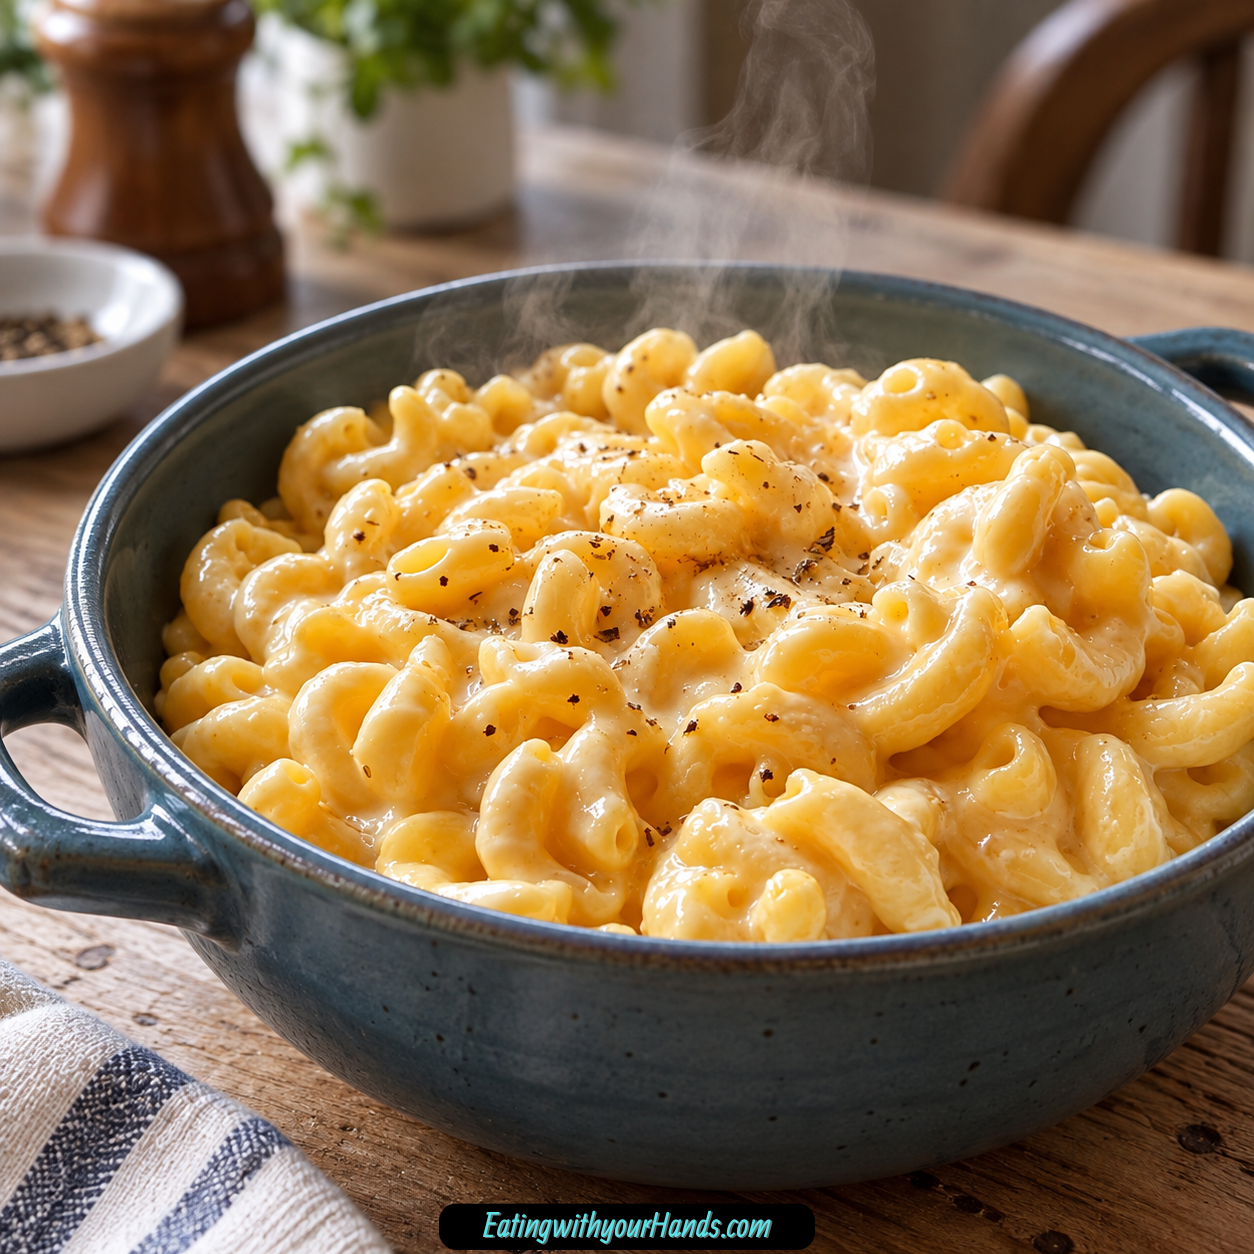

Creamy Macaroni and Cheese is the kind of dish that feels like comfort before the bowl even reaches the table. It is simple, warm, cheesy, familiar, and deeply satisfying in that way only homemade mac and cheese can be.
This recipe is built around tender elbow macaroni coated in a silky cheddar cheese sauce made with butter, flour, whole milk, shredded cheddar, salt, and black pepper. There are no complicated ingredients, no long baking time required, and no boxed shortcut flavor.
The magic starts with a basic roux. Butter and flour cook together for about a minute, then milk is whisked in until the sauce thickens into a creamy base.
Once the cheese melts into that sauce, everything changes. The sauce becomes rich, smooth, and clingy enough to coat every little curve of the macaroni.
This is the bowl I think of when the weather turns gloomy, when dinner needs to happen quickly, or when everyone at the table wants something they already know they will love. It has that cozy, rainy-day feeling that makes the kitchen smell like home.
It is also fast enough for a weeknight. From boiling the pasta to stirring in the cheese, this homemade macaroni and cheese can be ready in about 25 minutes.
That makes it quicker than waiting for delivery and far more comforting than a boxed version. It is kid-friendly, adult-approved, and endlessly flexible depending on what you want to add.
Serve it straight from the pot for maximum creaminess, or turn it into a baked version with buttery breadcrumbs or crushed Ritz crackers. Either way, this Creamy Macaroni and Cheese is pure comfort in a bowl.
Table of Contents
- Why You’ll Love This Macaroni and Cheese
- Recipe Details
- Ingredients
- Equipment Checklist
- Ingredient Notes
- Optional Swaps, Variations, Add-Ins, and Serving Ideas
- Why This Recipe Works
- Directions
- Step 1: Bring the Water to a Boil
- Step 2: Cook the Macaroni
- Step 3: Drain Without Rinsing
- Step 4: Set the Pasta Aside
- Step 5: Melt the Butter
- Step 6: Add the Flour
- Step 7: Watch the Roux Carefully
- Step 8: Slowly Add the Milk
- Step 9: Simmer Until Thickened
- Step 10: Lower the Heat
- Step 11: Add the Cheese Gradually
- Step 12: Season the Sauce
- Step 13: Check the Sauce Texture
- Step 14: Add the Pasta Back
- Step 15: Adjust the Creaminess
- Step 16: Serve Hot
- Step 17: Make It Baked if Desired
- Step 18: Store Leftovers
- Serving Ideas
- Storage
- Freezing
- Make-Ahead
- Helpful Notes for Best Results
- Variations
- Classic Creamy Macaroni and Cheese
- Bacon Mac and Cheese
- Gouda Cheddar Mac and Cheese
- Gruyère Cheddar Mac and Cheese
- Pepper Jack Mac and Cheese
- Baked Breadcrumb Mac and Cheese
- Ritz Cracker Mac and Cheese
- Mushroom Mac and Cheese
- Broccoli Mac and Cheese
- Spinach Mac and Cheese
- Gluten-Free Mac and Cheese
- Extra Creamy Mac and Cheese
- Troubleshooting
- Frequently Asked Questions
- Why This Recipe Works So Well
- Final Thoughts
- Macaroni and Cheese
Why You’ll Love This Macaroni and Cheese
This mac and cheese is creamy and smooth. The homemade cheddar sauce coats every noodle.
It is quick to make. The whole dish can be ready in about 25 minutes.
It uses simple ingredients. Pasta, butter, flour, milk, cheddar, salt, and pepper are all you need.
It is family-friendly. The flavor is classic enough for picky eaters but comforting enough for adults.
It is easy to customize. Bacon, green onions, vegetables, different cheeses, or a crispy topping can all be added.
It works as a main dish or side dish. Serve it alone, with salad, with roasted vegetables, or with grilled chicken.
Recipe Details
This recipe uses 8 oz elbow macaroni. Elbow macaroni is the classic shape, but another pasta shape can be used if needed.
The sauce starts with 2 tablespoons unsalted butter. If you only have salted butter, reduce the added salt later.
The roux uses 2 tablespoons all-purpose flour. This thickens the sauce and should not be skipped.
The creamy liquid is 2 cups whole milk. Whole milk creates the richest sauce.
The cheese is 2 cups packed shredded cheddar cheese. Sharp cheddar is a great choice, but mild cheddar also works.
Freshly grated cheese melts more smoothly than pre-shredded cheese. Pre-shredded cheese can contain anti-caking coatings that affect the sauce texture.
The seasoning is ¼ teaspoon salt and ¼ teaspoon black pepper. These balance the richness of the cheese sauce.
The pasta cooks for about 7 to 8 minutes, just until al dente. Do not rinse it after draining.
The roux cooks for about 1 minute. The milk then simmers for 3 to 4 minutes until thickened.
The cheese should be melted over low heat. High heat can make the sauce grainy.
Ingredients
For the Macaroni and Cheese
- 8 oz elbow macaroni
- 2 tablespoon butter, unsalted
- 2 tablespoon all-purpose flour
- 2 cups whole milk
- 2 cups shredded cheddar cheese, packed
- ¼ teaspoon salt
- ¼ teaspoon black pepper
Optional Add-Ins, Swaps, and Serving Ideas
- Crispy chopped bacon
- Green onions
- Gouda
- Gruyère
- Pepper jack
- Smoked gouda
- Buttery breadcrumbs
- Crushed Ritz crackers
- Sautéed mushrooms
- Roasted broccoli
- Spinach
- Simple green salad
- Tangy vinaigrette
- Roasted vegetables
- Grilled chicken
- Crispy garlic bread
- Heavy cream
- Gluten-free elbow macaroni
- Gluten-free flour
- Extra milk for reheating
Equipment Checklist
Large Pot
Use a large pot for boiling the pasta and making the sauce. This keeps the recipe simple and reduces dishes.
The same pot can be used after draining the macaroni. That makes the process faster.
Whisk
A whisk is the best tool for making a smooth cheese sauce. It helps prevent lumps when the milk is added to the roux.
A fork can work in a pinch. A whisk is still ideal.
Baking Dish
A baking dish is optional. You only need it if you want to make the baked version with a crispy topping.
For stovetop mac and cheese, no baking dish is needed. Serve it straight from the pot.
Ingredient Notes
Elbow macaroni is the classic choice for macaroni and cheese. Its shape holds sauce well and gives every bite that familiar comfort-food texture.
Butter gives the sauce richness. It also combines with flour to create the roux.
All-purpose flour thickens the milk into a sauce. Without it, the cheese sauce would be thinner and less stable.
Whole milk creates the creamiest result. The richer the milk, the smoother the sauce feels.
Cheddar cheese is the heart of the flavor. Sharp cheddar gives a stronger, more savory taste, while mild cheddar gives a softer cheese flavor.
Freshly grated cheddar melts better than pre-shredded cheese. Grating it yourself helps the sauce stay smooth.
Salt makes the cheese flavor pop. If using salted butter, add salt carefully.
Black pepper adds a gentle kick. It balances the richness without making the dish spicy.
Heavy cream can be stirred in for extra creaminess if you want a more indulgent version. Use it as a richness boost, not as a required ingredient.
Optional Swaps, Variations, Add-Ins, and Serving Ideas
Classic Creamy Macaroni and Cheese
Make the recipe with elbow macaroni, butter, flour, whole milk, cheddar cheese, salt, and black pepper. This gives the full stovetop version.
Serve it hot while the sauce is silky. Add a splash of milk if it thickens too much.
Bacon Lover’s Mac and Cheese
Stir in crispy chopped bacon. Add green onions for a smoky, savory twist.
You can also sprinkle extra bacon on top. This makes the dish heartier.
Gouda Mac and Cheese
Swap half the cheddar for gouda. The sauce becomes smooth and slightly richer.
Keep at least some cheddar for backbone flavor. The cheddar keeps the mac and cheese classic.
Gruyère Mac and Cheese
Swap half the cheddar for Gruyère. This gives the dish a deeper, more elegant cheese flavor.
Gruyère works especially well if serving mac and cheese as part of a bigger dinner. Keep the sauce low and slow while melting.
Pepper Jack Mac and Cheese
Swap half the cheddar for pepper jack. This gives the sauce a little heat.
It is a good option when you want a slightly spicy mac and cheese. Keep some cheddar in the mix.
Smoked Gouda Mac and Cheese
Use smoked gouda for part of the cheese. The smoky flavor makes the dish taste deeper.
This version is bold and cozy. It pairs well with bacon or roasted vegetables.
Baked Mac and Cheese
Transfer the finished mac and cheese to a baking dish. Top with buttery breadcrumbs or crushed Ritz crackers.
Bake at 375°F for 15 minutes. The top becomes golden and crisp while the inside stays creamy.
Veggie Boost Mac and Cheese
Stir in sautéed mushrooms, roasted broccoli, or spinach. The cheese sauce makes vegetables taste rich and comforting.
This is a simple way to add more texture and color. Keep the vegetables cooked before stirring them in.
Grilled Chicken Mac and Cheese
Serve the mac and cheese with grilled chicken. This turns it into a fuller meal.
The creamy pasta and simple chicken balance well. Add salad or roasted vegetables on the side.
Garlic Bread Dinner Plate
Serve mac and cheese with crispy garlic bread. This makes the meal extra cozy.
Add a green salad with tangy vinaigrette to balance the richness. The freshness helps the plate feel complete.
Gluten-Free Mac and Cheese
Use gluten-free elbow macaroni or another gluten-free pasta shape. Use gluten-free flour for the roux.
The sauce method stays the same. Stir gently so the pasta holds its shape.
Why This Recipe Works
This recipe works because it starts with a roux. Butter and flour cook together to create a base that thickens the milk into a smooth sauce.
Slowly whisking in the milk helps prevent lumps. Constant whisking is the secret to a silky texture.
Simmering the sauce for 3 to 4 minutes gives it time to thicken. The sauce should coat the back of a spoon before the cheese is added.
Turning the heat down low before adding cheese is important. High heat can make cheese seize and turn grainy.
Adding cheese by the handful helps it melt evenly. Each addition should melt before more cheese goes in.
The pasta is cooked al dente so it does not become mushy. It continues to soften slightly once mixed with the sauce.
Not rinsing the pasta helps the sauce cling. The starch left on the noodles works in your favor.
The dish is forgiving. If the sauce is too thick, a splash of warm milk can bring it back to creamy.
Directions
Step 1: Bring the Water to a Boil
Fill a large pot with water and bring it to a boil. Salt the water if desired.
The pasta needs enough room to move while cooking. A large pot helps the macaroni cook evenly.
Step 2: Cook the Macaroni
Add 8 oz elbow macaroni to the boiling water. Cook for about 7 to 8 minutes.
The pasta should be al dente, with a little bite. Avoid cooking it until mushy.
Step 3: Drain Without Rinsing
Drain the macaroni well. Do not rinse it.
The starch on the pasta helps the cheese sauce cling. Rinsing removes that helpful starch.
Step 4: Set the Pasta Aside
Keep the drained pasta nearby while you make the sauce. You will add it back to the pot later.
Do not let the pasta sit too long uncovered. The goal is to combine it with the sauce while everything is still warm.
Step 5: Melt the Butter
In the same large pot, melt 2 tablespoons unsalted butter over medium heat. Let it bubble gently.
Do not let the butter brown too much. It should be melted and ready for flour.
Step 6: Add the Flour
Whisk in 2 tablespoons all-purpose flour. Keep whisking until the butter and flour form a smooth paste.
Cook this mixture for about 1 minute. This removes the raw flour taste and creates the base for the sauce.
Step 7: Watch the Roux Carefully
Do not walk away while the roux cooks. It can burn quickly.
Keep the heat steady and stir constantly. The roux should stay light.
Step 8: Slowly Add the Milk
Slowly pour in 2 cups whole milk while whisking constantly. Add it gradually instead of all at once.
This helps prevent lumps. Keep the whisk moving until the mixture looks smooth.
Step 9: Simmer Until Thickened
Let the milk mixture simmer for 3 to 4 minutes. Whisk often.
The sauce should thicken enough to coat the back of a spoon. This means it is ready for cheese.
Step 10: Lower the Heat
Turn the heat down to low. This is important before adding cheese.
Cheese melts best with gentle heat. Too much heat can make the sauce grainy.
Step 11: Add the Cheese Gradually
Add 2 cups packed shredded cheddar cheese a handful at a time. Stir until each handful melts before adding the next.
This gradual melting helps create a smooth sauce. Do not rush this step.
Step 12: Season the Sauce
Add ¼ teaspoon salt and ¼ teaspoon black pepper. Stir and taste.
If using salted butter or salty cheese, be careful with extra salt. Adjust only if needed.
Step 13: Check the Sauce Texture
The sauce should be creamy, smooth, and thick enough to coat pasta. If it looks too thick, whisk in a splash of milk.
If it seems too thin, let it simmer briefly or add a little more cheese. Keep the heat low.
Step 14: Add the Pasta Back
Add the drained macaroni back into the pot with the cheese sauce. Stir gently.
Coat every noodle in the sauce. Take your time so the sauce spreads evenly.
Step 15: Adjust the Creaminess
If the macaroni and cheese looks too thick or dry, add a splash of milk. Stir until creamy again.
Mac and cheese thickens as it sits. A little milk can bring back the silky texture.
Step 16: Serve Hot
Serve immediately while the cheese sauce is warm and melty. This is when the texture is best.
Use a big spoon and scoop into bowls. Add black pepper if desired.
Step 17: Make It Baked if Desired
For a crispy version, transfer the mac and cheese to a baking dish. Top with breadcrumbs mixed with a little melted butter or crushed Ritz crackers.
Bake at 375°F for 15 minutes. The top should be golden and crunchy.
Step 18: Store Leftovers
Cool leftovers and transfer them to an airtight container. Refrigerate for up to 3 days.
Reheat with a splash of milk. Warm gently in short microwave bursts or on the stove.
Serving Ideas
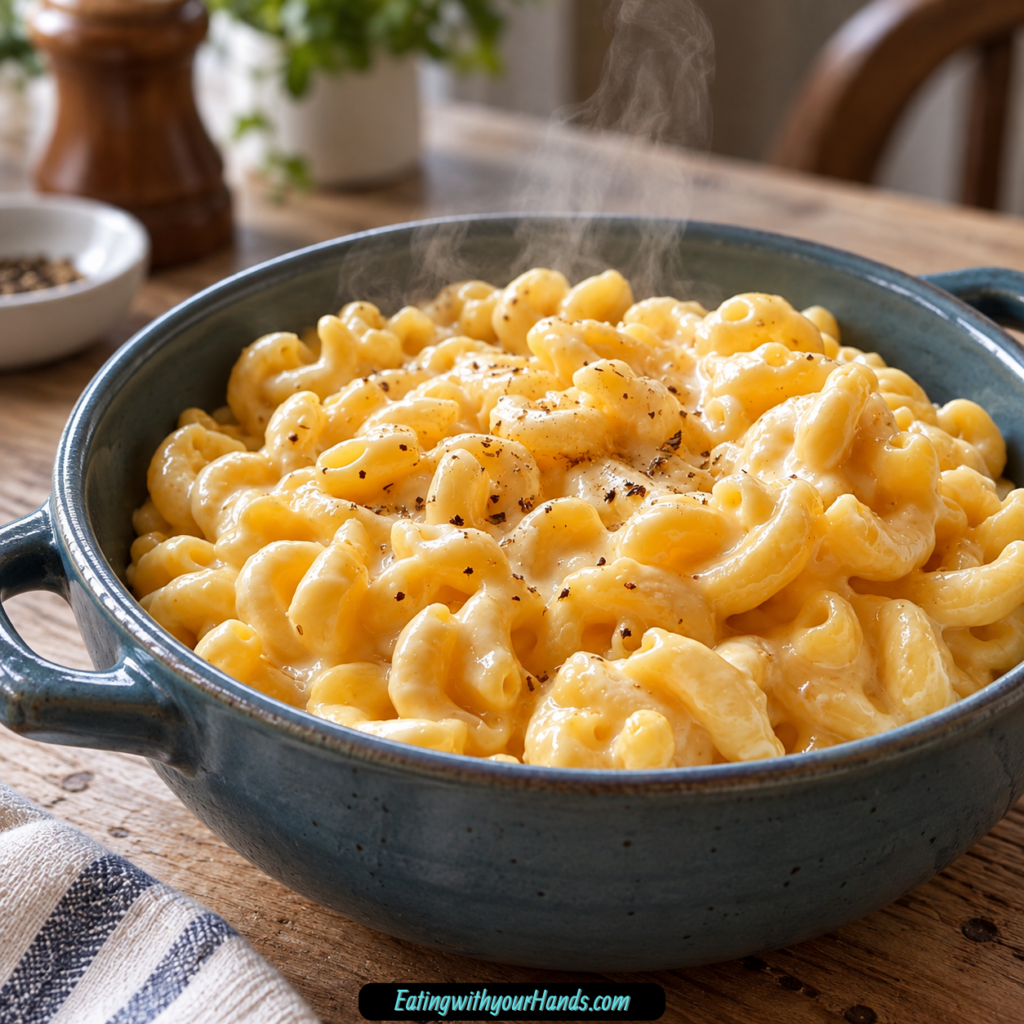
Serve Creamy Macaroni and Cheese piping hot. The sauce is at its best when it is freshly stirred and melty.
Pair it with a simple green salad. A tangy vinaigrette helps balance the richness.
Roasted vegetables are another good side. They bring texture and freshness to the plate.
Add grilled chicken if you want a fuller meal. The chicken makes the mac and cheese more filling.
Serve with crispy garlic bread for an extra cozy dinner. This is especially nice for a comfort-food night.
Add crispy bacon and green onions for a smoky topping. This turns the dish into something a little more loaded.
Serve it as a side dish for family dinners. It fits beside many simple mains.
For kids, keep it classic and creamy. The basic cheddar version is usually the safest crowd-pleaser.
Storage
Store leftover macaroni and cheese in an airtight container. Refrigerate for up to 3 days.
Let it cool before storing. This helps reduce extra moisture in the container.
The sauce will thicken in the refrigerator. That is normal.
Add a splash of milk before reheating. This helps bring back the creamy texture.
Microwave in short bursts, stirring between each one. This prevents uneven heating.
You can also reheat gently on the stove. Keep the heat low and stir often.
Do not overheat the sauce. Too much heat can make it grainy.
Freezing
Macaroni and cheese can be frozen, but the texture may become a little grainy after reheating. Freeze only if needed.
Place cooled mac and cheese in an airtight container. Freeze for up to 1 month.
Thaw overnight in the refrigerator. This helps it reheat more evenly.
Reheat with extra milk to bring back creaminess. Stir gently as it warms.
The sauce may not be exactly as smooth as fresh. It will still be comforting.
For best results, freeze portions instead of one large batch. Smaller portions reheat more evenly.
Avoid overheating after thawing. Gentle heat gives the best texture.
Make-Ahead
Macaroni and cheese is creamiest when served fresh. It can still be made ahead if needed.
Cook the full recipe, cool it, and store it in the refrigerator. Reheat with milk to loosen the sauce.
If making the baked version, prepare the stovetop mac first. Add the topping right before baking.
For smoother reheating, store without the crispy topping. Add fresh breadcrumbs or crushed Ritz before baking.
Freshly grated cheese helps the sauce reheat better. It melts more smoothly than pre-shredded cheese.
Make-ahead mac and cheese needs gentle reheating. Low heat keeps the sauce from breaking.
Serve as soon as it becomes creamy again. Do not keep reheating over and over.
Helpful Notes for Best Results
Cook the pasta al dente. Mushy pasta will not hold the sauce as well.
Do not rinse the drained pasta. The starch helps the sauce cling.
Cook the roux for about 1 minute. This thickens the sauce and removes raw flour flavor.
Whisk constantly while adding milk. This prevents lumps.
Use low heat when melting the cheese. High heat can make the sauce grainy.
Freshly grated cheese melts better than pre-shredded cheese. It creates a smoother sauce.
If the sauce is too thick, add warm milk. Whisk until silky again.
One serving is about 450 calories. This is comfort food, and it pairs nicely with salad if you want balance.
Variations
Classic Creamy Macaroni and Cheese
Use elbow macaroni, butter, flour, whole milk, cheddar cheese, salt, and black pepper. This gives the simple stovetop version.
Serve immediately. The sauce is smoothest when fresh.
Bacon Mac and Cheese
Add crispy chopped bacon to the finished mac and cheese. Stir in green onions for extra flavor.
Sprinkle more bacon on top if desired. This makes the dish smoky and savory.
Gouda Cheddar Mac and Cheese
Swap half the cheddar for gouda. The sauce becomes richer and a little smoother.
Smoked gouda can also be used. It adds a deeper flavor.
Gruyère Cheddar Mac and Cheese
Use half cheddar and half Gruyère. This creates a more savory, fancy flavor.
Keep the heat low while melting. Gruyère melts well but still needs gentle heat.
Pepper Jack Mac and Cheese
Swap half the cheddar for pepper jack. This adds a little heat.
It is a good choice for anyone who likes a mild spicy kick. Serve hot.
Baked Breadcrumb Mac and Cheese
Transfer the finished mac and cheese to a baking dish. Add buttery breadcrumbs on top.
Bake at 375°F for 15 minutes. The top becomes golden and crisp.
Ritz Cracker Mac and Cheese
Top the mac and cheese with crushed Ritz crackers instead of breadcrumbs. Add a little melted butter.
Bake until the topping is golden. The crackers make the top buttery and crunchy.
Mushroom Mac and Cheese
Stir in sautéed mushrooms. They add savory depth.
This variation works well with Gruyère or smoked gouda. Serve warm.
Broccoli Mac and Cheese
Add roasted broccoli to the finished mac and cheese. The broccoli adds texture and balance.
The cheese sauce makes it extra comforting. This is a good veggie-boost version.
Spinach Mac and Cheese
Stir in a handful of spinach. The heat from the pasta and sauce helps it soften.
This is an easy way to add greens. Keep the sauce creamy.
Gluten-Free Mac and Cheese
Use gluten-free elbow macaroni. Use gluten-free flour in the roux.
The method stays the same. Stir gently to protect the pasta texture.
Extra Creamy Mac and Cheese
Use whole milk, do not skimp on butter, and stir in a splash of heavy cream if desired. Melt the cheese low and slow.
This makes the sauce extra rich. Serve right away.
Troubleshooting
The Sauce Is Grainy
The heat may have been too high when the cheese was added. Lower the heat before stirring in cheese.
Pre-shredded cheese can also affect smoothness. Freshly grated cheese melts better.
The Sauce Has Lumps
The milk may have been added too quickly, or the whisking may not have been constant. Add milk slowly while whisking.
A whisk is the best tool. A fork can work, but it takes more effort.
The Sauce Is Too Thick
Add a splash of warm milk. Whisk until smooth.
Mac and cheese thickens as it sits. Extra milk brings it back.
The Sauce Is Too Thin
Let it simmer a little longer before adding the pasta. You can also add a pinch more cheese.
Keep the heat gentle. The sauce will thicken as it stands.
The Pasta Is Mushy
The pasta was cooked too long. Cook it 7 to 8 minutes, just until al dente.
Do not rinse after draining. Add it to the sauce while warm.
The Mac and Cheese Is Dry
It may have sat too long or needed more milk. Stir in a splash of milk.
Warm gently until creamy. Do not overheat.
The Baked Version Is Too Dry
The topping or baking time may have dried it out. Bake only 15 minutes at 375°F.
Start with creamy stovetop mac before baking. The pasta should be saucy going into the oven.
The Reheated Mac Is Not Creamy
Add milk before reheating. Stir often.
Microwave in short bursts or warm slowly on the stove. Too much heat can damage the sauce.
The Cheese Did Not Melt Smoothly
The cheese may have been added too quickly or over high heat. Add cheese by the handful over low heat.
Freshly grated cheese gives the smoothest melt. Stir until each addition melts before adding more.
The Flavor Tastes Flat
Add a little more salt or black pepper. Taste carefully.
Cheese needs seasoning to shine. Add slowly and stir well.
Frequently Asked Questions
Can I use gluten-free pasta?
Yes, use your favorite gluten-free elbow macaroni or another gluten-free shape. The sauce can also be made gluten-free if you use gluten-free flour for the roux.
The cooking time may vary depending on the pasta. Cook until al dente.
How do I make it extra creamy?
Use whole milk, keep the butter amount, and melt the cheese slowly over low heat. A splash of heavy cream can also be stirred in for extra richness.
Freshly grated cheese helps too. It melts more smoothly than pre-shredded cheese.
Can I freeze mac and cheese?
Yes, but the texture may become a little grainy after reheating. Freeze in an airtight container for up to 1 month.
Thaw overnight in the refrigerator. Reheat with extra milk to restore creaminess.
Can I bake this macaroni and cheese?
Yes, transfer the finished stovetop mac to a baking dish. Top with buttery breadcrumbs or crushed Ritz crackers.
Bake at 375°F for 15 minutes. The top becomes crisp and golden.
Why should I not rinse the pasta?
The starch on the pasta helps the sauce cling. Rinsing removes that starch.
Drain the pasta well and add it to the sauce warm. This gives the best coating.
Can I use pre-shredded cheese?
You can, but freshly grated cheese melts better. Pre-shredded cheese can contain coatings that affect smoothness.
For the silkiest sauce, grate the cheddar yourself. It is worth the small extra step.
What should I serve with mac and cheese?
Serve it with green salad, roasted vegetables, grilled chicken, or crispy garlic bread. A tangy vinaigrette balances the richness.
It can be a main dish or a side. Serve hot.
How long do leftovers last?
Leftovers last up to 3 days in an airtight container in the refrigerator. Reheat with a splash of milk.
Use short microwave bursts or gentle stovetop heat. Stir often.
Why This Recipe Works So Well
Creamy Macaroni and Cheese works because it uses a classic cheese sauce method. Butter and flour create a roux, milk turns that roux into a sauce, and cheddar melts in to make it rich and creamy.
The pasta is cooked just until al dente so it keeps its shape. That texture matters once it is coated in cheese sauce.
The sauce thickens before the cheese is added. This gives the cheese a stable base to melt into.
Low heat is the key to smooth cheese. Too much heat can make the sauce grainy.
Freshly grated cheddar gives the best texture. It melts into the milk sauce more cleanly.
Salt and pepper keep the flavor balanced. They make the cheese taste deeper.
The recipe is also flexible. Bacon, green onions, different cheeses, vegetables, baked toppings, grilled chicken, and gluten-free swaps all fit easily.
Most of all, this recipe works because it keeps comfort food simple. It is creamy, cheesy, fast, and deeply satisfying.
Final Thoughts
Creamy Macaroni and Cheese is made with elbow macaroni, butter, all-purpose flour, whole milk, shredded cheddar cheese, salt, and black pepper. It comes together in about 25 minutes with a silky homemade cheese sauce that coats every noodle.
Serve it hot as a cozy main dish or side, pair it with salad, roasted vegetables, grilled chicken, or garlic bread, and store leftovers in the refrigerator for up to 3 days. With its 7-to-8-minute pasta cook time, 1-minute roux, 3-to-4-minute sauce simmer, optional baked topping at 375°F for 15 minutes, freezer option up to 1 month, and variations like bacon, green onions, gouda, Gruyère, pepper jack, smoked gouda, breadcrumbs, crushed Ritz crackers, sautéed mushrooms, roasted broccoli, spinach, gluten-free pasta, gluten-free flour, and extra heavy cream, this mac and cheese is classic comfort made simple.
Macaroni and Cheese

Creamy, cheesy, simple, and comforting, this Macaroni and Cheese is made with elbow macaroni and a smooth cheddar cheese sauce. Butter, flour, milk, shredded cheddar, salt, and black pepper come together in a large pot for a classic American dinner that is ready in 25 minutes.
Recipe Details
- Prep Time: 10 minutes
- Cook Time: 15 minutes
- Total Time: 25 minutes
- Course: Dinner
- Cuisine: American
- Servings: 4 people
- Calories: 450 kcal
Equipment
- large pot
- Whisk
- baking dish
Ingredients
For the Cheese Sauce
- ¼ teaspoon black pepper
- ¼ teaspoon salt
- 2 cups shredded cheddar cheese
- 2 cups milk
- 2 tablespoon all-purpose flour
- 2 tablespoon butter
For the Pasta
- 8 oz elbow macaroni
Instructions
Step 1: Cook the Macaroni
Cook the elbow macaroni according to the package instructions. Drain the pasta well and set it aside.
Since the cooking time depends on the package instructions, no extra boiling time is added here. Keep the macaroni ready while you make the cheese sauce.
Step 2: Make the Butter and Flour Base
Melt the butter in a large pot over medium heat. Whisk in the all-purpose flour and cook for 1 minute.
This creates the base for the creamy sauce. Whisk well so the butter and flour combine smoothly before the milk is added.
Step 3: Add the Milk
Gradually whisk in the milk until the mixture is smooth. Continue cooking until the sauce thickens.
Add the milk slowly while whisking to help prevent lumps. The sauce should become creamy before the cheese goes in.
Step 4: Melt in the Cheddar
Stir in the shredded cheddar cheese until melted. Season the sauce with salt and black pepper.
Keep stirring until the cheese is fully incorporated and the sauce looks smooth. The cheddar should melt into the thickened milk mixture.
Step 5: Combine the Pasta and Sauce
Add the cooked macaroni to the cheese sauce. Stir until the pasta is evenly coated.
Make sure the sauce reaches all the elbow macaroni. The finished macaroni and cheese should be creamy, cheesy, and ready to serve.
Step 6: Serve Immediately
Serve the macaroni and cheese immediately while it is hot and creamy. Divide into 4 servings.
If you want a crispy topping, transfer the macaroni and cheese to a baking dish, sprinkle with breadcrumbs, and bake at 375°F for 15 minutes as noted.
Notes
- For a crispy topping, transfer to a baking dish, sprinkle with breadcrumbs, and bake at 375°F for 15 minutes.
Serving Suggestions
Serve Macaroni and Cheese immediately after the pasta has been stirred into the cheddar sauce. The elbow macaroni, butter, flour, milk, shredded cheddar cheese, salt, and black pepper make a simple comfort-food dinner for 4 people.
For the creamiest texture, serve it straight from the pot while the cheese sauce is still smooth and warm. If you prefer a baked finish, use the crispy topping option from the notes.
To make the baked version, transfer the macaroni and cheese to a baking dish, sprinkle with breadcrumbs, and bake at 375°F for 15 minutes. No breadcrumb quantity is provided, so no exact amount is added.
Storage
How to Store
The recipe does not provide specific storage instructions or storage duration, so no exact storage time is added here.
Pasta Tip
Use 8 oz elbow macaroni and cook it according to the package instructions. Drain it before adding it to the cheese sauce.
Sauce Tip
Whisk the flour into the melted butter and cook for 1 minute before adding the milk. This helps create a smooth cheese sauce.
Milk Tip
Gradually whisk in the milk until smooth. Adding it slowly helps prevent lumps.
Cheese Tip
Use 2 cups shredded cheddar cheese. Stir until fully melted before adding the cooked macaroni.
Seasoning Tip
Use ¼ teaspoon salt and ¼ teaspoon black pepper. Stir them into the cheese sauce before combining it with the pasta.
Crispy Topping Tip
For a crispy topping, transfer to a baking dish, sprinkle with breadcrumbs, and bake at 375°F for 15 minutes.

Fernando is the creator and writer behind the food blog Eating with your Hands. Living and working in cities like Paris, Barcelona, and Berlin, and being married to a Canadian foodie, has given Fernando a passion and interest in food and inspired him to run EWYH.