
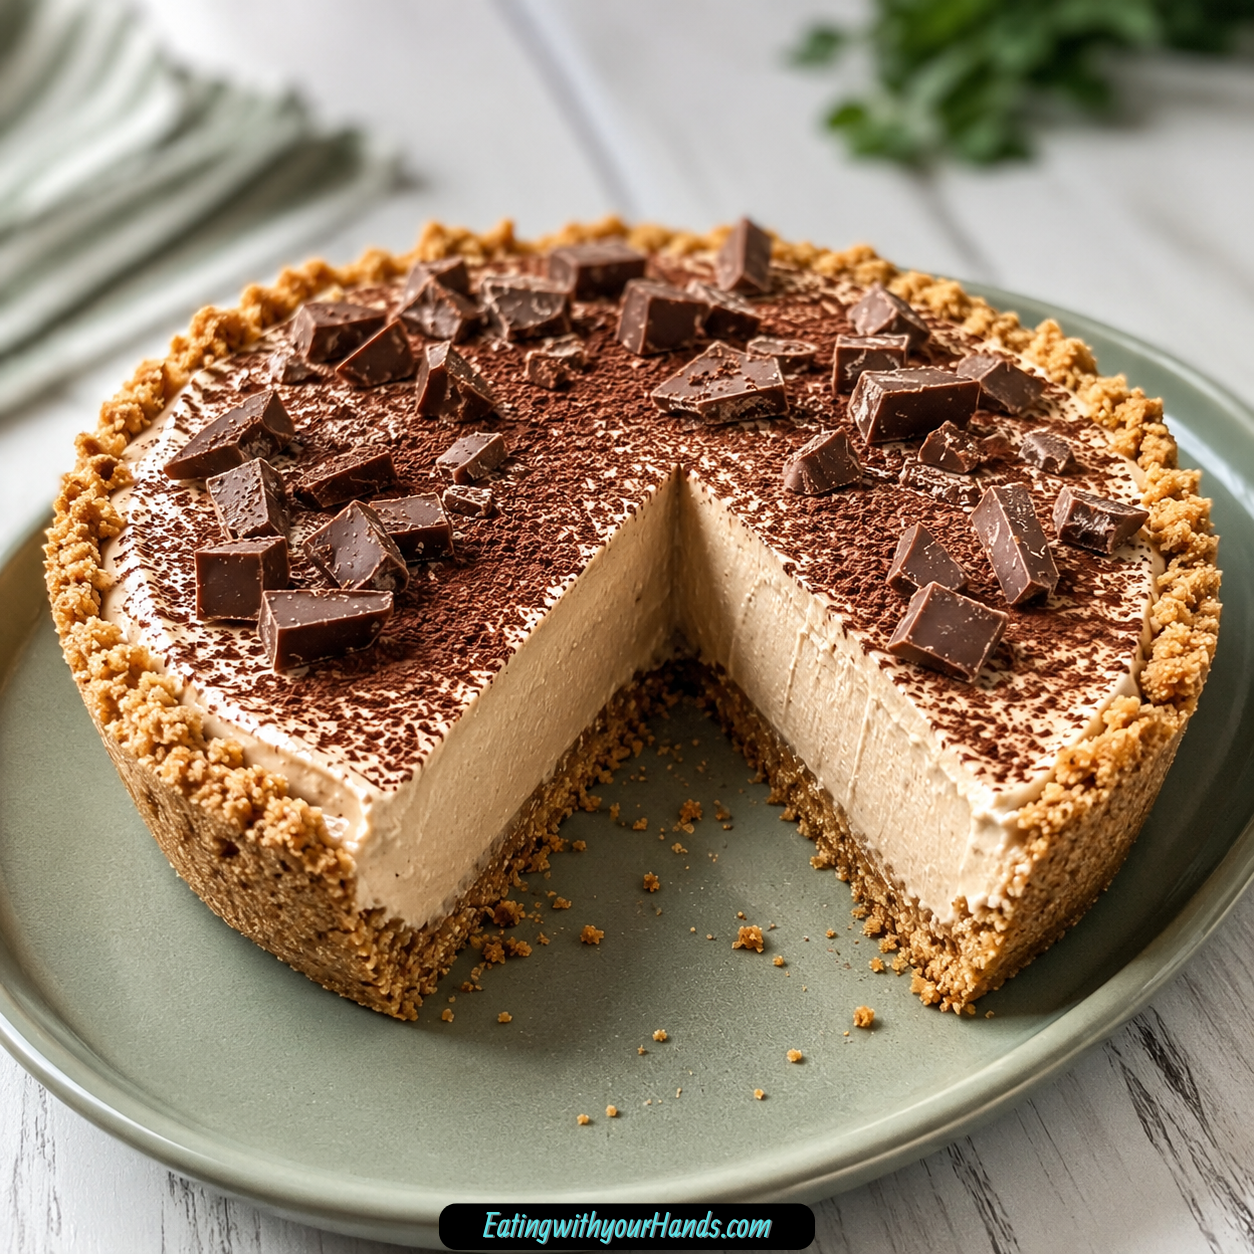
There are days when dessert needs to feel special, but the oven needs to stay off. That is exactly where this Creamy No-Bake Peanut Butter Pie earns its place as one of those reliable, low-stress recipes you can come back to again and again.
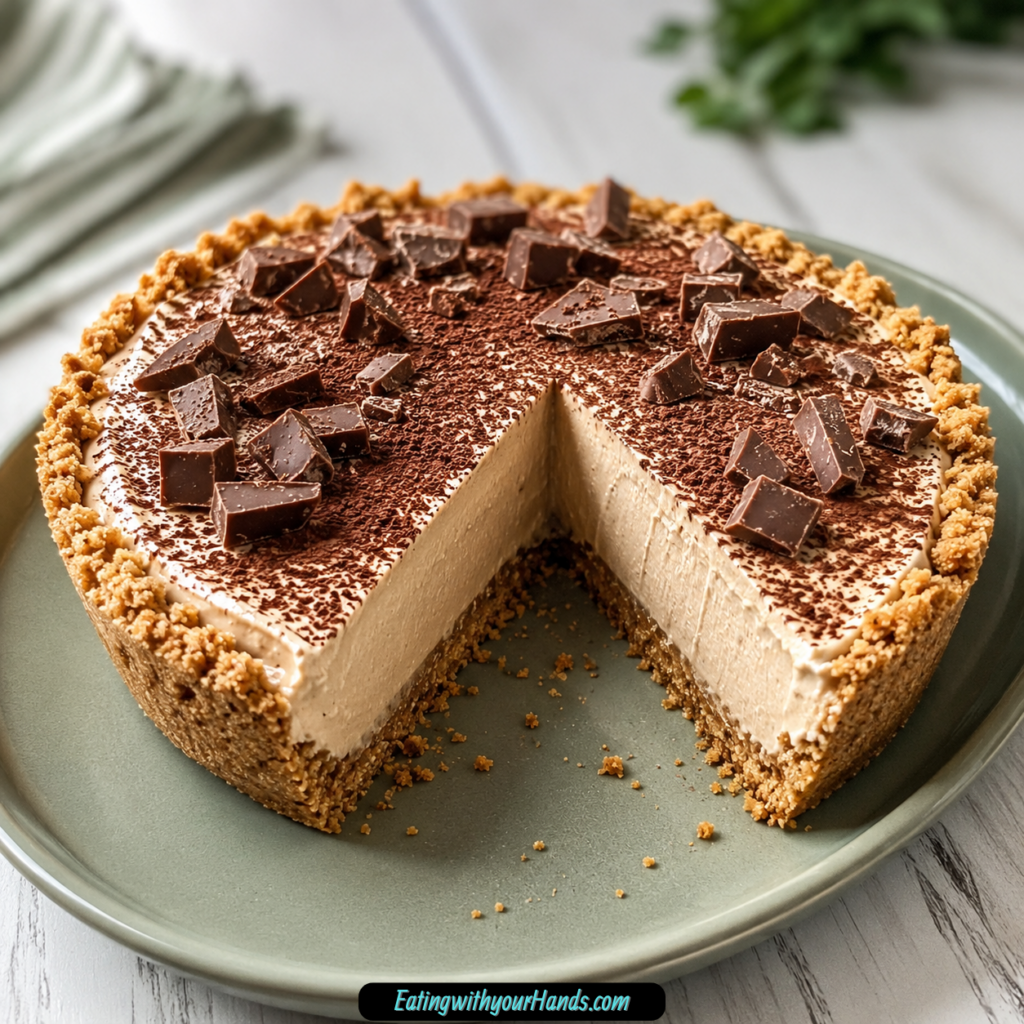
This pie is cool, creamy, peanut-buttery, lightly sweet, and built on a buttery graham cracker crust that comes together in minutes. It tastes like the kind of dessert that should take much more effort, but the refrigerator does most of the work.
The filling is the heart of the recipe. Softened cream cheese, creamy peanut butter, confectioners’ sugar, whipped heavy cream, and optional cocoa powder come together into a smooth, rich filling that feels indulgent without being heavy.
The crust adds the perfect contrast. Graham cracker crumbs and melted butter press into a simple 9-inch pie dish, giving every slice a crisp, buttery base.
This is the pie I would make for a hot summer day, a last-minute potluck, a birthday dessert, or a random weeknight when something sweet feels necessary. It is easy enough for a casual treat and pretty enough to serve to guests.
Best of all, it is a true no-bake dessert. You mix, press, whip, fold, chill, and serve.
Table of Contents
- What Is No-Bake Peanut Butter Pie?
- Why You’ll Love This No-Bake Peanut Butter Pie
- Recipe Details
- Ingredients You’ll Need
- A Closer Look at the Ingredients
- The Flavor Behind This Pie
- Directions
- Step 1: Gather the Ingredients and Tools
- Step 2: Make Sure the Cream Cheese Is Soft
- Step 3: Keep the Heavy Cream Cold
- Step 4: Mix the Graham Cracker Crumbs and Butter
- Step 5: Adjust the Crust Texture If Needed
- Step 6: Press the Crust into the Pie Dish
- Step 7: Chill the Crust
- Step 8: Beat the Cream Cheese
- Step 9: Add the Peanut Butter
- Step 10: Add the Confectioners’ Sugar
- Step 11: Add the Cocoa Powder If Using
- Step 12: Whip the Heavy Cream
- Step 13: Fold the Whipped Cream into the Peanut Butter Mixture
- Step 14: Stop When No White Streaks Remain
- Step 15: Fill the Chilled Crust
- Step 16: Add Optional Toppings Before Chilling
- Step 17: Cover the Pie
- Step 18: Chill for at Least 4 Hours
- Step 19: Slice with a Warm Knife
- Step 20: Serve Cold
- Helpful Tips for the Best No-Bake Peanut Butter Pie
- Common Mistakes
- Variations
- Serving Suggestions
- Storage Tips
- Freezing Instructions
- Make-Ahead Notes
- Frequently Asked Questions
- Final Thoughts
- No-Bake Peanut Butter Pie
What Is No-Bake Peanut Butter Pie?
No-Bake Peanut Butter Pie is a chilled dessert made with a graham cracker crust and a creamy peanut butter filling. The filling is made from cream cheese, peanut butter, confectioners’ sugar, whipped heavy cream, and optional cocoa powder.
Instead of baking, the pie sets in the refrigerator. The chill time helps the filling firm up so it can be sliced cleanly.
The texture is smooth and airy because whipped cream is folded into the peanut butter mixture. This keeps the pie rich but not too dense.
The crust is simple and buttery. Graham cracker crumbs and melted butter are mixed together, pressed into a pie dish, and chilled before the filling is added.
It is a great recipe for anyone who loves peanut butter but does not want a complicated dessert. It looks like something from a bakery case, but the method is very approachable.
Why You’ll Love This No-Bake Peanut Butter Pie
This pie is quick to prepare. The hands-on work takes about 20 minutes before the refrigerator takes over.
It does not require an oven. That makes it perfect for hot days, busy holidays, or moments when baking feels like too much.
The filling is creamy and smooth. Cream cheese gives it body, peanut butter gives it flavor, and whipped cream makes it light.
The graham cracker crust adds crunch. It balances the soft filling with a buttery, crumbly base.
It is perfect for many occasions. Serve it at potlucks, birthdays, summer gatherings, weeknight dinners, or casual celebrations.
It can be made ahead. In fact, chilling it overnight makes the texture even better.
Recipe Details
- Recipe name: Creamy No-Bake Peanut Butter Pie
- Recipe style: No-bake chilled pie
- Prep time: About 20 minutes
- Pie dish: 9-inch pie dish
- Crust chill time: 10 minutes
- Main chill time: At least 4 hours
- Best chill option: Overnight
- Filling texture: Creamy, smooth, fluffy, and rich
- Crust texture: Buttery, crisp, and crumbly
- Best peanut butter: Regular creamy peanut butter, not natural peanut butter
- Optional flavor addition: Cocoa powder
- Best slicing tip: Dip a sharp knife in hot water and dry it before slicing
- Refrigerator storage: Up to 5 days
- Freezer storage: Up to 2 months
- Make-ahead option: Make up to 24 hours in advance
- Store-bought crust option: Use a pre-made graham cracker crust and skip the crust steps
Ingredients You’ll Need
For the Crust
- 1 ½ cups graham cracker crumbs
- ½ cup unsalted butter, melted
For the Filling
- 8 oz cream cheese, softened
- 1 cup creamy peanut butter
- 1 cup confectioners’ sugar
- 1 cup heavy whipping cream
- 3 tablespoon cocoa powder
A Closer Look at the Ingredients
Graham cracker crumbs create the base of the pie. You can use pre-crushed crumbs or crush whole graham crackers yourself.
Melted unsalted butter binds the crumbs together. It helps the crust press firmly into the pie dish and hold its shape after chilling.
Cream cheese gives the filling structure and tang. It should be softened so it blends smoothly without lumps.
Creamy peanut butter gives the pie its main flavor. Use the regular kind rather than natural peanut butter because natural peanut butter can separate and make the filling oily.
Confectioners’ sugar sweetens the filling while keeping the texture smooth. If it looks lumpy, sifting it first can help.
Heavy whipping cream makes the filling lighter. When whipped to stiff peaks and folded in, it gives the pie a fluffy, mousse-like texture.
Cocoa powder is optional, but it adds a subtle chocolate depth. Regular or Dutch-processed cocoa powder can both work.
Each ingredient has a simple job. Together, they create a pie that is cool, creamy, peanut-buttery, and easy to slice after chilling.
The Flavor Behind This Pie
This pie works because peanut butter and cream cheese balance each other beautifully. The peanut butter brings rich nuttiness, while the cream cheese adds a slight tang that keeps the filling from tasting flat.
The confectioners’ sugar sweetens everything without making the texture grainy. It blends into the cream cheese and peanut butter smoothly.
The whipped cream is what keeps the pie from feeling too heavy. Without it, the filling would be much denser.
The graham cracker crust adds a toasted sweetness and a buttery crunch. That contrast makes every bite more satisfying.
The optional cocoa powder gives a gentle chocolate note. It does not turn the pie into a chocolate pie, but it adds depth that works well with peanut butter.
Directions
Step 1: Gather the Ingredients and Tools
Start by gathering the graham cracker crumbs, melted unsalted butter, softened cream cheese, creamy peanut butter, confectioners’ sugar, heavy whipping cream, and cocoa powder if using. You will also need a 9-inch pie dish, mixing bowls, hand mixer or stand mixer, rubber spatula, measuring cups, plastic wrap, and a sharp knife for serving.
This recipe moves smoothly when the cream cheese is softened and the heavy cream is cold. Those two temperature details help the filling turn out smooth and fluffy.
Make room in your refrigerator before you begin. The crust needs a short chill, and the finished pie needs several hours to set.
Step 2: Make Sure the Cream Cheese Is Soft
Let the cream cheese sit on the counter until softened. About an hour is ideal if you have time.
If you forgot, microwave it in 10-second bursts, stopping before it melts. Melted cream cheese can make the filling too loose.
Soft cream cheese is important because cold cream cheese leaves lumps. A smooth filling starts with properly softened cream cheese.
Step 3: Keep the Heavy Cream Cold
Keep the heavy whipping cream in the refrigerator until you are ready to whip it. Cold cream whips better and holds its shape.
Do not leave it sitting on the counter while you make the crust. The colder it stays, the better your filling texture will be.
This small detail helps the pie feel light instead of dense. It also makes folding easier later.
Step 4: Mix the Graham Cracker Crumbs and Butter
Add 1 ½ cups graham cracker crumbs to a medium bowl. Pour in ½ cup melted unsalted butter.
Stir until every crumb is coated. The mixture should look like wet sand.
Pinch a little between your fingers to check the texture. It should hold together lightly.
Step 5: Adjust the Crust Texture If Needed
If the crust mixture seems too dry, add another tablespoon of melted butter. If it seems too wet, add a small sprinkle of graham cracker crumbs.
The crust should not be greasy, but it should hold together when pressed. This balance helps it slice better later.
Small adjustments are fine. Graham cracker crumbs can vary slightly in texture.
Step 6: Press the Crust into the Pie Dish
Transfer the crumb mixture into a 9-inch pie dish. Press it firmly into the bottom and up the sides.
Use the bottom of a glass to pack the crust down evenly. A firmly packed crust is less likely to crumble when sliced.
Do not leave loose crumbs around the edges. Press the crust well so it becomes a sturdy base.
Step 7: Chill the Crust
Place the crust in the refrigerator for 10 minutes. This helps the butter firm up and the crust set.
A chilled crust is less likely to become soggy once the filling is added. It also makes spreading the filling easier.
While the crust chills, begin making the peanut butter filling. This keeps the recipe moving.
Step 8: Beat the Cream Cheese
Place 8 oz softened cream cheese in a large bowl. Beat with a hand mixer or stand mixer until smooth and fluffy, about 1 minute.
Scrape down the sides and bottom of the bowl. Cream cheese often sticks in pockets.
The mixture should look creamy before you add the peanut butter. This helps prevent lumps in the final filling.
Step 9: Add the Peanut Butter
Add 1 cup creamy peanut butter to the cream cheese. Beat until fully combined.
Use regular creamy peanut butter for the best texture. Natural peanut butter can separate and make the filling oily.
The mixture should look thick and smooth. Scrape the bowl as needed.
Step 10: Add the Confectioners’ Sugar
Add 1 cup confectioners’ sugar to the bowl. Mix on low at first so the sugar does not puff out.
Once it begins to blend, increase the speed slightly and beat until smooth. The filling should become sweet, thick, and creamy.
If your confectioners’ sugar is lumpy, sift it before adding. This keeps the texture silky.
Step 11: Add the Cocoa Powder If Using
Add 3 tablespoon cocoa powder if you want a subtle chocolate depth. Beat until fully blended.
This step is optional, but it adds a gentle chocolate note that pairs well with peanut butter. Use regular or Dutch-processed cocoa powder.
Make sure there are no dry cocoa streaks. Scrape the bowl once more.
Step 12: Whip the Heavy Cream
In a separate bowl, add 1 cup cold heavy whipping cream. Beat until stiff peaks form.
Stiff peaks mean the cream holds its shape when the beaters are lifted. It should not slide back into the bowl.
Do not overwhip. If you go too far, the cream can turn grainy and begin becoming butter.
Step 13: Fold the Whipped Cream into the Peanut Butter Mixture
Add the whipped cream to the peanut butter mixture. Use a rubber spatula to fold gently.
Fold by moving the spatula down through the middle, across the bottom, and up the side of the bowl. Turn the bowl as you work.
Do not stir aggressively. Folding keeps the filling light and fluffy.
Step 14: Stop When No White Streaks Remain
Continue folding until the whipped cream is fully incorporated. Stop as soon as no white streaks remain.
Overmixing can deflate the whipped cream. The goal is a smooth, airy filling.
Taste a small spoonful if desired. If it needs balance, the source suggests adding a pinch of salt.
Step 15: Fill the Chilled Crust
Remove the chilled crust from the refrigerator. Spoon the peanut butter filling into the crust.
Spread it gently from the center outward. Be careful not to pull up the crust.
Use a spatula to smooth the top. You can make it flat or add soft swirls with the back of a spoon.
Step 16: Add Optional Toppings Before Chilling
You can leave the pie plain or add simple toppings. A drizzle of melted chocolate, crushed peanuts, chocolate shavings, cocoa powder, caramel, or whipped cream can all work.
If you want the cleanest look, add delicate garnishes closer to serving. This is especially helpful for whipped cream.
Crushed peanuts can be added now for extra crunch. Chocolate drizzle should be allowed to set before slicing.
Step 17: Cover the Pie
Cover the pie loosely with plastic wrap. Try not to press the wrap directly into the filling.
Covering protects the pie while it chills. It also prevents the filling from absorbing refrigerator odors.
Make sure the pie is on a level shelf. This keeps the filling smooth.
Step 18: Chill for at Least 4 Hours
Refrigerate the pie for at least 4 hours. This gives the filling time to firm up.
Do not rush this step. If you slice too soon, the filling may be too soft.
The pie is even better if chilled overnight. Overnight chilling creates cleaner slices and a more settled flavor.
Step 19: Slice with a Warm Knife
When ready to serve, run a sharp knife under hot water and dry it. Slice the pie with the warm knife.
Wipe the blade between cuts for cleaner slices. This helps the creamy filling stay neat.
Because the pie is rich, smaller slices work well for serving a crowd. You can always go back for more.
Step 20: Serve Cold
Serve the pie chilled. The filling holds its shape best when cold.
If your kitchen is warm, let the pie chill for another 10 minutes after slicing. This helps the slices stay firm.
Serve plain or with whipped cream, crushed peanuts, chocolate shavings, cocoa powder, caramel drizzle, or chocolate drizzle. Every version works beautifully with peanut butter.
Helpful Tips for the Best No-Bake Peanut Butter Pie
Use softened cream cheese. Cold cream cheese can make the filling lumpy.
Use regular creamy peanut butter, not natural peanut butter. Natural peanut butter can separate and make the filling oily.
Keep the heavy cream cold before whipping. Cold cream creates better volume.
Stop whipping cream when stiff peaks form. Overwhipping can turn it grainy.
Fold gently. The whipped cream is what gives the pie its fluffy texture.
Chill for at least 4 hours. Overnight is even better for clean slices.
Common Mistakes
Using Cold Cream Cheese
Cold cream cheese does not blend smoothly. It can leave small lumps throughout the filling.
Let it soften before mixing. Use 10-second microwave bursts only if needed.
Using Natural Peanut Butter
Natural peanut butter can separate. That oil separation can make the filling less stable.
Use regular creamy peanut butter for the smoothest texture. It gives the pie the consistency the recipe is built around.
Overwhipping the Cream
Heavy cream should be whipped only until stiff peaks form. If you keep going, it can become grainy.
Stop as soon as the cream holds its shape. Smooth whipped cream makes a better filling.
Stirring Instead of Folding
Aggressive stirring can deflate the whipped cream. This makes the filling heavier.
Fold slowly with a spatula. Stop when the mixture is combined.
Slicing Too Soon
The pie needs time to set. If you cut it before 4 hours, it may be too soft.
Overnight chilling gives the best texture. This is especially helpful when serving guests.
Variations
Chocolate Drizzle
Melt ½ cup chocolate chips with 1 teaspoon coconut oil. Microwave in 30-second bursts and stir between each round.
Drizzle over the chilled pie and let it set for 10 minutes before slicing. Add sea salt on top for a sweet-salty finish.
Crunchy Peanut Butter Version
Swap the creamy peanut butter for crunchy peanut butter. This gives the filling little nutty pieces throughout.
You can also fold in ¼ cup chopped roasted peanuts. This adds even more texture.
Vegan Option
Use dairy-free cream cheese. Swap the heavy cream for full-fat coconut cream by chilling the can overnight and scooping out the solid part.
Use coconut oil instead of butter in the crust. The filling will be slightly less fluffy but still delicious.
Store-Bought Crust Shortcut
Use a pre-made graham cracker crust if you are short on time. Skip the crust-making steps and go straight to the filling.
The pie may be slightly shallower depending on the crust. Any extra filling can be enjoyed separately.
Brown Sugar Twist
If you do not have confectioners’ sugar, you can use ¾ cup brown sugar for a caramel-like twist. The texture may be slightly grainier.
The source also notes that granulated sugar can be blended until powdery. One cup granulated sugar makes about one cup confectioners’ sugar.
Serving Suggestions
Serve this pie cold from the refrigerator. The chilled filling is creamy, smooth, and firm enough to slice.
Add a dollop of whipped cream to each slice. It makes the pie look finished and adds lightness.
Crushed peanuts add crunch. Sprinkle them over the top right before serving.
Chocolate shavings or cocoa powder make the pie look extra pretty. They also highlight the optional cocoa flavor in the filling.
A drizzle of caramel adds sweetness. It pairs well with peanut butter and the graham cracker crust.
Serve smaller slices for parties because the pie is rich. Guests can always take a second piece.
Storage Tips
Cover leftovers tightly with plastic wrap or place slices in an airtight container. Store in the refrigerator for up to 5 days.
The crust may soften after day 3. The pie will still taste good, but the freshest texture is best earlier.
If condensation appears, blot gently with a paper towel before serving. This helps the top look cleaner.
Keep the pie cold until close to serving. Warm kitchens can soften the filling.
Do not leave the pie uncovered in the refrigerator. It can absorb other flavors.
Freezing Instructions
You can freeze this pie for up to 2 months. For easiest serving, freeze individual slices.
Wrap each slice in plastic wrap, then foil. This helps protect the creamy filling.
Thaw the slices in the refrigerator overnight before serving. This gives the best texture.
Do not thaw in a warm kitchen for too long. The filling needs to stay chilled.
Freezing is helpful if you want to save dessert for later. It also makes single-slice treats easy.
Make-Ahead Notes
This pie is excellent for making ahead. You can prepare it up to 24 hours before serving.
In fact, the texture is often better the next day. The filling has time to fully set, and the crust holds together more cleanly.
Wait to add garnishes until serving. Whipped cream, chocolate shavings, caramel, or crushed peanuts look freshest when added at the end.
Keep the pie refrigerated until the last minute. This helps it hold its shape.
For parties, slice with a hot, dry knife right before serving. Wipe the blade between cuts.
Frequently Asked Questions
Can I Use a Store-Bought Crust?
Yes, a pre-made graham cracker crust works well. Skip the homemade crust steps and make the filling.
The pie may be a little shallower depending on the crust size. Any extra filling can be saved for spoonfuls or small cups.
How Long Does It Keep in the Fridge?
The pie keeps for up to 5 days when covered tightly. Store it in the refrigerator.
The crust may soften after day 3. For best texture, enjoy it earlier.
Can I Make This Ahead for a Party?
Yes, this pie is a great make-ahead dessert. Make it up to 24 hours in advance.
Keep it refrigerated and wait to garnish until serving. This keeps the pie looking fresh.
What If I Do Not Have Confectioners’ Sugar?
You can blend granulated sugar in a blender until powdery. One cup granulated sugar makes about one cup confectioners’ sugar.
You can also use ¾ cup brown sugar for a caramel-like twist. The texture may be slightly grainier.
Can I Freeze No-Bake Peanut Butter Pie?
Yes, freeze individual slices wrapped in plastic and foil for up to 2 months. Thaw in the refrigerator overnight.
The pie should still taste creamy after thawing. Serve it cold.
Can I Use Natural Peanut Butter?
It is not recommended. Natural peanut butter can separate and make the filling oily.
Regular creamy peanut butter gives the smoothest and most stable filling. It is the best choice for this recipe.
How Do I Get Clean Slices?
Use a sharp knife dipped in hot water and dried before slicing. Wipe the blade between cuts.
The pie also slices better after chilling overnight. Cold filling holds its shape.
Can I Make a Vegan Version?
Yes, use dairy-free cream cheese and full-fat coconut cream. Chill the coconut cream overnight and use the solid part.
Use coconut oil instead of butter in the crust. The filling may be slightly less fluffy, but it will still work.
Final Thoughts
Creamy No-Bake Peanut Butter Pie Delight is the kind of dessert that makes life easier without tasting like a shortcut. The graham cracker crust is buttery and simple, while the filling is smooth, rich, peanut-buttery, and lightened with whipped cream.
It is perfect for summer days, last-minute potlucks, birthdays, family gatherings, weeknight treats, or any moment when you want dessert without turning on the oven. The process is simple, but the result feels special.
You can keep it classic or make it your own with chocolate drizzle, crunchy peanut butter, chopped roasted peanuts, sea salt, caramel, cocoa powder, or a vegan-style version. You can also use a store-bought crust when time is short.
Mix the crust, beat the filling, fold it gently, chill it patiently, and slice it cold. Every bite brings creamy peanut butter comfort against a crisp graham cracker crust, and that is exactly why this pie disappears so quickly.
No-Bake Peanut Butter Pie
This No-Bake Peanut Butter Pie is creamy, rich, and easy to make with a buttery graham cracker crust and a smooth peanut butter filling. The filling combines softened cream cheese, creamy peanut butter, confectioners’ sugar, heavy whipping cream, and cocoa powder for a sweet dessert with a light chocolate-peanut butter flavor. Since this pie does not need baking, it is a great make-ahead dessert for holidays, potlucks, summer gatherings, family dinners, or anytime you want a simple chilled pie with a rich, creamy texture.
Recipe Details
- Prep Time: 20 minutes
- Total Time: 20 minutes
- Course: Dessert, Pie
- Servings: 8 slices
Ingredients
For the Filling
- 3 tablespoon cocoa powder
- 1 cup heavy whipping cream
- 1 cup confectioners’ sugar
- 1 cup creamy peanut butter
- 8 oz cream cheese softened
For the Crust
- ½ cup unsalted butter melted
- 1 ½ cups graham cracker crumbs
Instructions
Step 1: Make the Graham Cracker Crust
In a bowl, mix the graham cracker crumbs with the melted unsalted butter.
Stir until the crumbs are evenly moistened and the mixture holds together when pressed.
Step 2: Press the Crust
Press the graham cracker mixture firmly into the bottom and up the sides of a pie dish.
Use the bottom of a measuring cup or glass to compact the crust evenly.
Step 3: Beat the Cream Cheese
In a separate mixing bowl, beat the softened cream cheese until smooth and creamy.
This helps the filling stay light without lumps.
Step 4: Add the Peanut Butter and Sugar
Add the creamy peanut butter and confectioners’ sugar to the cream cheese.
Mix until fully combined and smooth.
Step 5: Add the Cocoa Powder
Mix in the cocoa powder until evenly blended into the peanut butter filling.
Scrape down the bowl as needed so the flavor is consistent throughout.
Step 6: Whip the Cream
In another bowl, whip the heavy whipping cream until it becomes fluffy and holds soft peaks.
Step 7: Fold the Filling Together
Gently fold the whipped cream into the peanut butter mixture.
Continue folding until the filling is smooth, creamy, and evenly combined.
Step 8: Fill the Crust
Spread the peanut butter filling into the prepared graham cracker crust.
Smooth the top with a spatula.
Step 9: Chill Before Serving
Refrigerate the pie until firm and easy to slice.
Serve chilled for the best creamy texture.
Notes
For the cleanest slices, chill the pie well before serving. Keep the pie refrigerated until ready to serve.
Serving Suggestions
This no-bake peanut butter pie pairs well with:
- Whipped cream
- Chocolate shavings
- Crushed graham crackers
- Chopped peanuts
- Chocolate drizzle
- Caramel drizzle
- Cold milk
- Hot coffee
Storage
How to Store
Store the pie covered in the refrigerator.
Best Texture Tip
Keep the pie chilled until serving so the filling stays firm, creamy, and easy to cut into neat slices.

Fernando is the creator and writer behind the food blog Eating with your Hands. Living and working in cities like Paris, Barcelona, and Berlin, and being married to a Canadian foodie, has given Fernando a passion and interest in food and inspired him to run EWYH.