
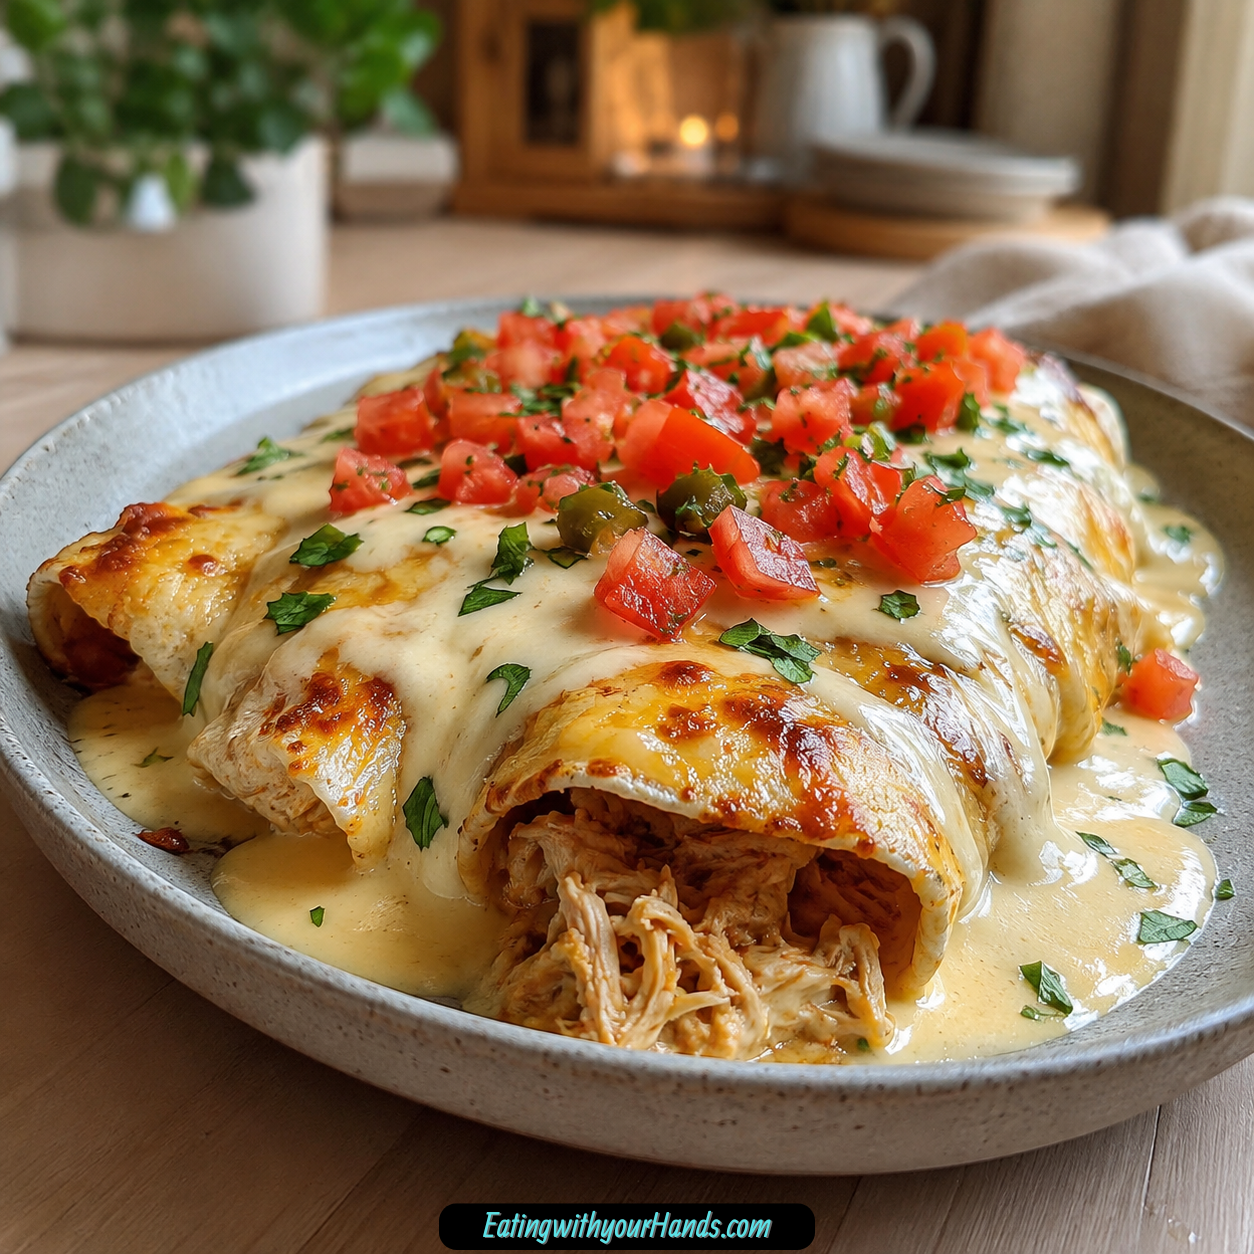
Creamy Queso Chicken Enchiladas are the kind of dinner that makes the whole table feel warmer before anyone even takes a bite. Soft tortillas are filled with seasoned shredded chicken, sour cream, cheddar cheese, and green chilies, then covered in a creamy queso-style sauce that bakes until hot, bubbly, and golden.
I love a dish that feels like it belongs to a slow Sunday evening, even when it comes together on a busy weeknight. These enchiladas have that cozy, family-dinner feeling, with tender chicken wrapped inside tortillas and a rich cheese sauce poured generously over the top.
There is something deeply comforting about enchiladas coming out of the oven. The sauce bubbles around the edges, the filling softens into the tortillas, and the whole dish smells cheesy, savory, and full of promise.
This recipe is easy enough for a regular evening but satisfying enough for a casual gathering with friends. It uses simple ingredients, takes only 15 minutes to prepare, and has the kind of creamy, zesty flavor that makes people reach for another serving.
The best part is how flexible it is. You can keep it classic with shredded chicken and cheddar, make it spicier with jalapeños or hot sauce, turn it vegetarian with black beans and vegetables, or prepare it ahead for the freezer.
Table of Contents
- Why You’ll Love These Creamy Queso Chicken Enchiladas
- Recipe Details
- Ingredients
- Optional Swaps, Variations, Add-Ins, and Serving Ideas
- Why These Creamy Queso Chicken Enchiladas Work
- Directions
- Step 1: Preheat the Oven
- Step 2: Set Out the Baking Dish
- Step 3: Prepare the Filling Bowl
- Step 4: Add the Taco Seasoning
- Step 5: Add the Sour Cream
- Step 6: Add the Shredded Cheddar Cheese
- Step 7: Add the Chopped Green Chilies
- Step 8: Mix Until Fully Combined
- Step 9: Lay Out the First Tortilla
- Step 10: Add the Filling
- Step 11: Roll the Tortilla
- Step 12: Repeat With the Remaining Tortillas
- Step 13: Prepare the Queso Sauce Bowl
- Step 14: Melt the Sauce in the Microwave
- Step 15: Use the Stovetop Option if Needed
- Step 16: Pour the Queso Sauce Over the Enchiladas
- Step 17: Bake the Enchiladas
- Step 18: Rest Briefly Before Serving
- Step 19: Add Toppings
- Step 20: Serve With Sides
- Serving Ideas
- Storage
- Reheating
- Freezing
- Make-Ahead
- Helpful Notes for Best Results
- Variations
- Troubleshooting
- Frequently Asked Questions
- Why This Recipe Works So Well
- Final Thoughts
- Creamy Queso Chicken Enchiladas
Why You’ll Love These Creamy Queso Chicken Enchiladas
These enchiladas have a quick prep time of just 15 minutes. That makes them a practical choice for busy weeknights when you still want something homemade.
The ingredients are simple and familiar. Shredded chicken, taco seasoning, sour cream, cheddar cheese, green chilies, Velveeta, diced tomatoes with green chilies, and tortillas create a creamy, filling dinner.
They are family-friendly. The flavors are cheesy, savory, creamy, and zesty without being complicated.
They are freezer-friendly. You can make a batch ahead and save it for a night when dinner needs to feel easy.
They are easy to customize. Add toppings, extra vegetables, different cheeses, or a little more heat depending on your taste.
The queso sauce makes them especially comforting. It melts into a creamy topping that turns simple enchiladas into something cozy and satisfying.
Recipe Details
These enchiladas bake at 350°F (175°C). The oven should be preheated before assembly so the dish is ready to bake once the enchiladas are filled and sauced.
The filling uses 2 cups shredded chicken, 1 packet taco seasoning, 1 cup sour cream, 1 cup shredded cheddar cheese, and 1 can chopped green chilies. Rotisserie chicken can be used for convenience.
The sauce uses 1 package Velveeta cheese and 1 can diced tomatoes with green chilies. These are melted together until smooth before being poured over the assembled enchiladas.
The shell portion uses 8 tortillas. Gluten-free tortillas can be used for those avoiding gluten, and corn tortillas can also be used for a different texture and flavor.
The filling is portioned into the tortillas using about ¼ cup per tortilla. Each tortilla is rolled and placed seam-side down in the baking dish.
The enchiladas bake for about 30 minutes. They are ready when they are bubbling hot and the cheese is a lovely golden brown.
Ingredients
Chicken Filling
2 cups shredded chicken
1 packet taco seasoning
1 cup sour cream
1 cup shredded cheddar cheese
1 can chopped green chilies
Queso Sauce
1 package Velveeta cheese
1 can diced tomatoes with green chilies
Tortilla Shells
8 tortillas
Ingredient Notes
Shredded chicken makes the filling tender and hearty. Rotisserie chicken is a convenient option when you want to save time.
Shredded beef or turkey can also be used if desired. Both options keep the enchiladas filling and satisfying.
Taco seasoning gives the filling its zesty flavor. Store-bought is perfectly fine, while homemade taco seasoning can add a more personal touch.
Sour cream makes the chicken filling creamy. Greek yogurt can be used as a healthier substitute with a similar creamy texture.
Shredded cheddar cheese adds classic cheesy flavor to the filling. Monterey Jack or Pepper Jack can be used if you want a different melt or a spicier twist.
Chopped green chilies add flavor without making the dish too complicated. If you love heat, diced jalapeños are a great alternative.
Velveeta cheese creates the creamy queso-style sauce. Cream cheese can be used instead, but it will change the flavor.
Diced tomatoes with green chilies help loosen and flavor the sauce. Fresh tomatoes or tomato sauce can work if preferred.
Tortillas hold the filling and create the enchilada shape. Gluten-free tortillas are available if you need a gluten-free version.
Optional Swaps, Variations, Add-Ins, and Serving Ideas
Shredded Turkey Enchiladas
Use shredded turkey instead of chicken. This creates a lighter version, especially when paired with low-fat sour cream.
The method stays the same. Mix the turkey with taco seasoning, sour cream, cheese, and green chilies before filling the tortillas.
Shredded Beef Enchiladas
Shredded beef can replace the shredded chicken. It gives the enchiladas a richer, heartier flavor.
Use the same filling method. The creamy queso sauce still works beautifully over the top.
Vegetarian Black Bean Enchiladas
Make the enchiladas vegetarian by substituting chicken with black beans. Add sautéed bell peppers for more flavor and texture.
This variation keeps the dish filling without meat. The queso sauce still makes it creamy and comforting.
Plant-Based Protein Enchiladas
A plant-based protein can be used instead of shredded chicken. This creates another vegetarian-friendly direction.
Mix it into the filling with taco seasoning, sour cream or an alternative, cheese, and green chilies. Adjust the texture as needed.
Spicier Queso Enchiladas
Add diced jalapeños or a splash of hot sauce. You can also add extra taco seasoning if you want more spice in the filling.
Pepper Jack cheese is another good choice for heat. It adds a spicy twist while still melting well.
Extra Vegetable Enchiladas
Add corn or black beans to the filling for extra nutrition. Fresh spinach or kale can also be added for a nutritious boost.
Sautéed bell peppers work especially well in the vegetarian version. They bring color and sweetness.
Different Cheese Profiles
Try Monterey Jack, Pepper Jack, queso blanco, or feta for a different flavor. Each cheese gives the enchiladas a slightly different personality.
Cheddar keeps the flavor familiar. Pepper Jack adds heat, while queso blanco and feta create unique profiles.
Corn Tortilla Version
Use corn tortillas for a different texture and flavor. This changes the bite but keeps the enchilada idea intact.
Handle corn tortillas gently when rolling. They can be more delicate than other tortillas.
Gluten-Free Version
Use gluten-free tortillas and double-check that the taco seasoning is gluten-free. This makes the dish suitable for those avoiding gluten.
The rest of the recipe can stay the same. Always check packaged ingredients when needed.
Dairy-Free Direction
Use dairy-free cheese and sour cream alternatives if lactose intolerance is a concern. The flavor and texture will change, but the dish can still be satisfying.
Follow the same assembly and baking method. Choose alternatives that melt and mix well.
Why These Creamy Queso Chicken Enchiladas Work
These enchiladas work because the filling and sauce both bring creamy comfort. The chicken filling is seasoned and rich, while the queso sauce adds a smooth, melty finish.
The shredded chicken keeps the enchiladas hearty without making them heavy. It blends easily with sour cream, cheddar cheese, taco seasoning, and green chilies.
The taco seasoning brings familiar zesty flavor. It keeps the filling from tasting plain.
Sour cream helps bind the filling. It also gives the chicken a creamy texture before the enchiladas even go into the oven.
The Velveeta and diced tomatoes with green chilies create a simple queso-style sauce. Melting them together makes a smooth topping that spreads easily over the tortillas.
Baking brings everything together. The tortillas soften, the filling warms through, and the cheese sauce bubbles into every corner.
Directions
Step 1: Preheat the Oven
Preheat your oven to 350°F (175°C). This gives the enchiladas a steady baking temperature.
Starting the oven first helps the rest of the process flow smoothly. By the time the enchiladas are assembled, the oven will be ready.
A fully preheated oven helps the cheese melt evenly. It also helps the dish become bubbling hot within the baking time.
Step 2: Set Out the Baking Dish
Place your baking dish near your workspace. You will use it to arrange the rolled enchiladas seam-side down.
Choose a dish that can hold 8 filled tortillas snugly. The enchiladas may puff slightly as they bake.
Keeping the dish nearby makes assembly easier. Once each tortilla is filled and rolled, it can go directly into the pan.
Step 3: Prepare the Filling Bowl
In a large mixing bowl, add 2 cups shredded chicken. Make sure the chicken is already shredded before mixing.
Rotisserie chicken is helpful if you want convenience. Shredded beef or turkey can also be used if desired.
The chicken should be in small enough pieces to roll easily inside the tortillas. Large pieces can make the enchiladas harder to shape.
Step 4: Add the Taco Seasoning
Add 1 packet taco seasoning to the shredded chicken. Sprinkle it evenly over the meat.
The seasoning gives the filling its zesty flavor. It helps the chicken taste bold and complete.
Store-bought taco seasoning works well. Homemade taco seasoning can also be used if you prefer.
Step 5: Add the Sour Cream
Add 1 cup sour cream to the bowl. Stir it gently into the chicken and taco seasoning.
The sour cream makes the filling creamy and helps it hold together. It also keeps the chicken from tasting dry.
Greek yogurt can be used as a healthier substitute. It gives a similar creamy texture.
Step 6: Add the Shredded Cheddar Cheese
Add 1 cup shredded cheddar cheese to the filling. Stir until it is spread throughout the chicken mixture.
The cheddar adds flavor and richness inside the tortillas. It also melts as the enchiladas bake.
Monterey Jack or Pepper Jack can be used instead if you want a different cheese flavor. Pepper Jack brings a spicy twist.
Step 7: Add the Chopped Green Chilies
Add 1 can chopped green chilies. Stir them into the filling.
The green chilies add mild zest and flavor. They make the filling taste brighter.
If you prefer more heat, diced jalapeños can be used as an alternative. Add them based on your spice preference.
Step 8: Mix Until Fully Combined
Mix the filling until the chicken is evenly coated. The sour cream, taco seasoning, cheese, and green chilies should be distributed throughout.
You want the creamy mixture to surround the chicken. This makes every bite taste consistent.
Take a moment to taste the filling if desired. Add extra taco seasoning or a dash of hot sauce if you want more spice.
Step 9: Lay Out the First Tortilla
Place one tortilla flat on a clean surface or plate. Keep the filling bowl close by.
A flat surface makes it easier to add the filling and roll neatly. Work with one tortilla at a time.
If the tortillas feel stiff, handle them gently. Soft tortillas are easier to roll around the filling.
Step 10: Add the Filling
Spoon about ¼ cup of the chicken filling into the center of the tortilla. Keep the filling in a line so it rolls evenly.
Do not overfill the tortilla. Too much filling can spill out as you roll.
The amount should feel generous but manageable. Each tortilla should close around the filling.
Step 11: Roll the Tortilla
Roll the tortilla from the bottom up. Tuck in the sides as you go to keep the filling inside.
Roll firmly enough to hold its shape but not so tightly that the tortilla tears. The filling should stay enclosed.
Place the rolled enchilada seam-side down in the baking dish. This helps it stay closed while baking.
Step 12: Repeat With the Remaining Tortillas
Continue filling and rolling until all 8 tortillas are assembled. Place each one seam-side down in the baking dish.
Line them up snugly. They tend to puff slightly in the oven, so a neat row helps them stay in place.
Make sure the filling is divided as evenly as possible. This gives each serving the same creamy chicken center.
Step 13: Prepare the Queso Sauce Bowl
In a separate bowl, combine 1 package Velveeta cheese and 1 can diced tomatoes with green chilies. These will melt into the sauce.
Cut or break the Velveeta as needed so it melts more easily. Smaller pieces warm faster and stir smoother.
The tomatoes with green chilies add flavor and help create a pourable cheese sauce. Stir them together before heating if possible.
Step 14: Melt the Sauce in the Microwave
Microwave the cheese and tomato mixture in 30-second intervals. Stir between each interval.
Continue heating and stirring until the cheese is melted and smooth. Do not rush with one long heating time.
The 30-second intervals help prevent scorching or uneven melting. The sauce should become creamy and pourable.
Step 15: Use the Stovetop Option if Needed
If you do not have a microwave, melt the sauce on the stovetop over low heat. Stir constantly.
Low heat is important because cheese can burn if heated too quickly. Keep it moving until smooth.
Once melted, remove from heat. The sauce should be ready to pour over the enchiladas.
Step 16: Pour the Queso Sauce Over the Enchiladas
Pour the melted queso sauce evenly over the assembled enchiladas. Try to cover the tops of the tortillas.
Use a spoon if needed to spread the sauce into the edges. Every enchilada should get some of that creamy topping.
Do not leave dry patches if you can help it. The sauce protects the tortillas and makes the dish rich.
Step 17: Bake the Enchiladas
Place the baking dish in the preheated oven. Bake for about 30 minutes.
The enchiladas should become bubbling hot. The cheese should turn a lovely golden brown.
Keep an eye on them during the last few minutes. You want a perfect cheesy crust without overcooking.
Step 18: Rest Briefly Before Serving
Remove the baking dish from the oven. Let the enchiladas sit briefly before serving.
This helps the filling settle slightly. It also makes the dish easier to portion.
The sauce will still be hot and creamy. Serve while warm for the best flavor and texture.
Step 19: Add Toppings
Top the warm enchiladas with fresh avocado, chopped cilantro, or a dollop of sour cream if desired. These toppings add freshness and extra flavor.
Avocado brings creaminess. Cilantro adds a bright herbal note.
Extra sour cream makes the dish even richer. Choose the toppings that fit your table.
Step 20: Serve With Sides
Serve the enchiladas with a simple side salad or Mexican rice for a complete meal. These sides make the dinner feel more rounded.
A side salad adds freshness. Mexican rice adds a classic, filling side.
Serve immediately while the queso sauce is warm. That is when the enchiladas taste most comforting.
Serving Ideas
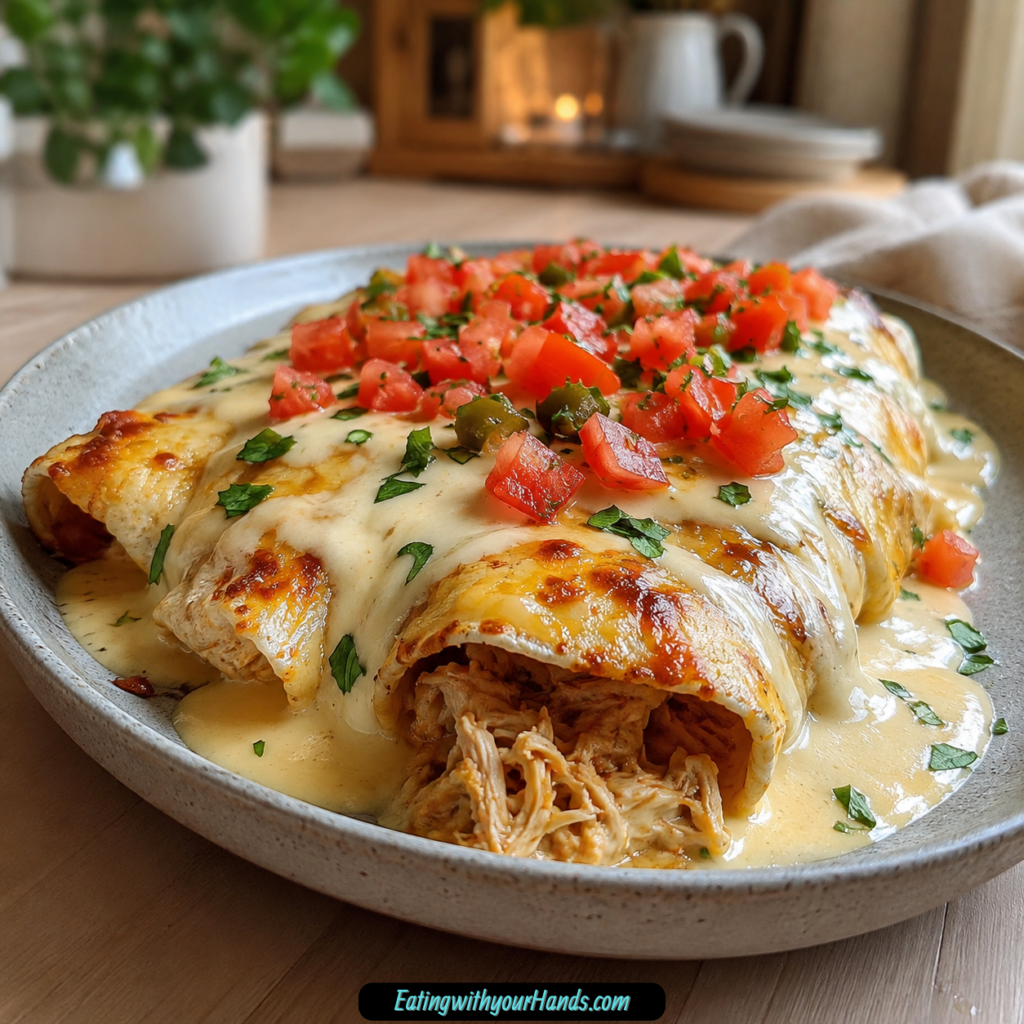
These creamy queso chicken enchiladas are best served warm, straight out of the oven. The sauce should be melted, bubbly, and golden.
Top them with fresh avocado if you want extra creaminess. Chopped cilantro adds freshness and color.
A dollop of sour cream works beautifully on top. It echoes the creamy filling and makes the plate feel complete.
Serve with a simple side salad for balance. The freshness of the salad helps lighten the rich queso sauce.
Mexican rice is another great side. It turns the enchiladas into a filling full meal.
These enchiladas work for cozy family dinners and casual gatherings. They are easy enough for weeknights but special enough to share.
Storage
Store leftovers in an airtight container in the refrigerator. They will keep for up to 3 days.
Let the enchiladas cool before storing. This helps prevent excess steam from collecting in the container.
Keep them covered so the tortillas do not dry out. The sauce will thicken slightly as it chills.
Store toppings like avocado or cilantro separately if possible. Fresh toppings are best added after reheating.
Reheating
Reheat leftovers in the microwave or in the oven. Use whichever method fits your time.
For oven reheating, warm at 350°F (175°C) until heated through. Covering loosely can help prevent the top from drying.
Microwave individual portions until hot. The sauce should become creamy again as it warms.
Serve reheated enchiladas with fresh toppings if desired. A new spoonful of sour cream or avocado can refresh the plate.
Freezing
These enchiladas can be frozen for up to 3 months. Cover them well to prevent freezer burn.
Wrap tightly with plastic wrap or aluminum foil before placing in a freezer-safe bag. This helps protect the dish.
Thaw before reheating when possible. Reheat until the center is hot.
Freezing makes this recipe useful for meal prep. A prepared batch can become an easy dinner later.
Make-Ahead
These enchiladas are make-ahead friendly. Assemble them, cover well, and refrigerate or freeze depending on when you plan to serve them.
If baking from the refrigerator, bake until hot and bubbly. The sauce should be melted and golden on top.
If freezing, wrap well to protect from freezer burn. Use within 3 months.
Make-ahead enchiladas are perfect for busy schedules. They give you a comforting dinner ready to bake or reheat.
Helpful Notes for Best Results
Taste the filling before assembling. Add extra taco seasoning or hot sauce if you want more spice.
Use rotisserie chicken when you need a shortcut. It makes the recipe even easier.
Roll the tortillas seam-side down. This helps the enchiladas stay closed during baking.
Line the enchiladas snugly in the baking dish. They may puff slightly as they bake.
Microwave the queso sauce in short intervals and stir often. This keeps the cheese from heating unevenly.
If using the stovetop, keep the heat low and stir constantly. Cheese can burn if left alone.
Use dairy-free cheese and sour cream alternatives if lactose intolerance is a concern. The flavor and texture will change, but the dish can still work.
Double-check gluten-free tortillas and taco seasoning if making the recipe gluten-free. Packaged seasonings can vary.
Variations
Lighter Turkey Enchiladas
Use shredded turkey instead of chicken. Pair it with low-fat sour cream for a lighter version.
The filling stays creamy and flavorful. Bake the enchiladas the same way.
Shredded Beef Queso Enchiladas
Use shredded beef instead of chicken. This gives the dish a richer flavor.
The queso sauce still pairs beautifully with the filling. Keep the same assembly method.
Vegetarian Black Bean Enchiladas
Replace the chicken with black beans. Add sautéed bell peppers for more flavor and texture.
This version keeps the enchiladas hearty. The creamy queso sauce makes them satisfying.
Corn Tortilla Enchiladas
Use corn tortillas for a different texture and flavor. They create a more distinct tortilla bite.
Handle them gently while rolling. Fill with about ¼ cup of filling and place seam-side down.
Spinach or Kale Enchiladas
Add fresh spinach or kale to the filling. This gives the enchiladas a nutritious boost.
Chop the greens so they mix easily with the chicken. Stir them into the filling before rolling.
Pepper Jack Enchiladas
Use Pepper Jack instead of cheddar. This adds a spicy cheese flavor.
This variation is great if you like a little heat. Pair it with jalapeños or hot sauce for more spice.
Monterey Jack Enchiladas
Use Monterey Jack for a mild, melty cheese option. It keeps the filling creamy and family-friendly.
This is a good choice when serving picky eaters. The sauce still adds plenty of flavor.
Queso Blanco Enchiladas
Try queso blanco for a unique cheese profile. It gives the dish a different creamy flavor.
Use it as part of the cheese direction if desired. The result will feel slightly different from cheddar.
Feta Twist Enchiladas
Experiment with feta for a unique flavor profile. It brings a tangier cheese note.
This is a more unusual variation. Use it when you want something different.
Extra Veggie Enchiladas
Add corn, black beans, sautéed bell peppers, spinach, or kale. These ingredients add nutrition and texture.
Mix them into the filling before rolling. Keep the tortillas manageable so they still close neatly.
Troubleshooting
Why Are My Enchiladas Dry?
They may not have had enough sauce on top. Pour the queso sauce evenly over the tortillas so they are well covered.
Dry tortillas can also happen if the dish bakes too long. Watch during the last few minutes.
Why Did My Tortillas Tear?
They may have been stiff or overfilled. Use about ¼ cup filling per tortilla.
Roll gently and do not pack the filling too tightly. Place seam-side down to help them stay closed.
Why Is My Sauce Not Smooth?
The cheese may not have melted evenly. Use 30-second microwave intervals and stir between each one.
If using the stovetop, keep the heat low and stir constantly. This helps prevent burning and uneven melting.
Why Is the Filling Too Mild?
Add extra taco seasoning or a dash of hot sauce. Taste before rolling so you can adjust.
Diced jalapeños can also add more heat. Use them if you want a spicier filling.
Why Are My Enchiladas Too Spicy?
The green chilies, jalapeños, taco seasoning, or hot sauce may have added more heat than expected. Balance with sour cream or toppings.
Use milder cheese and avoid extra jalapeños next time. Cheddar or Monterey Jack can keep the dish gentler.
Frequently Asked Questions
Can I Freeze Creamy Queso Chicken Enchiladas?
Yes, these enchiladas can be frozen. Wrap them tightly in plastic wrap or aluminum foil before placing them in a freezer-safe bag.
They can be frozen for up to 3 months. Cover them well to prevent freezer burn.
What Can I Use Instead of Velveeta Cheese?
Cream cheese can be used for a different flavor. Shredded cheddar can also be used for a more traditional taste.
Adjust melting times accordingly. Different cheeses melt at different speeds and may change the sauce texture.
How Can I Make This Recipe Gluten-Free?
Use gluten-free tortillas. Also double-check that your taco seasoning is gluten-free.
The rest of the recipe can stay the same. Always check packaged ingredients when needed.
Can I Use Greek Yogurt Instead of Sour Cream?
Yes, Greek yogurt can be used as a healthier substitute. It has a similar creamy texture.
The flavor will be slightly tangier. It still works well in the filling.
Can I Make These Vegetarian?
Yes, substitute the chicken with black beans. Add sautéed bell peppers for more flavor and texture.
A plant-based protein can also be used. The creamy queso sauce keeps the dish satisfying.
What Toppings Go Well With These Enchiladas?
Fresh avocado, chopped cilantro, and sour cream all work well. They add freshness, creaminess, and color.
You can choose one topping or use all three. Add them after baking.
How Long Do Leftovers Last?
Leftovers keep in the refrigerator for up to 3 days. Store them in an airtight container.
Reheat in the microwave or in a 350°F oven until heated through. Add fresh toppings after warming if desired.
Why This Recipe Works So Well
Creamy Queso Chicken Enchiladas work because the filling and sauce are both designed for comfort. The chicken mixture is creamy and flavorful, while the queso topping bakes into a warm, cheesy finish.
The shredded chicken makes the filling hearty. Taco seasoning, green chilies, sour cream, and cheddar give it flavor and texture.
The tortillas wrap everything into neat portions. Placing them seam-side down keeps the filling tucked inside while baking.
The Velveeta and diced tomatoes with green chilies melt into a simple queso sauce. It spreads over the enchiladas and keeps them moist.
Baking gives the dish its final cozy texture. The sauce bubbles, the tortillas soften, and the cheese turns golden.
The recipe also works because it can be adjusted easily. Chicken, turkey, beef, black beans, vegetables, different cheeses, gluten-free tortillas, and dairy-free alternatives all give you ways to make it your own.
Final Thoughts
Creamy Queso Chicken Enchiladas are the kind of meal that brings people toward the table. They are warm, cheesy, creamy, filling, and simple enough to make even when the day has been busy.
I love how this dish carries that feeling of comfort without asking for complicated steps. Shredded chicken, taco seasoning, sour cream, cheddar, green chilies, tortillas, and queso sauce become something that tastes like home.
Serve them for a cozy family dinner, a casual gathering, a weeknight meal, or a freezer-friendly make-ahead dish. However they land on the table, these enchiladas bring warmth, ease, and creamy queso comfort in every bite.
Creamy Queso Chicken Enchiladas
These Creamy Queso Chicken Enchiladas are warm, cheesy, saucy, and filled with seasoned shredded chicken wrapped in soft tortillas. With sour cream, taco seasoning, chopped green chilies, Velveeta cheese, and diced tomatoes with green chilies, this easy baked dinner is rich, comforting, and full of Mexican-inspired flavor.
Recipe Details
- Prep Time: 15 minutes
- Cook Time: 30 minutes
- Total Time: 45 minutes
- Course: Dinner
- Cuisine: Mexican
- Servings: 4 people
- Calories: 450 kcal
Equipment
- oven
- baking dish
Ingredients
For the Filling
- 1 can Chopped Green Chilies Diced jalapeños can be used for more heat.
- 1 cup Shredded Cheddar Cheese Monterey Jack or Pepper Jack for a spicy twist.
- 1 cup Sour Cream Greek yogurt can be used as a healthier substitute.
- 1 packet Taco Seasoning Store-bought or homemade for convenience.
- 2 cups Shredded Chicken Substitute with shredded beef or turkey if desired.
For the Sauce
- 1 can Diced Tomatoes with Green Chilies Fresh tomatoes or tomato sauce can work as alternatives.
- 1 package Velveeta Cheese Cream cheese can be used, though the flavor may differ.
For the Shell
- 8 tortillas Tortillas Gluten-free tortillas available for gluten avoidance.
Instructions
Step 1: Preheat the Oven
Preheat the oven to 350°F (175°C).
Step 2: Make the Chicken Filling
In a bowl, combine the shredded chicken, taco seasoning, sour cream, shredded cheddar cheese, and chopped green chilies.
Step 3: Fill the Tortillas
Spoon the chicken mixture into each tortilla.
Step 4: Roll and Arrange
Roll the filled tortillas tightly, then place them in a baking dish.
Step 5: Make the Queso Sauce
In a separate bowl, mix the Velveeta cheese and diced tomatoes with green chilies.
Step 6: Sauce the Enchiladas
Pour the queso mixture over the rolled enchiladas in the baking dish.
Step 7: Bake Until Heated Through
Bake in the oven for 30 minutes, until the enchiladas are heated through.
Notes
Serve with your favorite toppings like avocado or cilantro.
Shredded beef or turkey can be used instead of shredded chicken if desired.
Store-bought or homemade taco seasoning both work for convenience.
Greek yogurt can be used as a healthier substitute for sour cream.
Monterey Jack or Pepper Jack can be used for a spicy twist instead of shredded Cheddar cheese.
Diced jalapeños can be used for more heat instead of chopped green chilies.
Cream cheese can be used instead of Velveeta cheese, though the flavor may differ.
Fresh tomatoes or tomato sauce can work as alternatives to diced tomatoes with green chilies.
Gluten-free tortillas are available for gluten avoidance.
Serving Suggestions
- Serve hot with avocado or cilantro on top.
- Pair with Mexican rice or a simple side salad.
- Add refried beans or black beans on the side for a heartier dinner.
- Serve with chips and salsa for an easy family-style meal.
- Add extra toppings at the table so everyone can customize their plate.
Storage
How to Store
Let the enchiladas cool, then cover the baking dish tightly or transfer leftovers to an airtight container. Refrigerate until ready to reheat.
How to Reheat
Reheat until the enchiladas are hot all the way through and the queso sauce is creamy again.
Best Texture Tip
Keep the enchiladas covered while reheating so the tortillas stay soft and the sauce does not dry out.
Make-Ahead Tip
You can prepare the filling and assemble the enchiladas ahead of time, then add the queso sauce and bake when ready to serve.

Fernando is the creator and writer behind the food blog Eating with your Hands. Living and working in cities like Paris, Barcelona, and Berlin, and being married to a Canadian foodie, has given Fernando a passion and interest in food and inspired him to run EWYH.