
Some recipes instantly bring back the feeling of summer gatherings, even when you are standing in your own kitchen on an ordinary day. Crispy Air Fryer Onions have that kind of nostalgic pull.
They remind me of warm afternoons, backyard meals, the sound of family laughing nearby, and the irresistible smell of onions cooking until golden and savory. There is something about that crunchy coating wrapped around a tender onion ring that feels simple, familiar, and comforting.
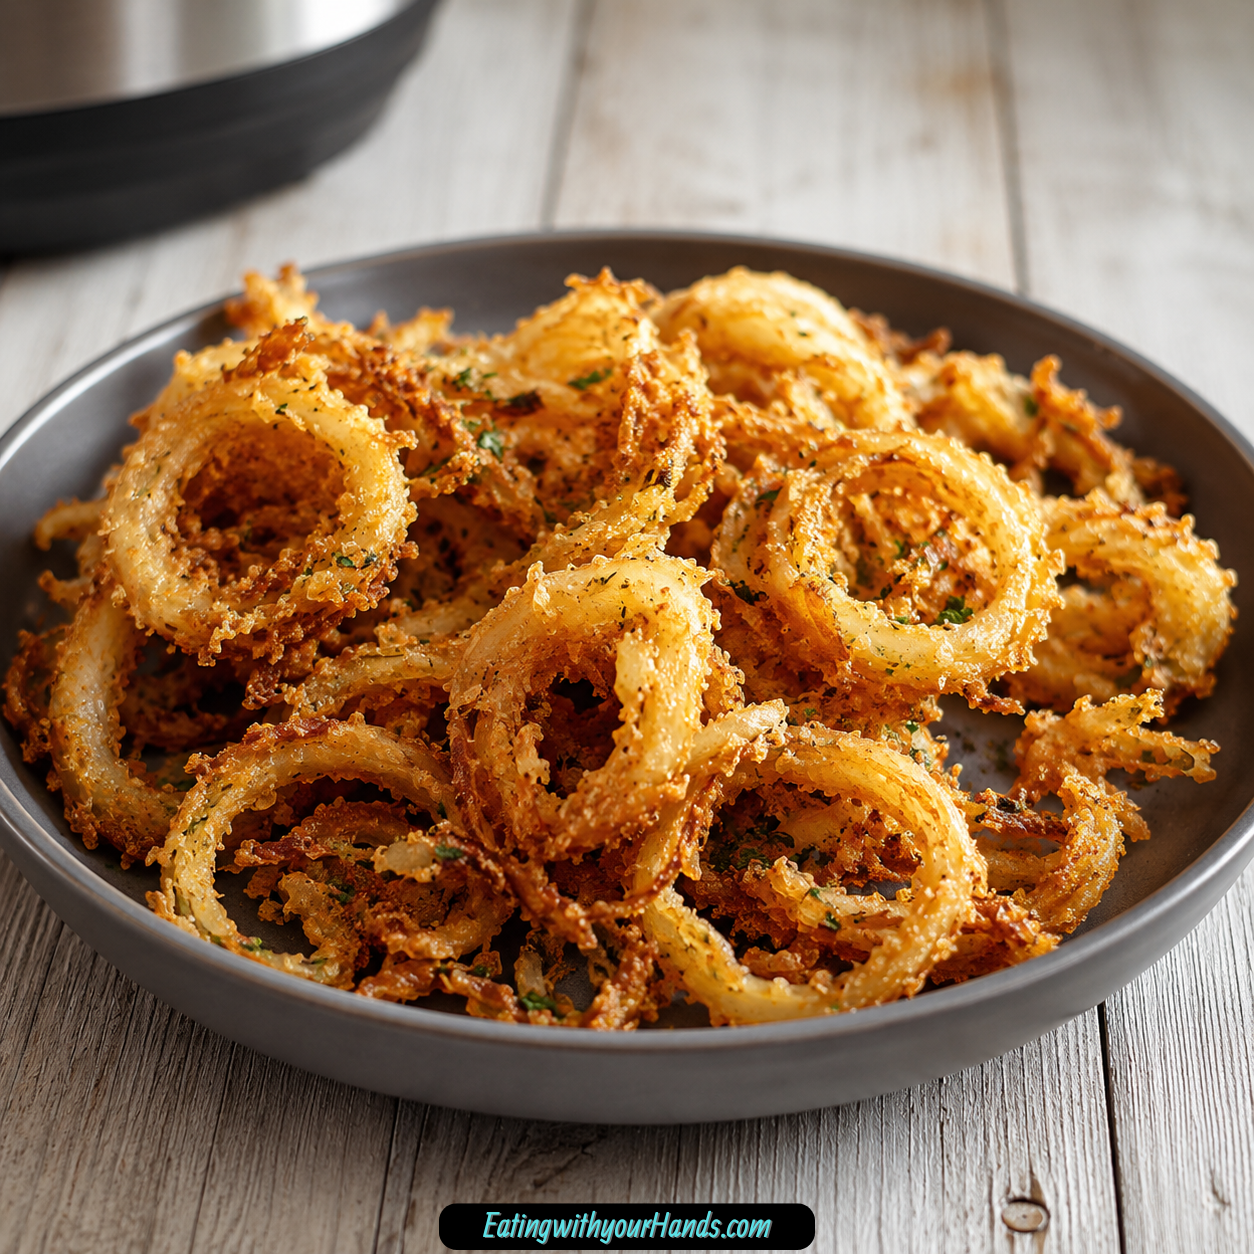
These onion rings give you all the satisfaction of a classic crispy onion snack, but they are made in the air fryer with less oil than deep frying. They come out golden, flavorful, and wonderfully crisp when served hot.
This recipe is quick enough for a weeknight side, easy enough for beginner cooks, and fun enough for parties, burgers, sandwiches, or game-day snacking. With a few pantry staples and two large onions, you can make a batch that feels homemade, cozy, and shareable.
Table of Contents
- What Are Crispy Air Fryer Onions?
- Why This Recipe Feels So Comforting
- Recipe Overview
- Why You’ll Love Crispy Air Fryer Onions
- Ingredients You’ll Need
- Ingredient Notes
- Directions
- Step 1: Prepare Your Workspace
- Step 2: Peel the Onions
- Step 3: Slice the Onions Into Rings
- Step 4: Separate the Onion Rings
- Step 5: Mix the Dry Coating
- Step 6: Add Optional Heat to the Coating
- Step 7: Prepare the Wet Mixture
- Step 8: Set Up the Coating Station
- Step 9: Dip the Onion Ring Into the Buttermilk
- Step 10: Coat the Onion Ring in Flour
- Step 11: Repeat With Remaining Onion Rings
- Step 12: Preheat the Air Fryer
- Step 13: Arrange the Onion Rings in the Basket
- Step 14: Spray Lightly for Extra Crunch
- Step 15: Air Fry the Onion Rings
- Step 16: Flip Halfway Through
- Step 17: Check for Crispiness
- Step 18: Remove Carefully
- Step 19: Serve While Hot
- Pro Tips for the Best Crispy Air Fryer Onions
- Variations
- Serving Suggestions
- Storage Tips
- Freezing Instructions
- Make-Ahead Instructions
- Common Mistakes to Avoid
- Helpful Notes
- Frequently Asked Questions
- Final Thoughts
- Crispy Air Fryer Onions
What Are Crispy Air Fryer Onions?
Crispy Air Fryer Onions are onion rings coated in a seasoned flour mixture, dipped in a buttermilk and egg mixture, then air fried until golden and crisp. They have the flavor and crunch of traditional onion rings, but they are made with the convenience of an air fryer.
The onions are sliced into ¼-inch rings so they cook evenly. Each ring is coated with a mixture of flour, garlic powder, paprika, salt, and black pepper, then cooked until the outside becomes crisp and the onion inside turns tender.
The buttermilk and egg mixture helps the coating stick. It also keeps the onions moist inside while the outside becomes golden.
These crispy onions are perfect as a snack, appetizer, or side dish. They pair beautifully with burgers, sandwiches, salads, and dipping sauces like ranch, barbecue, or spicy aioli.
Why This Recipe Feels So Comforting
There is something deeply comforting about crispy onions. They are humble, simple, and familiar, but they always feel like a treat.
The smell of onions cooking with paprika and garlic powder fills the kitchen with a savory aroma that feels warm and inviting. It is the kind of smell that makes people wander in and ask when the food will be ready.
The texture is what makes them so satisfying. The outside is crisp and seasoned, while the inside stays sweet, tender, and flavorful.
Because they are made in the air fryer, they feel easier and lighter than deep-fried onion rings. You still get the crunch and comfort, but with a simpler cooking method and less mess.
Recipe Overview
Prep Time: 15 minutes
Cook Time: 10 minutes
Total Time: 25 minutes
Servings: 4 people
This recipe takes only 25 minutes from start to finish. The onions are sliced, dipped, coated, and cooked in the air fryer until crisp.
The recipe serves 4 people, making it a great snack or side dish for family dinners, casual gatherings, or easy entertaining.
Why You’ll Love Crispy Air Fryer Onions
You will love this recipe because it is quick. With only 15 minutes of prep and 10 minutes of cooking, you can make a crispy homemade side without spending all day in the kitchen.
The ingredients are simple pantry staples. Onions, flour, garlic powder, paprika, salt, pepper, egg, buttermilk, and cooking spray come together easily.
This recipe is beginner-friendly. The steps are simple, and the air fryer does most of the cooking work.
These onions are perfect for gatherings. They are crunchy, savory, easy to serve, and always welcome next to burgers, sandwiches, or dipping sauces.
They can also be prepared ahead. You can coat the onion rings and keep them in the refrigerator for up to 2 hours before air frying.
Ingredients You’ll Need
2 large onions: Sweet varieties like Vidalia or yellow onions work best for a tender and flavorful bite.
1 cup all-purpose flour: This helps create a crispy coating; for a gluten-free option, use almond flour or a gluten-free blend.
1 teaspoon garlic powder: Adds savory depth; fresh minced garlic can be used for a stronger flavor.
1 teaspoon paprika: Provides smokiness and enhances color; smoked paprika can add a nice twist.
½ teaspoon salt: Essential for seasoning; adjust to taste.
½ teaspoon black pepper: Adds heat and complexity; increase this for a spicier kick.
1 large egg: Acts as a binder; for a vegan option, use flaxseed meal mixed with water.
1 cup buttermilk: Keeps the onions moist; if unavailable, mix milk with 1 tablespoon vinegar for a quick substitute.
Cooking spray, optional but recommended: Helps the onion rings become more golden and crunchy in the air fryer.
Ingredient Notes
Sweet onions like Vidalia or yellow onions work beautifully in this recipe. They become tender inside while keeping a naturally sweet flavor that balances the savory coating.
All-purpose flour creates the main coating. It helps the seasonings cling to the onion rings and forms the base for the crisp exterior.
Garlic powder gives the coating a savory flavor. It blends evenly into the flour and adds depth without adding moisture.
Paprika gives the onions color and a warm flavor. Smoked paprika can be used if you want a slightly smoky twist.
Salt is important because it brings out the sweetness of the onions and the flavor of the coating. Without enough seasoning, the onion rings can taste flat.
Black pepper adds a gentle heat. You can increase it if you prefer a stronger peppery flavor.
The egg helps bind the wet mixture. It gives the coating something to cling to so the flour does not slide off.
Buttermilk helps keep the onion rings moist and flavorful. If you do not have buttermilk, milk mixed with vinegar works as a quick substitute.
Cooking spray helps improve the crispiness. A light spray before air frying can make the coating more golden and crunchy.
Directions
Step 1: Prepare Your Workspace
Start by setting up a clean workspace with a cutting board, sharp knife, mixing bowls, plate, whisk, and air fryer basket. Having everything ready will make the coating process much easier.
This recipe uses both a dry coating and a wet mixture, so organization matters. Once the onion rings are sliced, you will move them through each coating step before air frying.
Place a plate or tray nearby for the coated onion rings. This gives them somewhere to rest while you finish preparing the full batch.
Step 2: Peel the Onions
Peel the outer skins from the 2 large onions. Remove any dry or tough outer layers so you are left with clean, smooth onions.
Sweet onions or yellow onions are a good choice because they become tender and flavorful. They also balance nicely with the savory coating.
Once peeled, place the onions on the cutting board. Keep the root end steady while slicing to help maintain control.
Step 3: Slice the Onions Into Rings
Slice the onions into rings about ¼ inch thick. Try to keep the slices even so they cook at the same rate.
If the rings are too thin, they may become fragile and difficult to coat. If they are too thick, the onion may not soften enough during the short air fryer time.
A ¼-inch thickness gives you a good balance of tender onion and crisp coating. It also makes the rings easier to handle.
Step 4: Separate the Onion Rings
Gently separate the onion slices into individual rings. Work slowly so you do not break them.
Some rings will be large, and others will be smaller from the center of the onion. You can use both sizes.
If a few pieces break, you can still coat and cook them. They may not look like perfect rings, but they will still taste delicious.
Step 5: Mix the Dry Coating
In a mixing bowl, combine 1 cup all-purpose flour, 1 teaspoon garlic powder, 1 teaspoon paprika, ½ teaspoon salt, and ½ teaspoon black pepper. Stir until evenly mixed.
This seasoned flour mixture creates the main flavor of the onion rings. The garlic powder and paprika make the coating savory and warm.
Make sure the spices are fully distributed through the flour. This helps every onion ring taste evenly seasoned.
Step 6: Add Optional Heat to the Coating
If you like a little extra spice, add a pinch of cayenne pepper to the flour mixture. This is optional, but it gives the coating a warmer kick.
Start with a small amount if you are unsure. Onion rings should still taste balanced, not overwhelmingly spicy.
Stir again after adding cayenne so it blends evenly into the coating. This prevents one ring from being much hotter than the others.
Step 7: Prepare the Wet Mixture
In another bowl, whisk together 1 large egg and 1 cup buttermilk. Whisk until the mixture is smooth and fully combined.
The wet mixture helps the flour coating stick to the onion rings. It also keeps the onions moist inside while they cook.
Make sure there are no visible streaks of egg. A smooth mixture gives you a more even coating.
Step 8: Set Up the Coating Station
Arrange your bowls in order: onion rings, buttermilk mixture, flour mixture, and a plate for finished rings. This makes the process much easier.
A coating station helps prevent mess and keeps the steps clear. You can move each onion ring from wet mixture to dry coating, then to the plate.
If you want, use one hand for wet dipping and one hand for dry coating. This helps keep your fingers from becoming too sticky.
Step 9: Dip the Onion Ring Into the Buttermilk
Take one onion ring and dip it into the buttermilk and egg mixture. Make sure it is fully coated.
Let any excess mixture drip back into the bowl. Too much liquid can make the flour coating clump.
The onion ring should be moist enough for the flour to stick, but not dripping heavily. This creates a better crust.
Step 10: Coat the Onion Ring in Flour
Transfer the dipped onion ring to the seasoned flour mixture. Coat it thoroughly on all sides.
Press gently so the flour adheres to the wet surface. This helps create a more secure coating that can crisp in the air fryer.
Shake off any excess flour before placing the ring on the plate. Too much loose flour can fall off in the basket.
Step 11: Repeat With Remaining Onion Rings
Continue dipping and coating the onion rings one at a time. Place each coated ring on a plate or tray.
Try to keep the rings from touching too much after coating. This helps prevent the coating from sticking to itself or falling off.
If the flour mixture becomes clumpy, stir it lightly before continuing. This keeps the coating more even.
Step 12: Preheat the Air Fryer
Preheat your air fryer to 375°F for about 5 minutes. Preheating helps the onion rings cook evenly and become crisp.
A hot air fryer gives the coating a better start. If the basket is cold, the onions may take longer to crisp.
This step is simple, but it makes a real difference in texture. Always preheat for best results.
Step 13: Arrange the Onion Rings in the Basket
Place the coated onion rings in the air fryer basket in a single layer. Make sure they do not overlap.
Overlapping prevents hot air from circulating properly. This can lead to uneven cooking and softer spots.
If your basket is small, cook the onion rings in batches. A little patience gives you much crispier results.
Step 14: Spray Lightly for Extra Crunch
Lightly spray the onion rings with cooking spray before cooking. This helps the coating become more golden and crunchy.
You do not need to soak them. A light, even mist is enough.
Skipping the spray can still work, but the rings may not brown as well. For the best crunch, use a little spray.
Step 15: Air Fry the Onion Rings
Air fry the onion rings at 375°F for 10 minutes. The coating should begin to turn golden and crisp.
Keep an eye on them near the end of cooking. Air fryers can vary slightly, and onion rings can brown quickly.
The onions should be tender inside, while the coating should look crisp on the outside. That contrast is what makes them so satisfying.
Step 16: Flip Halfway Through
Flip the onion rings halfway through cooking. This helps both sides brown evenly.
Use tongs gently so the coating does not break. The rings can be delicate while they are still cooking.
Flipping is important because the bottom side may not crisp as much without turning. This step helps create a better all-around texture.
Step 17: Check for Crispiness
After 10 minutes, check the onion rings. They should be golden brown and crisp.
If they need a little more color, cook them for another minute or two while watching closely. Do not overcook them until they become too dark.
The best onion rings are crisp outside and tender inside. Remove them once they reach that point.
Step 18: Remove Carefully
Carefully remove the onion rings from the air fryer basket. Use tongs or a spatula so they do not break.
Place them on a plate or serving tray. Let them cool slightly before serving.
They will be hot right away, so give them a minute. This also helps the coating settle.
Step 19: Serve While Hot
Serve the Crispy Air Fryer Onions hot for the best texture. The coating is crispest right after cooking.
They are delicious on their own, but dipping sauces make them even better. Ranch, barbecue sauce, and spicy aioli all pair beautifully.
Serve them with burgers, sandwiches, or a fresh garden salad. They add crunch and comfort to almost any casual meal.

Pro Tips for the Best Crispy Air Fryer Onions
Slice the onions evenly. Uniform rings cook more evenly and look better on the plate.
Do not overcrowd the air fryer basket. The rings need space for hot air to circulate.
Preheat the air fryer before cooking. This helps the coating crisp properly.
Use cooking spray for extra crunch. A light mist helps the flour coating become golden.
Serve immediately. Onion rings are always best when hot and fresh.
Variations
Add a sprinkle of grated Parmesan cheese for a cheesy twist. This gives the coating extra savory flavor.
Try using sweet potatoes for a colorful and nutritious alternative. This changes the recipe into a different crispy snack idea.
For a spicier version, mix cayenne pepper or hot sauce into the buttermilk. This gives the onion rings heat from the inside of the coating.
Experiment with different seasonings like Italian herbs or taco seasoning. These can change the flavor profile while keeping the method the same.
Make them gluten-free by substituting all-purpose flour with a gluten-free blend. Almond flour can also be used as a gluten-free option.
Serving Suggestions
Serve Crispy Air Fryer Onions hot as a snack, appetizer, or side dish. They are best when the coating is still crunchy.
They pair perfectly with burgers. The crispy onion texture adds a savory crunch to a soft bun and juicy filling.
They are also delicious with sandwiches. A few crispy onions on the side can make a simple sandwich feel more special.
A fresh garden salad is another great pairing. The warm, crispy onions contrast beautifully with cool greens.
For dipping, offer ranch, barbecue sauce, or spicy aioli. These sauces make the onion rings even more fun to share.
Storage Tips
Store leftover Crispy Air Fryer Onions in an airtight container in the refrigerator for up to 3 days. Let them cool completely before storing.
To help keep them from getting too soft, avoid stacking them heavily on top of each other. If possible, place them in a shallow layer.
The coating will soften after refrigeration, but it can be revived. Reheat the rings in the air fryer for the best texture.
Avoid reheating in a microwave if you want crispiness. The air fryer is the better choice for bringing back crunch.
Freezing Instructions
You can freeze Crispy Air Fryer Onions after cooking. Let them cool completely first.
Arrange them in a single layer on a baking sheet and freeze until solid. This prevents them from sticking together.
Once frozen, transfer them to a freezer-safe bag. They can be stored for up to 2 months.
Reheat them in the air fryer when ready to enjoy. This helps restore their crispy texture.
Make-Ahead Instructions
You can prepare the onion rings ahead of time. Coat them and place them in the refrigerator for up to 2 hours before air frying.
This is helpful when you are entertaining. You can do the messy coating step early and cook them fresh when guests arrive.
Keep the prepared rings in a single layer if possible. This helps protect the coating before cooking.
Air fry them just before serving for the best crunch. Freshly cooked onion rings have the best texture.
Common Mistakes to Avoid
Not preheating the air fryer can lead to uneven cooking. Always preheat before adding the onion rings.
Overcrowding the basket prevents crispiness. Cook in batches if needed.
Not separating the onion rings can cause clumping. Separate them gently before coating.
Skipping the cooking spray can reduce crunch. A light spray helps the coating become golden.
Using soft or uneven onion slices can also affect texture. Slice the onions evenly for the best result.
Helpful Notes
For a dairy-free option, use almond milk mixed with vinegar in place of buttermilk. This keeps the wet mixture tangy without dairy.
You can add chopped herbs like parsley or chives to the flour mixture for freshness. This gives the coating a more colorful, herby flavor.
For a gluten-free version, make sure all ingredients are certified gluten-free. This includes flour blends, spices, and any coatings.
Leftover onion rings can be reheated in the air fryer to restore crispiness. Heat them gently until warm and crisp again.
For a vegan option, use flaxseed meal mixed with water instead of the egg. Pair it with a dairy-free buttermilk substitute if needed.
Frequently Asked Questions
Can Crispy Air Fryer Onions Be Frozen?
Yes, Crispy Air Fryer Onions can be frozen. After cooking, let them cool completely.
Arrange them in a single layer on a baking sheet and freeze until solid. Then transfer them to a freezer-safe bag.
They can be stored for up to 2 months. Reheat them in the air fryer for best results.
Can Ingredients Be Substituted?
Yes, several ingredients can be substituted. You can use almond flour or a gluten-free flour blend instead of all-purpose flour.
If you do not have buttermilk, mix regular milk with 1 tablespoon of vinegar for a quick substitute. For a dairy-free option, use almond milk mixed with vinegar.
How Should I Store Leftovers?
Store leftover onion rings in an airtight container in the refrigerator for up to 3 days. Let them cool before sealing.
To keep them as crisp as possible, avoid stacking them too heavily. Reheat in the air fryer before serving.
Can This Recipe Be Made Ahead?
Yes, you can prepare the onion rings ahead of time. Coat them and place them in the refrigerator for up to 2 hours before air frying.
This makes them convenient for parties or quick snacks. Cook them fresh when ready for the best texture.
Why Are My Onion Rings Not Crispy?
They may have been overcrowded in the air fryer basket. Hot air needs space to circulate around each ring.
Skipping the cooking spray can also reduce crispiness. A light spray helps the coating brown and crunch.
What Onions Work Best?
Sweet onions like Vidalia or yellow onions work best. They become tender and flavorful when cooked.
They also balance well with the savory coating. Their natural sweetness makes the onion rings more delicious.
What Dipping Sauces Go Well With Air Fryer Onions?
Ranch, barbecue sauce, and spicy aioli all pair well with these onion rings. Each sauce brings a different kind of flavor.
You can serve one sauce or offer several for variety. This makes the onion rings perfect for sharing.
Final Thoughts
Crispy Air Fryer Onions are the kind of recipe that turns a simple onion into something golden, crunchy, and memorable. With sweet onions, seasoned flour, buttermilk, egg, and a quick air fryer cook time, you get a snack or side dish that feels comforting without needing deep frying.
They are quick enough for everyday meals and fun enough for gatherings. Serve them with burgers, sandwiches, salads, or dipping sauces, and they will always bring a little extra joy to the table.
What makes them special is the combination of texture and memory. The crisp coating, tender onion inside, and savory aroma feel like backyard barbecues, family laughter, and homemade comfort.
Serve them hot, share them generously, and enjoy every crunchy bite. These Crispy Air Fryer Onions are simple, cozy, and made for moments when good food brings everyone closer.
Crispy Air Fryer Onions

These Crispy Air Fryer Onions are golden, flavorful onion rings made with a seasoned flour coating and a simple buttermilk mixture. They turn crisp in the air fryer without deep frying, making them a great snack or side dish.
Recipe Information
- Prep Time: 15 minutes
- Cook Time: 10 minutes
- Total Time: 25 minutes
- Course: Side Dish, Snack
- Cuisine: American
- Servings: 4 people
- Calories: 250 kcal
Equipment
- Air Fryer
- Mixing bowl
Ingredients
For the Onion Rings
- 1 teaspoon paprika
Adds warm color, light smokiness, and extra flavor to the coating. - 2 large onions
Sweet varieties like Vidalia or yellow onions work best. - ½ teaspoon black pepper
Adds mild heat and a little depth. - 1 large egg
Helps bind the coating to the onion rings. - 1 cup all-purpose flour
Creates the base of the crispy coating. - 1 cup buttermilk
Keeps the onions moist and helps the coating cling. - 1 teaspoon garlic powder
Adds savory flavor to the onion rings. - ½ teaspoon salt
Seasons the coating and brings out the onion flavor.
Instructions
- Peel the onions and slice them into rings.
- In a mixing bowl, stir together the all-purpose flour, garlic powder, paprika, salt, and black pepper.
- In a separate bowl, whisk the egg and buttermilk until smooth.
- Dip each onion ring into the buttermilk mixture.
- Coat each dipped onion ring in the seasoned flour mixture, pressing lightly so the coating sticks.
- Arrange the coated onion rings in the air fryer basket in a single layer.
- Air fry at 375°F for 10 minutes, flipping the onion rings halfway through cooking.
- Cook until the onion rings are crisp, golden, and tender inside.
- Serve warm as a snack or side dish.
Notes
- For extra crunch, lightly spray the onion rings with cooking spray before air frying.
- Cook in batches if needed so the onion rings are not overcrowded.
- Serve with ranch, spicy mayo, ketchup, or your favorite dipping sauce.

Fernando is the creator and writer behind the food blog Eating with your Hands. Living and working in cities like Paris, Barcelona, and Berlin, and being married to a Canadian foodie, has given Fernando a passion and interest in food and inspired him to run EWYH.